mr part 2 Intermediate submission.

UKworkshop.co.uk

Help Support UKworkshop.co.uk:

This site may earn a commission from merchant affiliate links, including eBay, Amazon, and others.

mr

Established Member
Joined
28 Jun 2005
Messages
1,737
Reaction score
0
Location
Devon
Did I get it in in time?
Anyway, the plan was to dowel the cabinet together so that the top and base would overhang the sides and I could put some sort of relief onto the overhang. So I knocked up this quick dowel jig. unfortunately the jig wasn't accurate enough and the dowels ended up out of alignment. All of which is irrelevant as I managed to blow the side out when hammering one of the dowels in so I'm now paused and wondering how to recover.

1464276742_72667f0e19.jpg


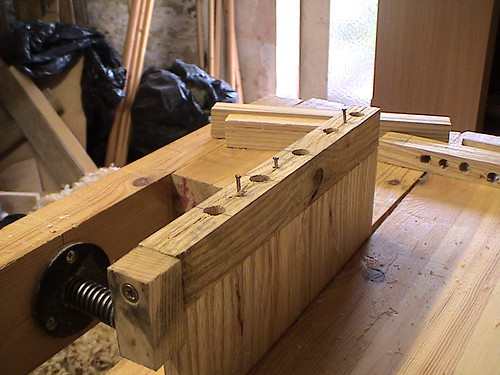
The dowel jig setup for use.

1464276768_3e47789fd7.jpg


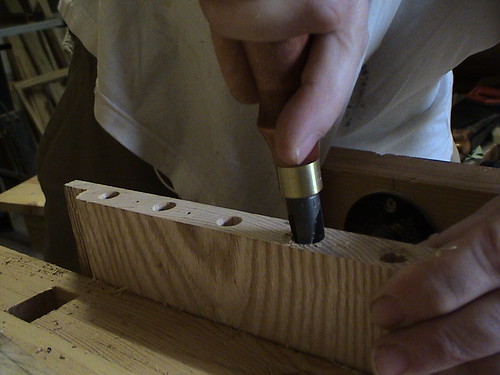
drilled and countersunk (spot the misalignment)

1464276744_ce86dfe475.jpg


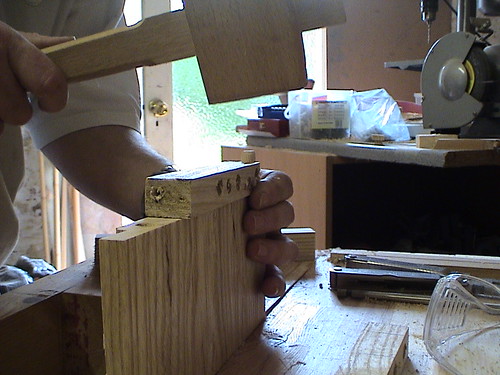
knocking the dowels in using the jig as a depth gauge.

1464276760_4b5f2b3127.jpg


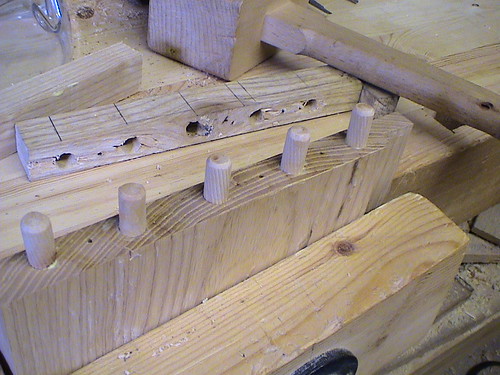
shortly before it all went wrong.

So back to the drawing board, probably have to remake these panels unles I can think of an alternate means of construction.

Mike
 
Mike,
Dowels are harder than they look and a row like that needs a very good jig. There are one or two on the market that work pretty well.

To recover that, you might think of biscuits if you have a joiner, or a loose tongue or a couple of loose tenons. It is by no means irrecoverable yet.
 
No biscuit joiner I'm afraid. I'm considering cutting the side panels down and going with a mitred case, but that seems like a bit of a compromise. Plus it throws other measurements out, the cabinet back is already made and that would have to be cut down slightly to fit a mitred case etc.
Accuracy with dowels is all important, and my wee jig just wasn't up to the job. Some small loose tenons might do the job, thanks for the idea Chris.

Once this is sorted I just need to make and mount the doors, and inset the glass panels, the components for which are made up and ready.

First the design was laid out to size.

1463600343_f0201f3254.jpg


glass sourced

1463600353_1e84eac6fa.jpg


and the various elements fused in the kiln prior to bonding them onto the glass panel itself.

1463600325_03d4ef75c1.jpg
 
Hi Mike,

A couple of thoughts. If those dowels are glued in, just cut and plane them flush and the panel will be as good as new. You say that one side of the panel blew as you hammered one of the dowels in. That might be repairable if you cut away the damage and insert a new piece.

I know you don't like using a router, but I'd be inclined to rout some slots and insert loose tongues to join the panels. You could either use a double fence arrangement to guide the router or make up a simple jig and use a guide bush. Either of those would stop the router wandering off line.

By the way I like the look of that glass :wink:

Hope some of this helps.

Cheers :wink:

Paul
 
I think sawing off and planing those dowels is a must Paul. Not sure quite how I'm going to cure the blow out, I may have to remake that side which isn't too bad I spose. Not convinced I want to go with dowels again having made such a hash of this attempt but then faint heart bla bla bla... I'm almost certain to destroy the piece completely with a router, even with bushes and fences I manage to make a mess with it, which is why it's currently earning its keep as a workshop doorstop - far more effective use for it. :)

Cheers Mike
 
I gave up using dowels along time ago for exactly the reason you encountered. Suggestions given are very good.

I would like to know more about the glass though - looks fascinating.

Cheers

Tim
 
The glass is coloured glass cut to shape and then fused in a kiln, it can be fused into molds and slumped over formers etc. After fusing the petals and other shapes the plan is to bond it to some coloured sheet glass which will then be set into the door frames so making glass door panels with a petal relief if you follow. That is if I don't manage to drop them or something equally daft while putting them into the door frames.

Cheers Mike
 
Mike,
Re the blowout. I am not sure how bad it is but if you scarf in a contrasting piece of wood you might get an unusual but attractive effect. Adam did this sort of thing on a stool he made and the result was very nice.
 
Hi Mike,

Been giving this a bit more thought. If you don't want to use dowels, biscuits or loose tongues, then your options are rather limited if you want to keep to the original overall dimensions. One way you could do it (which isn't exactly fine cabinet making but would work and get you out of a jam) would be to use screws. If you were to drill through the top and base and side pieces (cramp it all together first to ensure that the holes line up), open up the holes in the side panels and glue in some fibre Rawl Plugs (they are available in different lengths and diameters), then cut these flush when the glue is dry. Counter-bore the holes in the top and base pieces to take dowels (say 10mm). Then assemble the cabinet using countersunk chipboard screws and glue. Then plug the counter-bored holes with glued-in dowels and plane flush when dry. Not sure how you are fitting the back, but that will help to hold it all rigid and stop it racking.

Using fibre Rawl Plugs is a very good way of doing it when you need to screw into end grain - that together with chipboard screws provide a very firm fixing.

As I say, it's not fine cabinet making but it might be the best option in the circumstances :wink:

Cheers :wink:

Paul
 
Ooer closing day tomorrow.
I'm not finished, no chance that I will be seeing as I can't get my doors til the end of November now cos they're up north where the glass kiln is. So that be the end of that one. The post can stay as it is I guess in case anybody wants an example of the Luddite way, I'll come back to it when the things finished and update as a project WIP rather than a competition entry I spose.

Cheers Mike
 
Aye my doors , or at least the glass bits are at my sisters place and she cant get them down to me til the end of November now so thats the end of it really for now. Never mind eh.
Cheers Mike
 
Mike - shame you couldn't get the project finished in time :( tho' I'll look forward to seeing it later in the Projects forum - Rob
 
I'm also sorry you couldn't get this finished before the deadline - although, I've been enjoying your recent articles in GoodWood (just when I was thinking of cancelling my subscription!) so, I'm looking forward to see the end result of this piece (all done by hand, I assume!). :wink:
 
Thanks Olly, nice to know that someone likes my rantings :) This cabinet has indeed been made entirely by hand to date as the pics attest hopefully. It will get finished sooner or later and at that point Ill get the finished result up but that wont be till December at the earliest in all probability.

Cheers Mike
 
Back
Top