Mortice chisel grinding angles?

UKworkshop.co.uk

Help Support UKworkshop.co.uk:

This site may earn a commission from merchant affiliate links, including eBay, Amazon, and others.

Eric The Viking

Established Member
Joined
19 Jan 2010
Messages
6,599
Reaction score
74
Location
Bristle, CUBA (the County that Used to Be Avon)
This isn't another sharpening thead as such, but...

... a couple of years ago I bought a socketed mortice 3/8" chisel by James Cam. It turns out to be quite old, but it has quite a lot of meat left in it, and I'd like to use it.

It seems to have a good steel edge, forge-welded to the rest of the blade. I couldn't get it to take a decent edge, and the suggestion on here was that a previous owner had sharpened past the hardening, so the steel was soft where it should be harder (for honing). So I have re-hardened it (I hope!), but I'm still having considerable difficulty getting it to take and hold a good edge.

So... I'll give it one more go as-is, then try hardening & tempering again, in case I got it wrong last time. But before I go a grinding, each time taking off a little more irreplaceable steel, I thought I'd check:

Given these are basically used for clobbering and levering, should I consider a steeper angle, so as to strengthen the business end, compared to my normal bevelled and firmer chisels, or should I stick to roughly 25 + 30?

Please bear in mind too that I'll get the basic angle(s) with a slow, wet grinder (Tormek-style), so there is a slight hollow-grind effect, which isn't ideal I'd guess, but the wheel has still got a decent diameter, so not too severe.

E.

PS: To avoid an obvious digression, freehand grinding+honing is out of the question. My hands are slowly getting worse (back at work at a keyboard is not helping, but I've no choice), and I don't have the dexterity any more and can't achieve it. Getting older really sucks.
 
Personally I don't like hollow grinds on mortice shisels. Of course I use a 6" grinder, so the hollow is more pronounced. It looks awfull when I do that to a mortice chisel, way too weak for levering. (it probably looks equally bad under magnification on a normal chisel, but it doesn't bother me in that application). A mortise chisel depends on it's bevel to glide into the wood as deep as possible (riding the bevel). I am afraid that a hollow grind would hinder this process.

So what I do is grinding away as much metal as possible, freehand on my 6" grinder. It doesn't need to be precise, just removing as much material, as quickly as possible. Then at last I use a belt sander with a 60 grit belt, upside down in a vise. This takes care of the last shaping to make the bevel flat again, about 25 degrees. Then onto the stones, a medium India at first, rather new so still agressive to make a decent size secundairy bevel at 30 degrees and then honing on finer stones to 30+ degrees. I don't know exactly, doesn't really matter.

On rehardening. It probably is a water quench steel. These very old tools don't use alloys to slow the quenching speed enough for oil quenching. But be warned! Water quenching is very agressive for the steel. I haven't had succes yet and have cracked a few old tools allready! No idea how they managed in the old days, and I would love to hear some tips too.

I don't know how rare James Cam tools are, but I would be very reluctant to quench in water.
 
Thanks.

Last time I quenched in sunflower oil, which seemed to be about right I think I may not have got the hardening temp high enough though. Instinctively I'd have gone for something a bit steeper - say 27 or 28 for the primary, as I said to give more strength, but you say you're happy with 25, per normal. Have you run into any problems?

I ought to 'fess up too, that I've tended to test it on deal (softwood), which is the worst for being 'unhelpful' to less than perfect sharpness. As such it's a good test to see if the edge is good enough, but unforgiving if it isn't.

It's frustrating me: Roy Underhil never seems to run into this problem, and he uses old mortice chisels all the time, (and deal sometimes, too!). Wondering now if I should simply be clouting it harder!
 
You need IMO a high angle such as 35 ~ 40 degrees. There best off hand sharpened to gai a nice curve to the chamfer to make levering out the waste easier.
 
For edge retention/chipping it's only the secondary, or even micro bevel that matters.

So it would be easy to try a TINY 35 degree final edge to see if it helped, and it could be ground away quite easily.

BugBear
 
Yes, first try with a steeper secundairy angle. You want a low primary angle for easier penetration, but a high secondairy angle for edge retention.

I have great results with antique Dutch mortise chisels, but had the same problem with the one and only English mortise chisel I had. So that proves that Dutch tools were a lot better then English ones (hammer) :mrgreen:
 
Corneel":1hsn0lsr said:
Yes, first try with a steeper secundairy angle. You want a low primary angle for easier penetration, but a high secondairy angle for edge retention.

I have great results with antique Dutch mortise chisels, but had the same problem with the one and only English mortise chisel I had. So that proves that Dutch tools were a lot better then English ones (hammer) :mrgreen:

FIGHT! :D

BugBear
 
Couple of things.

Firstly, James Cam is a fairly early maker; late 18th century through to about 1838 according to BPM2. There was also a Joseph Cam, but his dates are later - latter half of the 19th century. So any edge tool by James Cam (and most by Joseph Cam) will pre-date the development of oil-hardening steels in the very late 19th century - the steel WILL be water hardening. The chisel is most unlikely to be of solid tool steel, almost all early mortice chisels are laminated, and careful cleaning up with some fine wet-and-dry should reveal the jointline between toolsteel and the main body of the chisel, which will be of wrought iron.

Secondly, before attempting to re-harden toolsteel, it's wise to anneal it - soften it right down*. That's done by bringing it to a bright red heat, allowing the heat long enough to penetrate right through, then allowing it cool AS SLOWLY AS POSSIBLE - preferably an hour or so. Once that's done, bring the piece back to hardening temperature - about the colour of cooked carrots - and plunge vertically into water. Then clean it off, and temper by heating to about straw colour and quenching again.

* Trying to re-harden a piece of already hard (albeit imperfectly) straight carbon steel is quite likely to just degrade it. You end up with a build-up of tiny cracks within the metallic structure that will make the tool brittle and prone to chipping. This effect is worse with water-hardening steels because the very high rate of cooling on quenching causes some high internal stresses; the effect is not so pronounced with oil-hardening steels.

Alternatively, just buy another 3/8" mortice chisel - they're not exactly rare or phenomenally expensive!
 
One tiny addition. If it is made of blister steel, yes then the tool is most probably laminated, a small piece of steel forge welded to a wrought iron body.

But if it made in the late 18th century from the "new fangled" cast steel, then it could very well be solid steel throughout. The smiths had troubles forge welding cast steel to wrought iron back then and learned the trick only later in the 19th century. Many of the Seaton chest chisels are solid steel.
 
Corneel":dcp7huqb said:
One tiny addition. If it is made of blister steel, yes then the tool is most probably laminated, a small piece of steel forge welded to a wrought iron body.

But if it made in the late 18th century from the "new fangled" cast steel, then it could very well be solid steel throughout. The smiths had troubles forge welding cast steel to wrought iron back then and learned the trick only later in the 19th century. Many of the Seaton chest chisels are solid steel.

The point about the Seaton chisels is only partly true - the cast steel firmers and some of the cementation steel firmers are indeed solid tool steel, though some of the latter are laminated. All the Seaton mortice chisels and socket chisels are laminated.

One characteristic of straight carbon steel is that thicker sections do not through-harden. It seems that at best only about 1/8" depth or less hardens, which may be one reason why it was only used in thinnish sections; the other reason may be the high cost of quality tool steel in the 18th and most of the 19th centuries.
 
Thanks everyone.

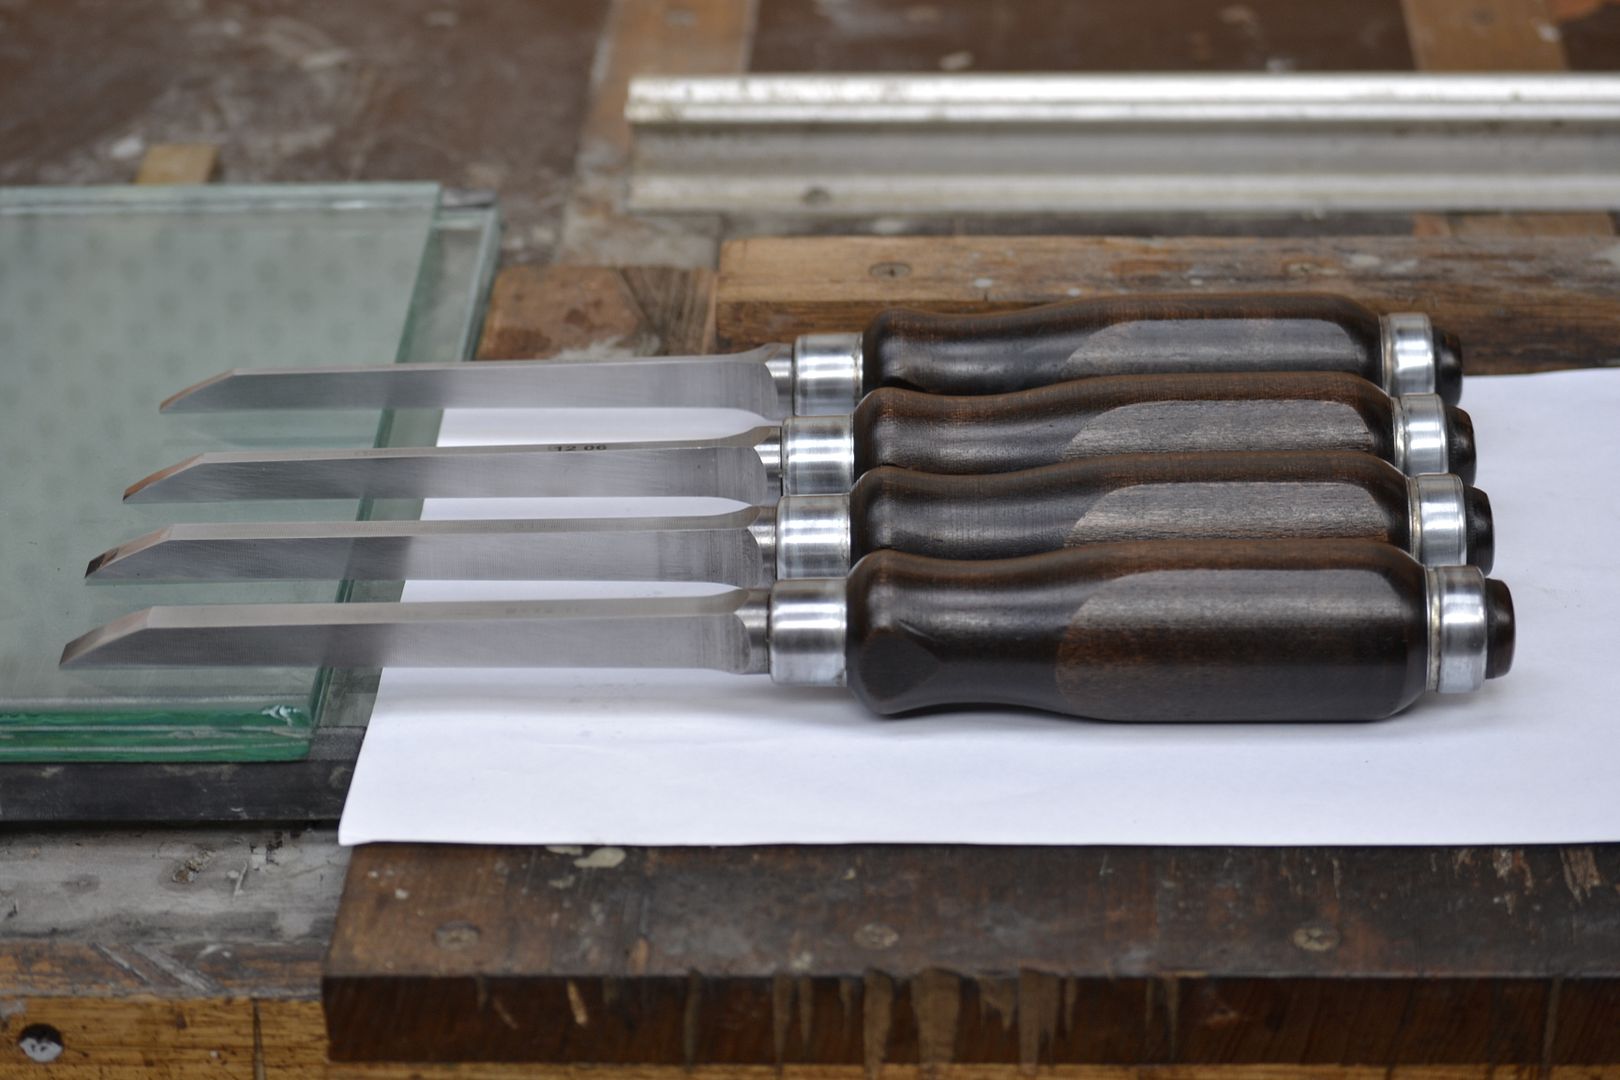
It is a laminated blade, which is probably an indication it's water-hardened. I'll have a good look when the weather improves, and I'll have one more try at honing before attempting anythign else, in case (aiming for a steeper angle, per Swagman's rather beautiful set).

Cheers,

E.
 
Eric The Viking said:
It's frustrating me: Roy Underhil never seems to run into this problem, and he uses old mortice chisels all the time, (and deal sometimes, too!). quote]

You overlook the fact that Roy possesses a tool not available to you.
Its called film editing, so in his world, bad stuff never happens.
 
Roy does it all in one take so no editing is possible, but he might do the whole take several times.

Pete
 
I worked on very many technically-similar TV shows back in the late 1970s-80s: several series of Tony Hart's programmes, Animal Magic, which was live, Wildtrack (also live, IIRC, which always added to the 'fun') and a number of others.

I'm certain Roy does do it in one, almost every time. In fact I can't remember watching one where there was an easy edit point (where you could do a pick-up if you needed to), and it's very unlikely he cheats - UNCTV say it's one take and I believe them.

FWIW, there are either three or four cameras (the camera men are time-served too - the shots are usually excellent), and the studio director, Geary Morton, also knows his stuff really well.

This sort of thing used to be bread-and-butter TV in Britain, and young directors would be dropped into it, precisely because it's hard and good stuff to learn on (you really have to think it out and it's very hard to wing-it) but there are probably very few studio directors nowadays who know how to plan and direct that sort of show - the TV side is a great deal harder than it looks. If you want edit points, you build them into the studio script. And as I said, there aren't any (well nothing easy or obvious).

The one thing I'd guess they regret is having a "covered" set at the back - the lighting is marginal, especially on the older stuff (modern cameras need less light), and they are prevented from lighting the back properly. I'd expect a few second or third takes have been because cameras couldn't get the shots, or could but the lighting wasn't good enough on the take.

Also, as an ex boom op, it's great to see how well the sound is covered (can't remember the Sound Super, to my shame). Again, I'm morally certain they use a Fisher boom in the traditional style, as it doesn't sound like radio mics. Could be Trams, combed into the hair like drama, but I'd be very surprised. Again, I've never yet spotted a boom shadow, which you'd probably have seen if I'd been doing it!

There's a very good production and technical team behind the Woodwright's shop.

E.

PS: It's occurred to me that you _could_ use "iso feeds" from individual cameras to give you flexibility - the video equivalent of multitrack audio recording, but that would only let you alter the point where you cut between cameras on one take, it would only make it slightly easier to do edits between takes, and the hints you usually get that reveal an edit just aren't there anyway.
 
.... and I have fairies at the bottom of my garden too. :)

Back to mortice chisels. I have a few ancient "pig-stickers" which are ground to about 35 degrees. They work very well, hold their edge well and are as tough as old boots. Available at any good car-boot for about a quid. :)
 

Latest posts

Back
Top