


About a year ago we retired our old 32" TV and bought a new 50" Panasonic smart TV after I convinced the LoML that I could adapt our existing TV stand to take it. I was as good as my word, and this is what I came up with.

Smart piece of chipboard (floor grade of course) with a piece of beech to resist bending, plus those James Micheners that I haven't read for years, but which I might want someday, under the feet to get the viewing height right. What's not to like? Quite a bit according to the boss. Not my best work, nor what she had in mind at all, so thinking cap back on.
A few years back, our very own "Woodbloke" did a WIP of a media unit inspired by Alan Peters, which I greatly admired at the time, although I think the original thread was lost in WH1. However, here's a link to Rob's Blog which shows the finished article. This will have to be modified to fit in a corner, provide additional storage, and for the TV to be "grandchild proof" by being attached using a wall mounting bracket on a post up the back of the unit, and with all cabling being hidden within the post . I particularly wanted to avoid the "flat pack" look, and also wanted to try the swordtip tenons used by Rob on his original piece. Whilst we have no plans to move house, the piece shouldn't be "too bespoke" to fit elsewhere, and for that reason I have made it in 3 separate stand alone parts. Time being short, I have cut a few corners here, so if you're reading this Rob, you might want to take a stiff drink and observe from behind the sofa. :lol:
I am cutting my own veneers in English Oak, but to reduce the amount of work involved, and to preserve my supply of oak, this will be limited to the tops and end panels. The rest will be Oak veneered 18mm ply, and I'm hoping that that the visual difference will be minimal. The tops and sides are 2 layers of 18mm ply glued together to make a 36mm thick substrate on to which I will glue 2mm veneers cut with my bandsaw, and thicknessed with my newly acquired Jet 16-32 plus drum sander. In view of the thickness and rigidity of the substrate (36mm of ply) I am only going to veneer one side. The other side will be left as the original oak veneer.
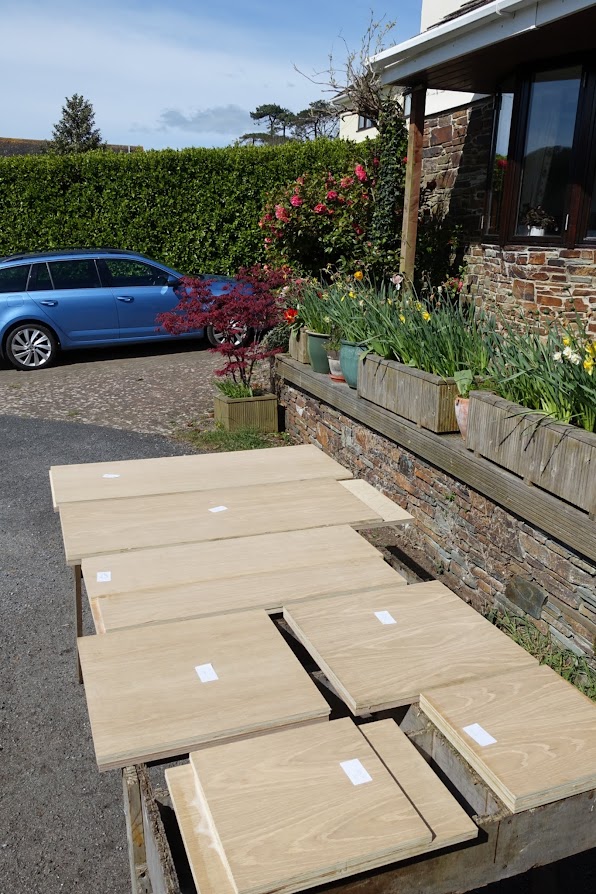
Here are some of the main components, glued up and slightly over sized ready for trimming.
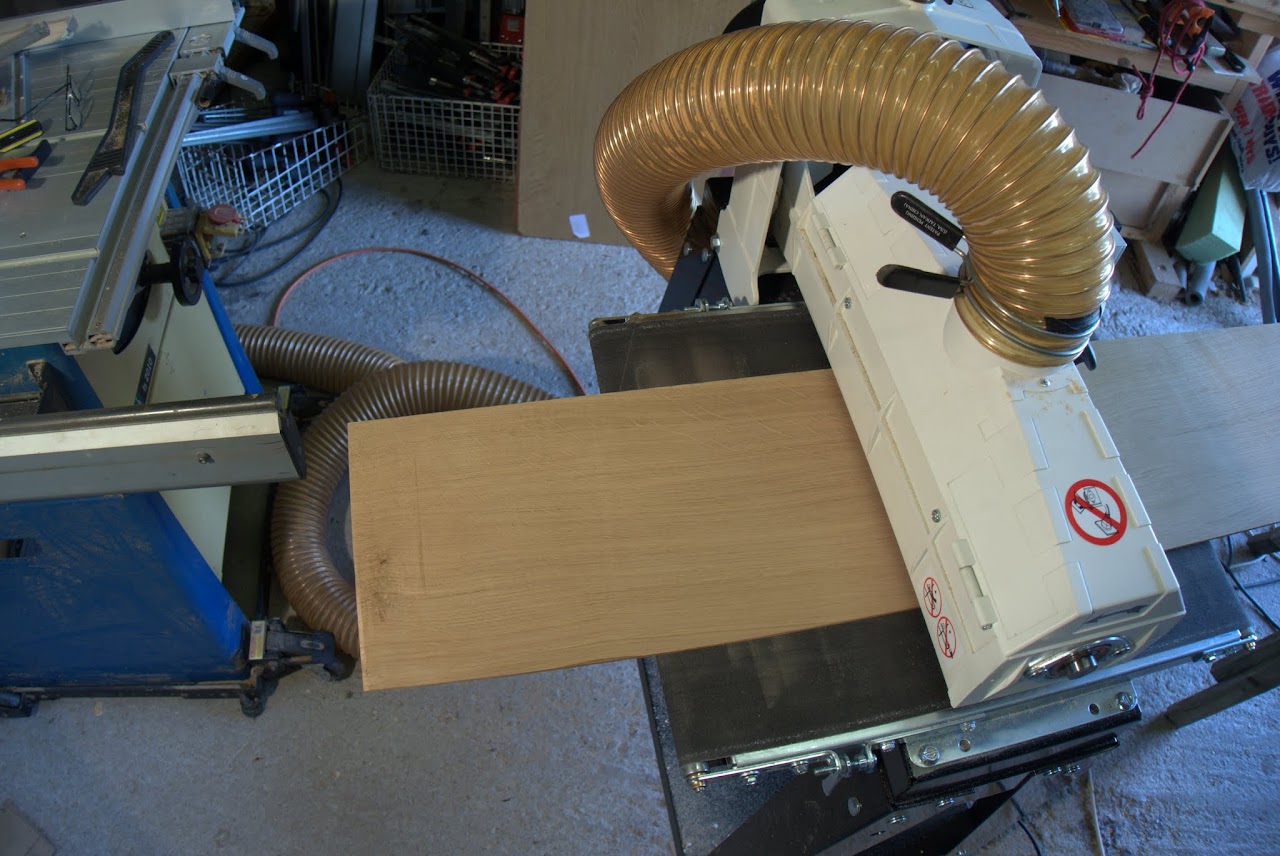
Veneers get final thicknessing in the drum sander.
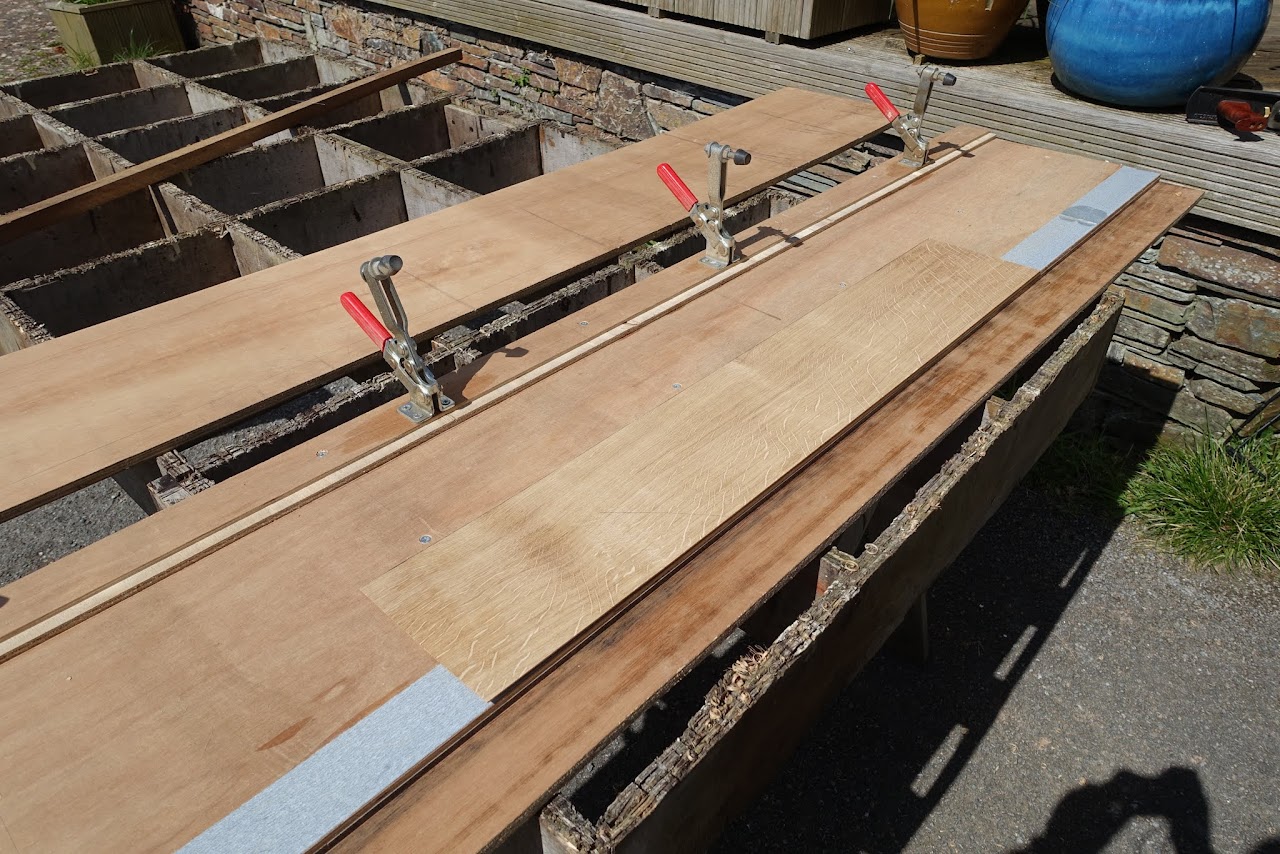
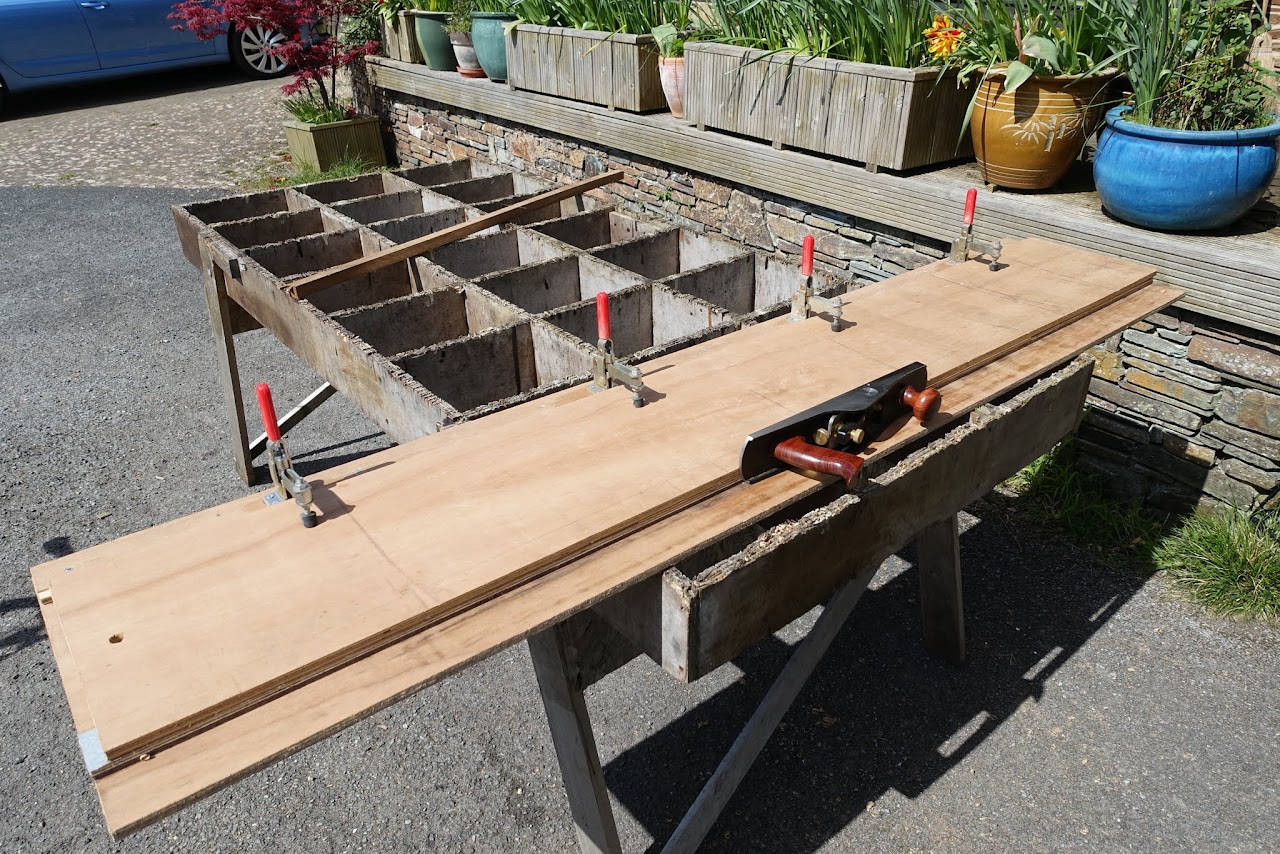
The veneer edges are "shot" on a home made Steve Maskery veneer shooting board.
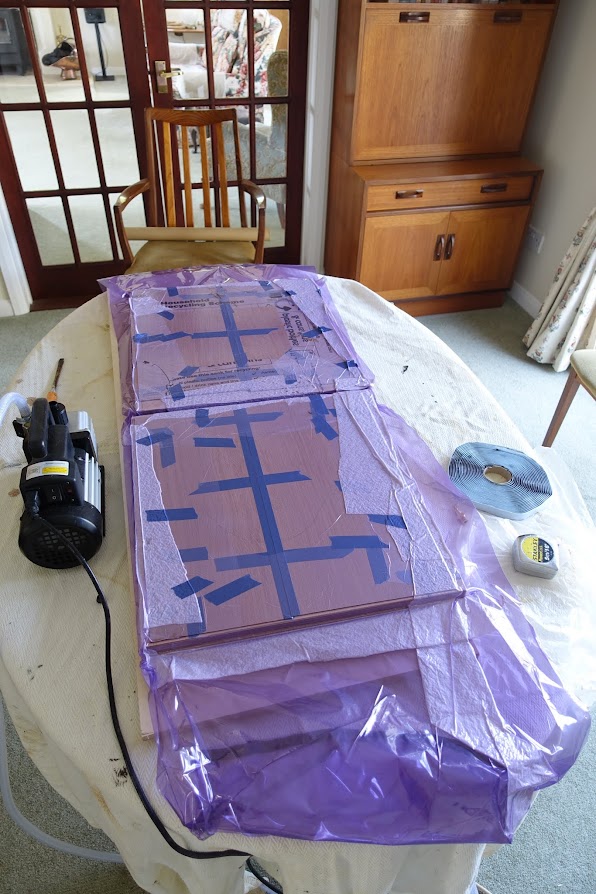
... and then glued to the substrate using cascamite spread with a foam mini-roller before going in the vacuum bag. I pressed 2 ends at a time, or one top. The pump was left running for about 6 hours and didn't seem to complain, although one day I will get around to building one of Robert's vacuum control gizmos.
Time to think about the lipping, and the sword tip tenons. I made up a test piece and tried cutting one manually. Not only was it very time consuming, the end result was not good. :eusa-think: And there will need to be nine of these in the final ensemble. Time to think "quick and dirty". Rob - if you're still with me, time to look away!
The tops and sides are 38mm thick ( 2 x 18mm ply + 2mm veneer). I have therefore cut lipping stock in English Oak 42mm x 22mm. This will allow for 2mm overhang top and bottom, and for a 3mm "flat" when rounding the edge. The sides, top and base are assembled using two rows of 6mm dominoes, with a single row for the 18mm dividers, which I have already lipped. The lipping will be attached to the top and bottom with a single row of dominoes, but the lipping on the sides will just be a glued fit as I wanted some unconstrained "wiggle room" when final fitting the sword tip tenons.
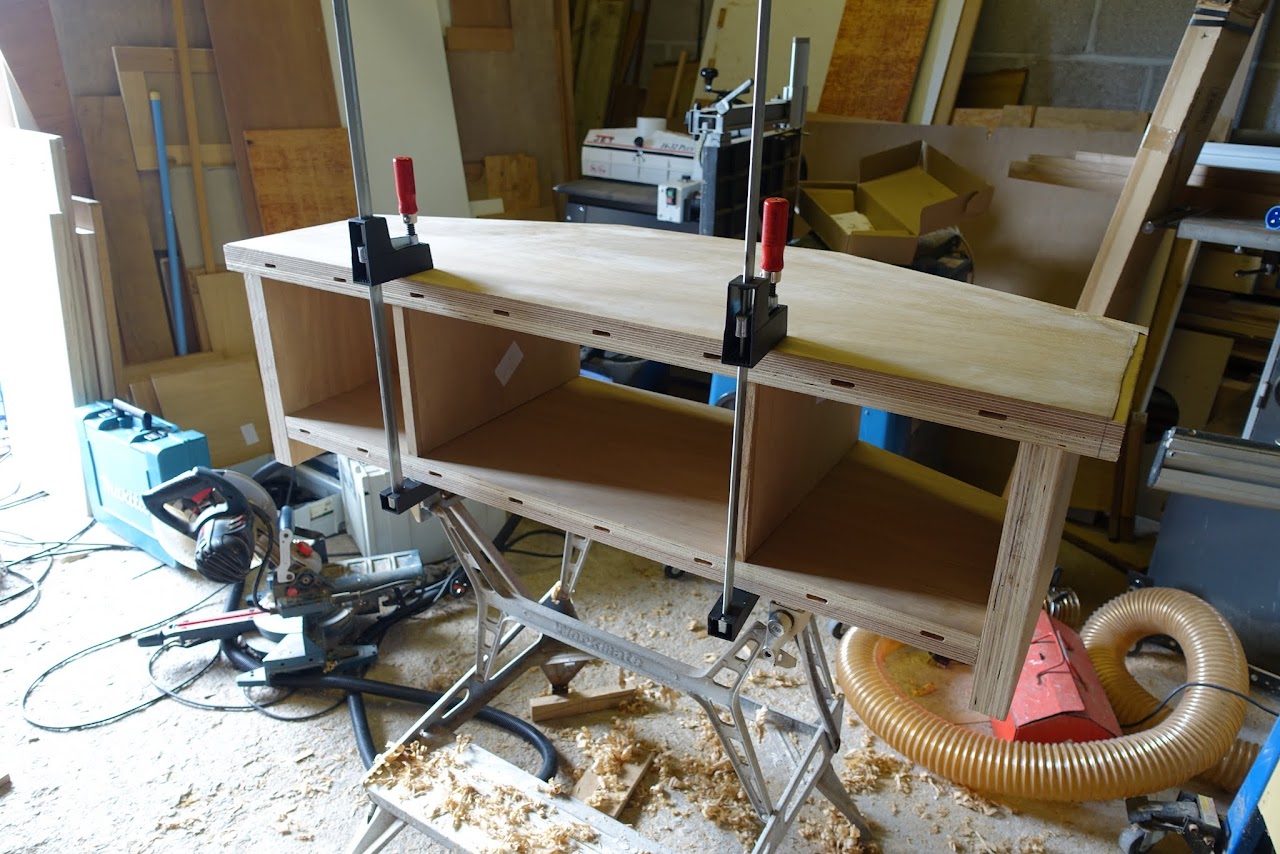
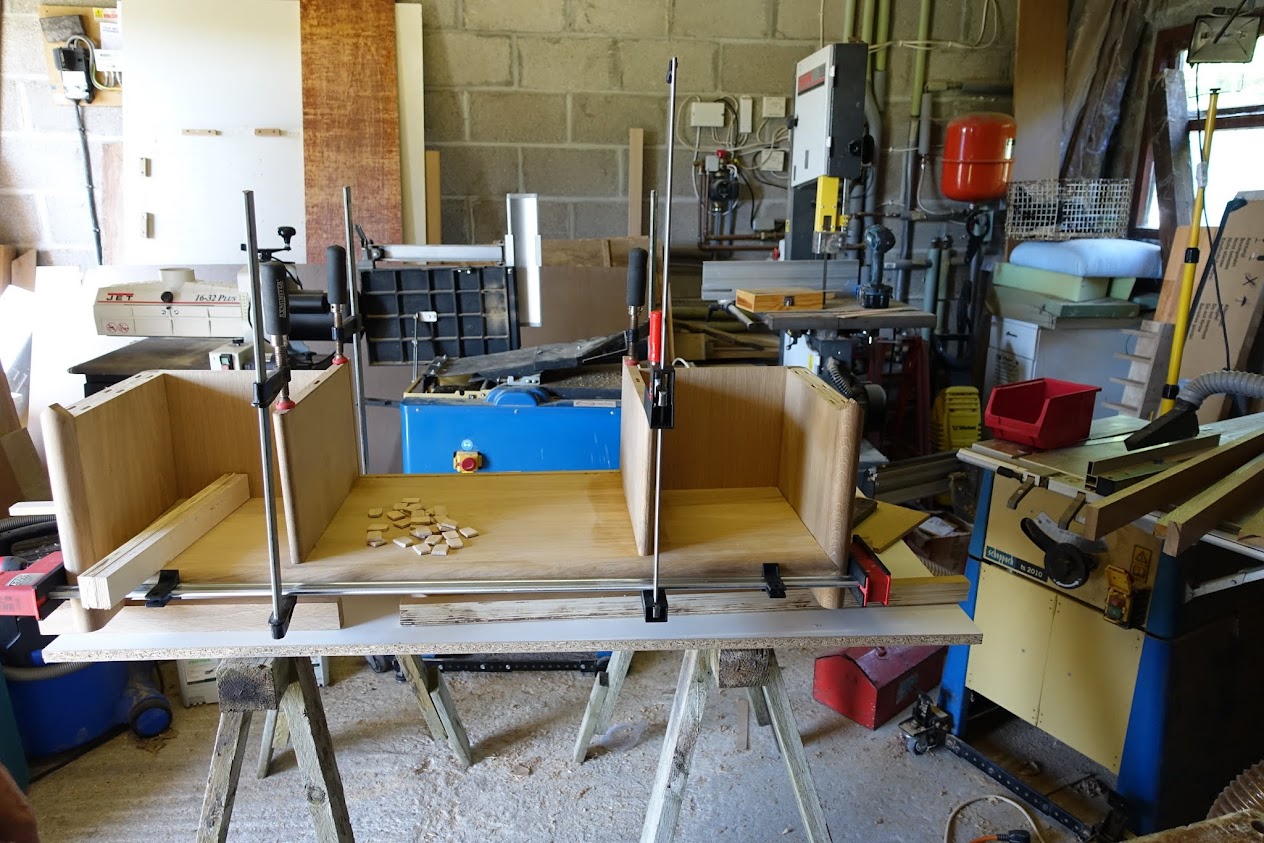
Here's the initial dry assembly. The base and sides have been cut to final size to enable fitting, but the ends of the top have been left to protect them for the time being.
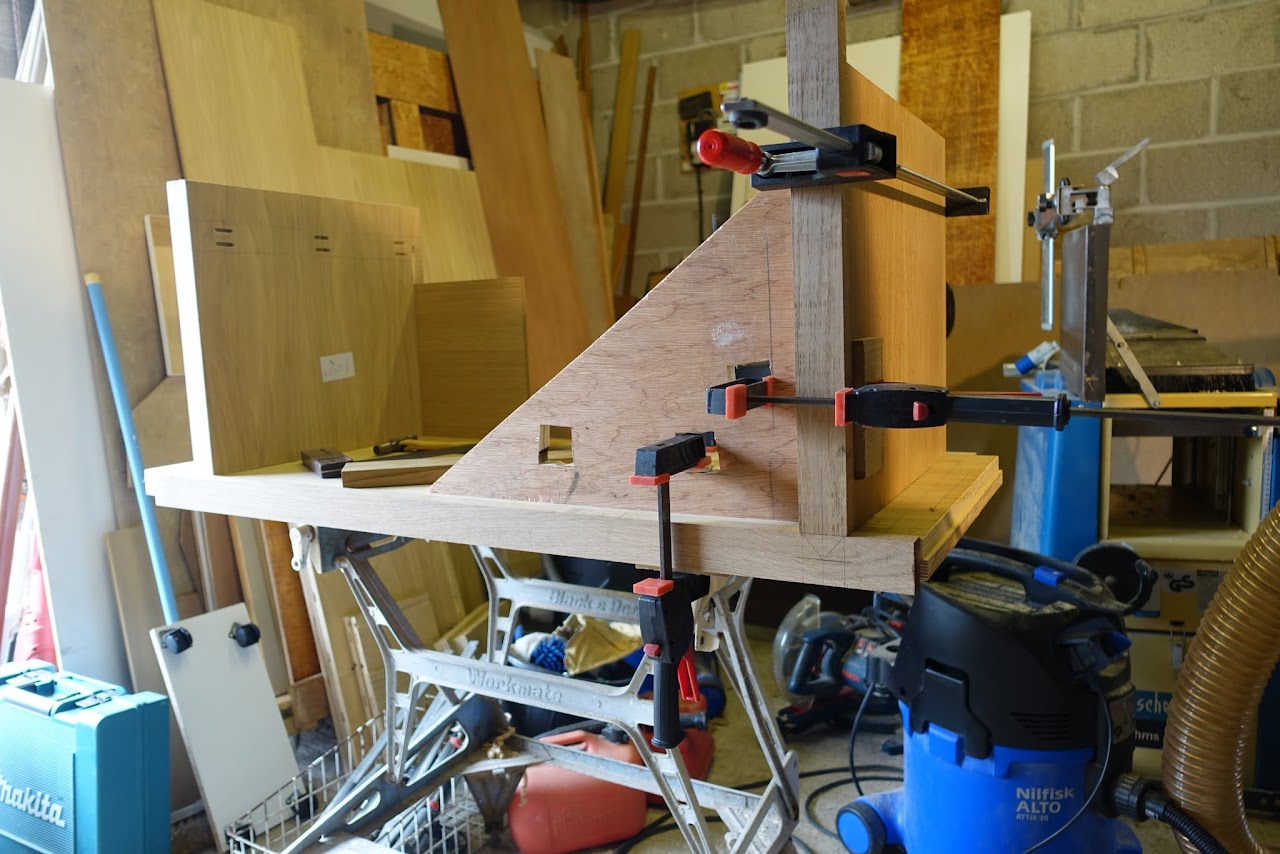
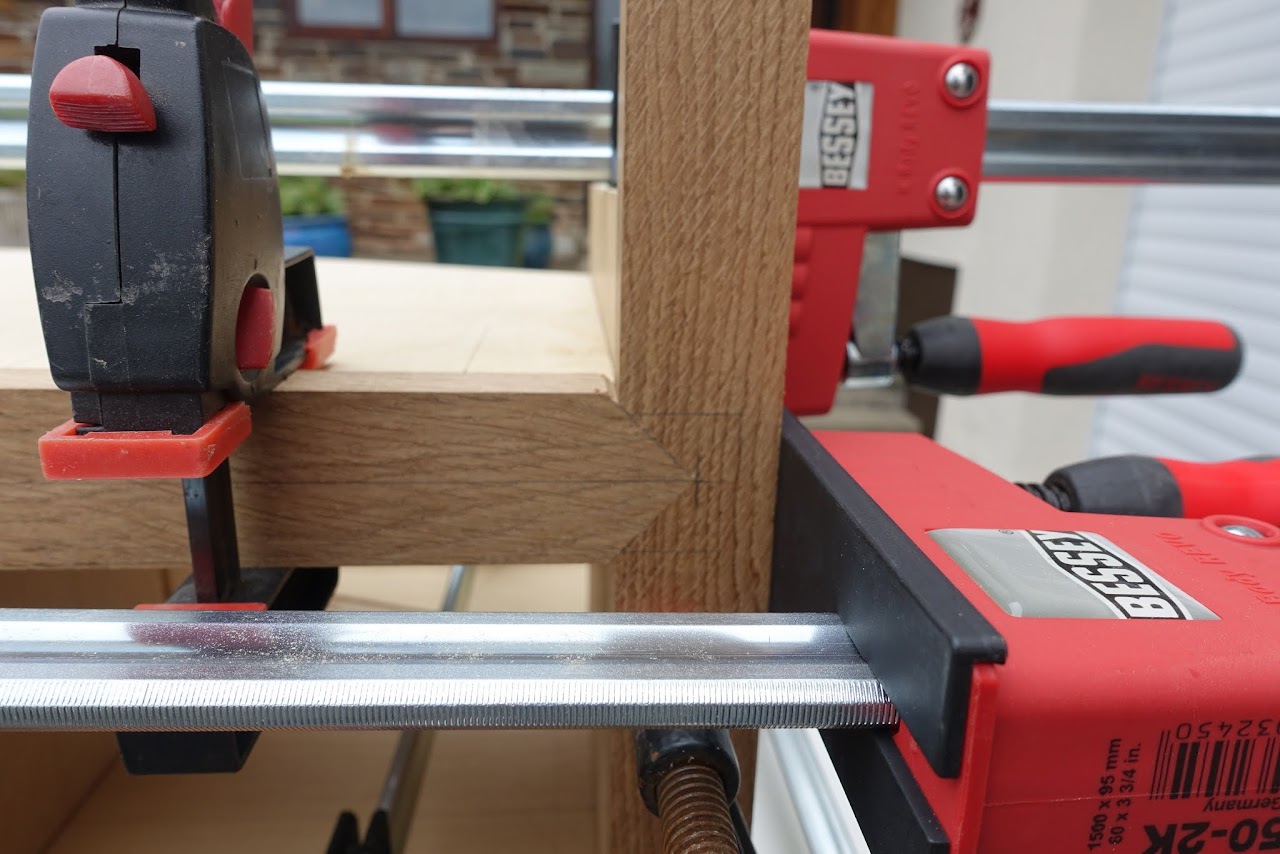
I am starting with the unit that will go into the corner of the room as this will be more or less unseen, so a good place for the first joint whilst I am still learning! The front lipping is attached as described with dominoes as a dry fit. The side lipping is attached with clamps, and the whole thing held square with a piece of ply clamped in place.
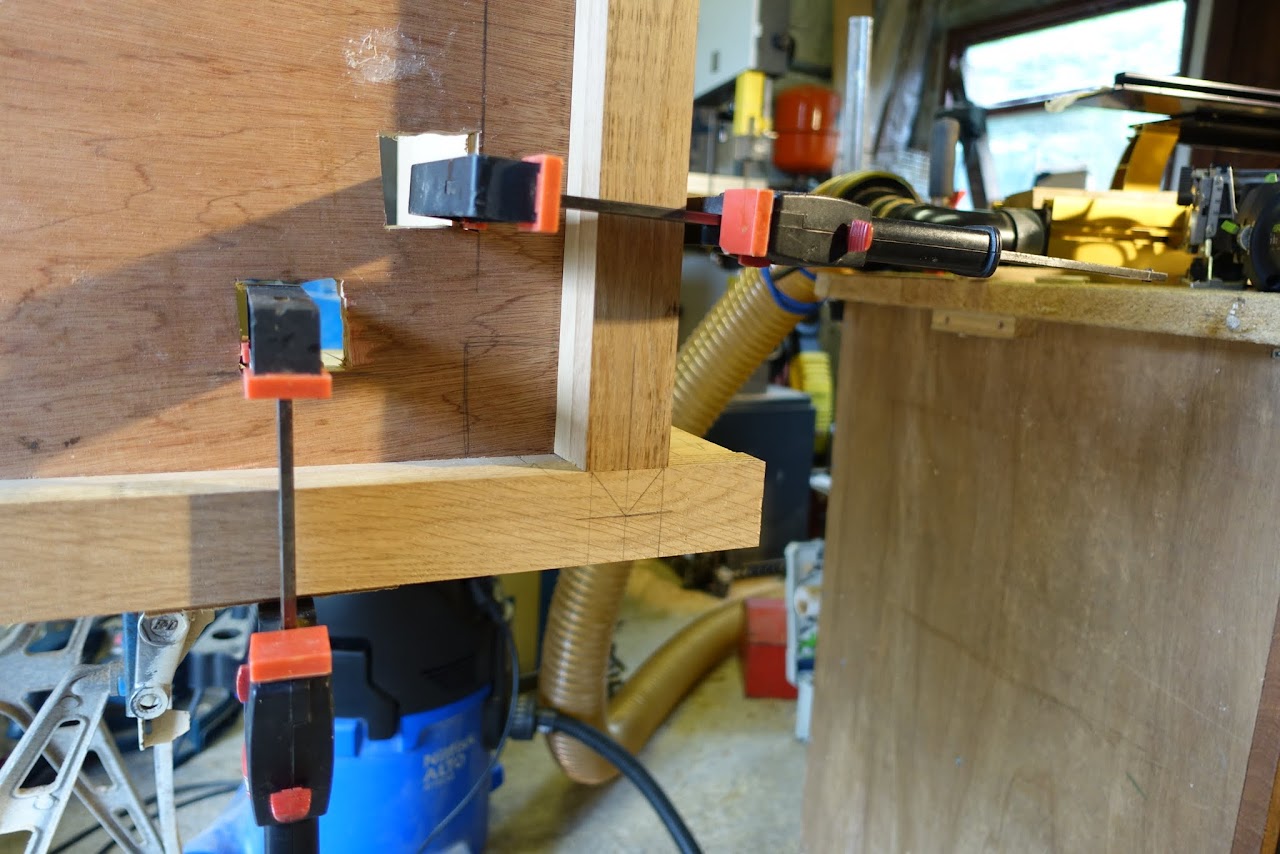
Then the joint is carefully marked out on the top lipping (confusingly at the bottom of the photo). The most important part of this is the centre line which marks the tip of the "V" and the extended centre line from the side.
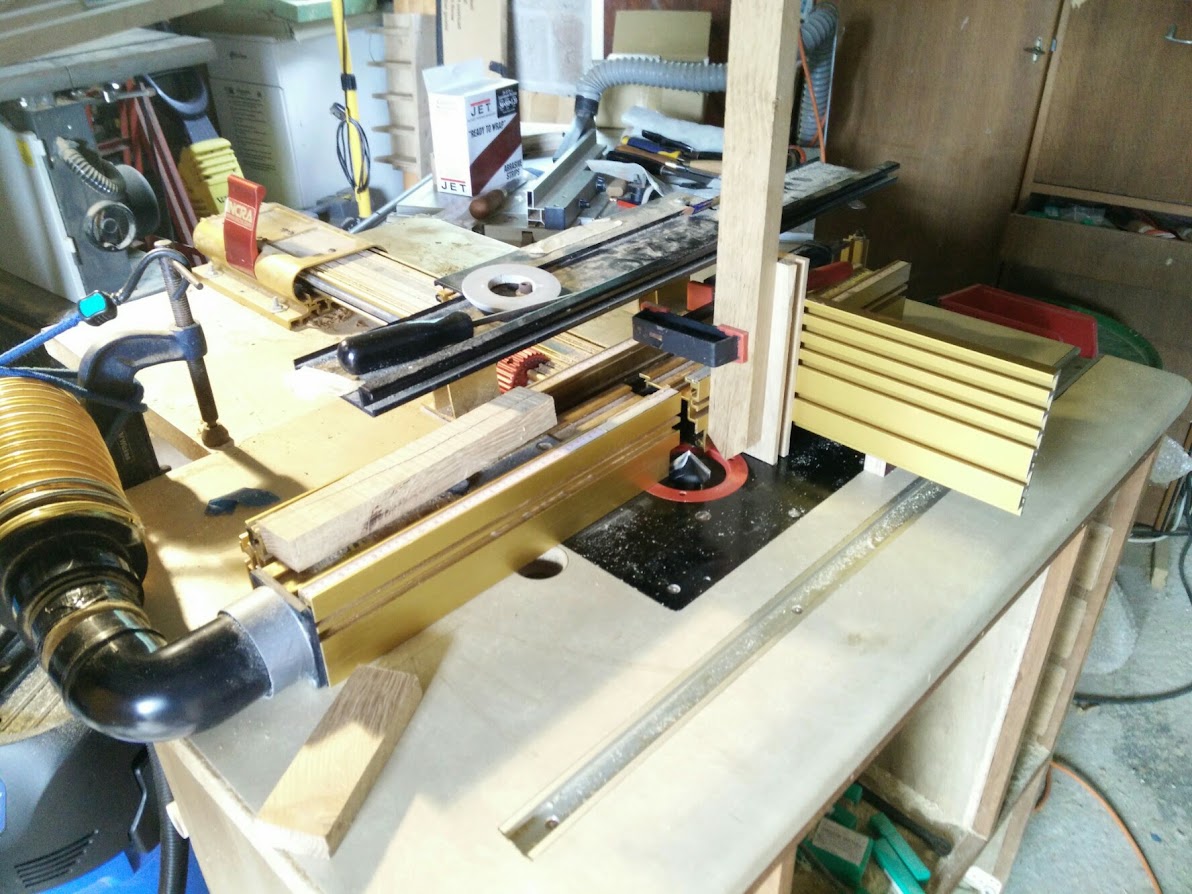
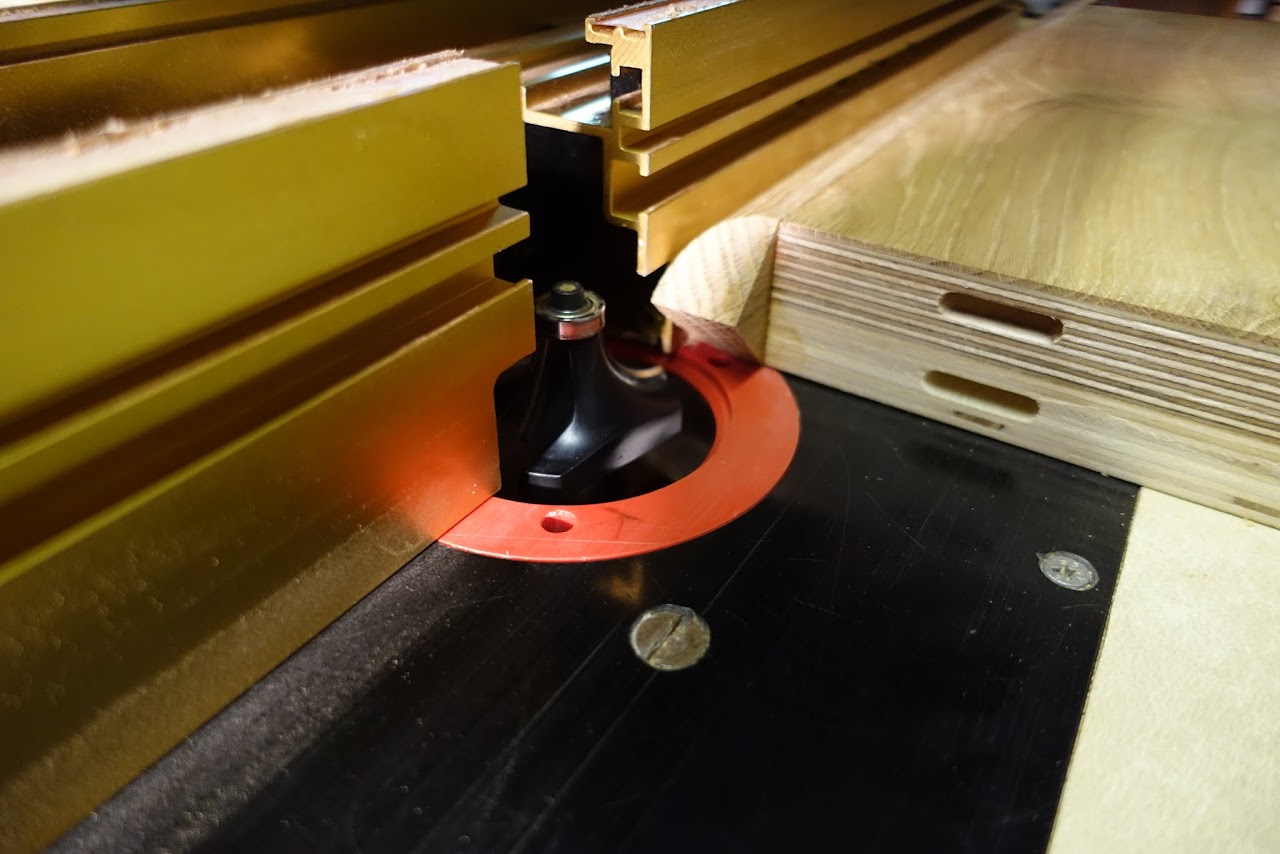
The "V"'s are cut first on the router table using a 39mm 90 deg V cutter. Initially set the tip of the cutter flush with the table top so that the tip can be aligned with the centre line of the marked up top. Using a backing piece to prevent breakout, make multiple passes, raising the cutter a few mm at a time until the tip of the "V" reaches the horizontal centre line. The whole thing is held in a simple jig which slides in the T track on my router table.
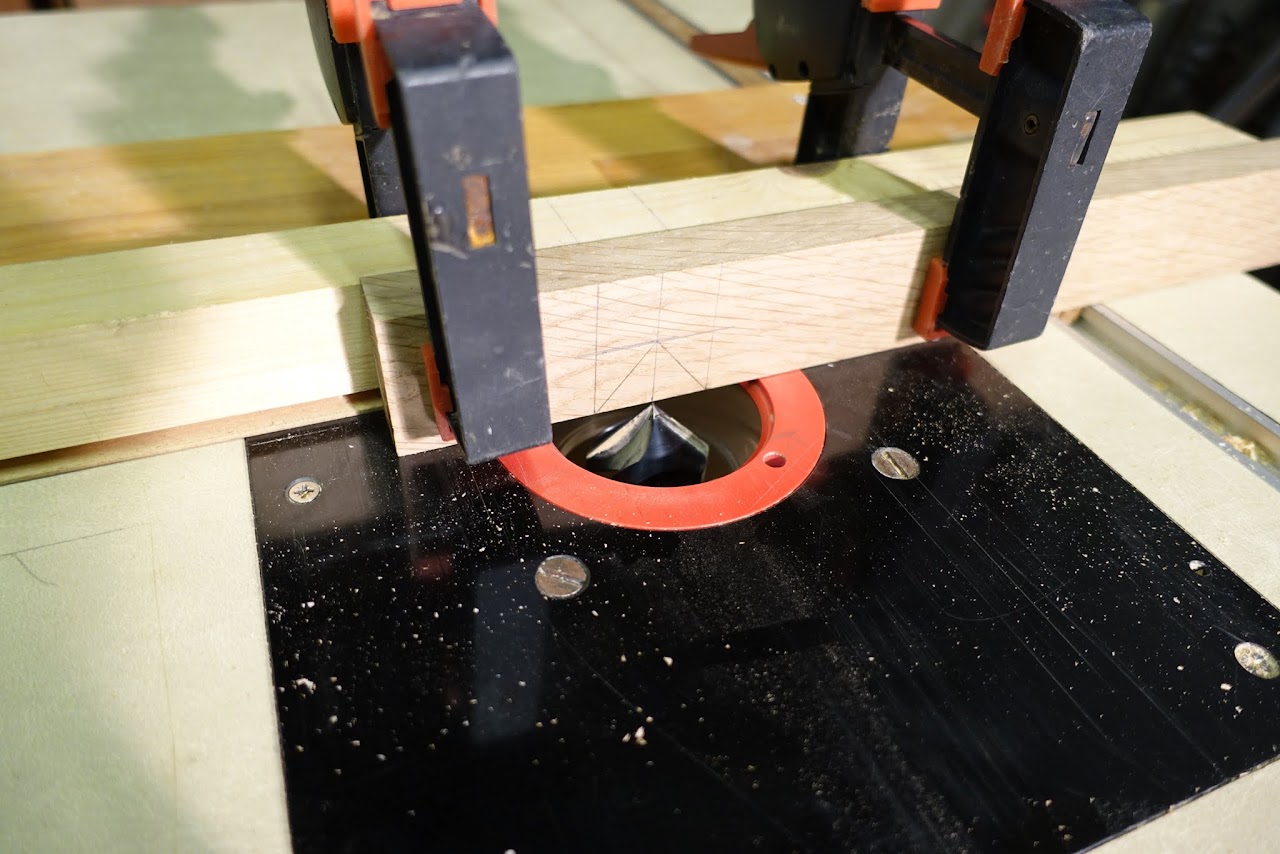
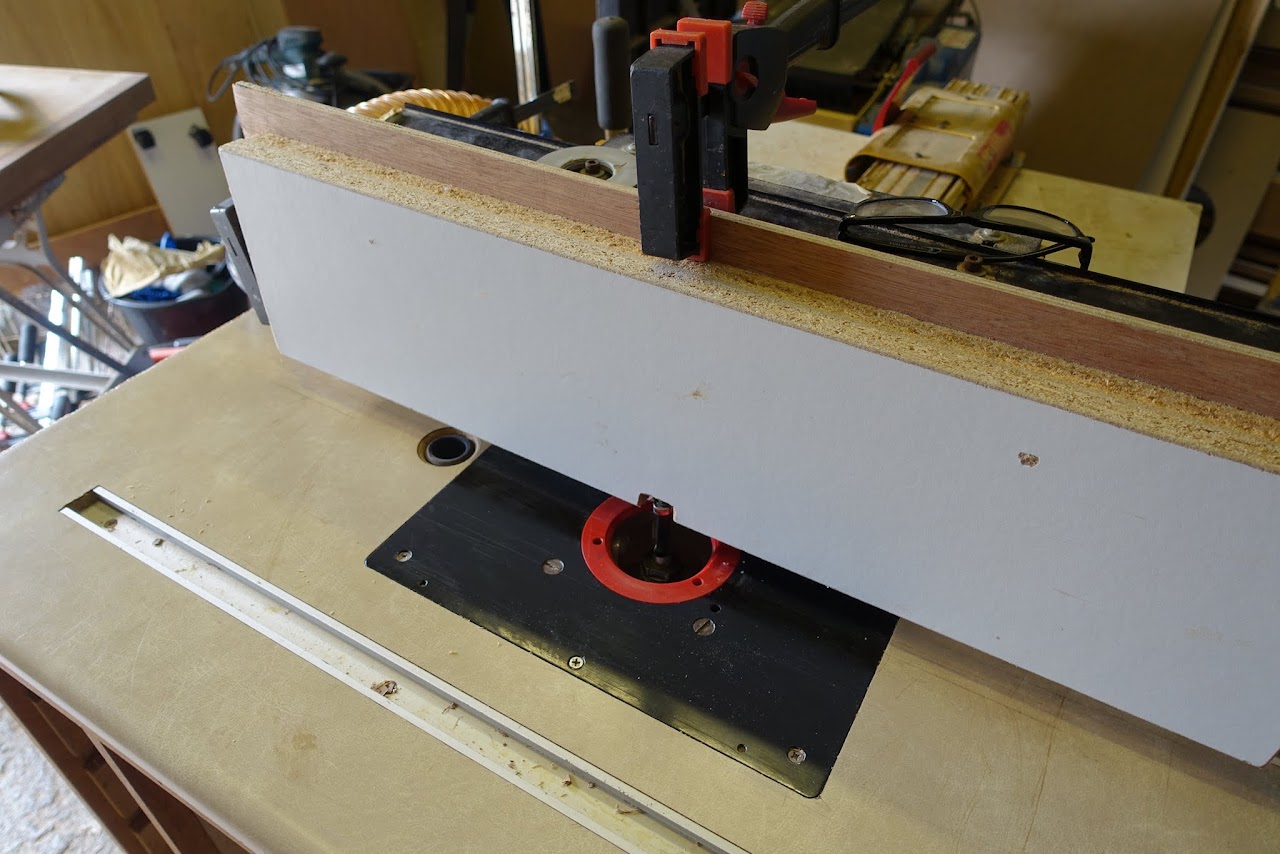
Use the same cutter to cut the tenons. The side lipping is held vertically against the fence as shown, again with a piece of sacrificial scrap behind to prevent break out. As with the V mortises, make multiple passes, rotating the piece through 180 deg each time so that you are making an identical cut from each side. Stop when you reach the centre line!
All being well, you have now cut your first sword tip tenon!
Now just repeat 9 times! :lol: Remember to cut the V mortice first as that cannot be tweaked. Then cut the V tenon, which can be.
Now for another dry assembly of the unit so that the lipping can be glued in place. Once the lipping has been glued, dis-assemble, taking great care now how you store them as the V tenons are easily damaged.
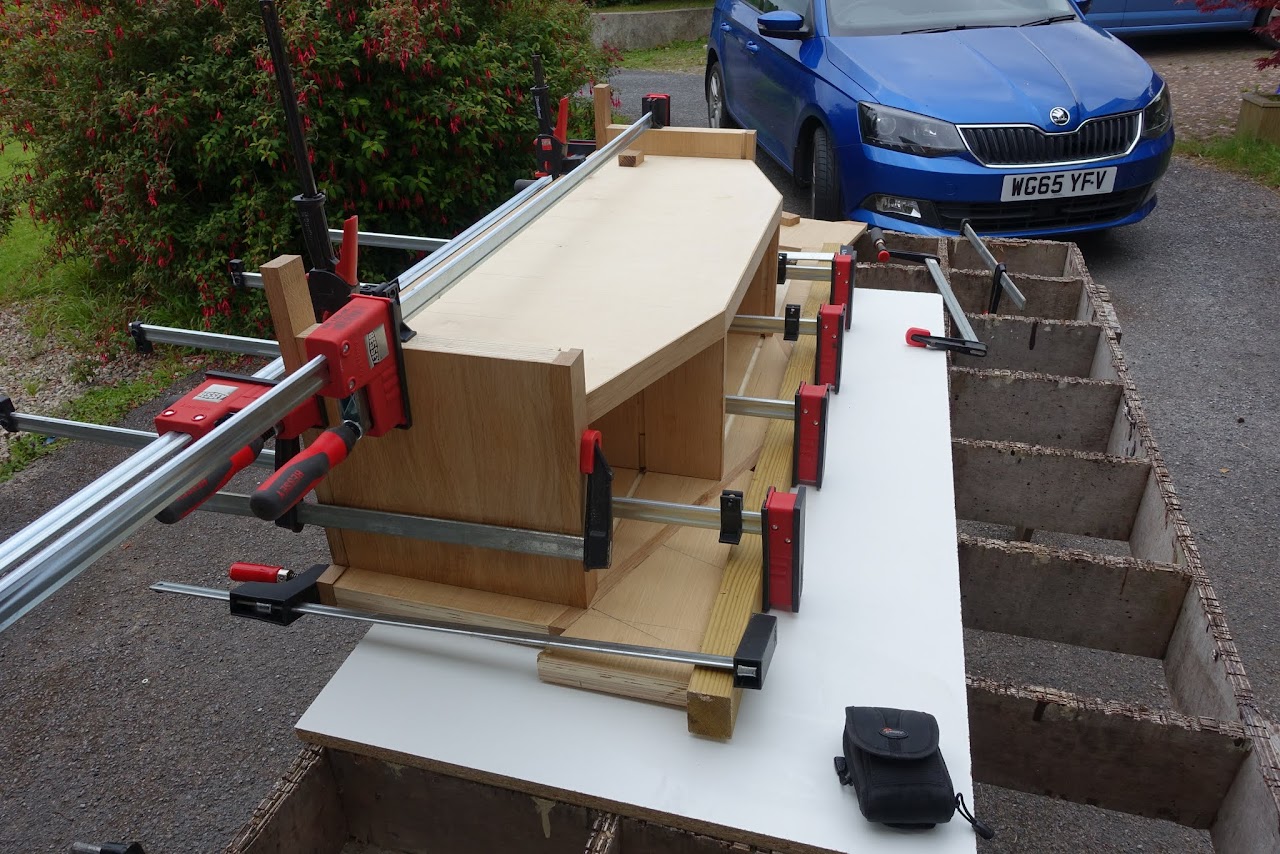
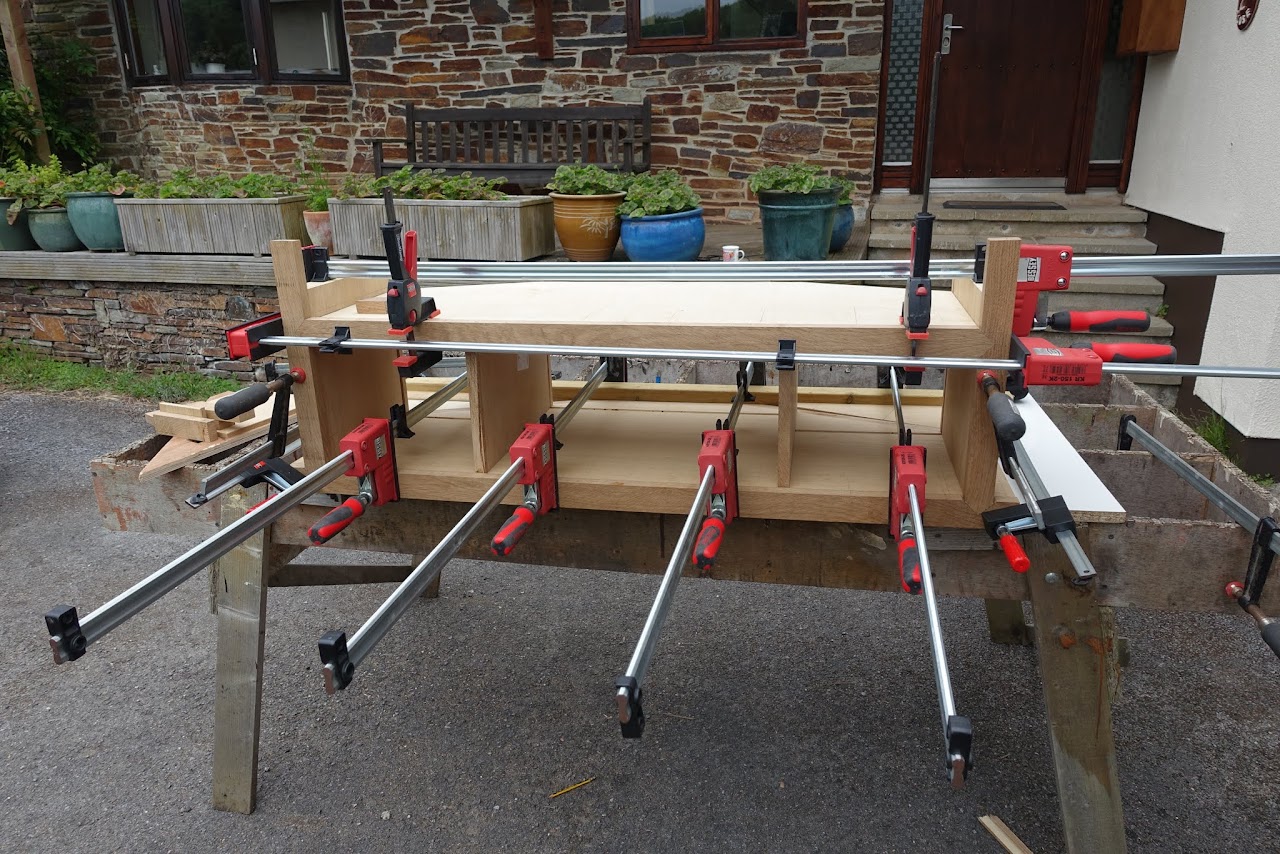
The assembly process is repeated for the TV unit itself, and here I've used the offcuts from the back to provide the clamping support for both front and rear lipping. The offcuts are screwed to that piece of 3x2.
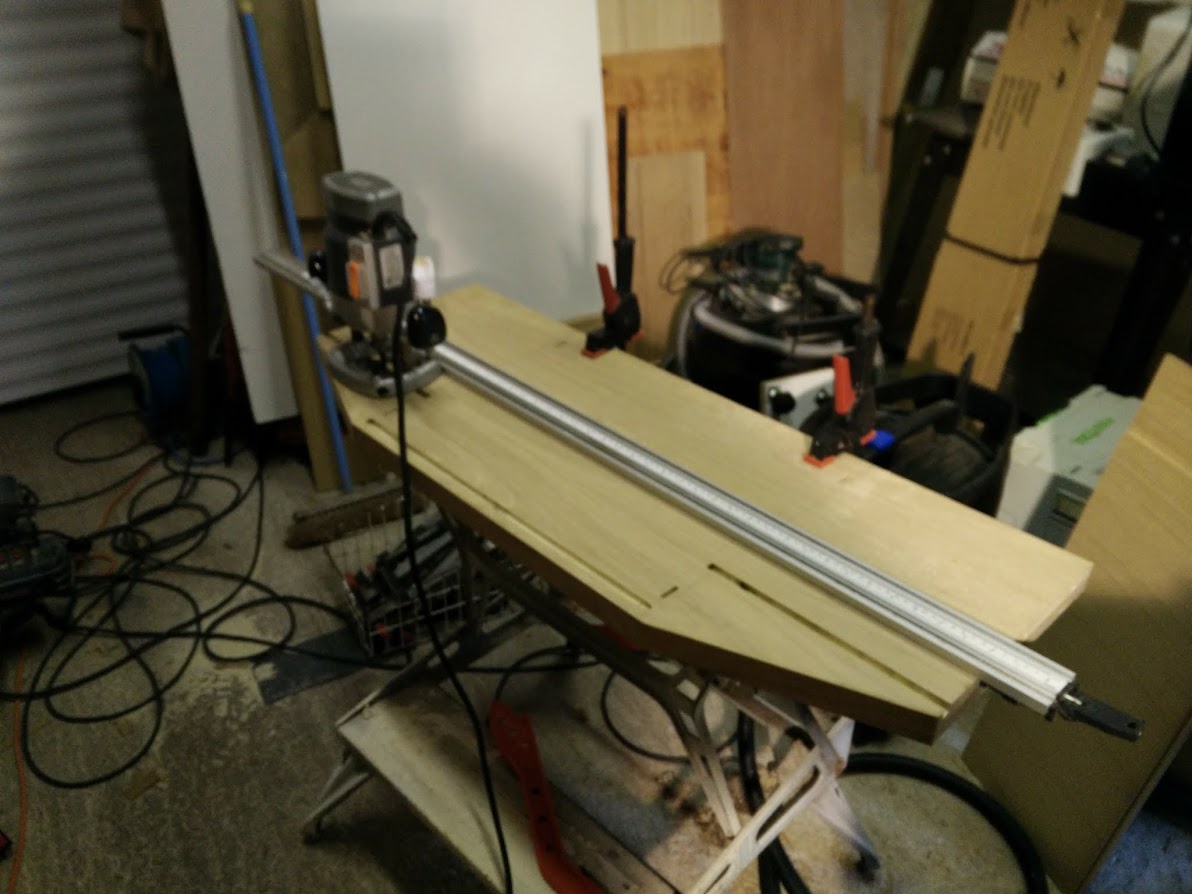
Time to round over the lipping. I believe Rob did his lovingly by hand. Not me - back to the router table! First trim the 2mm overhang each side using a flush cutter. I also like to use a fence as "belt and braces" as by now I have invested a lot of time in the components. Finally, I cut the tops to their final length and added an end lipping of American Black Walnut.
Final flush cutting was finished off with a cabinet scraper. Then round the lipping over with a 19mm rounding over bit, again on the router table.
The backs are 9mm oak faced ply, so next job was to cut the groove to take these in the top, base and sides. Most were done with a groove cutter on the router table, but the back of the TV unit required using a hand held router against a fence.
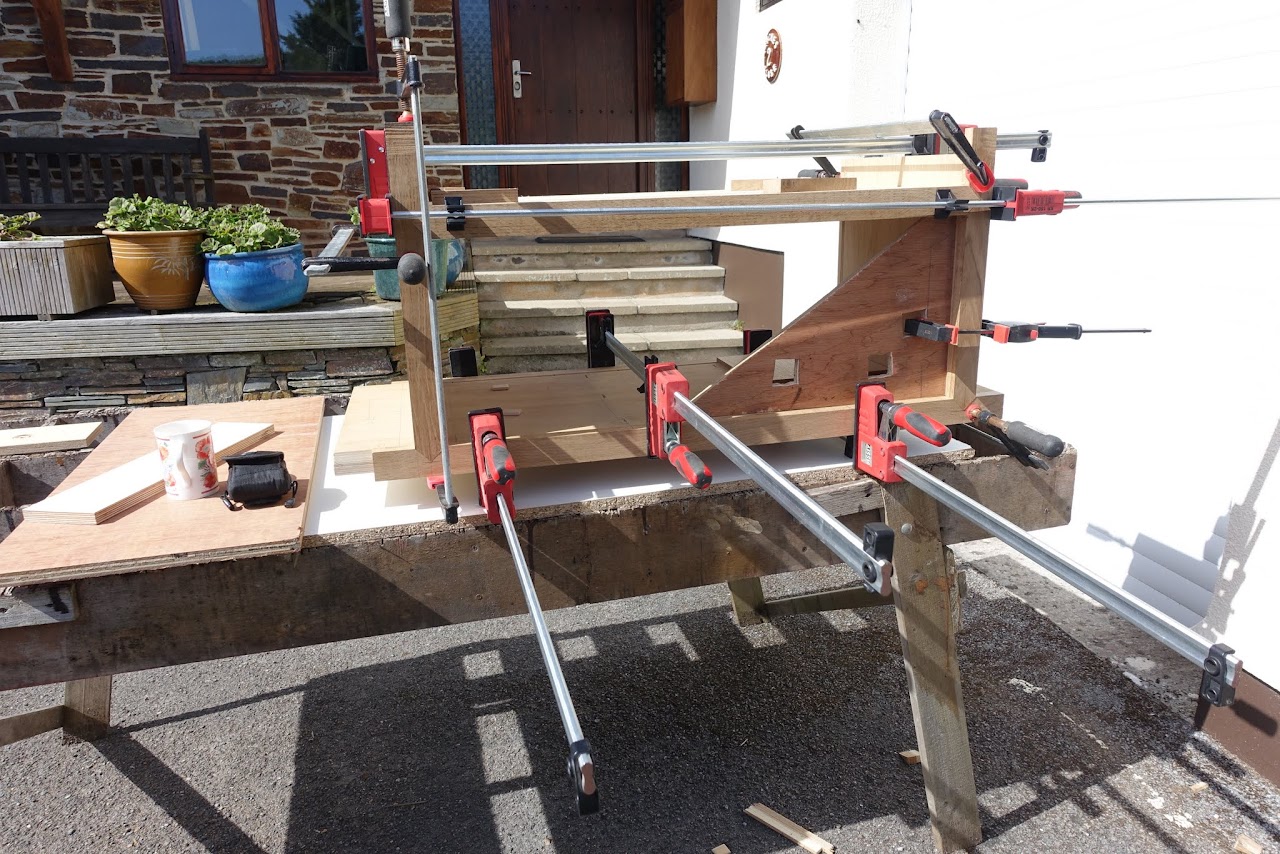
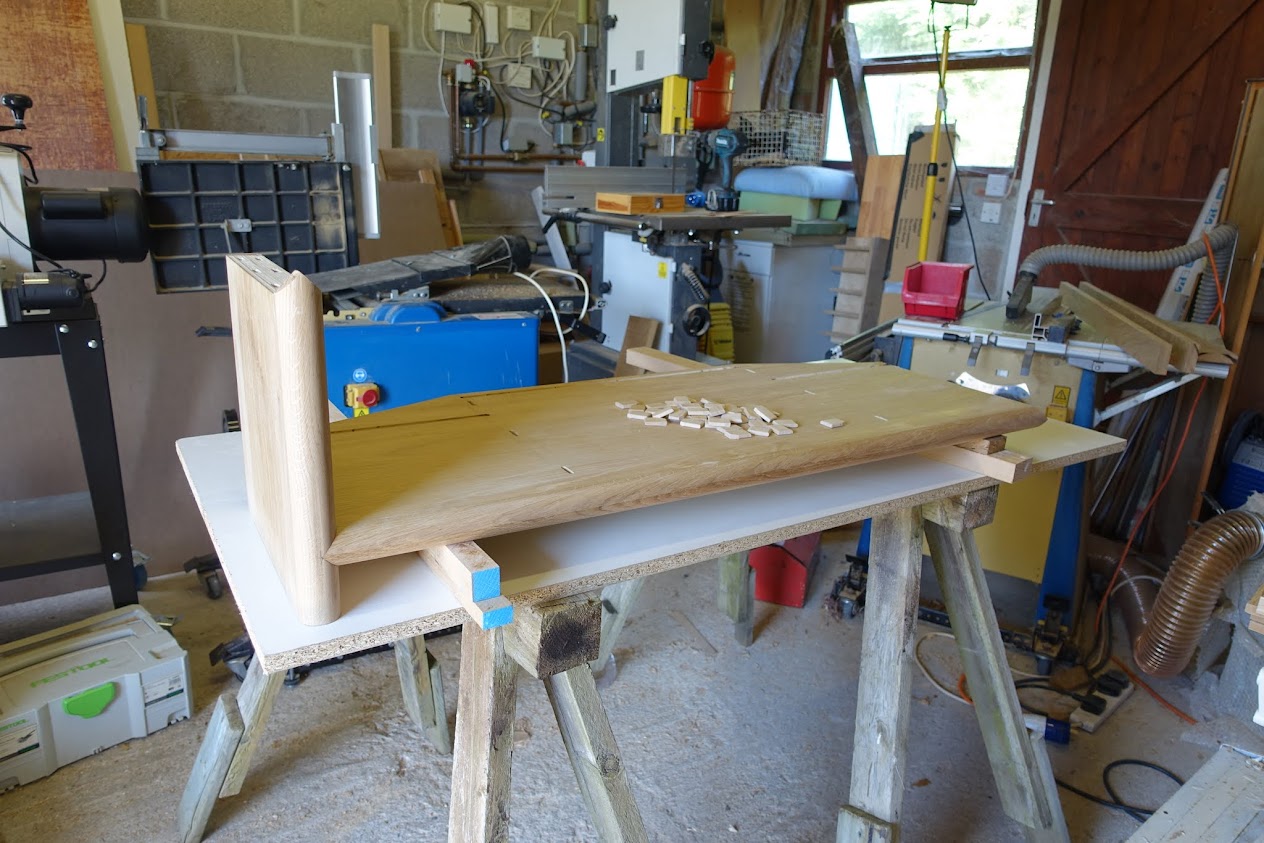
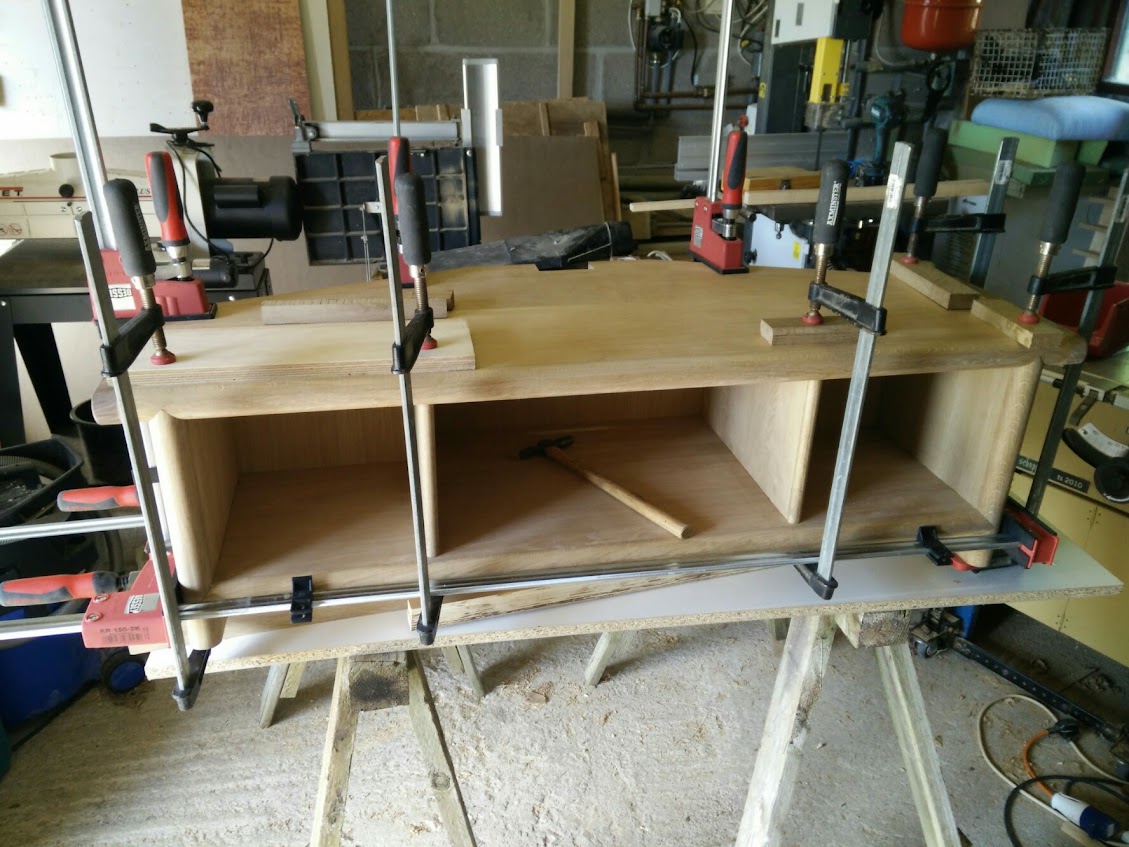
Now time for the glue up. I remember Rob saying that he had some assistance for this, but not having that luxury, I had to work out a sequence that would work single handed. First, a final dry assembly to make sure everything fits.
Start the glue up by supporting the base at the right height for the sides, then attach the sides.
.... and the dividers, and drop in the 9mm ply backs.
..... and finally add the top, and clamp in position, all the time checking with a square to ensure there is no racking. With the drop in backs, the risk of this was minimal anyway.
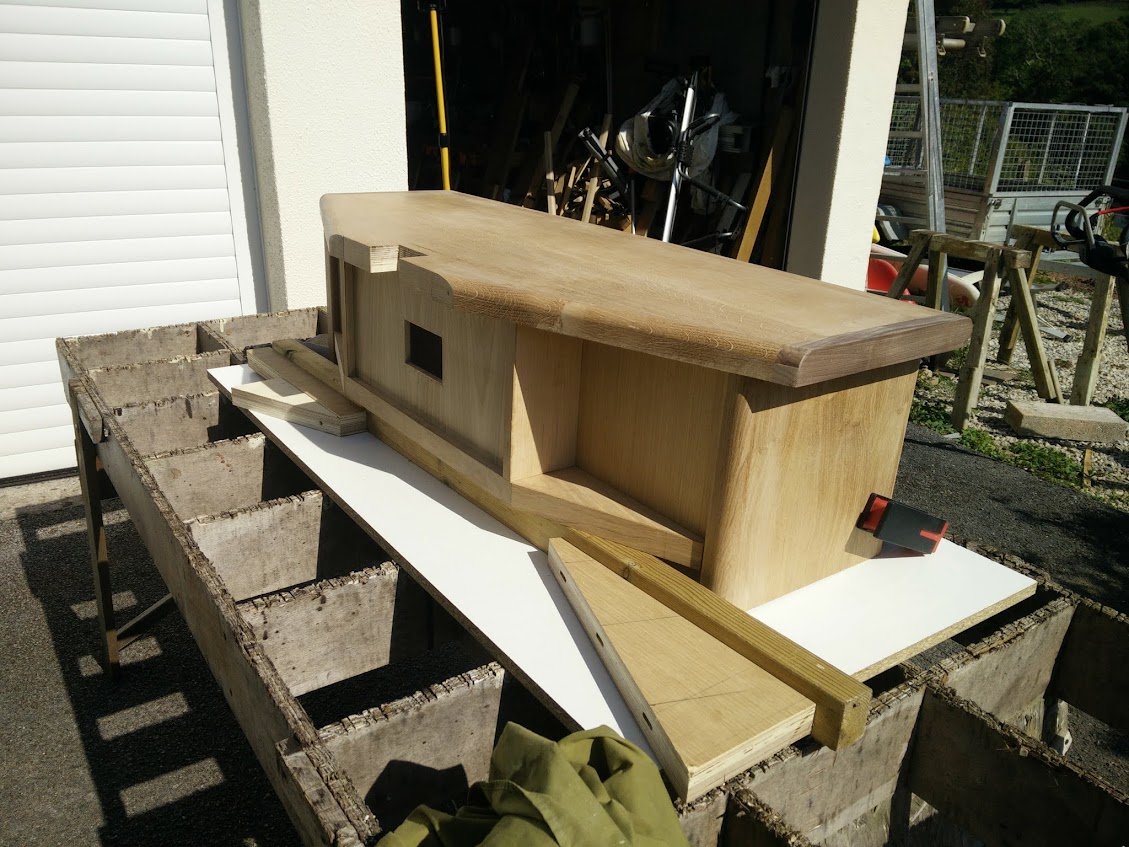
A post was added up the back with a U shaped x section so that cabling could be hidden from view within it, and an 18mm plywood plate added to which was attached the wall hanging bracket. The finish is 2 coats of Osmo PolyX Oil, initially applied with a brush and then wiped over with a cloth dampened with white spirit to remove any excess and also brush marks. Then denibbed with some well worn 320 grit Abranet, and 3 coats of Chestnut Microcrystalline wax.
Just need to add the drawers now. Time to get to grips with the Wood Rat and after 2 sessions, I had a pile of 8 drawers.
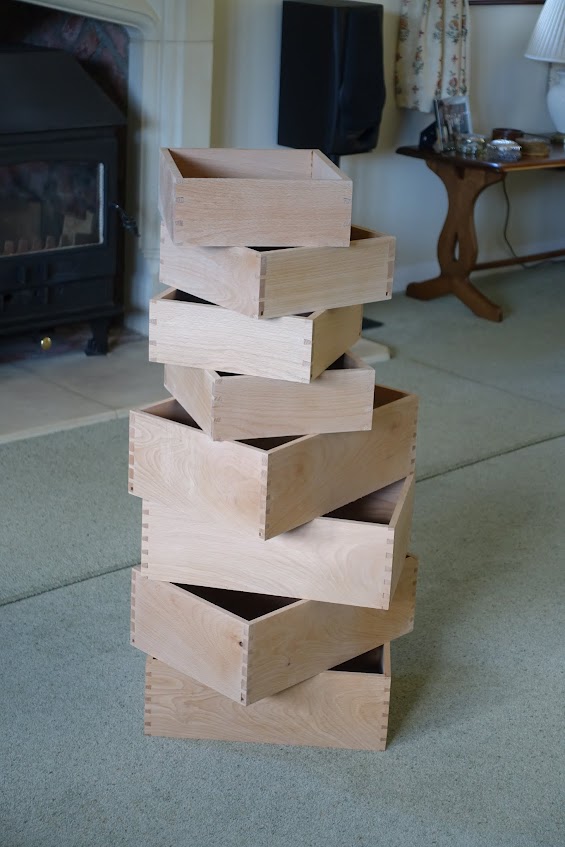
The drawers in Rob's piece are a beautiful traditional piston fit. Me - I place an order with Ironmongery direct and get a package the next morning. Job done - quick and dirty! :lol:
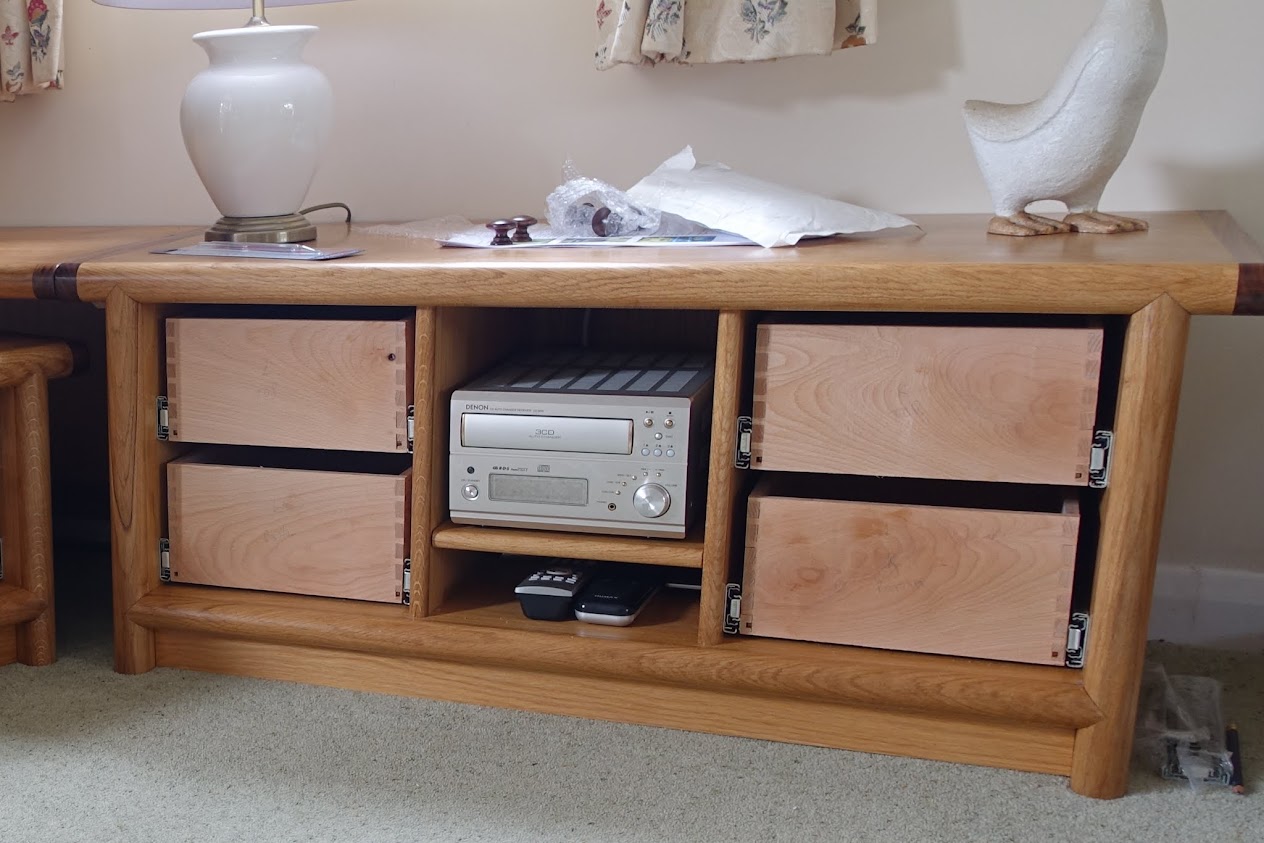
The solid drawer fronts are fitted with a 1.25 spacer all round .........
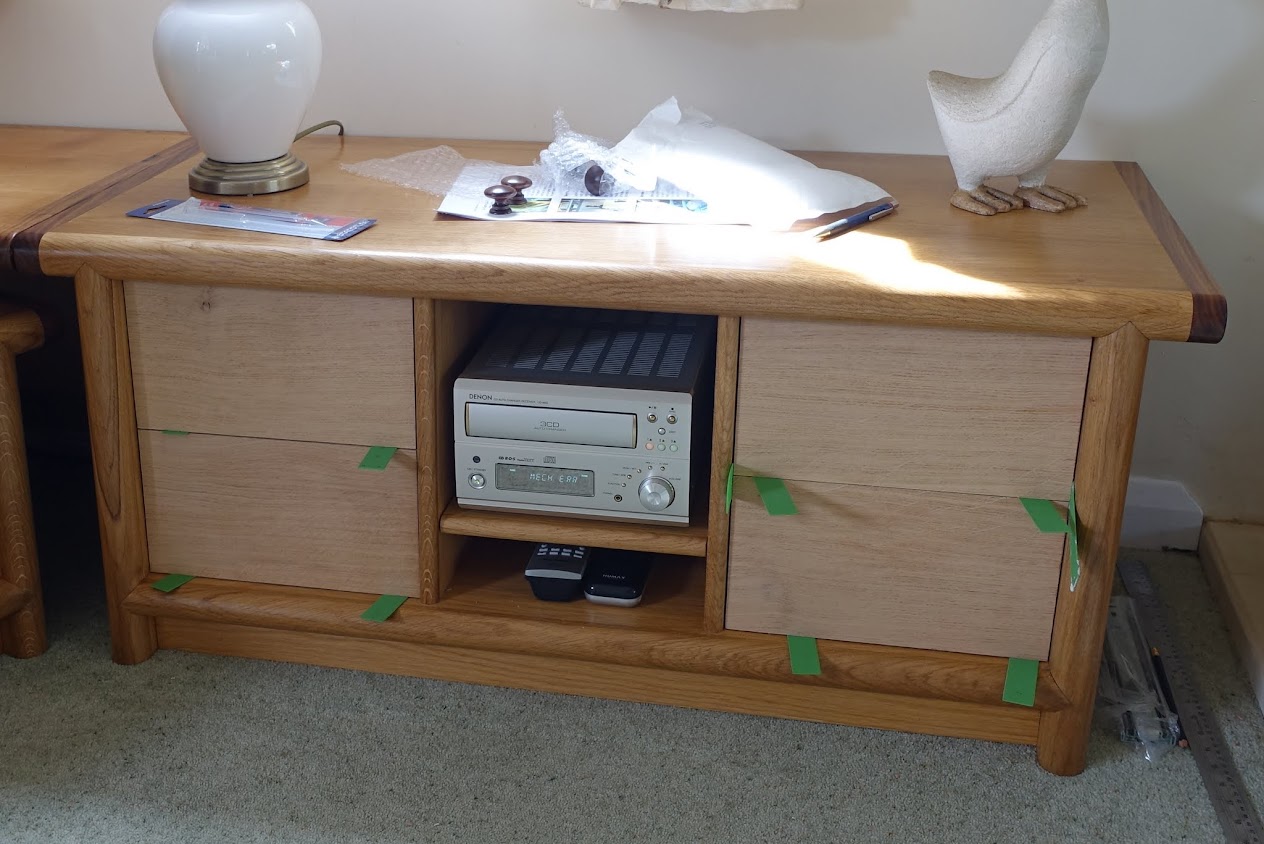
Knobs are also in ABW and as I don't have a lathe were bought over the net. Drawer fronts are attached initially with a single screw through the central hole where the knob will go. Then screw through from inside the drawer into the front, remove the central screw and replace with a knob in the same position using the same hole. Job done!
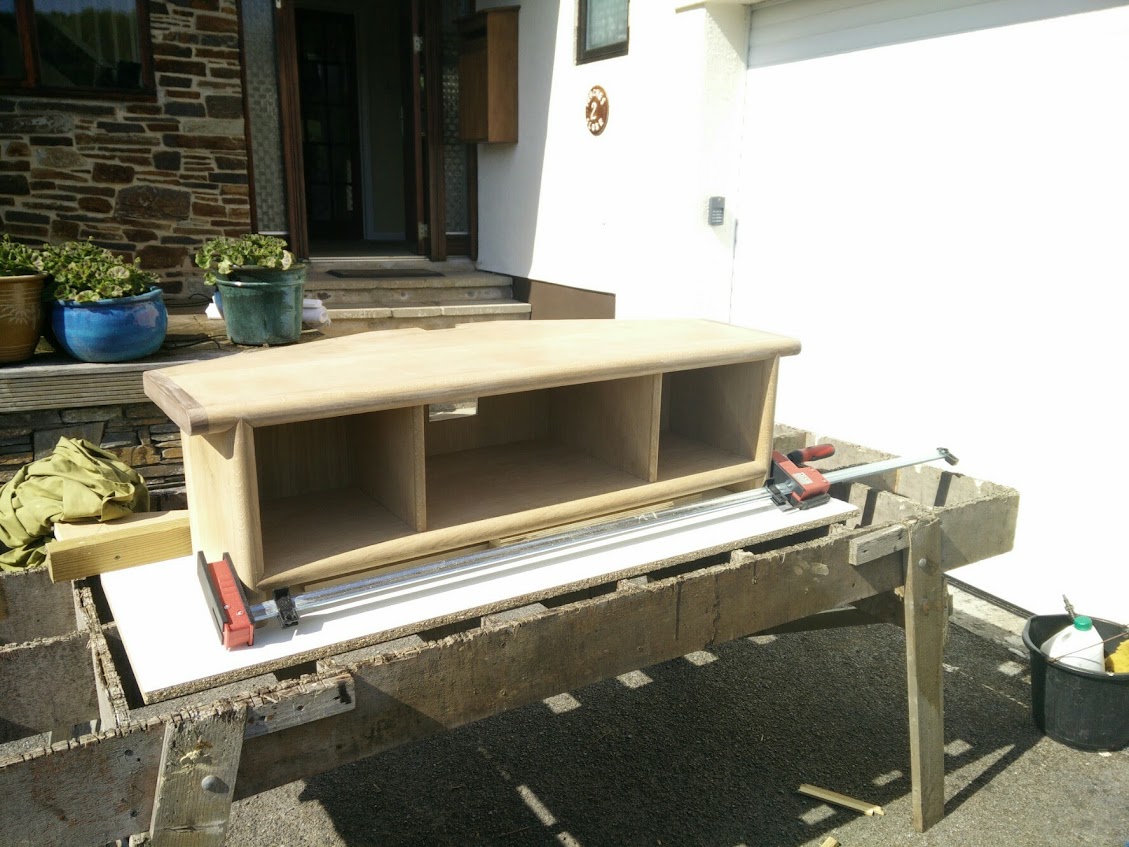
Here's the finished units.
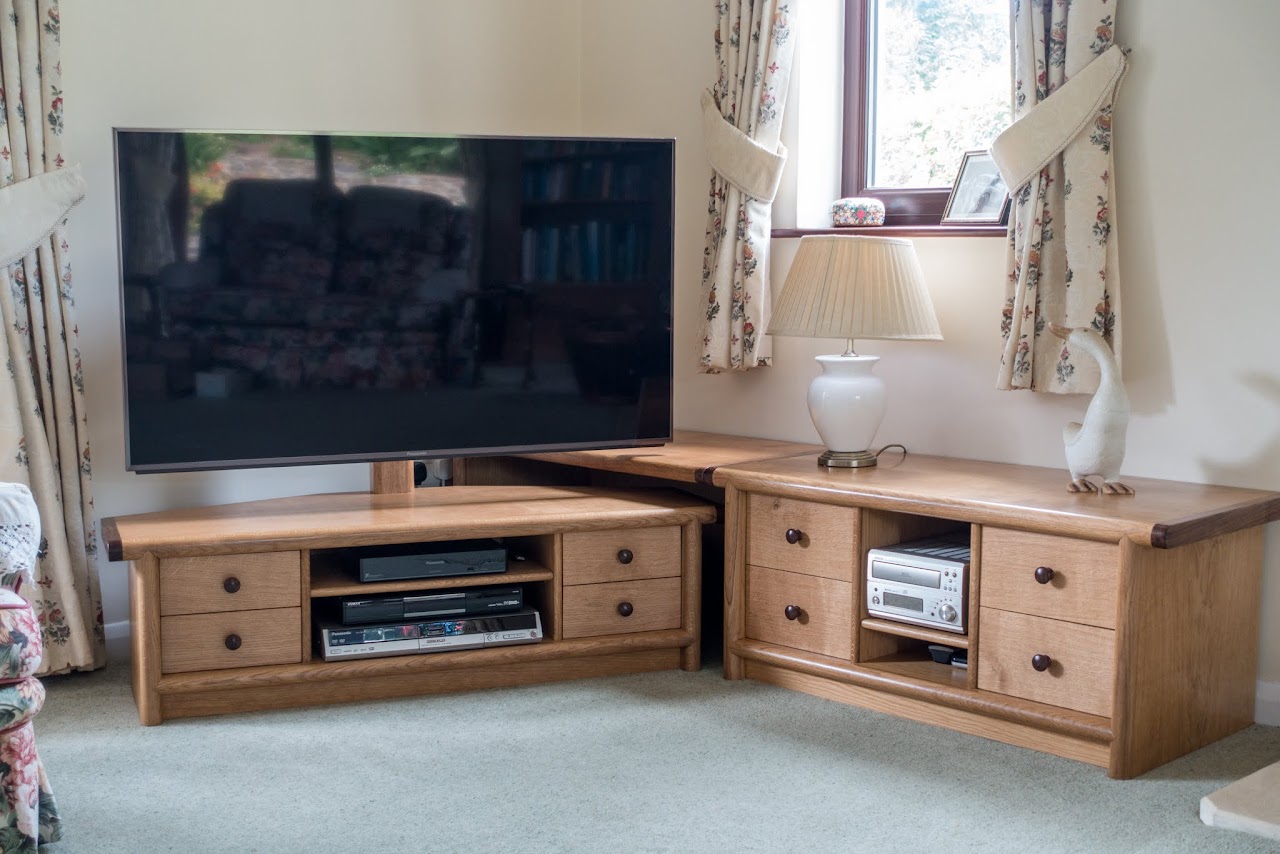
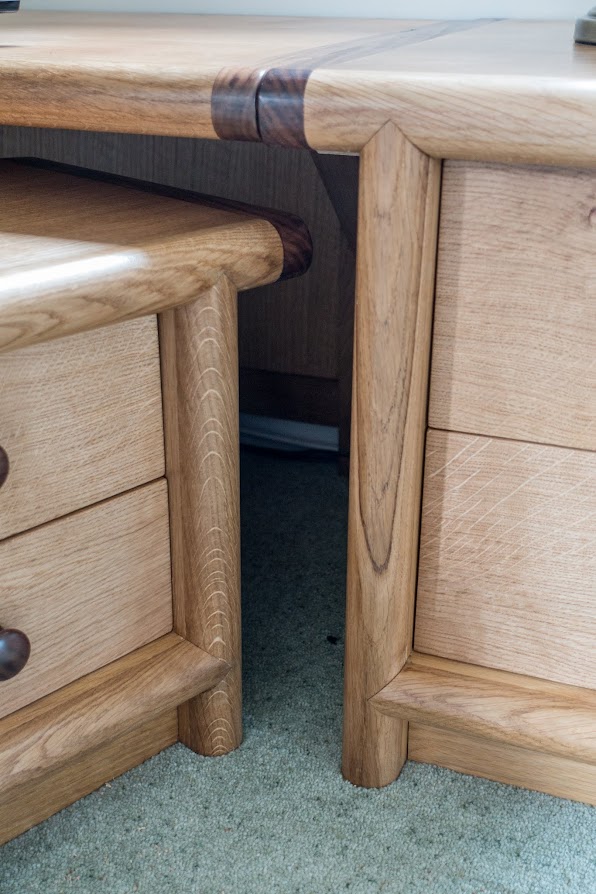
It is designed this way so that the unit on the right and the TV unit can be used as stand alone pieces if required. The unit that goes in to the corner is simply a veneered top, with an end piece like the main unit, a leg at the back right with an oak faced mdf panel set in to the back, and resting on a block screwed to the underside of the main unit to ensure the front edge is flush.
Time to settle in my favourite chair with a beer and watch the Athletics! bscene-drinkingcheers:
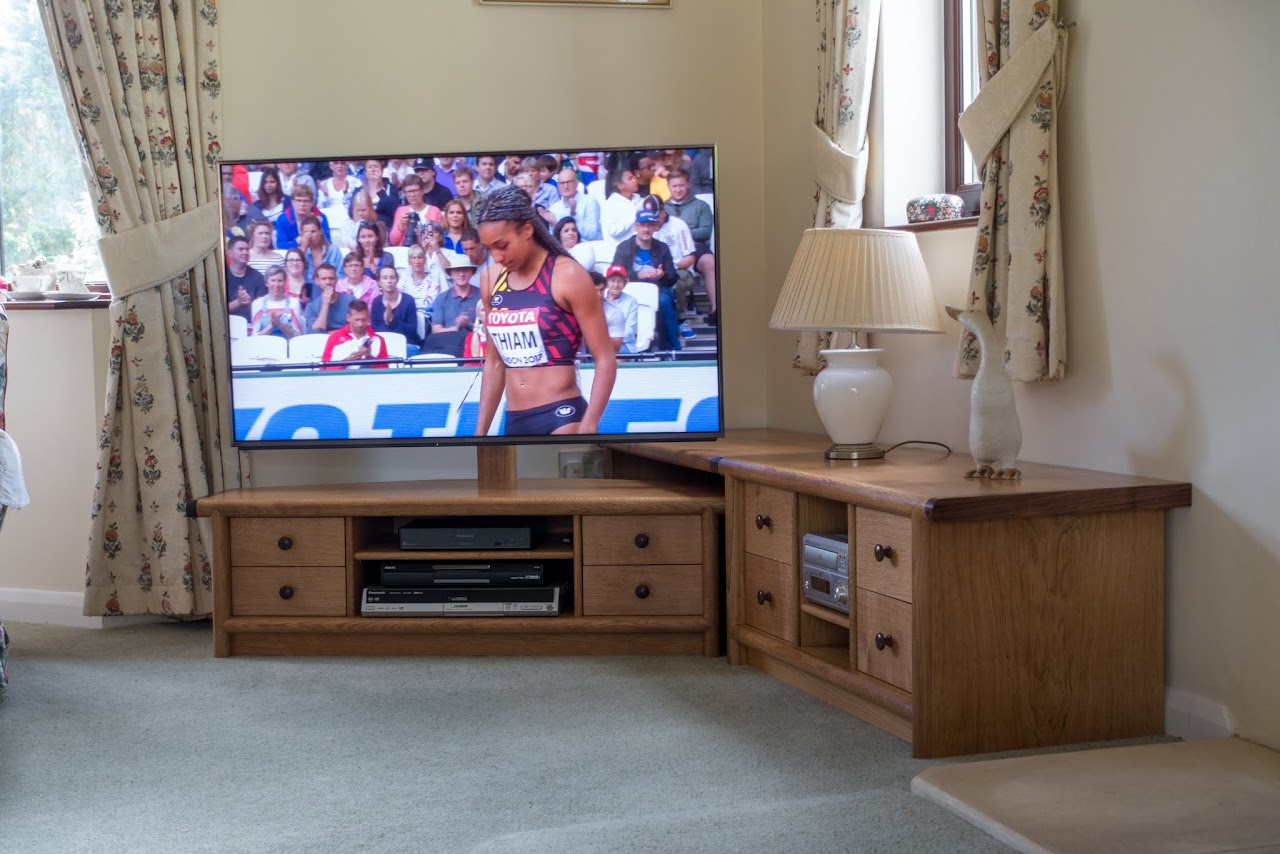
If you're still there Rob, many thanks for providing the inspiration, and for advice given. Hope I haven't butchered your original concept too much! :lol:
Smart piece of chipboard (floor grade of course) with a piece of beech to resist bending, plus those James Micheners that I haven't read for years, but which I might want someday, under the feet to get the viewing height right. What's not to like? Quite a bit according to the boss. Not my best work, nor what she had in mind at all, so thinking cap back on.
A few years back, our very own "Woodbloke" did a WIP of a media unit inspired by Alan Peters, which I greatly admired at the time, although I think the original thread was lost in WH1. However, here's a link to Rob's Blog which shows the finished article. This will have to be modified to fit in a corner, provide additional storage, and for the TV to be "grandchild proof" by being attached using a wall mounting bracket on a post up the back of the unit, and with all cabling being hidden within the post . I particularly wanted to avoid the "flat pack" look, and also wanted to try the swordtip tenons used by Rob on his original piece. Whilst we have no plans to move house, the piece shouldn't be "too bespoke" to fit elsewhere, and for that reason I have made it in 3 separate stand alone parts. Time being short, I have cut a few corners here, so if you're reading this Rob, you might want to take a stiff drink and observe from behind the sofa. :lol:
I am cutting my own veneers in English Oak, but to reduce the amount of work involved, and to preserve my supply of oak, this will be limited to the tops and end panels. The rest will be Oak veneered 18mm ply, and I'm hoping that that the visual difference will be minimal. The tops and sides are 2 layers of 18mm ply glued together to make a 36mm thick substrate on to which I will glue 2mm veneers cut with my bandsaw, and thicknessed with my newly acquired Jet 16-32 plus drum sander. In view of the thickness and rigidity of the substrate (36mm of ply) I am only going to veneer one side. The other side will be left as the original oak veneer.
Here are some of the main components, glued up and slightly over sized ready for trimming.
Veneers get final thicknessing in the drum sander.
The veneer edges are "shot" on a home made Steve Maskery veneer shooting board.
... and then glued to the substrate using cascamite spread with a foam mini-roller before going in the vacuum bag. I pressed 2 ends at a time, or one top. The pump was left running for about 6 hours and didn't seem to complain, although one day I will get around to building one of Robert's vacuum control gizmos.
Time to think about the lipping, and the sword tip tenons. I made up a test piece and tried cutting one manually. Not only was it very time consuming, the end result was not good. :eusa-think: And there will need to be nine of these in the final ensemble. Time to think "quick and dirty". Rob - if you're still with me, time to look away!
The tops and sides are 38mm thick ( 2 x 18mm ply + 2mm veneer). I have therefore cut lipping stock in English Oak 42mm x 22mm. This will allow for 2mm overhang top and bottom, and for a 3mm "flat" when rounding the edge. The sides, top and base are assembled using two rows of 6mm dominoes, with a single row for the 18mm dividers, which I have already lipped. The lipping will be attached to the top and bottom with a single row of dominoes, but the lipping on the sides will just be a glued fit as I wanted some unconstrained "wiggle room" when final fitting the sword tip tenons.
Here's the initial dry assembly. The base and sides have been cut to final size to enable fitting, but the ends of the top have been left to protect them for the time being.
I am starting with the unit that will go into the corner of the room as this will be more or less unseen, so a good place for the first joint whilst I am still learning! The front lipping is attached as described with dominoes as a dry fit. The side lipping is attached with clamps, and the whole thing held square with a piece of ply clamped in place.
Then the joint is carefully marked out on the top lipping (confusingly at the bottom of the photo). The most important part of this is the centre line which marks the tip of the "V" and the extended centre line from the side.
The "V"'s are cut first on the router table using a 39mm 90 deg V cutter. Initially set the tip of the cutter flush with the table top so that the tip can be aligned with the centre line of the marked up top. Using a backing piece to prevent breakout, make multiple passes, raising the cutter a few mm at a time until the tip of the "V" reaches the horizontal centre line. The whole thing is held in a simple jig which slides in the T track on my router table.
Use the same cutter to cut the tenons. The side lipping is held vertically against the fence as shown, again with a piece of sacrificial scrap behind to prevent break out. As with the V mortises, make multiple passes, rotating the piece through 180 deg each time so that you are making an identical cut from each side. Stop when you reach the centre line!
All being well, you have now cut your first sword tip tenon!
Now just repeat 9 times! :lol: Remember to cut the V mortice first as that cannot be tweaked. Then cut the V tenon, which can be.
Now for another dry assembly of the unit so that the lipping can be glued in place. Once the lipping has been glued, dis-assemble, taking great care now how you store them as the V tenons are easily damaged.
The assembly process is repeated for the TV unit itself, and here I've used the offcuts from the back to provide the clamping support for both front and rear lipping. The offcuts are screwed to that piece of 3x2.
Time to round over the lipping. I believe Rob did his lovingly by hand. Not me - back to the router table! First trim the 2mm overhang each side using a flush cutter. I also like to use a fence as "belt and braces" as by now I have invested a lot of time in the components. Finally, I cut the tops to their final length and added an end lipping of American Black Walnut.
Final flush cutting was finished off with a cabinet scraper. Then round the lipping over with a 19mm rounding over bit, again on the router table.
The backs are 9mm oak faced ply, so next job was to cut the groove to take these in the top, base and sides. Most were done with a groove cutter on the router table, but the back of the TV unit required using a hand held router against a fence.
Now time for the glue up. I remember Rob saying that he had some assistance for this, but not having that luxury, I had to work out a sequence that would work single handed. First, a final dry assembly to make sure everything fits.
Start the glue up by supporting the base at the right height for the sides, then attach the sides.
.... and the dividers, and drop in the 9mm ply backs.
..... and finally add the top, and clamp in position, all the time checking with a square to ensure there is no racking. With the drop in backs, the risk of this was minimal anyway.
A post was added up the back with a U shaped x section so that cabling could be hidden from view within it, and an 18mm plywood plate added to which was attached the wall hanging bracket. The finish is 2 coats of Osmo PolyX Oil, initially applied with a brush and then wiped over with a cloth dampened with white spirit to remove any excess and also brush marks. Then denibbed with some well worn 320 grit Abranet, and 3 coats of Chestnut Microcrystalline wax.
Just need to add the drawers now. Time to get to grips with the Wood Rat and after 2 sessions, I had a pile of 8 drawers.
The drawers in Rob's piece are a beautiful traditional piston fit. Me - I place an order with Ironmongery direct and get a package the next morning. Job done - quick and dirty! :lol:
The solid drawer fronts are fitted with a 1.25 spacer all round .........
Knobs are also in ABW and as I don't have a lathe were bought over the net. Drawer fronts are attached initially with a single screw through the central hole where the knob will go. Then screw through from inside the drawer into the front, remove the central screw and replace with a knob in the same position using the same hole. Job done!
Here's the finished units.
It is designed this way so that the unit on the right and the TV unit can be used as stand alone pieces if required. The unit that goes in to the corner is simply a veneered top, with an end piece like the main unit, a leg at the back right with an oak faced mdf panel set in to the back, and resting on a block screwed to the underside of the main unit to ensure the front edge is flush.
Time to settle in my favourite chair with a beer and watch the Athletics!
bscene-drinkingcheers:If you're still there Rob, many thanks for providing the inspiration, and for advice given. Hope I haven't butchered your original concept too much! :lol: