


doctor Bob
Established Member
- Joined
- 22 Jun 2011
- Messages
- 5,171
- Reaction score
- 1,881
So it cropped up in another thread about making curved doors. A few people were interested so I thought I'd start a new thread.
We are talking about a concave frame but the principle is similar for a convex, but becomes a bit more complex because your working the outside of the door and frame of the former rather than the inside.
the images are of various projects so don't necessarily follow through but they will give you a good idea of how it all works.
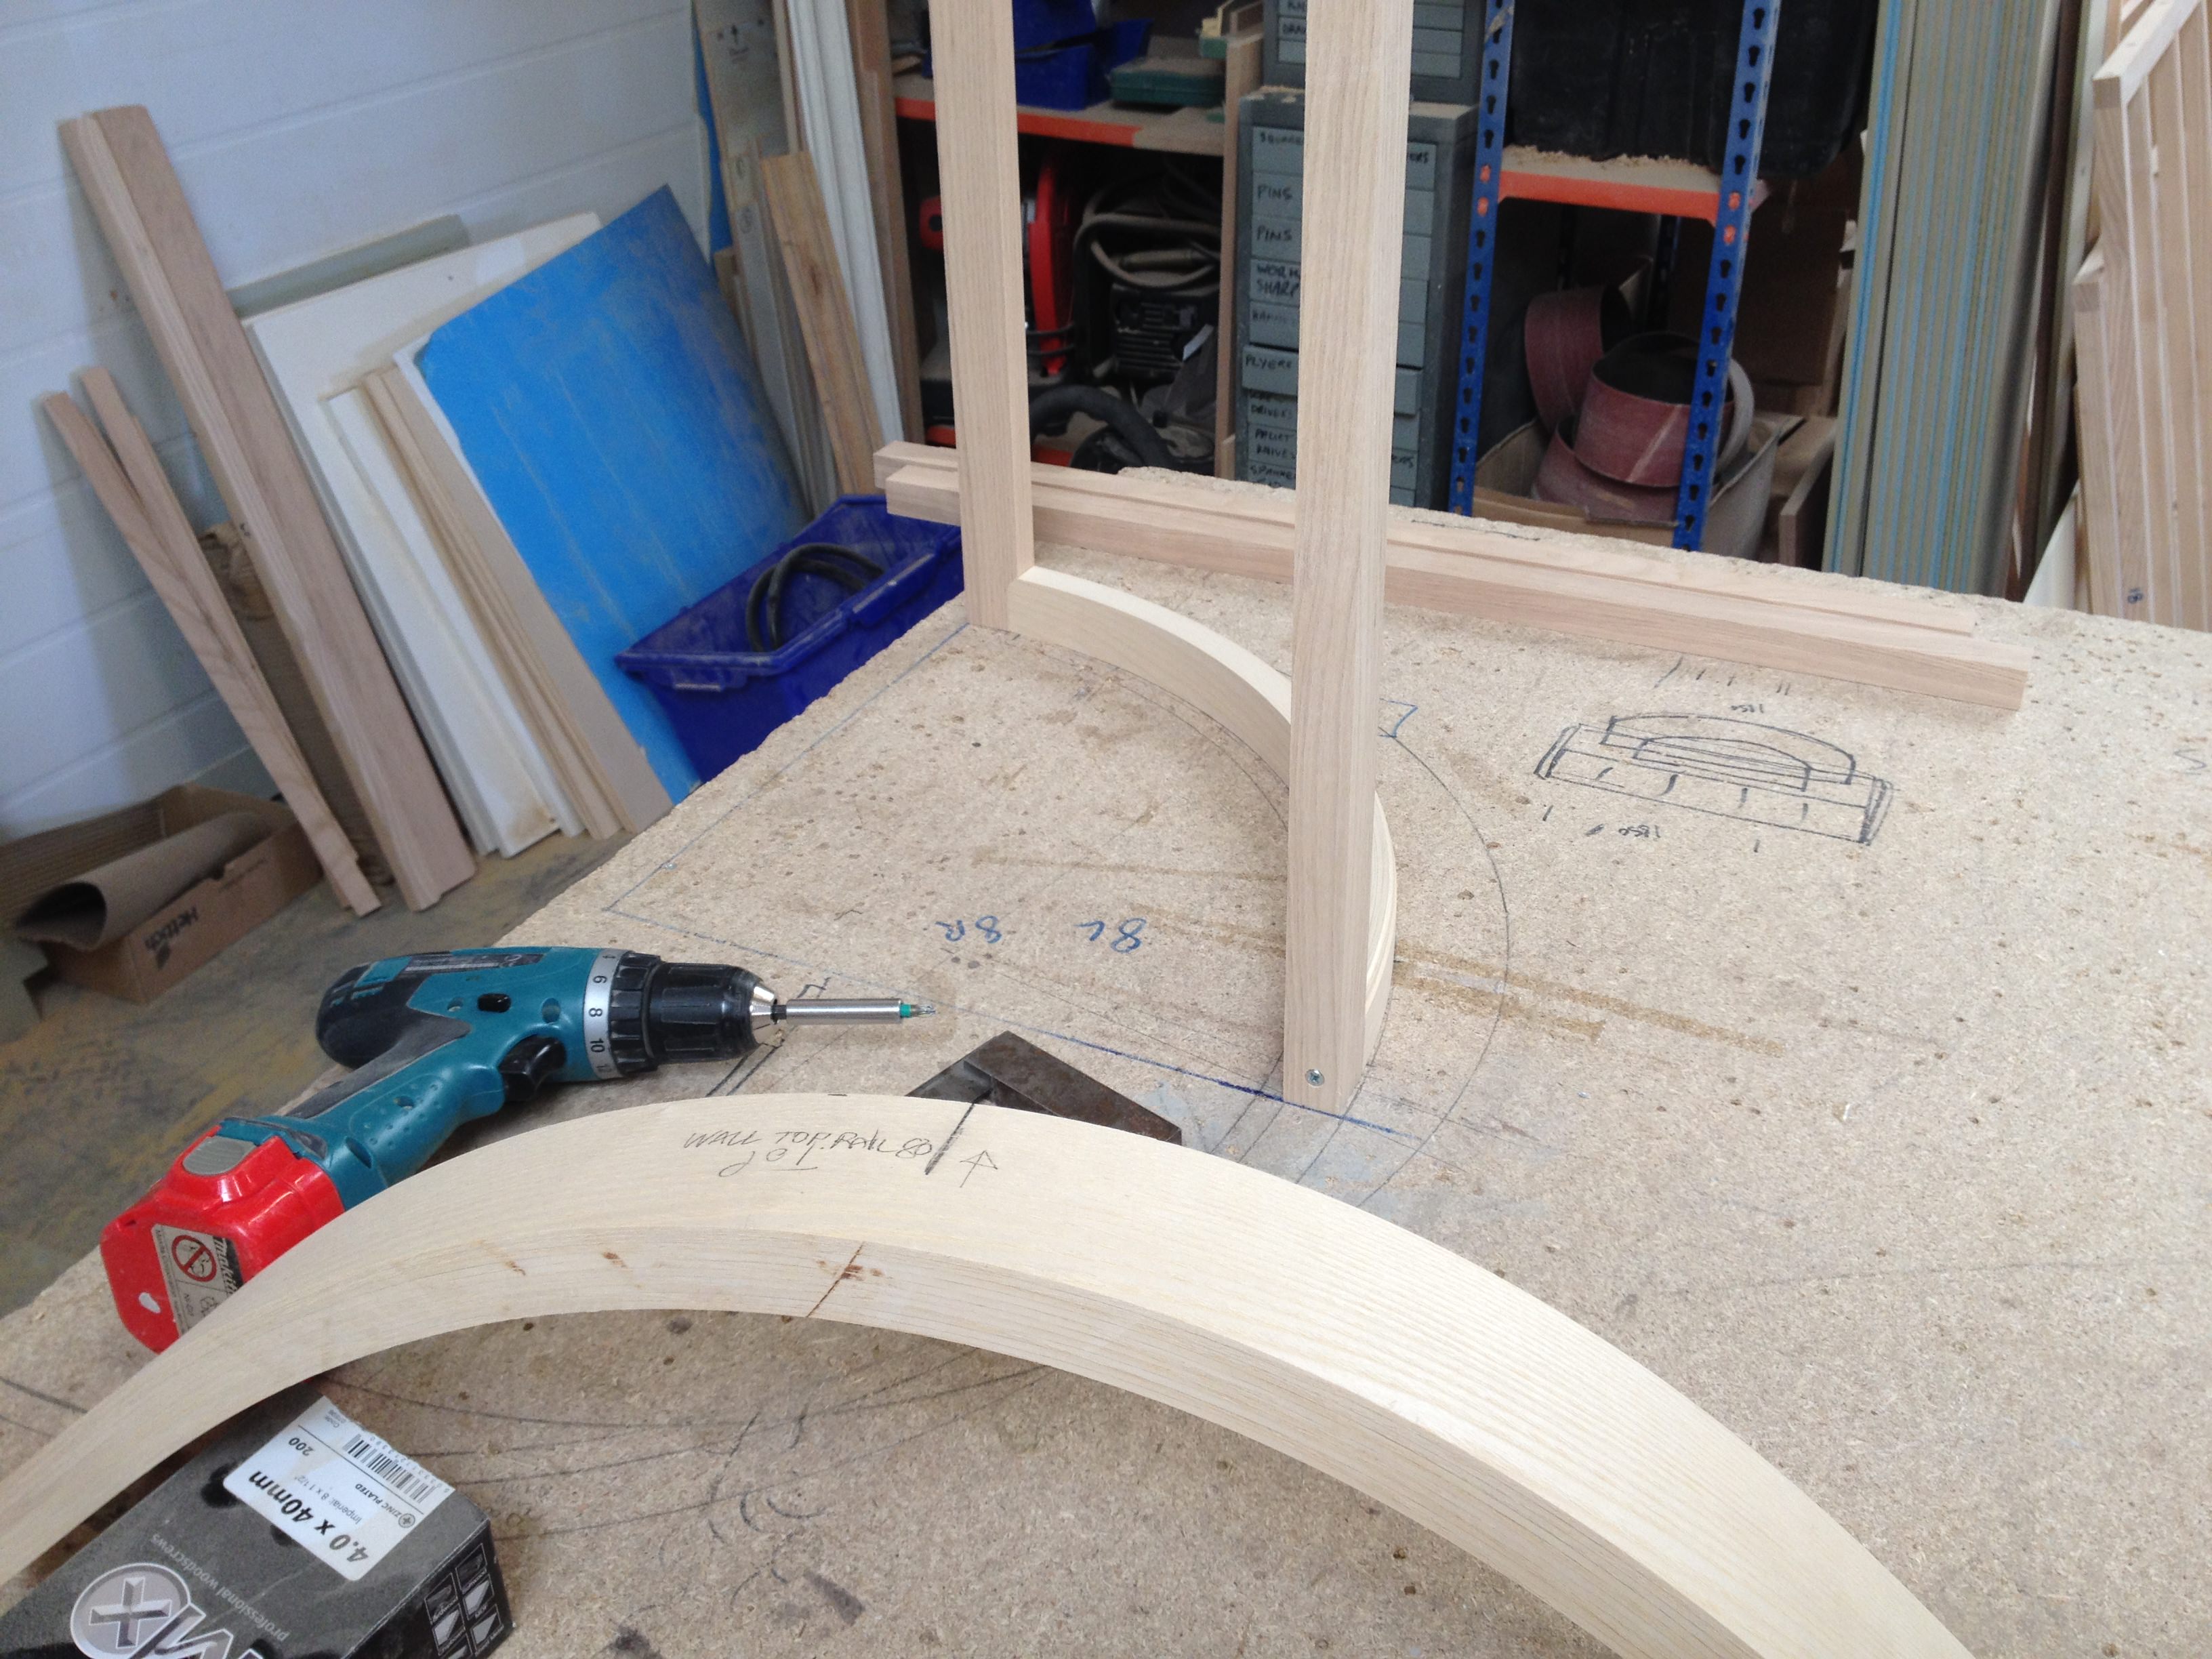
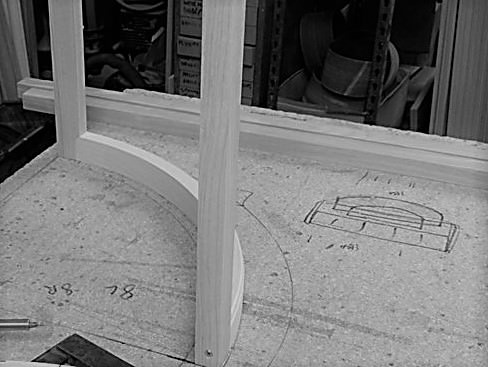
Step 1: Draw an accurate rod..... this is essential, all dimensions and cuts will be taken from the rod. Doesn't have to be spectacular, I quickly swing the inside and outside arcs through 90degrees, mark the 37mm frame and the 80mm verticals. All joints should be projected from the centre of the circle.
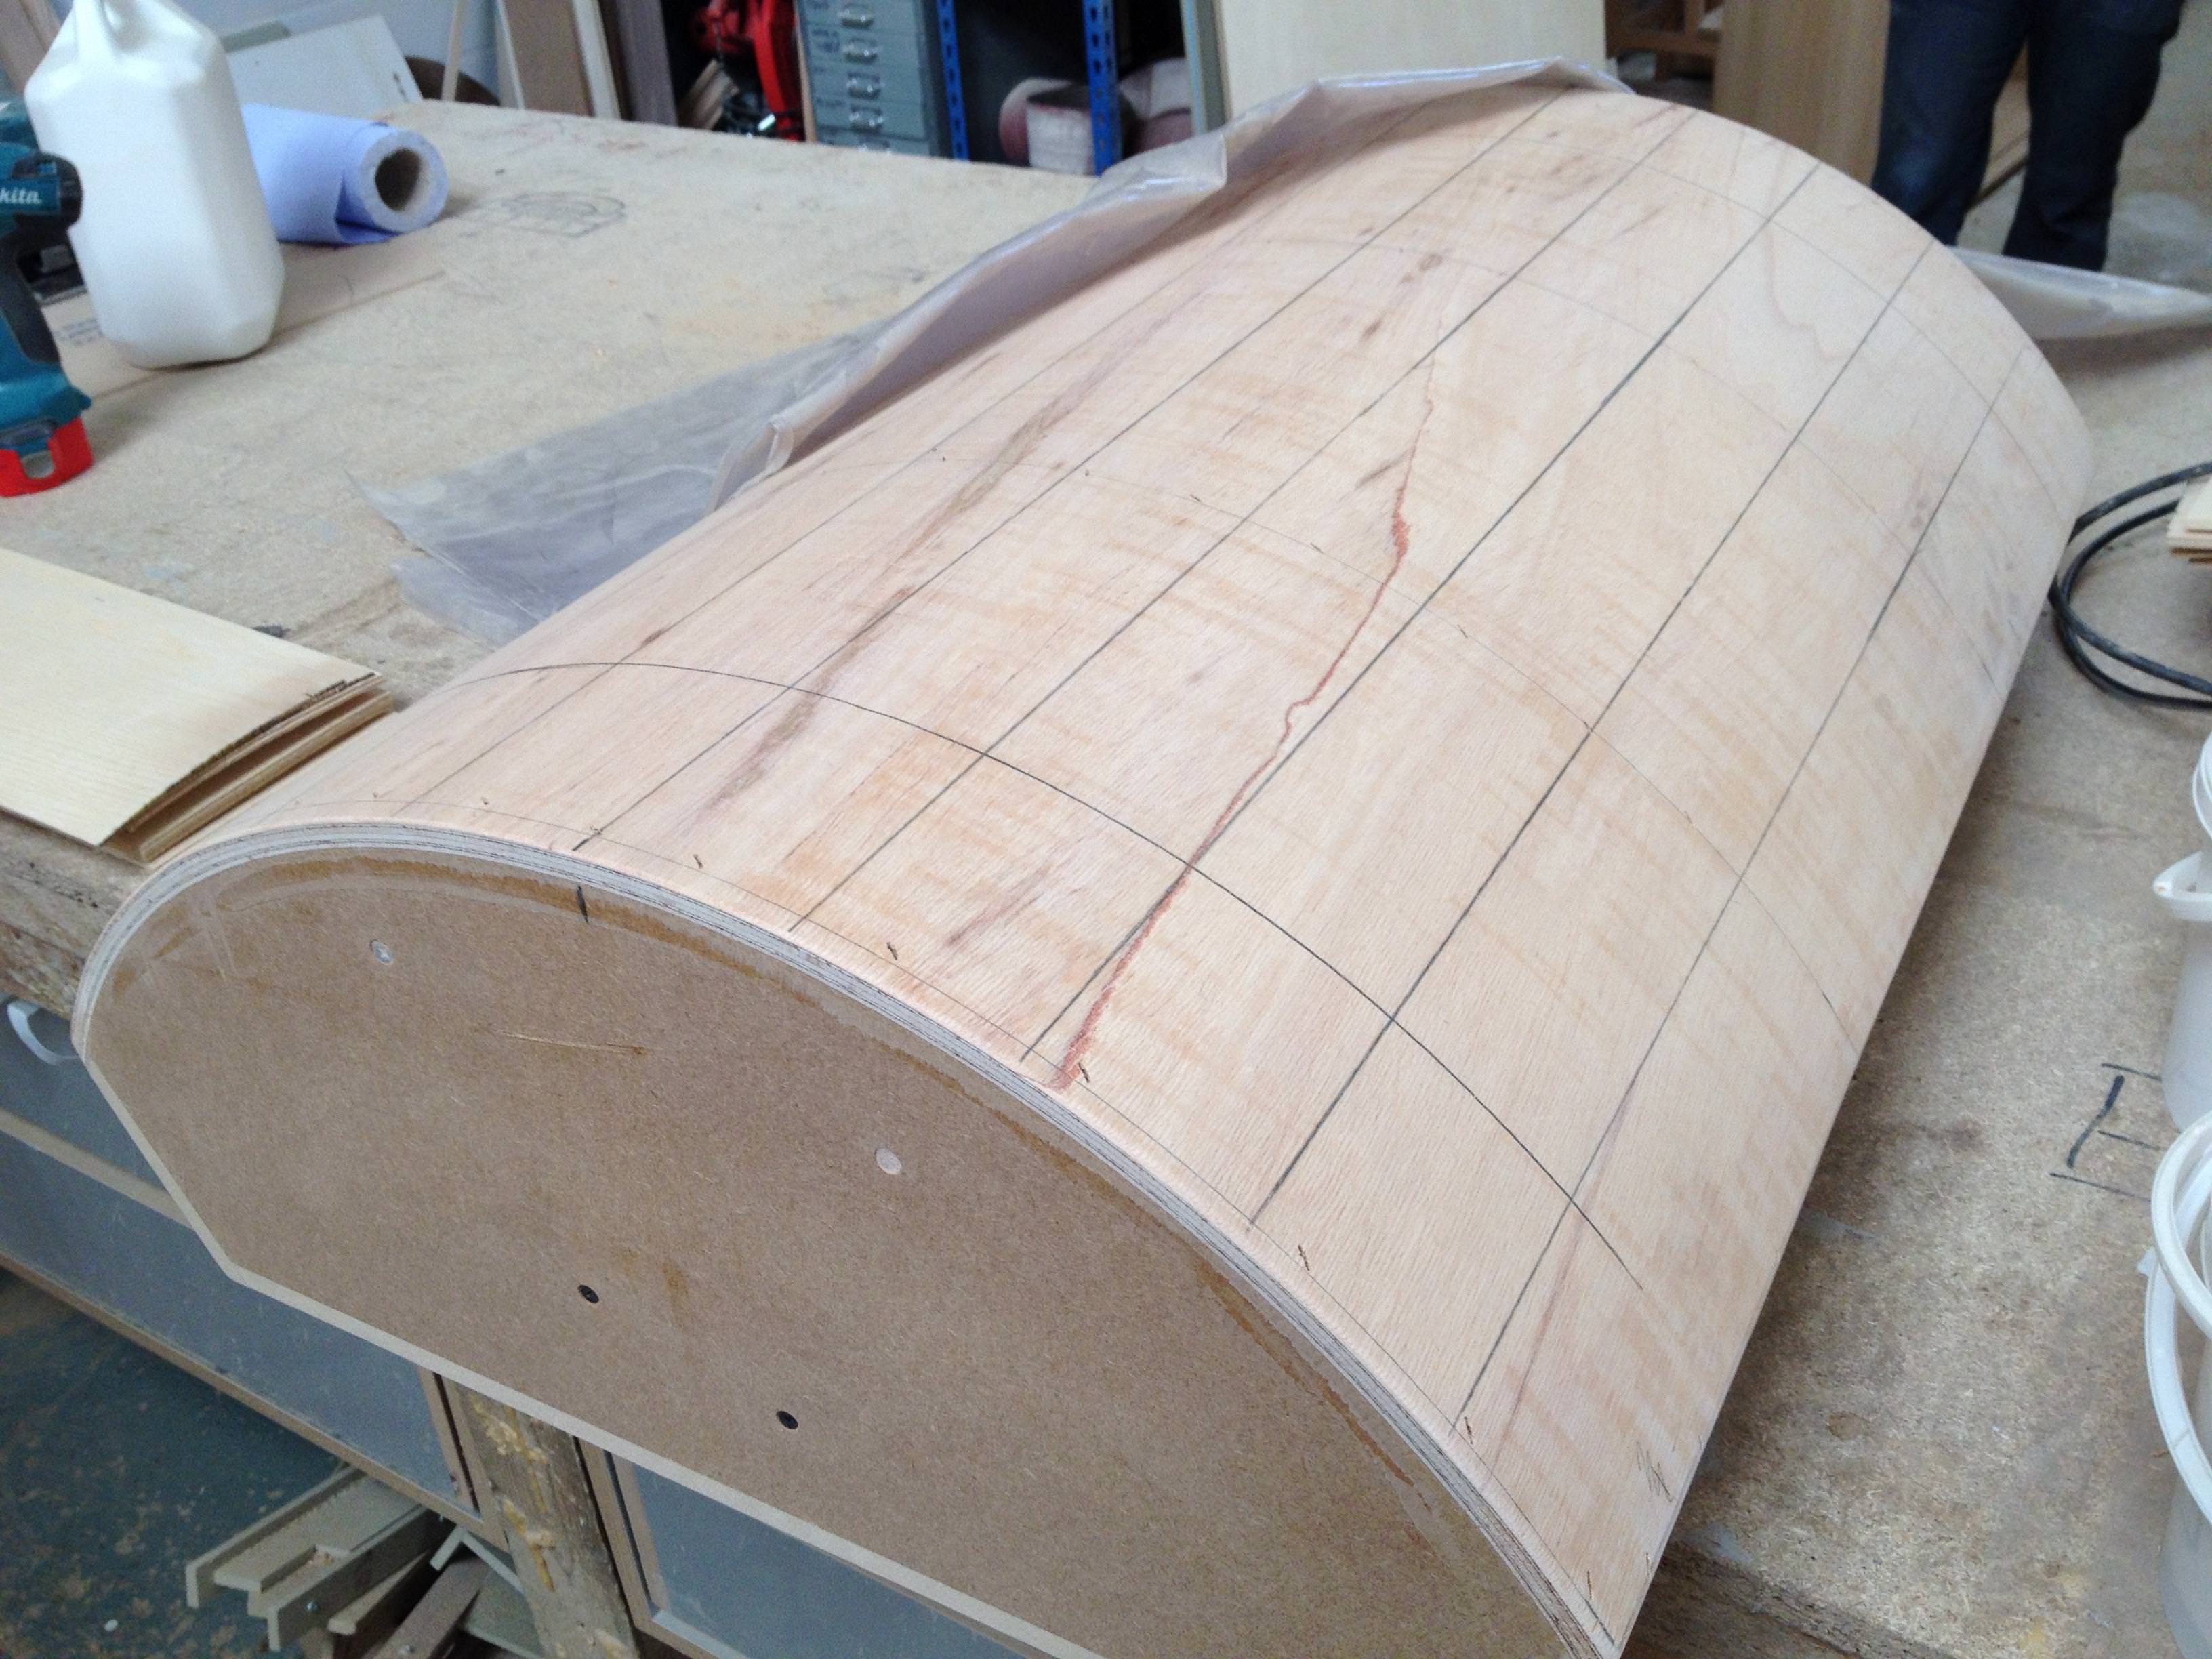
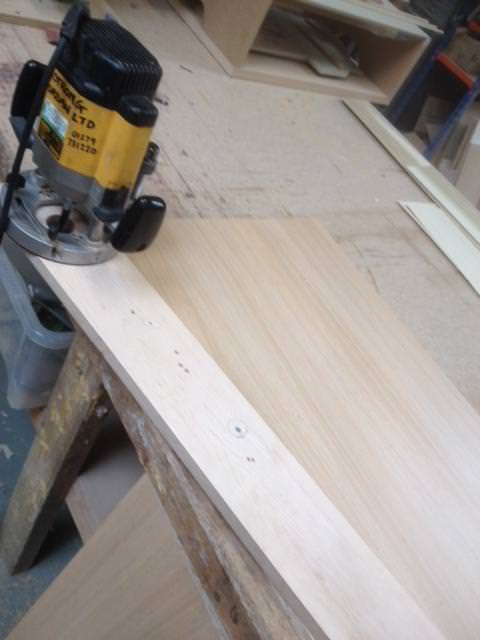
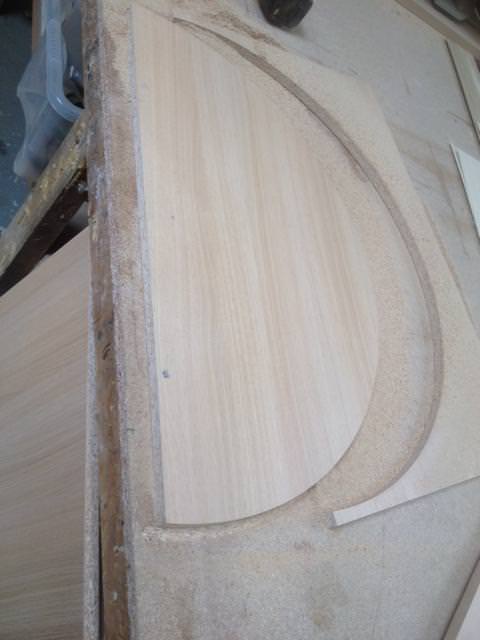
Step 2: formers.... I tend to make one former for the door and frame (same radius as the inside of the door) and another for the plinth (if it's skirting you can just pack out the door former) The former should be over the length of the arc of the frame, so if you are doing a quarter round then the former should be about a third of a circle, also over height by about 20%.
Once the former is made mark the centre line (top to bottom, not side to side), this is so you can transfer the centre line onto the formed parts and work from these to keep everything square.
Narrow one for the plinth
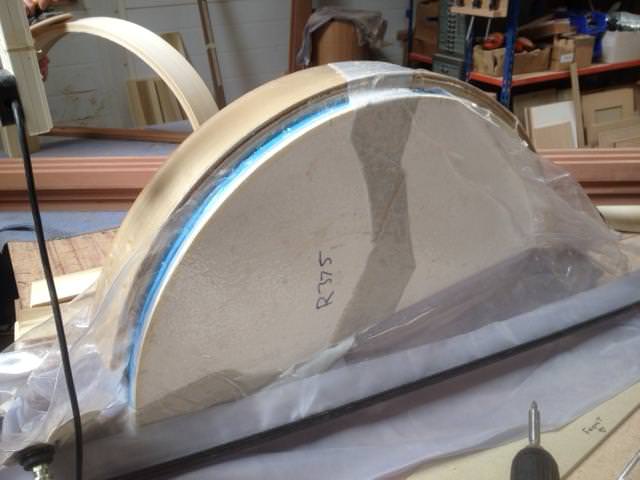
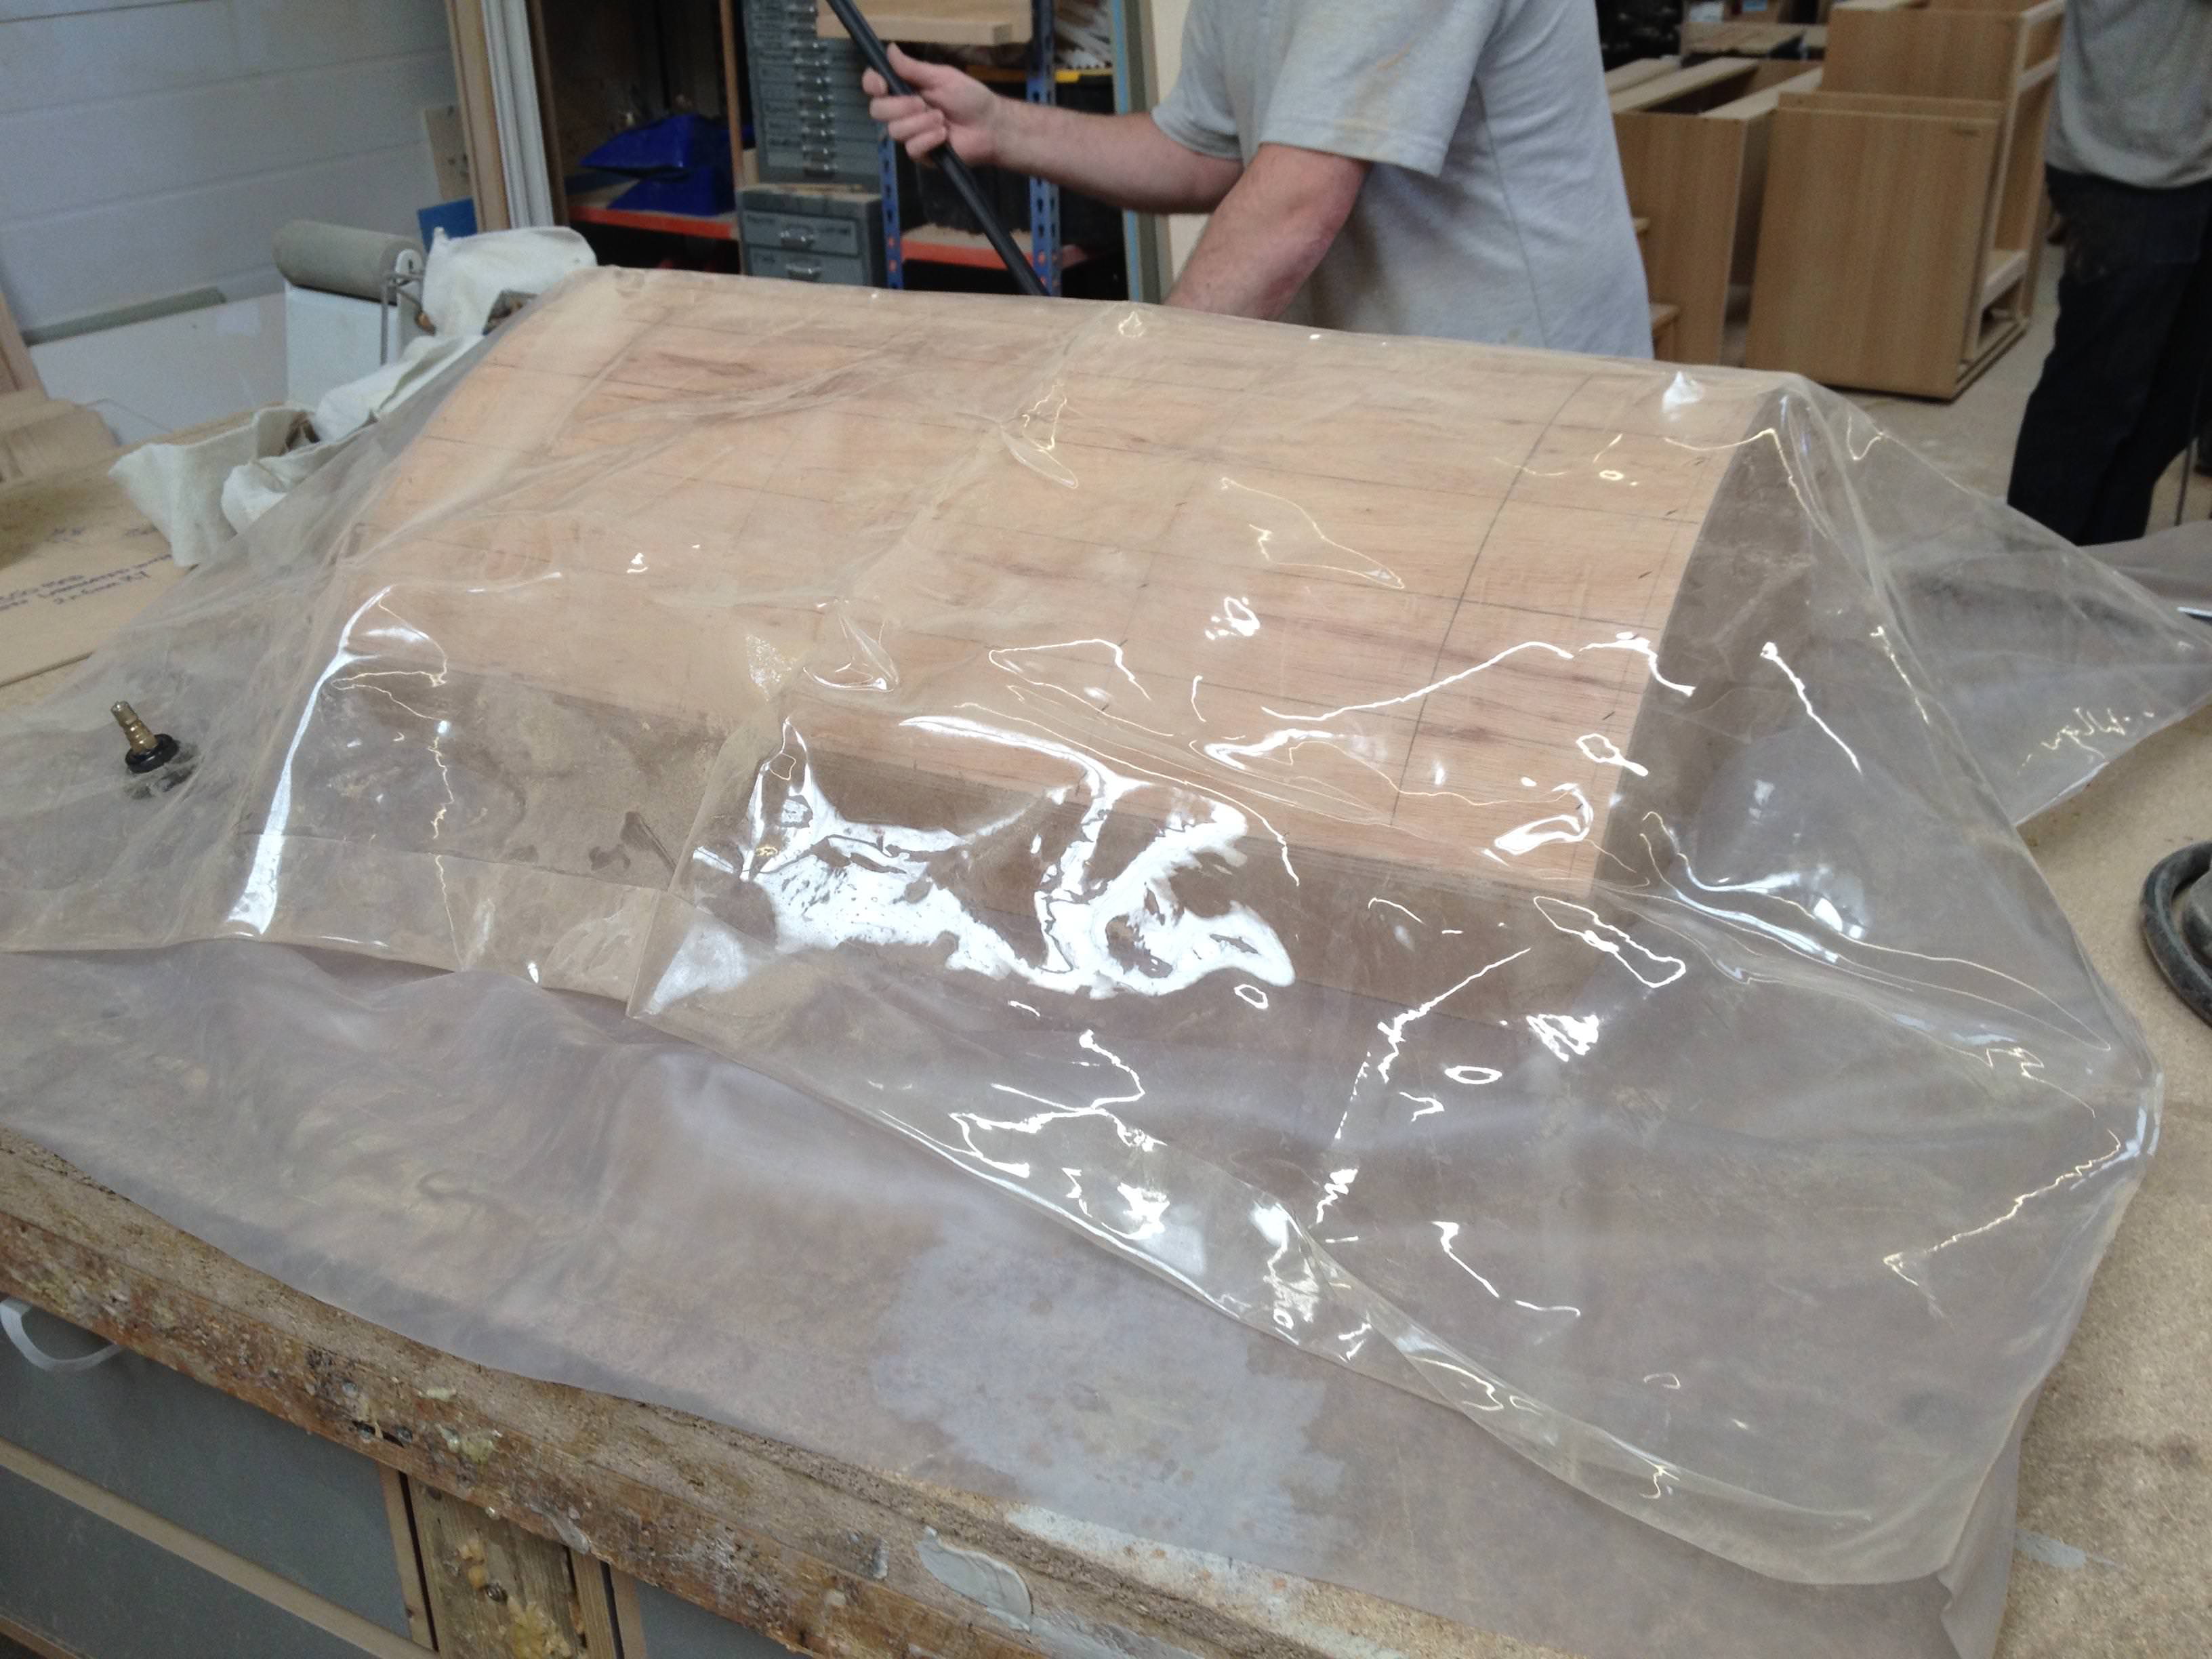
Former sits in vacuum bag
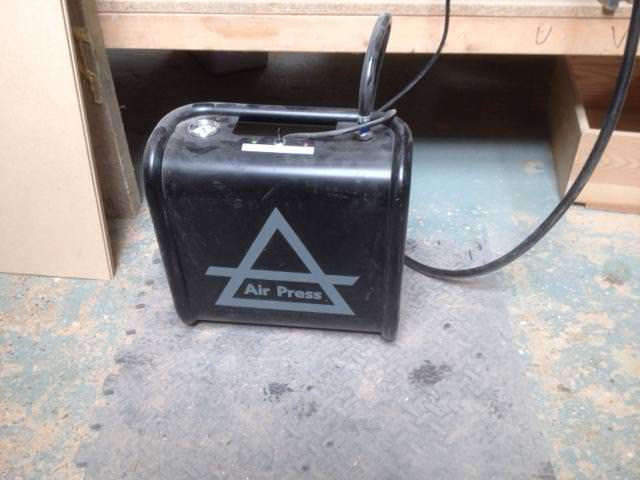
Vacuum pump I use, I do have a bigger one which can do up to 4 bags at once, but it can get a bit hectic using that one, only when it's mental busy do I get that one out.
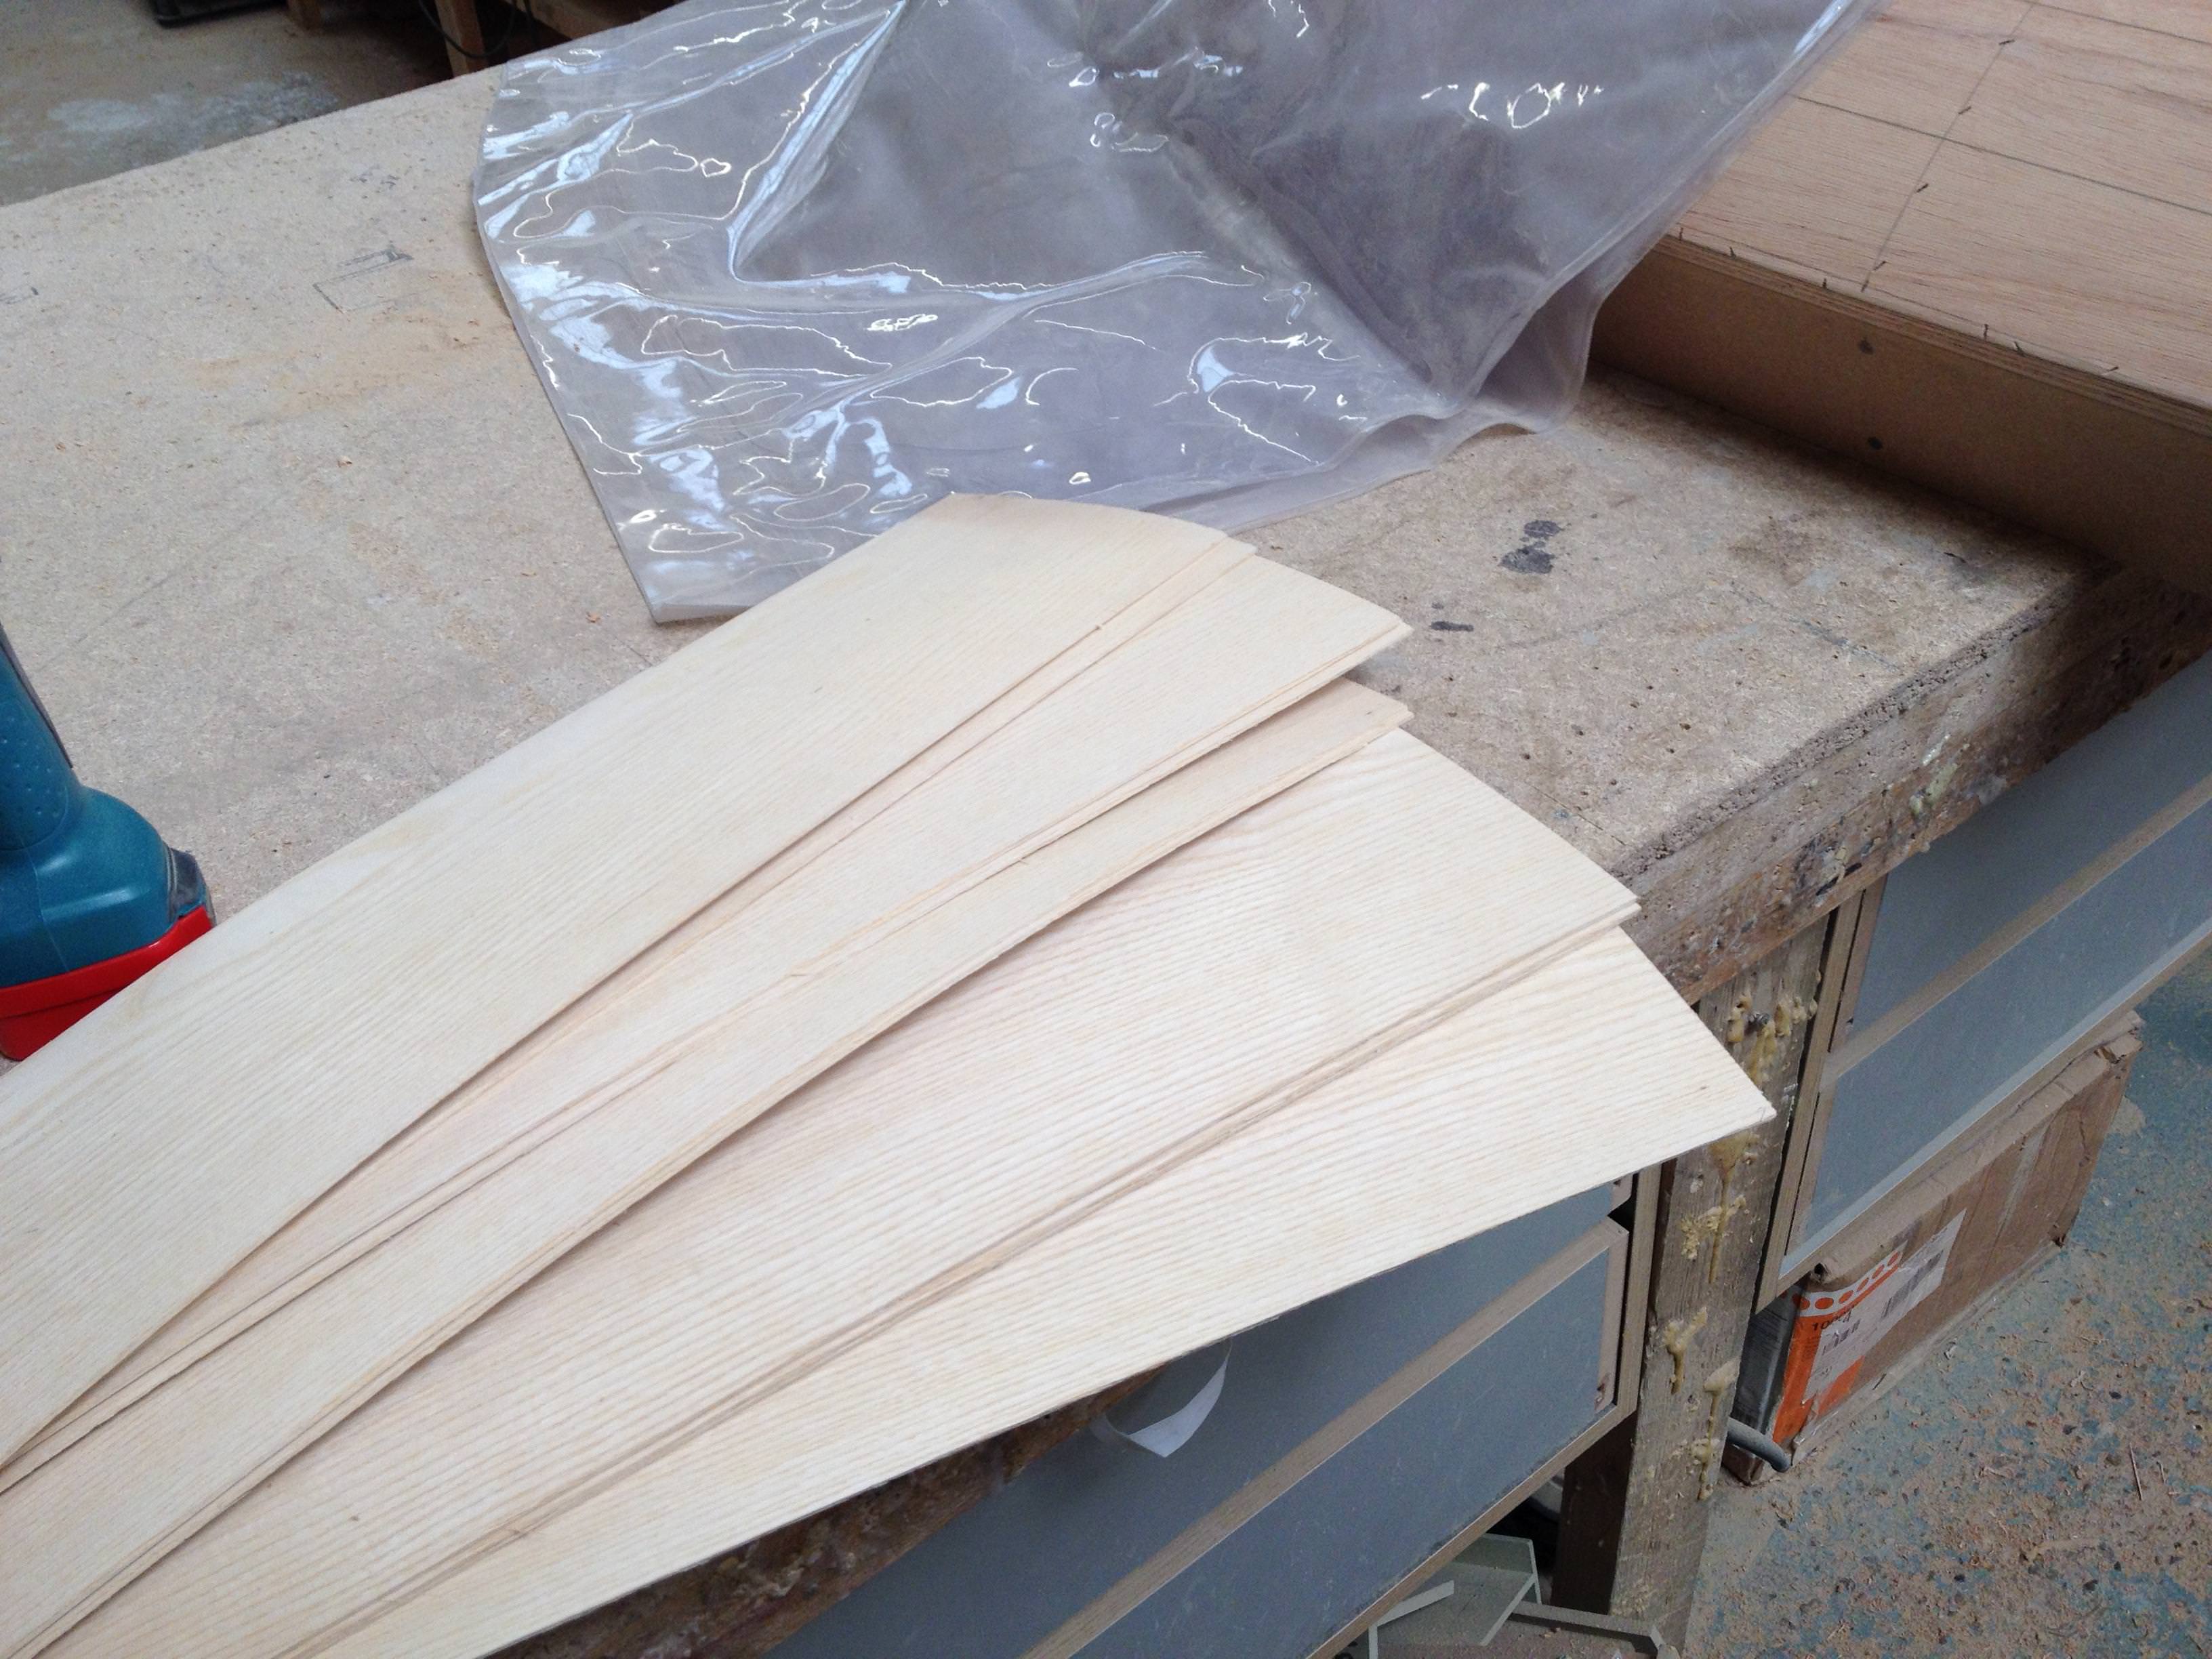
Step 3: material choice..... I use either constuctional veneers 2mm or 1.5mm birch ply (thanks lynx for that one). I use constructional veneers for timber projects, ie oak, walnut etc and birch ply for painted projects. I do 26mm door thickness so for each rail I need about 17 strips of 1.5mm birch ply. For 80mm rails I will rip strips at 90mm x 17 of them. Do not think you can speed up the process by making super wide strips and ripping down, the wider you go the more difficult to press, widest I do is about 180mm for 2 x 80mm rails. I will do 90mm strips for the frame rails as well, this can then be ripped once glued up to 2 curved frame rails at 37mm.
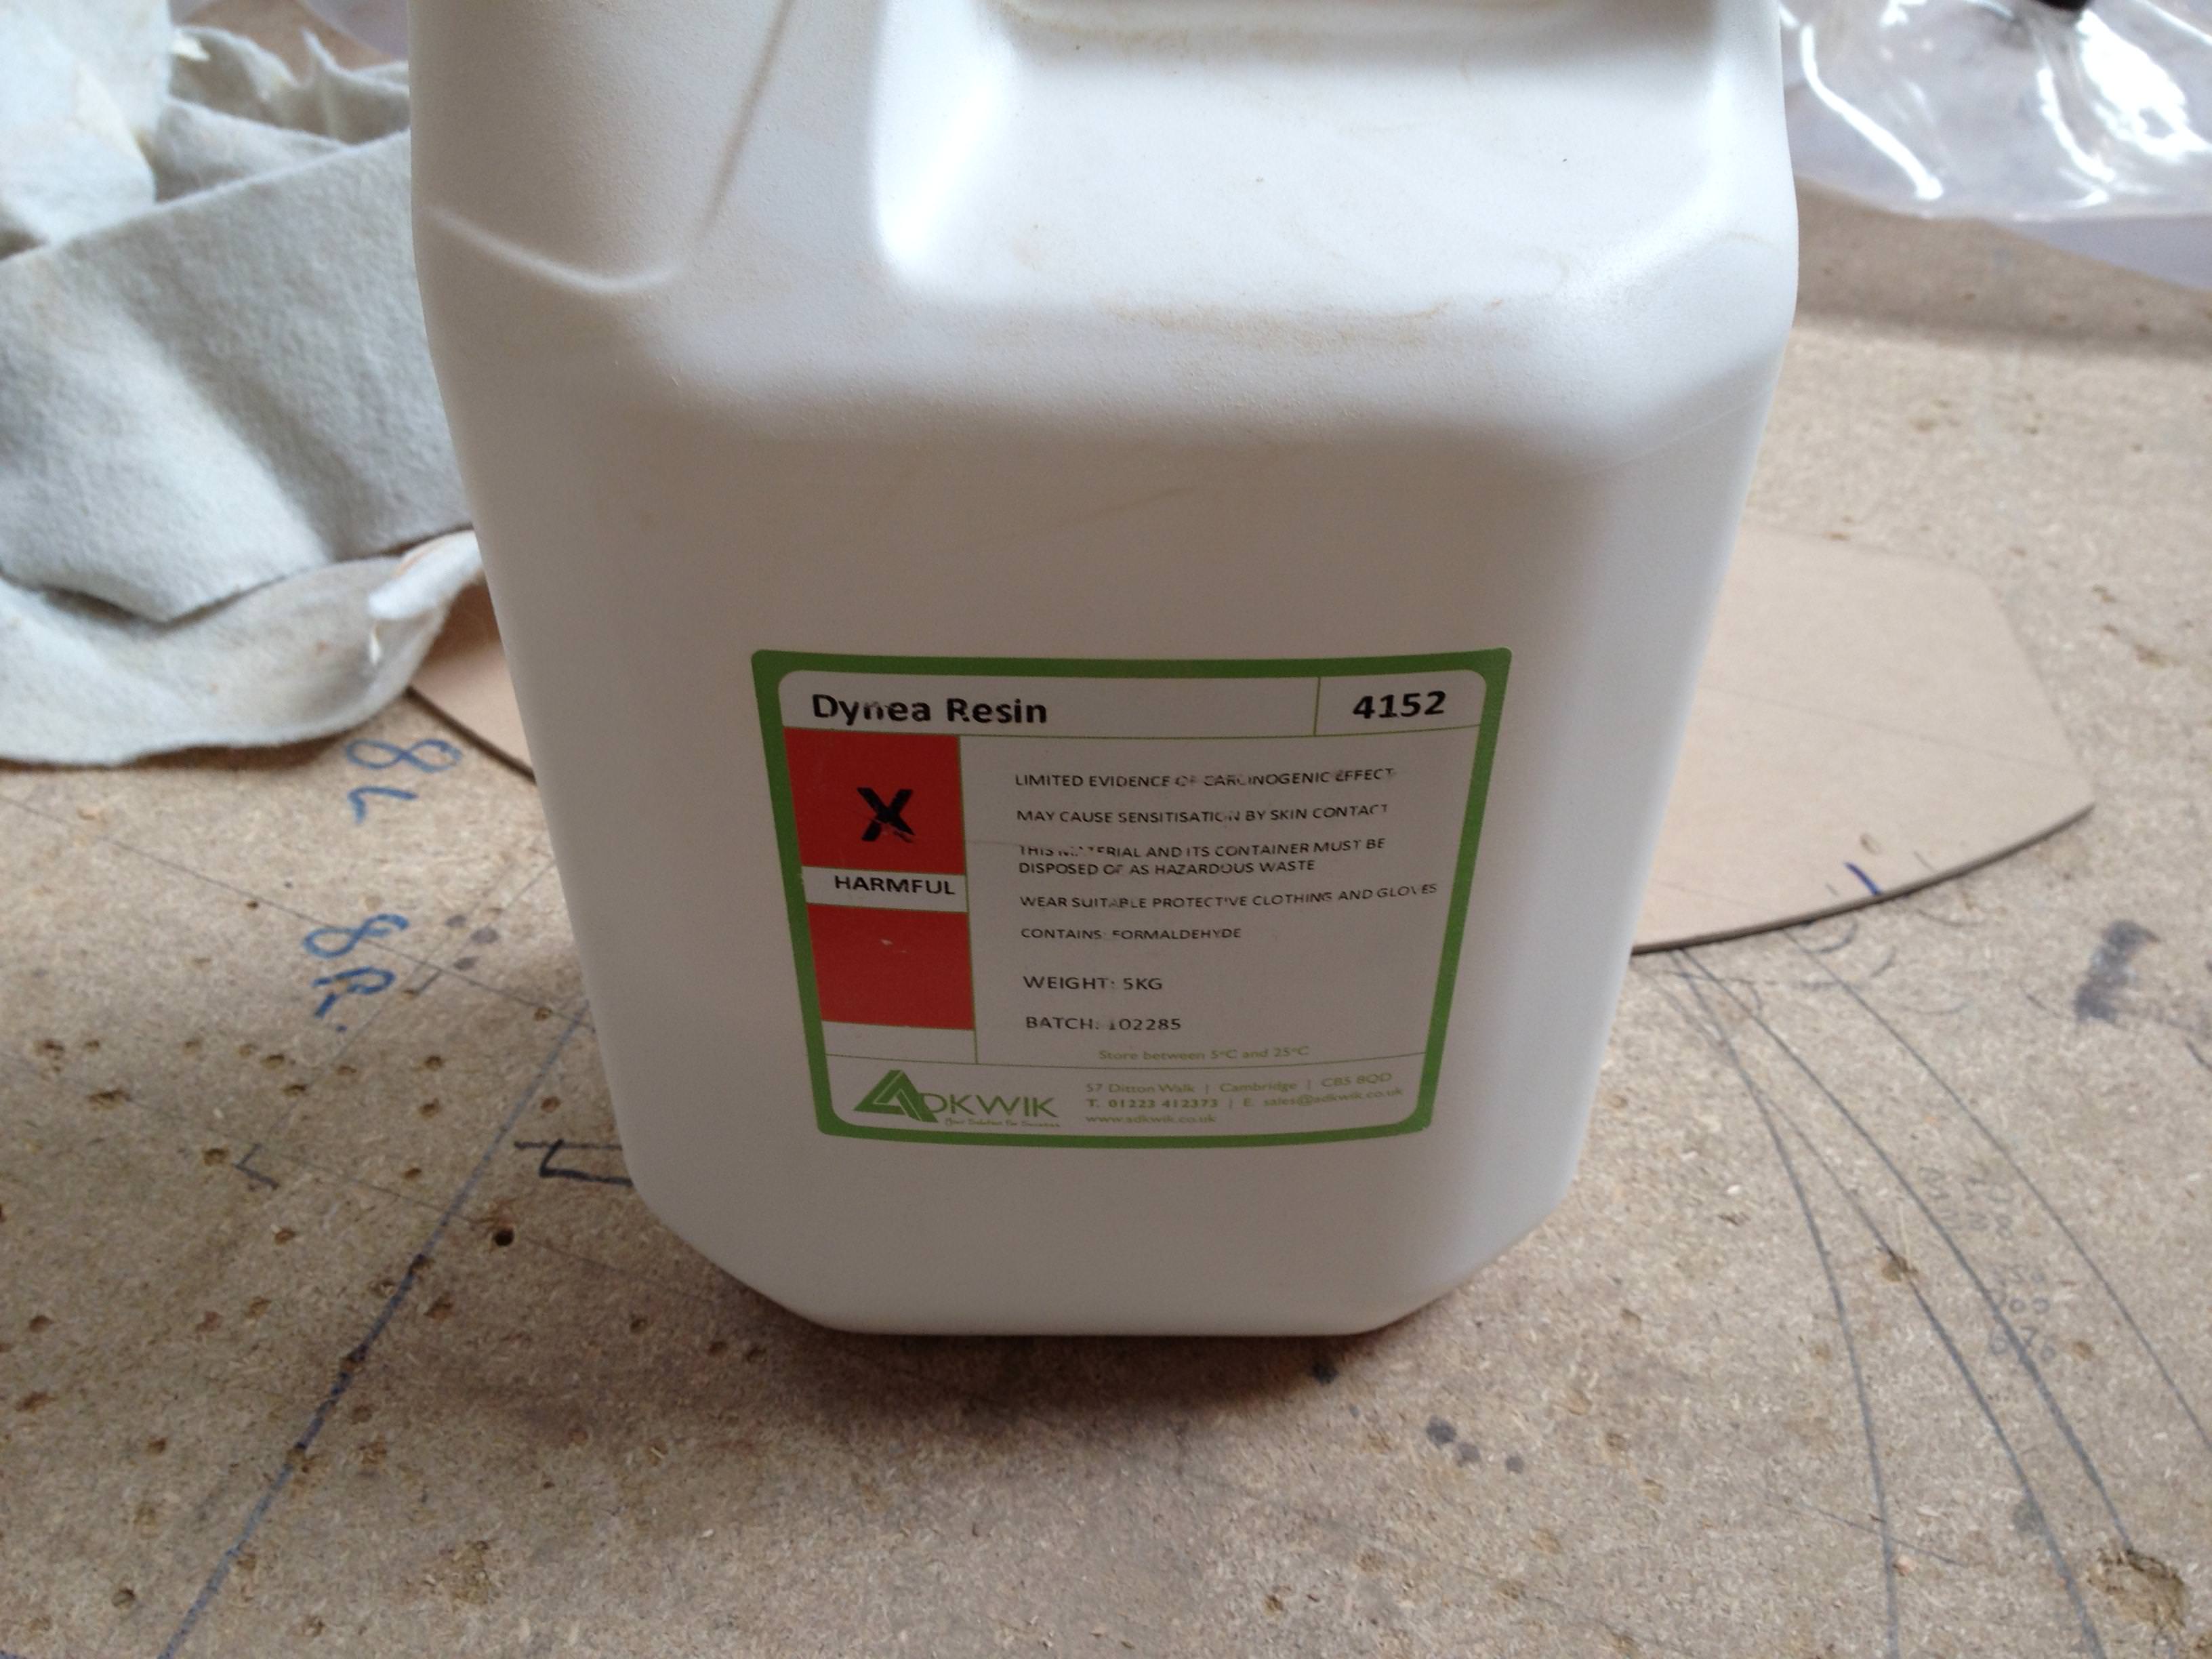
Step 4: Glue..... I use a resin adhesive, it's a 2 part, powder and resin. The powder is either fast. medium or slow bond. After a lot of practice I use fast, but would advice to start with slow or medium. Resin tends to give little or no spring back especially with 2mm or 1.5mm strips, and no chance of creep unlike PVA.
I apply it to all the strips using a glue roller, soon as applied it needs to be put in hot soapy water, otherwise it will set whilst you work.
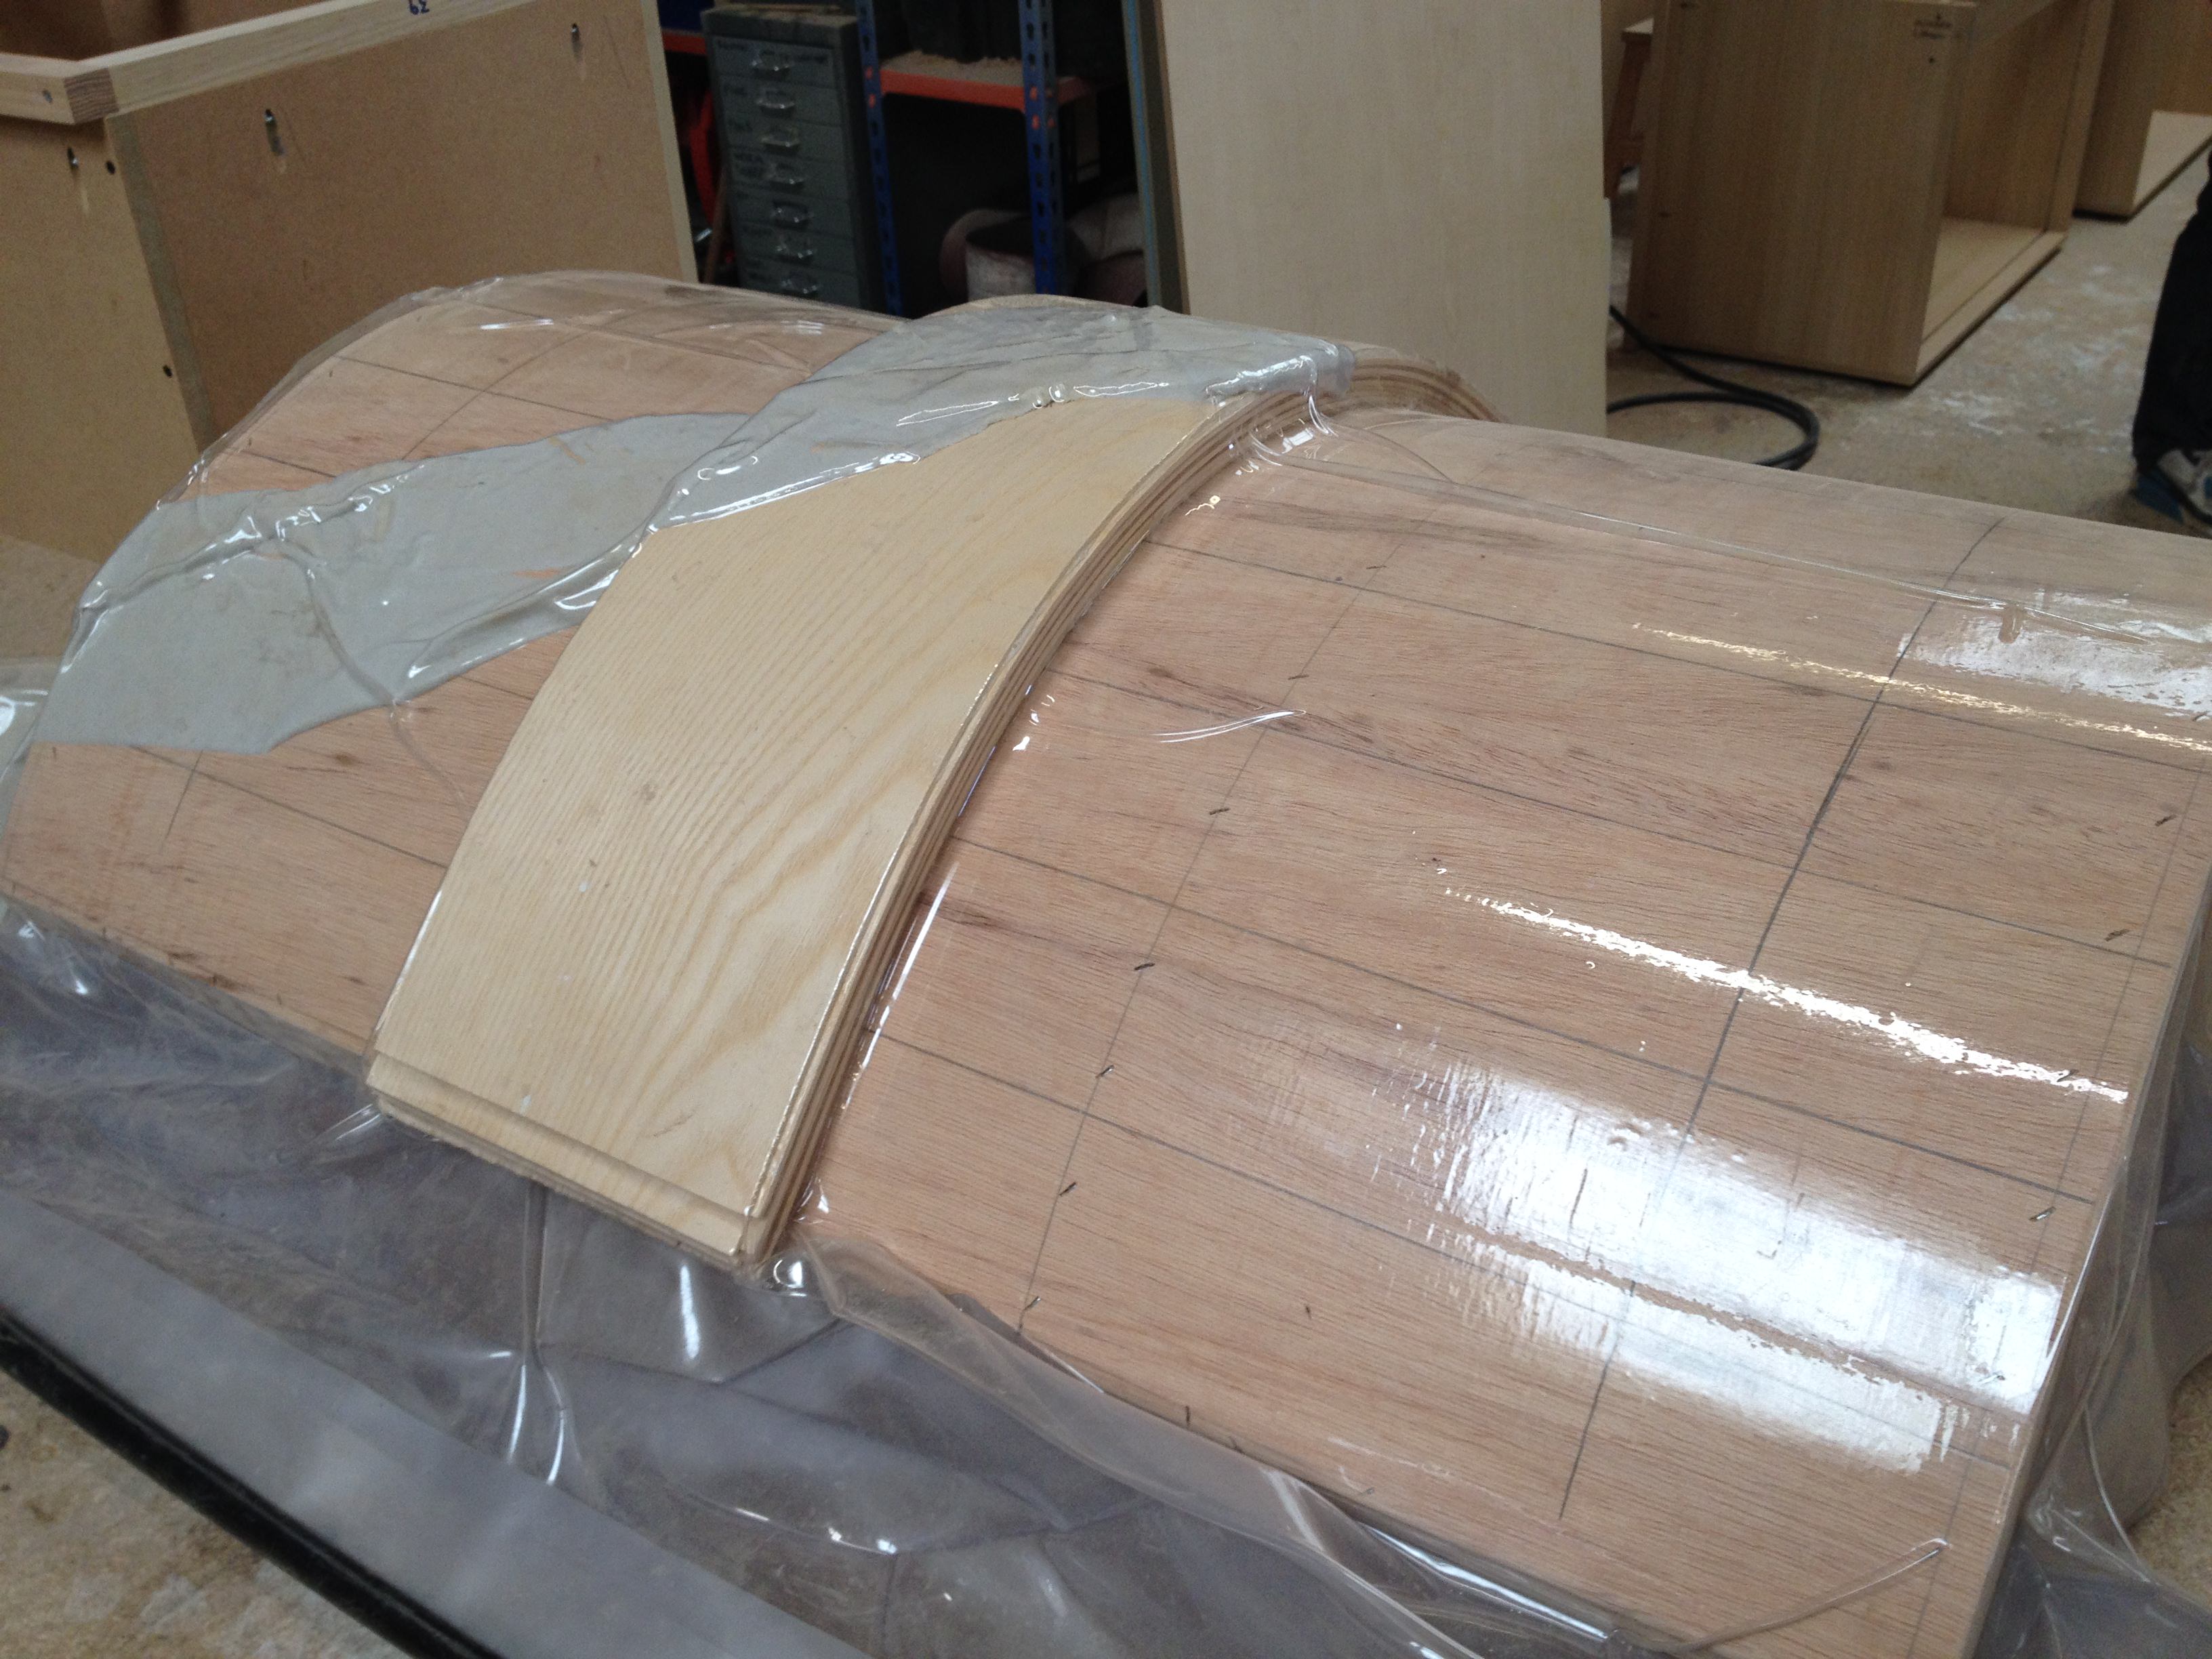
Step 5: glue up..... pretty simple if your used to a vacuum bag, stack all the glued up pieces together and either for horizontals lay across, side to side the former and for verticals lay length ways on the former. Bag up and vacuum down, on the horizontals just make sure the bag doesn't tuck under the ends, but this is one of the reasons for doing them over length to ensure the tightly pressed bit in the middle is the section you use.
1 strip to make 2 curved horizontals

Step 6: components... so for a single curved door in a beaded face frame (staffed frame) you need the following. Before any curved components are removed from the former the centre line needs to be transferred to the formed piece.
Door
2 x horizontals = strips ripped at either 90mm x 2 lots, or one lot of 180mm
2 x verticals= strips ripped at 180mm ripped to 2 x 80mm
1 x centre panel, 2 x 5mm sheets of flexiply, my shaker panels have a 7mm set in from the back edge, so in order to get the curve correct I have to put a 7mm flexi packer on the former. Glued up again in the same manner.
Frame, because my staff projects 3mm past the door i use 2 extra strips in the frame to make it 3mm thicker.
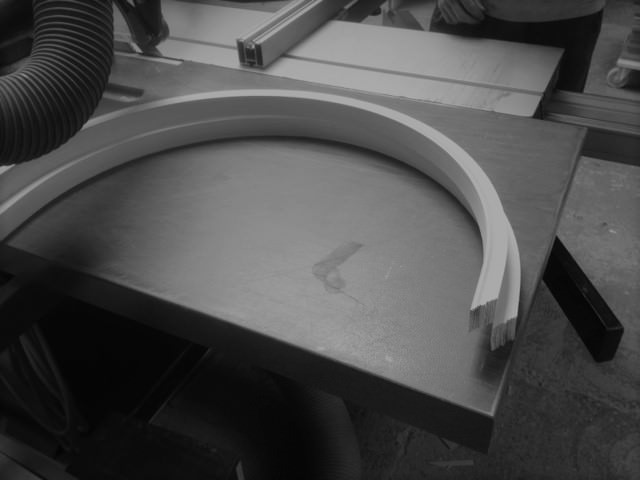
2 x curved horizontals= strips ripped at 90mm and then ripped once glued up to 2 x 37mm
2 verticals= box section 37 x 29mm
Step 7: making the frame, once I have all the components I cut them to size on the panel saw, using the rod as a guide for the cuts.
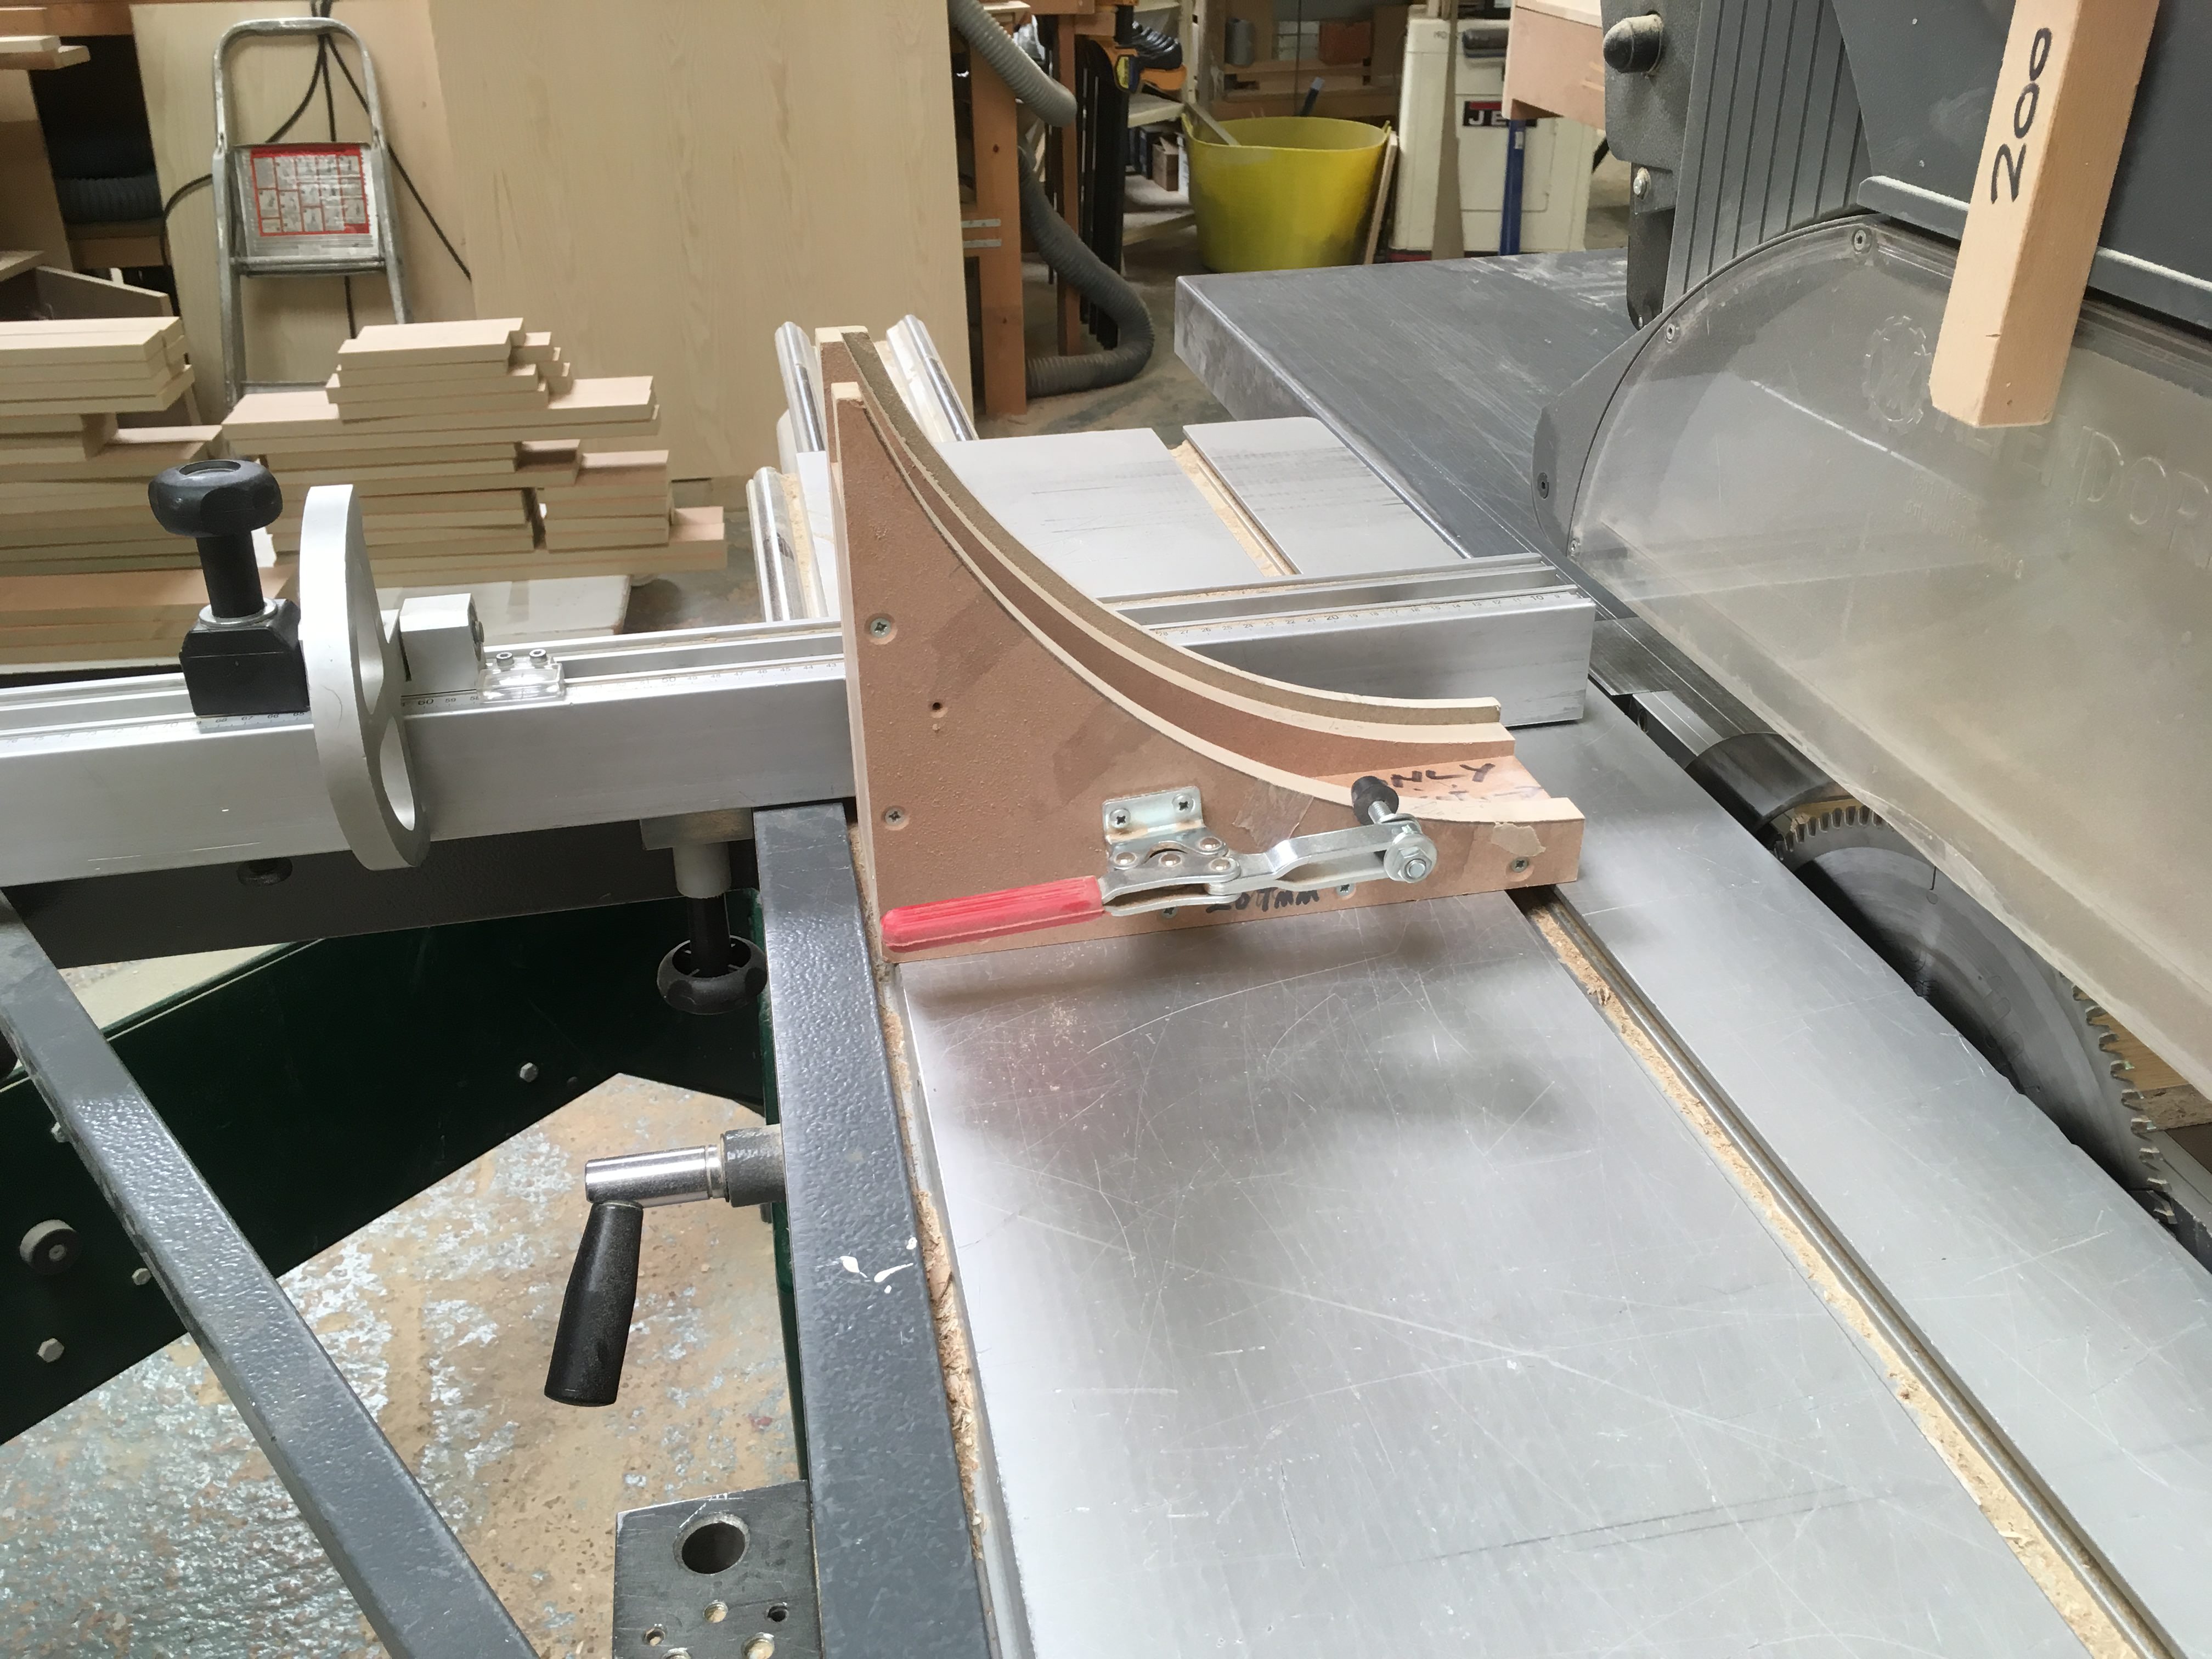
I hold the curved rails in a jig similar to below, this ensures the cut is 90degrees to the tangent.
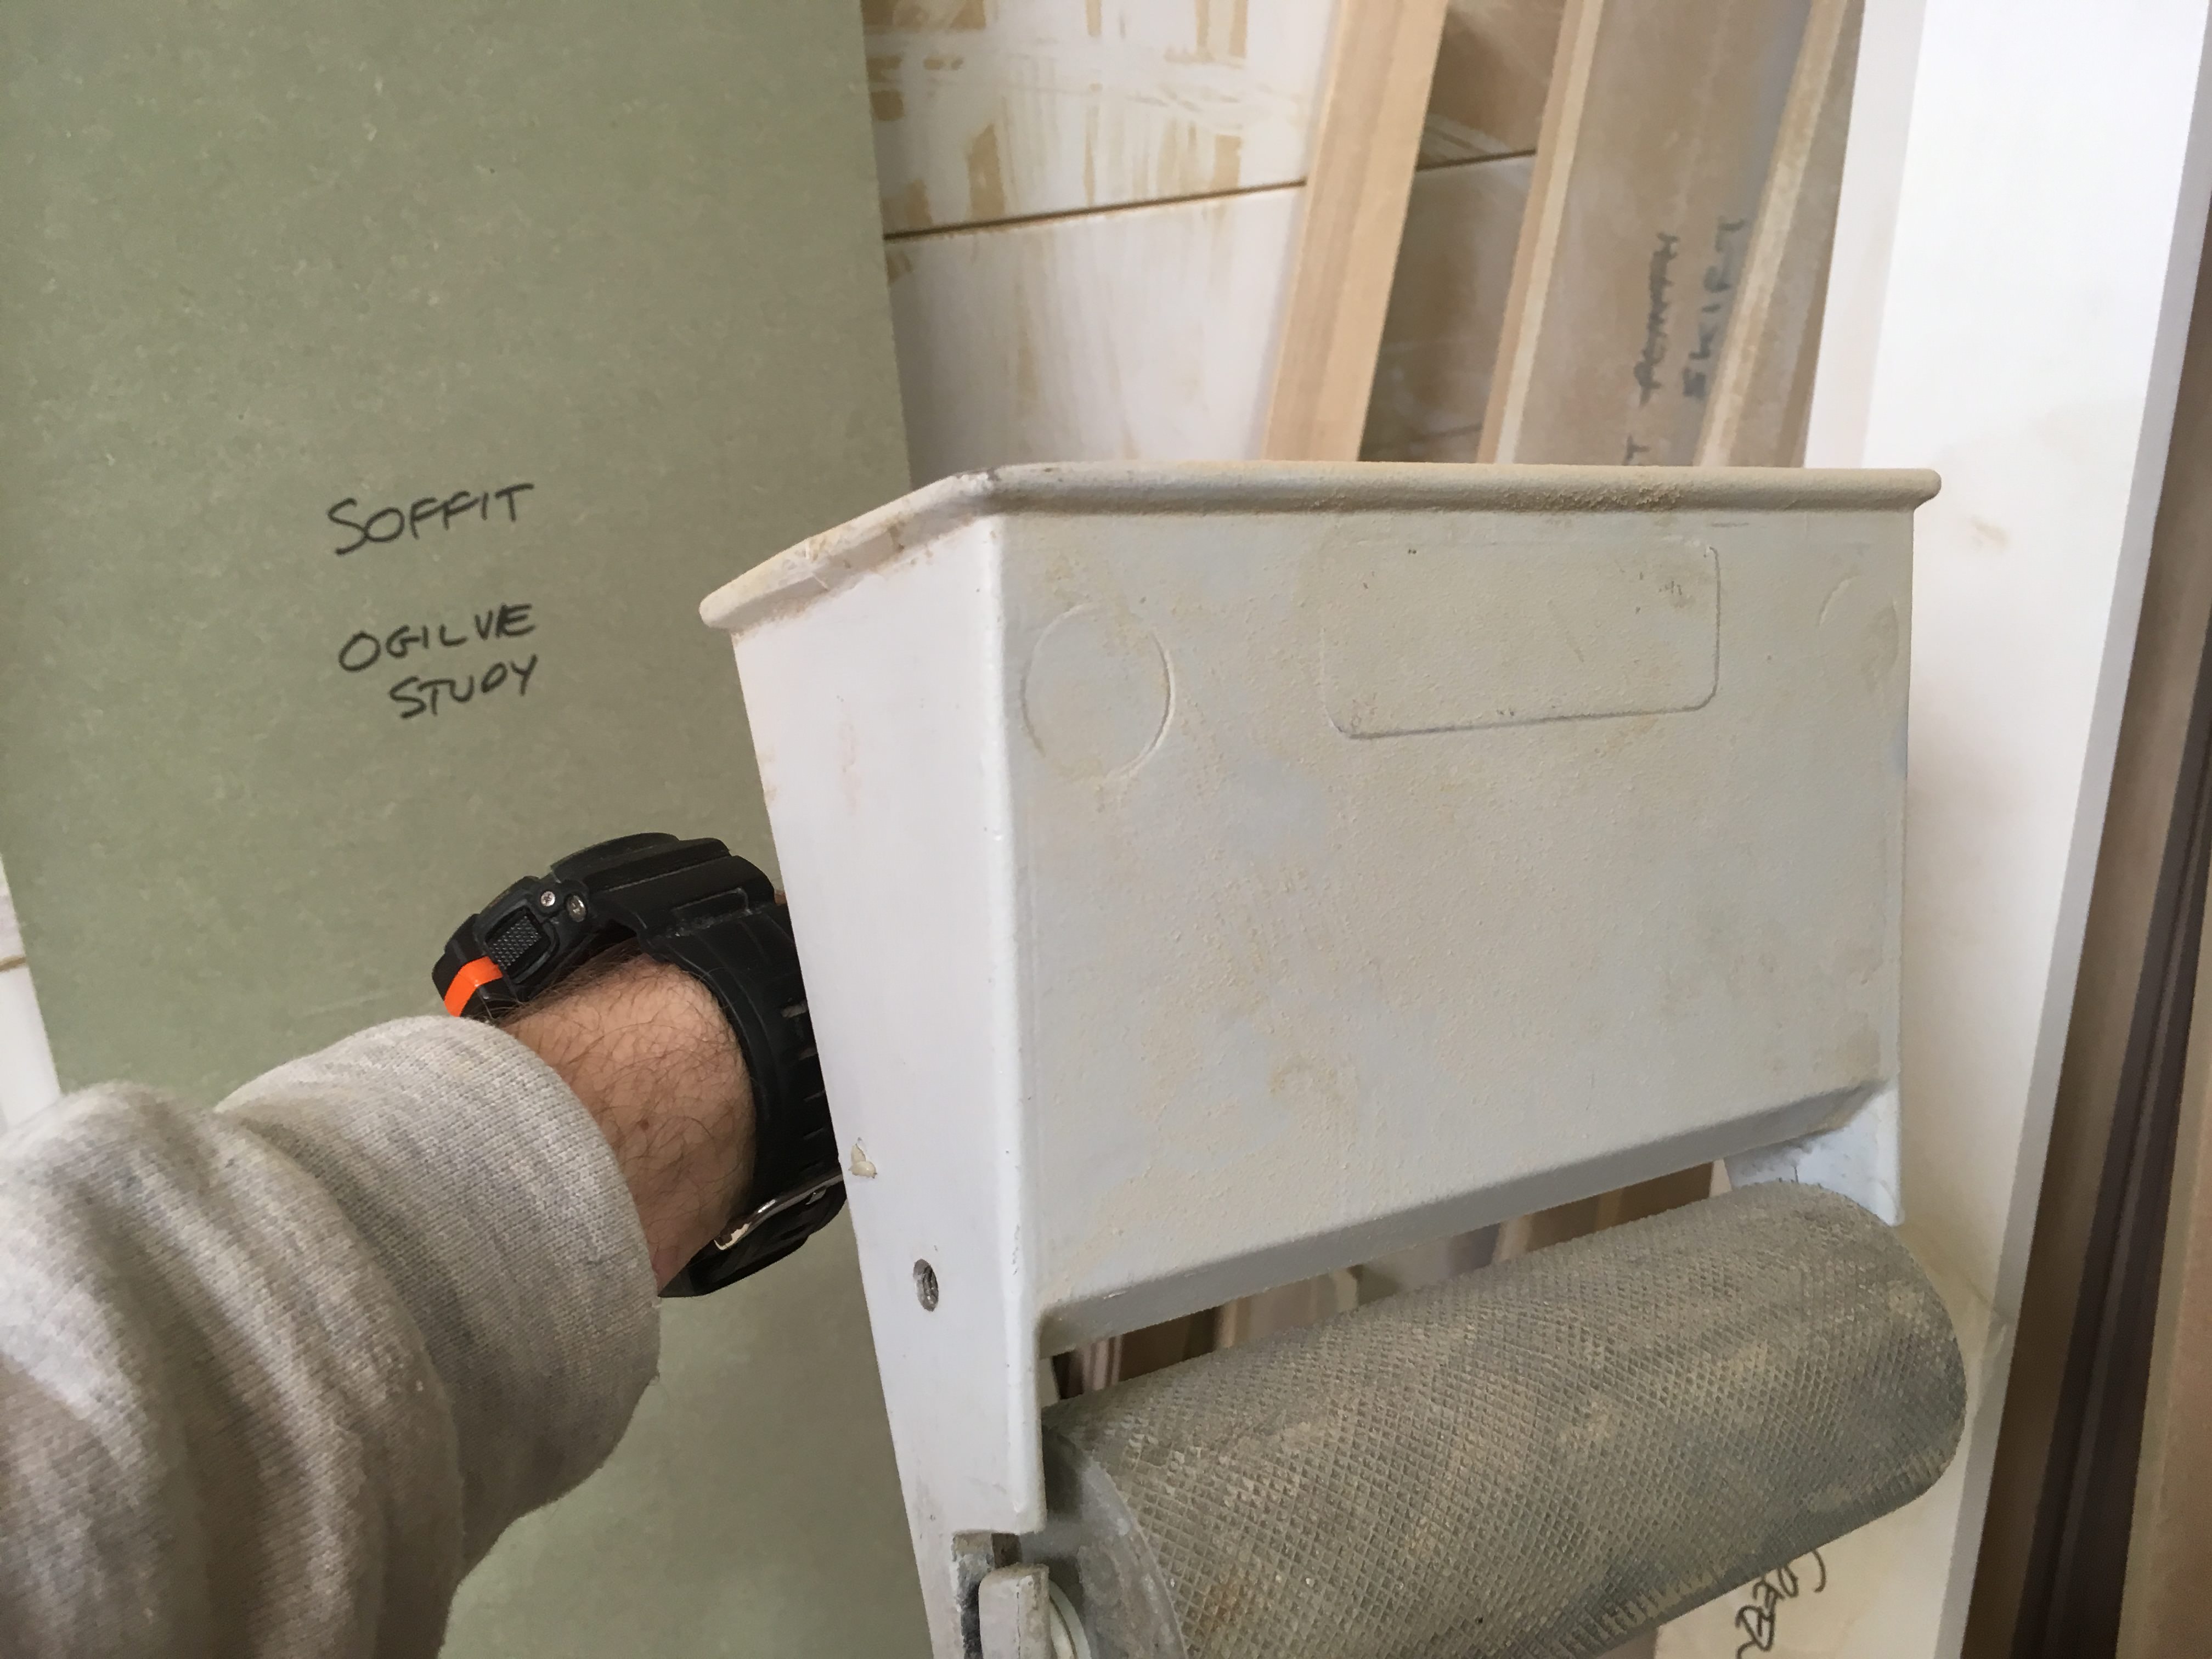
I then use a Notcher to cut out the frame for the beaded detail, run it over a router cutter with a staff bit in, and assemble.
Stock image of a notcher below


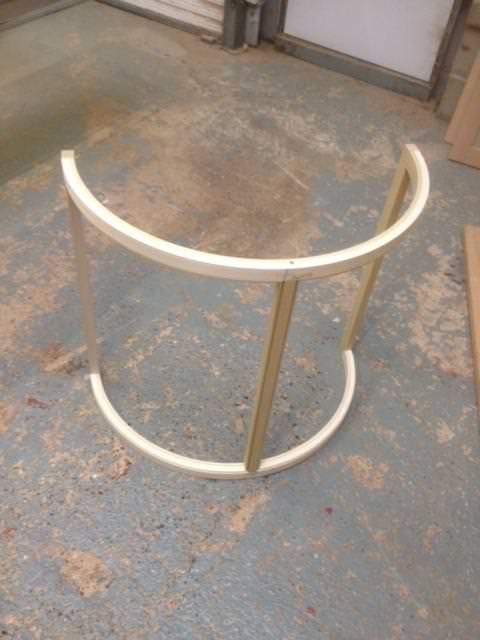
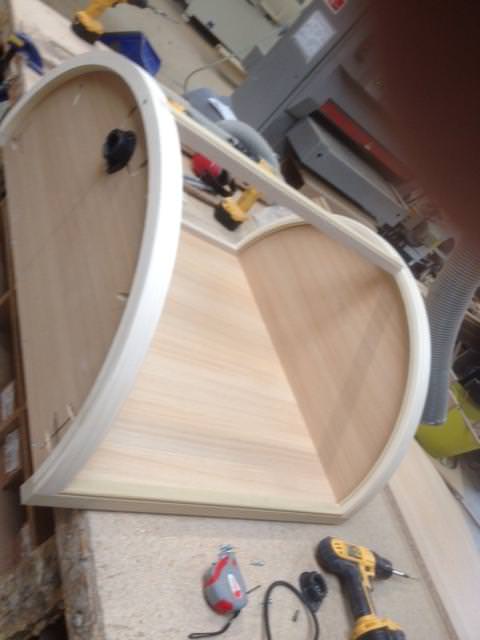
Step 8: Carcass........ always make the carcass to the frame, use the frame to draw out the base and top of the carcass, if you do it the other way round you will end up flexing the frame to fit the carcass.
Posting this is quite time consuming and worrying I might lose it all, so I'll post this now and come back to the doors later.
We are talking about a concave frame but the principle is similar for a convex, but becomes a bit more complex because your working the outside of the door and frame of the former rather than the inside.
the images are of various projects so don't necessarily follow through but they will give you a good idea of how it all works.
Step 1: Draw an accurate rod..... this is essential, all dimensions and cuts will be taken from the rod. Doesn't have to be spectacular, I quickly swing the inside and outside arcs through 90degrees, mark the 37mm frame and the 80mm verticals. All joints should be projected from the centre of the circle.
Step 2: formers.... I tend to make one former for the door and frame (same radius as the inside of the door) and another for the plinth (if it's skirting you can just pack out the door former) The former should be over the length of the arc of the frame, so if you are doing a quarter round then the former should be about a third of a circle, also over height by about 20%.
Once the former is made mark the centre line (top to bottom, not side to side), this is so you can transfer the centre line onto the formed parts and work from these to keep everything square.
Narrow one for the plinth
Former sits in vacuum bag
Vacuum pump I use, I do have a bigger one which can do up to 4 bags at once, but it can get a bit hectic using that one, only when it's mental busy do I get that one out.
Step 3: material choice..... I use either constuctional veneers 2mm or 1.5mm birch ply (thanks lynx for that one). I use constructional veneers for timber projects, ie oak, walnut etc and birch ply for painted projects. I do 26mm door thickness so for each rail I need about 17 strips of 1.5mm birch ply. For 80mm rails I will rip strips at 90mm x 17 of them. Do not think you can speed up the process by making super wide strips and ripping down, the wider you go the more difficult to press, widest I do is about 180mm for 2 x 80mm rails. I will do 90mm strips for the frame rails as well, this can then be ripped once glued up to 2 curved frame rails at 37mm.
Step 4: Glue..... I use a resin adhesive, it's a 2 part, powder and resin. The powder is either fast. medium or slow bond. After a lot of practice I use fast, but would advice to start with slow or medium. Resin tends to give little or no spring back especially with 2mm or 1.5mm strips, and no chance of creep unlike PVA.
I apply it to all the strips using a glue roller, soon as applied it needs to be put in hot soapy water, otherwise it will set whilst you work.
Step 5: glue up..... pretty simple if your used to a vacuum bag, stack all the glued up pieces together and either for horizontals lay across, side to side the former and for verticals lay length ways on the former. Bag up and vacuum down, on the horizontals just make sure the bag doesn't tuck under the ends, but this is one of the reasons for doing them over length to ensure the tightly pressed bit in the middle is the section you use.
1 strip to make 2 curved horizontals
Step 6: components... so for a single curved door in a beaded face frame (staffed frame) you need the following. Before any curved components are removed from the former the centre line needs to be transferred to the formed piece.
Door
2 x horizontals = strips ripped at either 90mm x 2 lots, or one lot of 180mm
2 x verticals= strips ripped at 180mm ripped to 2 x 80mm
1 x centre panel, 2 x 5mm sheets of flexiply, my shaker panels have a 7mm set in from the back edge, so in order to get the curve correct I have to put a 7mm flexi packer on the former. Glued up again in the same manner.
Frame, because my staff projects 3mm past the door i use 2 extra strips in the frame to make it 3mm thicker.
2 x curved horizontals= strips ripped at 90mm and then ripped once glued up to 2 x 37mm
2 verticals= box section 37 x 29mm
Step 7: making the frame, once I have all the components I cut them to size on the panel saw, using the rod as a guide for the cuts.
I hold the curved rails in a jig similar to below, this ensures the cut is 90degrees to the tangent.
I then use a Notcher to cut out the frame for the beaded detail, run it over a router cutter with a staff bit in, and assemble.
Stock image of a notcher below
Step 8: Carcass........ always make the carcass to the frame, use the frame to draw out the base and top of the carcass, if you do it the other way round you will end up flexing the frame to fit the carcass.
Posting this is quite time consuming and worrying I might lose it all, so I'll post this now and come back to the doors later.