Making a double bridle joint

UKworkshop.co.uk

Help Support UKworkshop.co.uk:

This site may earn a commission from merchant affiliate links, including eBay, Amazon, and others.

Steve Maskery

Established Member
Joined
26 Apr 2004
Messages
11,795
Reaction score
156
Location
Kirkby-in-Ashfield
So there I was, minding my own business, settling down with a pint at the Folk Club, when Ray (you remember Ray) comes over and says, "Steve, I've got a job for you. Can you join 4 bits of wood together for me to make a gate to the vegetable garden?"

He produces a drawing.

"What kind of joints do you want?", says I.

"Anything. Lap joints will do. I've got the wood in the car".

Lap joints my eye, he'll get double bridles and be grateful. So I went with him to the car. What has he got? Some 25-year air-dried oak? Reclaimed mahogany, perhaps. Or even...

CLS. I ask you, CLS.

"No problem", says I, thinking, "Can I actually join this stuff at all?"

This is a job for the Ultimate Bandsaw Tenon Jig. After all, a bridle joint is just like a mortice and tenon except that the mortice is open-ended.

The UBTJ relies on a system of spacers for accurate repetition. If the spacer fits the mortise, the tenon will fit the mortice. The kerf of the blade is accounted for in the jig itself, it just has to be calibrated once, which takes about a minute if I don't rush, and thereafter it is set until I change the blade.

This timber is 70mm wide. Divide that by 3 and I get 14mm, which is not a very standard size, so I settled on 12mm tenons with a 15mm gap between them (27mm between centres). So I need two spacers for this job, 12mm and 27mm.

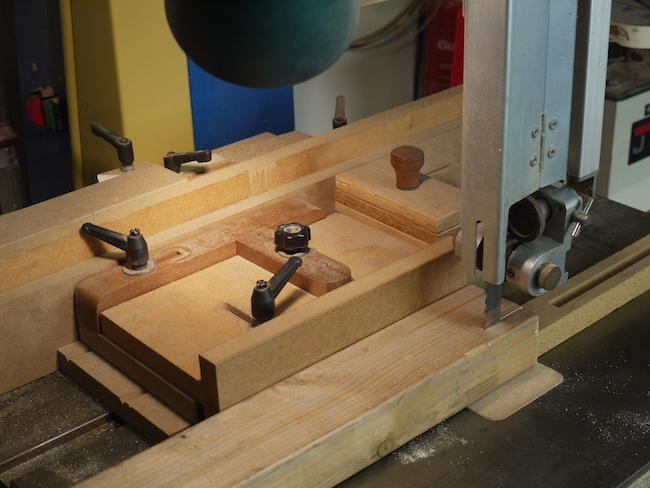
The UBTJ looks a lot more complicated than it really is. It's basically a sliding fence that can be moved to to any position by placing a spacer or two behind it. A Kerf Compensation Stop enables me to cut to the waste side of the line, whether it is a RH cheek or a LH cheek.

P1050782.JPG


The back stop can be in one of two positions. Open for tenons, closed for sockets. I started with the tenons.

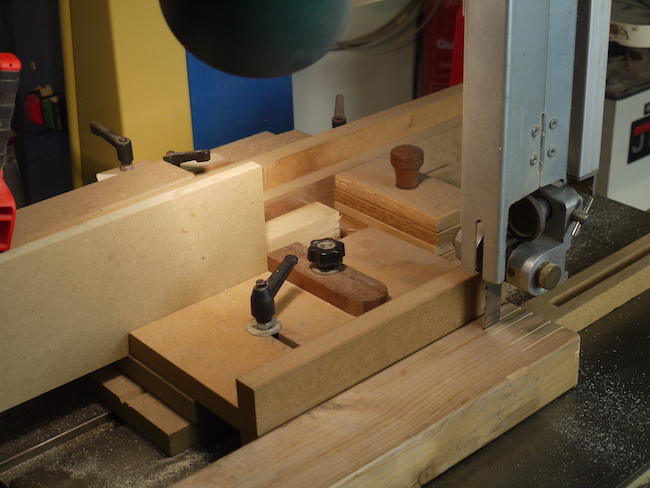
I positioned the fence so that I can cut the face furthest from the face side, which runs against the fence, and cut the first face of the cheek, using a stop to make sure that I do not over-cut.

P1050783.JPG


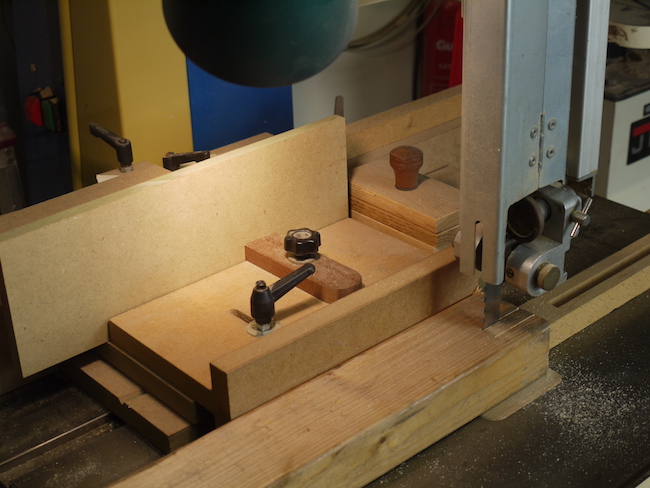
The the 12mm spacer is inserted, which moves the fence over by 12mm plus the kerf of the blade. This cuts the other face of the first tenon.
P1050785.JPG


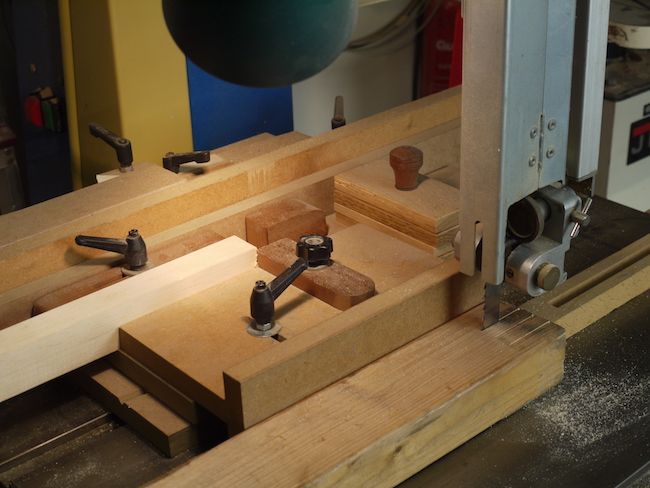
The spacer is replaced by the 27mm spacer, but it goes only just up to, rather than completely behind, the KCS. So this moves the whole piece over by 27mm.
P1050786.JPG


I make the first cut on the second tenon, then insert both spacers completely behind the KCS and make the final cut.

P1050787.JPG


I mark which bits I need to remove, as it's the easiest thing in the world to cut out the bits I am supposed to be keeping.
 

Attachments

  • P1050782.JPG
    P1050782.JPG
    232.8 KB · Views: 295
  • P1050783.JPG
    P1050783.JPG
    227 KB · Views: 277
  • P1050786.JPG
    P1050786.JPG
    217.8 KB · Views: 277
  • P1050787.JPG
    P1050787.JPG
    198.9 KB · Views: 278
  • P1050785.JPG
    P1050785.JPG
    211.2 KB · Views: 320
For the sockets, the setup is slightly different. The back fence is in the closed position, which means that when the working fence is pushed right back, I am cutting to the other side of that very first cut, making the inside face of the socket.

P1050788.JPG


The 12mm spacer is used again, but this time only up to the KCS, not behind it.
This moves the job up 12mm MINUS the kerf of the blade, to make the second cut and complete the first socket.

P1050789.JPG


Replace the 12mm spacer with the 27mm one, behind the KCS, to make the third cheek

P1050790.JPG


and finally insert the 12mm spacer up to, but not behind, the KCS. To make the final cut.

P1050792.JPG


It may sound complicated but it is very straightforward.

P1050794.JPG


I tried chopping out the waste. I may as well have tried to carve cotton wool. A coping saw worked much more cleanly and I bottomed out all the sockets on the bandsaw.

P1050797.JPG


So, how did it go? All four corners go together beautifully, properly flush and are even interchangeable, straight off the saw. No mallet required, just a thump of a fist.

P1050805.JPG


Sometimes I'm a smug old geezer.
 

Attachments

  • P1050788.JPG
    P1050788.JPG
    219.6 KB · Views: 292
  • P1050789.JPG
    P1050789.JPG
    208.1 KB · Views: 290
  • P1050790.JPG
    P1050790.JPG
    211.8 KB · Views: 285
  • P1050792.JPG
    P1050792.JPG
    214 KB · Views: 268
  • P1050794.JPG
    P1050794.JPG
    228.3 KB · Views: 290
  • P1050797.JPG
    P1050797.JPG
    252.5 KB · Views: 269
  • P1050805.JPG
    P1050805.JPG
    168.3 KB · Views: 269
Steve Maskery":12att1cj said:
So there I was, minding my own business, settling down with a pint at the Folk Club, when Ray (you remember Ray) comes over and says, "Steve, I've got a job for you. Can you join 4 bits of wood together for me............

Right about there I'd have said......."Nope. No way. But come over to my workshop and I'll help you to make your own." Thereafter, it's hardly likely that any bandsaws would have been troubled.

There's lots of ways to skin a cat, though, and it's nice to see proper joints being made. Well done Steve.
 
Nice work. Your friend should be buying you all the pints you want on your next trip to the pub.

Being in the land of dado blades they would be my go to. With a proper sled. :wink:

Pete
 
Inspector":1uxpa9yz said:
Nice work. Your friend should be buying you all the pints you want on your next trip to the pub.

Being in the land of dado blades they would be my go to. With a proper sled. :wink:

Pete

Well, yes I could have gone that route too. I have the equivalent jig for the TS, imaginatively called the Ultimate Tablesaw Tenon Jig, and that can be calibrated to any blade, including a dado blade, which I also have. It would have made cleaning out the bottoms easier, certainly. Next time, eh?

I've delivered it this afternoon. The first thing he did was get his tape measure out. Cheeky beggar.

Chris saw it and said, "That's pretty".

I came home with 250 reclaimed slates, so everybody is happy.
 
Is it a double bridle or is it a comb joint? I've always wanted to call it a double bridle but everyone I know seems to call it a comb joint.
 
Ah, answers on a postcard please :)
It's a double bridle. Or a twin bridle. Or a short comb joint (does two teeth count as a comb?). Or a box joint (but probably better reserved for something more identifiably box-proprtioned). Or a finger joint.
I don't really care what it's called, I just hope Ray glues it up with a good D4 adhesive.
 
Nice job Steve, but .................... you know CLS is not suitable for exterior use?
 
Steve Maskery":39bk2com said:
So, how did it go? All four corners go together beautifully, properly flush and are even interchangeable, straight off the saw.

I hope people appreciate how impressive that is.

The applicants for the Barnsley Workshop are whittled down by a day long practical hand tool test run against the clock. You never know exactly what's on the agenda, but it's certain to contain a lot of joint cutting. However the acid test, the one that really separates the sheep from the goats, isn't some fancy dovetail. You're expected to be able to do those in your sleep. No, the real killer is the humble bridle joint.

The thing about the bridle joint is there's absolutely no where to hide. You can't load the dice in your favour with judicious undercutting. You can't aim off on one side. You can't pitch for a slightly tight joint and hammer it home for invisible glue lines. It's either dead right or it's horribly wrong.

If you cut a bridle joint too loose then it's gappy, but if you cut it too tight then it springs open and it's gappy again.

That's why many makers who can do secret mitred dovetails in their sleep will get sweaty palmed at the prospect of a bridle joint!
 
custard":zptwwyqz said:
Steve Maskery":zptwwyqz said:
So, how did it go? All four corners go together beautifully, properly flush and are even interchangeable, straight off the saw.

I hope people appreciate how impressive that is.

The applicants for the Barnsley Workshop are whittled down by a day long practical hand tool test run against the clock. You never know exactly what's on the agenda, but it's certain to contain a lot of joint cutting. However the acid test, the one that really separates the sheep from the goats, isn't some fancy dovetail. You're expected to be able to do those in your sleep. No, the real killer is the humble bridle joint.

The thing about the bridle joint is there's absolutely no where to hide. You can't load the dice in your favour with judicious undercutting. You can't aim off on one side. You can't pitch for a slightly tight joint and hammer it home for invisible glue lines. It's either dead right or it's horribly wrong.

If you cut a bridle joint too loose then it's gappy, but if you cut it too tight then it springs open and it's gappy again.

That's why many makers who can do secret mitred dovetails in their sleep will get sweaty palmed at the prospect of a bridle joint!

I'm not with you Custard, I understand theres no where to go if you cut all 4 on the same jig or at once but if they are handcut individually then they can be adjusted.
 
custard":3qx96z71 said:
Steve Maskery":3qx96z71 said:
So, how did it go? All four corners go together beautifully, properly flush and are even interchangeable, straight off the saw.

I hope people appreciate how impressive that is.

The applicants for the Barnsley Workshop are whittled down by a day long practical hand tool test run against the clock. You never know exactly what's on the agenda, but it's certain to contain a lot of joint cutting. However the acid test, the one that really separates the sheep from the goats, isn't some fancy dovetail. You're expected to be able to do those in your sleep. No, the real killer is the humble bridle joint.

The thing about the bridle joint is there's absolutely no where to hide. You can't load the dice in your favour with judicious undercutting. You can't aim off on one side. You can't pitch for a slightly tight joint and hammer it home for invisible glue lines. It's either dead right or it's horribly wrong.

If you cut a bridle joint too loose then it's gappy, but if you cut it too tight then it springs open and it's gappy again.

That's why many makers who can do secret mitred dovetails in their sleep will get sweaty palmed at the prospect of a bridle joint!

I don't understand?

When I look at that bridle joint, I see a box/finger joint
And a dovetail joint is just a box/finger joint without the angled cuts?
 
doctor Bob":zaswoi8c said:
I'm not with you Custard, I understand theres no where to go if you cut all 4 on the same jig or at once but if they are handcut individually then they can be adjusted.

When you're working against the clock you're virtually certain to fail if you cut a fat "tenon" and pare it down.
 
I am sure that Steve's jig is great but I can't help but think that joint is not the best joint for an outside gate and I fail to understand how we have moved on from an outside gate to fine furniture making.
 
Well guys, I think you are all right.

Personally I would not build a garden gate in that way or of that material. But that is what I was asked to do and I cannot possibly say no to Ray, after what he has done for me. I think I've done the best job I can under the circumstances. I couldn't cut that by hand, not to save my life.

I've always had poor eyesight. I could not see the line, let alone cut to it. It's not so bad these days, two cornea grafts and a billion pounds of NHS resources later and I can see to drive and read, at least with a little help from technology. So I try to have a decent stab at using a tenon saw and such like.
But for most of my life, seeing stuff has been a challenge. And it was this difficulty which led me to take the avenue of using jigs for common woodworking tasks. I started by making other people's jigs, notably Bob Wearing in the 70s and 80s, and thereafter I've tried to take whatever has gone before and improve it. A couple of things are completely original and I am proud of them. This is one of them. I really do believe that it is the best in the world. If you disagree, that's fine, just point me in the direction of a better one, I'm always eager to learn.
I probably have Nick Gibbs to thank for raising my profile. After all, I've never been a professional woodworker, only ever a keen amateur from a line of woodies. But Nick gave me exposure and all the challenges I found, and overcame, he published. Some articles were never attributed to Steve Maskery, only to Mr. Jig. I smile at that. I even got "groupied" once, at the Newark show, by a stranger, must have been a hundred years old, who came up to me and said, "You are Mr. Jig!". He then turned round and walked off. At least he didn't claim £5.
I'm no craftsman. Never have been, never will be. But I do know how to make what I want, in a way I can handle, knowing that the end result will be quite presentable. And I think I'm actually quite good at sharing my limited skills and experience in a way that people like and can relate to.
So, much as I love my "Inspired By Peter Sefton" tenon saw, for a job like this, I'll use my jig and bandsaw and be confident that it will turn out right.
 
Steve Maskery":e5xeww42 said:
I even got "groupied" once, at the Newark show, by a stranger, must have been a hundred years old, who came up to me and said, "You are Mr. Jig!". He then turned round and walked off.

yeah, sorry about that, hope I didn't frighten you :shock:
 

Latest posts

Back
Top