Joiners: How do you size a door SKETCHUP DRAWING OF JIG

UKworkshop.co.uk

Help Support UKworkshop.co.uk:

This site may earn a commission from merchant affiliate links, including eBay, Amazon, and others.

Graham Orm

Established Member
Joined
6 Jan 2013
Messages
3,646
Reaction score
4
Location
Manchester
I do a lot of smaller jobs these days since I did my back in. Fitting doors is a regular, and out of square door casings is also a regular. Other than a protracted process of cut and try, or a lengthy marking out process which always makes me nervous I don't know of another way. Is there one?
 
Hopefully someone good will be along soon. Till then its me :)

Ive done a few bad ones. Quickest for me was hang a strip of ply from the frame with a couple of spare hinges. Then using more strips and a glue gun build a template off the hanging strip. Add a couple of cross braces to hold its shape.

Use the template on the door and add a couple of mm all round to allow for error. Cut/try and plane to fit.

hth
 
I sometimes use the old door as a template, carefully cheching the gaps, marking the spots weere extra needs adding.
Other times i use my 6ft level (as a straight edge) to check the legs and a square of ply to check the head referenced of the level.
If the customer is redecorating i have removed the arcitrave and adjusted the frame.
 
I sometimes use the old door as a template too, but make sure you mark where it needs to be bigger than the original and also, if it has a leading edge planned on it, make sure you take that into account!

I fit a lot of reclaimed doors into old door frames.
I like to make sure the stiles are equal, so measure the width at the top and bottom, (making sure it doesn't bow in or out too much) and then take the same amount of both side of the door so it is about 4 mm narrower than the frame. (I cut a leading edge with the saw at this stage)
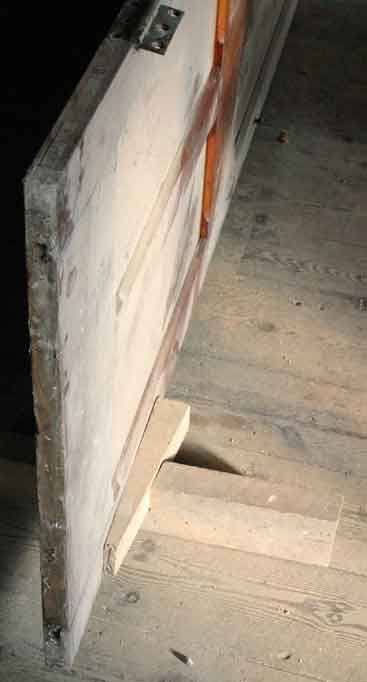
I then stand it in the opening tight against the upright of the frame and mark along the bottom, parallel to the floor.
(This isn't the line to cut too) Measure how much height you need to remove in order to make the top rail the same width as the stiles and mark another line on the bottom of the door, parallel to the first line using this measurement and cut.
This should now be a perfect fit on both sides and bottom.
Then measure the height of the frame both sides, transfer this to the door minus about 8mm and cut.

Hopefully, you should now have a perfectly fitting door to hang.

Hopefully that all made sense!
 
I use the old door as a template, I fit doors all the time and no door frame is square.....ever !!

Check fit of original door in frame, if okay then make sure you mark top of old door, lay on top of new door, mark hinges onto new door, fit hinges, and hang then trim to suit.
 
Measure the width of the frame and plane door to size. Place door into opening of frame. If the door is taller than the frame just run a pencil line across the top...... Or wedge the bottom of the door so its tight to the top of the frame and transfer the frame head angle onto the door.
 
Thanks for the input guys. I use both techniques, using the old door as a template and trimming the width first then the length.

The thing that prompted this post was the last job I did, which was 6 new doors into frames where the owner had thrown the old doors away, then filled and decorated, concealing all traces of where the hinges used to be! On top of this the frames were a mile out, up to half an inch across the head. This makes it difficult to get the height right or shape of the top without numerous test fits. The new doors were all oak. Thankfully they cleared a bedroom for me to use for the upstairs doors or I would have been wrecked humping them up and down stairs.

I'm not happy, not happy at all. I was hoping someone would come on and suggest something blindingly obvious that I have been missing. It should be such a quick job, what could take 40 minutes often runs to two hours. Ive started a jig. If it works I'll post it on here.

Thanks again guys.
 
Got to hang 6 fire doors in an old house all on landings, with no where to set up, other than outside, I not carting them up and down 2
flights of stairs to trim them in, door linings are well out, existing doors are all in twist and fit where they touch, so I know it isn't going to be straight forward.

So I have made a jig, but as yet not had chance to prove it works, didn't want to post evidence of it on here until it is proven, and, you all take the ****

But if it helps someone else here it is:

door jig.jpg


Paul
 

Attachments

  • door jig.jpg
    door jig.jpg
    21.7 KB · Views: 416
Well it might reduce the fitting time a little: use a pencil and compass, use the compass point as the guide on the frame and the pencil to mark the door. I think this works better when the door is a relatively close fit.
 
Grayorm":jdh6n2cr said:
I do a lot of smaller jobs these days since I did my back in. Fitting doors is a regular, and out of square door casings is also a regular. Other than a protracted process of cut and try, or a lengthy marking out process which always makes me nervous I don't know of another way. Is there one?
Start with an oversize door. It doesn't need to be a lengthy process: you offer it up to the hole with the hinge side tight up, hold it with wedges and mark/scribe around the other three sides with a pencil. Plane/saw to the lines, adjusted for carpet gap and with an allowance for the swing. Once it's fitting the hole you can then fine adjust (perhaps after hanging it).
Basically that's how it's always done - I can't see how it could be made easier, or why you'd want to.
Fitting a door is easier than making a template to fit a door. Even if you had a working template you would most likely need some fine adjusting before the end. Nothing is ever square or straight.
 
what ive done in the past is get the hanging side done and get someone to hold it to the frame while you mark from other side allowing for gapping hope that makes sense what ever way you do it its never a quick job
 
geordie":dwuhq0vx said:
what ive done in the past is get the hanging side done and get someone to hold it to the frame while you mark from other side allowing for gapping hope that makes sense what ever way you do it its never a quick job
Or if you haven't got someone to hold it you use a wedge or two, perhaps with a nail for temporary knob so you have something to hold. Perhaps check the head for square first (sliding bevel) and trim that before you offer up.
 
That sounds like a great way to cock up Jacob, if not for you definitely for me. Thanks for the picture HOJ. I'm well on the way with a different type, I'll post pictures when it's done.
 
Just like any other door.
I always try the level on the floor, then cut and shoot the bottom first, onto the threshold.
Then shoot the hanging stile, followed by the striking stile and allowing for the leading edge, and so to the door head.
In extreme cases you may well have to plane the "bent" stile edges while holding the plane at an angle across the door or the plane will try and keep straight through it's length, as it is designed to do.
Must admit I've followed some really dodgy first fixings. Regards Rodders
 
Grayorm":3b0ls2so said:
That sounds like a great way to cock up Jacob, if not for you definitely for me. ...
I don't know any other way. I don't think there is one. Basically it's a though you are making a template for the door, but instead of a template you use the door itself and cut out the middleman so to speak.
 
I always start with the door oversized. Always a good idea to use unlipped blanks, as these can be finished to out of square doorways, as you can add to the dimensions as well as remove from them.
As has been previously said, this is a painstaking process, but worth the trouble.
 
Just in case anybody doesn't already know this - the single most useful accessory to door fitting is the door prop wedge. You can plane the edges even if you are working on a narrow landing:

doorwedge.jpg


doorwedge2.jpg


could do with a bit of dusting around here
 
A chippy mate of mine made one of those in 1990, the year I bought a seriously knackered 400 year old cottage. I've always called it a locking wedge. We built and fitted all the doors using it and every door I've hung since. It cost nothing and works perfect every time. A very useful bit of good old fashioned chippy ingenuity.

I have to say that its (in a perverse way) slightly gratifying to see the professionals have as much hassle swinging a door as I've always had. I'd always assumed it was because I was just a dumass amateur and didn't know the trick of the trade. Turns out its just a bummer of a job for everyone.

Trend have jig-ised that wedge idea for several zillion pounds I notice whenever I attend the D&M show.
 
Fitting a door into an existing frame is always painful. We make lots of doors and also fit, but I try and steer clear of jobs that are doors only. It is much easier to make a complete door set, which is a door complete with frame with ironmongery, tested in the frame and then painted. Fitting a door set involves wedging the frame in place, screwing the door on, then adjusting the frame until the door sits nicely in the frame. The frame can then have plastic packers pushed in place and then screwed to the brickwork. No need for a spirit level, tape measure and no shooting in. The door is cut square in the factory with correct tolerances, so the door is used to set the frame position not the other way around.
 
Jacob":3i3hvrzi said:
Just in case anybody doesn't already know this - the single most useful accessory to door fitting is the door prop wedge. You can plane the edges even if you are working on a narrow landing:
doorwedge2.jpg


could do with a bit of dusting around here

I was given a pair of these by a kindly Howdens manager. They're not cheap to buy, but work well. Only trouble is after doing your stuff, you lift the door, turn, and trip over them, but you can't have everything. I've glued a strip of carpet to the face of each of them as they were marking the doors when new.

My jig is well on the way, just waiting for an adjustment component. If it works it will speed up the process dramatically and guarantee accuracy for any shape of door opening.
door gripper.JPG
 

Attachments

  • door gripper.JPG
    door gripper.JPG
    15.4 KB · Views: 159
Back
Top