


Derek Cohen (Perth Oz)
Established Member
Improving the #66 Hand Beader
Stanley produced the #66 Hand Beader between 1886 and 1941. This was shaped along the lines of a spokeshave but the irons were captured at the same angle as a scraper plane, and this is how it was used.
The #66 came supplied with two fences, one rectangular for straight edges, and the other oval for round edges. There were 8 cutters that were made up of single beads, reeds, a flute, and a router.
Of course, it was possible to make one’s own irons – in fact, this is a simple task that I shall later illustrate - which increases the range of this simple but useful finishing tool.
Good condition, vintage #66s with both fences and all blades command a pretty penny on eBay these days. For much the same price one can purchase a new Lie-Nielsen model in bronze, which is quite a stunner, and it comes with thicker irons and improved performance.

My first #66 was a lonely Stanley minus irons and fences. I purchased the missing pieces from LN and, in addition, made my own irons for this. The LN fences require a little filing to fit the Stanley body. The irons fit without modification.
For the past few years the #66 has lain in a drawer as I have instead preferred to make and use simple scratchstocks. In particular, I liked the ones made by Garrett Hack:
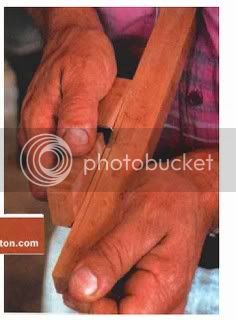
One of the features I valued on the scratchstock was the large registration area of the fence. Compared to the Stanley/LN, it is massive.
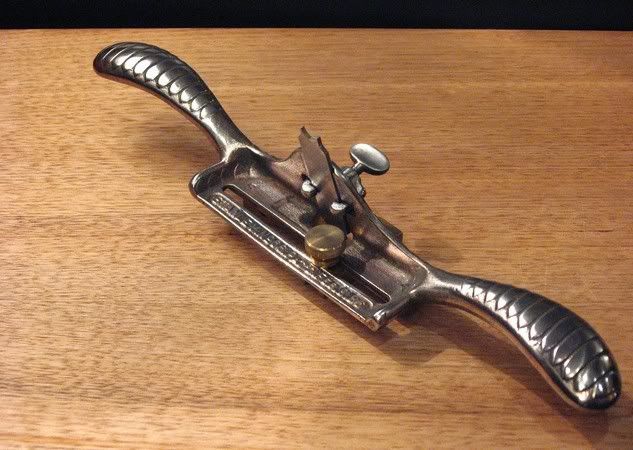
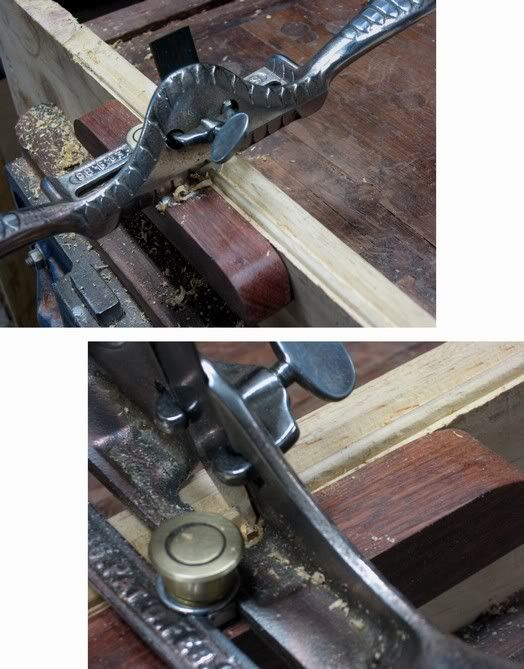
Quite recently I won another derelict Stanley #66-minus-irons-and-fences. I had a little fun cleaning off the rust and shining it up. Here it is with LN fence and iron.
This time I decided that I would build a decent fence, one with substantial registration. I was sure that this would improve the performance of the #66, which up till now I have felt to be less stable/predictable than desired.
For those that simply wish to use the original fence design, and lack one for their #66, then the following tutorial will help you make one as well.
Further, I shall demonstrate how simple it is to make one’s own irons. The world is your oyster when it comes to shapes.
Building a fence
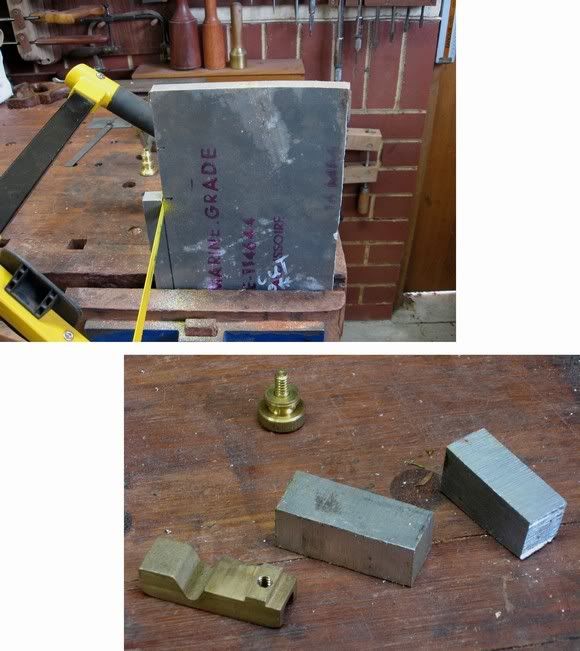
I used scraps lying around the workshop. There was this chunk of marine grade aluminium that seemed just right. Mark off a section a little over the width as the LN fence and about twice the length. The LN is ½” x 1 ¾”.
A hacksaw and a little cutting oil makes fast work.
It will later be more clearly seen that the length I am using is slightly shorter than the full length of the LN/Stanley fence. For my purpose the full length is unnecessary. However, for those wanting to create an “original” type, then cut it to 1 ¾”.
Mark off the waste and remove this with the hacksaw. Note, these dimensions are not critical. I eyeballed everything and cut as close to the line as possible. The only important dimension is the tenon. This must fit snuggly inside the slide.
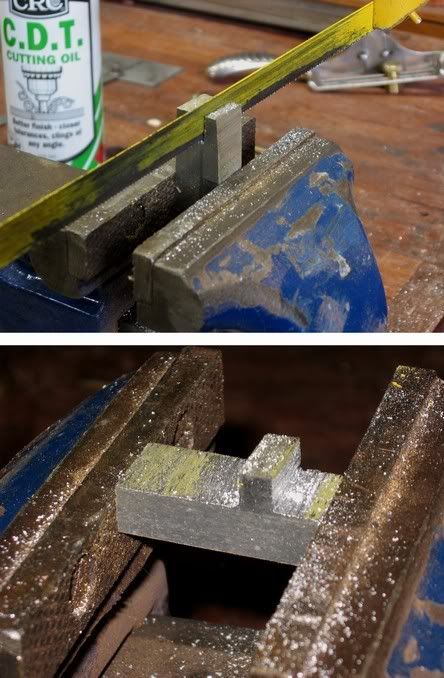
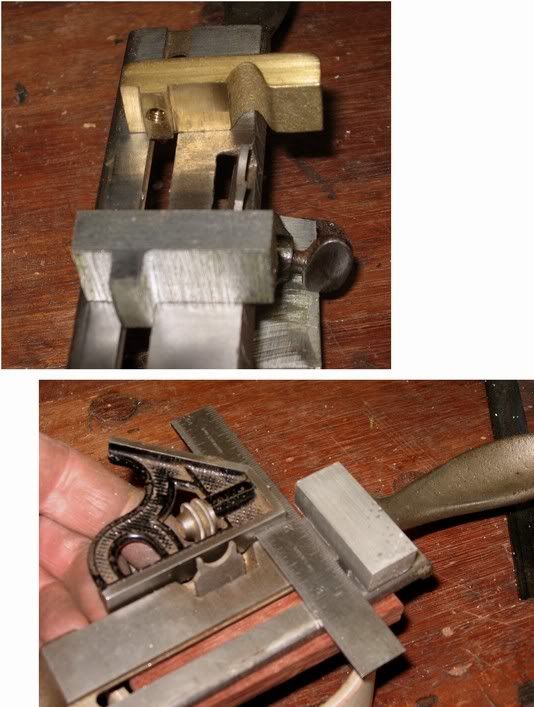
Here I am checking the fit of the tenon. When filing, use one with coarse teeth. I usually add chalk to the face but did not have any today so have to frequently brush the teeth to keep them clean.
Make sure the fence sits square to the slide otherwise you will later be cutting across the iron.
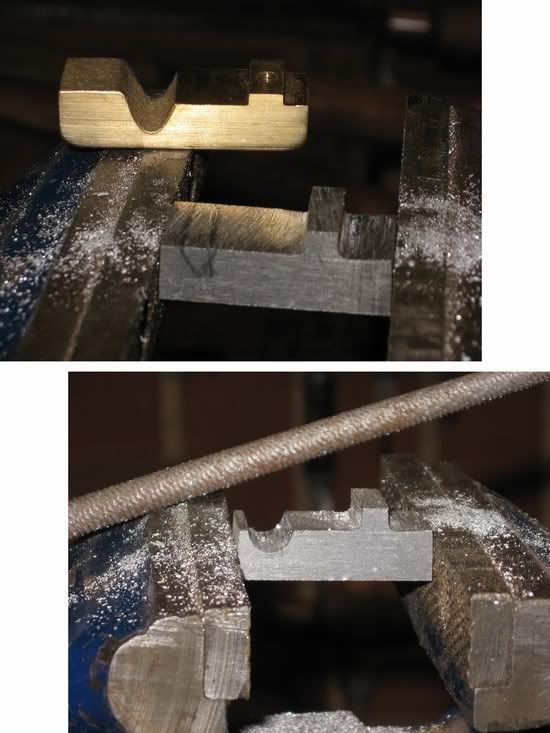
Now it is time to add the clearance cut-out for the blade. Both the Stanley and the LN are V-shaped. But there is nothing that says this is law. I made mine round. So much easier!
The Fence Screw
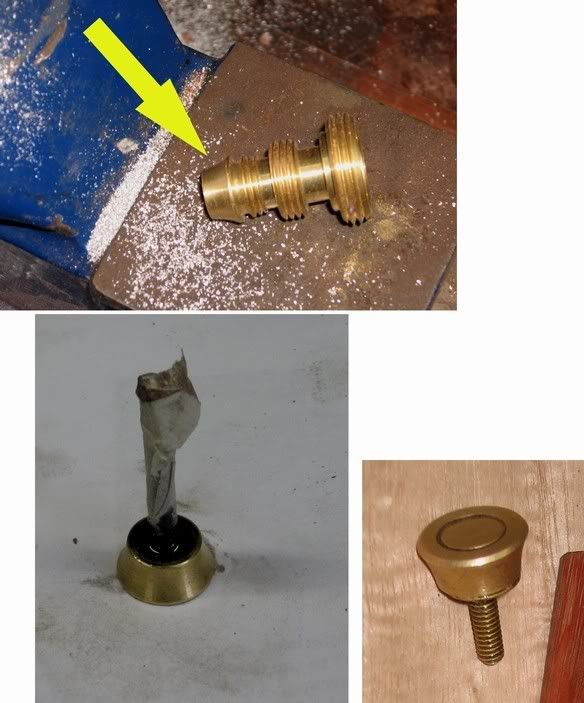
The basic building block was a brass hose connector or, to be exact, what was left of one.
I cut off a section, then epoxied in a piece of brass to fill the end and a brass screw for the thread. I used black-tinted epoxy to create the band on the head.
Now the tenon can be tapped to accept this thread.

Back to the fence
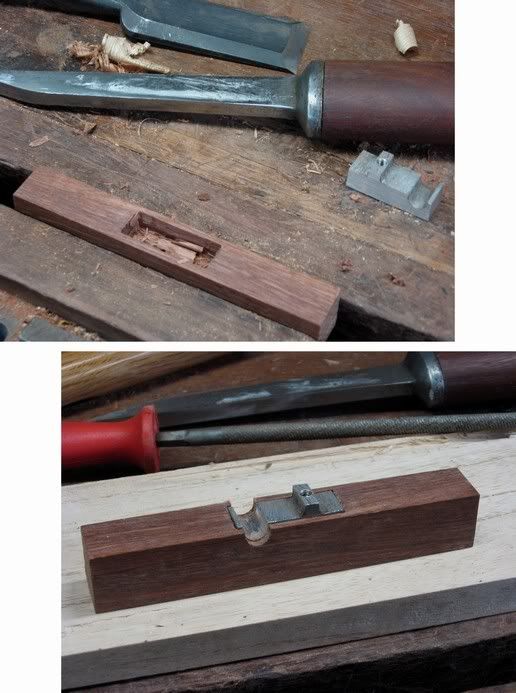
Using a drill, mortice chisel and slick, a mortice is formed in a Jarrah section 5 ½” x ¾” x ¾”. This will be the new fence.
The final shaping, and then finished with wax.
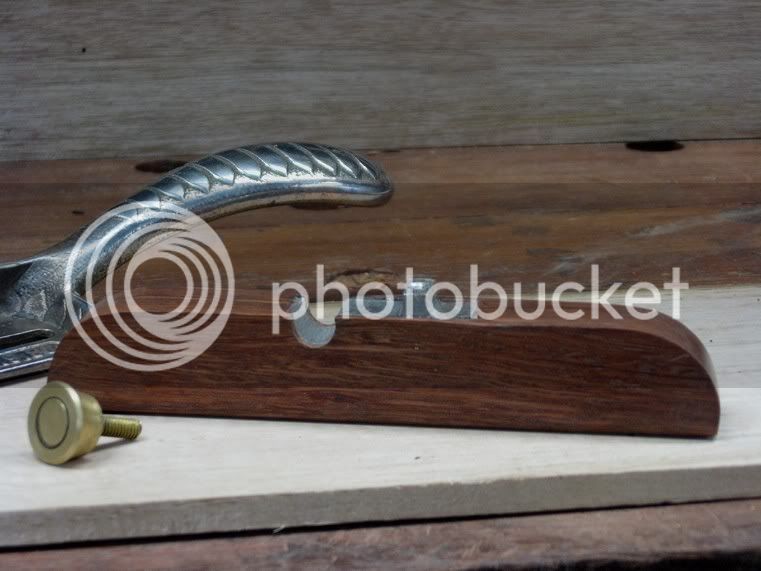
Here the fence is attached.

Build an iron
As a change of pace from the LN irons, one can very easily makes one’s own. The one here took me about 10 minutes.
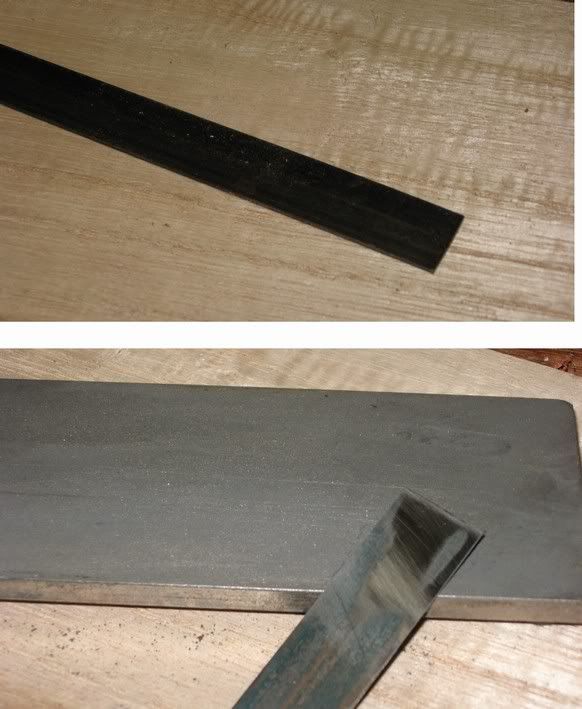
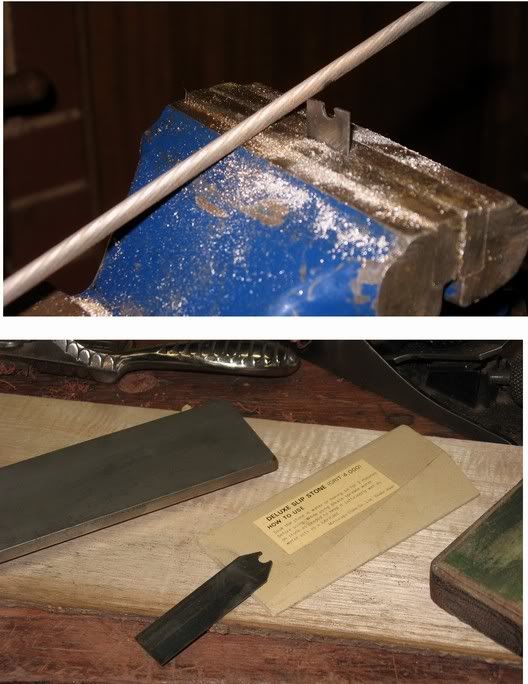
As an aside, I once accepted a bet that I could make a scratchstock and iron and cut a bead to a set depth faster than a fellow woodworker could set up a ‘tailed router in a table and cut the same simple bead. I won. The point is that this is such a simple task. No heat treating. Just a piece of ¾” wide bandsaw blade (that has had its teeth removed on a beltsander, which reduces it to the desired width for the #66), a selection of chainsaw sharpening files, and honing equipment (I use a extra fine diamond plate, a leather strop with green rouge (.5 microns) and a waterstone slip.
Step one, cut off a section of the bandsaw steel. Step two, smooth the faces.
Step three is to file the desired profile. Here I am making a simple bead for illustration.
Step four is to make sure that all surfaces – face and edges – are polished as smooth as possible.
The Performance
I first tried out the #66 with the LN irons. The new fence really makes the beader so much easier to use. It is significantly more stable, less inclined to wander off course, and this translates into a better finish than usual.
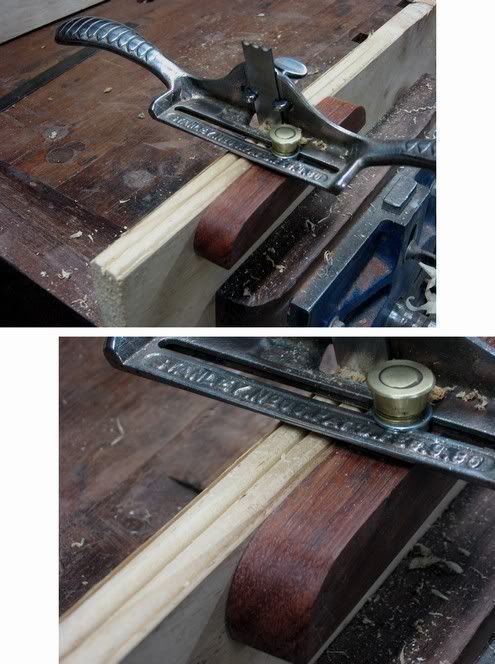
Lastly I used the bandsaw irons. This are thinner than the LN irons and flex slightly. In use I think that I actually preferred them. I like the LN. I like these ones as well. They cut cleanly and easily.
I definitely see more use for this #66 in the future
Derek Cohen
Perth, Australia
August 2007
Stanley produced the #66 Hand Beader between 1886 and 1941. This was shaped along the lines of a spokeshave but the irons were captured at the same angle as a scraper plane, and this is how it was used.
The #66 came supplied with two fences, one rectangular for straight edges, and the other oval for round edges. There were 8 cutters that were made up of single beads, reeds, a flute, and a router.
Of course, it was possible to make one’s own irons – in fact, this is a simple task that I shall later illustrate - which increases the range of this simple but useful finishing tool.
Good condition, vintage #66s with both fences and all blades command a pretty penny on eBay these days. For much the same price one can purchase a new Lie-Nielsen model in bronze, which is quite a stunner, and it comes with thicker irons and improved performance.
My first #66 was a lonely Stanley minus irons and fences. I purchased the missing pieces from LN and, in addition, made my own irons for this. The LN fences require a little filing to fit the Stanley body. The irons fit without modification.
For the past few years the #66 has lain in a drawer as I have instead preferred to make and use simple scratchstocks. In particular, I liked the ones made by Garrett Hack:
One of the features I valued on the scratchstock was the large registration area of the fence. Compared to the Stanley/LN, it is massive.
Quite recently I won another derelict Stanley #66-minus-irons-and-fences. I had a little fun cleaning off the rust and shining it up. Here it is with LN fence and iron.
This time I decided that I would build a decent fence, one with substantial registration. I was sure that this would improve the performance of the #66, which up till now I have felt to be less stable/predictable than desired.
For those that simply wish to use the original fence design, and lack one for their #66, then the following tutorial will help you make one as well.
Further, I shall demonstrate how simple it is to make one’s own irons. The world is your oyster when it comes to shapes.
Building a fence
I used scraps lying around the workshop. There was this chunk of marine grade aluminium that seemed just right. Mark off a section a little over the width as the LN fence and about twice the length. The LN is ½” x 1 ¾”.
A hacksaw and a little cutting oil makes fast work.
It will later be more clearly seen that the length I am using is slightly shorter than the full length of the LN/Stanley fence. For my purpose the full length is unnecessary. However, for those wanting to create an “original” type, then cut it to 1 ¾”.
Mark off the waste and remove this with the hacksaw. Note, these dimensions are not critical. I eyeballed everything and cut as close to the line as possible. The only important dimension is the tenon. This must fit snuggly inside the slide.
Here I am checking the fit of the tenon. When filing, use one with coarse teeth. I usually add chalk to the face but did not have any today so have to frequently brush the teeth to keep them clean.
Make sure the fence sits square to the slide otherwise you will later be cutting across the iron.
Now it is time to add the clearance cut-out for the blade. Both the Stanley and the LN are V-shaped. But there is nothing that says this is law. I made mine round. So much easier!
The Fence Screw
The basic building block was a brass hose connector or, to be exact, what was left of one.
I cut off a section, then epoxied in a piece of brass to fill the end and a brass screw for the thread. I used black-tinted epoxy to create the band on the head.
Now the tenon can be tapped to accept this thread.
Back to the fence
Using a drill, mortice chisel and slick, a mortice is formed in a Jarrah section 5 ½” x ¾” x ¾”. This will be the new fence.
The final shaping, and then finished with wax.
Here the fence is attached.
Build an iron
As a change of pace from the LN irons, one can very easily makes one’s own. The one here took me about 10 minutes.
As an aside, I once accepted a bet that I could make a scratchstock and iron and cut a bead to a set depth faster than a fellow woodworker could set up a ‘tailed router in a table and cut the same simple bead. I won. The point is that this is such a simple task. No heat treating. Just a piece of ¾” wide bandsaw blade (that has had its teeth removed on a beltsander, which reduces it to the desired width for the #66), a selection of chainsaw sharpening files, and honing equipment (I use a extra fine diamond plate, a leather strop with green rouge (.5 microns) and a waterstone slip.
Step one, cut off a section of the bandsaw steel. Step two, smooth the faces.
Step three is to file the desired profile. Here I am making a simple bead for illustration.
Step four is to make sure that all surfaces – face and edges – are polished as smooth as possible.
The Performance
I first tried out the #66 with the LN irons. The new fence really makes the beader so much easier to use. It is significantly more stable, less inclined to wander off course, and this translates into a better finish than usual.
Lastly I used the bandsaw irons. This are thinner than the LN irons and flex slightly. In use I think that I actually preferred them. I like the LN. I like these ones as well. They cut cleanly and easily.
I definitely see more use for this #66 in the future
Derek Cohen
Perth, Australia
August 2007

") Record #05.
Record #05.