how to square boards on a router table?

UKworkshop.co.uk

Help Support UKworkshop.co.uk:

This site may earn a commission from merchant affiliate links, including eBay, Amazon, and others.
wellywood":1z3ccbuc said:
Reggie, I've re-read your posts and I may have misunderstood what you're trying to do. When you say you want to square the board, do you mean that you're trying end up with a board with a consistent width all way along its length?
What I (and others) was referring to was getting a 90* edge to a flat face.
If you are trying to get a board with a consistent width along its length, you're better off using a TS with a fence.

lets say I have cut a piece of wood, 2ft long 4inches wide, and 3/4" thick, I want to straighten and square the 3/4" edge that was left a bit out by my wonky sawing. :)
 
Reggie":zbiullrl said:
lets say I have cut a piece of wood, 2ft long 4inches wide, and 3/4" thick, I want to straighten and square the 3/4" edge that was left a bit out by my wonky sawing. :)

My set-up does that fine, I have a Startrite P/T but I still prefer my router set-up to do this job.
 
Reggie":1o5pe0hw said:
lets say I have cut a piece of wood, 2ft long 4inches wide, and 3/4" thick, I want to straighten and square the 3/4" edge that was left a bit out by my wonky sawing. :)

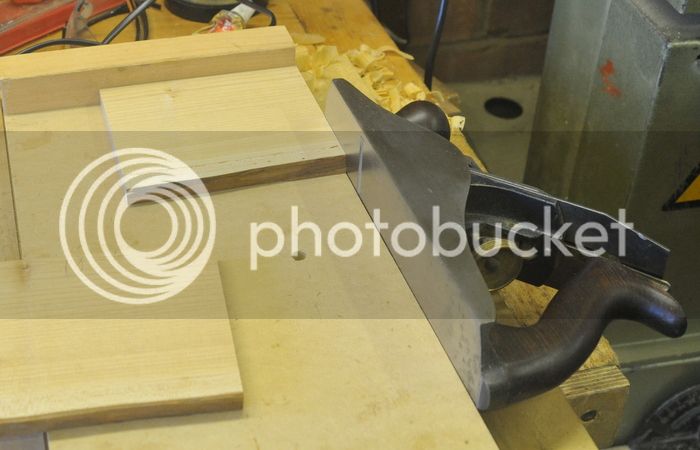
Plane and shooting board, plane £12, board offcuts from the skip.


Pete
 
scrimper":3jdbk32n said:
Reggie":3jdbk32n said:
lets say I have cut a piece of wood, 2ft long 4inches wide, and 3/4" thick, I want to straighten and square the 3/4" edge that was left a bit out by my wonky sawing. :)

My set-up does that fine, I have a Startrite P/T but I still prefer my router set-up to do this job.

Unless you have some clever jig, an ordinary split-fence on its own isn't enough. You want this:
squared board.png

But you risk getting this:
not_true.png

The edges are still square, but it tapers along the length.

You need a thicknesser (or hand tools) to get the opposing surfaces parallel.
 

Attachments

  • squared board.png
    squared board.png
    5.7 KB · Views: 60
  • not_true.png
    not_true.png
    3.6 KB · Views: 60
Pete, I have a shooting board, I have no problem with being able to do it by hand :) And eric yep, I'm trying to get the opposing surfaces parallel. If not a planer thicknesser then a jig sounds like the way forwards.
 
I'm probably missing something here (bit of a novice) but surely if you had one face square and straight using the stepped split fence method above could you not then reset the fence so it was parallel along its length, back it off from the router bit to the width you required, then using the squared / straight edge against the fence, feed the timber through behind the bit from the what would be the other direction (left to right)
Only problems I can see with this is you're leaning over the router bit and dust collection but I'm sure a jig/guard could be knocked up to solve these problems?
 
manxman":ancfvyve said:
I'm probably missing something here (bit of a novice) but surely if you had one face square and straight using the stepped split fence method above could you not then reset the fence so it was parallel along its length, back it off from the router bit to the width you required, then using the squared / straight edge against the fence, feed the timber through behind the bit from the what would be the other direction (left to right)
Only problems I can see with this is you're leaning over the router bit and dust collection but I'm sure a jig/guard could be knocked up to solve these problems?

A. Dangerous. Theoretically you aren't climb cutting, but the slightest mistake would shove the stock in your midriff.

B. Very easy to ruin the board as one slip would make the cutter dig in further - the stock can only move into the cutter, not away from it, and you can't remove it manually at all quickly.

You could make it work with featherboards - in essence a home-made, horizontal thicknesser - but there is no actual drive through the "machine". Inevitably you'd have to stop and restart at some point, and I'd expect the finish to be very rough as a consequence.

E.
 
manxman":uv8ufst6 said:
I'm probably missing something here (bit of a novice) but surely if you had one face square and straight using the stepped split fence method above could you not then reset the fence so it was parallel along its length, back it off from the router bit to the width you required, then using the squared / straight edge against the fence, feed the timber through behind the bit from the what would be the other direction (left to right)
Only problems I can see with this is you're leaning over the router bit and dust collection but I'm sure a jig/guard could be knocked up to solve these problems?

As Eric says, climb cutting is a dangerous practice (it can sometimes have its place with care) but it also sounds like you're suggesting trapping the wood between the bit and the fence which IMO is a no - no.
 
I wasn't suggesting Climb cutting (just had to google that to check what you ment!) you'd still be cutting in the right direction for the cutter but from the opposit side of the table if you see what I mean.
i.e. if you stood on the fence side of the router table you'd have the fence in front of you followed by the work piece with the squared / straight against the fence, and beyond that the cutter. You'd still be feeding from right to left so the right direction for the cutters rotation. With a couple of featherboards either side of the cutter pressing the stock in to the fence surely if you only took a slither off at a time it would be fine?
 
I know it's not climb cutting but it is still dangerous. You might even make it work, but I strongly recommend you don't do it, because you have the stock between cutter and fence.

The rollers in a thicknesser have two functions: drive AND downwards pressure. It wouldn't work or be safe without both, and you're only applying the pressure, not the even forward drive.

You *will* end up aligned with the stock, pushing it, because it's next to impossible to push it sideways. If you do stay at the side of the stock, leaning over the fence, you can't use push sticks and you risk losing a finger (the cutter will be completely unguarded, remember, and you can't see most of it).

There will be dust and flying debris everywhere because the DX won't connect either, unless you jury-rig something with a vacuum hose, and even then...

... and back where I came in, one slip and you will wreck the stock.

The risks of that sort of thing aren't always apparent. I was designing on a cutter jig for small circles. I was beginning to get good results, then I got over confident and discovered I'd made a missile launcher instead.

E.
 
Rodger that, I'll take your advice, thanks. I haven't tried it but was looking for away to do this sort of thing myself with what I already, guess in the name of safety I'll have to buy more tools :)
 
I don't have a lot to spend, and as a consequence only have a planer/thicknesser because it came up cheaply in our local free ads paper (TradeIt, also on-line). I've had to strip it and fettle it too.

Before that, I *did* use a router table as a planer, with OK results, limited by the construction quality of my bought table and fence. I've made several small window frames and a few other bits and bobs that way.

Suggestions:
  • If you haven't got any, get two or three good engineers' squares, in very short (2") and longer sizes up to around 5-6". You'll also need a really good straightedge, as long as you can get - mine is 750mm (Axminster's are the best value I've found). This latter is for setting depth of cut. As long as you're gentle addressing the cutter, a steel one is better, IMHO, as it's less easily damaged. Ones with shaped/rounded bits on them for grab handles are best avoided. Squared off corners are best (the axi ones have a bevel, but that's OK as the other three sides are square).
  • Get the 75mm long 1/2" cutter from Wealdon - it's good quality. If you want a better finish straight off the table, you'll need a larger diameter cutter (shallower curve is the biggest reason), but that one is pretty good. Larger diameter cutters will be shorter (by a lot!), and harder to set up, but you might, for example, use a big rebate cutter in the same way.
  • The other reason for a long cutter is that it's a lot easier to check everything is square if you have more length. I'm going to buy some 1/2" silver steel bar for this purpose as it will give me a 9" "cutter" to check against - much more satisfactory.
    Get everything square, then check it again. Twice.
  • You have to split the fence. It will probably work better if you make a fence in one piece, then cut it in the middle, as the two pieces _must_ then be coplanar. Do the trick of sticking a thin shim/sheet of something to the outfeed side to determine the cut depth - make that depth very shallow (around 1mm max) and resign yourself to multiple passes. My table came with a split fence. Nothing was square to anything else out of the box and that makes it very hard to see where the problems are! Far better to DIY a fence you can trust; there are lots of designs out there, including Chris Tribe's excellently straightforward howto on YouTube. I can't emphasise enough that the quality of result depends on accuracy of setup and squareness (table to cutter and table to fence, and the exactly correct match of the cutter projection (from the fence) to the shim you add to the outfeed side).
  • Be prepared to waste a lot of stock in experiments. Softwood will do, but don't expect setup to be the instant success the experts with YouTube channels will have you believe.
  • The accuracy over long lengths of stock is quite limited. You can't really force bowed stock to be straight against a router table fence (featherboards ain't gonna hack it, neither can I with pushsticks!), so you'll get better results with stock cut close to final length - you'll almost certainly get some snipe, so allow a couple of inches at least oversize. You'll find out in the experiments!
  • Stock that's in wind is harder to sort out (it always is!). Short lengths help, but hand-planing a reference surface is the best start.
  • When it's working OK, you still have the problem of getting the stock square on four sides! You really can't make a thicknesser this way, but you can avoid horrible mistakes: once you have two flat surfaces at 90 degrees to each other, you can use your squares to mark lines across the stock (with care you can get square-ish lines across the rough surfaces). Use these for finished thickness marks. Put several along the stock, and check them with your straightedge (should be in a line). Use them as telltales to make sure you're not making a wedge shape when you 'plane' the third and fourth sides (make a second set of telltales, afresh, for side #4).
  • Don't try to get the dimensioning exact on the router table - one slip and you've wasted the stock. I did my first window frames with only a #5 and #4 planes, but they were fine for finishing. It's good exercise, anyway!

Longer list than I intended, Hope some of that is useful - I'm sure your experience will be different to mine!

Whatever you do, be safe and have fun.

E.
 
if you only have a router u can do it just not in a table.
make a jig a straight edge board with two groves 90 degrees to the straight edge bolt a fence to these grooves they can let u adjust the depth from the straight edge. put ur wood u want to thickness against the straight edge ( one edge must be straight first this will thickness not plane) clamp it and run a trim bit along ur jig making ur stock parallel! u will get break out and it won't be quick.
do u have a skill saw? a skill saw can be used more efficiently make urself a track out of mdf and use it like a festal track saw without the price tag. will let ur skill saw run against a fence giving u a straight cut.

a thicknesser was invented for a reason.
always be safe and if u see something make sure its safe post it up here.

never have a router cutting one edge of a board and the other edge against a fence very dangerous, u can only do rebate cuts on the router table going one direction as the cutting circle pushes it against the fence if ur only removing material on one side of the cutter it would pull it away from the fence and wreck ur piece possibly hurt u badly.
ur doing the right thing asking for advice here tho.
regards Rick
 
thanks guys, I will look into this all some more before attempting anything, safety is the priority :) At the moment I only have a bosch router table setup, it's really a site table, it comes with a glass fibre? split fence, so no chance of really doing too much with attachments on that but it does have a mitre slot, so maybe..... I should be getting a much better table setup once the carcass is built, which will have to have a fence built for it but crucially, I have all the mitre slot/slider stuff ready to go for that one, so it would be a case of building a jig of some description I suspect.

I don't expect to necessarily use the router table for this every time, however, I am very limited on the time I can spend working on stuff due to energy levels, so I really want it as a method to fall back on that requires less work from me (clearly there is some prep work to be done to get it setup).
 

Latest posts

Back
Top