Home-made router table

UKworkshop.co.uk

Help Support UKworkshop.co.uk:

This site may earn a commission from merchant affiliate links, including eBay, Amazon, and others.

Orion801

Established Member
Joined
28 Nov 2012
Messages
26
Reaction score
0
Location
Hinckley
I'm planning on making my own router table as part of a workbench I'm in the process of making. I plan to use an old 600w elu router that I have which is fairly small and light. I was wondering if I would get away with a base plate made of ply or mdf or if this is likely to be too weak. If anybody has experience of this type of project I'd appreciate any advice!
 
i think that over time, it might sag. but if you make it to the same size as a phenolic or metal one, yyou can replace with minimal effort. height can be adjusted with set screws, so it is only the footprint that is important.
 
My router table is home made. The top is a piece of 38mm kitchen worktop that is about 30 years old. I just created a recess in the underside of the top to accept the router, leaving about 9mm thickness and I screw my router directly to the table so I lose 9mm depth of cut which hasn't been a problem for me. The topside has a 6mm thick MDF disc which sits is a rebate but doesn't take any weight. This disc is replacable and different discs have different size holes depending on which cutter I am using. It's been good enough for the last 15 years. Ask me if you'd like more details.
 
I got by for years with an scrap Ikea wardrobe shelf with a circular recess routed in it. That was for a small router (Bosch POF500a). The lack of a mounting plate (I just drove the largest cutter through the surface!) made it easier to get a good finish, I think.

For a small router, kitchen worktop may be overkill.
 
Thanks for the tips guys. I've begun a bit of work on this, having made myself an insert plate out of 10mm mdf. Unfortunately my router doesn't have any mounting holes in the base so I'm having to use the two threaded holes used for mounting a template guide. I'm hoping that this will be sufficient but plan to incorporate some sort of feature to support the router by the two rods that can be inserted to attach a parallel fence as a safety measure to prevent the router from falling. I also intend to use nyloc nuts to prevent the mounting screws from loosening with vibrations.

I've got some bits left over to make a fence from my ts200 as I got the extension table meaning I now have a short rail and fence spare, meaning I only had to buy the connecting clamp to get a complete fence assembly! I plan to attach some mdf blocks to the fence to allow me to add in a recess for cutters.

When everything's come along a bit further I'll post up some pictures. Thanks again for the advice!
 
Orion801":27hj8tf9 said:
Thanks for the tips guys. I've begun a bit of work on this, having made myself an insert plate out of 10mm mdf. Unfortunately my router doesn't have any mounting holes in the base so I'm having to use the two threaded holes used for mounting a template guide. I'm hoping that this will be sufficient but plan to incorporate some sort of feature to support the router by the two rods that can be inserted to attach a parallel fence as a safety measure to prevent the router from falling.

Easiest way to use the bars for support. With the bars in the router and the router on a flat surface. Measure to the top of the bars. Get an off cut of timber, drill 2 holes in it at the same centre hole distance as the router base and the same or slightly smaller diameter of the rods. Then drill 2 more holes in the timber after turning it 90 degrees. Then cut the timber down the length /centre of the timber, cutting through the 1st set of holes. You then have 2 clamps. Drill your mounting plate for the counter sunk bolts and bolt through both the mounting plate/ clamps and tighten :)
 
I like the clamp idea. Think ill give that a go!

I couldn't see any screws holding the sub base in place, I believe it must be glued in place. Thanks for the suggestion though
 
Well having procrastinated rather a lot I have finally got round to (almost) finishing this off. Here's a few photos.

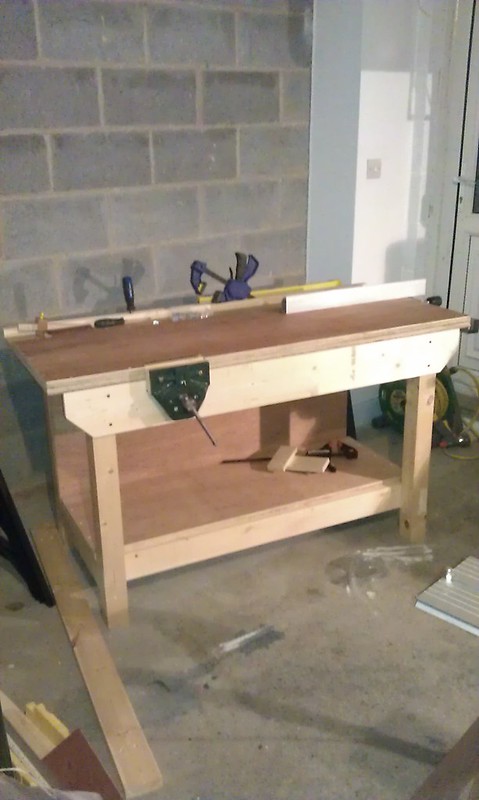
Workbench with fence mounted. Several angle brackets bought from Screwfix used to fix the short rail from my TS200 tablesaw (now replaced on the saw with the long rail that comes with the extension table). Had to buy an additional clamp to mount the fence to the rail but otherwise just used spare parts from the saw (which comes with both a long and short rip fence, currently using the long one on the router table and short on the table saw).


IMAG0187 by Orion801, on Flickr

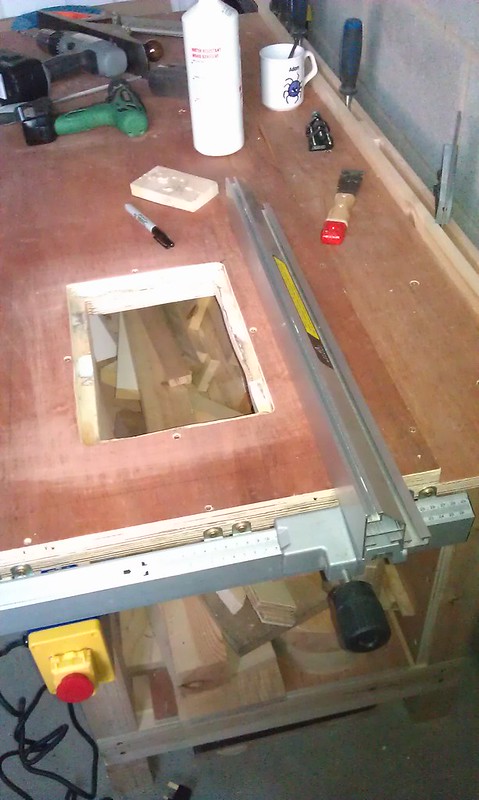
Opening cut out for insert plate and NVR switch added. Not the neatest of work with the router unfortunately but does the job.


IMAG0211 by Orion801, on Flickr

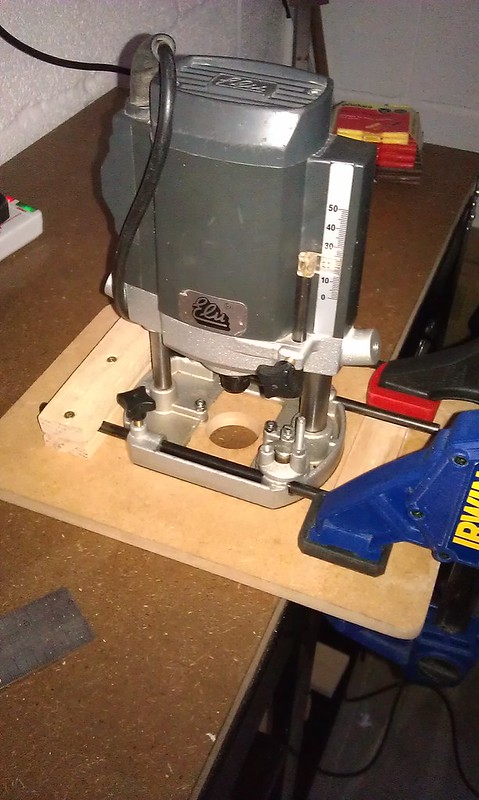
Insert plate - router is held in place by two screws into the template guide holes which are then secured with some nyloc nuts. I've also made a clamp as suggested earlier out of some offcuts (only one completed in the photo as bottom section of second one is being glued in place. The final assembly has one on each side).


IMAG0206 by Orion801, on Flickr

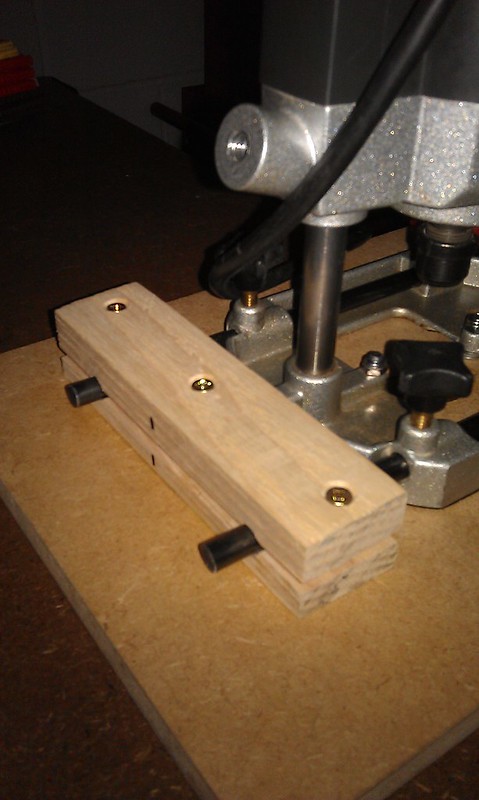
Close up of the clamp.


IMAG0207 by Orion801, on Flickr

Finished table along with a test piece with a couple slots routed out. I've used some sections of 18mm ply held in place by some spigot clamps to create an auxiliary fence. I've also drilled a hole in a jubilee clip and fixed it to the t-track on the top of the fence to allow me to hold a vacuum attachment in place for dust extraction (still makes quite a lot of dust but seems to pick up most of the fine particles which is what counts!).
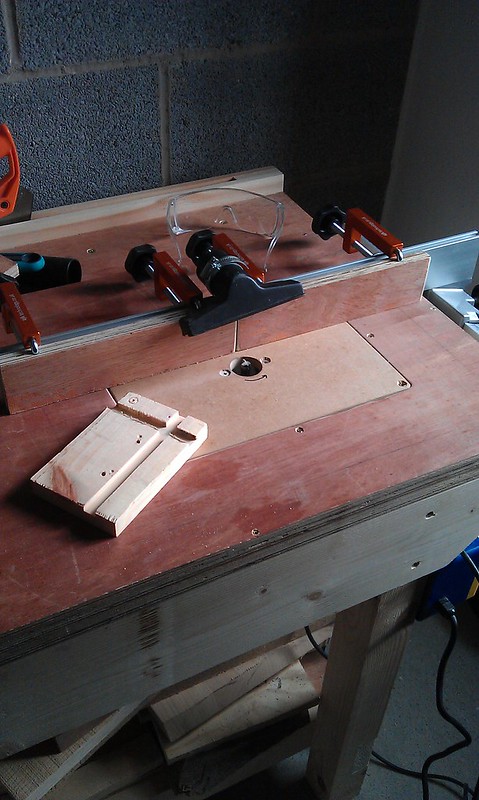

IMAG0218 by Orion801, on Flickr

It's now in a fully functioning state at last which is nice. I still intend on routing out a channel to fit some t-track parallel to the fence which I will then use for featherboards and jigs. I may also route out a second channel that my TS200 mitre guide will fit in (unfortunately a different size to the t-track for the featherboards).

I'm very happy with the initial results, it probably isn't as accurate as a shop bought one but is certainly a hell of a lot cheaper as well as having the satisfaction of knowing it's something I made myself.

Thanks to everybody on here for all of their suggestions.
 
Back
Top