Hill LATE Howel Backsaw

UKworkshop.co.uk

Help Support UKworkshop.co.uk:

This site may earn a commission from merchant affiliate links, including eBay, Amazon, and others.
Richard T":1gttf2ns said:
I stand educated and corrected. If these saws were designed to be so shallow - go for it.

I don't think the pitting is too bad is it?

No, its fairly ok Richard...well for the age anyway! The patina is the standard beautiful dark grey and there is the occasional pitting but not too close to the cutting edge.

Jim
 
Saws have certainly got smaller over the years - Gramercy then Wenzloff Carcase saws with their D/T versions below:

gwsaws2.jpg


Ian of Tuffsaws used to sharpen saws - here's some clean up work I did on my Grandfather's saw (Leeds is my home town)

willey1tk9.jpg

fwts2ln3.jpg

willeysawrenvy6.jpg
 
Rod - that is a serious battery of very fine saws! I must admit that your Grandfather's is my personal favourite of those (Tyzack Non-Pareil, I think, if the little elephant is anything to go by). There's something a bit special about using a fine quality inherited tool.

On the subject of steel gauges (or gages) - things get a bit complicated. There was no British Standard Institution until about 1900, so before that (and indeed for some time after) several trade and local standards were used. According to Machinery's Handbook, 11th edition of 1942, the Birmingham Gauge legalised in 1914 was used for iron and steel sheets and hoops, but differed from the older Birmingham Guage or Stub's Iron Wire Gauge. The figure quoted for the older 'Birmingham or Stub's Iron Wire Gauge' number of 23 is 0.025".

I think there's scope for further research on historical steel sheet 'standard' thicknesses - any other contributions gratefully received!
 
Rod...there are times when I can be so green with envy...that I could disappear against a bush!

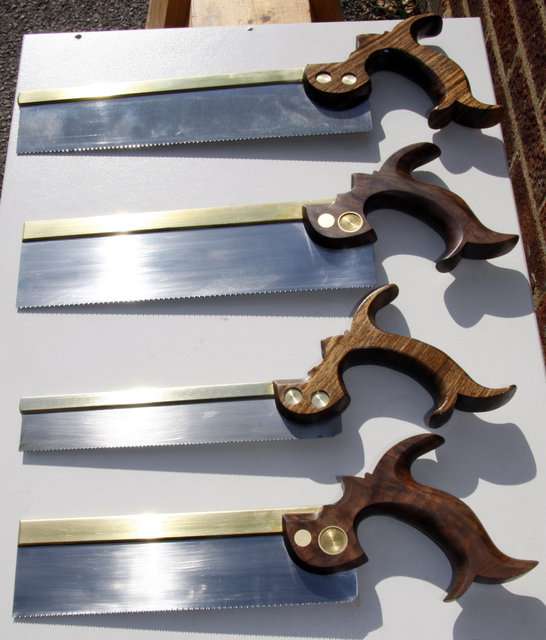
Stunning saws indeed mate...and thanks for the education.

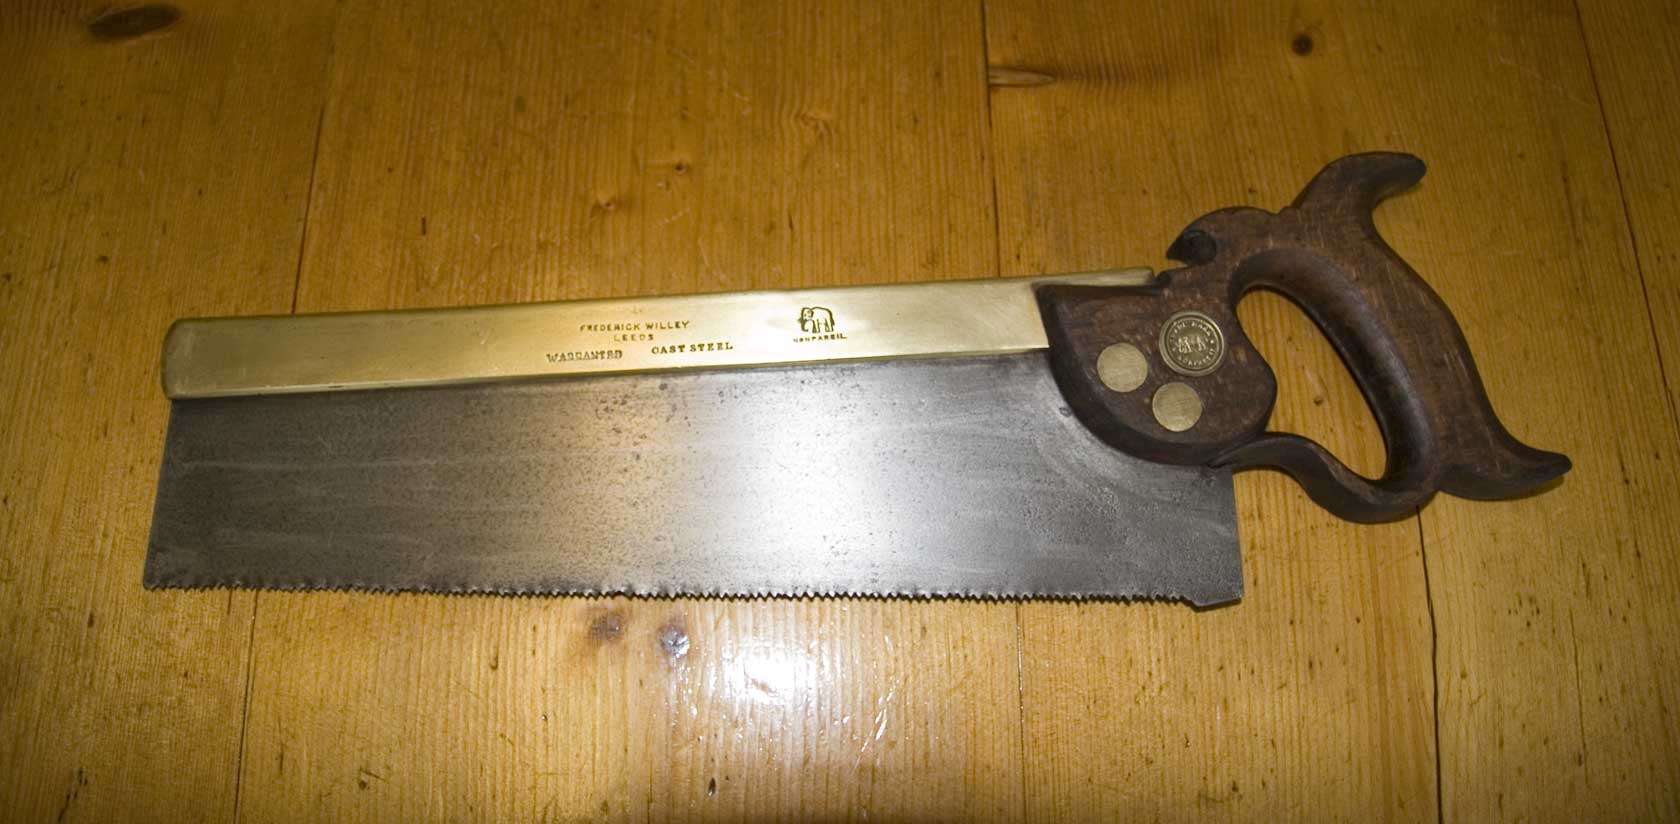
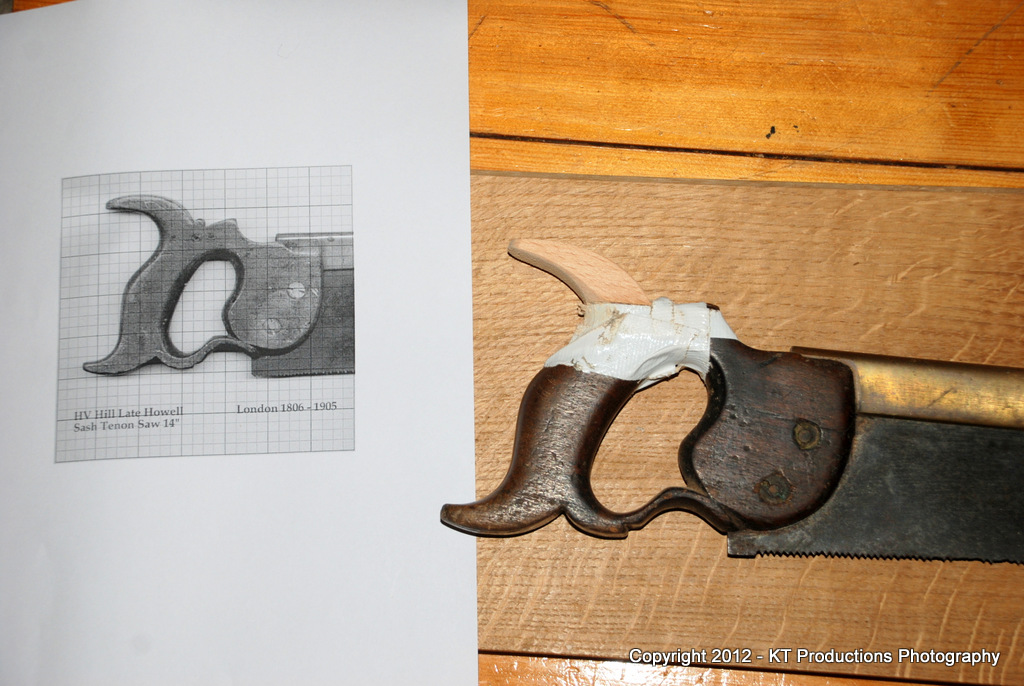
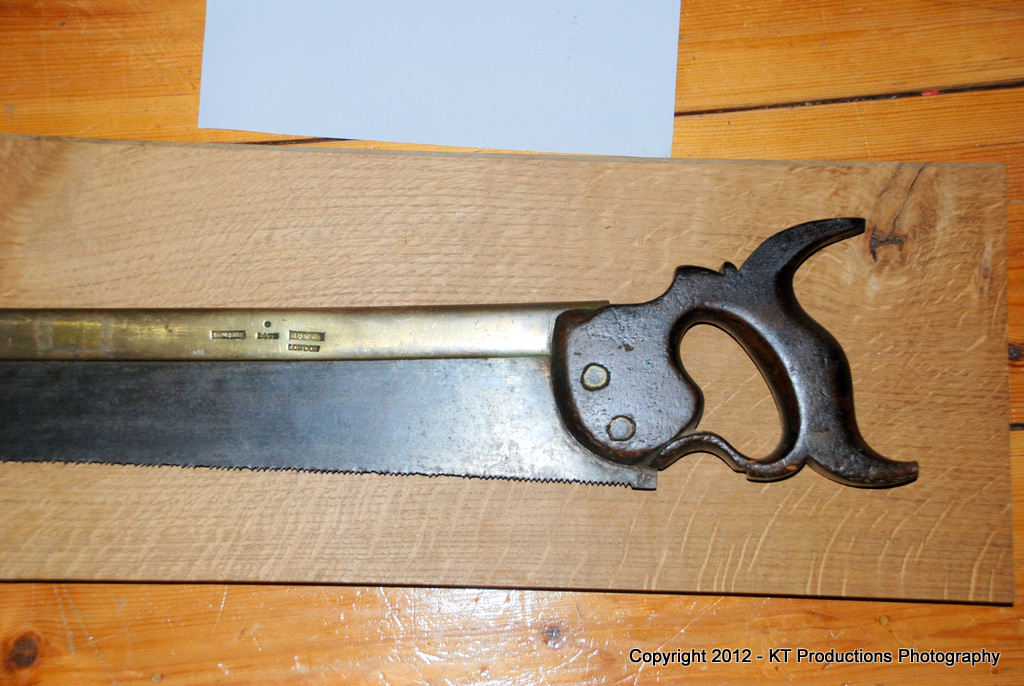
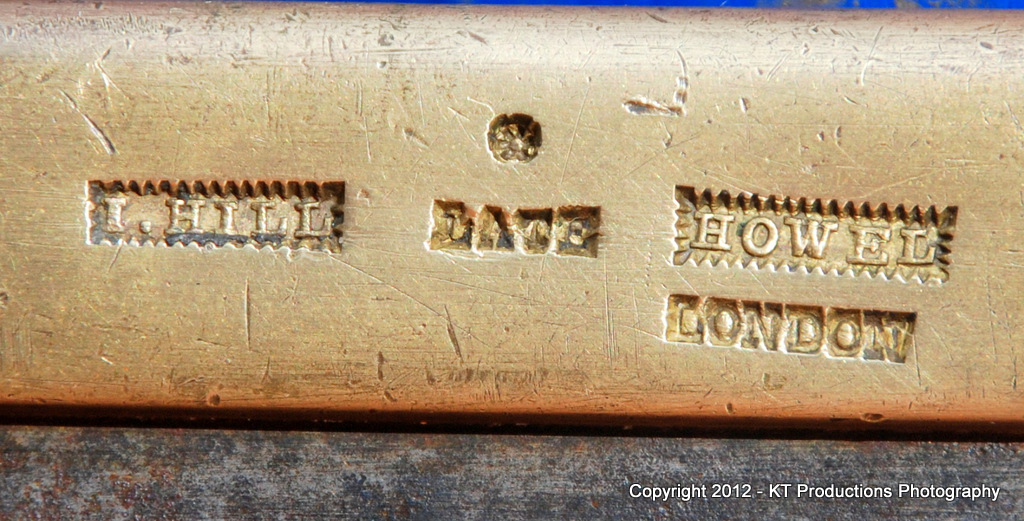
CC...thanks also for your research...I have to get a micrometer on the plate on the Hill....interesting indeed.

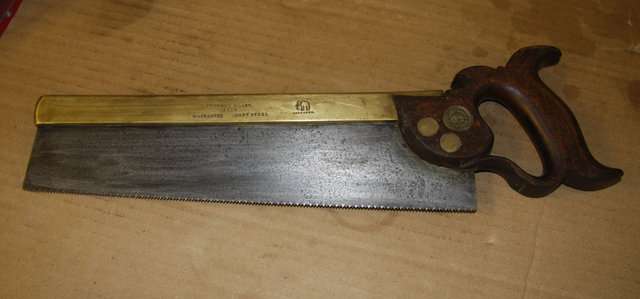
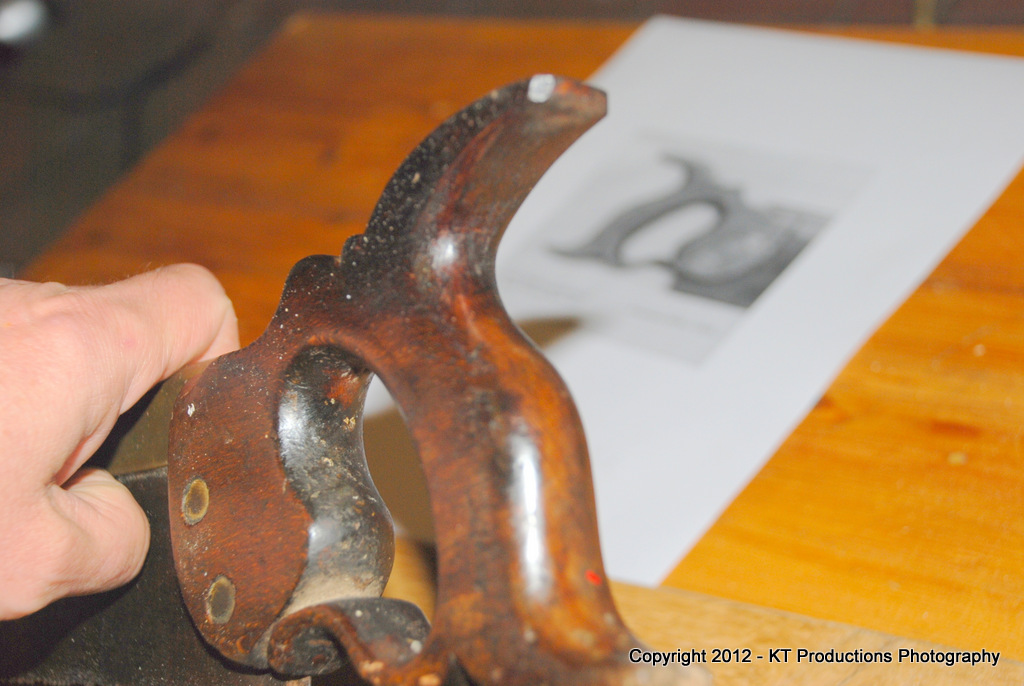
Ok....now...my patience being what it is and my confidence in Pedder's ability being very high...I decided not to wait but fix that horn...as the imbalance was doing my head in!

So...once again a few WIP pictures.

I gave up on the idea of the dovetail. That was silly! Only one shot at it and no going back...I didn't want to hack anything more than I had to out of what was left of the old handle.

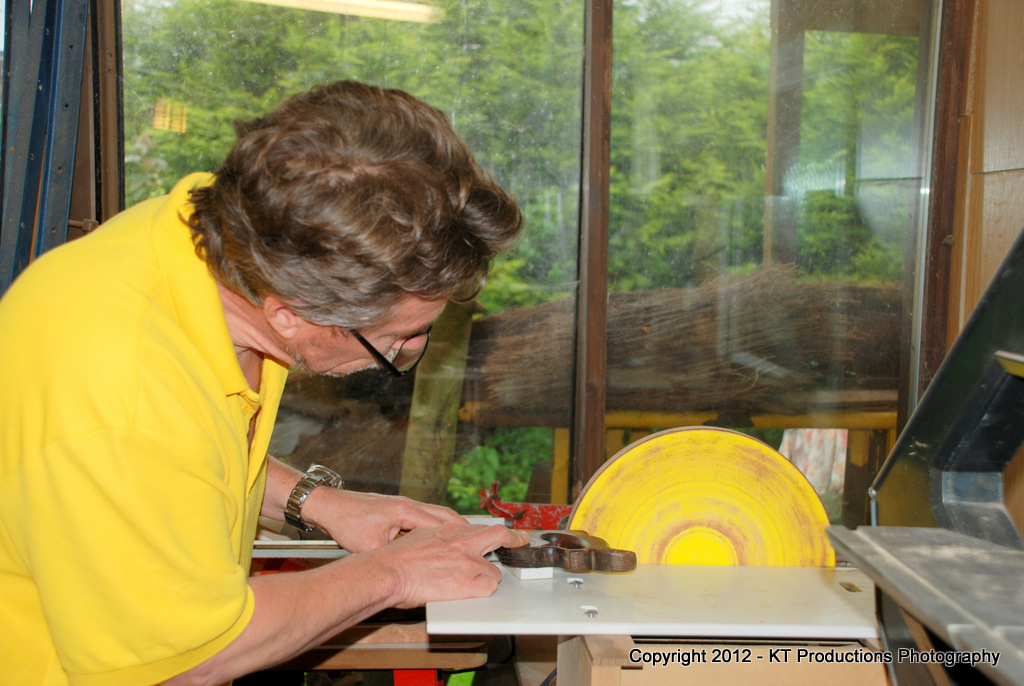
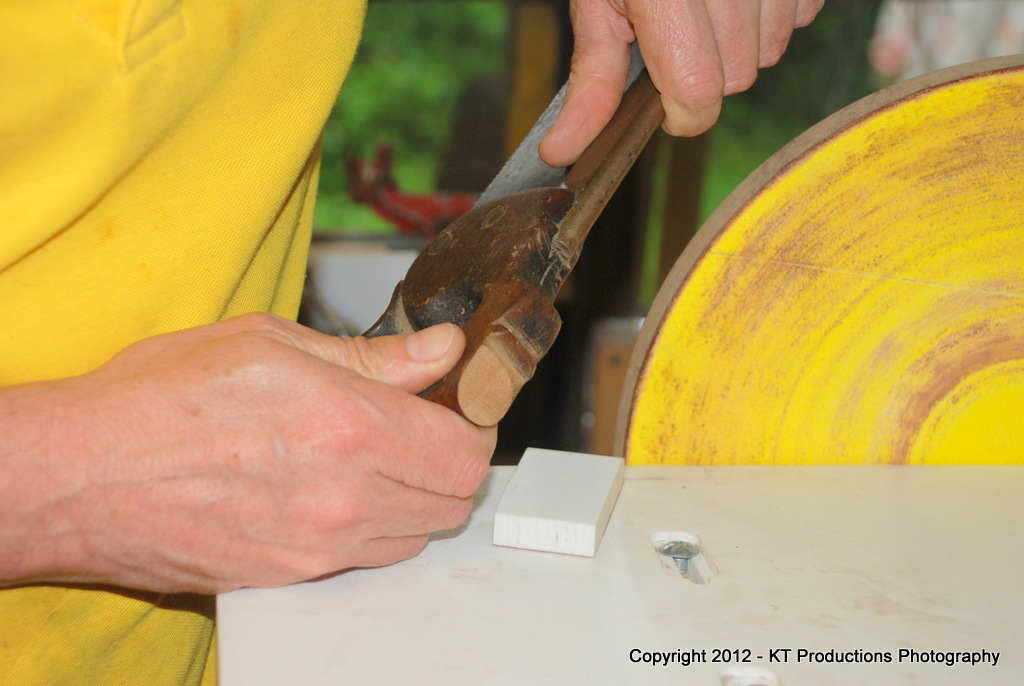
So...rule no.1 of repairing using a butt joint...flatten the stock.....

DSC_2059.JPG


The disc sander is perfect for this as long as the saw was supported horizontally it was easy to sand the stub down....

DSC_2062.JPG


...this left a nice flat surface to mate the new piece to....

DSC_2064.JPG


Just a little more to come off the right side as you can see.

Ages ago when I was trading antiques...I saw on Freecycle a post offering a "commode". Thinking this would be an antique one...I asked for it...was successful and picked it up.

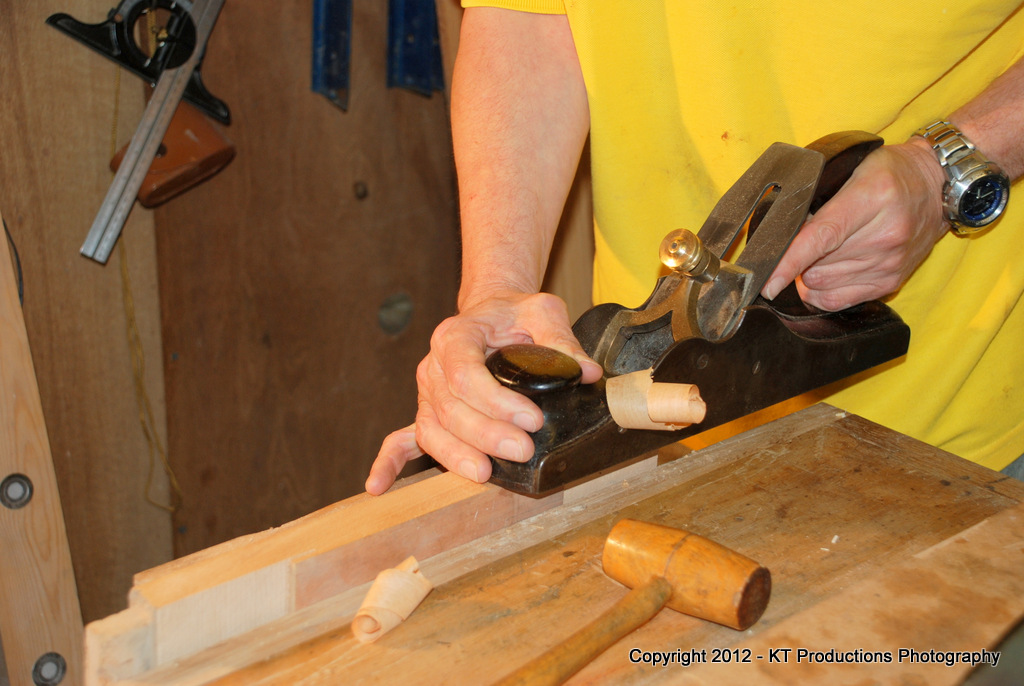
To my horror it was one of those beech framed ones with a plastic potty in it....but I didn't have the heart not to take it so I threw away the plastic bit in the nearest bin and chopped up the wood....some nice beech indeed was revealed. This is a leg:

DSC_2058.JPG


Not quite as old as the saw but nice all the same...and after a quick skim with the old panel plane...perfectly flat.

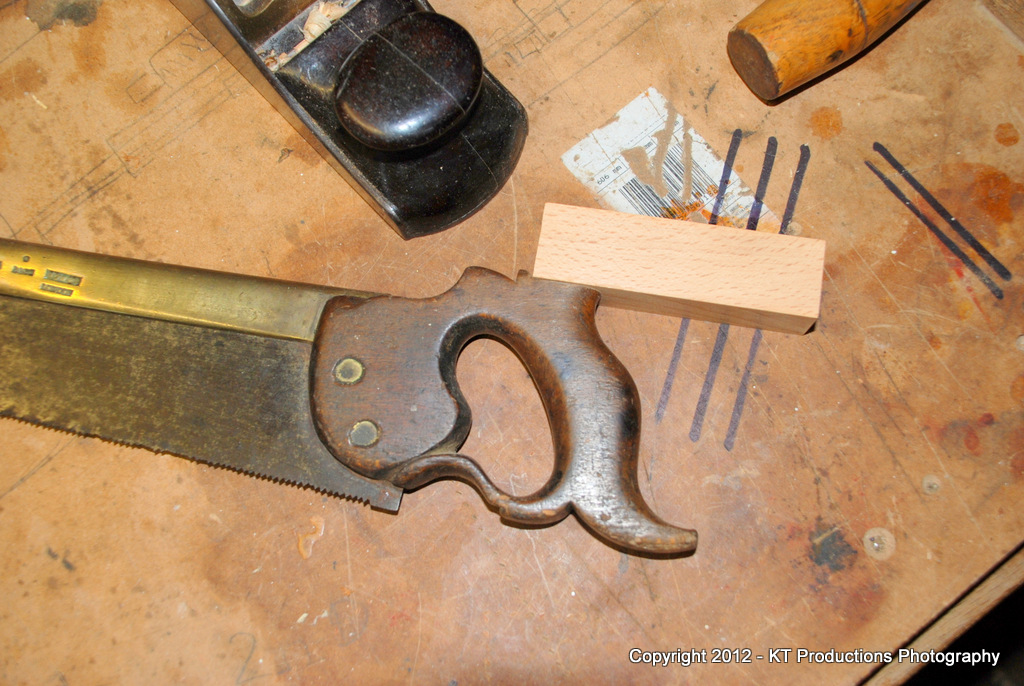
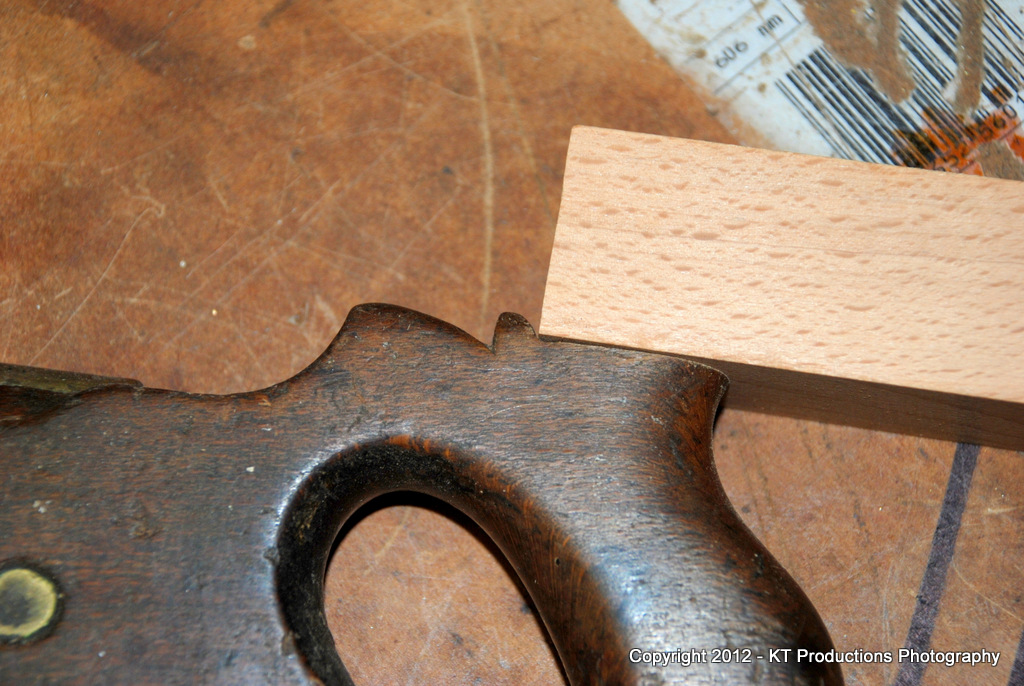
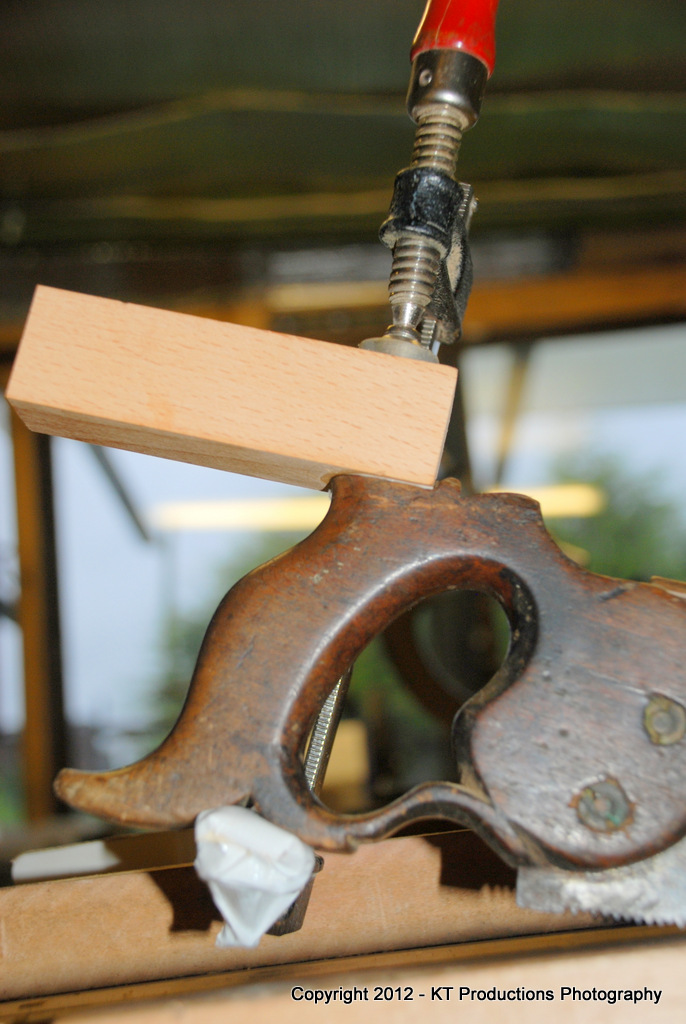
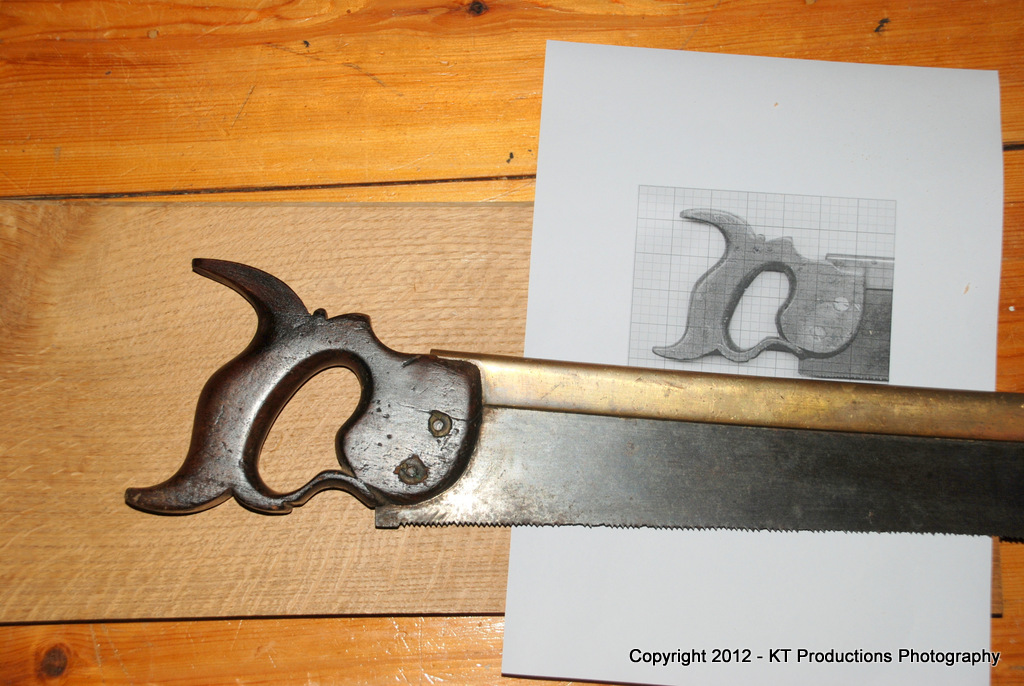
I then cut a piece of with the grain going in the right direction and tested it against the handle:

DSC_2068.JPG


A perfect mating....

DSC_2066.JPG


I always use a lot more stock that I need...I once used a tiny bit too little and now go a bit over the top... :mrgreen:

DSC_2072.JPG


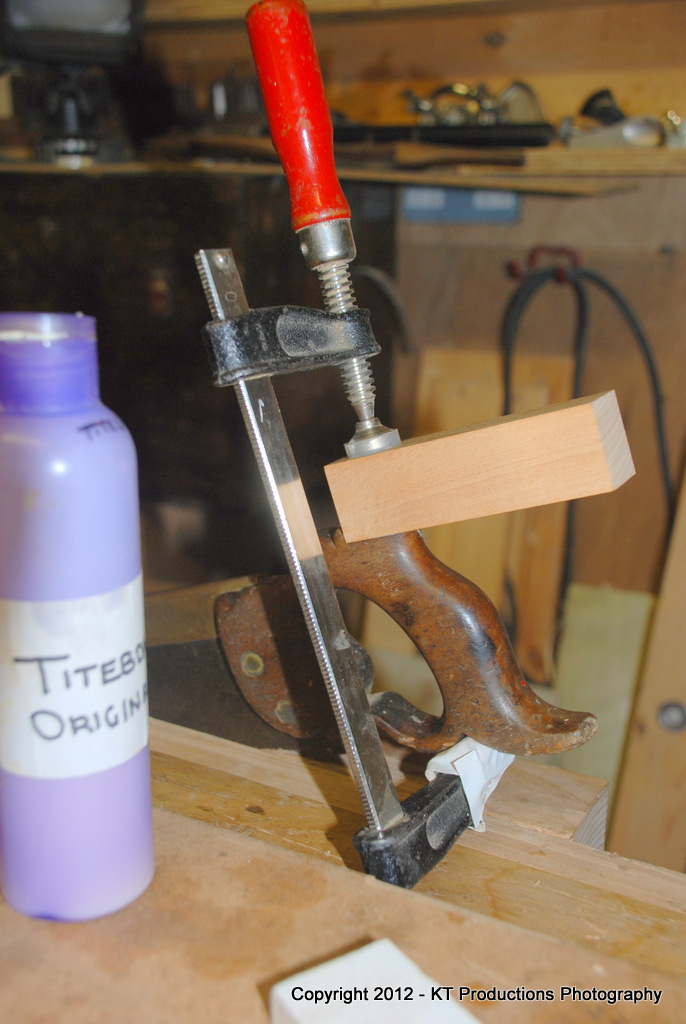
Titebond Original is the glue that I have always used for these joints...it really works for me and it stronger than the wood under tests that I have done on scrap stock with a hammer. It split the wood.

This applies even to a butt joint..which doesn't have any physical lock like a dovetail.

Careful clamping is a must with these old handles..I don't want to bruise the old wood...

DSC_2079.JPG


Luckily the bottom curves join to form a nice stable lock....and add a pad with duct tape and cotton wool helps protect the wood further.

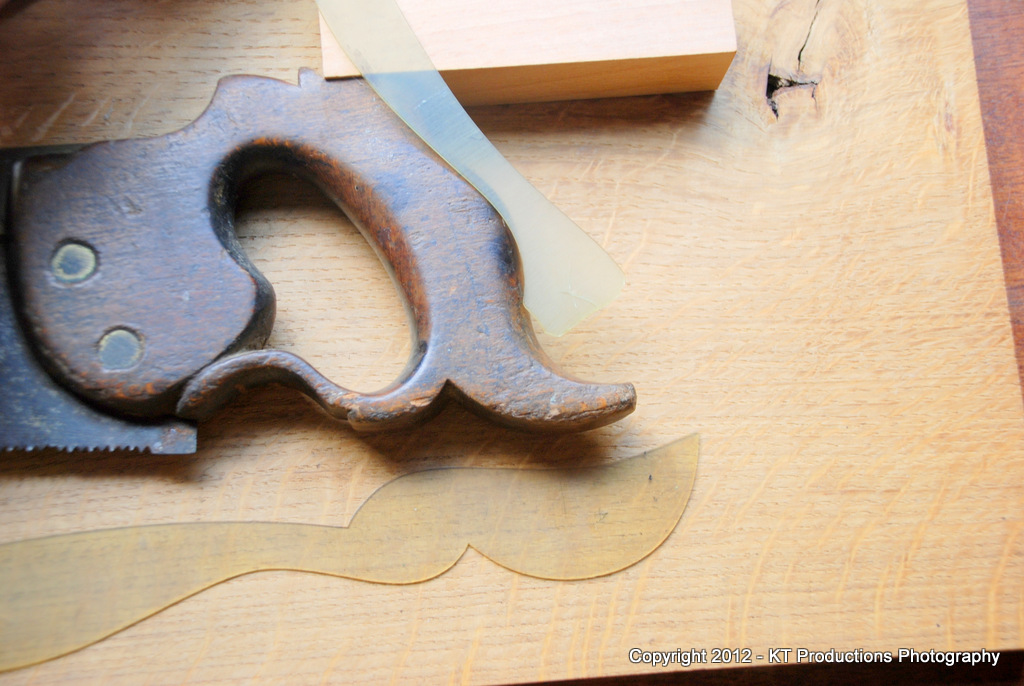
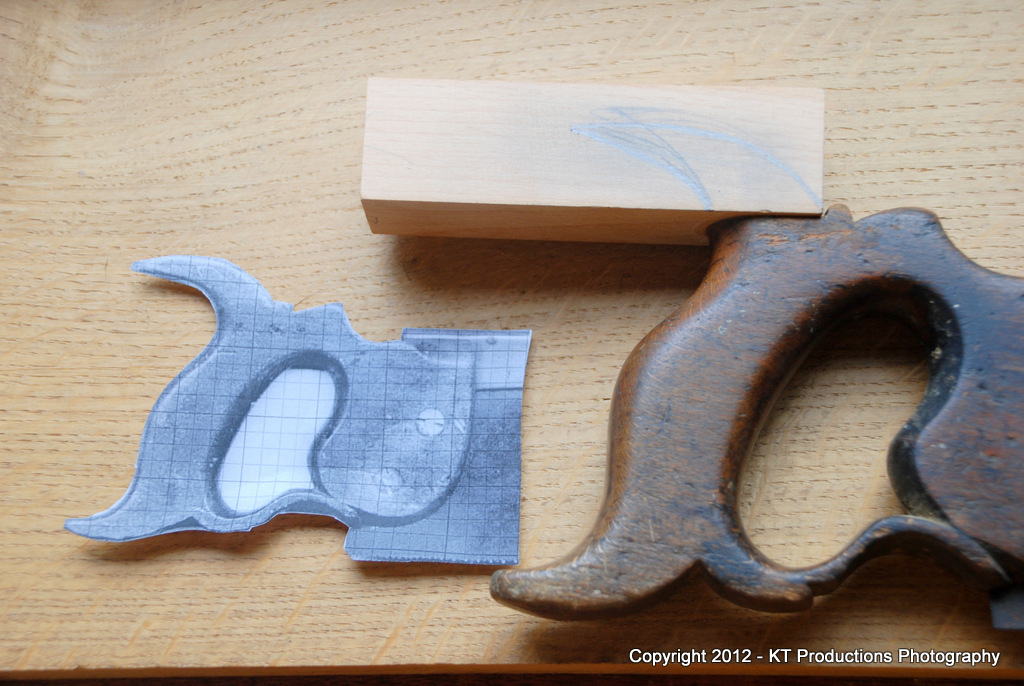
Ages ago at a bootfair I picked up what I thought was a set of very old celluloid French curves...

DSC_2089.JPG


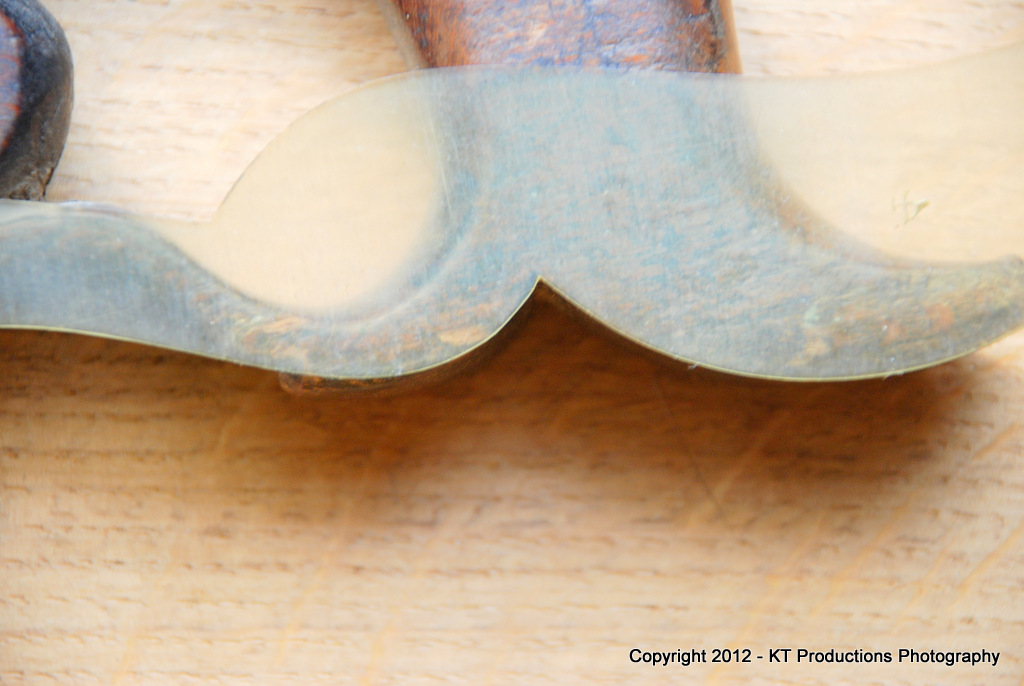
Digging them out of the drawer...I discovered that they matched the shapes on the handle perfectly!!!

DSC_2084.JPG


This one has a very old No.4 stamped on it....and I wonder if these were a set actually used by a saw maker. A bit of a coincidence if not!

From a Howel template on the Net....I discovered that the other way round matched the top horn...brilliant! I can use it as a guide!

DSC_2104.JPG


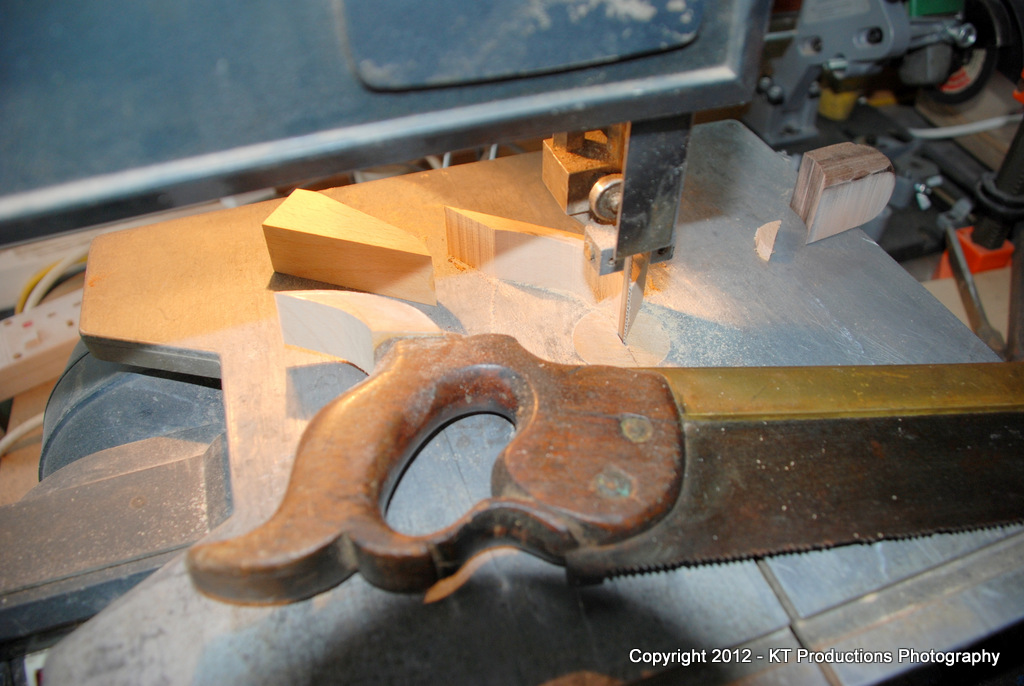
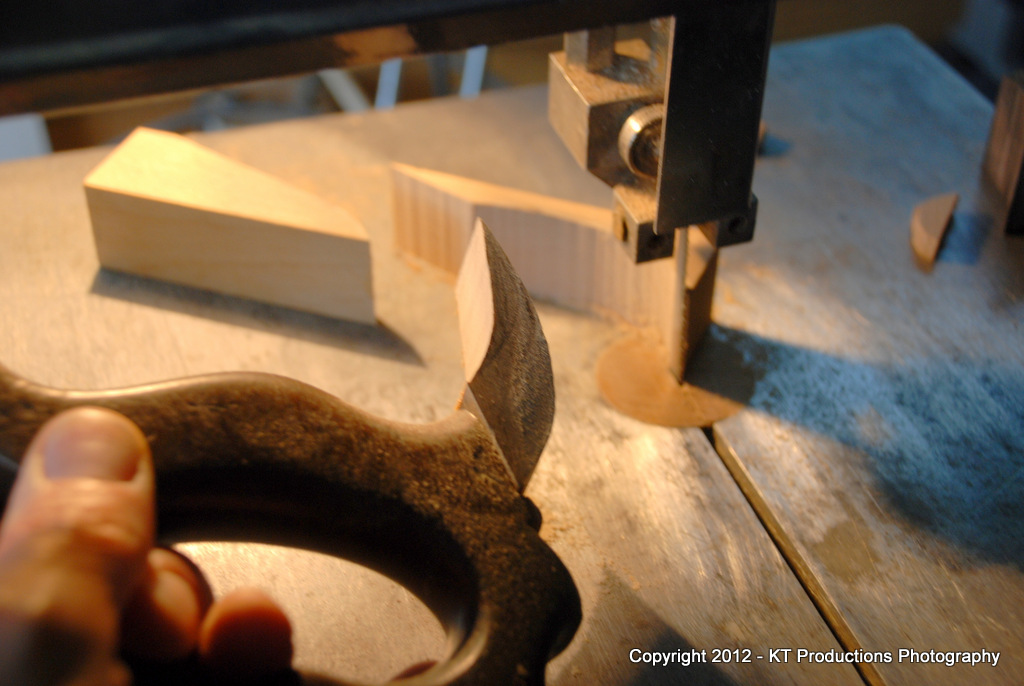
I made a couple of pencil marks to compare to the template so that I got the right one and then ran it through the Burgess with the Tuffsaw blade which made swift work of the excess...

DSC_2105.JPG


....but tracked the line perfectly..with a little bit over to make adjustments as I finish the stock with rasps and shaves...

DSC_2109.JPG


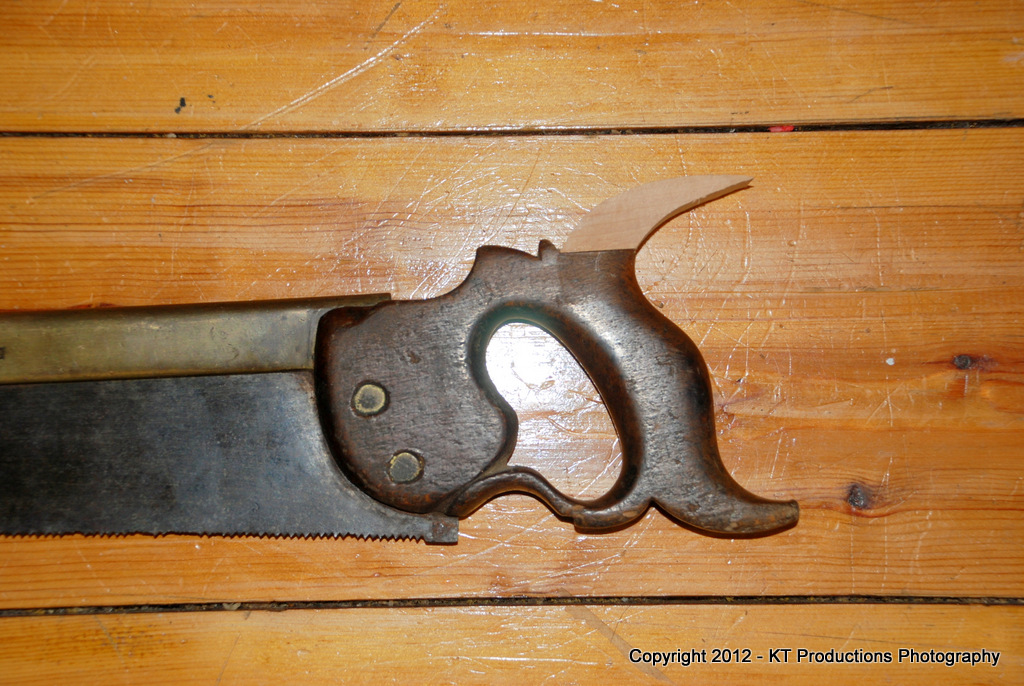
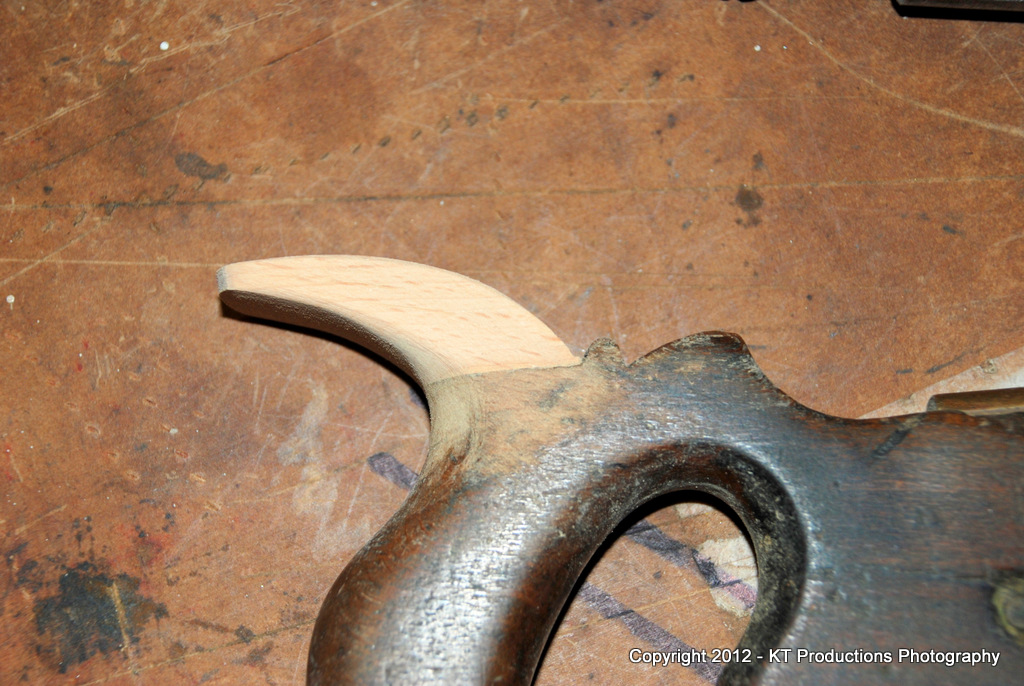
Not a bad profile....

DSC_2110.JPG


The internal curve needs a bit of adjustment to line up in a nice curve with the handle...

DSC_2111.JPG


....constantly checking against the template. Note at this stage the extreme of the old handle is taped up to protect the finish as much as possible.

DSC_2114.JPG


That's better!

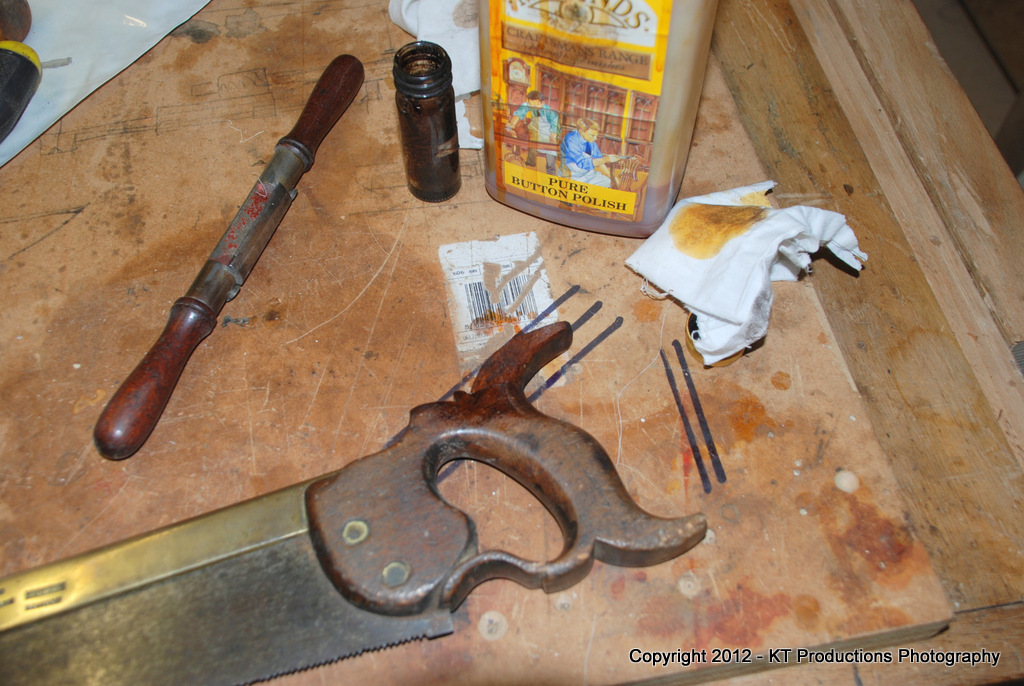
A number of layers of stain are used to try to lay a foundation that will match the original when polish is added and blended in...

DSC_2115.JPG


This is locked in with a thin layer of button polish and this helps blend the two parts.

Once dry...000 wire wool is used to blend the finish...and a single layer of button polish is used over the whole handle.

DSC_2117.JPG


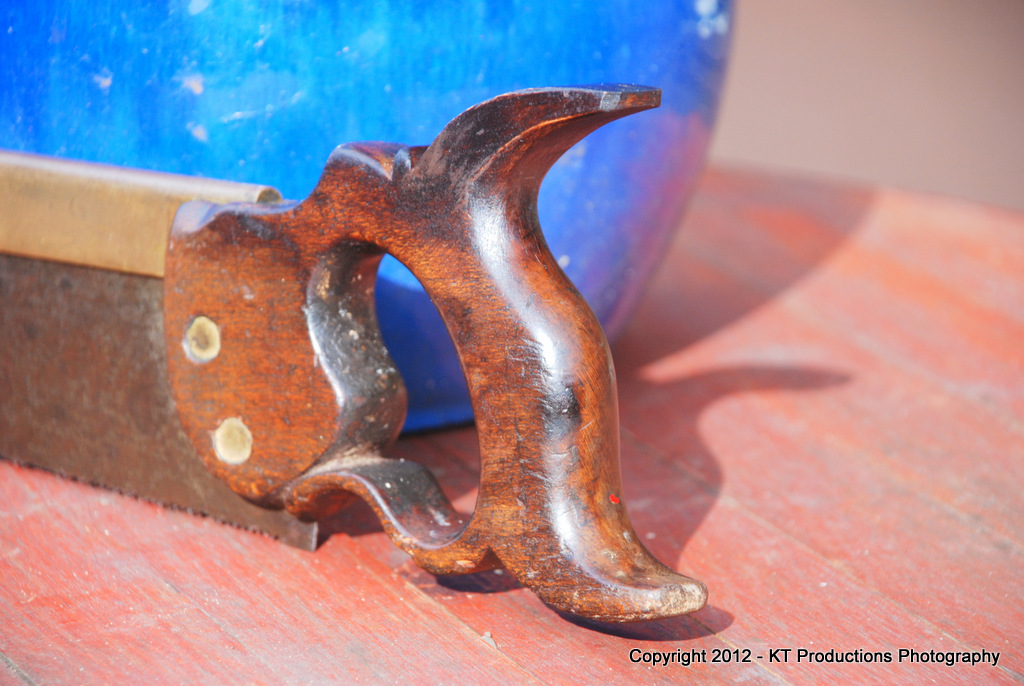
And the other side....

DSC_2118.JPG


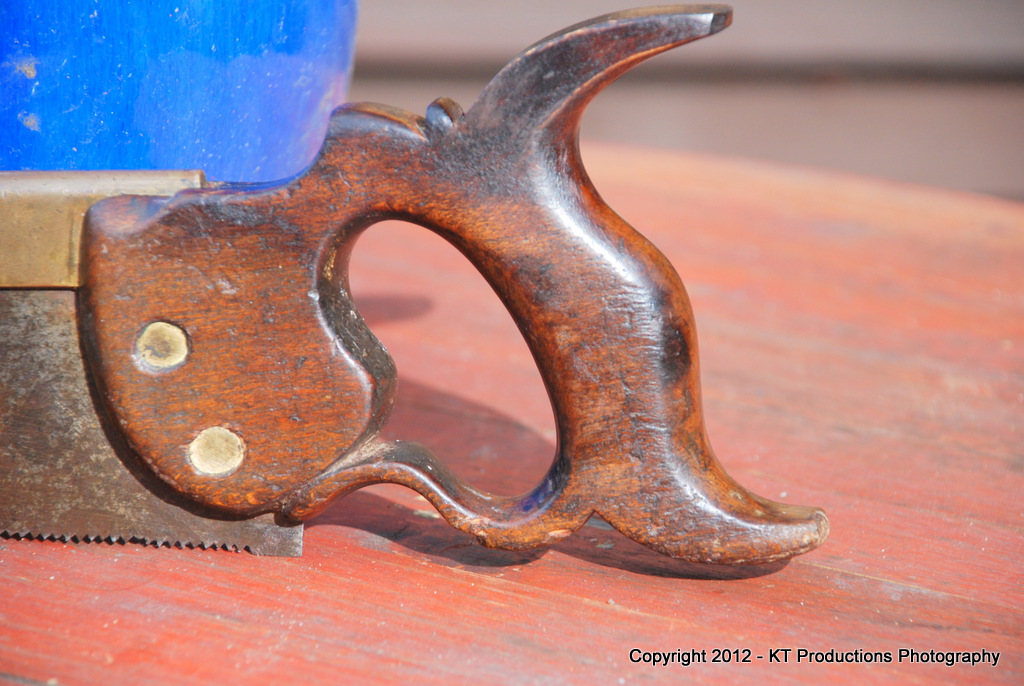
Once this has hardened off...I will take the shine off the whole thing and distress it further to match...but for now...

DSC_2119.JPG


I'm quite pleased with the outcome and a bit of my wax formula will later tone everything down to original.

Now all I need is to get the blade fixed! :wink:

Jim
 
Nice job Jim - I love those horns!

I got a bit carried away with the saws I picked them up in NYC a few years back - the Gramercys as kits.

CC - the saw is a Tyzack marketed by Frederick Willey, Corn Exchange, Leeds in the late 1800's. I also have a Willey Handsaw. My family come from Leeds and it may have belonged to my Great Grandfather who was a Wheelwright?

Rod
 
Lovely looking job again there Jim, and a useful reference for anyone else too.
What a bit of luck with those celluloid curves! Total justification for buying odd things just in case they come in useful - if anyone decided in advance that they wanted to buy a set of saw handle templates, I think they'd be looking for a very long time!

The challenge is now back on though, for you to find a saw with a nice brass back which is beyond the redemptive powers of Corrodip, Pedder and your special wax formula!
 
Harbo":17pw7g2j said:
Saws have certainly got smaller over the years - Gramercy then Wenzloff Carcase saws with their D/T versions below:

gwsaws2.jpg


Ian of Tuffsaws used to sharpen saws - here's some clean up work I did on my Grandfather's saw (Leeds is my home town)

willey1tk9.jpg

fwts2ln3.jpg

willeysawrenvy6.jpg

I have just had dry sex!!
 
Brilliant job again Jim, superb results and a clear WIP.

Posts like that should be in a sticky thread of their own for easy future reference, IMHO. 8)
 
Jimi - that looks a LOT better. The handle looks balanced and comfortable now; it looked downright uncomfortable to use with the top horn missing. Just needs a quick trip to The Dentist now. I'd try it without doing too much blade-cleaning - I don't think the current patina will affect it's performance adversely at all, if my Drabble and Sanderson is anything to go by.

Speaking of D&S, Pete was asking if anybody knew anything about them. I've not been able to find much, but from a perusal of www.backsaw.net I have learned the following; the first reference to a Benjamin Drabble of 29, Long Croft, Sheffield (saw manufacturer) is in 1822. Drabble and Sanderson of Ebenezer Works, 37 Russell Street, Sheffield (steel refiners, saw, file, and calico web manufacturers) are listed in 1841. There are several trade directory entries through the late 19th and early 20th centuries, the last being for Drabble and Sanderson Ltd, Elect Works, Savile St East (saw manufacturers) in 1925. So it seems the firm had a long life - formed before 1841 and lasting until at least 1925.

Now - reference to 'London' on Pete's saw back. I think this refers not to the geographical location, but to a saw quality grade. Reference is made in the book, 'The Tool Chest of Benjamin Seaton' to there being four (later five) grades of saw made in Sheffield, namely Common steel, German Steel, Cast steel and London Spring steel. The latter were of the best grade of crucible cast steel, tempered to a spring temper, hammered, ground and glazed (polished). The practice of grading so was fairly new in Benjamin Seaton's time, apparently; but carried currency for at least the first half of the 19th century and possibly longer. So 'London' in this case means 'premium quality', not 'made in London'.
 
very impressive Jim, do you own any clothes in colours other than yellow?? :lol:

strange that between us we own 4 of these beauties, that have been scattered nation wide.

how many makers would there have been in the factory that made these?

adidat
 
Cheers guys!

Rod...that Frederick Willey is lovely...and of course...the modern ones are sublime but I think I'll stick to collecting old ones...with possibly one exception! :wink:

Yes Andy...I do now have the same problem as before...no brass back which is interesting enough to showcase as stamps but destroyed enough as a saw to be a donor...will keep searching!

I did a bit of distressing today...it is easier to do this in the sunshine as you can see what you're doing that way!

The key to distressing is to camouflage the join by emulating the wear and damage, grot and crud of the surrounding original wood.

DSC_2132.JPG


Notice the palm grip and the front of the handle near the back join are both darkened over the centuries and other areas where contact is made by the hand are worn light....

DSC_2133.JPG


You can clearly see the shape of the hand as it sits when in use.

To disguise the line of the join the darker you can get the wood either side (assuming the join is accurately mated)...the easier it is to make it disappear. And fortunately the join was in the area where one would expect darkened staining.

Couple with with some wear marks showing through to the lighter wood along the edge of the horn and you end up with a result which hides the repair to the best effect.

Of course...age is the best healer and soon, with use, the repair will disappear into the background.

DSC_2131.JPG


Just a passing word about cleaning brass and particularly stamps and marks....the only real way to clean out the area with the minimum disruption to the patina is with a toothbrush and soapy water.

DSC_2134.JPG


The original stamp was full of decades of impacted grime...but now it's beautifully legible (although there is a bit left under the I.HILL I see!)....and the patina is mostly surviving and will oxidise back to match the rest of the back in no time at all.

And now we can clearly see the little dot...is in fact a sun with little rays inside! Wonderful!

And no Chris...I only have yellow clothes...ALL Smurfs do ya know!! :mrgreen: :mrgreen:

Jimi
 
Hi Jim,

I was offline for two weeks and missed this thread. Just send me the saw, I will try my best. Or replace the blade if I fail.

Great job on the repair!

Cheers
Pedder
 
pedder":ikj7bno2 said:
Hi Jim,

I was offline for two weeks and missed this thread. Just send me the saw, I will try my best. Or replace the blade if I fail.

Great job on the repair!

Cheers
Pedder

Hi Pedder...

I thought you must have been away for a while....

Thanks for the offer...I know how much you enjoyed Robert but this one "Harry" is quite cute too!

I have PMd you back and will pop it in the post at the earliest opportunity....

Cheers and thanks again

Jimi
 
Well, things have not stood still since I last posted!

Some good news and some bad news....

Harry was sent to Germany this week for some remedial surgery by the excellent hand of our friend here...Pedder of Two Lawyers Toolsworks and for those of you who don't know them....CLICK HERE

Firstly...the steel after almost 200 years has finally given up to fatigue...and is too brittle to set even if it could be resharpened.

pedderupgrade1.JPG


Pedder did a fantastic job of preserving the old saw screws...which if you all remember were well embedded in the wood...a result of the over-tightening needed to secure the handle over the years after the holes in the old steel fractured and perished.

pedderupgrade2.JPG


You can see in the next picture how terminal the corrosion has become...water ingression at the handle joint.....

IMG_0005.JPG


The holes had also elongated quite extensively over the decades...

pedderupgrade6.JPG


I had left Pedder free reign to do whatever he felt necessary and if he felt that a new set of teeth were needed now to preserve the great name...so be it.

I would rather one new great name be responsible many years after another great name made the saw to restore the tool to what a tool does best...work with wood and not in a museum!

It's not a rare maker in the great scheme of things....it still has its pedigree...and I now have a new tenon saw...by two of the great makers of fine saws...many many moons apart.

Let me introduce you to "HARRIETTE!"

pedderupgrade7.JPG


I am sure that both the LATE Mr Hill....maker of the LATE Mr HOWELL's saws would smile a wry smile for this fine saw to preserved in such a way by probably the finest makers of saws of our time!

Enjoy.....

pedderupgrade9.JPG


pedderupgrade8.JPG


I would like to say a HUGE thank you to my dear friend Pedder....a wonderful tenon saw...which I can indeed use to crosscut hardwoods too!

Cheers mate!!

=D> =D> =D>

Jimi
 
Good grief Jim - and Pedder - that's fantastic. Using an old saw to make ..... a saw! Makes a nice change :) It will have to wait double the time for it's Carter treatment.
What a great resurrection. =D>
 
Hi Pete,

I was a little sorry, I couldn't save the old plate, but when I test set the saw, the teeth flew away.
This blade seems to be a little small, too, but it is only 0.5mm thick so deeper was no option.

I Like the way she cuts now. At 11 tpi she's fast and smooth.

Why "she" in German saws are femal only handsaws are (male) part of animals (fox tails Fuchsschwanz).
So it has become a running gag between Jim and me.

Cheers
Pedder
 
jimi43":2c2mhmeo said:
Just a passing word about cleaning brass and particularly stamps and marks....the only real way to clean out the area with the minimum disruption to the patina is with a toothbrush and soapy water.

DSC_2134.JPG


The original stamp was full of decades of impacted grime...but now it's beautifully legible (although there is a bit left under the I.HILL I see!)....and the patina is mostly surviving and will oxidise back to match the rest of the back in no time at all.

I'm fairly sure that most solvents wouldn't remove patina - I'd have tried meths and/or white spirit to get the grot out of "HILL", again on a tooth brush (suede brush at the max)

BugBear
 
Back
Top