


scholar
Established Member
Paul's thread on retrofitting Veritas vices reminded me that I was going to post some pictures of my recent flattening of my workbench.
I have had this for a few years, having bought it from the great Tom Lie-Nielsen himself at one of the (much missed) Axminster shows.

btw, I definitely did not pay the £1300 that the sticker was asking for - it was the final day of the show and Tom did say I made him cry...
The advice from Lie-Nielsen is to flatten the top every year or so and I had never done this, although tried rather half-heartedly once, but didn't get very far as the maple is blinking hard and the grain direction is all over the place, so I repeatedly put it off.
I finally decided to bite the bullet when I needed to glue up and cramp some 8' flat panel doors to the bench and I wanted to eliminate all risk of twist as they needed to match precisely in pairs (to be joined by Soss hinges, but that is another story).
I pretty much followed the really helpful guidance here http://www.highlandwoodworking.com/flat ... outer.aspx, although I made a more robust solution for the side rails for the router sled to run on as shown below.
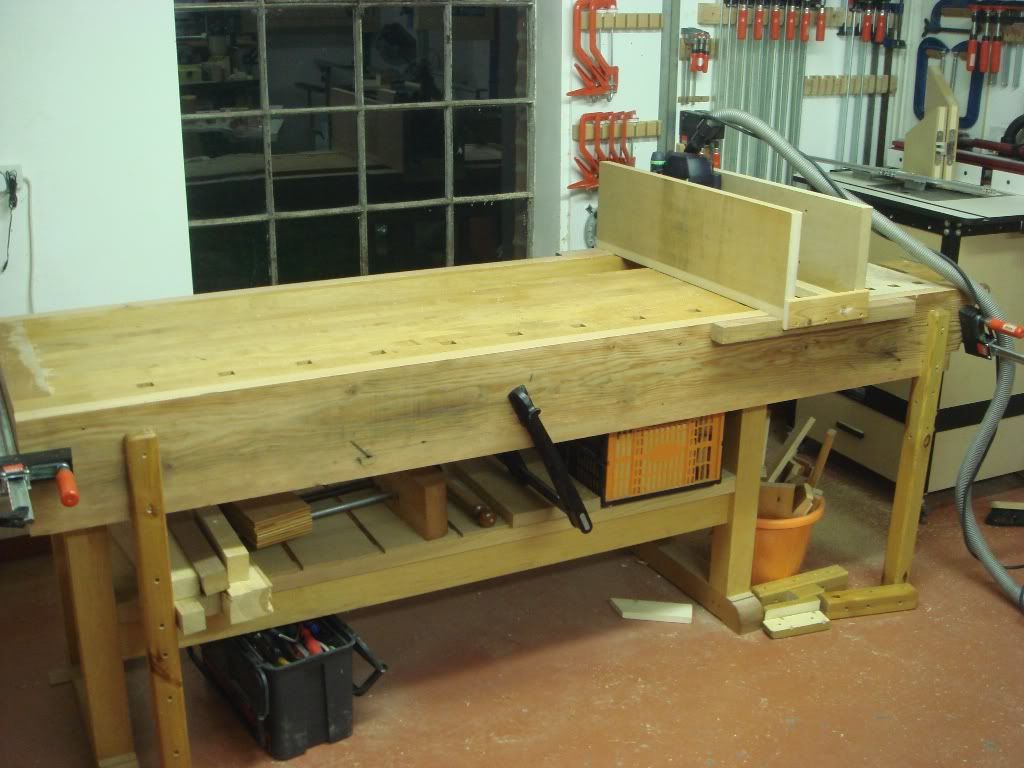
I used a hefty joist of 2" pitch pine that was just long enough to make the rails for both sides. I jointed the two top edges with my Festool circular saw using a guide rail which was the easiest way to get two straight edges.
I added the support legs which had an 8mm bolt screwed into a t-nut on the bottom of each - this allowed for micro adjustment of the height of each to get the two rails exactly in the same plane. I did this with two spirit levels as winding sticks and checked my result using the string method described in the Highland Woodworking link above. Having got the two rails in the same plane, I then mapped out the high and low points using a combination of precision shims and a straight edge across the two side beams - I found the bench had a crown in the middle approx 2.2mm higher than the low point that was in one corner with most of the rest of the perimeter of the bench being about 1.3mm higher than the low point.
I then readjusted the position of the rails (using the straight edge and shims) to give the minimum amount of shaving off the top - Then cramped both rails good and tight to the bench - then rechecked my levels using the winding sticks and string.

The router sled was made with some hefty mdf - fitted the biggest router bit (11/4" CMT) I could find at Axminster, set the router depth to the low point, switched on, held my breath, said a prayer and went for it.
It was really quick to do the routing.
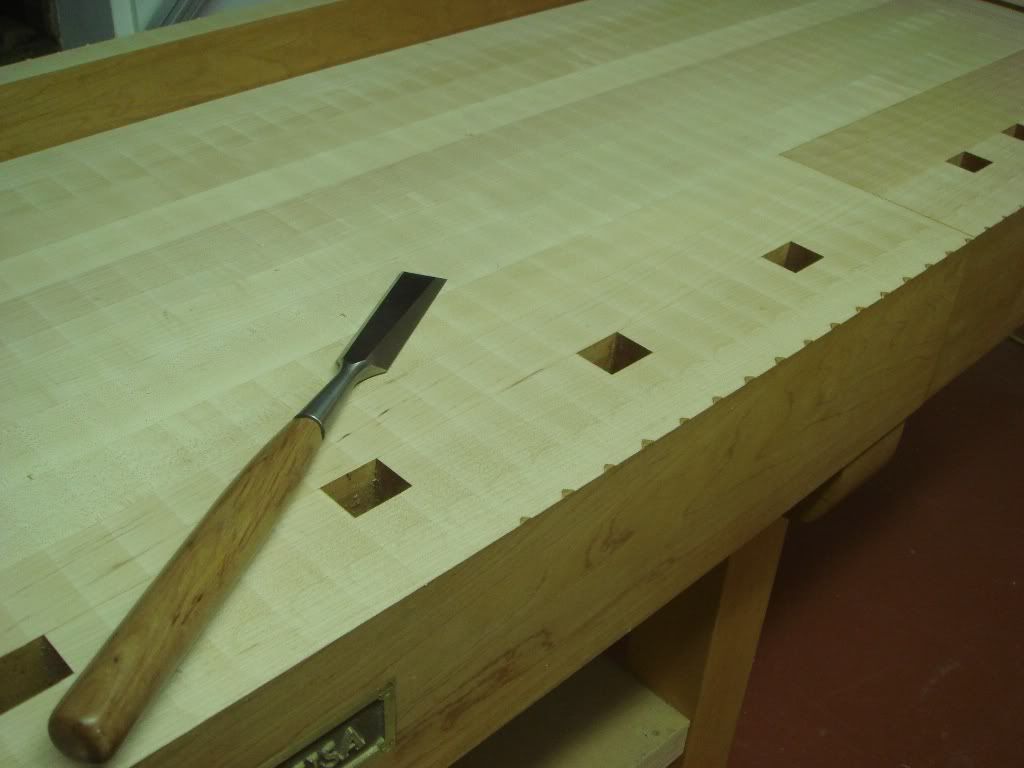
I intentionally left the lttle nibs at the edges so I could check that all had gone to plan, just trimmed them off with a chisel (had to be a Lie-Nielsen for this special occasion).
The router left a very flat finish which I lightly sanded with my belt sander.
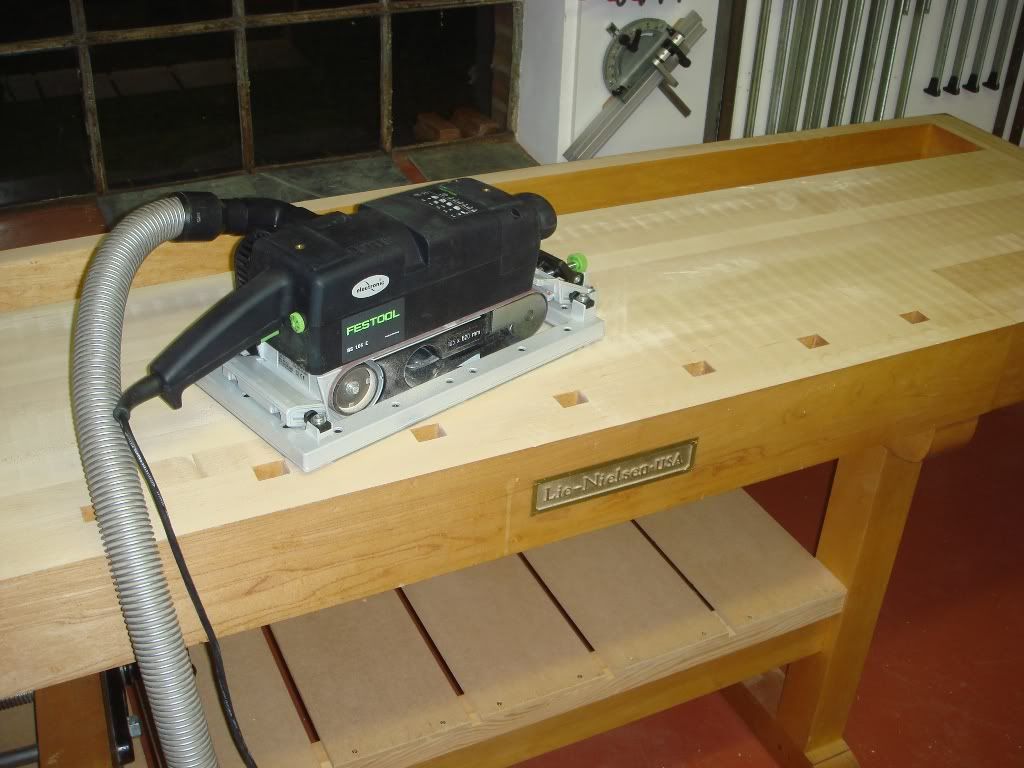
This probably looks a bit brutal, but the frame on the sander allows for very precise ajustment of the sanding action.
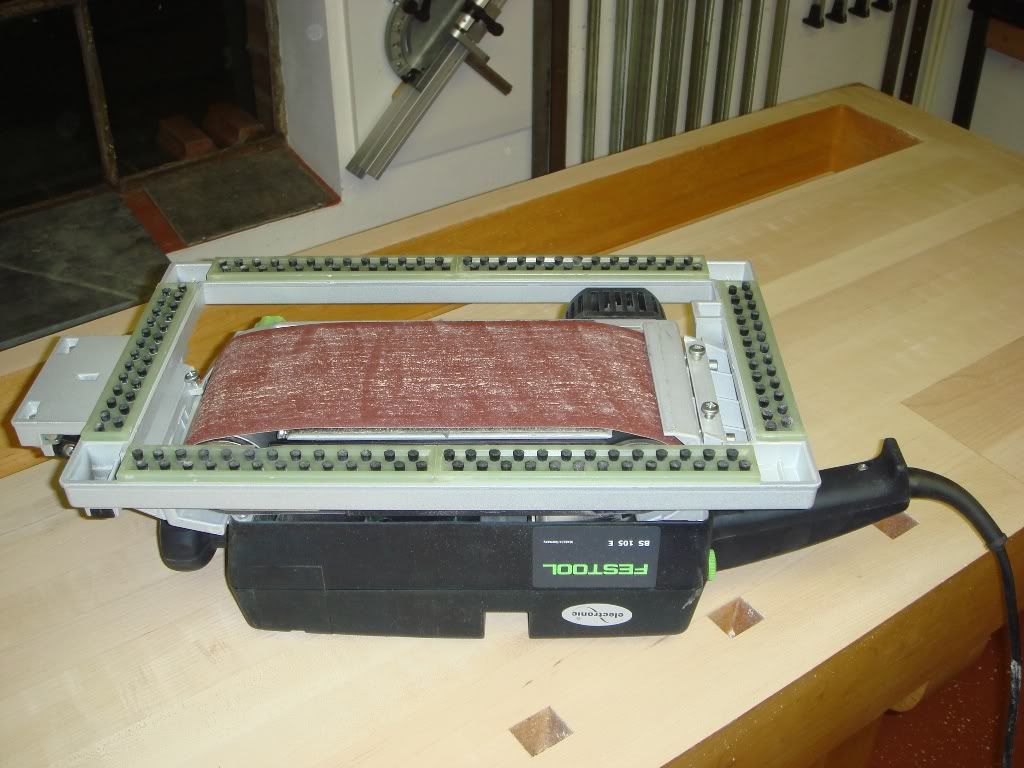
This was the first time I had properly used this sander (an ebay bargain as they are eye-wateringly expensive) and I am mightily impressed with its precision.
I then followed up with my scraper plane (I confess to buying this new for the job).
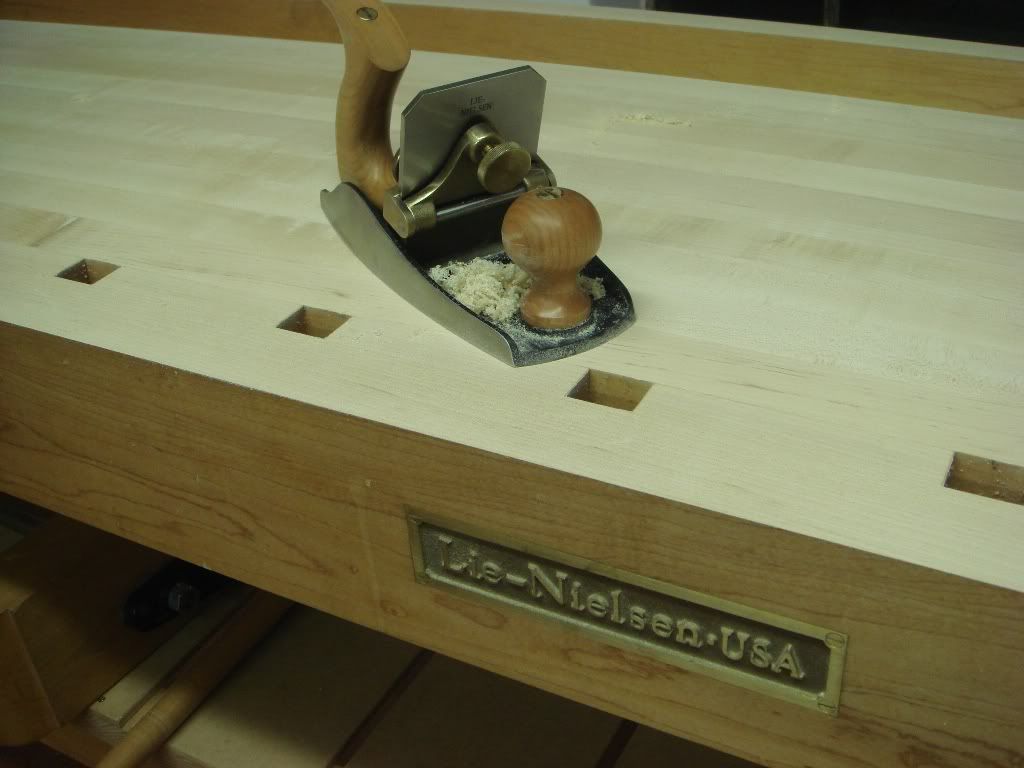
Again, I am very impressed with the tool - left a lovely silky finish.
Then coated the top with the recommended mix of 50:50 Boiled Linseed Oil and Turpentine. The chap in Axminster suggested (having been on the Lie-Nielsen visit) that they now recommend adding 10% of some polyurethane which apparently helps to keep it cleaner, but the only poly I could find was a bit yucky so I left it out.
The finished article:
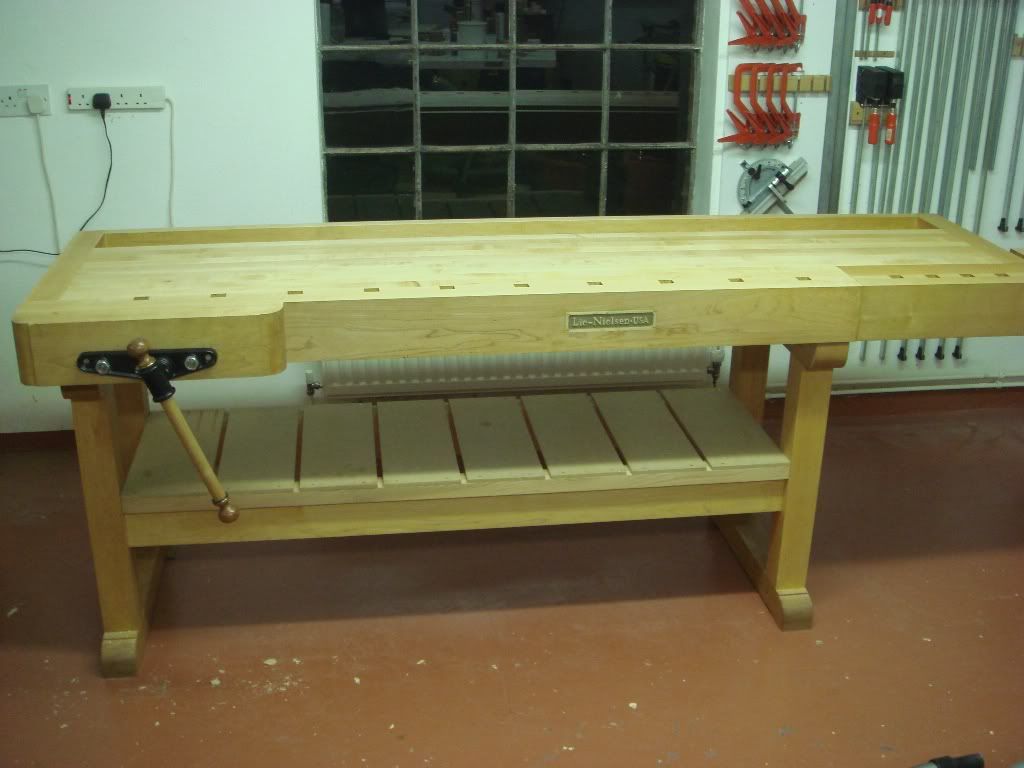
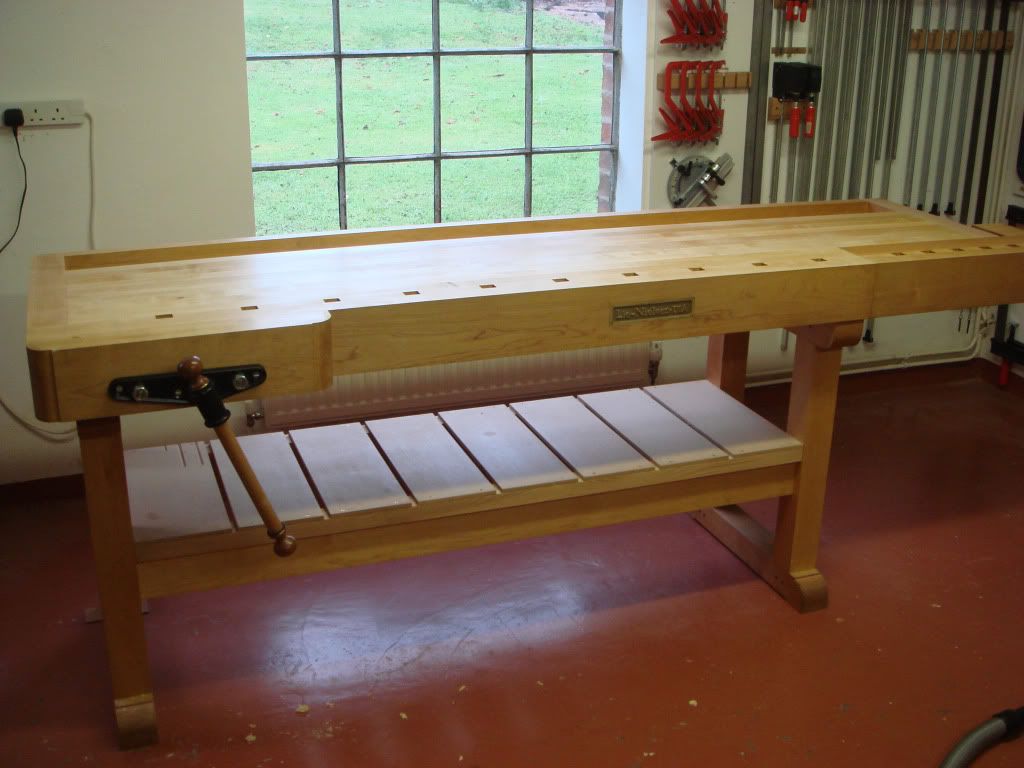
Overall, as with many jobs, all the effort was really in the preparation - the actual flattening was very easy and satisfying. I think my adjustable legs for the side rails were a key part of making it go right - also making everything really hefty was important given the length of the bench.
Just thought it might encourage others to take the plunge if your bench needs some tweaking.
Cheers
I have had this for a few years, having bought it from the great Tom Lie-Nielsen himself at one of the (much missed) Axminster shows.
btw, I definitely did not pay the £1300 that the sticker was asking for - it was the final day of the show and Tom did say I made him cry...
The advice from Lie-Nielsen is to flatten the top every year or so and I had never done this, although tried rather half-heartedly once, but didn't get very far as the maple is blinking hard and the grain direction is all over the place, so I repeatedly put it off.
I finally decided to bite the bullet when I needed to glue up and cramp some 8' flat panel doors to the bench and I wanted to eliminate all risk of twist as they needed to match precisely in pairs (to be joined by Soss hinges, but that is another story).
I pretty much followed the really helpful guidance here http://www.highlandwoodworking.com/flat ... outer.aspx, although I made a more robust solution for the side rails for the router sled to run on as shown below.
I used a hefty joist of 2" pitch pine that was just long enough to make the rails for both sides. I jointed the two top edges with my Festool circular saw using a guide rail which was the easiest way to get two straight edges.
I added the support legs which had an 8mm bolt screwed into a t-nut on the bottom of each - this allowed for micro adjustment of the height of each to get the two rails exactly in the same plane. I did this with two spirit levels as winding sticks and checked my result using the string method described in the Highland Woodworking link above. Having got the two rails in the same plane, I then mapped out the high and low points using a combination of precision shims and a straight edge across the two side beams - I found the bench had a crown in the middle approx 2.2mm higher than the low point that was in one corner with most of the rest of the perimeter of the bench being about 1.3mm higher than the low point.
I then readjusted the position of the rails (using the straight edge and shims) to give the minimum amount of shaving off the top - Then cramped both rails good and tight to the bench - then rechecked my levels using the winding sticks and string.
The router sled was made with some hefty mdf - fitted the biggest router bit (11/4" CMT) I could find at Axminster, set the router depth to the low point, switched on, held my breath, said a prayer and went for it.
It was really quick to do the routing.
I intentionally left the lttle nibs at the edges so I could check that all had gone to plan, just trimmed them off with a chisel (had to be a Lie-Nielsen for this special occasion).
The router left a very flat finish which I lightly sanded with my belt sander.
This probably looks a bit brutal, but the frame on the sander allows for very precise ajustment of the sanding action.
This was the first time I had properly used this sander (an ebay bargain as they are eye-wateringly expensive) and I am mightily impressed with its precision.
I then followed up with my scraper plane (I confess to buying this new for the job).
Again, I am very impressed with the tool - left a lovely silky finish.
Then coated the top with the recommended mix of 50:50 Boiled Linseed Oil and Turpentine. The chap in Axminster suggested (having been on the Lie-Nielsen visit) that they now recommend adding 10% of some polyurethane which apparently helps to keep it cleaner, but the only poly I could find was a bit yucky so I left it out.
The finished article:
Overall, as with many jobs, all the effort was really in the preparation - the actual flattening was very easy and satisfying. I think my adjustable legs for the side rails were a key part of making it go right - also making everything really hefty was important given the length of the bench.
Just thought it might encourage others to take the plunge if your bench needs some tweaking.
Cheers
")