Derek Willis.
Established Member
A short piece on how to French Polish with shellac.
French Polishing.
French polishing is undoubtedly the ultimate finish, and although a myth of great difficulty has been built up around it there is actually no need. I will try to simplify the process here but first let me tell you a little something about the origin and make up of it.
• French Polish is made from Shellac and alcohol, usually nowadays Methylated spirit.
• Shellac is made from a product of the Lac Beetle living in Asia, i.e. Thailand, India and China.
• The Lac Beetle lays it’s eggs in the branches of trees, by the thousand and surrounds them with a substance that sets hard and after the eggs have hatched, is harvested and processed to produce Shellac.
• There are many grades of Lac, as it is called, and they all go to make up differing types of Lac for French polish, I think that it might be better to restrain ourselves and stick to one type or so.
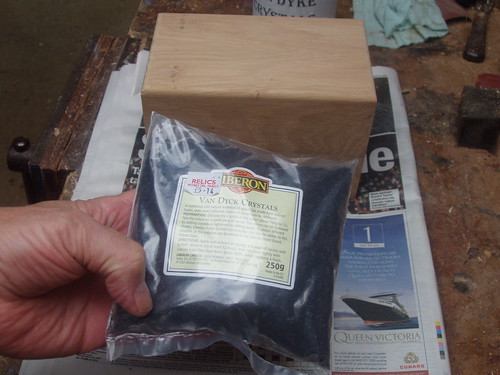
• I make up my own French Polish and so can you, from your chosen supplier, I have previously mentioned Relics and their website, I like to go and collect mine so that I can browse around at all the other stuff they have, also eed shaking quite often to disperse.
• I like to use Blonde dewaxed flakes for most of my polishing, because it is pale and suits almost anything, but I always have by me some proprietary branded Button polish for touching-in of darker pieces, and I have coloured some of my own mixture with Rare Earth pigments to make coloured shellac.
Except for the Deal all of the timbers finished extremely well using the method described herein. To the left is a piece of Deal (softwood), this I have polished with Blonde shellac but I have added Burnt Sienna Rare earth pigment to colour it to a shade near to Mahogany. Deal does not accept this type of finish too well, because of its softness, unlike the various hardwoods, but I thought I would like to demonstrate it.
Here are two redwoods, the first being Utile, and the replacement for most Mahogany nowadays, and a piece of what is probably real Brazilian Mahogany as is it many years old. I put a line across the centre of both of these and polished each half separately one with dark button polish and the other with Blonde shellac, as you can see with a timber of this colour and density there is no visible difference.
Except for the Deal all of the timbers finished extremely well using the method described herein.
Next is a piece of Maple which accepts Blonde shellac finish very well and does not go under a great transformation of colour in doing so Beech is next, and there again works well colourwise, and has the close-grained texture to finish very well, that’s probably why it is used so extensively in the furniture industry.
Next is a piece of Chestnut, which in my opinion has been improved with the shellac finish, as it seems to bring out the grain and the natural timber colourIroko (Teak) finishes very nicely and benefits from finishing with shellac as it enhances the colour of the timber without disguising the colour variations in the graining.
We will now go through the process necessary to carry out a successful French polishing operation.
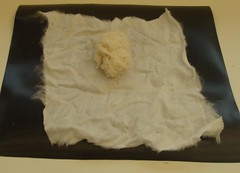
First you must make a rubber.
A piece of good cotton cloth with a good-sized piece, the size of a large egg at least, of cotton waste.
Fold-in the top two inches,
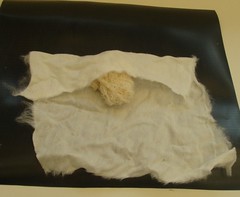
Fold in the two Corners.
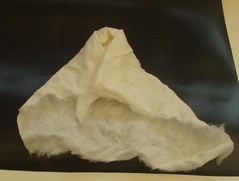
Fold-in the two sides as shown
Your rubber is now ready for use.
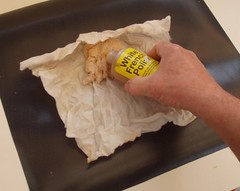
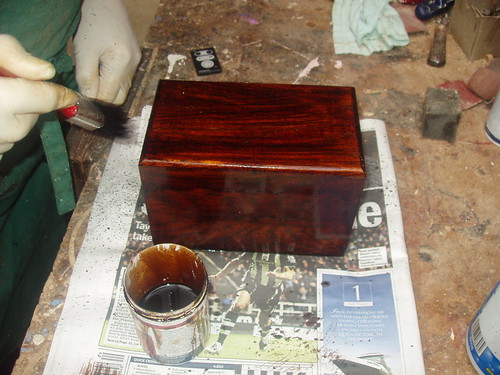
Unwrap your rubber again, now pour Into the cotton waste a small amount of shellac, enough to soak the cotton waste but not to run through, a dispenser should be used so as not to overload the rubber, traditionally a wine bottle was used with a groove cut in the side of the cork to give a very small amount at a time, if you buy your French polish or Button polish in the containers shown in the picture, they have small pouring spouts. Fold up the rubber again and twist the tail, in doing so you will force the Shellac through the cover so allowing you to apply it to the surface of the timber.
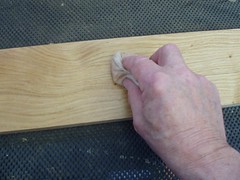
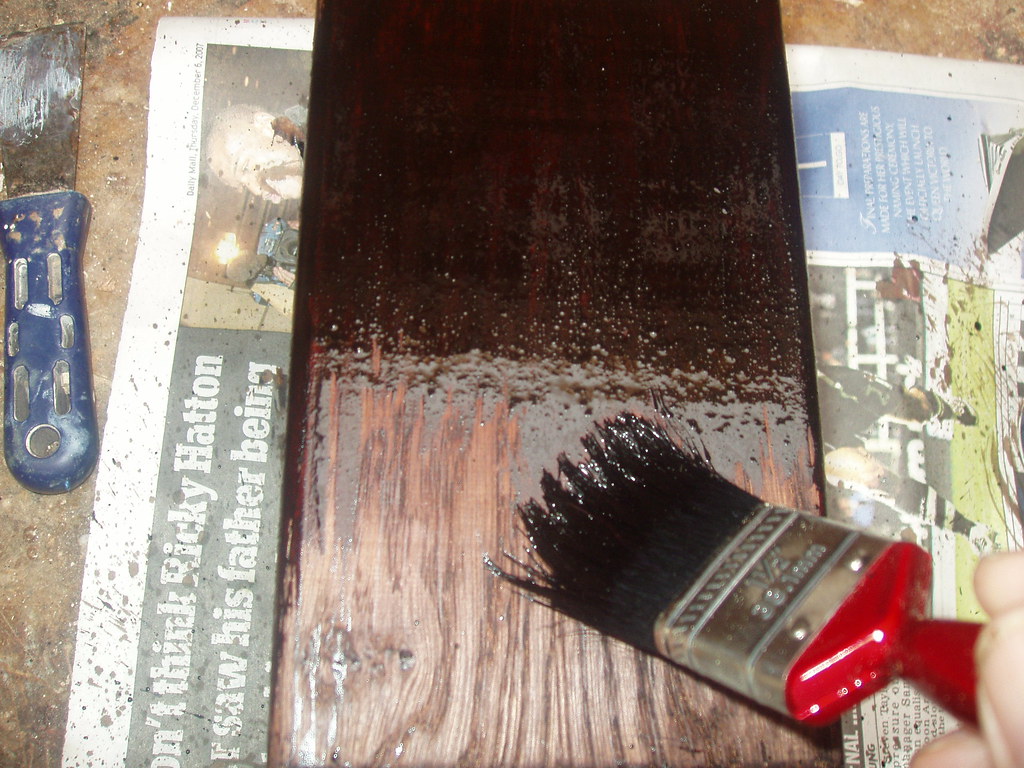
Apply the shellac to the timber in a circular motion without lifting off.
If you have carried out the process, as before described, with Sanding sealer, the whole French Polishing process will be that much easier as the timber will not be so absorbent.
If any open pores or blemishes are visible in the surface of the timber at this stage, they can be filled with proprietary grain filler, prior to the polishing process, just brush in the grain filler, allow to harden, and then sand off with very fine glass paper.
Any minor blemishes that show up during the polishing process can be removed by using, Pumice or Rottenstone, just touch the rubber onto some of this powder and work into the aforesaid blemish, these preparations are so fine that they will not harm any work you have already done but will blend the polish and fill where necessary.
Pumice is more course that Rottenstone, but it is not dark and will therefore be better on light coloured woods, whereas Rottenstone is almost black and will stain lighter timbers.
Start by twisting the tail of the rubber so that a little of the shellac is forced through the cloth, work in circular movements, do not let the rubber stop on the surface, always run-off at the end to finish a stroke,
but try to keep your movements continuous, twist-up the tail as and when you need more shellac to keep covering the surface. When you begin to run low, open your rubber and charge it again with shellac.There will come a time when your rubber will start to drag a little, this is the time to put a few drops of linseed oil onto the surface of your rubber this will make the rubber slide over the timber a lot easier and you will be able to carry on with adding more shellac to your finish.
It is a good idea to change the pattern of your rubbing to figure-of-eight and eventually to straight up and down strokes, following the grain.
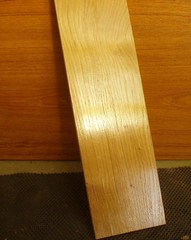
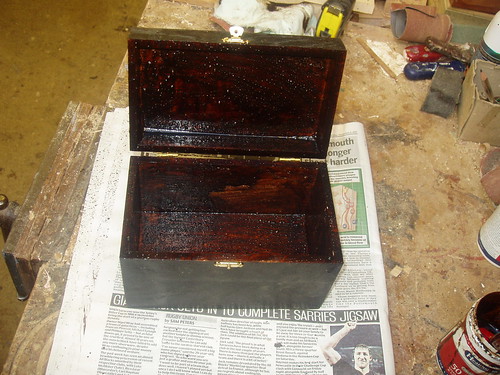
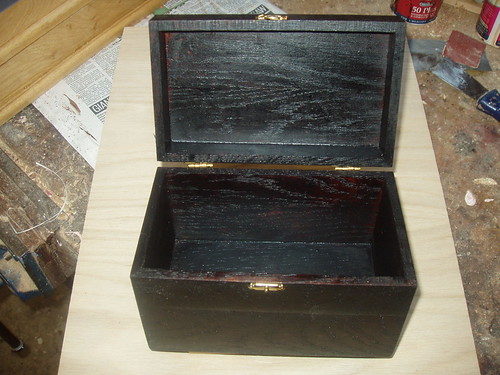
Very quickly you will see a very good surface appear, (it is not a long job at all).
Although shellac is very quick drying, it is advisable to let the work stand for a short while to harden and then to do a bit more polishing.
Keep an eye on the light reflecting across your work and correct any blemishes that may occur straight away by rubbing in more polish and then oil.
You will need to spirit-off when the desired finish is obtained, that is, to wipe over the whole area with your rubber dipped in Methylated spirit to remove the surplus linseed oil, It is probably better if you make up a separate rubber and keep for spiriting off as otherwise it will dilute the shellac to a degree that will be inadvisable. This will remove any surplus Linseed oil from the surface, but not so much as to affect the polish, use spirit very sparingly. I will advise that spiriting of must be used only in the circumstances where too much oil is present.
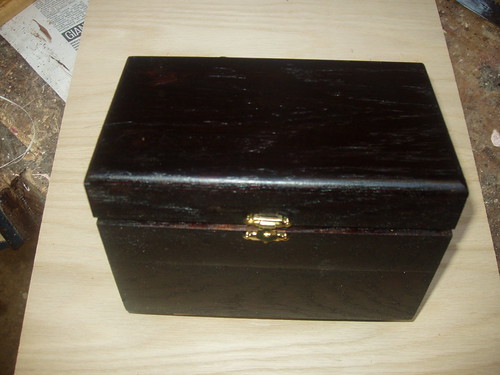
• Allow to harden for 48 hours at least before use or damage to the finished surface may occur
Derek Willis.
French Polishing.
French polishing is undoubtedly the ultimate finish, and although a myth of great difficulty has been built up around it there is actually no need. I will try to simplify the process here but first let me tell you a little something about the origin and make up of it.
• French Polish is made from Shellac and alcohol, usually nowadays Methylated spirit.
• Shellac is made from a product of the Lac Beetle living in Asia, i.e. Thailand, India and China.
• The Lac Beetle lays it’s eggs in the branches of trees, by the thousand and surrounds them with a substance that sets hard and after the eggs have hatched, is harvested and processed to produce Shellac.
• There are many grades of Lac, as it is called, and they all go to make up differing types of Lac for French polish, I think that it might be better to restrain ourselves and stick to one type or so.
• I make up my own French Polish and so can you, from your chosen supplier, I have previously mentioned Relics and their website, I like to go and collect mine so that I can browse around at all the other stuff they have, also eed shaking quite often to disperse.
• I like to use Blonde dewaxed flakes for most of my polishing, because it is pale and suits almost anything, but I always have by me some proprietary branded Button polish for touching-in of darker pieces, and I have coloured some of my own mixture with Rare Earth pigments to make coloured shellac.
Except for the Deal all of the timbers finished extremely well using the method described herein. To the left is a piece of Deal (softwood), this I have polished with Blonde shellac but I have added Burnt Sienna Rare earth pigment to colour it to a shade near to Mahogany. Deal does not accept this type of finish too well, because of its softness, unlike the various hardwoods, but I thought I would like to demonstrate it.
Here are two redwoods, the first being Utile, and the replacement for most Mahogany nowadays, and a piece of what is probably real Brazilian Mahogany as is it many years old. I put a line across the centre of both of these and polished each half separately one with dark button polish and the other with Blonde shellac, as you can see with a timber of this colour and density there is no visible difference.
Except for the Deal all of the timbers finished extremely well using the method described herein.
Next is a piece of Maple which accepts Blonde shellac finish very well and does not go under a great transformation of colour in doing so Beech is next, and there again works well colourwise, and has the close-grained texture to finish very well, that’s probably why it is used so extensively in the furniture industry.
Next is a piece of Chestnut, which in my opinion has been improved with the shellac finish, as it seems to bring out the grain and the natural timber colourIroko (Teak) finishes very nicely and benefits from finishing with shellac as it enhances the colour of the timber without disguising the colour variations in the graining.
We will now go through the process necessary to carry out a successful French polishing operation.
First you must make a rubber.
A piece of good cotton cloth with a good-sized piece, the size of a large egg at least, of cotton waste.
Fold-in the top two inches,
Fold in the two Corners.
Fold-in the two sides as shown
Your rubber is now ready for use.
Unwrap your rubber again, now pour Into the cotton waste a small amount of shellac, enough to soak the cotton waste but not to run through, a dispenser should be used so as not to overload the rubber, traditionally a wine bottle was used with a groove cut in the side of the cork to give a very small amount at a time, if you buy your French polish or Button polish in the containers shown in the picture, they have small pouring spouts. Fold up the rubber again and twist the tail, in doing so you will force the Shellac through the cover so allowing you to apply it to the surface of the timber.
Apply the shellac to the timber in a circular motion without lifting off.
If you have carried out the process, as before described, with Sanding sealer, the whole French Polishing process will be that much easier as the timber will not be so absorbent.
If any open pores or blemishes are visible in the surface of the timber at this stage, they can be filled with proprietary grain filler, prior to the polishing process, just brush in the grain filler, allow to harden, and then sand off with very fine glass paper.
Any minor blemishes that show up during the polishing process can be removed by using, Pumice or Rottenstone, just touch the rubber onto some of this powder and work into the aforesaid blemish, these preparations are so fine that they will not harm any work you have already done but will blend the polish and fill where necessary.
Pumice is more course that Rottenstone, but it is not dark and will therefore be better on light coloured woods, whereas Rottenstone is almost black and will stain lighter timbers.
Start by twisting the tail of the rubber so that a little of the shellac is forced through the cloth, work in circular movements, do not let the rubber stop on the surface, always run-off at the end to finish a stroke,
but try to keep your movements continuous, twist-up the tail as and when you need more shellac to keep covering the surface. When you begin to run low, open your rubber and charge it again with shellac.There will come a time when your rubber will start to drag a little, this is the time to put a few drops of linseed oil onto the surface of your rubber this will make the rubber slide over the timber a lot easier and you will be able to carry on with adding more shellac to your finish.
It is a good idea to change the pattern of your rubbing to figure-of-eight and eventually to straight up and down strokes, following the grain.
Very quickly you will see a very good surface appear, (it is not a long job at all).
Although shellac is very quick drying, it is advisable to let the work stand for a short while to harden and then to do a bit more polishing.
Keep an eye on the light reflecting across your work and correct any blemishes that may occur straight away by rubbing in more polish and then oil.
You will need to spirit-off when the desired finish is obtained, that is, to wipe over the whole area with your rubber dipped in Methylated spirit to remove the surplus linseed oil, It is probably better if you make up a separate rubber and keep for spiriting off as otherwise it will dilute the shellac to a degree that will be inadvisable. This will remove any surplus Linseed oil from the surface, but not so much as to affect the polish, use spirit very sparingly. I will advise that spiriting of must be used only in the circumstances where too much oil is present.
• Allow to harden for 48 hours at least before use or damage to the finished surface may occur
Derek Willis.