Effects of cap iron on planing...

UKworkshop.co.uk

Help Support UKworkshop.co.uk:

This site may earn a commission from merchant affiliate links, including eBay, Amazon, and others.
Derek,

Not trying to sound like a know-it-all. But how tight did you set the chipbreaker to the edge? On my first trials I thought it was very very close, but wasn't impressed with the results. So I measured with a vernier caliper about 0.4mm. Well that obviously wasn't tight enough. After halving that distance I started to get good results.

But I don't plane Jarah of course.

I wonder, how did the old time Australian carpenters work that stuff? Or didn't the use Jarah for finer woodworking things?
 
Hi Corneel

It was between .2mm and .3mm. I used a Starrett adjustable square to set the distance, having measured the projection beforehand.

Trying to get it closer is tough with Stanley chip breakers. Even if I was not close enough (and as I said earlier I shall try again), this illustrates that this method is not a practical one, that is, there are other more efficient methods around.

I will try again with a LN chip breaker, and even perhaps a Clifton.

Regards from Perth

Derek
 
Maybe you hit the limit of what an old Stanley can do? Warren probably won't agree...
The hardest wood I have is jatoba. I can plane that with thin shavings and a tight chipbreaker without trouble. But it's not in the same category as jarah.
 
OK, once more back into the fray dear friends, once more ...

This time with pictures.

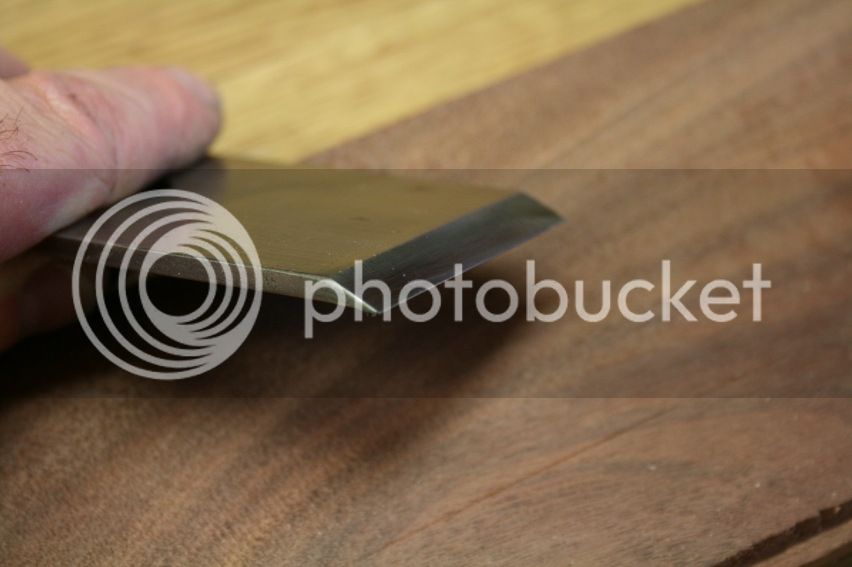
I elected to use a Bed Rock #604. This has a LN Chip Breaker and a M4 blade honed to 13000 on a Sigma. Let no one criticise the components! :)

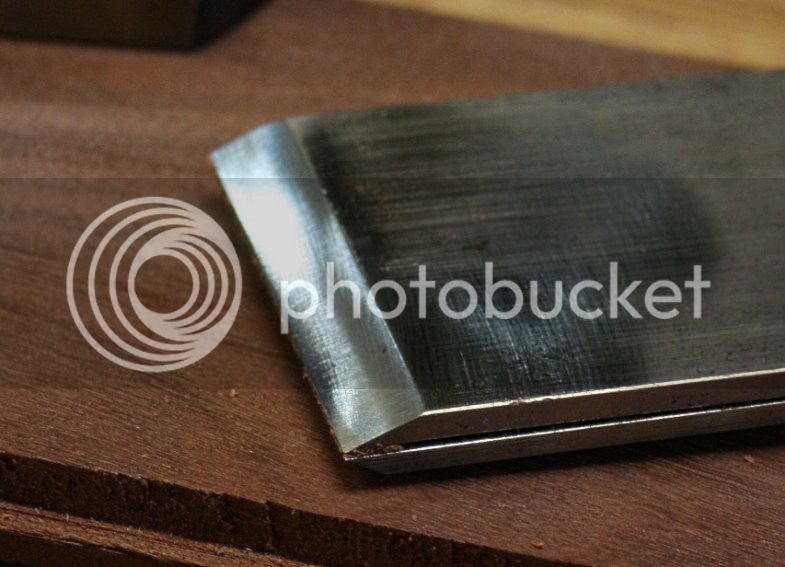
The chip breaker was given a microbevel of around 70-80 degrees ..

1.jpg


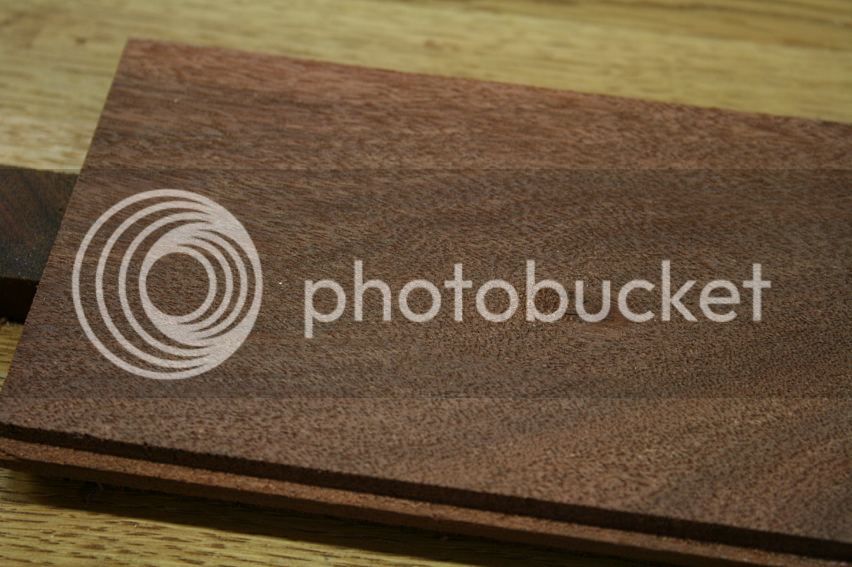
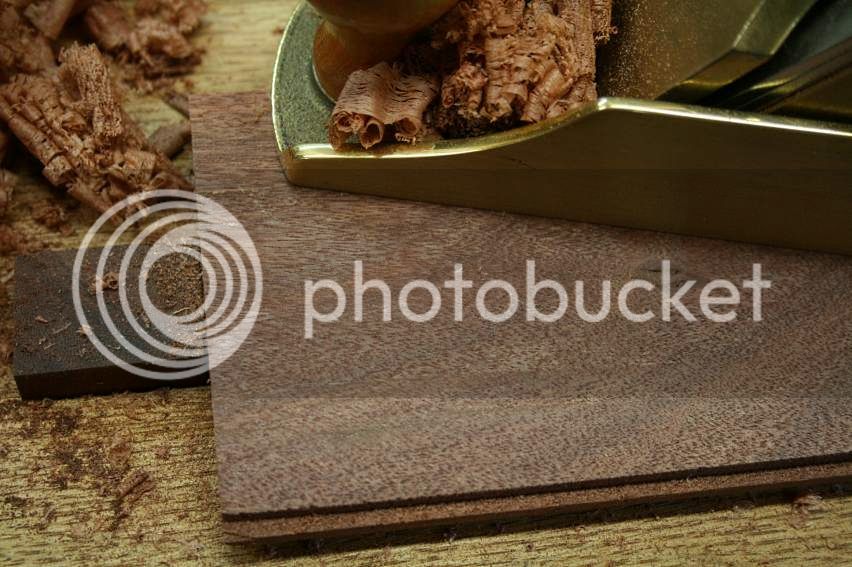
This is the Jarrah surface I am trying to tame. It looks worse here since it was last planed by the Stanley #3 in the abortive last effort.

2.jpg


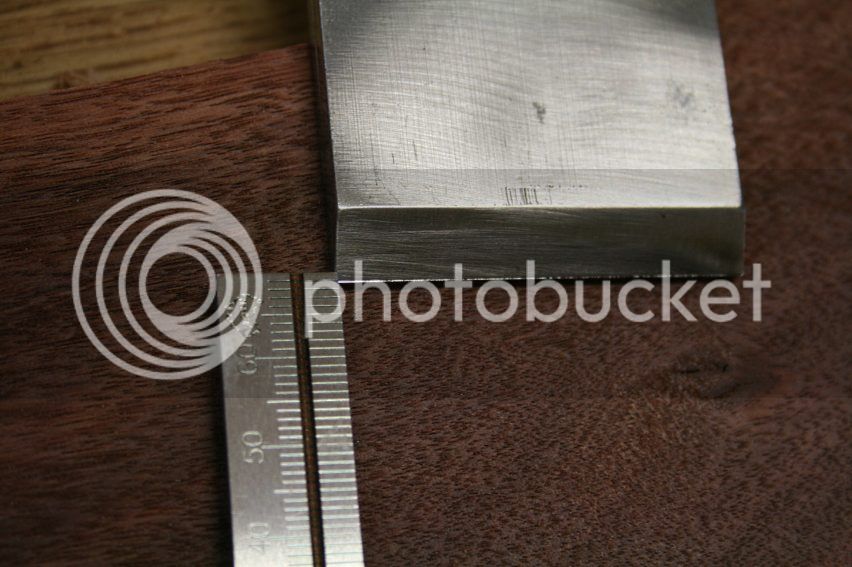
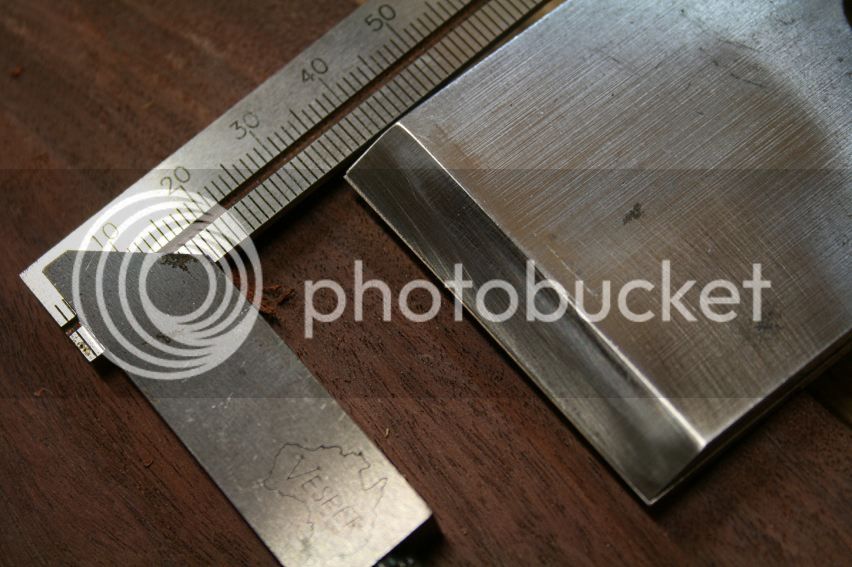
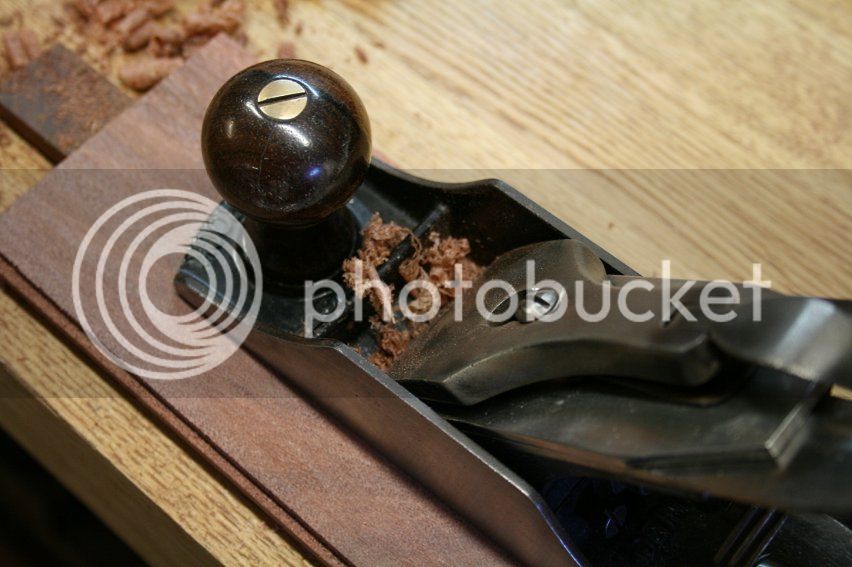
For the first effort with the #604 - call it a baseline - I set the chip breaker at about 0.4 - 0.5mm, which is typical of my usual position.

3.jpg


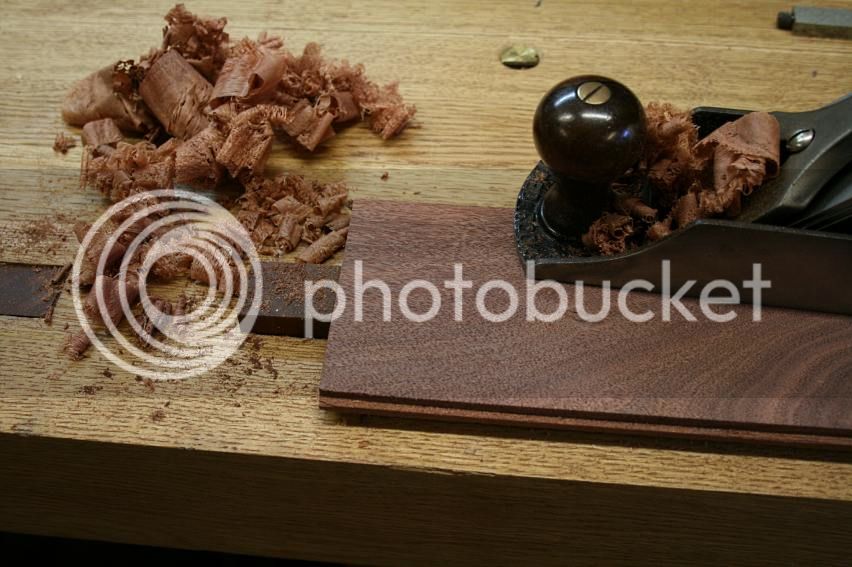
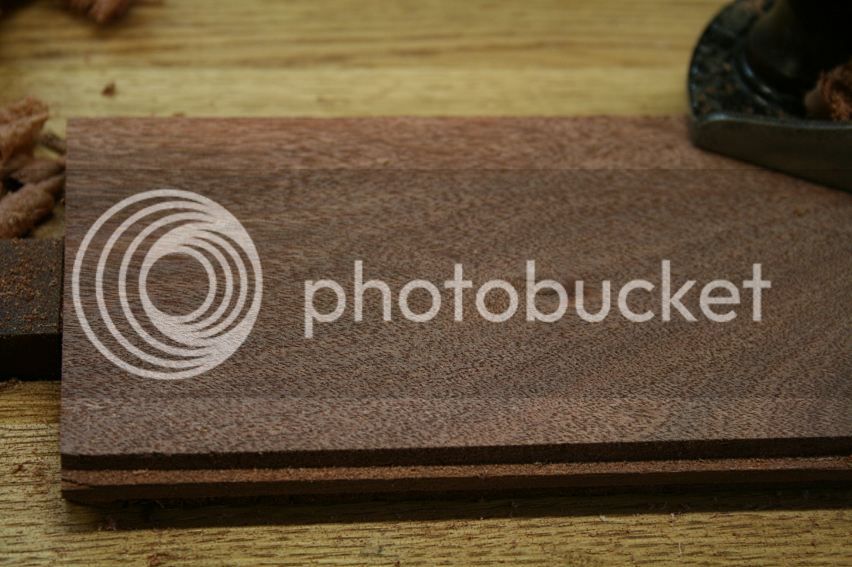
The shavings were nothing spectacular and nor was the wood surface (I would not usually use this plane on this wood), but it was an improvement over the Stanley #3 ..

4.jpg


5.jpg


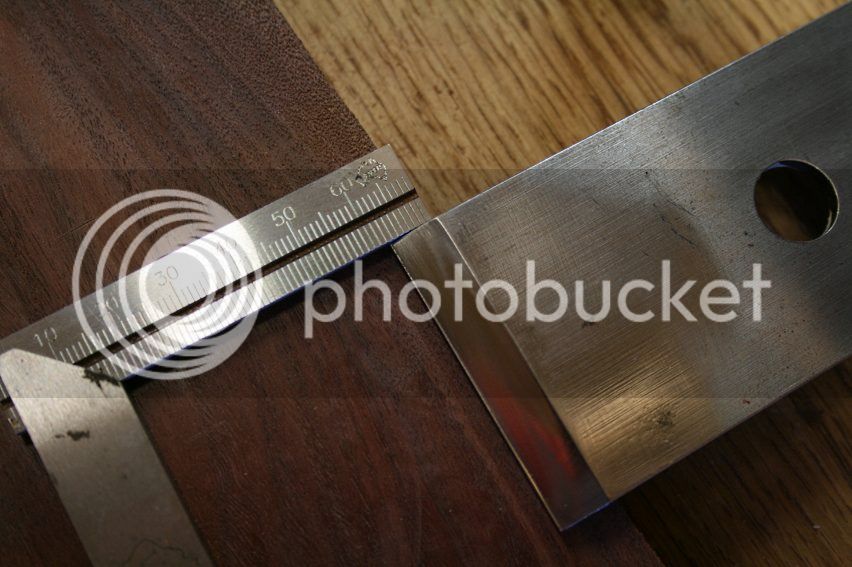
Soooo ... now the chip breaker was repositioned at about 0.2mm ...

11.jpg


... and I started planning, waiting for the smooth surface to appear ... but it was a major anticlimax as the mouth clogged ...

10.jpg


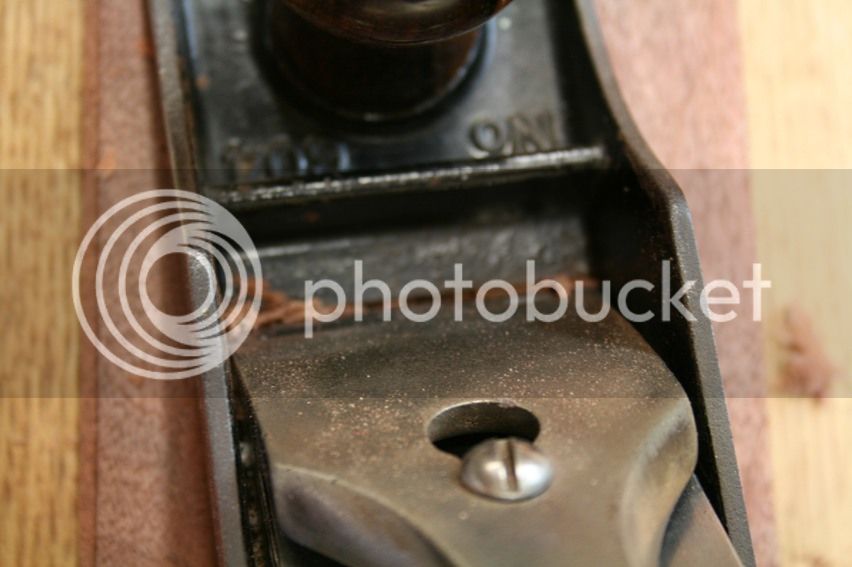
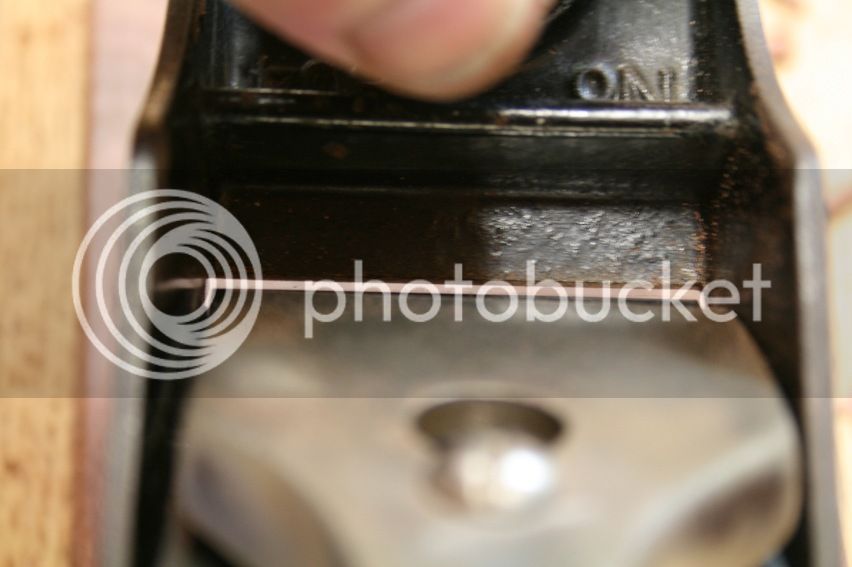
OK, here's the culprit ... the chip breaker is not absolutely flush (although I did smooth it on a fone diamond stone.

12.jpg


Back to the waterstones.

This is the only chip breaker in existence that is honed to 13000 grit!

21.jpg


The mouth has clearance ...

22.jpg


But in spite of all this, the plane would not make shavings!

23.jpg


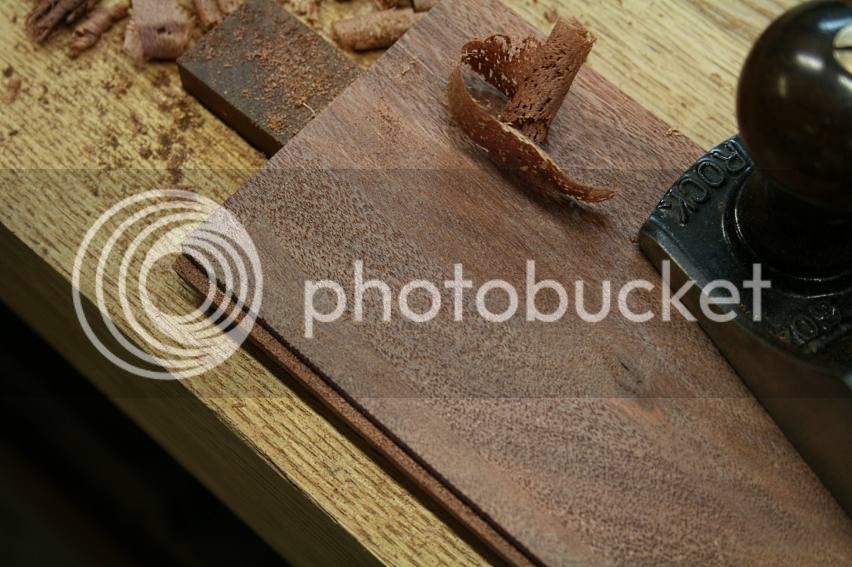
So I pulled the chip breaker back again ..

31.jpg


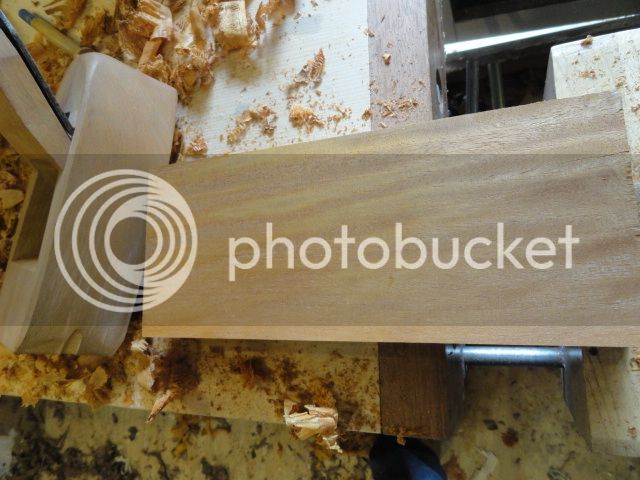
... and took a slightly deeper shaving than before. Now you see why I do not do this with Stanley planes ...

32.jpg


It is not a pretty sight. Sigh.

OK, out came the LN with a 55 degree frog I used before. Keep in mind that the Veritas SBUS, with a 62 degree cutting angle, produced a better finish yesterday.

41.jpg


The finish is clearly better to the touch.

There needs to be a summing up of the three experimental sessions: I think that the bottom line is that I just cannot get the chip breaker effect on this piece of Jarrah. By contrast, I was able to achieve a better finish with a 55 degree LN #3, and decent finish with a Veritas SBUS with 62 degree cutting angle. Perhaps some types of wood will not respond to changes of chip breaker projection, and the case for high cutting angles remains the alternative?

Regards from Perth

Derek
 
It's impossible to capture the quality of a woodsurface on photo, so you will have to believe my words for it.

I picked up an offcut of quarter sawn jatoba. It has a ribbonstripe, meaning the grain runs back and forth among each grow ring. Planing with the grain and against in the same little bit of wood. It has given me only greave when trying to handplane in the past, even with my infill plane.

This piece was still rough sawn. After some tinckering with the capiron setting, and after resharpening the blade, I managed to produce a flawless surface within minutes with this simple wooden smoother. First I took rather thick shavings (as thick as possible while still being able to push the plane). That produced some tearout. Then I lightened the cut and cleaned it up.

DSC02515.jpg


I do get clogging too from time to time too. It really isn't an easy technique and needs some time to master. For us simple beginers with this technique the limit seems to be somewhere between jatoba and jarah. I'm sure Warren Mickley would have no troubles with your piece of wood, Derek. I can only advice you to start with more mundane wood and get some miles under the belt. Then when you gain experience you can move uo the ladder of difficult woods.

At the other hand, a steep pitch is a valid technique too, even in a historic perspective. High angle planes have always been around. And honing a backbevel has been described in old literature too.
 
I've been following this discussion (and similar ones on other forums) with interest. I found the video quite useful to watch and, although it doesn't feature a "mouth" and keeps the bed angle constant at 40 degrees, it spurred me to try out this "ultra-tight chipbreaker" thing.
For a test bed I used a Stanley #3, a fairly recent example with black plastic handles. The sole had been lapped a couple years ago but she was a bit of a dog. The original iron was ground and sharpened to 10K on waterstones and the chipbreaker flattened and the leading edge given a "microbevel" at 80 degrees. The mouth was opened out to 3mm - fine for a Jack but not for a smoother! Still, I thought that would ape the video quite closely.

chip1.jpg


First I tried hard maple - this particular piece had grain that reversed from the middle, making for a decent test. Using a regular bench plane and a sharp iron you got a small amount of tearout. I set the chipbreaker 0.45mm from the edge (using stacked feeler gauges sat on the end of the chipbreaker - this was moved forward until the cutting edge just disappeared behind the feelers) Taking some shavings (about 2 thou thick) I got tearout and it left a nasty surface. It also "felt" rough as I planed. Hmm....
I moved the chipbreaker closer to 0.2mm from the edge and took some shavings. Much happier! The surface was left like glass, very impressed. I then planed from the opposite end of the board and got the same results - now very impressed. Remember, this is a nasty cheap Stanley! Finally I moved the chipbreaker forward again to 0.1mm and got some weird shavings. Fine, but it was obvious the lane was not happy. So I moved it back to 0.2mm and everything was cool again.
My next test was on some softwood. I used a piece of B+Q's delightful pine, absolute rubbish piece of stuff with lots of knots. The Stanley sailed though the lot leaving a shining surface. I repeated from the opposite end of the board and got the same result - very impressive! When planing knots you usually get tear-out on the "far-side" of each knot, but not this time.

I want to do some more testing but my initial thoughts are: Getting the chipbreaker in the right place is deal breaker. Too close or far and it doesn't happen but getting it in the "zone" was fairly easy. Watch the shavings the plane makes - when its "right" the shavings seem to come straight up out of the throat in a straight shaving. The tightness of the mouth seems to be taken out of the equation when the chipbreaker is so close to the mouth.
My next avenue is how thick a shaving you can take without tear-out. Back to the bench....
Philly

chip2.jpg
 
Thanks Derek! Still lots of variables to test. At the moment I'm of the mind that for tough interlocked stuff a high angle plane works better but that for softer stuff the chipbreaker thing can offer a real benefit, which kind of ties in with historical tool choices.
Corneel - it depends how things pan out, but maybe ;)
Chees
Phil
 
It's obvious from experience down the centuries that there are many ways to improve plane performance. What is not completely known is HOW they all work, and how they interact.

BugBear
 
Well, one thing for sure, tight mouths and close chipbreaker settings don't mix very well. A tight mouth is of course a valid method to reduce tear out too. But it's an expensive solution, and in the case of wooden planes, it has a short life. The same goes for high bedding angles, they are rare and/or expensive. A shortcut into higher bedding angles is the backbevel of course.

But this is not about one method against the other. It is about getting the maximum performance from the planes that are so abundant on the market, 45 degree double iron planes. Wood or iron, new or old, they are all around us. It's very valuable to know how to use them to the max. And knowing how your Stanley works, doesn't mean that you aren't allowed to use your Lie Nielsen bevel up smoother anymore.

Phil, it would be great if you could offer double iron planes. For some reason all the "boutique" plane makers seem to choose to make the high angle, tight mouth planes. It would give you more metal work of course.
 
These results are very interesting and although the wood specie seems to influence the outcome, the chipbreaker setting could help us to manage difficult woods.
Thank you for taking time to do and show this. =D>

Ciao,
Giuliano :D
 
Samples taken from among timber species always vary and variation in technique tends to be the best approach toward taming and manipulating stock - regardless of whether dealing with hard or softwoods and their many quirks. This doesn't dictate a need to possess masses of tools, but it does dictate a genuine need to practise sharpening and hand tool manipulation as thoroughly and often as possible. It's genuinely a case of 75% theoretical and 25% practical knowledge in learning and practicing most craft activities.

The reason behind the above statement is that no one method holds true in all instances and even if minimal clearance - between cap iron and leading (Cutting iron) edge - is found to work on some work samples, it won't work on all. Be prepared to vary tool settings and technique and you'll begin to learn the method/techniques and approach to tool set-up that stood our forebears in good stead for so many hundreds of years.

So much has and will be said of certain settings helping improve a plane's performance, but so much boils down to the law of averages and - whilst the comparatively recent fascination with micron-fine iron:cap iron adjustments prevail - all too many seem to forget this discovery is neither a new or recent one. One simple - yet fundamental - drawback with the finesse settings currently being espoused are the limitations upon tool use once it becomes so specialised. Another is the fact that - once set - problems can and will be encountered with regard to depth of cut and binding when material condition is less than optimally suited to such a set-up. That is unless one opts for multiple tool use, or accumulating a set of iron:cap iron configurations to be swapped at will depending upon materials being worked. Not necessarily a good thing if a worker is operating within a tight budget.
 
Coming very very late into this fascinating discussion, may I venture the following?

On my web site at http://tinyurl.com/5s9dwct there's a pic of an actual plane blade in a normal situation in which the cap iron is very close to the edge and set so that the face of the cap iron actually projects below the surface of the sole.

I think it makes the point that such a close setting limits the depth setting of the blade to an almost impractical extent. The projection normal to the sole (if my trig is correct) will have to be about seven-tenth of the actual set-back distance.

It looks as though the wood fibres have been compressed and distorted and then detached from the parent wood, producing a shaving resembling the type III shaving described on page 149, fig 4 of Hoadley's 'Understanding Wood'.

There's some unfinished work on the parent page http://tinyurl.com/247vmjq.

I have quite a few microscope pics of some mahogany planed against the grain, waiting time and motivation to sort out, edit and put up. I also should make some pics with a variety of shaving aperture settings and different timbers.

Jeff
http://www.amgron.clara.net
 
Jeff, nice pictures indeed. You went to great lengths to find out what happens at the edge! You can see that tight mouths and steep angles are also methods to reduce tear out.

In the pictures on this page I see two things worth mentioning.

- In none of the pictures you use the sole of the plane to support the iron. You loose support at the most critical place, just behind the edge.

- I only see a picture with a close capiron, but it's set way too deep, thus disturbing the cut. Do you also have pictures where the capiron is set at a more reasonable position, just a bit higher then the sole, and what happens then?
 
Corneel":1t60niet said:
- I only see a picture with a close capiron, but it's set way too deep, thus disturbing the cut

This could be the reason for which Philly had troubles with 0,1 mm cap iron setting....

Philly":1t60niet said:
my initial thoughts are: Getting the chipbreaker in the right place is deal breaker. Too close or far and it doesn't happen but getting it in the "zone" was fairly easy

I suggest to name this zone...the "Philly's Zone" :mrgreen:
 
Jeff's photo's and comments make a good point - with the CB set so close it has to limit the depth of cut. It also shows why you can't have a really tight mouth as there is nowhere for the shavings to go.
I've been using the Stanley on various bits of wood to see how it responds and have had good results on a wide range of stuff. With interlocked grain it worked pretty well, although not as well as a high angle blade/tight mouth combo. With softwoods it excelled. I moved the CB back to a "normal" position (about 1.5mm) and got tearout.
Yesterday I decided to use a Clifton to see if a better built plane would perform better on the harder woods - I'll be back with my results later.

Oh, and one thing I noticed - with the CB in the "zone" the plane left the surface of the timber shining and glassy. I believe this is what the video was all about as improving the finished surface was the goal - it certainly seems to have achieved it.
Cheers
Philly
 
Yes, tight mouth and close chipbreaker don't mix very well. You'll have to choose one or the other. When you pull the frog back, you will get better support of the blade as well, another advantage.

The best results until now I get with the chipbreaker set about 0.2 to 0.3 mm. Much closer and I run into troubles with the small camber on my smoother and jointer blade. That leaves plenty of adjustment range from fluffy shavings to pretty stiff 0.2mm ones. When you want to take even thicker shavings, indeed you will have to move the chipbreaker. Overall I find this is a very usefull range. I think Jeff's argument is a non-issue in practical use of the chip breaker.

Until now most of the discussion is about smoothers. But it works very well on jointers too! It's nice to know, when you adjust a drawer to a case for example, that you are not going to rip a chunck out of that critical surface.
 
Corneel wrote:

I think Jeff's argument is a non-issue in practical use of the chip breaker.

Agreed, it is a rather academic point but I think it counters the argument in favour of an extremely fine CI setback that I think was made in the original set of the Prof's pics (made of cutter action without taking the rest of the plane's structure into account).

Jeff
[email protected]
 
Back
Top