I have found that there are four causes for people to not saw straight.
1. Stance, Cheshirechappie has covered this problem.
2. Not look directly down the blade when sawing. With a backed Saw it's very tempting to start looking to one side as the back of the saw slightly obscures the vision of where the saw is cutting. Unless your nose is vertically above the saw, you will Saw to which ever side your head is biased away from top dead centre. So, if you look to the left of the saw, which is normally for a right handed person, the saw will tend to veer off to the right. By looking to one side the brain tries to make the Saw appear vertical so pulls your hand subconsciously towards your head. Hope that makes sense.
3. Trying to cut with a dull saw, a dull Saw will never cut straight.
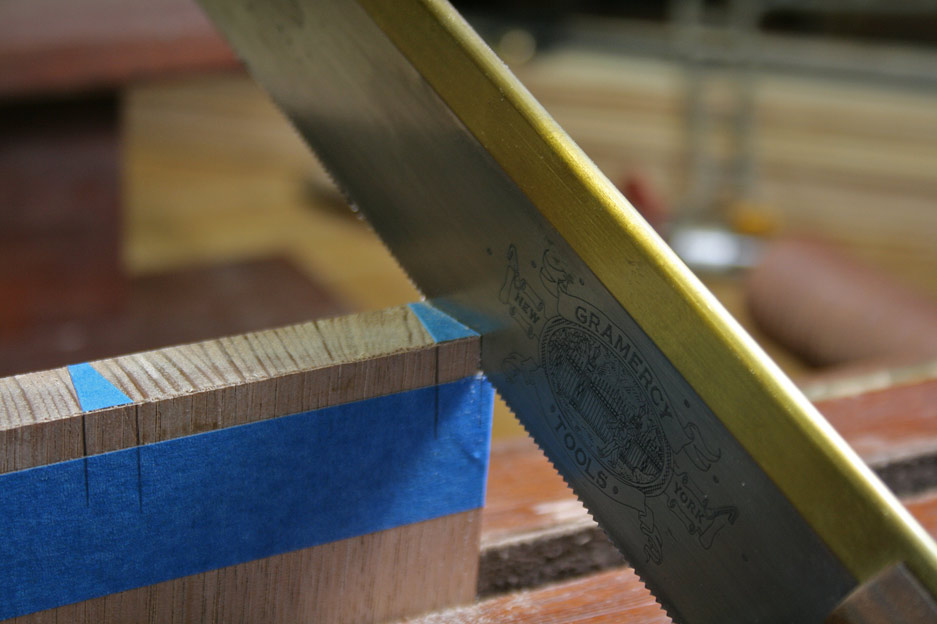
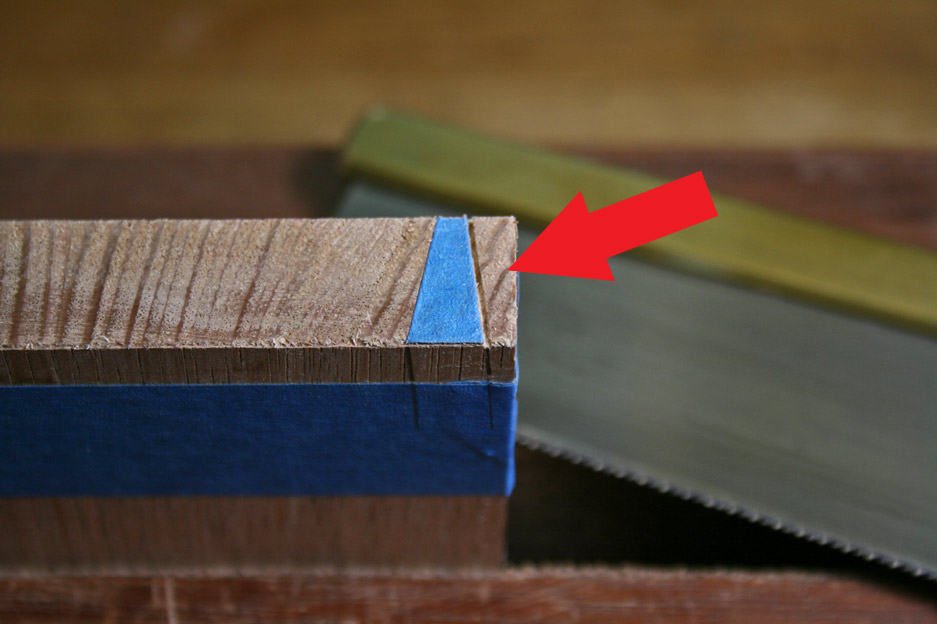
4. A saw with too much set / uneven set. This affects almost 90% of the saws I see. You want as little set on a saw as you can get away with. Once you have established a kerf, and the blade has started to Saw into the stuff, you want to then be able to concentrate on the sawing action, and have the saw take care of keeping itself straight. With too much set, the saw can wobble about in the kerf and go off line. If the saw just fits in the kerf it has little ability to Saw off line. A dovetail Saw should have virtually no kerf and so care has to be taken when starting the cut that the saw is vertical, after this it should then cut perfectly to the line with no further guidance necessary. I know I'm rather controversial when I say, that apart from a new high quality saw (Pax, Skelton.....only two quality British Saw makers I know.....there are others....but their not British!) I would always advocate stripping off all of the teeth and hand sharpening it again. Getting rid of too much set is very very difficult and with second hand saws they can have been 'stoned' down the sides to 'correct' and uneven set that causes the Saw to 'walk' to one side, which can not be fixed other than by re-sharpening.