Colouring filler.

UKworkshop.co.uk

Help Support UKworkshop.co.uk:

This site may earn a commission from merchant affiliate links, including eBay, Amazon, and others.

MikeG.

Established Member
Joined
24 Aug 2008
Messages
10,163
Reaction score
691
Location
Essex/ Suffolk border
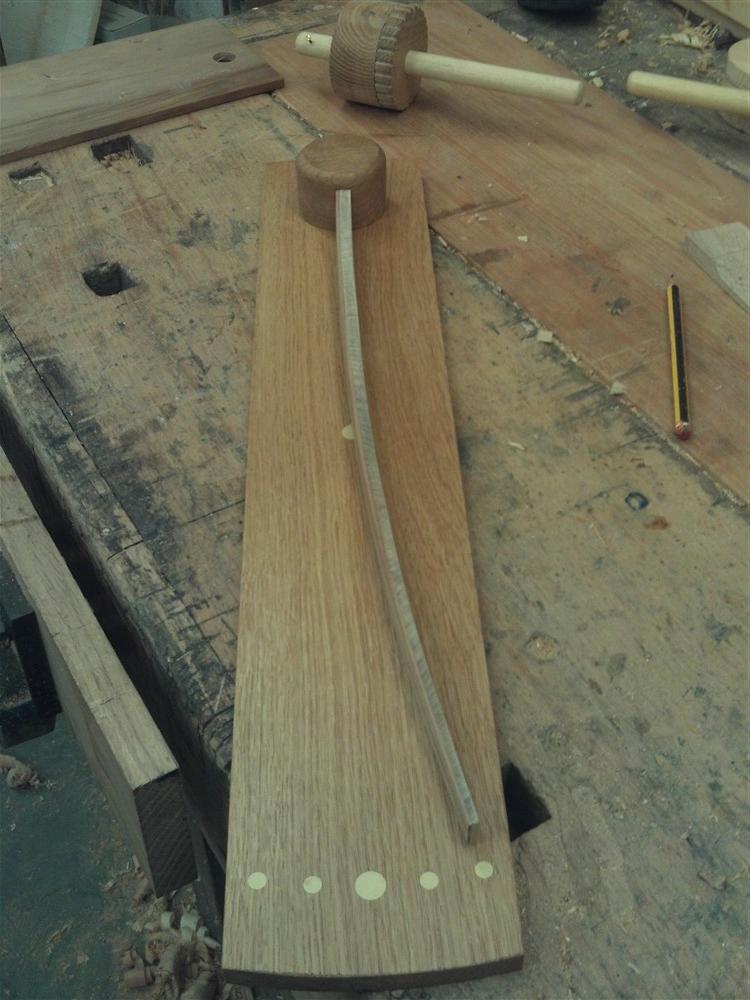
I recently made this hygrometer, and used a two part filler to make the dots:

TXjnOgG.jpg


I have other projects in mind in which it would be useful to be able to use the same simple technique, but to have a black finish instead. Is it possible to add something to the filler to turn it black, and if so, what do I need? Colour stability is obviously critical here. I wouldn't want to find it's turned a pale grey in 6 months time. If black is possible, are other colours possible too? I have a feeling that turners do this sort of thing.
 
https://www.wood-finishes-direct.com/pr ... rfEALw_wcB
I've not used this, but have used Morrells black dye and it's good - it wouldn't colour 2 part though as it's water based. If you use 2 part fillers, get yourself a small bottle of styrene - it revives stiffening filler and even on new stuff sometimes it's handy to have it a little more liquid. It's not cheap but a little goes a long way.
 
Thanks Phil......but I've got a mega-sized tin of filler and a tiny need for coloured stuff, so if possible, I'd like to be able to colour what I've got rather than buy a ready-coloured filler. As an aside, despite the option to select sizes on that Morrell's stuff, 750ml seems to be the only available size (£17.90 + delivery).
 
Two-part = epoxy right? You can colour epoxies with oil paint or enamel paint, just a tiny dab seems to turn any epoxy putty a really decent charcoal grey. If strength isn't a priority you should be able to add more until it goes dark enough. Although for a solid black filler I'd be inclined to make it from scratch from 5-min epoxy, if necessary thickened with a bit of fine sanding dust.
 
ED65":1slt8f1u said:
Two-part = epoxy right?

I'm not 100% It's the same stuff as car body filler, but without the fibre.

You can colour epoxies with oil paint or enamel paint, just a tiny dab seems to turn any epoxy putty a really decent charcoal grey. If strength isn't a priority you should be able to add more until it goes dark enough. Although for a solid black filler I'd be inclined to make it from scratch from 5-min epoxy, if necessary thickened with a bit of fine sanding dust.

Thanks. I'll experiment.
 
Everbuild 2 part (what I use) is polyester and contains styrene - I think most of the 2 part ones are basically the same, in which case pigment for polyester resin would work fine - you should be able to get decent depth of colour.
 
Earth pigments are the best for colouring filler but they work better with some fillers than others. The colour range is limited unless you go to a really good art supplies shop like https://www.cornelissen.com/pigments-gu ... esins.html . The best filler colour combo is powdered lamp or veg black that you should be able to get from your local artist supplies shop and Isopon P38 that you can get from your local auto parts shop.
That said, why not use timber inlays? With a tapered plug cutter you can inlay ebony, pear, mahogany or purpleheart!
 
Hi Mike. I have produced circular musical fingerboard markers using poster paint powder and 2 part epoxy adhesive. The finish is good and the paint is fully enclosed and does not bleed out.
 
mrpercysnodgrass":36igqf2v said:
.......That said, why not use timber inlays? With a tapered plug cutter you can inlay ebony, pear, mahogany or purpleheart!

Because the project coming up involves lots of filling/ inlay, and none of it circular. Filling really is the only option.
 
dizjasta":36sxzhce said:
Hi Mike. I have produced circular musical fingerboard markers using poster paint powder and 2 part epoxy adhesive. The finish is good and the paint is fully enclosed and does not bleed out.
As you say you haven't got lots to do this is a very economical method. I use cheap 2 part epoxy and all manner of colourants (instant coffee is good for the odd knot hole/blemish).
 
A word of caution,before using anything other than a pigment intended for polyester resin (because thats what your filler is based on) do a small test mix.Not everything is compatible and at best it might take a bit longer to cure while at worst it will remain sticky for a very long time.Most powders ought to work and there is a fair chance that a pigment for epoxy has a good chance.

The other risk to be aware of is that if you sand the coloured filler and any sanding dust remains in the pores of the wood,you may have a bit of local discoloration.A coat of sealer on the piece prior to filling can help with this.
 
For the lettering on the cutting board I made before Christmas I did the following;

I printed out the lettering on paper and stuck it to the timber with Prittstick.

Very carefully and slowly I cut through the paper into the timber with a very very sharp knife. Usual woodworking technique of starting a mm away from the line and then slowly pare back to it. As I knew I was filling the inlay with a tinted epoxy I wasn't worried about making the bottom of the recess smooth and regular. For the bottom of the J which is circular I used an appropriately sized drill bit to drill this out.

Once the outline of the recess was clearly established I removed the remaining paper with a card scraper and then tidied up any rough edges with the knife. I deepened the recess to about 5-6mm and again double checked that the outline was correct. Achieving the depth is the most important to ensure there is sufficient filler material in there to give it some strength and stop it falling out if the wood moves with humidity.

I gave the area a light sanding with 240g on a block to remove any whispers of timber then got set up to fill it. I just used the cheap 5min epoxy from the pound shop and tinted it with black mica powder from Amazon UK. (I looked for the link to the one I bought but couldn't find it, there are loads available though)

I did a fair bit of research before buying the mica powder and this is what I found out. Mica is a naturally occurring material used in the making of cosmetics, therefore it is nonreactive and safe for human contact. It is ground to a very fine powder, this makes it ideal for use as a pigment as it is easily dispersed through the binder material and doesn't cause bubbles or dry spots to form.

So with my epoxy ready to be mixed and the mica powder ready I went and pinched the girlfriends hair dryer, I set this up to warm the timber. Warming the timber up keeps the epoxy warm and less viscous. I mixed the epoxy and then added the mica, only a tiny bit is needed to achieve a solid colour, any more and it'll just make the epoxy to thick. When combining the two epoxy components I tried to fold it together rather than mix it as this reduces the number of bubbles.

Working quickly, I spread the epoxy into the recess and then used the stream of hot air from the hairdryer to push it into all the nooks and crannys, this also reduces the viscosity, allowing it to flow and any air bubbles to rise to the surface. As with any filler I made sure that I had filled it to a mm or two above the finished level.

Once the epoxy was cured I scraped off the bulk of the excess with the card scraper and then sanded it back with 80g until it was all level with the surrounding timber. I worked up the grits to 240g and had a good look at the epoxy surface. I found one small air bubble which hadn't popped so I drilled this out and mixed up another batch to fill it.

When I was finally happy that it was perfect i sanded up to 600g and gave the whole cutting board 3 coats of Osmo oil.
 
Hi Mike

I use the same filler and have done so for quite a few years, I mix in artists acrylic paint, usually browns and ochres to get good timber matches but I tried pure black for you yesterday and it works fine . Acrylic paint is completely colour fast and doesn't affect the setting of the filler. It is important though to mix the colour fully into the main filler before adding the hardener. I still have turned items at least 6 years old in which the filler has not faded.

Nick

P.S If you're still looking for carving gouges/chisels and happen to be inWorcestershire on Sunday 10 Feb, there's another big Flea Fair at Malvern.
 
Back
Top