ChrisxBates
Member
Chris,
The blocks I used were new, fully planed and had a mini chamfer along all edges so they didn't need sanded. I had used a floor sander in the past and didn't do a great job, some real dodgy gouges at the edges where I started. But there's some good advice on here for alternatives so I'd go with that. When I decide to refinish the floor I will get a professional to do it for me. I think I've earned that!
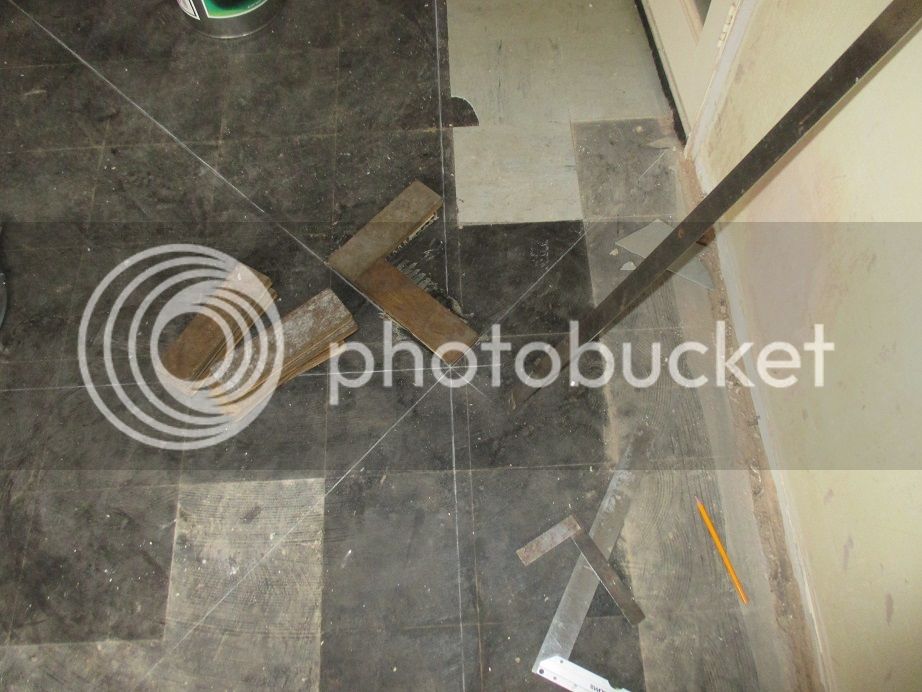
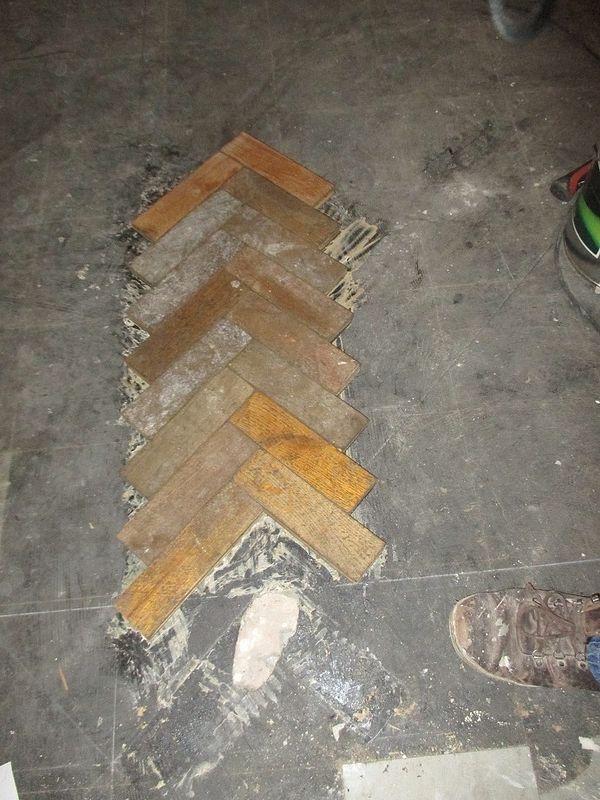
I found old hand written instructions online on how to fit herringbone that had been scanned. I'll send them to you. Totally invaluable but as Siggy said, your lines and angles need to be perfect or a line of gaps will start to form. I started the job in our dining room and there's a row of gaps that annoy me every day. By the time I had finished the living room and the hall I had learned my lesson. The hall is 7-8m long and the spines are perfect. It not only looks better but it makes it easier and quicker to fit if everything is straight. Keep checking as you go along.
I never went with expansion gaps between the rooms. Technically parquet doesn't need expansion gaps as the grain direction isn't uniform and if you're fitting flooring in a dry, central heated home it won't be a problem. Wouldn't be so confident on a concrete sub floor though. I also laid 6mm ply to help smooth out the lumps and bumps. I'll take a pic of how I filled the gap between the rooms. Tried to make a feature of it and it turned out quite nice (I think).
For the finish I never went with the full polished look. I used Rubio Monocoat, another online find. Gives a low sheen finish and just rubs on with a cloth and rub off the excess 15 mins later and it's done. Really tough too.
Hope this helps, I use this site a lot as it's such a great resource so it would be nice to think I could help someone else
Keep us up to date on the progress!!
K.
Thanks for the advice Quadie, With the Rubio Monocoat, how long after application can it be walked on. The hall is in the middle of the house.
If you want to send me the instructions it would be good. [email protected]
Chris