Cedar strip canoe - moving swiftly on

UKworkshop.co.uk

Help Support UKworkshop.co.uk:

This site may earn a commission from merchant affiliate links, including eBay, Amazon, and others.
Oops!

I'd replace those on aesthetic grounds, else it will be a permanent (embarrassing) reminder for your dad! Hope he recovers quickly so he can help you.
 
A course by coarse staggered patch may be the best way to handle this with individual scarf joints at different locations to help blend it all in
 
Glad the canoe was there to take the brunt of the impact, the broken boards are better than broken bones. I know you feel the same , but your dad won’t. Bet he’s torn up inside poor guy.

Whatever you decide to do I’m sure it’ll turn out great.

Fitz.
 
Ouch
Well I’m glad your dad is ok
great shame about the canoe
Not even in the water and it’s been holed
I think I would have go the strip if all back and make it look pristine again
But good luck either way
 
I feel for you, I know exactly what it's like to see many hours of careful work get flushed down the toilet.

Stick with it, I hope it gets finished to the high standard that will give you and your dad years of satisfaction at a job well done.
 
An interesting thread that I’ve just picked up on. Hope your Dad’s ok, btw. I helped build a fibreglass canoe at school over 50 years ago. We has zero knowledge and we’re pretty much left to ourselves to build it with a mould. Didn’t know much about resin and setting etc and it turned out that the mix wasn’t very stiff and ran down inside and set at the bottom in about 3 inches of hard block throughout the canoe. When launched, it pretty much floated but with the top close to the surface of the water. A heavy kid would sink it.
Now this build is a work of art, and I’m afraid I would remove and replace the damaged strips completely. You’ll feel better about it eventually.
 
Glad your dad is OK. I can imagine how he must feel having had a few disasters myself :(

I agree with the others, replace the strips that are broken. The amount of effort involved in replacement will be small compared with the work you still have to do and have done. If you don't make an invisible repair you will regret it every time you look at it and even if others do not notice, you will.

I am not a boat builder but is there is a risk of getting a slight bend in it if you have to remove some strips so it is not balanced on each side?
 
I have to agree with others too you need to change the strips if you don't it will always be a sad reminder to dad, in the future you both want to look back with pride at what has been made here, go for it you know the saying "Do it today for tomorrow is promised to no one"

Phill
 
Really sorry to hear about the damage to your canoe and dad. Many cedar strip canoes are not done with full length strips so you could cut out the damage and go for a staggered repair. The ends dont need to be scarfed, just butted end to end and the slats on either side will support everything until it is epoxied. As you have gone to the trouble of full length slats I would go for a full replacement. It looks like about 8 or 9 slats. Probably the biggest pain will be machining the replacement slats
Good luck Ian
 
At least it will be below the waterline, so floating it will be invisible.
however, as you’re in no rush, and assuming you have/can get more material, I’d be inclined to remove those seven or eight strips and replace them. To have such a beautiful craft with the flaw will always niggle you.

Lovely job so far And a fascinating WIP.

Hope dad doesn’t feel too bad about it and is recovering.
 
Hi everyone,
Thanks very much for all the kind words, my dad seems to have come through with no lasting damage which is good, and now due to good old Boris, he's cracking on without me and has made good progress.
Regarding all the advice about fixing the mishap, I am inclined to agree that removing the strips would have been the best solution, followed by scarfing in some new pieces as a second option, as we do have some extra material but probably not enough to colour match the other side if we were to replace the whole length of the damaged strips.
My dad, however, had different ideas, while left to his own devices he glued the damage back together, getting some of that unsightly darkening of glue that seems to happen occasionally, then continued to add strips above the damage. I was somewhat miffed by this as I thought we had agreed to wait and decide how to fix it when I next came round, but I do think he partly felt guilty and wanted to proceed as quickly as possible to make up for the error.
We will get some coloured wood filler to try and minimise the horrendous state of the dark glue, but I guess the damage is always going to be there now, and it's always going to be visible, I can't see a seamless repair happening now.
It is well below the waterline which is a minor bonus, but it's far from ideal, I will certainly always know it's there!


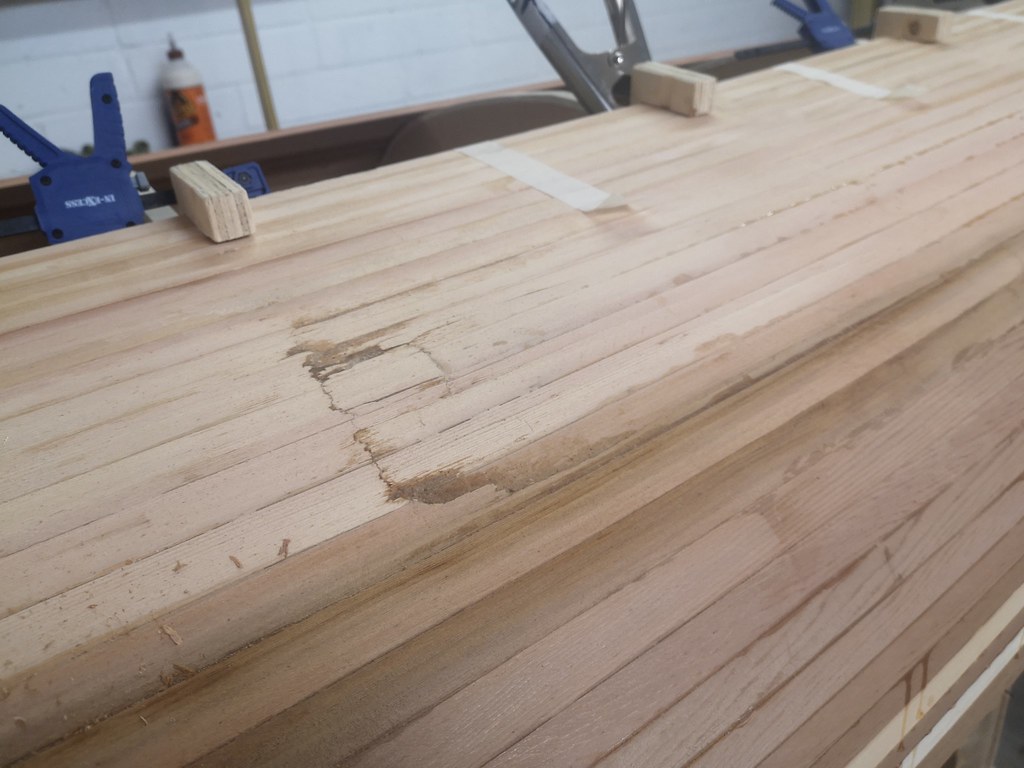
This has moved this canoe firmly into the 'practice canoe' category for me, we were keen to build another after this anyway but now it feels like a necessity, I know we can do so much better, and we will.

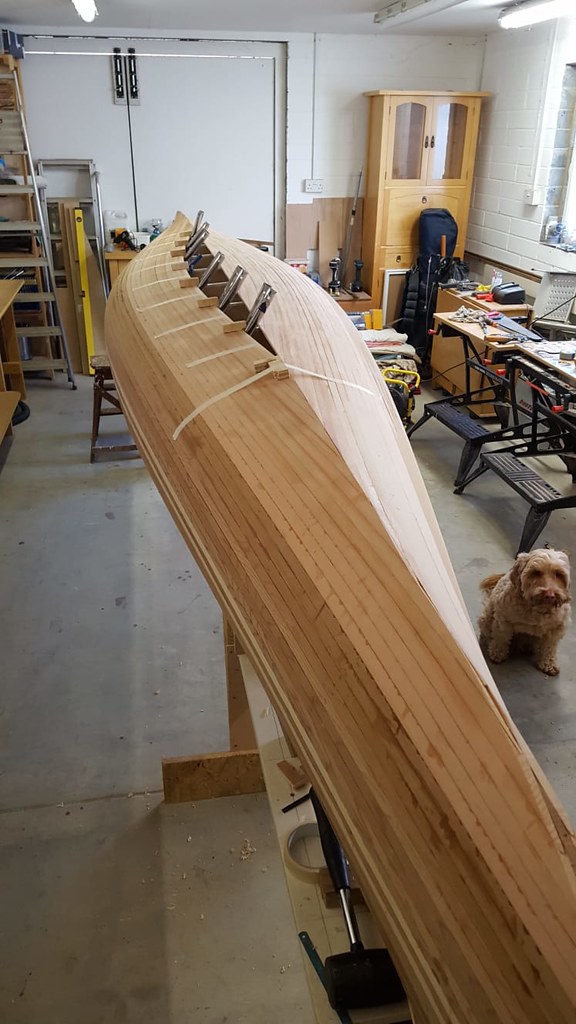
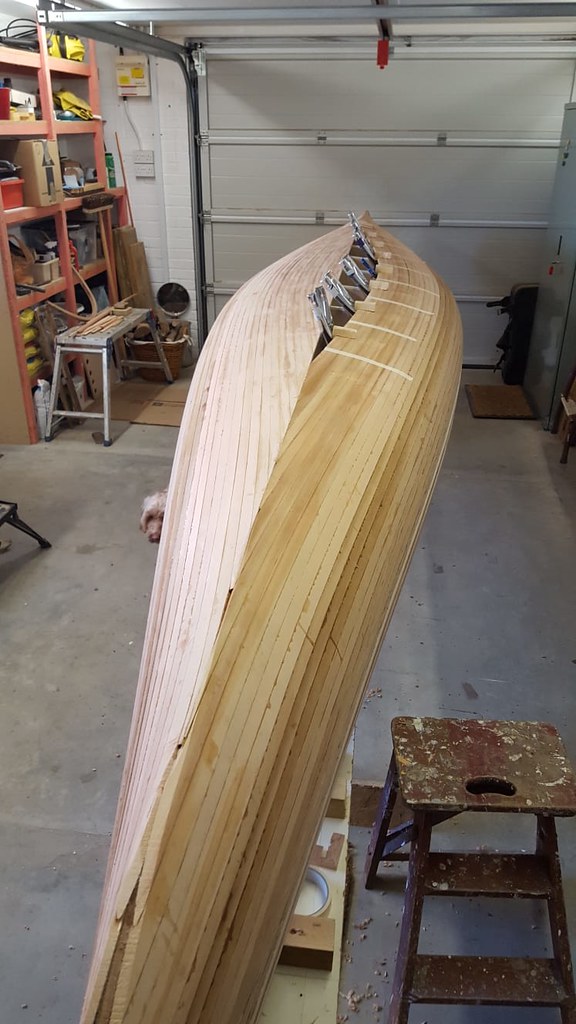
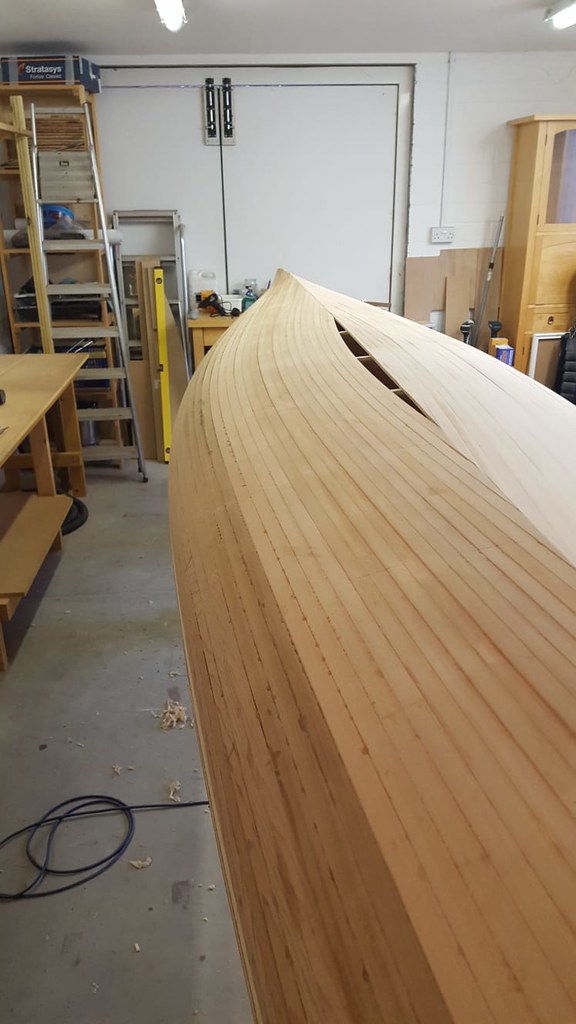
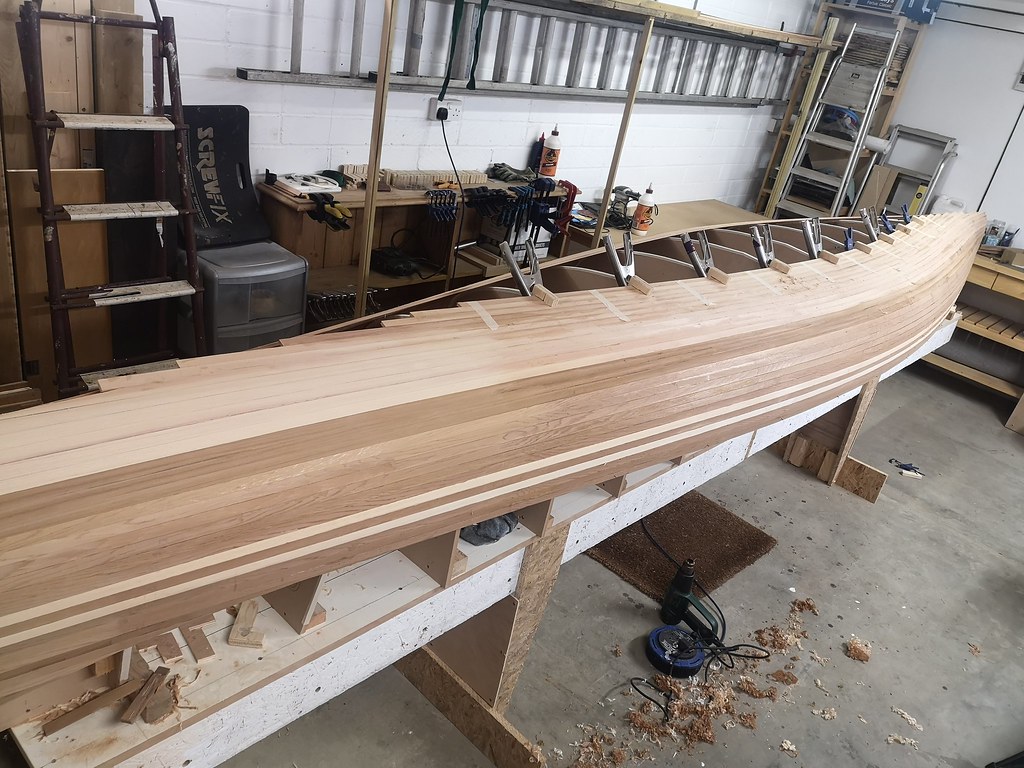
Anyway, back to the stripping, my dad made it to the middle!


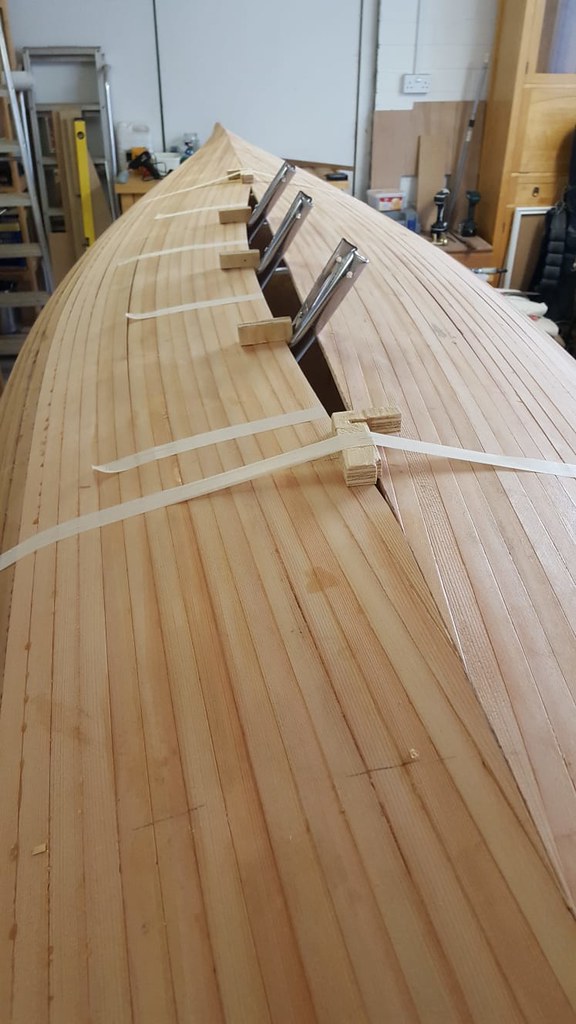
After getting every strip past the centreline, he marked the centreline onto the strips, i'm not sure how exactly but he did a pretty good job:


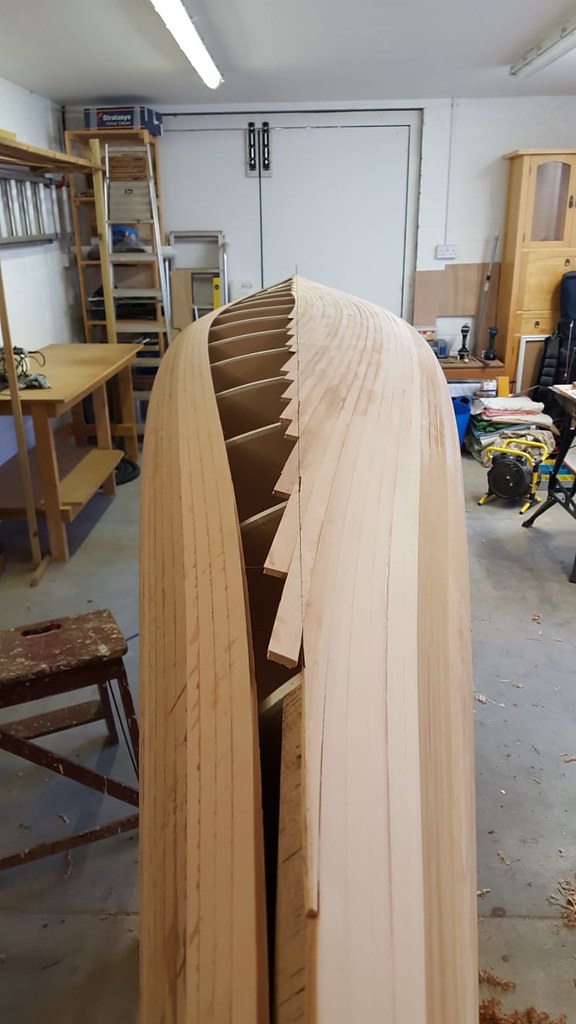
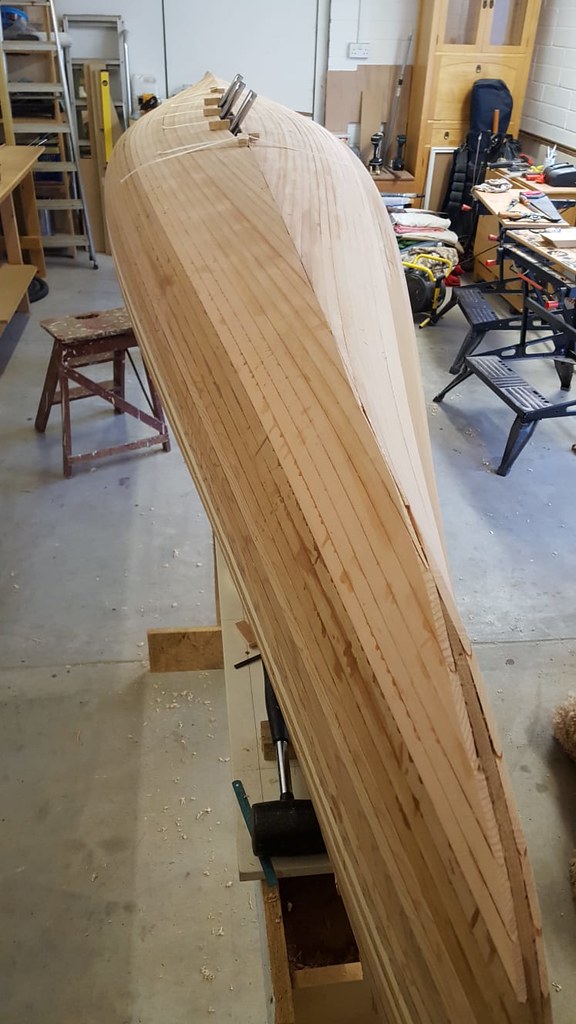
Then using a tenon saw apparently, he trimmed it down to the line the whole way along, creating this rather beautiful, almost optical illusion-like photo:
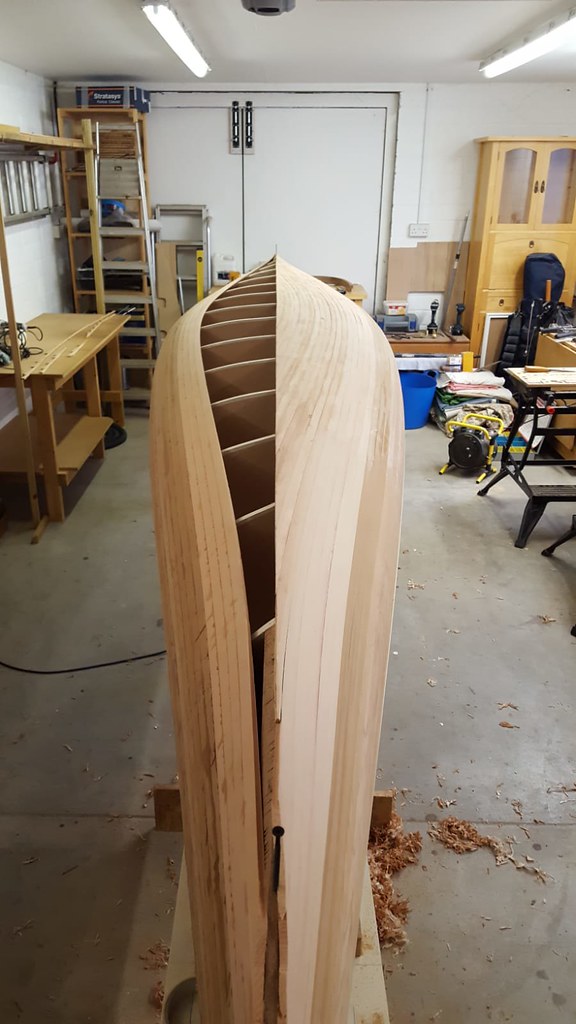


Love that one.

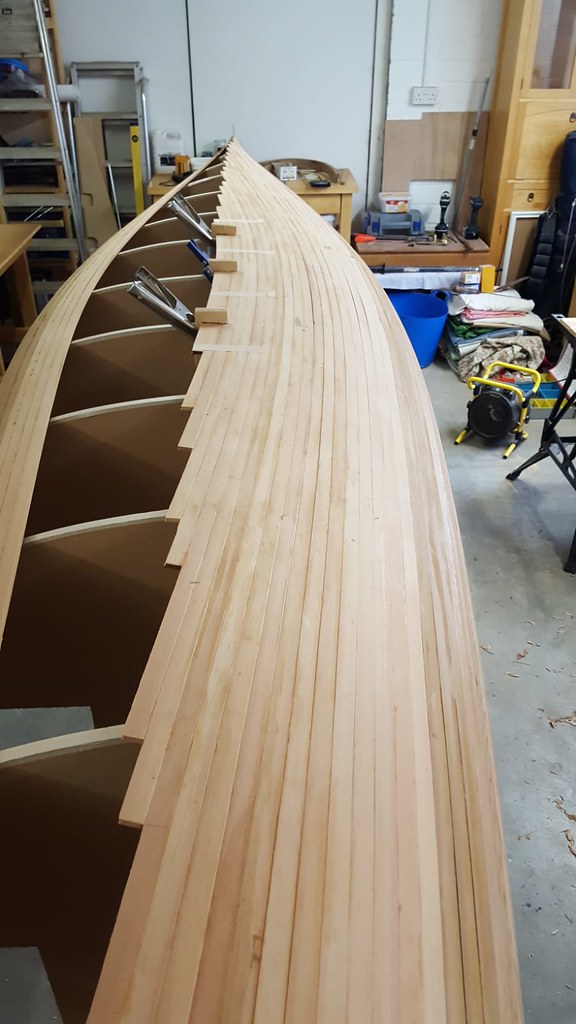
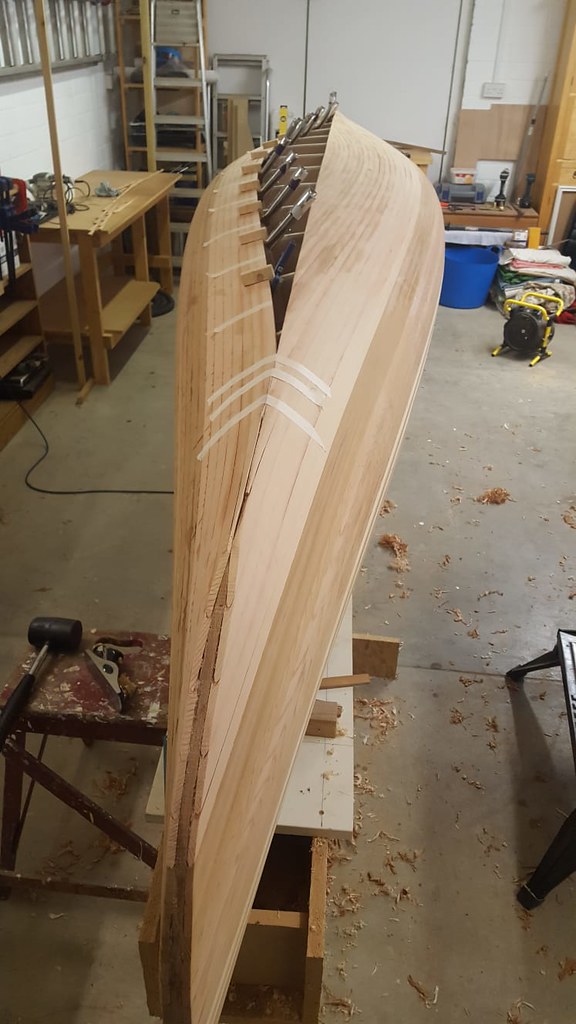
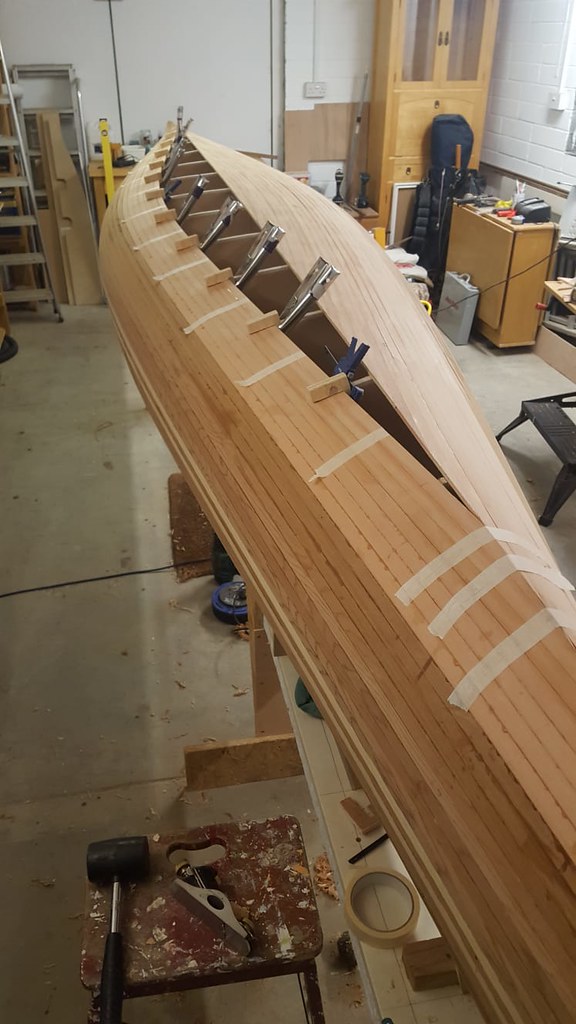
He then started putting strips on the opposite side, this is a little more tricky as you can't stick them on oversize and trim them back after gluing like before, each strip needs to be cut to match the centreline perfectly both ends before gluing up. He tells me this is very difficult on his own!


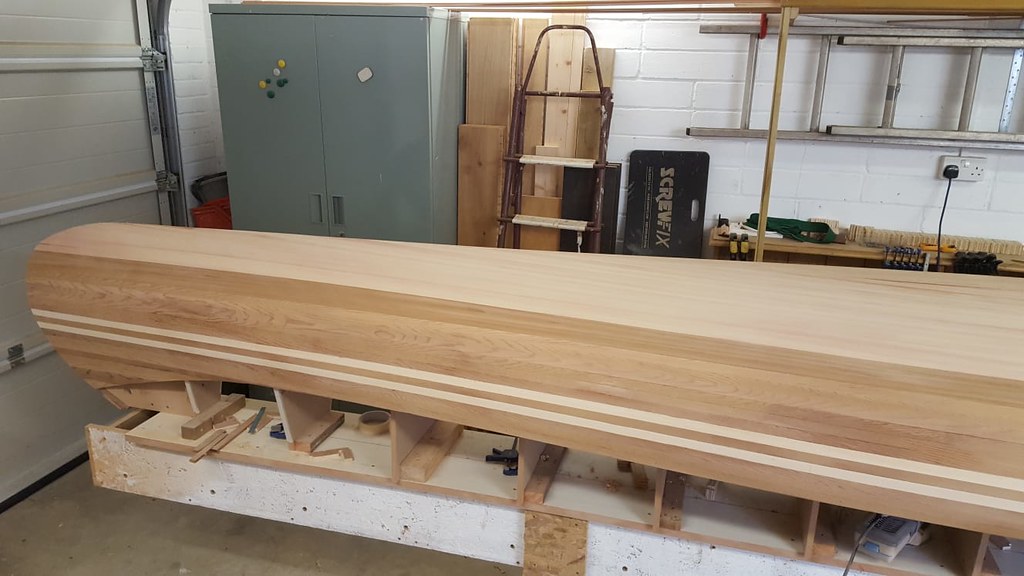
Before lockdown we also started to smooth the finished side of the boat at one end, what a satisfying job that is! The cedar is so easy to work that it planes like a dream, taking the high spots off the strips is very easy and 80 grit sanding to a pretty decent smooth finish is not a long process.
Here is a shot of the smoothed part and a shot showing some smooth and some un-touched:


My dad has learned how to send photos via whatsapp now so when there is progress i'll be sure to post it up!
 
Hi Dan,
Really good project, sharing it with your dad is wonderful. I have been building boats since I was 15 starting with a Bell Woodworkings Mirror dinghy kit. I never really had the space or the tools to really relish my goal but you have to adapt. I was fortunate to know a pioneer in glass fibre construction "Joseph Rankin"' t/a Glasplies in Southport, Lancashire. Joe died many years ago, the company continued for a while but now has ceased trading. His expertise however is what most of the other UK suppliers have built upon. Joe's knowledge was in relation to solid glass fibre boats and I am lucky to learned from him.
For your project I would use Glassfibre Surfacing Tissue. It comes 1 metre wide so as previously suggested a join at the keel is ideal. It is 3mm thick about 25-27 grams per square metre. So light it tends to float in the air. I would use a UV stabilised epoxy resin ABL Stevens are a company I have used, the "West system" is well known. I covered the outside of the hull with epoxy before applying the tissue and let it dry filling in any slight gaps with homemade resin filler. Ensure the hull is smooth again and apply the tissue. Bulldog clips help to hold it down so long as its firmly held in place at the keel. You may have to dart it in places where the curve tightens up. Some boatbuilders then use a second tissue laying it in the opposite direction. You could also line the inside as I did but on your build with the cove and bead edge joint, just a coat of resin inside may be enough. Dry fit tryout is good practice. All of this before the gunwales go on.
With my H & S cap on, Epoxy resin does not smell as pungent as Polyester but equally if not more nasty so wear adequate respirators and keep the room well ventilated. Its a messy business
Joe Rankin's advice was resin cures at 20 -25 deg c. You can drop to 16 deg by adding more catalyst but I would strongly recommend against it, you need the ratios spot on within 20- 25 range so adding more catalyst is very hit and miss. Ok for mass builders who have experimented but not for us mortals. It has to be dry as well so pick your day(s).

Malcolm
 
I have attached a page of Glasplies advice Paragraphs 6 to 11 apply. I would add that the process of wetting the hull before applying the tissue will give you an indication of the amount you need. If you're under at this stage it is less of a problem. I use scales to measure ratio by weight rather than volume as its more accurate. Good quality resin will keep well in dry ambient temperatures, if sealed and uncontaminated.
 

Attachments

  • Resin1.jpg
    Resin1.jpg
    175.4 KB · Views: 3
Oh dear. What a shame that your dad decided to bodge it up. At the very least it needed patching properly. This would definitely cause me to lose interest and this one would be sold on asap after finishing. Dad would be in my bad books for overriding an agreement and doing a disfiguring glue up. Sorry.
 
Excellent read!.. A project that I have on my bucket list. Looks like you're doing a fab job - dramas and all! Dads hey!!??...

Keep up the good work (y)
 
Oh dear. What a shame that your dad decided to bodge it up. At the very least it needed patching properly. This would definitely cause me to lose interest and this one would be sold on asap after finishing. Dad would be in my bad books for overriding an agreement and doing a disfiguring glue up. Sorry.

At the end of the day i'm spending some time with my dad messing around with bits of wood, I can't really be that upset with him about an accident. Maybe I don't have the perfectionist streak of some but we will still get a lot of enjoyment from the rest of the build and use of the canoe in future. I've no doubt here will be another one though!
 
The whatsapps have been coming thick and fast, the stripping is now almost complete, with no extra unplanned holes I might add!


In the picture below you can see some of the various methods required to hold things in place when things get a little tight, masking tape is an absolute lifesaver for this work. Also it shows how well the points of the strips from opposing sides of the boat are matching up, i'm dead impressed with that. It will be covered by a keel strip but you will be able to see it inside the boat, so it's nice that they line up so well.


A bit more shaping of the finished side has been done, it's looking lovely and smooth


And this is the hole where the last strip goes, it's known as the whiskey strip so my dad says he's left it for me to fit when I'm allowed to go over, and he's got a bottle waiting in the drinks cabinet.

 
Back
Top