Building a shed in Finland

UKworkshop.co.uk

Help Support UKworkshop.co.uk:

This site may earn a commission from merchant affiliate links, including eBay, Amazon, and others.
Wow, what a post !
Thank you for documenting the project.
I stand in awe of someone who can carry on a real form of building like this.
There are so few who still have the desire, skill, and perseverance to make this both real, and yet, so basic.
Now that you have done it - you have helped others by your detailed post - but if you were teaching, I would be your first student !
You could ( and should ) extend this to building beautiful homes.
Thank you
 
what will u use to protect the wood....?
do u have wood eating bugs up there.....?
I did some paneling like that but under a tiled roof....
took the time to seal/stain all sides before fitting...

Not a problem here fortunately. The traditional paint is a very old type of paint called Falu Red, which dates back to the 1500s and is still popular today. It translates to english as mud paint, but I am not sure about that. It's rust as coloration with a mix of other minerals such as copper (the iron ore from Falu has all those, hence Falu Red name) that is boiled with a starch like flour and sometimes linseed oil too.

It's more a stain than a paint that builds a layer. Permeability prevents trapping of water however so that can be a plus.

However, all my other buildings are gray-blueish with white accents. There is apparently mud paint of other colors. I would like to try that.
iXvbzZ3.png
 
It is going to look very smart!
(Did you miss the building lesson all about windows ;-) )

I'm sure I could add some later, if I find some cheap old windows. But its just a shed so low priority.

Wow, what a post !
Thank you for documenting the project.
I stand in awe of someone who can carry on a real form of building like this.
There are so few who still have the desire, skill, and perseverance to make this both real, and yet, so basic.
Now that you have done it - you have helped others by your detailed post - but if you were teaching, I would be your first student !
You could ( and should ) extend this to building beautiful homes.
Thank you

Thanks for the kind words, I don't think I could do this professionally, I work far too slowly!
 
A late, but larger update

I have gotten some more shelving up and I also moved the old shelf that used to be in the shop over here (back wall), no point tossing it away.

Mw1nDuhh.jpg


I got the boards up to cover the underside of the roof in the front
XXkD47Ah.jpg


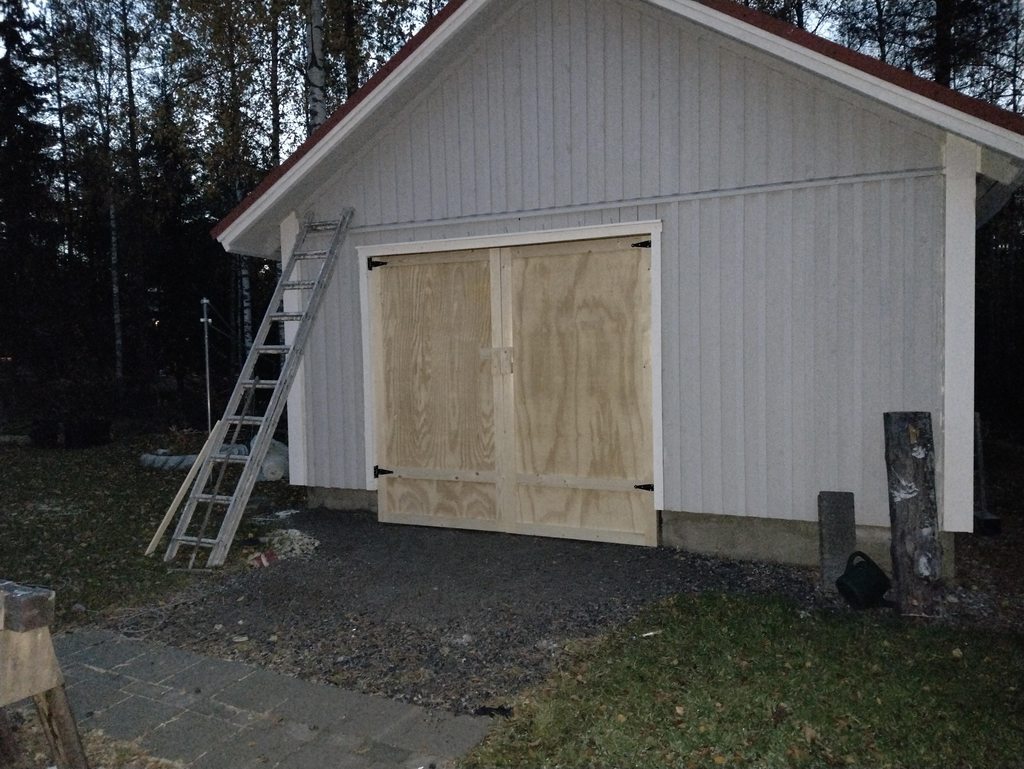
Then I had to pull a **** load of boards on this wall because when I looked at it from afar I saw they where not plumb. I pulled them, removed the nails and put every board back with a water level. I kept pulilng boards after this pic was taken, probably redid 80% of the wall.

Cf2LFd7h.jpg


Then I started covering up the corners. I dunno what you call these in english:
nPZMAZyh.jpg


Back wall mostly done, before the boards ran out. Bur I got the last batch today and it should last me to fix all that needs doing. I am just missing the battens now.
znzUufzh.jpg


I need to cut off the beams that stick out before I can proceed, I used a sawzall on the front side but the blade was ****ty and wore out so I have ordered new blades, they got here today and are hopfully better quality. They have similar tooths as old timey tree felling saws, the type used by two people.
u673adLh.jpg


Then my fiance came home with a pool so I had to spend time to assemble that too:
6UND8pkh.jpg


We got a better filtration system though, the ones that come with these cheap pools are like 10x undersized for the task.

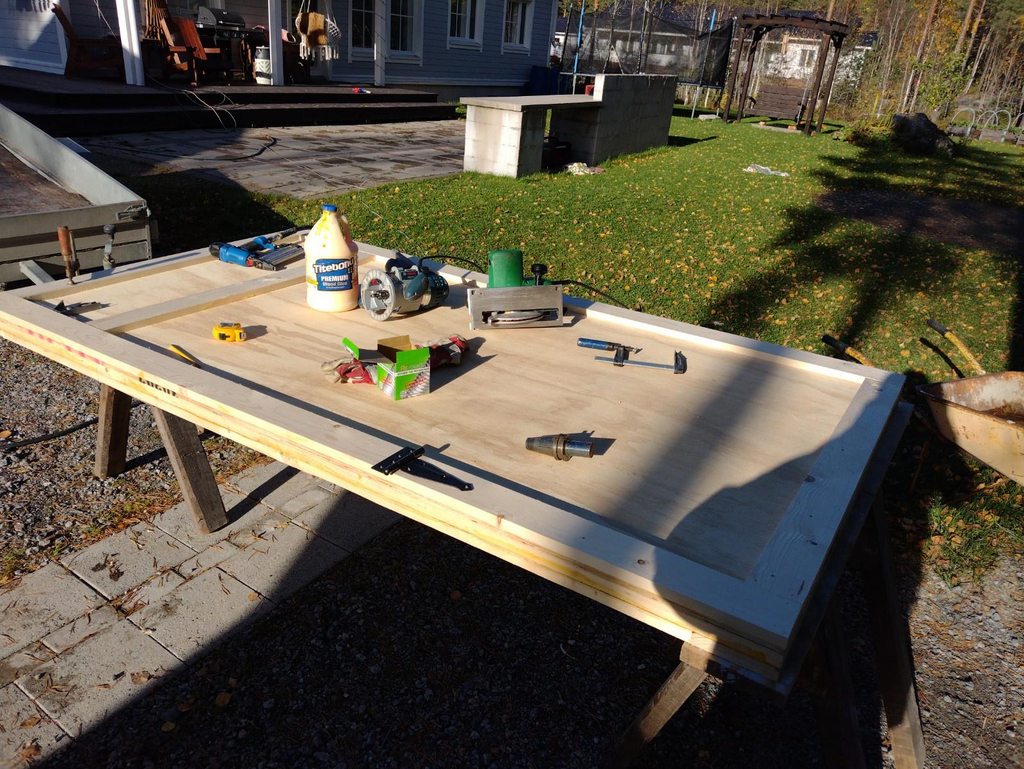
The miter station has been really handy, but since it's MDF if it starts to rain I have to pull it inside and it has rained a lot this summer.

rWz26eXh.jpg


Still it's so fast to set angles.
6gmvyvMh.jpg


I developed a new procedure for cutting the boards for the upper part of the gable wall. When I did the front wall I went back and forth with a measuring tape for each board and it took forever! This time I laid the previous board down and put a spacer between the next board and extended the cut line to the new board. This way I could cut a bunch of boards and just go and nail them up.
lzyxmsth.jpg


Going a lot faster
ekbTbC0h.jpg


E3Ei2jih.jpg


Done in a few hours. Took me two days to do the front...

qERDz9Xh.jpg


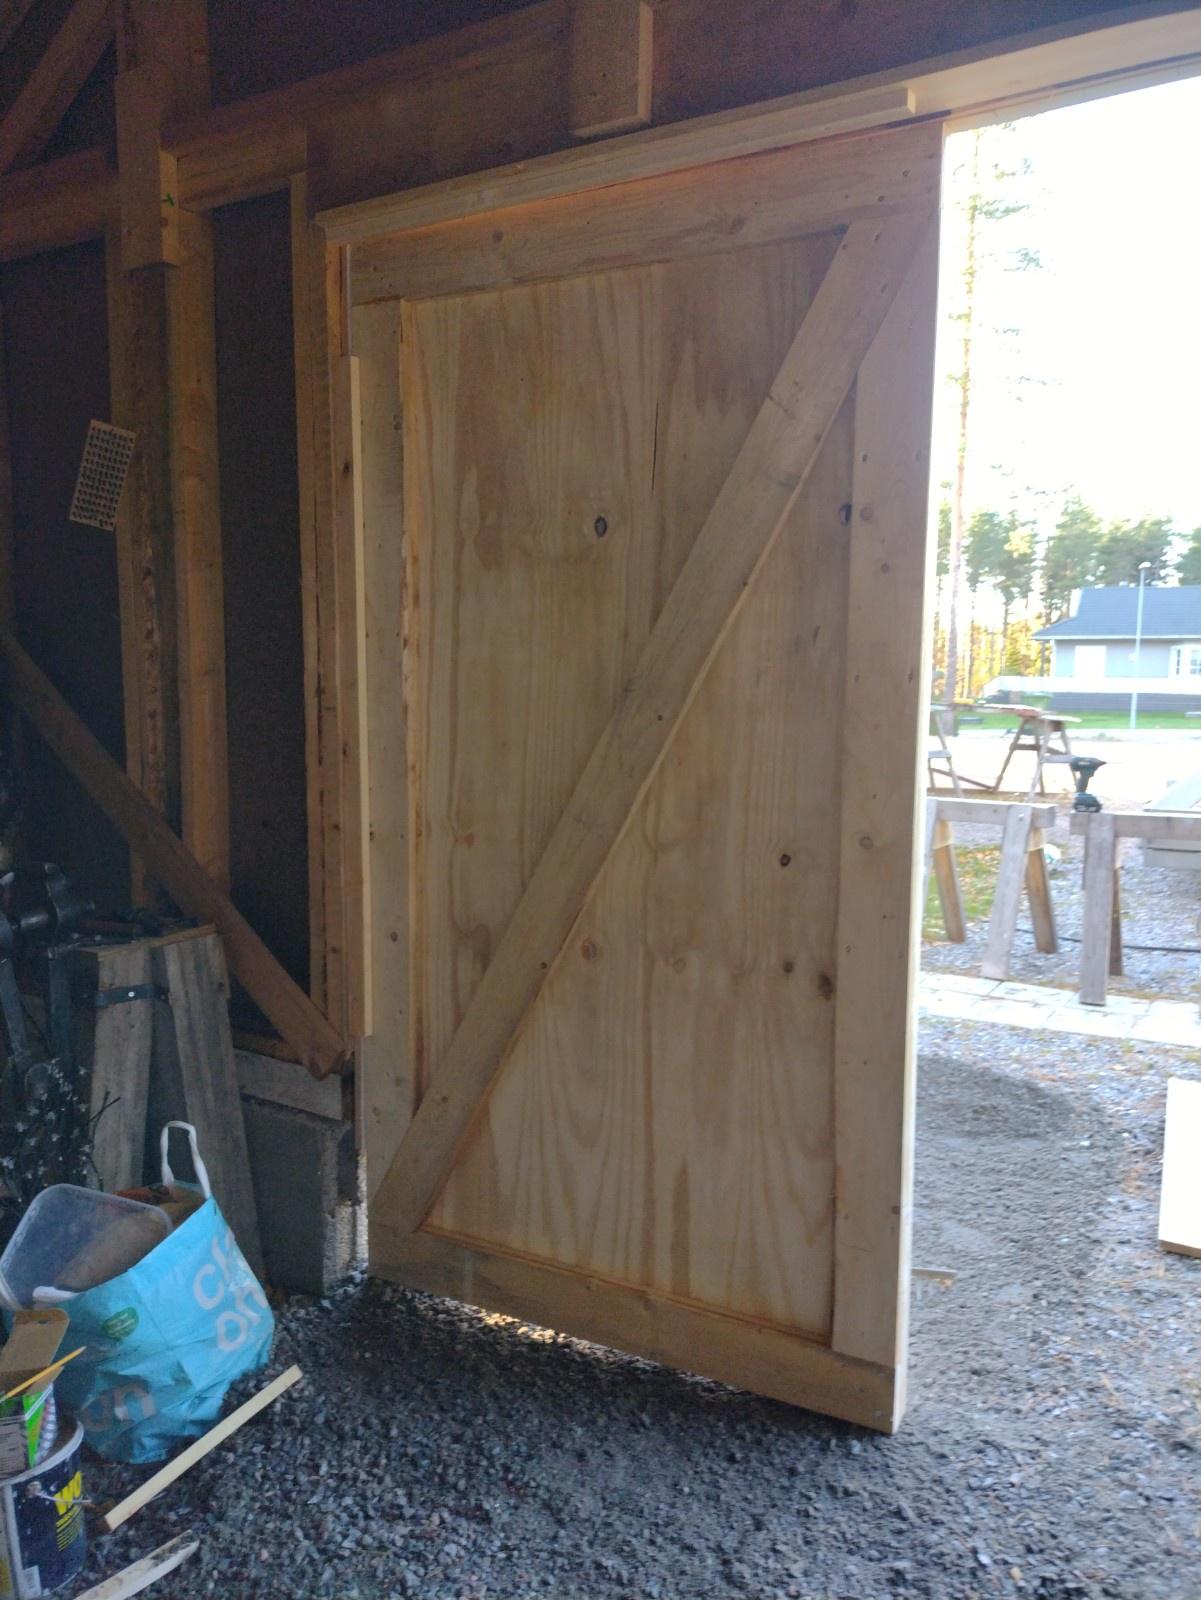
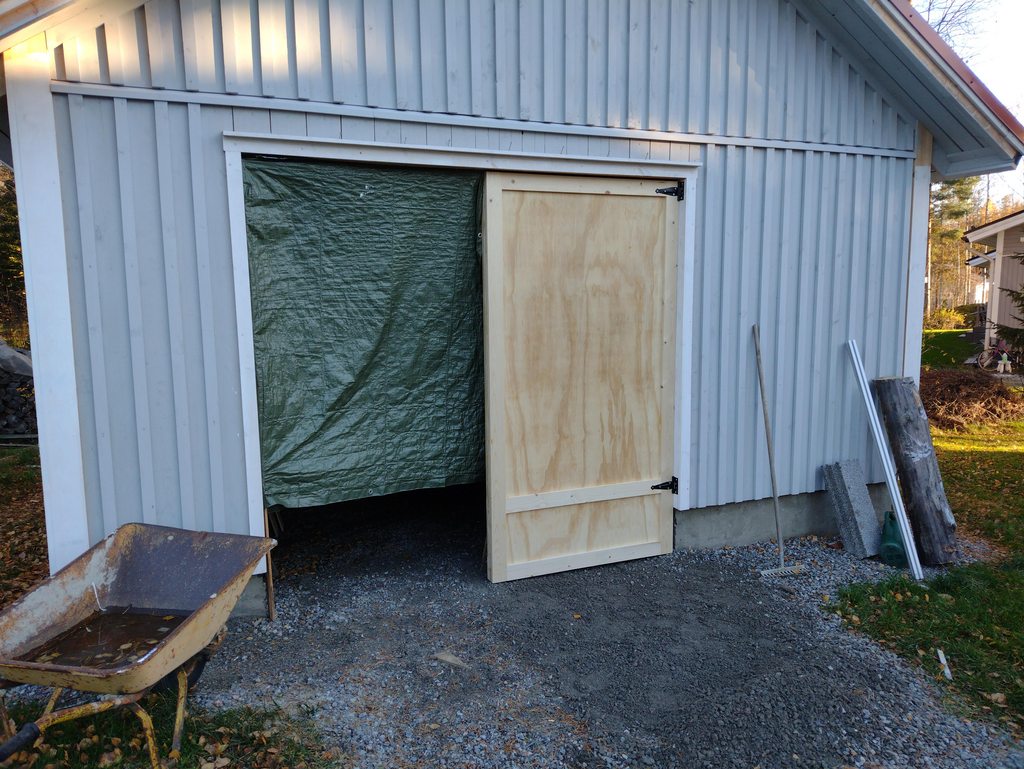
I've started doing some decorative stuff, covering all the corners and finishing the door opening. I will be redoing the top list, it can't just be nailed on the front like this. Plain mistake on my part. I will be fitting sheet metal drip board later.

zLNazFch.jpg


Starting to paint the shed
uNiJz8sh.jpg


CLBJLVLh.jpg


ePZcnsLh.jpg


I am painting with dilluted paint as a primer on the fresh boards and I am doing it before the battens go up. As time goes on they will shrink and leave gaps without paint if I don't paint these first.

And I've nailed battens onto the entire lower part of the shed now and started painting those. I still need to do the upper side on both front and back.

ZLAFDBph.jpg


bNAemCDh.jpg


Above you can see what it looks like when I've done a "primer" coat using paint thinned with water compared to further down where I've been over it again.

s4TDEmFh.jpg


This wall I went over with a spray gun last night. I put paint in a 1.8 mm primer gun I have used on cars and stuff and dilluted it with water and it worked pretty well I gotta say. I still went over the wall with a brush afterwards but it was much quicker than doing with only a brush. I think if I had a spray gun with a 2.5 mm tip that would be the ideal for this paint. I'm planning get one of those anyway for spraying polyester filler.

OatpiaMh.jpg
 
Lokks to be going well Dennis. Did think you could make a better door though :LOL:
 
It can survive without gutters, I'll be adding those the very last. There's underground drainage that also helps.

First door is up.
CXWharjh.jpg


I screwed some wood into the door opening to butt the door up against that to get it sitting correctly, then I screwed it in place. The door frame was made from 125x22mm panel boards, I laminted two layers with the grain in opposite directions to stop the door warping. Then I fitted an outer skin of plywood, with narrower and planed boards to create details.

9XhOjN0.jpg


8cinAoCh.jpg


It's not done yet, but I wanted to put it up like this before I got heavier. I plan to add more detailing on the front such as some , also considering a third hinge. For now the door is screwed in place, but I want to make a concrete threshold under the doors later, and the lock will lock into the top of the door frame as well as into the threshold. The doors will also be painted, most likely white. Though dark grey could be interesting too.

The hinges are also temporary, I really want to forge my own hinger but there's been no time for that. I am so behind on my forging work, haven't fired up the forge all summer and now winter's nearly here.
 
I didn't want to spend loads of money on temporary hinges, they feel beefy enough to me to last until I replace them with something better.
 
Now I have a complete door at least

wQ6tSVAh.jpg


Sorry about the blurry photo, mornings are getting dark this time of year. I still gotta make some adjustments though, the door frame isn't square. Doors are, the frame on the left side has gotten twisted, the stud itself that's the issue. Will have to do some corrective planing.

And this guy is always interested in ladders
hOO62l6l.jpg
 
it's all comming along really well now....good job.....
I have to work on a gravel floor, 3 years now, drives me nuts.....
I would have concreted the floor before now to make working easier....
IMG_5215.jpeg

my new worshop build starts this winter.....at long last.....lol....
ps the pick up hiding in the back is a 128 Citroen...
 
Here's an updated photo of the shed, taken today

XkiepWbh.jpg


I might have mentioned before, but I am thinking of casting a concrete floor slab in it, insulated slab of course. I am also thinking of adding insulation and sealing it up better and moving my woodworking shop into there and freeing the space in my garage entirely for metalworking and car related stuff.


I am unsure how well it would work to have an insulated, but unheated shop. I might then add a wood stove, but it wouldn't be heated on a permanent basis and temperature would then definitely go above and below freezing. Which can cause frost to form on metal surfaces which then melts. That's my main worry really. I would have more space in this shed than I do now for woodworking, 25m2 vs maybe 18m2.
 
Big doors, heat loss when opened? RE condensation, when finished, would opening the doors (perhaps with fan) 'cool the place down' sufficient to stop condensation?
Nothing worse than a cold workplace!
 
Not worried about working in cold if I get a wood stove that should bring the temps up quick. What I am worried about is how the equipment will fare.
 
Since you are considering putting in an insulated concrete slab you could put piping in it to take heated water from the wood stove to warm it up too. It might be enough to keep the inside temperature up enough to keep from freezing although you might have to use it every day. In the same vein an exterior wood boiler with a good sized fire, could heat enough water to keep the shop warm for days. More money, time and effort to set up of course.

Otherwise keeping your hand tools in an insulated, electrically heated cabinet and blankets over your machines with rod heaters fastened under the tables will keep them from rusting. Is there enough winter sunlight to make some electricity for rod heaters?

Nice building you can be proud of.

Pete
 
I wouldn't do anything water borne because it would surely freeze. I barely do any woodworking in winter time, a few days over the whole winter really, I haven't really done anything this winter that's woodworking related I think. So things would mostly be cold for long stretches of time. That's also why I am contemplating this, since a lot of heated real estate is now used mostly as storage of woodworking tools.
 
I was using the term "water" rather loosely. It would have to be an antifreeze mix of one type or another to keep it from freezing etc. I do understand not wanting to keep a warm shop you don't use a lot.

Pete
 
Back
Top