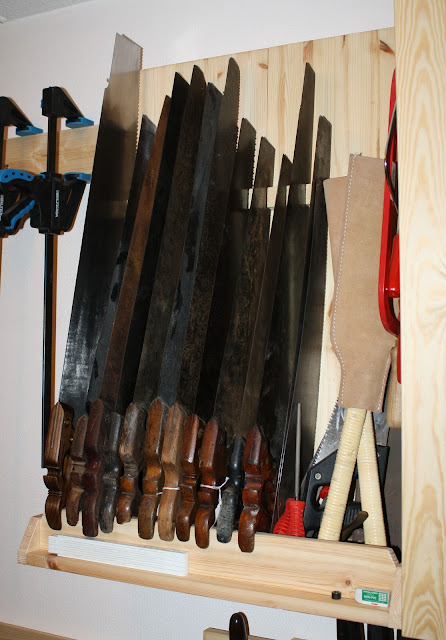
I'm a big fellow at 6'6", so I've got a long arm stroke to match, and I don't have a bandsaw so all stock prep is done by hand. For years I've kept an eye on ebay and local flea markets for a nice big ripsaw to ease the pain, but I've never had any luck. I was chatting with Pedder a few weeks back and he pointed me towards Lui Rocca, a bloke from the UK who has started making saws on the side as Springwood Handsaws - especially the big stuff, it seems! So that got me thinking..
After some dialogue with him he sorted me out with two shiny new sawplates, a 29" progressive pitch ripper 5 - 3.5ppi and a 27" 6ppi crosscut. Beautiful stuff. I was keen to try making my own handles and he was able to sort me out with enough black walnut for the two of them. Real upstanding chap Lui - a pleasure to deal with, in-progress photos, and a very decent price to boot!
I designed my own handle design, something of a cross between a classic Disston thumbhole handle and I threw in a bunch of influences from eg the D7 and some backsaw handles I like, to end up with something a little more ornate.
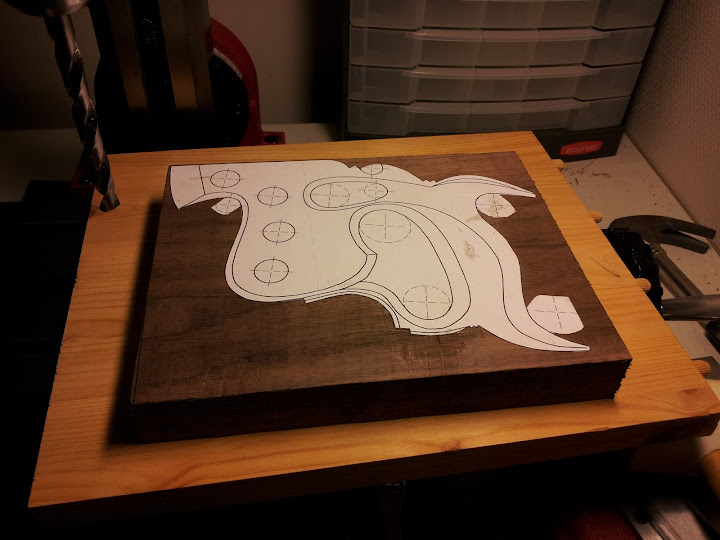
I started by printing out the design and using a glue-stick to paste it to the blank:
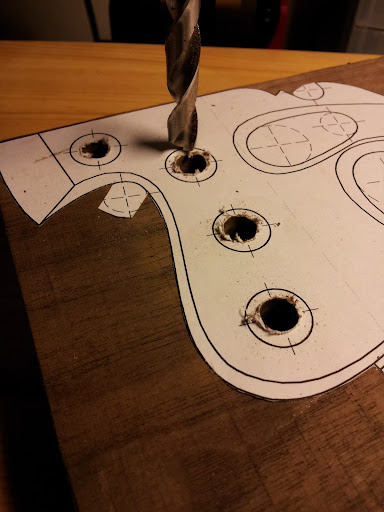
Then I drilled for the sawnuts:
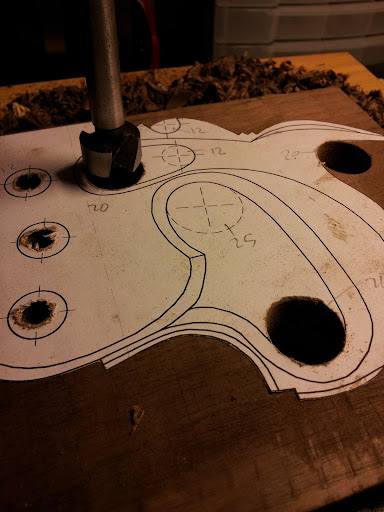
I used forstners and spade bits to hog out the curved parts:
Then used a coping saw to cut the shape:

I was having too much fun when carving and forgot to take any photos, but I used rasps and files until I was happy with the rough shape - this was a whole lot of fun!
I then carefully measured the kerf of each of my saws until I found one that matched the thickness of the sawplate. I clamped this saw to my bench with a ~1/2" block of wood underneath it, and shimmed with paper so I could pull the new handle along the teeth and start a perfectly centred slot for the plate:
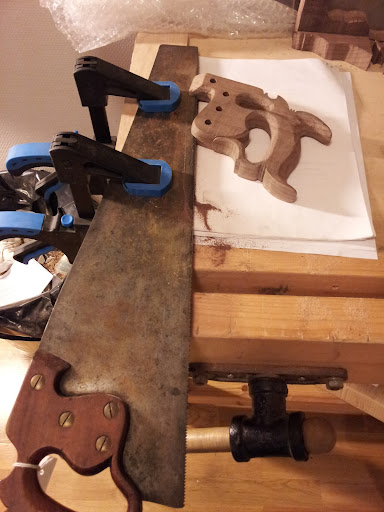
Once the slot was well started I switched back around the normal way and finished the slot to depth:
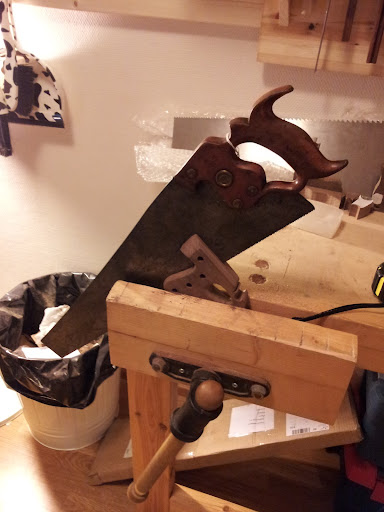
I marked up the sawplate for drilling and used a sharp cobalt bit with slow speeds and a bunch of coolant to drill it through. Every time it started to make any high pitched noises I paused and replenished the coolant - it was an easy process in the end:

Next up I spent a few hours doing my most hated of woodworking activities - sanding. I didn't bother taking off all of the tool marks, I went until I had a nice comfy handle and left it at that. I mixed up a batch of finish, based on a recipe I've heard from Pekka Huhta, an old boatbuilders' classic. 2:2:1 boiled linseed oil : mineral spirits : pine tar. This went into a freezer bag along with the handle. I let this soak while I cleaned up the dust from all the sanding:
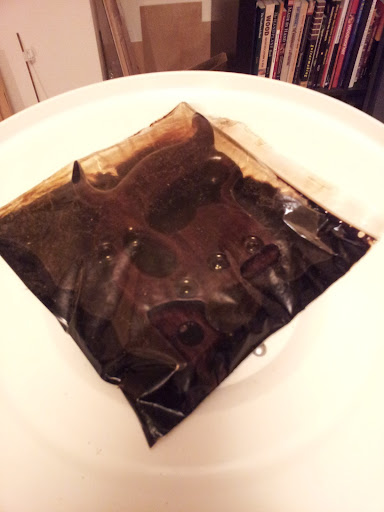
I left it in there for about 30 minutes, then took it out and wiped all the excess off. The rest of the finish is kept for next time. It will keep oozing out of the endgrain for a while. I let that dry for 24 hours, then rubbed in some paste beeswax (50/50 beeswax & mineral spirits) and assembled the saw! The sawnuts are simple brass M6 furniture nuts, joined with a short length of brass M6 threaded rod.
The completed monster:
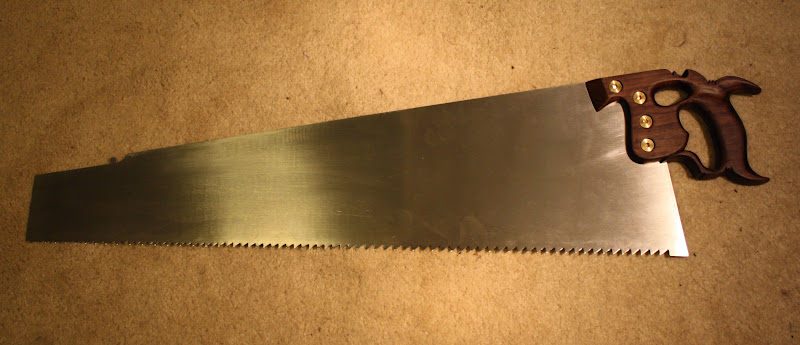
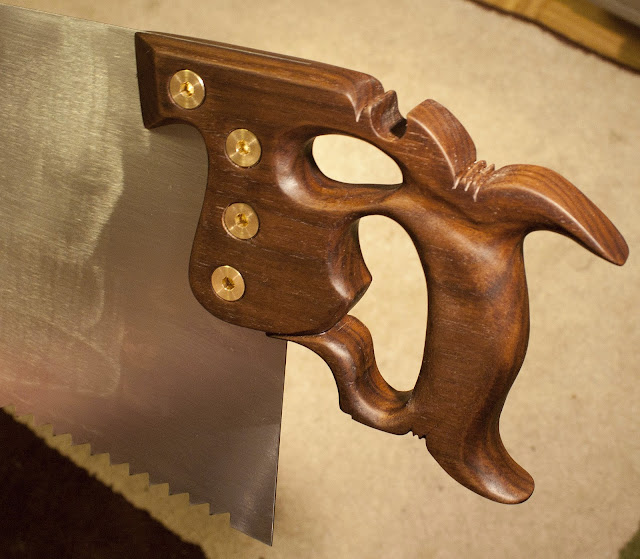
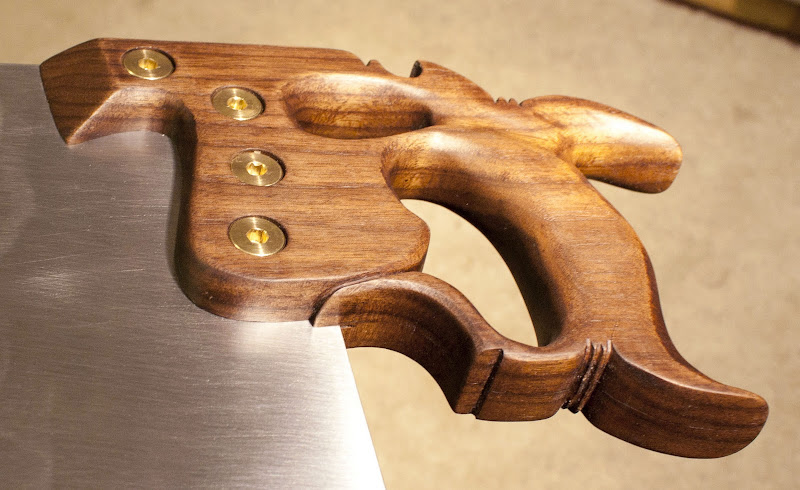
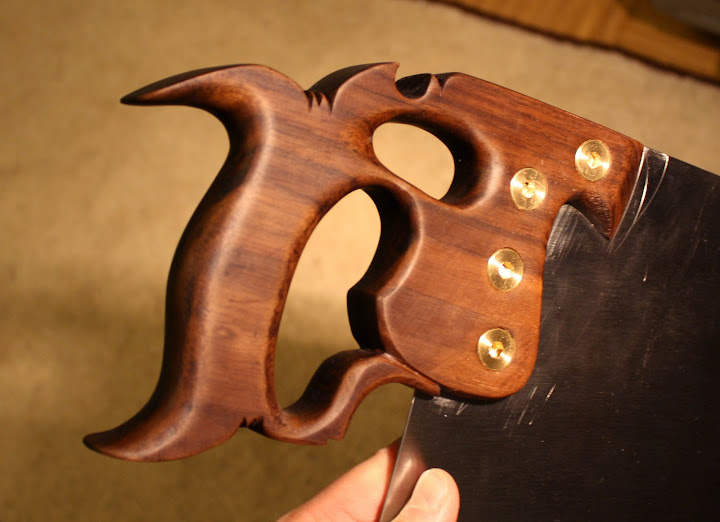
It was a great experience to make this handle, surprisingly easy and very satisfying. The result is supremely comfortable, and the finish is very tactile and easy on the hands. The performance of the plate is very impressive - it really is a monster. I tossed a piece of 4" pine at it for its first test run and it chewed through it in no time. I'll be enjoying this saw for years to come")
Thanks Lui!
After some dialogue with him he sorted me out with two shiny new sawplates, a 29" progressive pitch ripper 5 - 3.5ppi and a 27" 6ppi crosscut. Beautiful stuff. I was keen to try making my own handles and he was able to sort me out with enough black walnut for the two of them. Real upstanding chap Lui - a pleasure to deal with, in-progress photos, and a very decent price to boot!
I designed my own handle design, something of a cross between a classic Disston thumbhole handle and I threw in a bunch of influences from eg the D7 and some backsaw handles I like, to end up with something a little more ornate.
I started by printing out the design and using a glue-stick to paste it to the blank:
Then I drilled for the sawnuts:
I used forstners and spade bits to hog out the curved parts:
Then used a coping saw to cut the shape:
I was having too much fun when carving and forgot to take any photos, but I used rasps and files until I was happy with the rough shape - this was a whole lot of fun!
I then carefully measured the kerf of each of my saws until I found one that matched the thickness of the sawplate. I clamped this saw to my bench with a ~1/2" block of wood underneath it, and shimmed with paper so I could pull the new handle along the teeth and start a perfectly centred slot for the plate:
Once the slot was well started I switched back around the normal way and finished the slot to depth:
I marked up the sawplate for drilling and used a sharp cobalt bit with slow speeds and a bunch of coolant to drill it through. Every time it started to make any high pitched noises I paused and replenished the coolant - it was an easy process in the end:
Next up I spent a few hours doing my most hated of woodworking activities - sanding. I didn't bother taking off all of the tool marks, I went until I had a nice comfy handle and left it at that. I mixed up a batch of finish, based on a recipe I've heard from Pekka Huhta, an old boatbuilders' classic. 2:2:1 boiled linseed oil : mineral spirits : pine tar. This went into a freezer bag along with the handle. I let this soak while I cleaned up the dust from all the sanding:
I left it in there for about 30 minutes, then took it out and wiped all the excess off. The rest of the finish is kept for next time. It will keep oozing out of the endgrain for a while. I let that dry for 24 hours, then rubbed in some paste beeswax (50/50 beeswax & mineral spirits) and assembled the saw! The sawnuts are simple brass M6 furniture nuts, joined with a short length of brass M6 threaded rod.
The completed monster:
It was a great experience to make this handle, surprisingly easy and very satisfying. The result is supremely comfortable, and the finish is very tactile and easy on the hands. The performance of the plate is very impressive - it really is a monster. I tossed a piece of 4" pine at it for its first test run and it chewed through it in no time. I'll be enjoying this saw for years to come
Thanks Lui!