Pretty sure I'll get some hate for this, but it started out as a "Couple of hours. Tops" project and turned into something else.
Hence the use of OSB.
(I can hear the murmurs of disapproval already )
)
Anyway. Long story short, I've had the BS250 nearly four years now, and it's always been sat on top of a bench, which is obviously WAY too high. Not been used a great deal in that time, probably due to the discomfort of using at eye-height. Anyway the factory supplied (yes, yes ... Tuffsaws, need to get in touch etc etc) blade finally snapped a few weeks back, at which point I just shrugged and said whatever.
Couple of weeks ago though, I was picking up some freshly sharpened blades from DB Keighley, and on the spur of the moment asked if they had any bandsaw blades, sure enough a 1/2" x 6tpi was on hand, so bought that and set about freshly installing and tuning the BS250. Great stuff. Back in action and all running true.
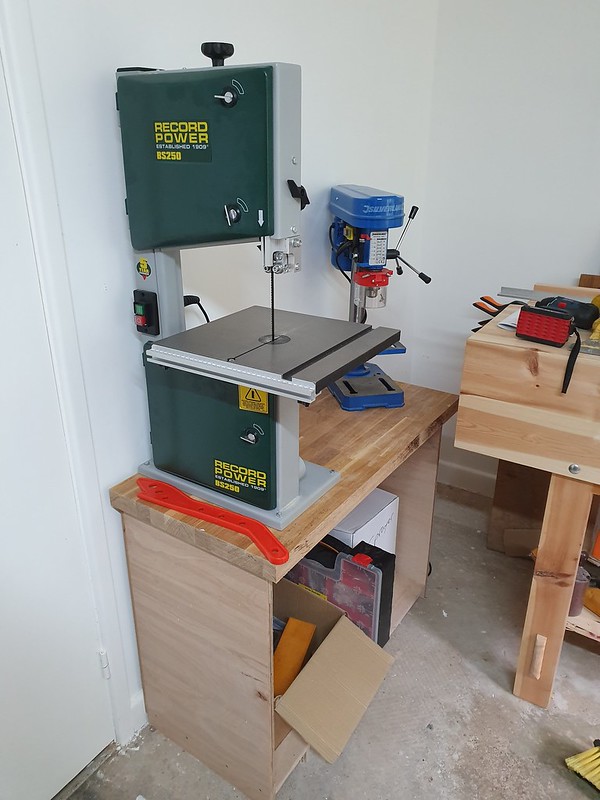
That's when I decided enough was enough and a stand at the correct height was needed. So off to the local timber merchants, and wouldn't you know it, been cleared out of 18mm ply no more than an hour earlier. Sod it, only a cheapo bandsaw stand, OSB will do.
Once started though, I realised the cut edges were REALLY rough, not from the freshly sharpened Freud blade, just naturally so. Ok so I'll run some softwood strips off and edge it all. What you see below developed from that simple premise. With hindsight I should have sanded the softwood lipping rather than take it straight off the Triton lunchbox thicknesser, couple of wee nicks in the blades are very evident now they're painted black. Finish is Screwfix No Nonsense quick drying gloss floor varnish. Oh, and the top is a piece of 25mm Egger flooring.


Hence the use of OSB.
(I can hear the murmurs of disapproval already
)Anyway. Long story short, I've had the BS250 nearly four years now, and it's always been sat on top of a bench, which is obviously WAY too high. Not been used a great deal in that time, probably due to the discomfort of using at eye-height. Anyway the factory supplied (yes, yes ... Tuffsaws, need to get in touch etc etc) blade finally snapped a few weeks back, at which point I just shrugged and said whatever.
Couple of weeks ago though, I was picking up some freshly sharpened blades from DB Keighley, and on the spur of the moment asked if they had any bandsaw blades, sure enough a 1/2" x 6tpi was on hand, so bought that and set about freshly installing and tuning the BS250. Great stuff. Back in action and all running true.
That's when I decided enough was enough and a stand at the correct height was needed. So off to the local timber merchants, and wouldn't you know it, been cleared out of 18mm ply no more than an hour earlier. Sod it, only a cheapo bandsaw stand, OSB will do.
Once started though, I realised the cut edges were REALLY rough, not from the freshly sharpened Freud blade, just naturally so. Ok so I'll run some softwood strips off and edge it all. What you see below developed from that simple premise. With hindsight I should have sanded the softwood lipping rather than take it straight off the Triton lunchbox thicknesser, couple of wee nicks in the blades are very evident now they're painted black. Finish is Screwfix No Nonsense quick drying gloss floor varnish. Oh, and the top is a piece of 25mm Egger flooring.