


Guys, finally finished (3/5/2009) the Baby High Chair and here's the story...
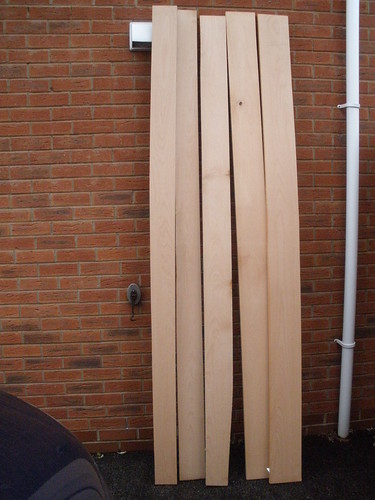
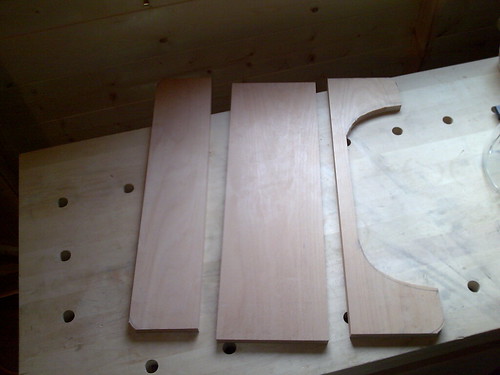
bought some steamed beech for the project. Original intention was to use
standard beech, but they only had 2" boards and i had no way to resaw so had
to go with the 1" steamed beech. Here are the boards. They look like bananas
in the picture for some reason but they were all very straight, except for the
bottom right edge of the middle board....that's real !
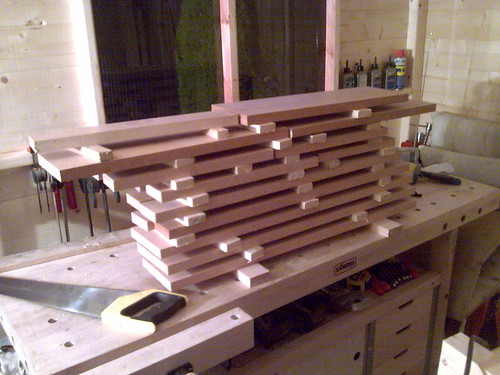
boards ripped and crosscut. very rough dimensions with plenty of margin as
this is my first hardwood project...apart from the seagrass stool at school
about 18 years ago !
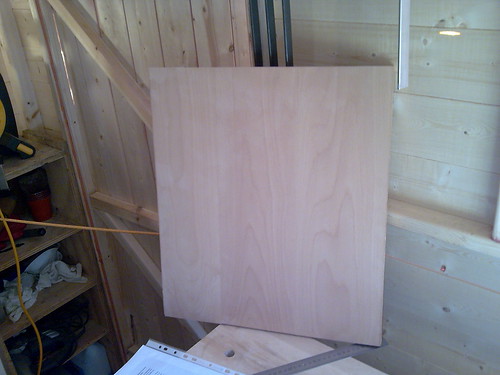
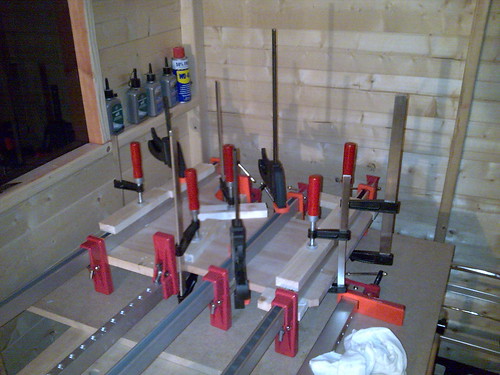
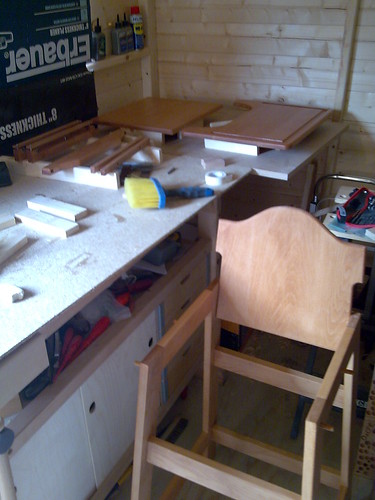
boards jointed for the seat and back.
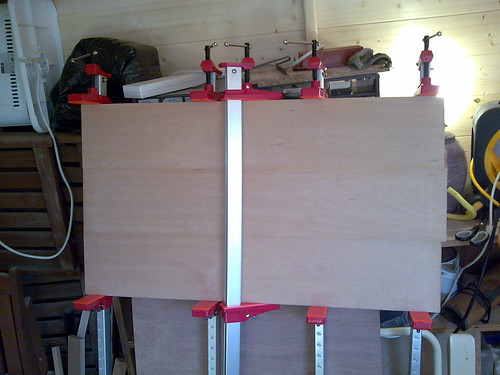
boards jointed for the tray.
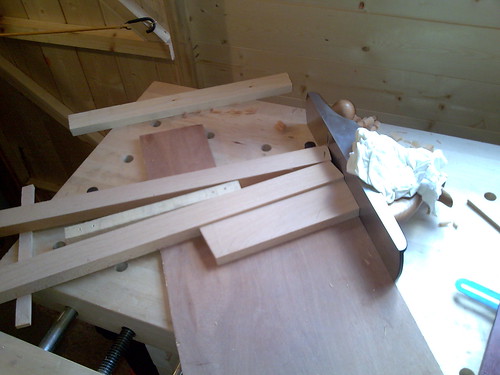
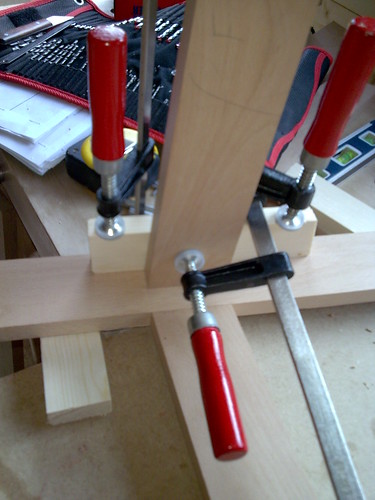
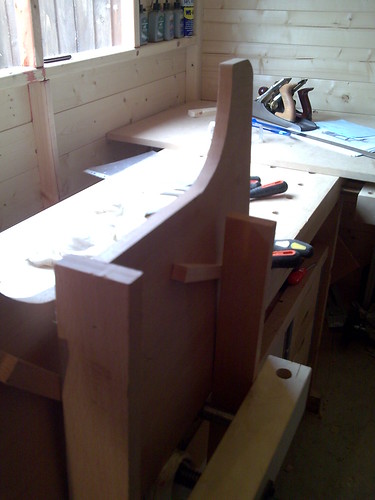
my makeshift shooting board with micro-adjustable fence ! looks crude and
rubbish but managed to create a very accurate finish in the end. The piece
being shooted (shot?) here is the top rail of the side A-frame.
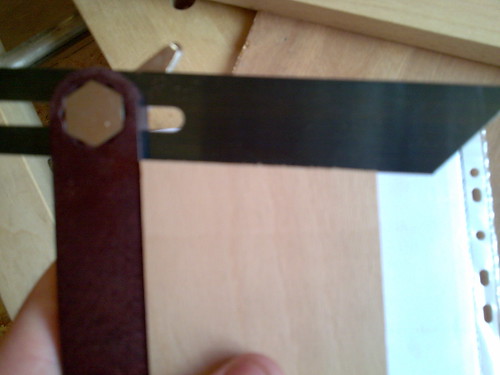
shows the accuracy of the shoot across the face with the bevel gauge pre set to
the required angle (6 degrees)
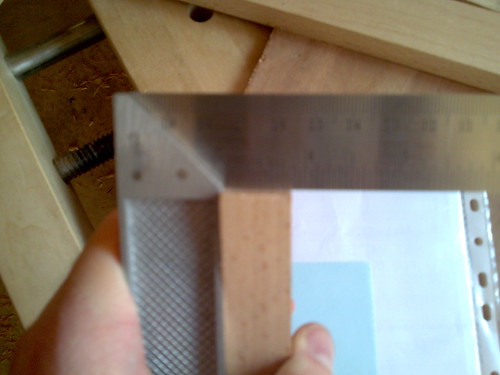
...and across the edge
The plans that i bought showed the side frames constructed using doweled
joints but i just couldn't get my head around how i was going to drill the
holes in the mating pieces accurately and consistently enough to get good
results.
Thinking..thinking...thinking then it hit me...replace the doweled joints with
a loose/floating tennon joint...Simples !
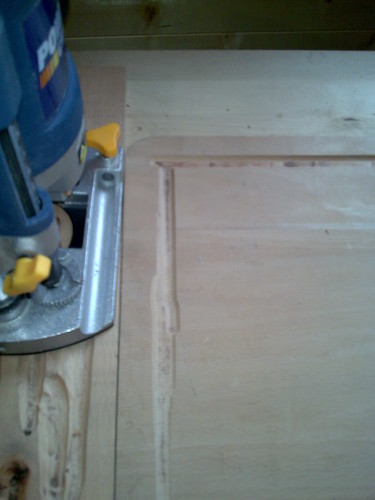
It's going to be much easier to create a joint using a router with a plunge and
base as 2 references than it is to use a drill free-hand. So, heres the
morticing jig that i knocked up using some MDF .
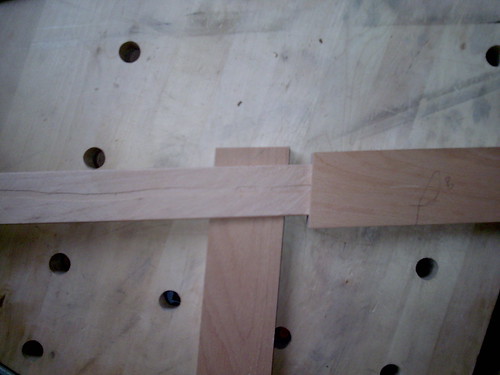
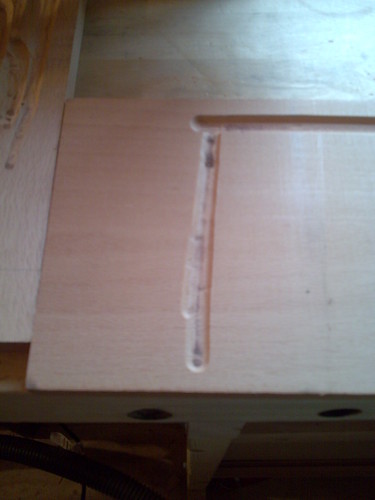
This picture shows the top rail of the side A-frame against a leg with a
length of stock i had sized for the loose/floating tennons, lightly scored
down the length with the router to allow the air out when glued up.
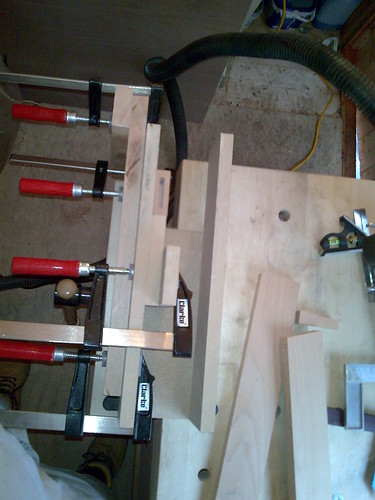
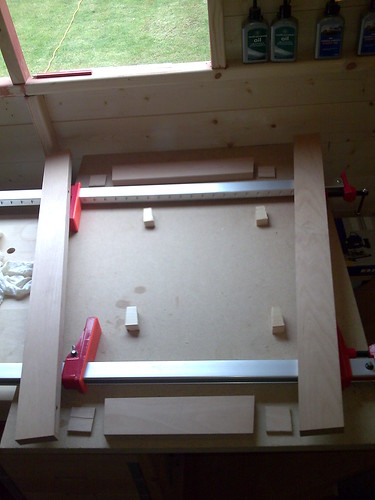
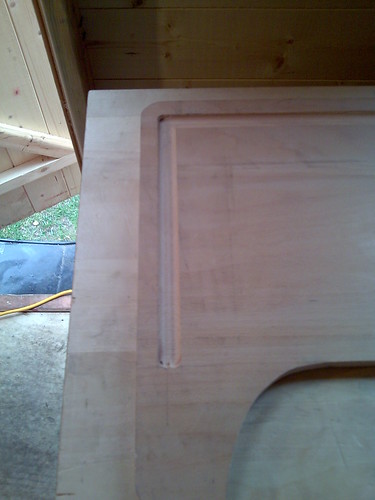
Have tried a dry fit and set everything up prior to glueing
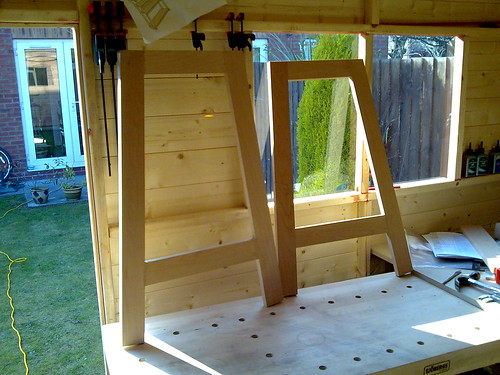
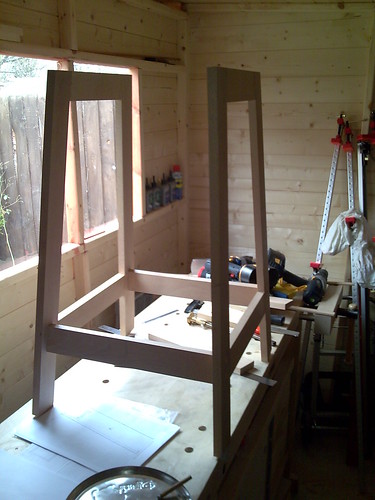
Finished side A-frames. They are the same size, just the one on the left is
more in the foreground.
Front rail that joins the two A-frames, held in place ready for drilling.
Front and rear bottom rails joined to side A-frames.
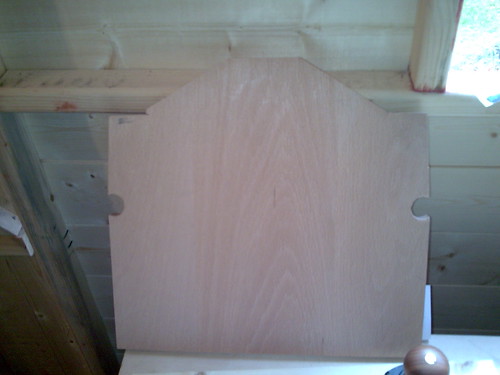
This is the back of the chair. Flat drill bit for the side holes and jigsaw
for the top profile.
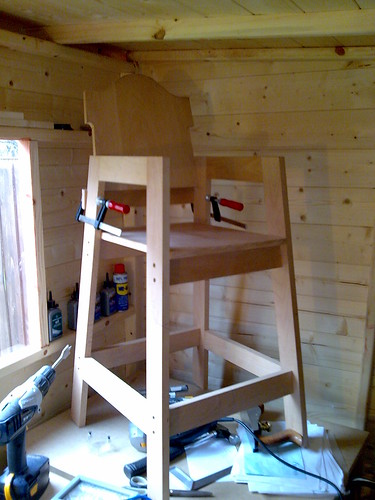
Couldn't resist a dry fit just to see how it looked. The plans showed the
front and rear rails joined with a single screw but i decided to use two as i
wasn't sure that one screw driven into end grain was enough. Baby. Paranoid.
I know a lot (all?) of you will probably cringe at this idea as it doesn't
allow seasonal movement, but i convinced myself it was ok because:-
(i) if the joint was a MT joint then this would not allow movement either. In
my case the Tennon was replace with 2 screws.
(ii) the wood will be sealed with several coats of oil, greatly
reducing moisture ingress/egress
(iii) the timber went straight from yard to shed without any acclimatisation (i
know, i know, but there is just NO room in the house! I tried). BUT, i
took a piece inside and wrote its cross grain measurement on it, placed
it on a rad and there it remained for about 2 weeks. As i live with
a woman, you can well imagine that it got a proper good roasting from
the rad ! ! After about 2 weeks there was 1 mm movement, but that could
easily be measurement error.
The tray, rough cut to shape with the jigsaw.
DISASTER with a capital F. I had the tray clamped to the bench between dogs so
that i could route the curve on the inside of the tray. I was convinced that
on this curve i should be hand routing from left to right but for some reason
the cutter gripped the wood and dragged along causing the tray to jump from the
dogs and hit the deck....
...producing this ! ! To be fair, i had noticed that after i had jointed the
boards for the tray there were gaps, albeit very small, along the glue lines
and ultimately this is why it broke so easily but after glue-up i didn't
bother about the small gaps because:-
(i) i wasnt sure how to correct, and
(ii) i knew i had to mount the slides for the tray on the underside and they
were going cross grain on the boards so thought that they would bolster it
a bit. Amazingly, nothing else in the 'workshop' got broken
after this...but only because i was blinded by the Red Mist literally
couldn't see anything to throw/break/pull/push/kick/belt
Red Mist cleared now. Had to re joint the boards for the tray, after squaring
the edges. MAN, this took ages. Are there any tricks to squaring an edge to a
face or is it really just practice, practice, practice ! ?
inside curve of the tray is now routed and this is the tray held in the vice
so that the corners can be knocked off with a rasp then filed down.
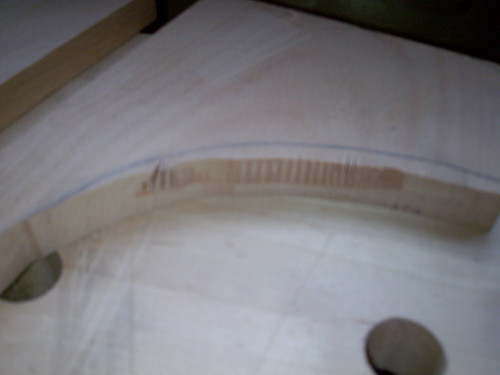
Now had to start on the groove/recess around the edge of the tray that catches
the spills.
Another DISASTER with a capital F !
If you look at the picture, the grove along the top has burn on it. I thought
this was because i wasn't moving the router quick enough with the box core bit
- even though i was using the same technique as all the other routing i had
done with other bits and no burn. So when i was doing the vertical grove i
thought i would move faster. I think that this moving faster made me apply
more force and the ****** fence moved mid grove and caused this....(looking at
this pic now it looks like it moved twice, but i only noticed the second move)
Devastated. What do i do now. I've just had to rejoint the tray once, and re
face it, because it wasn't good enough the first time. And now that i've
finally jointed it right this happens. Anyone remember The Incredible Hulk and
the roar that he lets out when he changes from David Banner...that was me !
Brew.
Scratch head.
Plan B.
Get some scrap and recreate the 'feature enhancement opportunity' that i had
previously created, then use this to practice a solution on. It didn't have to
be exact,just share the same features.
I couldn't understand why the wood was burning with the box core bit. It was
sharp as it was straight out of the box so the only reason was operator error.
Looking at the burn marks, they appear along the apex of the curve, so the
reason *must* be because this is the only part of the bit that's in contact
with the wood the whole time. I came up with the 'solution' of using a V
grove bit first, then using a box core bit that's minutely raised and sanding
will cure any differences.
So off i trot and buy a V grove bit, and a wider box core bit than the one i
have...just to try it and see what happens. Tried out the new box core bit on
a piece of scrap and it worked a treat. In fact, short of holding the router
stationary i couldn't get it to burn. So, it would appear that the box core
bit that i originally used 'out of the box' was as sharp as Trigger ! The
original box core bit came with the router along with the other bits i have
used in the past so i had no reason to suspect that it wasn't sharp. Live and
learn.
The only thing i could do was to create a grove all around the tray that is as
wide as the widest point of the messed-up groove. This produced the
following....
I'M WELL HAPPY with the result.
I remember when i was at DanBradNailerAlchemist's 'Do' this year someone said
that their father/mentor said that your true skill would be shown by not what
you make but how you hide your mistakes....surely this makes me a Master ! No ?

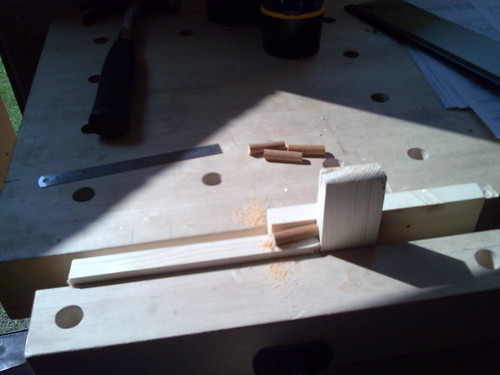
just a little jig (if you can call it that - they were just clamped in the
vice) to make sure that all the dowels for the tray slides were the same length
started to finish with Liberon Finishing Oil. Previous to this i'd random
orbit sanded 80, 120 and 240G
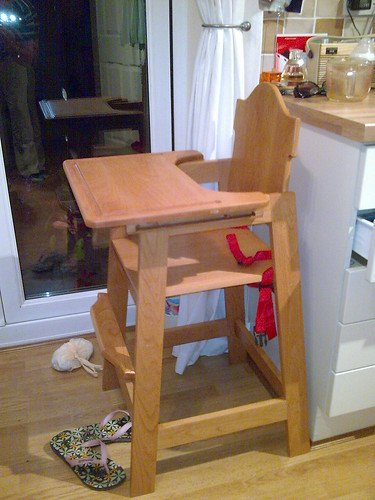
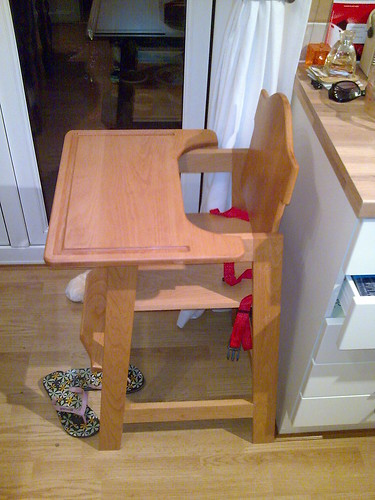
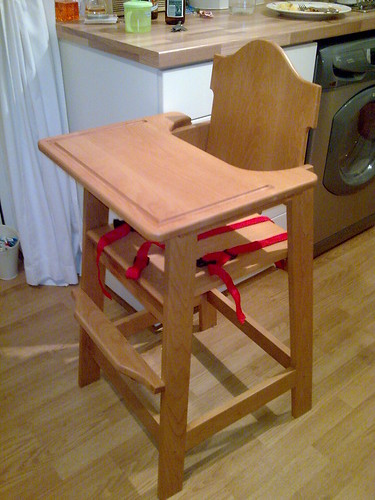
FINISHED !

All sugestions, comments and criticisms welcome...however brutal (if they're
brutal, pleasse make them constructive)
FuryJohn
bought some steamed beech for the project. Original intention was to use
standard beech, but they only had 2" boards and i had no way to resaw so had
to go with the 1" steamed beech. Here are the boards. They look like bananas
in the picture for some reason but they were all very straight, except for the
bottom right edge of the middle board....that's real !
boards ripped and crosscut. very rough dimensions with plenty of margin as
this is my first hardwood project...apart from the seagrass stool at school
about 18 years ago !
boards jointed for the seat and back.
boards jointed for the tray.
my makeshift shooting board with micro-adjustable fence ! looks crude and
rubbish but managed to create a very accurate finish in the end. The piece
being shooted (shot?) here is the top rail of the side A-frame.
shows the accuracy of the shoot across the face with the bevel gauge pre set to
the required angle (6 degrees)
...and across the edge
The plans that i bought showed the side frames constructed using doweled
joints but i just couldn't get my head around how i was going to drill the
holes in the mating pieces accurately and consistently enough to get good
results.
Thinking..thinking...thinking then it hit me...replace the doweled joints with
a loose/floating tennon joint...Simples !
It's going to be much easier to create a joint using a router with a plunge and
base as 2 references than it is to use a drill free-hand. So, heres the
morticing jig that i knocked up using some MDF .
This picture shows the top rail of the side A-frame against a leg with a
length of stock i had sized for the loose/floating tennons, lightly scored
down the length with the router to allow the air out when glued up.
Have tried a dry fit and set everything up prior to glueing
Finished side A-frames. They are the same size, just the one on the left is
more in the foreground.
Front rail that joins the two A-frames, held in place ready for drilling.
Front and rear bottom rails joined to side A-frames.
This is the back of the chair. Flat drill bit for the side holes and jigsaw
for the top profile.
Couldn't resist a dry fit just to see how it looked. The plans showed the
front and rear rails joined with a single screw but i decided to use two as i
wasn't sure that one screw driven into end grain was enough. Baby. Paranoid.
I know a lot (all?) of you will probably cringe at this idea as it doesn't
allow seasonal movement, but i convinced myself it was ok because:-
(i) if the joint was a MT joint then this would not allow movement either. In
my case the Tennon was replace with 2 screws.
(ii) the wood will be sealed with several coats of oil, greatly
reducing moisture ingress/egress
(iii) the timber went straight from yard to shed without any acclimatisation (i
know, i know, but there is just NO room in the house! I tried). BUT, i
took a piece inside and wrote its cross grain measurement on it, placed
it on a rad and there it remained for about 2 weeks. As i live with
a woman, you can well imagine that it got a proper good roasting from
the rad ! ! After about 2 weeks there was 1 mm movement, but that could
easily be measurement error.
The tray, rough cut to shape with the jigsaw.
DISASTER with a capital F. I had the tray clamped to the bench between dogs so
that i could route the curve on the inside of the tray. I was convinced that
on this curve i should be hand routing from left to right but for some reason
the cutter gripped the wood and dragged along causing the tray to jump from the
dogs and hit the deck....
...producing this ! ! To be fair, i had noticed that after i had jointed the
boards for the tray there were gaps, albeit very small, along the glue lines
and ultimately this is why it broke so easily but after glue-up i didn't
bother about the small gaps because:-
(i) i wasnt sure how to correct, and
(ii) i knew i had to mount the slides for the tray on the underside and they
were going cross grain on the boards so thought that they would bolster it
a bit. Amazingly, nothing else in the 'workshop' got broken
after this...but only because i was blinded by the Red Mist literally
couldn't see anything to throw/break/pull/push/kick/belt
Red Mist cleared now. Had to re joint the boards for the tray, after squaring
the edges. MAN, this took ages. Are there any tricks to squaring an edge to a
face or is it really just practice, practice, practice ! ?
inside curve of the tray is now routed and this is the tray held in the vice
so that the corners can be knocked off with a rasp then filed down.
Now had to start on the groove/recess around the edge of the tray that catches
the spills.
Another DISASTER with a capital F !
If you look at the picture, the grove along the top has burn on it. I thought
this was because i wasn't moving the router quick enough with the box core bit
- even though i was using the same technique as all the other routing i had
done with other bits and no burn. So when i was doing the vertical grove i
thought i would move faster. I think that this moving faster made me apply
more force and the ****** fence moved mid grove and caused this....(looking at
this pic now it looks like it moved twice, but i only noticed the second move)
Devastated. What do i do now. I've just had to rejoint the tray once, and re
face it, because it wasn't good enough the first time. And now that i've
finally jointed it right this happens. Anyone remember The Incredible Hulk and
the roar that he lets out when he changes from David Banner...that was me !
Brew.
Scratch head.
Plan B.
Get some scrap and recreate the 'feature enhancement opportunity' that i had
previously created, then use this to practice a solution on. It didn't have to
be exact,just share the same features.
I couldn't understand why the wood was burning with the box core bit. It was
sharp as it was straight out of the box so the only reason was operator error.
Looking at the burn marks, they appear along the apex of the curve, so the
reason *must* be because this is the only part of the bit that's in contact
with the wood the whole time. I came up with the 'solution' of using a V
grove bit first, then using a box core bit that's minutely raised and sanding
will cure any differences.
So off i trot and buy a V grove bit, and a wider box core bit than the one i
have...just to try it and see what happens. Tried out the new box core bit on
a piece of scrap and it worked a treat. In fact, short of holding the router
stationary i couldn't get it to burn. So, it would appear that the box core
bit that i originally used 'out of the box' was as sharp as Trigger ! The
original box core bit came with the router along with the other bits i have
used in the past so i had no reason to suspect that it wasn't sharp. Live and
learn.
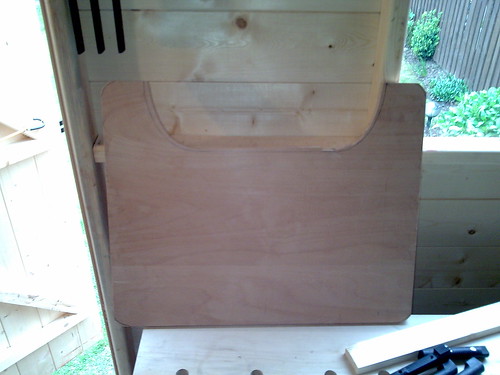
The only thing i could do was to create a grove all around the tray that is as
wide as the widest point of the messed-up groove. This produced the
following....
I'M WELL HAPPY with the result.
I remember when i was at DanBradNailerAlchemist's 'Do' this year someone said
that their father/mentor said that your true skill would be shown by not what
you make but how you hide your mistakes....surely this makes me a Master ! No ?
just a little jig (if you can call it that - they were just clamped in the
vice) to make sure that all the dowels for the tray slides were the same length
started to finish with Liberon Finishing Oil. Previous to this i'd random
orbit sanded 80, 120 and 240G
FINISHED !
All sugestions, comments and criticisms welcome...however brutal (if they're
brutal, pleasse make them constructive)
FuryJohn
