Axminster HBS350N / RECORD POWER BS350 Bandsaw Advice?

UKworkshop.co.uk

Help Support UKworkshop.co.uk:

This site may earn a commission from merchant affiliate links, including eBay, Amazon, and others.
Chris

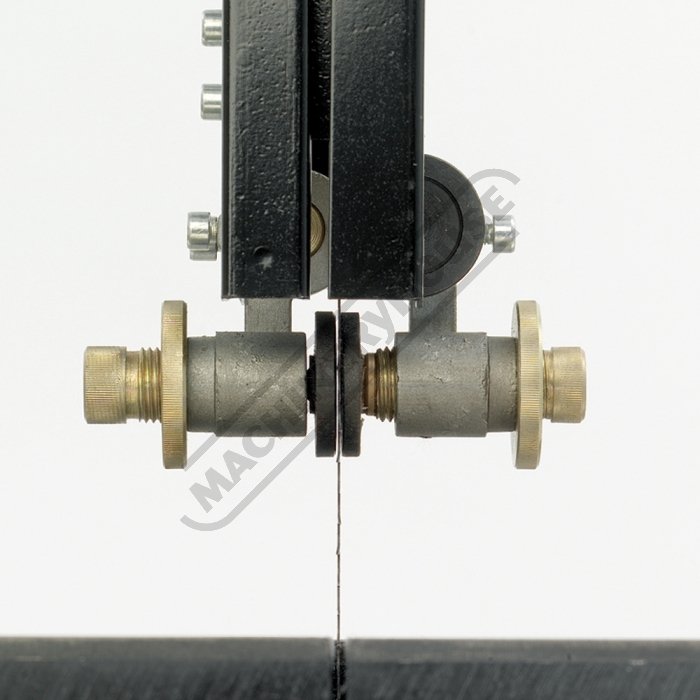
I did not drill or tap anything when fitting the de-lux fence, I used the existing holes in the table, as I think you can with the standard fence upgrade, also as I said in the thread, the only problem with the de-lux fence is the size of the lower knobs on the fixing brackets prevent the bottom door from opening without twisting the door sideways, easy mod with a different knob.

Mike
 
Ah yes, sorry Mike - it was MikeK who did the drilling and tapping, I was remembering the post which I read a while back wrongly. I think I'm going to give it a try using the original holes as you suggest might be possible in that thread - when I recently bought the guides from them, they said I could return them if it wasn't an easy fit so hopefully they'll let me do the same with a fence. Maybe a Christmas present to myself... :)

Malcolm - thanks for the post, though I think I have it set up right at the moment - the problem I had above was movement of the blade forward and back which was down to the weld and is all sorted just fine now.
 
chris152 - do you think you could possible do a step by step guide for how you fitted the guides? ... I know you have already cut off pieces, but perhaps pictures of what you changed would be very helpful.

I'm ording then guides now.
 
Transatlantic

The photo's are further up the page, pretty self explanatory I thought. :ho2

Mike
 
Happy to TA, but I need to take a closer look again tomorrow before suggesting what to cut off - it's a little while back and I'll need to think it through step-by-step. It was pretty simple, though I felt the same about chopping anything up - but I'd got to the point with the old blocks that I figured I had next to nothing to lose. Bear with me...

edit - can you post a photo of what the setup is like before the modification?! That'll help me retrace the steps.

Having looked at your pictures and compared it to mine, I think I know what to cut off now, but a step by step would probably still be useful. My workshop is kindof dark at the moment, I'll try to take some pictures tomorrow. Here are some I found online though.

1_Accurate-and-Easy-to-Use-Blade-Guides.jpg

0000249_record-power-bs350s-premium-14-bandsaw.jpeg

large_14503478032775.jpg
 
Last edited by a moderator:
Funny, my rubbing blocks never lined up vertically with the blade as in the photo above! Anyway, I've had a look this morning and I only made a few cuts.

I removed all three 'bearings'/ rubbing block attachments.
Then I cut off the two pieces that connect the main assembly to the rubbing block attachments.
Then I inverted the assembly that attached to the rubbing block attachments, and
attached the whole new assembly to the side of what remains of the old assembly.
I had to cut down the guard so it would then all fit, as per the photos.

The photo of the cut-off pieces above (in my earlier post) shows where I cut the attaching pieces off (I did it with a hack saw, very easy).
I did a few more photos just now, so you can see it a bit more clearly, and so you can see where I cut the guard. (I did the latter following Mike's comments, above.) I guess I should add that the guard's there for a reason and now it's not all there, but that's obvious.

Extra pics:
_MG_6624.jpg

_MG_6626.jpg

_MG_6627.jpg


This method worked for me and if I can do it, I'm certain anyone can.
Hope that helps, let me know if you need more pics. Good luck!

EDIT: maybe the title of this thread should indicate that it's mostly about the Record 350, in case anyone thinks the above applies to Axminster's own saw! Don't know if I can add that?
 

Attachments

  • _MG_6624.jpg
    _MG_6624.jpg
    113.8 KB · Views: 1,216
  • _MG_6626.jpg
    _MG_6626.jpg
    126.5 KB · Views: 1,216
  • _MG_6627.jpg
    _MG_6627.jpg
    208.9 KB · Views: 1,219
BANDSAW.jpg


Seriously is that the best we can do when lining up the guides, no matter where the blade is on the wheel that sort of offset is an appalling statement of the engineering that goes into these things, notwithstanding rubbing blocks instead of bearings, at least the new range are using a better engineering solution, perhaps they are listening.

Mike :ho2 :deer
 

Attachments

  • BANDSAW.jpg
    BANDSAW.jpg
    255.9 KB · Views: 1,198
Here are my results. Seems to look ok, but do tell me if you spot anything incorrect.

Unfortunately, my unit arrived with a stripped out female thread where the black grub screws go into on the back, so will be contacting Axminster to see what they say. I'll be happy to keep it (and tap a new thread) if they are willing to provide a fair discount, else I'll be expecting a replacement.

1.jpg


2.jpg


3.jpg


4.jpg


5.jpg


6.jpg


7.jpg


8.jpg
 

Attachments

  • 1.jpg
    1.jpg
    246.8 KB · Views: 1,192
  • 2.jpg
    2.jpg
    221 KB · Views: 1,191
  • 3.jpg
    3.jpg
    234.6 KB · Views: 1,184
  • 4.jpg
    4.jpg
    202.1 KB · Views: 1,180
  • 5.jpg
    5.jpg
    225.6 KB · Views: 1,181
  • 6.jpg
    6.jpg
    243.3 KB · Views: 1,181
  • 7.jpg
    7.jpg
    205.2 KB · Views: 1,180
  • 8.jpg
    8.jpg
    219.2 KB · Views: 1,174
Perhaps I ought to charge Axminster commission. :twisted:

Mike :ho2 :deer
 
How are people making their mitre track sliders for the RP bs350? My efforts have some wobble in them which make accuracy a problem.

If the slots were straight-sided it'd be easier - is getting them milled vertical, maybe even to a more standard width, a big job?
 
Hi Chris, hope all is well with you and yours.

Getting them milled vertically should not be a problem, getting them milled wider will depend on the width of the raised portion underneath the table you don't want to break through the side of the slot, needs a bit of measurement to confirm, but any engineering shop will be able to carry this out for you.

Mike
 
I hadn't even thought about the width of material underneath - thanks for mentioning it. The base of the slot is 15mm width, and the 'rib' under the table that it's cut into is 33mm width - add 2mm to the width of the slot each side would bring it up to 19mm, but would that be removing too much from the rib/ table? Tbh, I'd be happy just getting vertical sides to the slot so I can make up my own sliders more easily, but 19mm seems to be the size for commercially available runners.

All good here, hope the same's true at your end, Mike.
 
Some people must have a lot of patience, the first time I had to adjust the top bearings and that guard was just making life hard it was cut of, no hesitation. Now easy to access to adjust but would like the bearings now.
 
Here are my results. Seems to look ok, but do tell me if you spot anything incorrect.

Unfortunately, my unit arrived with a stripped out female thread where the black grub screws go into on the back, so will be contacting Axminster to see what they say. I'll be happy to keep it (and tap a new thread) if they are willing to provide a fair discount, else I'll be expecting a replacement.

View attachment 65253

View attachment 65254

View attachment 65255

View attachment 65256

View attachment 65257

View attachment 65258

View attachment 65259

View attachment 65260
Excellent photos on this mod. I am going to do this next week and these photos and information on this thread should make is easy.
Can you tell me if you did the bottom set as well?
 
Back
Top