OPJ
Established Member
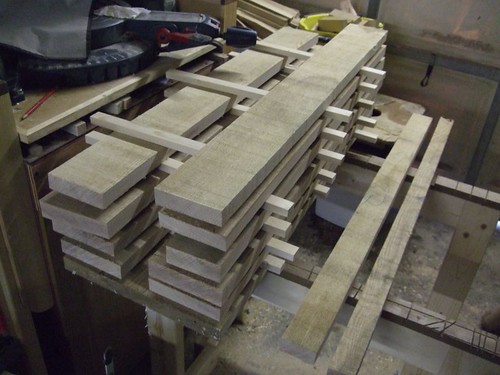
I've been putting this off since late last year but with some time off work and a stack of timber that's been consuming space in my bedroom since October I decided to get on with it. My mum's "brief" was that it should be 900mm x 600mm in size with a lower shelf and made in ash to suit the rest of our living room furniture. Apart from that, I'm free to explore a little. :wink: English ash was the material of choice, with thanks to Interesting Timbers.

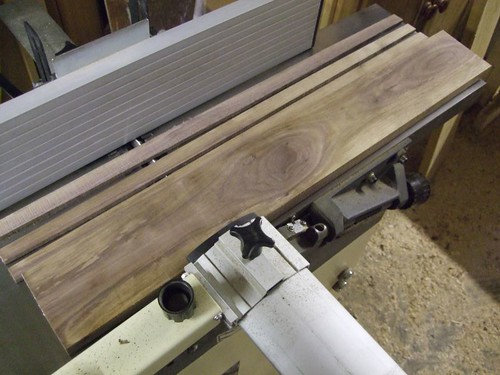
After preparing and cutting to length of the timber for the four 45mm square legs and all upper and lower rails...
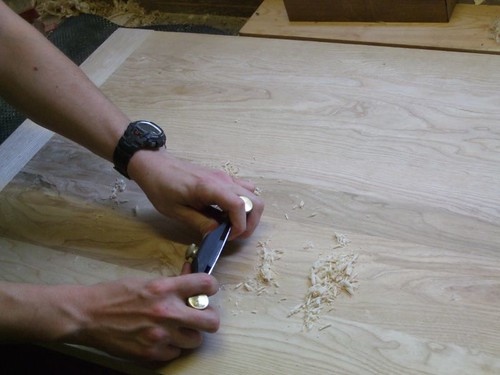
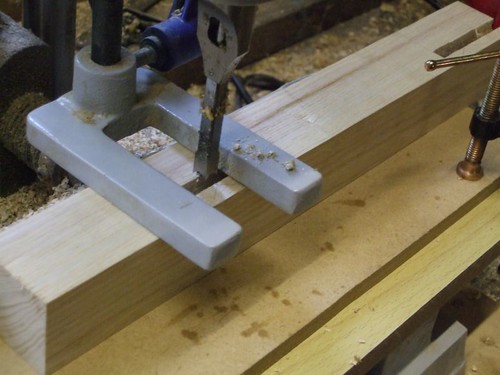
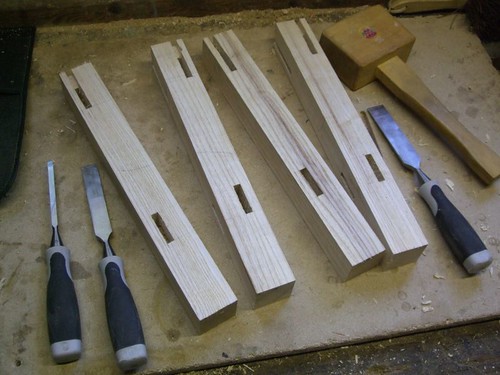
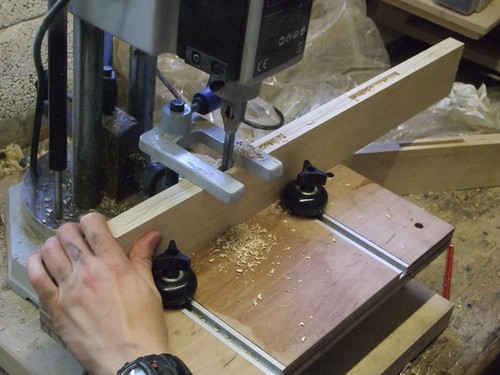
I marked out all the mortices for the leg and began cutting with a 5/16" Japanese chisel (about 8mm).
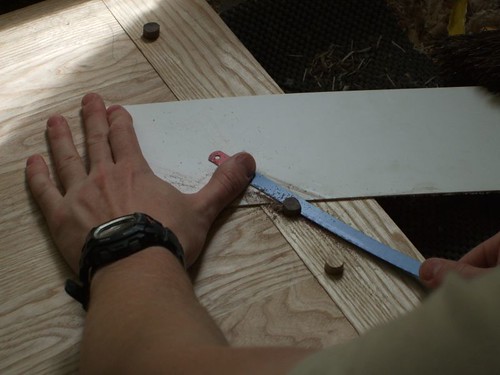
These mortices were then cleaned up with a mallet and various chisels. I'm not sure how clear it is from this photo but both sets of mortices are offset from one another... I've designed this so that the upper rails will finish 3mm short of the face or the legs while the lower rails are set back 6mm, allowing for a 3mm overhang from the shelf. :wink:
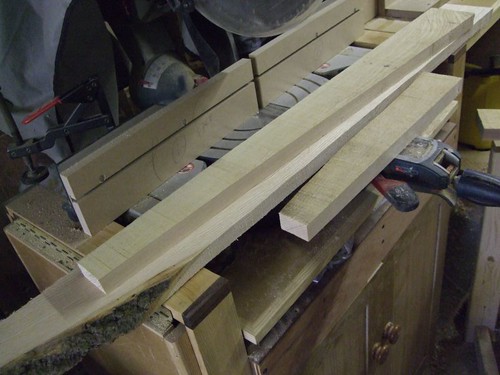
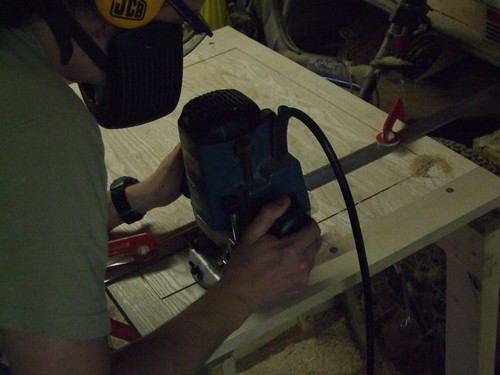
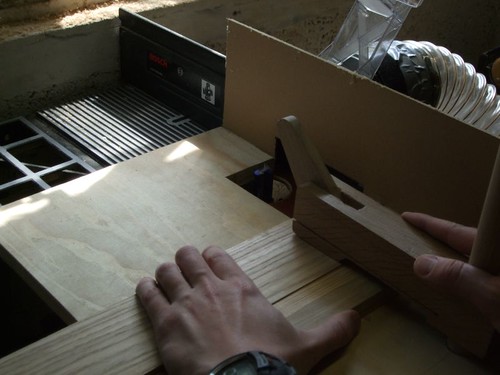
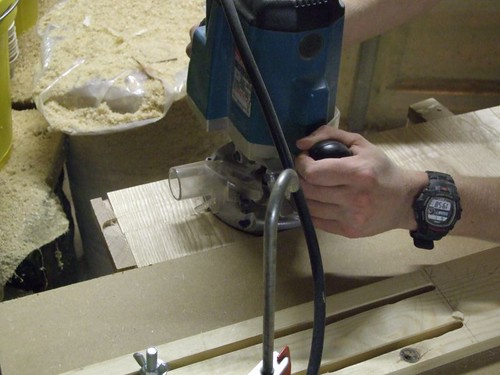
Next job was to cut the tenons then to fit the mortices. These were done using my preferred method for 1" thick stuff; Steve Maskery's router table jig.
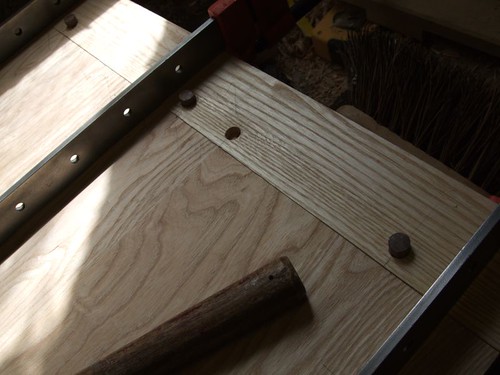
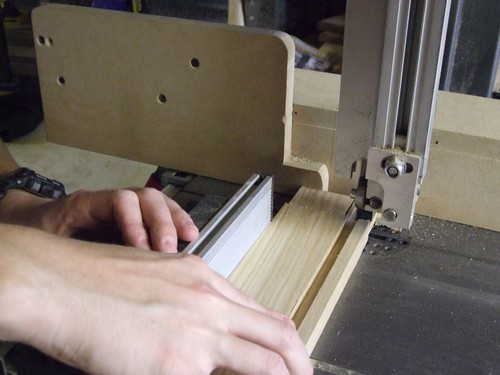
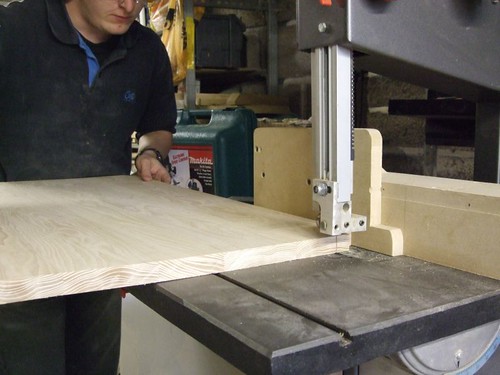
Haunches were then cut in to the upper rails on the bandsaw before routing 3/8" wide x 7mm deep grooves in to each rail to take the buttons that'll later be used to fix the top and shelf. I've noticed some people prefer on 6mm thick tenons, but I tend to stick with half and half...
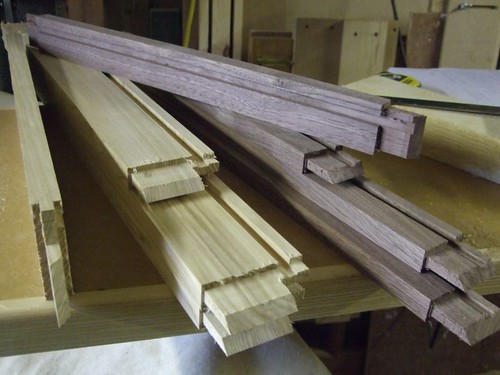
After cutting the tenons to length and mitring the ends on my mitre saw, here you can see the finished results.
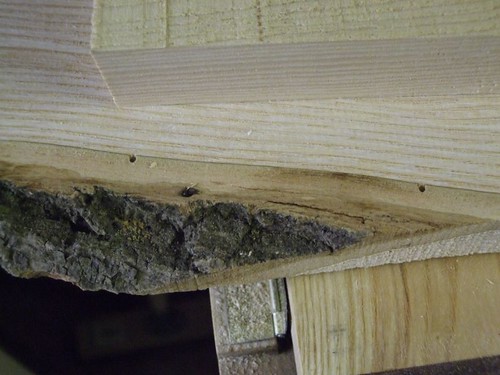
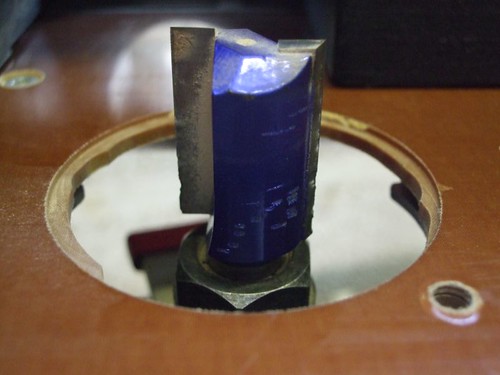
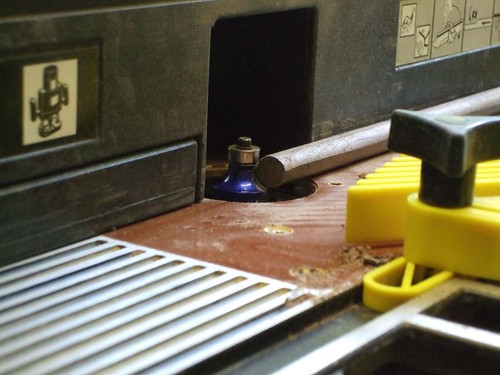
...I should make it clear that I ran in to a little trouble when routing the tenons on my table... When I built the jig I made the unfortunate mistake of placing a screw in line with where the cutter would be doing it's work, but behind the fence. It wasn't necessary for me to rout this far past the fence but something when 'bang' when I did and it made a mess of my 7/8" cutter (fortunately, I rarely use it anyway).
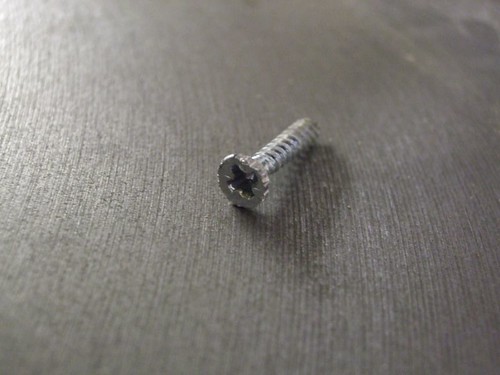
Here's the offending screw: :?
At this point, I wasn't sure if the walnut-idea was really going to work, but I have persevered and I later come to like it with the shelf in place.
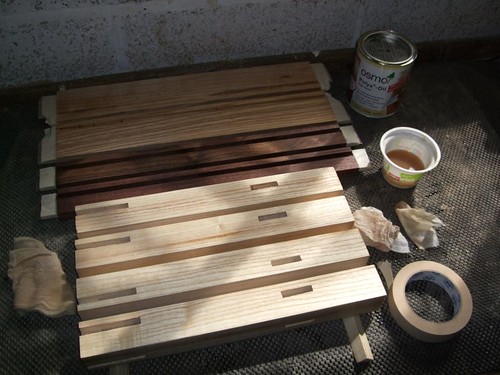
After going through a couple of dry-runs I gave all components for the two ends of the frame work a good clean up and two coats of Osmo Polyx Oil, Clear Satin, which I was using for the first time. Must say that I'm very impressed with this finish all around.")
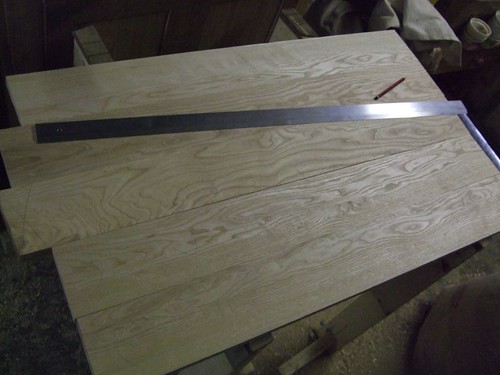
While I left the glue to set on the two ends I began working on the timber for the shelf. I dry assembly of all frame components gave me the dimensions for this, taking in to account that I wanted it set-back 3mm from the outside face of the legs all round.
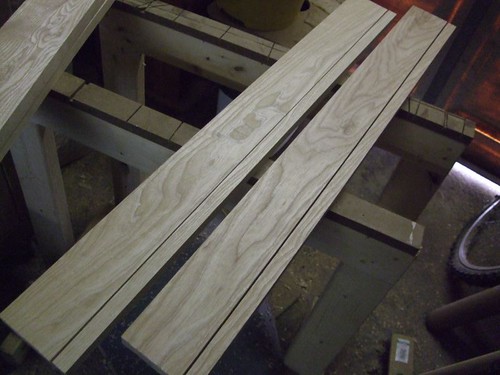
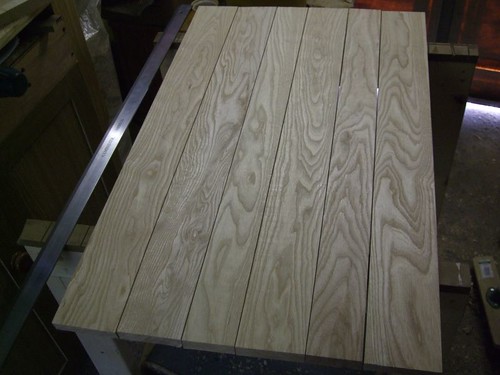
So, I cut some boards out and planed them all up, looking to make the shelf from five boards for stability, only to realise that I'd somehow gotten my maths wrong and was 45mm short! I managed to get around this by adding two more boards to the pile and ripping a couple of others down to compensate (this did mean I could lose some of the straight-grain and utilise figuring). I ran all boards through the thicknesser at 21.5mm to ensure they were all of uniform thickness.
After the glue up with no.10 biscuits (I was out of 20's and mistakenly ordered another 100 10's! :roll I realised something had gone wrong somewhere and that there was a slight 'kink' or dip in the panel. It may be that I over-tightened the cramps... With a little planing and some random orbit sanding though, I was able to get most of it out and I've kept my fingers crossed that the screws might pull it down tight...
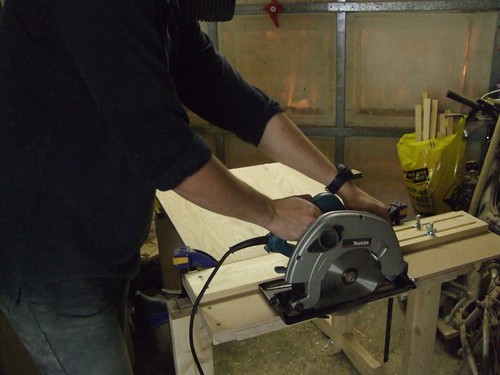
After cross-cutting it to length with my circular saw jig...
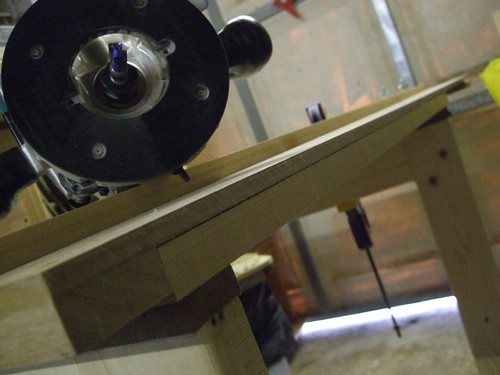
And ripping it to width a router and flush-trimming bit...
I was ready to mark out and cut the notches on my bandsaw before final assembly of the frame. The shelf has to go in at the same time, otherwise, quite simply... It's not going to fit! :shock: :wink:
I had to rush out and buy a few more sash cramps in order to get this done though; the 900mm cheap Record cramps have an actual capacity of less than 900mm. I'm quite fond of these Silverline ones though which cost a little bit extra. They seem like good value for money.
Before applying the cramps I stuck a few scraps of ply in place with some double-sided tape - there's a nice tip for you, next time you glue up!
I did encounter some dents in the timber after planing the rail edges by hand before applying the oil. Turns out a small dead knot in my softwood vice jaws was to blame! :roll: I drop of water and a few minutes with an iron was all it took to clear this up though.
While that was left to set then, I decided it would be a good idea to begin work on the top. Before that though, I got to work on improving my morticer fence (which you can see in another thread) as I was planning to accurately chop long mortices in to some breaboard ends. Meanwhile, the timber had been cut oversize and left to 'settle' in-stick with plenty of spare near by, just in case...
We've approached the point in this project of where I am not very proud of myself. I realised before planing this next batch of timber up that the knives on my machine had somehow shifted out of alignment. I made a half-a**ed attempt at re-setting thinking it would be okay to simply adjust the fence where necessary to compensate for any out-of-square cuts. To some extent, I was right in thinking like this... On the other, I am using a combined planer AND thicknessing machine - so, if the blades are out on the top then they're definitely not gonna be parallel to the thicknessing bed, are they!! :x
After a couple of hours work then, I ended up with a pile of timber that wasn't perfectly square at the edges and they were also in fact very slightly tapered looking at the thickness of each board. This made for a reasonably difficult glue-up, even with no.20 biscuits, but at least I always prepare my timber at least 1mm wider than it needs to be.
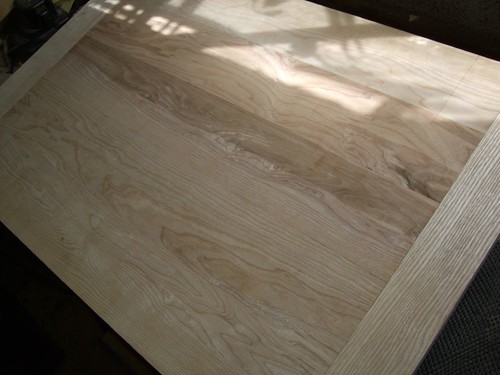
After a couple of hours yesterday with my Veritas bevel-up smoothing plane going both straight and diagonally across the grain, followed by some time with my Metabo ROS, I managed to get a satisfactory level of flatness with a finish about 21mm thick. Although, it felt like I'd removed an awful lot more than 1mm by the time I was done in that sweltering heat! :shock: :wink:
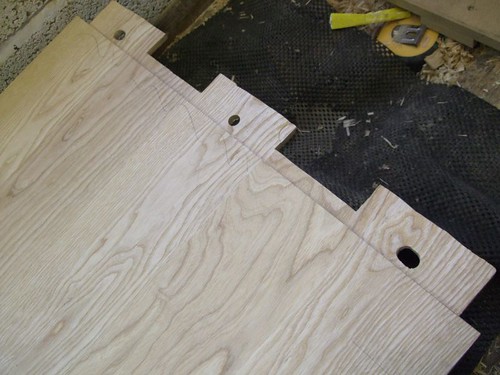
I prepared the breaboards from straight-grained stuff to a finished thickness of 22.5mm, meaning I'd have excess to plane off once the boards were fitted. With my new morticing jig complete, I could safely chop out the 5/16" wide mortices for the three tenons and two haunches which you'll see in a moment...
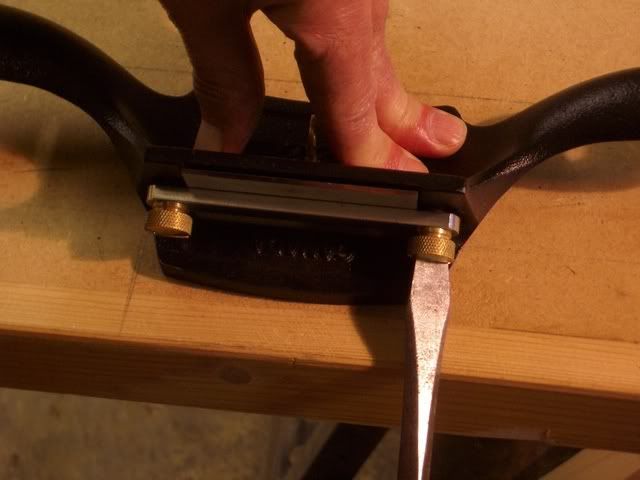
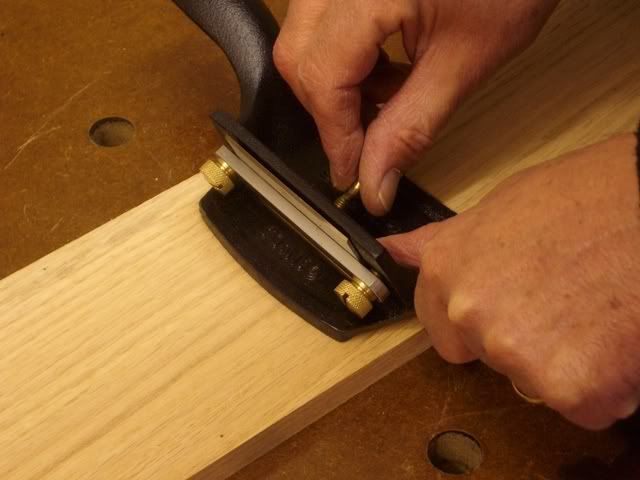
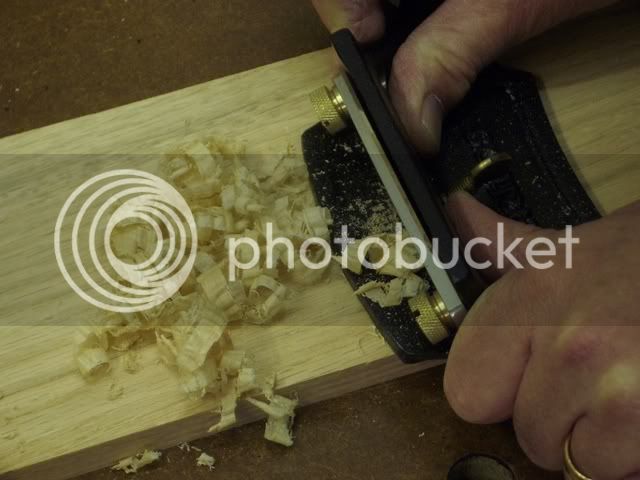
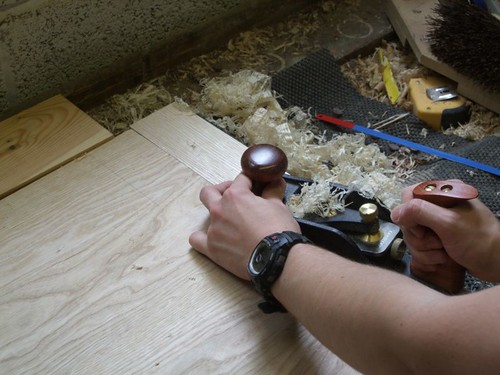
To cut the tenons on the end of the breadboards, I have intended to use the parallel fence with my router - but, unfortunately, with the wooden fence extension fitted, the bars were 15mm short of being clamped, so I had to use an alternative method with a straightedge. This didn't go quite as according to plane and it left me with a bit of work to do with a shoulder plane to tidy up after.
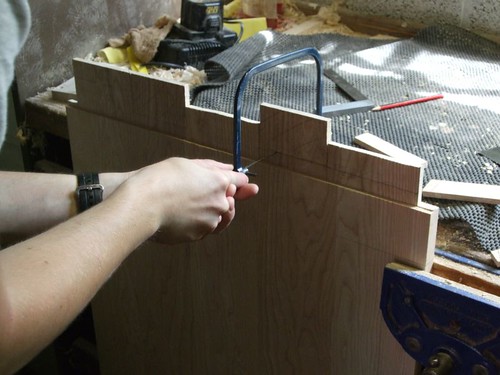
Continuing my use of hand tools for the weekend then, I cut these out using a tenon and coping saw. Needless to say, they are indeed a bit wonky - but who's gonna see them! :wink:
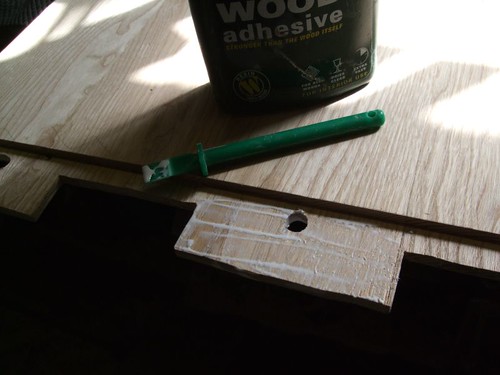
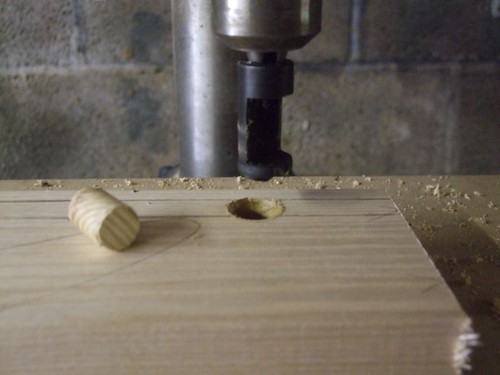
After fitting the breadboards I was able to mark out for the dowel which I will use to draw-bore the joint for a tight fit. I used sash cramps to pull the joint up tight, relieved the pressure and then marked a holes through the breadboards using a 1/2" forstner bit. Then, it was a case of moving the centre points back 1mm toward the shoulder lines and elongating the two outside holes.
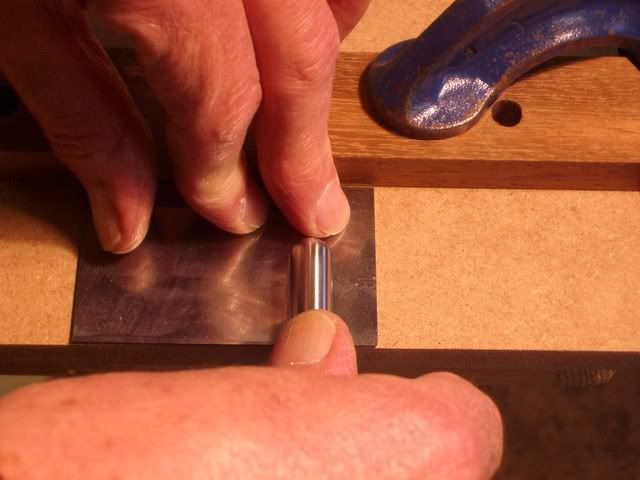
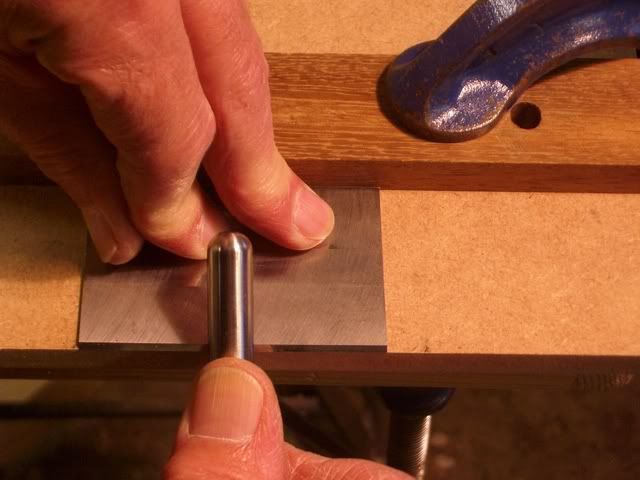
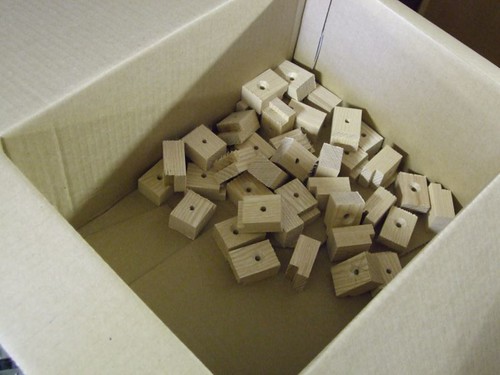
Last thing I managed to do today then was to "turn" some 1/2" diameter dowels from American Black Walnut using a 1/4" round-over cutter in my router table. The finises result isn't quite perfect but the fit is very good.
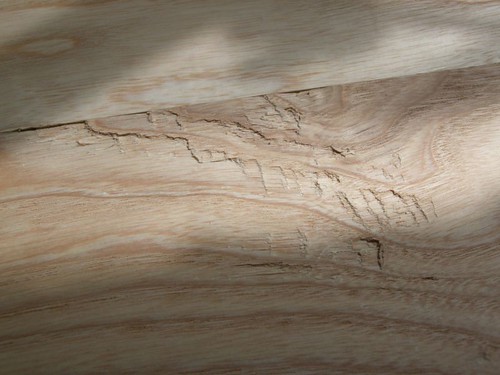
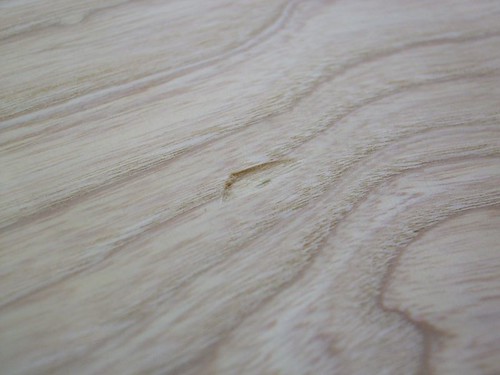
I suffered some problems with tearout as I was hand-planing the top (yes, I got a bit carried away... :shock: ) and I was wondering if anyone could suggest a way to get over this, without removing more material? Can I steam out with water and an iron?
My apologies for making this first post so bleedin' long - it's my own fault for not starting something and coming back to it sooner! :roll:
Thanks for looking anyway, I hope you enjoy it. :?
After preparing and cutting to length of the timber for the four 45mm square legs and all upper and lower rails...
I marked out all the mortices for the leg and began cutting with a 5/16" Japanese chisel (about 8mm).
These mortices were then cleaned up with a mallet and various chisels. I'm not sure how clear it is from this photo but both sets of mortices are offset from one another... I've designed this so that the upper rails will finish 3mm short of the face or the legs while the lower rails are set back 6mm, allowing for a 3mm overhang from the shelf. :wink:
Next job was to cut the tenons then to fit the mortices. These were done using my preferred method for 1" thick stuff; Steve Maskery's router table jig.
Haunches were then cut in to the upper rails on the bandsaw before routing 3/8" wide x 7mm deep grooves in to each rail to take the buttons that'll later be used to fix the top and shelf. I've noticed some people prefer on 6mm thick tenons, but I tend to stick with half and half...
After cutting the tenons to length and mitring the ends on my mitre saw, here you can see the finished results.
...I should make it clear that I ran in to a little trouble when routing the tenons on my table... When I built the jig I made the unfortunate mistake of placing a screw in line with where the cutter would be doing it's work, but behind the fence. It wasn't necessary for me to rout this far past the fence but something when 'bang' when I did and it made a mess of my 7/8" cutter (fortunately, I rarely use it anyway).
Here's the offending screw: :?
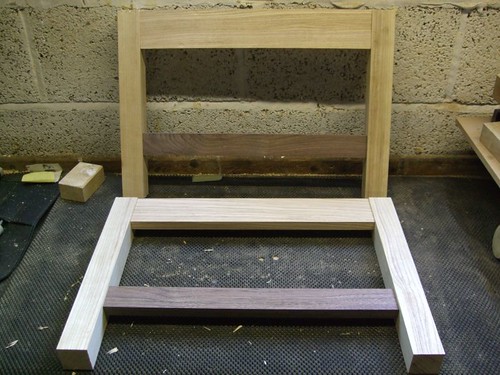
At this point, I wasn't sure if the walnut-idea was really going to work, but I have persevered and I later come to like it with the shelf in place.
After going through a couple of dry-runs I gave all components for the two ends of the frame work a good clean up and two coats of Osmo Polyx Oil, Clear Satin, which I was using for the first time. Must say that I'm very impressed with this finish all around.
While I left the glue to set on the two ends I began working on the timber for the shelf. I dry assembly of all frame components gave me the dimensions for this, taking in to account that I wanted it set-back 3mm from the outside face of the legs all round.
So, I cut some boards out and planed them all up, looking to make the shelf from five boards for stability, only to realise that I'd somehow gotten my maths wrong and was 45mm short!
I managed to get around this by adding two more boards to the pile and ripping a couple of others down to compensate (this did mean I could lose some of the straight-grain and utilise figuring). I ran all boards through the thicknesser at 21.5mm to ensure they were all of uniform thickness.
After the glue up with no.10 biscuits (I was out of 20's and mistakenly ordered another 100 10's! :roll
I realised something had gone wrong somewhere and that there was a slight 'kink' or dip in the panel. It may be that I over-tightened the cramps... With a little planing and some random orbit sanding though, I was able to get most of it out and I've kept my fingers crossed that the screws might pull it down tight... After cross-cutting it to length with my circular saw jig...
And ripping it to width a router and flush-trimming bit...
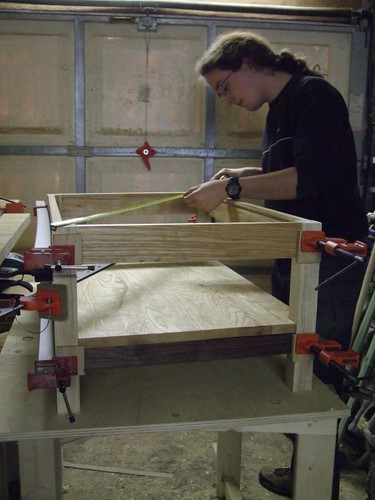
I was ready to mark out and cut the notches on my bandsaw before final assembly of the frame. The shelf has to go in at the same time, otherwise, quite simply... It's not going to fit! :shock: :wink:
I had to rush out and buy a few more sash cramps in order to get this done though; the 900mm cheap Record cramps have an actual capacity of less than 900mm. I'm quite fond of these Silverline ones though which cost a little bit extra. They seem like good value for money.
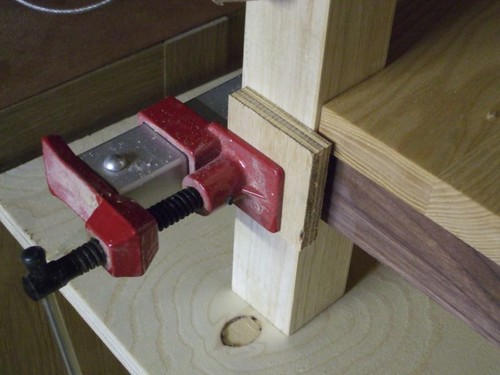
Before applying the cramps I stuck a few scraps of ply in place with some double-sided tape - there's a nice tip for you, next time you glue up!
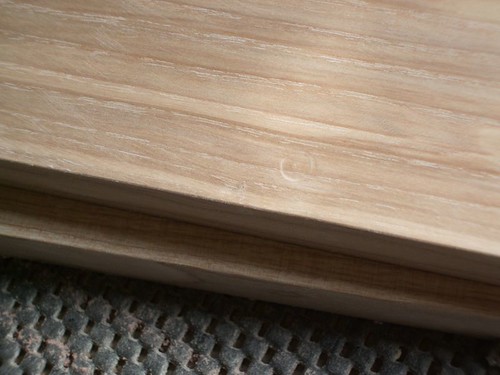
I did encounter some dents in the timber after planing the rail edges by hand before applying the oil. Turns out a small dead knot in my softwood vice jaws was to blame! :roll: I drop of water and a few minutes with an iron was all it took to clear this up though.
While that was left to set then, I decided it would be a good idea to begin work on the top. Before that though, I got to work on improving my morticer fence (which you can see in another thread) as I was planning to accurately chop long mortices in to some breaboard ends. Meanwhile, the timber had been cut oversize and left to 'settle' in-stick with plenty of spare near by, just in case...
We've approached the point in this project of where I am not very proud of myself. I realised before planing this next batch of timber up that the knives on my machine had somehow shifted out of alignment. I made a half-a**ed attempt at re-setting thinking it would be okay to simply adjust the fence where necessary to compensate for any out-of-square cuts. To some extent, I was right in thinking like this... On the other, I am using a combined planer AND thicknessing machine - so, if the blades are out on the top then they're definitely not gonna be parallel to the thicknessing bed, are they!! :x
After a couple of hours work then, I ended up with a pile of timber that wasn't perfectly square at the edges and they were also in fact very slightly tapered looking at the thickness of each board. This made for a reasonably difficult glue-up, even with no.20 biscuits, but at least I always prepare my timber at least 1mm wider than it needs to be.
After a couple of hours yesterday with my Veritas bevel-up smoothing plane going both straight and diagonally across the grain, followed by some time with my Metabo ROS, I managed to get a satisfactory level of flatness with a finish about 21mm thick. Although, it felt like I'd removed an awful lot more than 1mm by the time I was done in that sweltering heat! :shock: :wink:
I prepared the breaboards from straight-grained stuff to a finished thickness of 22.5mm, meaning I'd have excess to plane off once the boards were fitted. With my new morticing jig complete, I could safely chop out the 5/16" wide mortices for the three tenons and two haunches which you'll see in a moment...
To cut the tenons on the end of the breadboards, I have intended to use the parallel fence with my router - but, unfortunately, with the wooden fence extension fitted, the bars were 15mm short of being clamped, so I had to use an alternative method with a straightedge. This didn't go quite as according to plane and it left me with a bit of work to do with a shoulder plane to tidy up after.
Continuing my use of hand tools for the weekend then, I cut these out using a tenon and coping saw. Needless to say, they are indeed a bit wonky - but who's gonna see them! :wink:
After fitting the breadboards I was able to mark out for the dowel which I will use to draw-bore the joint for a tight fit. I used sash cramps to pull the joint up tight, relieved the pressure and then marked a holes through the breadboards using a 1/2" forstner bit. Then, it was a case of moving the centre points back 1mm toward the shoulder lines and elongating the two outside holes.
Last thing I managed to do today then was to "turn" some 1/2" diameter dowels from American Black Walnut using a 1/4" round-over cutter in my router table. The finises result isn't quite perfect but the fit is very good.
I suffered some problems with tearout as I was hand-planing the top (yes, I got a bit carried away... :shock: ) and I was wondering if anyone could suggest a way to get over this, without removing more material? Can I steam out with water and an iron?
My apologies for making this first post so bleedin' long - it's my own fault for not starting something and coming back to it sooner! :roll:
Thanks for looking anyway, I hope you enjoy it. :?