Arts & Crafts-style TV Stand (English Oak) - Finished

UKworkshop.co.uk

Help Support UKworkshop.co.uk:

This site may earn a commission from merchant affiliate links, including eBay, Amazon, and others.

OPJ

Established Member
Joined
31 Jul 2005
Messages
5,566
Reaction score
1
Location
North Somerset
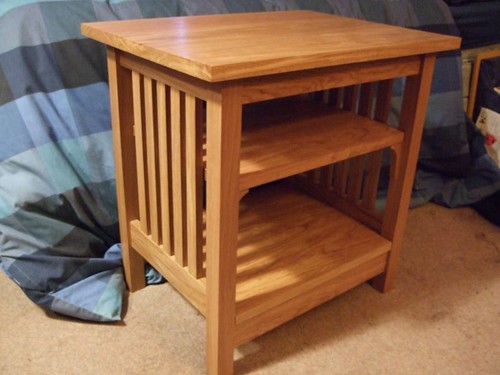
Yes, the deadline for all part two competition entries may be along way behind us now but, after a couple of previously documented planer-thicknesser problems, Wednesday 20th February 2008 was the day my belated Arts & Crafts-style Oak TV Stand finally began! :D

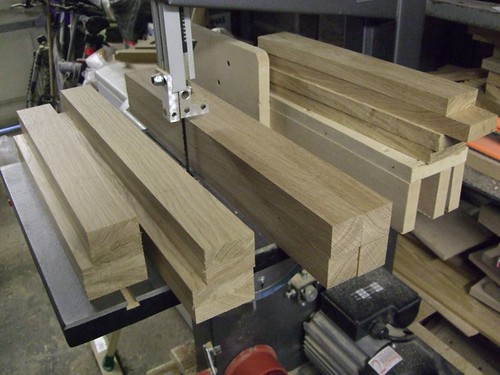
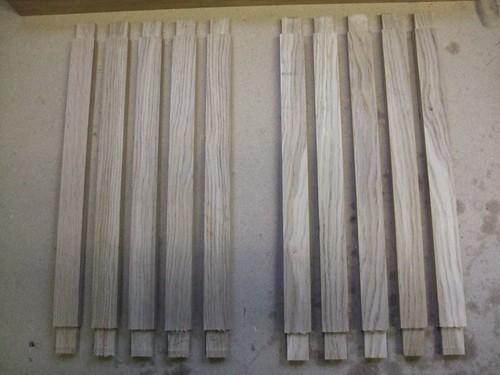
So. This first shot shows the components for the basic frame (excluding the slats, top and two shelves) planed up and ready to go. It's been sat in my bedroom sine October so, even without a moisture meter, I know it has to be dry enough.
And yes, I tend to use my bandsaw for more than half the jobs my workbench should be used for! :)

2295279751_11e41dc49c.jpg


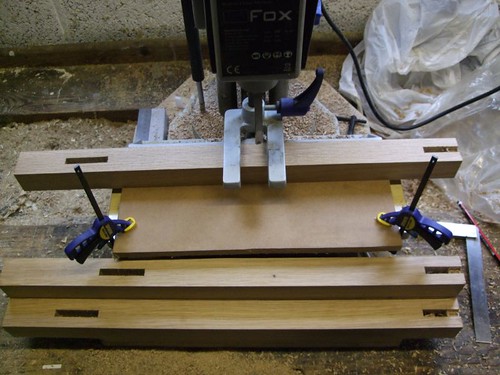
First job was to mark up the legs and cut the mortises on my Fox morticer. First time I've properly used it and it did a great job - perhaps that also had something to do with the good quality Japanese chisels.

2296074084_af8c2e852e.jpg


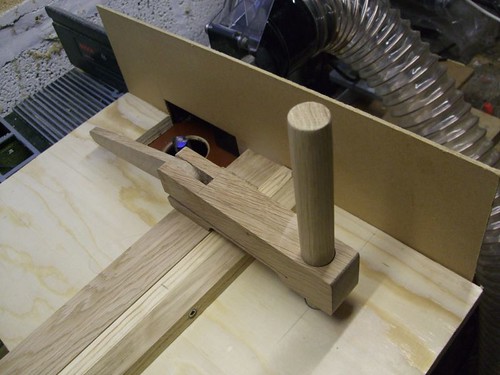
With all the mortices cleaned up, it's time to get ready for some tennoning usng my adaptation of Steve Maskery's excellent router table jig. Worked like a treat, even though my Bosch table is convex along its length!

2296074420_5f7637fc54.jpg


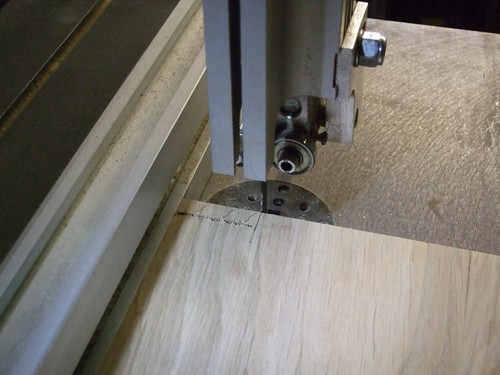
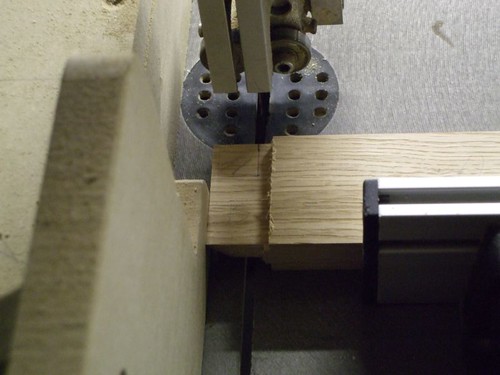
Once both sets of rails were done, it was time to cut the haunches. I chose the bandsaw, using my short rip fence as a stop - another adaptation from one of Steve's great ideas. :wink:

2295280705_c1ea531f4d.jpg


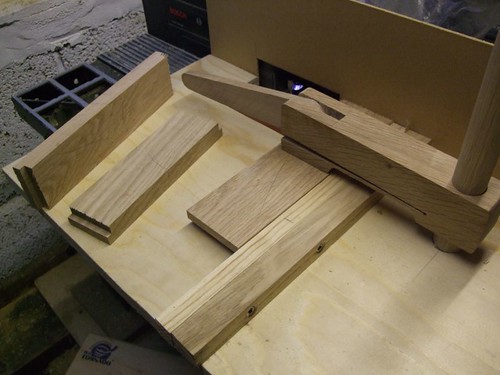
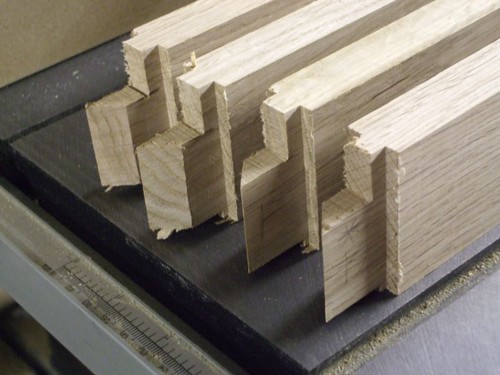
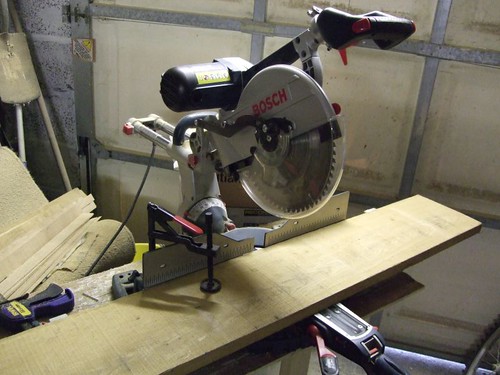
Then, it was time to cut a 45º angle on the ends of the top rails and cut the lower rails to length at 90º, on my monstrous 12" Bosch SCMS. Here's the finished result of the top rails.

2295281307_c898cd5b8e.jpg


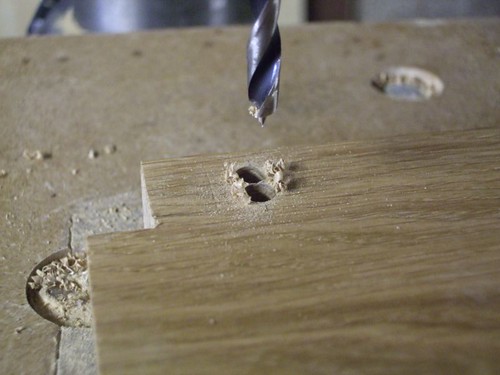
Before I could think about dry-assembling the frame, it was time for a mistake! :oops: Back to the router table we go; it's time to rout the 3/8" grooves for the 19mm thick buttons - which will be cut from the offcuts you saw in the first photo.
Because I changed the design slightly (you'll see a little later), didn't need to rout a groove in the two lower side rails, as they're going to sit higher than the shelf, which will only rest on the front and back rails. :roll:

2296073738_ac0ab8fa00.jpg


2295280613_2c80f23f8b.jpg


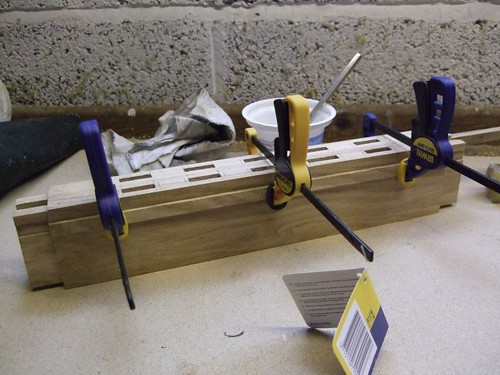
Next job was to dry-assemble the frame then, in order to get the shoulder-to-shoulder length for these slats, which will run vertically in each of the two sides. Tenons, again, cut on the router table. I did contemplate doing them on the bandsaw, just for a change, but hey, why do something differently when it worked great the first time!

2296074366_6b151e3b43.jpg


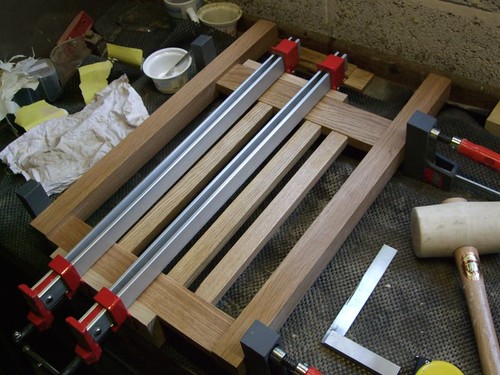
And it goes together a little something like this! :wink:

2295281041_14da473f2f.jpg


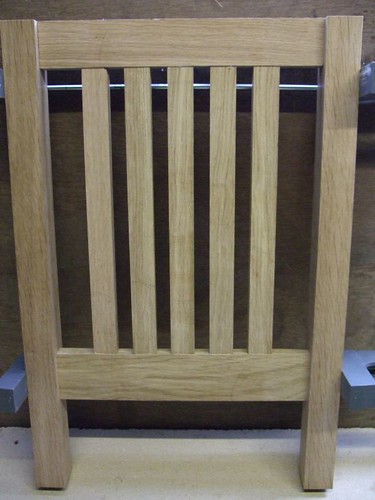
And then, like this - it'll still need finishing and fitting of the two shelves before I even consider gluing it up.

2296073646_31e528e7e1.jpg


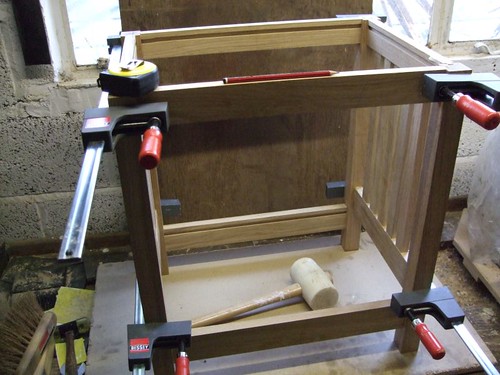
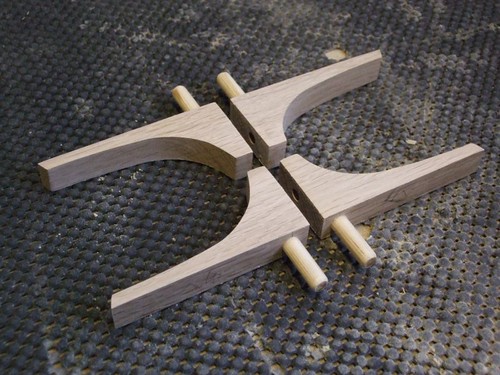
How am I going to support the shelf, you may be thinking...
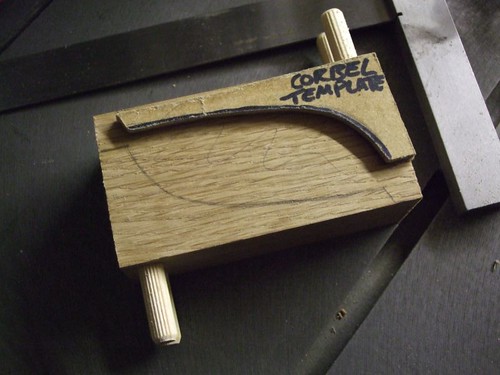
Well, I'm still not entirely certain about that. I intend to add a little corbel [posh word for bracket!] to each corner, dowelled to the inside of each leg. Probably dowelled up in to the base of the shelf as well, with an elongated hole for expansion/contraction.
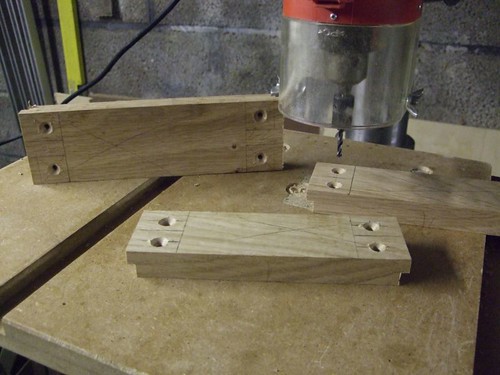
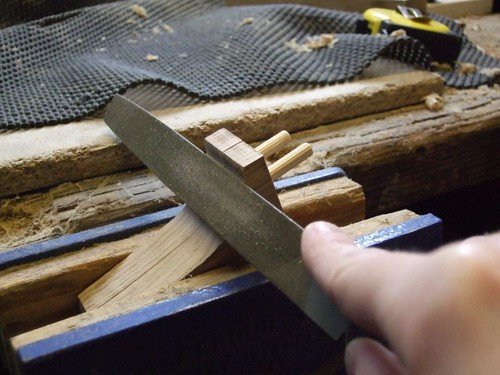
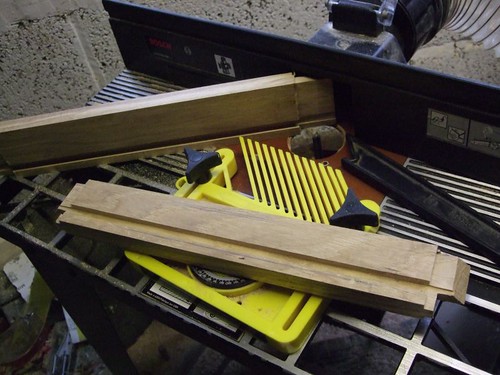
I decided that sticking two blanks together with double-sided tape would make it easier - fitting the 8mm dowels dry now made it much easier - and safer - cutting them on the bandsaw.

2296073280_1eb2c3f214.jpg


--------------

Well, that's as much as I'm able let you see right now. :wink:

Since then though, managed to get the two shelves glued up with the aid of my lovely new Makita biscuit jointer and I've given all the frame components a first coat of Danish Oil.

The Bosch saw cut the 9"x1" oak better than I could ever have done better and easier than I could do by hand! Really like the toggle clamp. Didn't get this until November - how would I have managed without it?!

2295280191_59929db48d.jpg


I still need to cut the buttons though - and I'd appreciate anyone's advice on the best way to do this - I reckon I need... ten of them, minimum.

There's still time to change the support for the middle shelf - if you have any other ideas, I'd like to hear from you. I'm contemplating adding a row of dowels to the inside faces of the slats but, that'd require VERY accurate drilling...! :?

Thanks must also go to Philly for modifying my morticer bush. I wouldn't have been able to use my lovely Japanese chisels without his help! :D

Thanks for reading. I'll get an update for you when I can. :) :wink:
 
For the buttons take a length of say 20x20 timber, pass one end over a router bit in the table to form the step, just like a one sided tennon. Cut off the embrio button with the mitre saw and repeat.

Looking good so far

Jason
 
Thanks Jason, that's kind of what I had in mind. Does sound like the best option.

I guess there's no other way than to keep jumping back-and-forth between different machines. Unless of course you're VERY good with a bandsaw, perhaps...? :)
 
Looking good Olly.


I'm surprised you like that toggle clamp, I can't stand it. It's such a faff to setup and is either too tight or too loose.
 
OPJ":2o9t8gaz said:
I guess there's no other way than to keep jumping back-and-forth between different machines.
You could half the number of jumps by working both ends of the stock. :)
 
Olly, that's impressive progress and it looks good to. Super jig which I imagine has many other applications too.

For the buttons, couldn't you route a rebate the whole length of a piece of wood, then drill a series of screw holes along it and then cut them off as needed?

I love the arts and crafts stuff as well. Looking forward to see what finish you choose. I prefer a lighter finish rather than the traditional dark treatment.

Ted
 
lucky9cat":16q4cmh2 said:
For the buttons, couldn't you route a rebate the whole length of a piece of wood, then drill a series of screw holes along it and then cut them off as needed?

You need to route the lip on the end grain otherwise the button will snap when tightened up.

Jason
 
Hmm. Take your point. I must admit, I've done it the other way before and got lucky and had no problems. I'm sure I've seen Norm do it like that before as well.

Ted
 
WiZeR":ukuytemr said:
Looking good Olly.


I'm surprised you like that toggle clamp, I can't stand it. It's such a faff to setup and is either too tight or too loose.

I do agree with your point, it can be a pain trying to get it just right.

I find that if it's too tight and won't bite down, it's often because part of the hinge mechanism is coming in to contact with the fence. I don't use it for smaller cuts but, I wouldn't try and cut a big 9" wide board without it! Could be useful for cross-cutting waney-edge too, but normally, I'd rip that off first.
 
DaveL":12jqxhi4 said:
OPJ":12jqxhi4 said:
I guess there's no other way than to keep jumping back-and-forth between different machines.
You could half the number of jumps by working both ends of the stock. :)

Thanks Dave, very good idea! :D

I've also considered routing and drilling a wide off cut and then ripping it down on the bandsaw. The sawn edges aren't going to be seen.
 
lucky9cat":xcpdievi said:
Olly, that's impressive progress and it looks good to.
I love the arts and crafts stuff as well. Looking forward to see what finish you choose. I prefer a lighter finish rather than the traditional dark treatment.

Ted

Thank you, Ted. :)

The finish is going to simply be Danish Oil, either three or four coats (just applied to second one this morning). I'm really not in to varnishes or stains; don't see the point when you can show of the beauty of the grain so well with an oil finish. It may not be tradtional Arts & Crafts, but I like it. :wink:


I've got another question for the forum - once I'm ready for the glue up, do you think I should glue the vertical slats in to place or leave them dry? In all honesty, they don't really need glue. They're a snug fit and aren't gonna go anywhere unless the rails do first. :)
 
OPJ":1rsxw7fv said:
I've got another question for the forum - once I'm ready for the glue up, do you think I should glue the vertical slats in to place or leave them dry? In all honesty, they don't really need glue. They're a snug fit and aren't gonna go anywhere unless the rails do first. :)


It's going to look stunning, very interesting design.

Like you said the slats don't need glue, at least it will be less hassle on glue up and less cleaning any glue runs. I wouldn't glue them.
 
Made a little bit of progress today and over the past weekend. I have managed to give all the frame components three coats of Danish Oil before doing another dry-fit and the, finally, getting the two sides glued up this morning.

2307070955_e08a37fc51.jpg


I figured right at the start that it would be a lot easier two glue the sides up individually before adding the front and back rails. Plus, I'll actually be able to fit the two shelves in there as well! :wink:

2307071129_633412e9e4.jpg


I wasn't intending to glue the vertical slats in place until I did the last dry run and, after checking both tenon lengths and mortice depths, decided they were gonna need just a little extra help in order to pull the shoulders up tight and keep them there. Very little glue was used - sometimes, I've learned, that's all you need.

The Danish Oil has take for ever to dry though. First coat wasn't too bad but, I applied the third at about 5pm last night and it was still slightly sticky this morning! I was contemplating adding a fourth coat at one point but, fortunately, the two-year-old can of Rustins' I had to break in to with a hacksaw has finally run dry. :)

I think my next job will be to start cutting the buttons and cleaning up the two shelves now I can happily make a mess again. :)
 
Thanks Chris. I know. :( I'm quite impressed with how little time it's actually taken me to get this done, compared with other things I've made in the past - I bet I could've made that deadline after all... Oh well, definitely next time! :wink:

After gluing up the top today in preparation for the weekend, I've been working on these fiddly little buttons and also an oilstone box that'll (hopefully!) allow me to level my oilstones flush with the top of the box, so I can use my excellent Veritas honing guide with dishing out the middle. :)

With the buttons then, after cutting the ends of these offcuts off square on the bandsaw (...smaller, safer, less accurate) I cut a 3/8" bare-faced tenon on each end of these scrap pieces in order to match the grooves in the rails - again, using the brilliant router table jig idea of Mr. Maskery. :wink:

2313050706_3c3c5135c6.jpg


Next job was to mark them all out and drill the holes.

2313050874_7e37e336aa.jpg


Then, it was back to the bandsaw to cut them out (two from each end) before tidying them up on the little Perform Belt & Disc Sander I'm currently trying to get rid of - guess I do have a use for it after all! :roll: :wink:

This is the only photo I have for the oilstone box so far; I may start another thread on this when I get some more work done at the weekend.

2313051348_523f6c9bfc.jpg


I do like this planer-thicknesser but, it gave me a hell of a fright earlier when a piece of oak was zipped from under my hands and, if not for the bridge guard, I'd have lost four fingers off my left hand!! :? :shock: It's frightening to think that I used to work with an silly person who found the bridge guard on the Scheppach machine only got in the way and, that keeping his hands on the timber as it passes OVER the cutter block was the only way to get accurate results!!

Saying that though, I seem to struggle to get a decent finish on the planer though. When Axminster set this up for me, they set it so the blades were fractionally proud of the outfeed table - not something I agree with, personally. But, I always end up with a 'bump' from where I transfer my hand pressure over to the outfeed table and then end up with snipe at the end of the cut as well.

The tables are definitely level though. Does this setup with the knives require a slightly different approach to the one I'm used to, where the blades would be flush with the outfeed table?

Any suggestions on this would be appreciated. :)
 
Well, I've done some more reading on the 'net and in some books and I'm tempted to go along with the idea that my blades simply aren't sharp enough and therefore the very hard oak doesn't stay flat as it goes over the cutter block. That is certainly what it feels like, also.

I've got a rather brief update for your here of some work I've been doing to the shelves and finishing off the corbels, before applying coats of Danish Oil to all.

2328956216_5dc4257dd3.jpg


Both the mid and lower shelves have to be notched to fit around the legs. I tried to deliberately allow about 1mm either side for any movement of the legs and rails (this will be situated next to a radiator) but, I'm sorry to say that while the lower shelf is quite acceptable, the gaps on the mid-shelf came out a little larger than I'd have liked.

But, after a lot paring with a chisel and producing some end-grain shavings with my smoothing plane :wink: (I also discovered my cheap roofing square was out on the inside, simply because of some bumps they hadn't bothered to clean off!! :twisted: ), I managed to even it out on the front edge; the back edge isn't as important, since it won't be seen.

2328137053_f87c71ab1f.jpg


Here you can see the elongated holes on the underside of the mid-shelf, which will rest on top of the four corbels on each leg. And did a dry run yesterday and this is a surprisingly strong set up! These holes simply allow for any movement across the width of the shelves.

2328136895_a8369a1563.jpg


Now, cleaning these up is something I've been trying to hide from for about two-weeks since I cut them on the bandsaw. I was hoping I'd have bought myself an SIP bobbin sander by now but, as I have little income at the moment and would like to buy a lathe, I've decided to save up a little extra and go for the Jet machine at £300 later on, which will also take bobbins as small as 1/4". :)

So, it was a case of scraping, filing and then sanding with the paper wrapped around the dowel. I'm very pleased with the results too. The other benefit of doing two at a time is that you can have an identical pair for the front and two for the back - it doesn't therefore matter if two are thicker than the other two! :wink: :D

2328956056_d71de52734.jpg


I don't really have much to show after this right now as I've simply been oiling, which also means I can't start making dust again until after it's dried. :( I'm aiming for three good coats on each, which means four, because I usually cut to sand the grain back down after the first.

I'm also a little reluctant to give too much away because this could be appearing in a magazine near you, fairly soon...! :wink:
 
And so, the job is done - and I'm very happy with the final result! :D

But, just before I let you have a look yourselves, I'm going to show you the chaos this will be replacing...

2367213202_d7453f06de.jpg


Okay, so, here's the first shot, taken in the daytime, after four coats of Danish Oil:

2367211826_a49089a9bf.jpg


Here's a nice view of the top. I'm tempted to say I actually saved the worst boards for this part! Trouble is, the small knots didn't "appear" until after I'd started planing and I couldn't cut them out. :( I might also have flipped the middle board around 180º, given a second-chance.

2366376989_08f4644bab.jpg


And this final shot was taken in the evening, with the blinds drawn and lights on. It's in the same finished state as the other photo but looks a lot darker. Not sure which one I prefer.

2367212288_5924d81698.jpg


I haven't managed to actually fit everything in to place yet though as I felt something go in my back yesterday after lifting a small sheet of ply. Maybe at the weekend. I'm very pleased with how this has turned out though, aside from the slightly exaggerated gaps around the legs on the middle shelf. Those brackets are all that supports the shelf, by the way - and incredibly strong they are too.

Thank you for looking. I'll try and report back soon with a shot of everything in final situ but, until then, I hope you like this as much as I do! :D
 
Looks fantastic Olly, nice job.

Please be careful with your back. If you damage it, misery will ensue.
 
Back
Top