Another Sellers MkII bench build & new workshop! Project #2

UKworkshop.co.uk

Help Support UKworkshop.co.uk:

This site may earn a commission from merchant affiliate links, including eBay, Amazon, and others.
DBT85":u9xow9tk said:
sticky backed velco or "hoop and loop" as they are desperately trying to get people to call it.
Well, yeah.... because Velcro™ is technically a trademarked brand name, like Hoover™.

DBT85":u9xow9tk said:
My dear fellow, you turn the plate upside down and the grippy bit holds in place on the wood! :D
That's what I thought, old bean, but my wood itself was too smooth!

DBT85":u9xow9tk said:
Mine fit nicely and need a blow on the underside to release them, but they could still be neater than they are.
Mine are dead tight, which is awkward as I have a 300/600 double-sided plate.
Have you sealed yours with anything, to stop the wood from absorbing the lapping fluid/glass cleaner?
 
Tasky":1qevjhb4 said:
sticky backed velco or "hoop and loop" as they are desperately trying to get people to call it.
Well, yeah.... because Velcro™ is technically a trademarked brand name, like Hoover™. [/quote]
Might as well give up. Its Velco, as my not Hoover is a hoover, your not Biro is a biro, and budget cola from the happy shopper was still called coke!

Tasky":1qevjhb4 said:
That's what I thought, old bean, but my wood itself was too smooth!
Ohh, Mine was not, lol.

Tasky":1qevjhb4 said:
Mine are dead tight, which is awkward as I have a 300/600 double-sided plate.
Have you sealed yours with anything, to stop the wood from absorbing the lapping fluid/glass cleaner?

I've not sealed it yet. I have a wee bottle of shellac so will probably use that as per St Pauls suggestion at the end of his video. Just didn't have time yesterday and won't want to buttocks about on Saturday until after I've sharpened a few bits and got going on this bleedin' workbench.

How long have you had your plates btw? How they holding up, not being the more expensive ezelap?
 
DBT85":2ark8vyh said:
How long have you had your plates btw? How they holding up, not being the more expensive ezelap?
Few months, and they're doing great. I've done the whole range of kitchen knives and some other peoples' stuff on them without issue.
 
Tasky":k36ee51s said:
Few months, and they're doing great. I've done the whole range of kitchen knives and some other peoples' stuff on them without issue.
Ahh good to hear. I need to do ours too as they've become dangerously blunt.
 
Got the rest of my hardware arriving on Monday, just the carriage bolts really. Also took advantage of Toolstations Valentine offer (still running, £14 off £100 spend) to get myself 4x 1500mm clamps and a selection of screws as right now the only things I have are 4x40mm or 4x50mm.

So, clamping sorted (now 4x 900mm ally, 4x 1200mm steel and 4x 1500mm ally), I'm trying to have a think about my vices. bI was fortunate/greedy enough to get 2 Pre 1965 ish Record 52 1/2s with QR on ebay for under £80 for the pair. Both work fine, but one would need some love before I used it at all.

Trying decided if I a) fit both, one at the end and one at the leg as normal, or fit the better one at the leg, fettle the other and then swap over and do the same. I've probably little need for both, but they are here now and such a pain to ship anywhere lol.

Also took a moment to order 2x 25x6x600 bits of aluminium bar from ebay for just over a tenner posted. My winding sticks. Saves me trying to make some until I feel like it as a project and these were hardly expensive.

Heading off to my first ever car boot at Stratford race course on Saturday, weather permitting, to see what I see. Also have my eye on something on ebay that would be a nice addition to my collection and a bit of a project to get all items back to life.
 
So today I headed off to my first car boot to see what I could see. Little on offer of interest apart from some wooden spokeshaves for £4 a go. Not in need yet and I know they aren't going away any time soon so I passed.

Managed to get my TV and Chromecast hooked up, so I can Plex/Netflix/Spotify my way through my work which will be cool. Maybe if Sky do a deal on another Mini box I'll get one in there too. Tomorrow I might get the TV on the wall and out of my way on the floor.

Also, at last, I managed to snag 20 odd minutes for my first go at sharpening on my new sharpening plate. I only attempted to do my 18mm Lidl chisel in this go. I tried to use a honing guide I got but I wasn't happy with it rocking left and right so abandoned it.

Used Isopropyl Alcohol for fluid as it wipes clean, smells nice and seems to do the job. I'm sure someone will inform me that I'm at risk of immediate death.

I have awarded myself a 7/10 for this first effort. By the time I'd finished I was able to shave my wrist, the edge is shiny shiny and with a fingernail angled almost vertical, the edge doesn't slip off and just digs in every time. Takes a nice clean even curly shaving on wood if I attempt it.

My reason for only getting 7 out of 10 is that I didn't get my bevel right and I need to work on the face more as there are still too many marks there. Since I was doing it freehand (and it felt like it was going fine) I've managed to increase the bevel to about 30deg while the chisels come at 25. I can see that I've barely touched the back 2/3 of the bevel. Something for next time.

As you can see, the before photos are at the top, and the afters are at the bottom.
fpPRPDw.png


Perchance tomorrow there might be glue and planing in my sights.
 
Good effort there on the chisel - I do use an Eclipse honing guide for mine but it takes a fair bit of practice to prevent see-sawing side to side - the advantage is maintaining the 25 degree angle more easily - like yourself I tried freehand and was going too steep as well as not being consistent.

I need to pick up another set of those chisels, hoping Lidl stock them again soon. Not sure if my last set were a bad batch but the edges are breaking too easily even with fairly gentle use. Could be my error but, well, another set would be a way to find out.
 
NickN":1cym11nb said:
Good effort there on the chisel - I do use an Eclipse honing guide for mine but it takes a fair bit of practice to prevent see-sawing side to side - the advantage is maintaining the 25 degree angle more easily - like yourself I tried freehand and was going too steep as well as not being consistent.

I need to pick up another set of those chisels, hoping Lidl stock them again soon. Not sure if my last set were a bad batch but the edges are breaking too easily even with fairly gentle use. Could be my error but, well, another set would be a way to find out.
Thanks Nick. Mine just came with a set of like 8 chisels with rubber grips and metal caps which I got for about £19 lol. It's an eclipse type, but yeah, not stable.

I think another go knowing that it needs to be a lower angle and I might be able to nail it freehand. If I feel I really can't get it then I might get Veritas mk2 with the wide roller.

If you pm me your address I'd gladly send a set to you (lidl, not Aldi), for some reason I bought 4 or 5.
 
The Veritas guide does look good - might be on my Christmas list I reckon :)

And that's a very kind offer - seeing as you're not that far away you'd also be welcome to pop over and see the end result of what you're building, or I can nip over and sample your tea.. lol. Will PM you. :eek:ccasion5:
 
Another day at it and I was *this close* to using some glue!

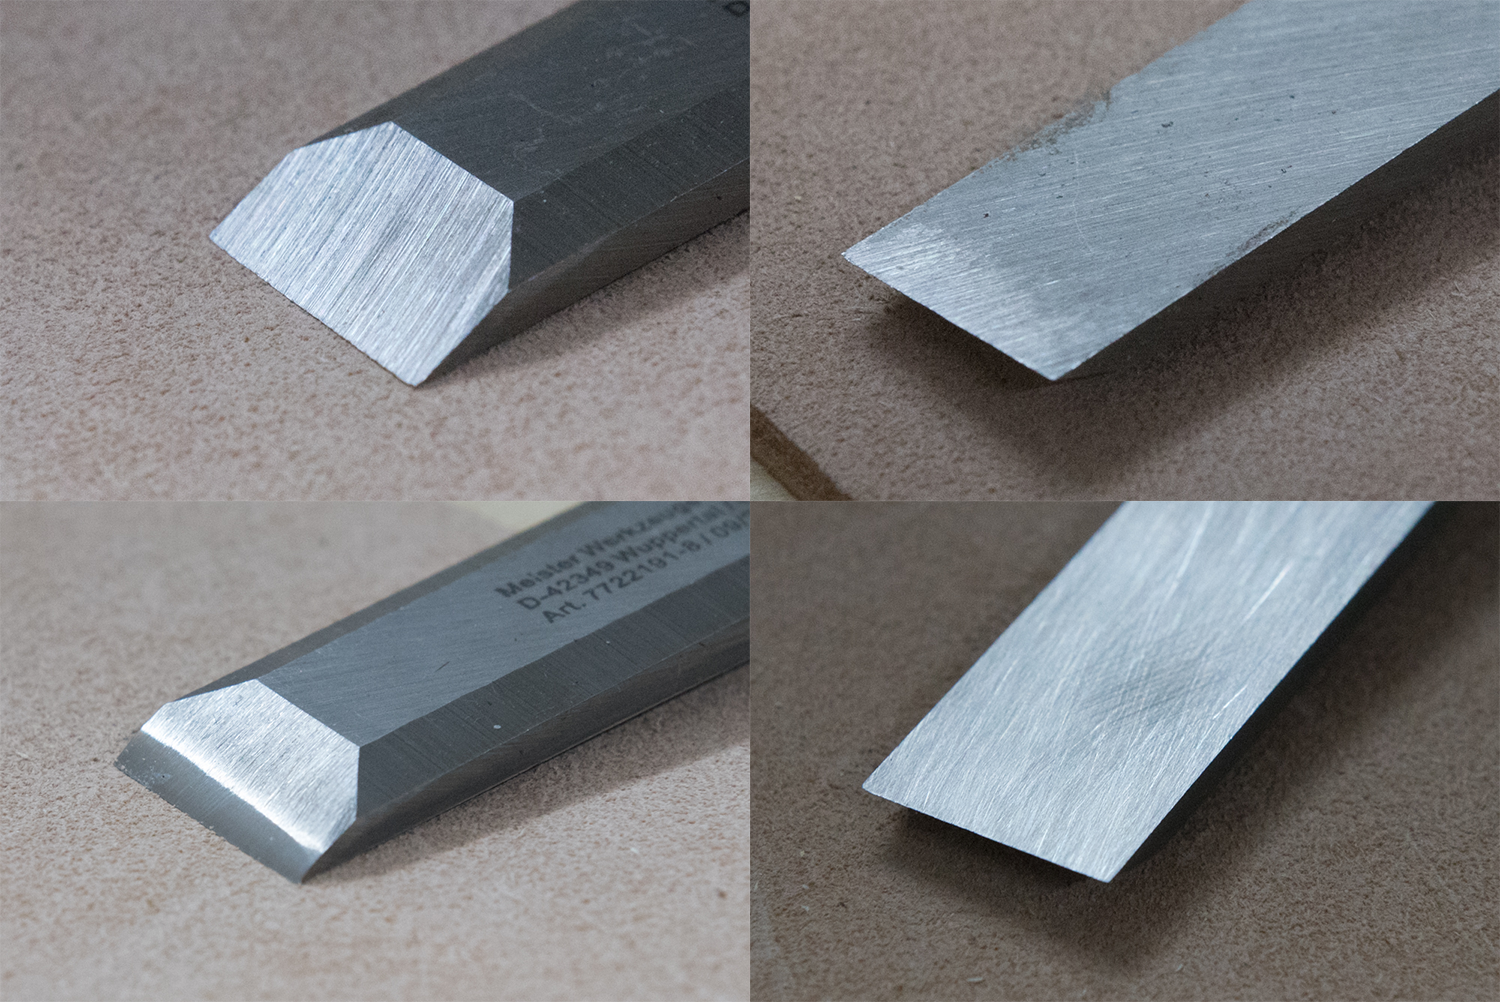
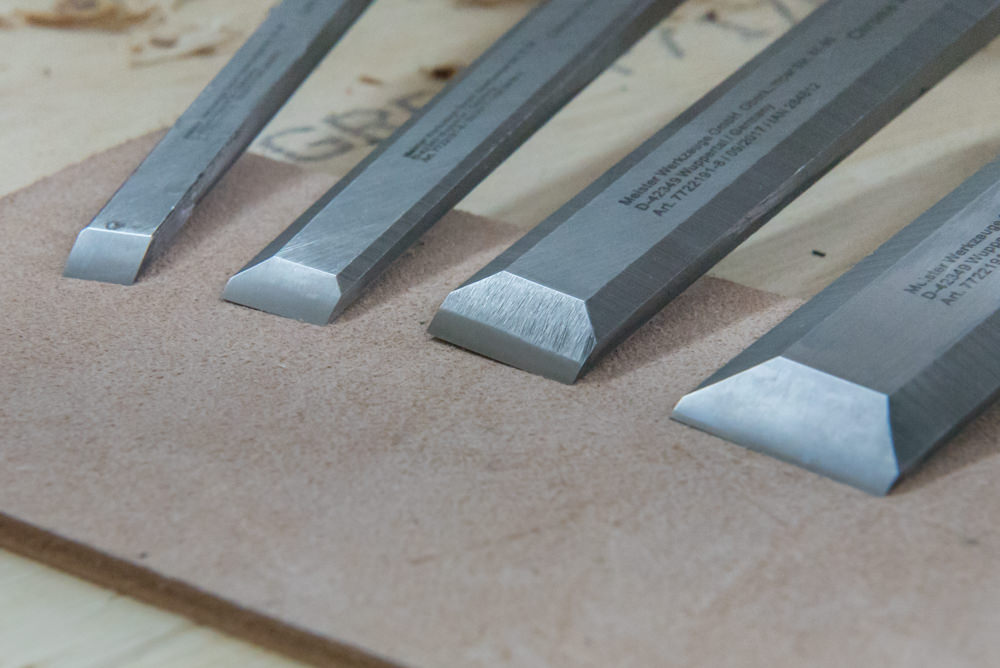
Started out the day with more sharpening. First off, my other 3 Lidl chisels. All done freehand and all a better result than my first attempt yesterday. Remebered to keep my hand a bit lower to maintain the bevel and so stayed between 23 and 26 degrees and also too the machining off the whole bevel. The backs were also done of course and while not mirror like, are certainly very close. Perhaps another go will improve them further. I'm not too worried, like yesterdays efforts, these 3 all shave me and want to dig in to my nail at an acute angle rather than slip off. They glide through the wood. Job done!

IkLzXkN.jpg


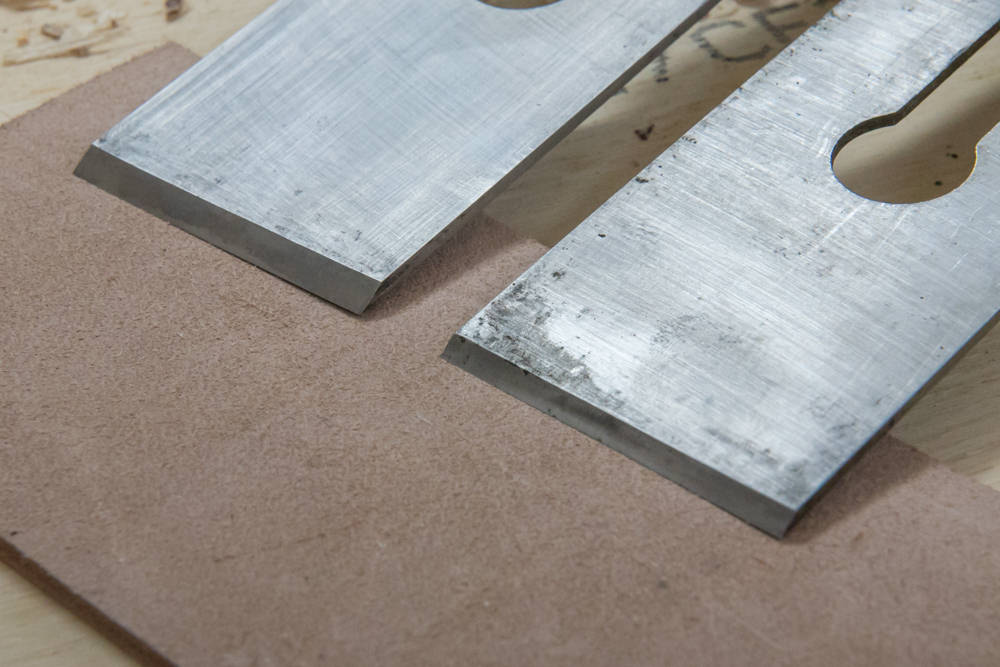
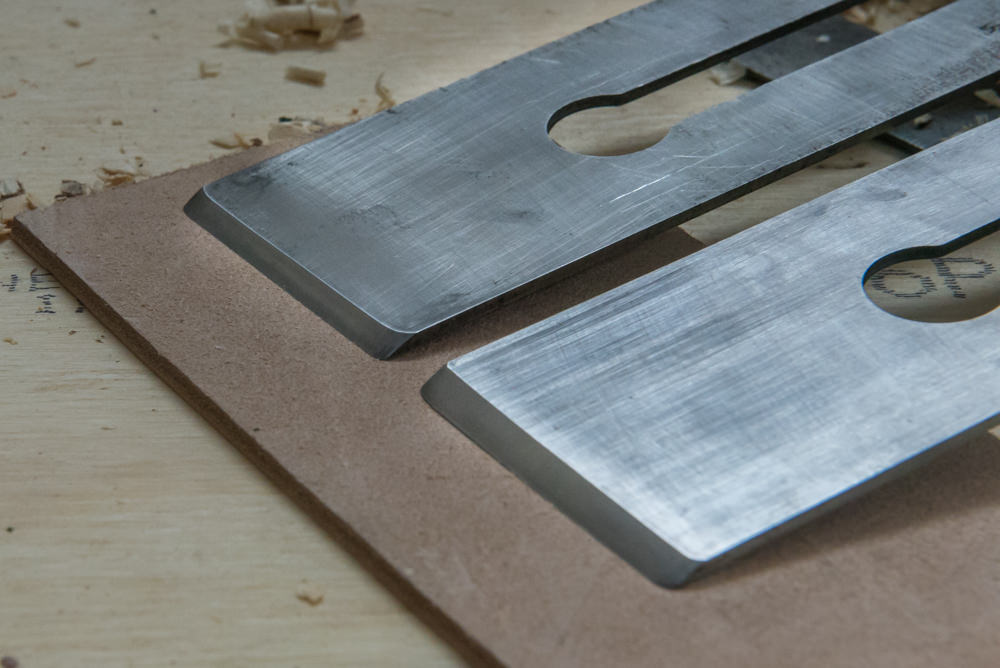
Next up were 2 plane irons. One was a Stanley was as it came from the factory and 25 degrees. This one had 2 dings in where I'd caught a screw previously. The other, a Record, had been done before I bought it it looks like, at around 30 degrees.

LTqHheM.jpg


For the Stanley I used the honing guide and took it up to 30. Took quite some time on my 300 plate and were I doing it again I'd be using some coarser sand paper to get me through most of the work. But I got there and the dings were removed too. Went through all 3 stones, then my strop, only to realise that I'd neglected to camber the edges a little. Oh testicles, I thought. Went back and got it done. The honing guide felt fine with the plane iron in with the wider blade giving it the balance it was missing with the narrower chisels.

nKvhaFf.jpg


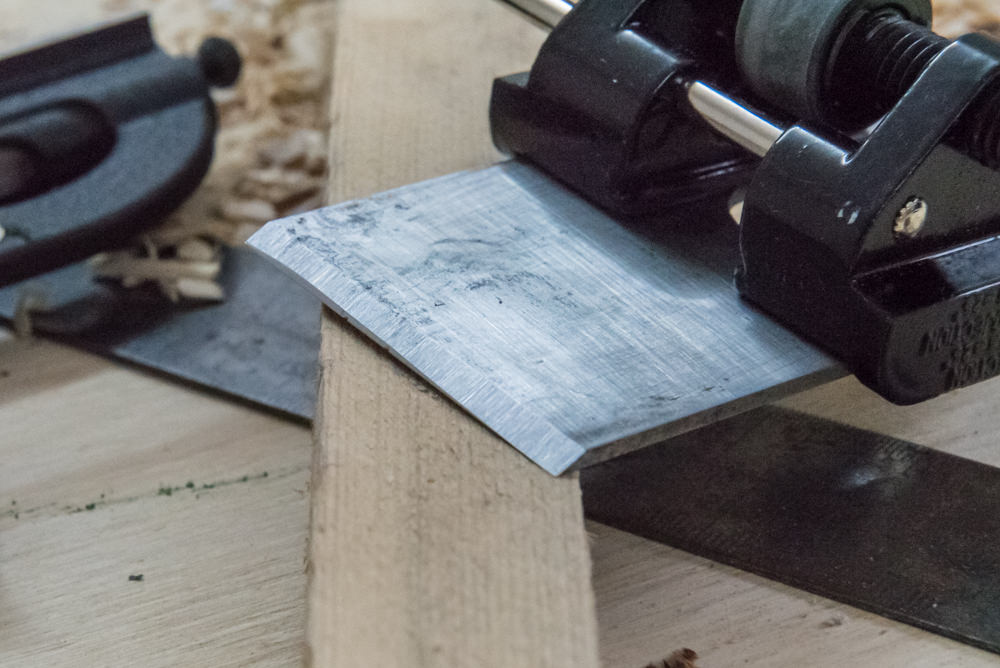
The Record blade I did freehand and that came out quite well too. Both are taking nice shavings for my first attempt. Result.

XzioTiK.jpg


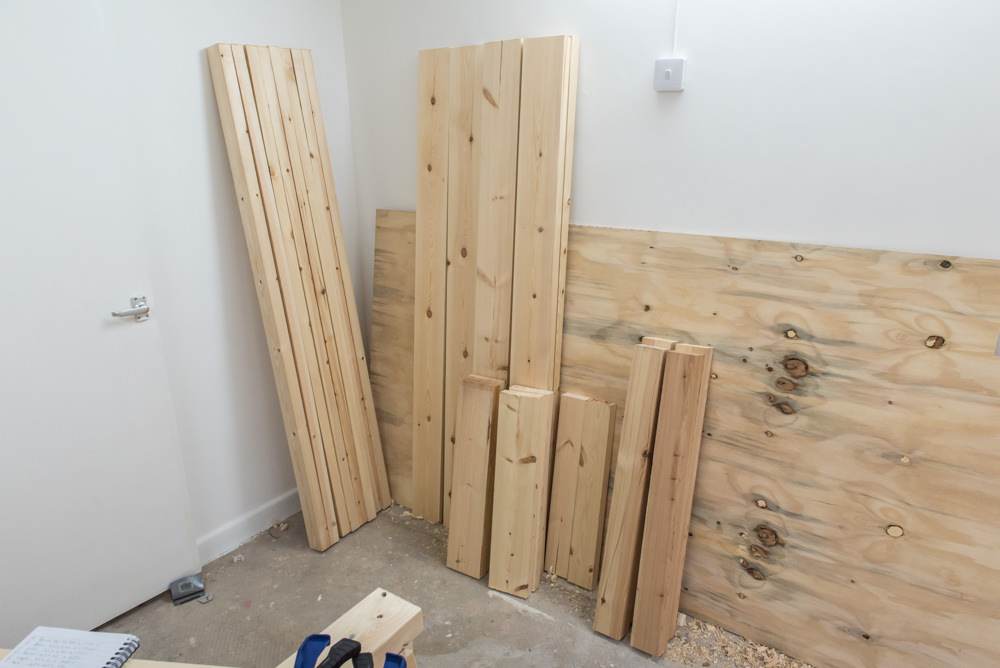
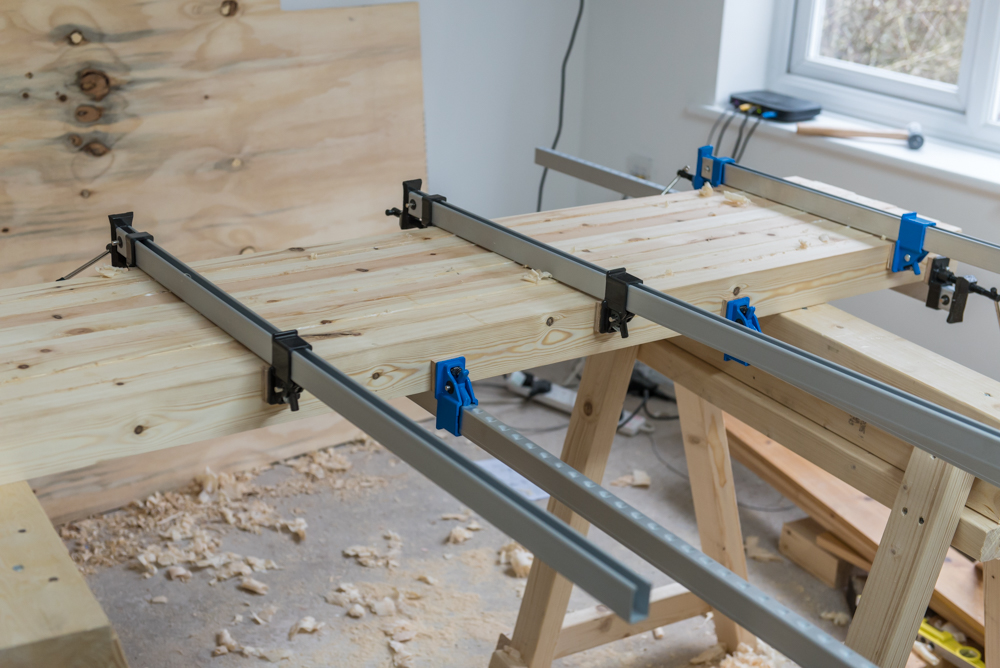
Next up, time to deforest my living room and get my parts cut to length/rough length. Some will need to be trimmed later so were cut a fraction long. No knifewalls on these but I was very pleasantly surprised at how clean the results were now that I actually learned how to use a saw. They're square too!

FADSpqG.jpg


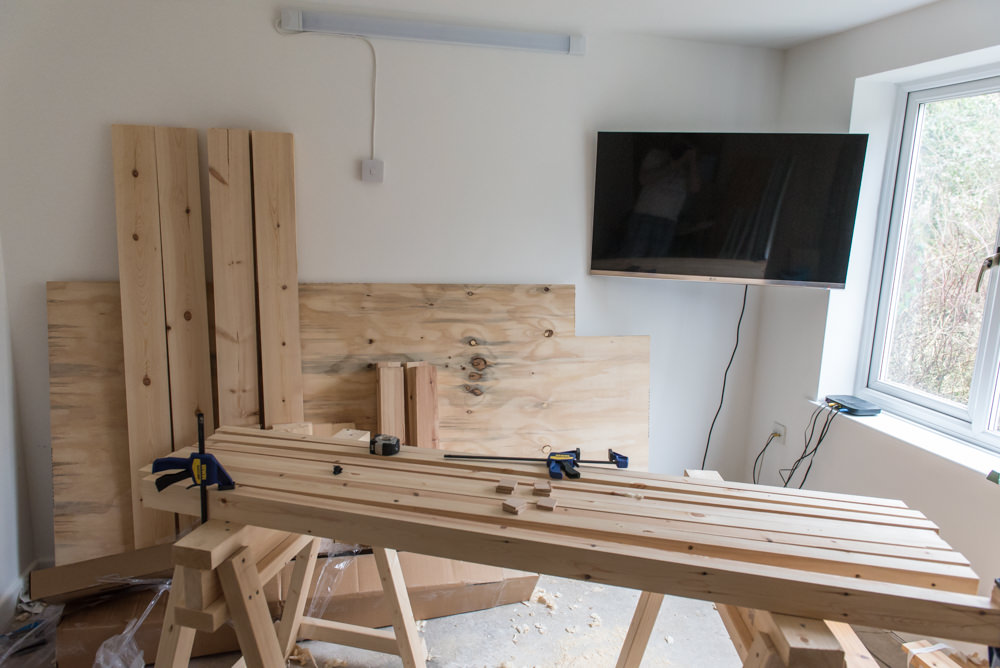
And so at last, I could plane and prepare my benchtop pieces. Not too much work as they were already PAR. Just a little here and there really.

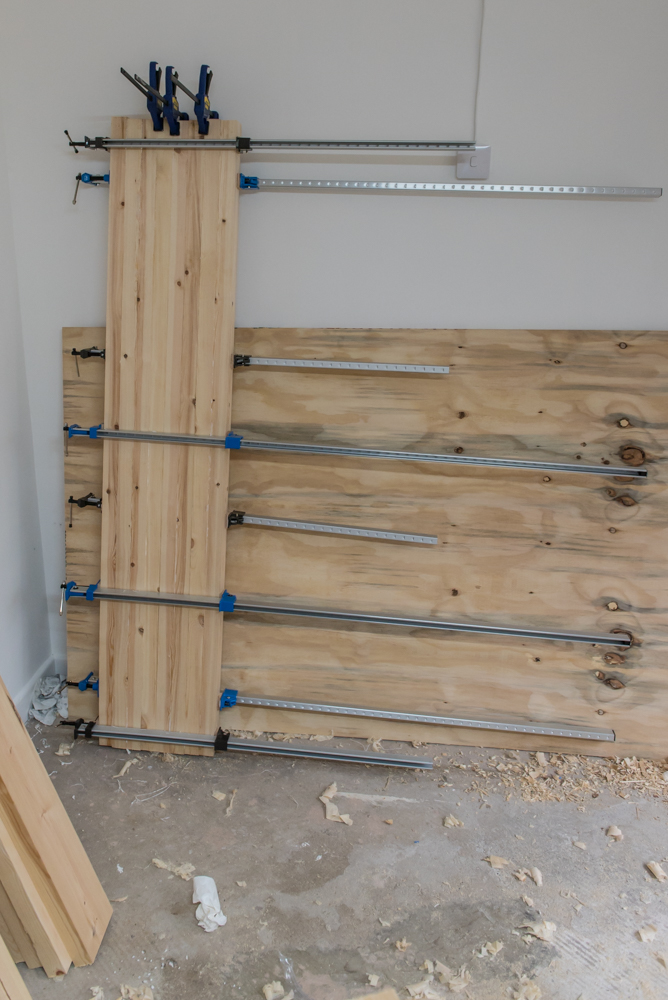
And so there it was left. All 8 pieces arranged to make a nice top and a solitary clamp used to check that I can remove the bow in a couple. With my daughter moments away from being declared safe to move (bedtime for 6 months olds is fun!) I didn't want to start gluing up and persuading the pieces to line up only to be interrupted or worse, wake the monster.

So tomorrow then. Tomorrow glue shall be used. And my TV will get mounted. Since she slept I managed to mark up ready to hang it tomorrow morning. Finally my workbench is starting!
 
You must be happy, you got loads done today by the look of it. All looking really good too - will be a nice moment when that bench top gets glued, the first piece of the project complete (ish).

I think the worst pieces I had were the apron boards for needing planing - everything else was not at all bad.
 
NickN":2rs7usz5 said:
You must be happy, you got loads done today by the look of it. All looking really good too - will be a nice moment when that bench top gets glued, the first piece of the project complete (ish).

I think the worst pieces I had were the apron boards for needing planing - everything else was not at all bad.
Certainly nice to actually make some progress, as little as it was.

Really nice to finally get the sharpening done though. With initialisation done the next time round should be much faster. Still have my router blades to do but they are teeny so won't take long. I also have a VonHaus 10 piece set going from 2" down to 1/4" that I'll probably do too. Day-glow orange handles and steel caps, but they should do a job. Dad wants his done too for what very little use they get. I'm getting a large wooden plane for my trouble though so not all bad.

I've also got saws to do once I've got the bench up, and a fair few tools that need love including my grandads "warranted" saw that's all rusted up. Really hoping to bring that back to life. My childhood was spent whacking screws in to old cupboard doors with a hammer in his back garden lol.

Anyway. Hands up all who are shocked that I didn't get to gluing today? Shocking news I know. Doing nights tonight so only had a few hours this morning. An emergency dentist visit and a bit of time with the baby left me just enough time to mount the TV and sort the pads out for my clamps. The 1500mm ones arrived today from Toolstation and were branded *gasp* Silverline. They look identical to the others I have and actually run freer. All will need proper fettling and bracing at a later date.

47" probably a bit big for the shop, but it's cost me the £18 bracket. A bracket that laughably claims to be able to take twice the weight of this TV. The wall plate could take it, the arm, less so.
qm3LKtb.jpg


A selection of clamps done up to make sure my sticky backed velcro is stuck down. I have to say that I cut 24 of the pads out of that sheep of hardwood ply from Travis and all of them are solid all round and have nice faces. Way better than the ply I used for my plate. I should have stuck to my original idea to glue 2 pieces together to make the plate. Never mind. Out of interest, that sheet was £22 structural hardwood ply from Travis. An 18mm sheet would have been £47 from them, so a fair bit more than the £23 Elliotis Pine I got from Davies. An 18mm sheet of hardwood ply from them would have been £32.

FqgM0fJ.jpg


Ahh. Never mind. Efforts resume come Thursday once I'm home again.

This thread will be all about my workbench build. Eventually. I promise.


Really.
 
Haha - I keep checking back to see something actually happening to do with a workbench, only to find you've been busy sorting out your TV! :D
 
MattRoberts":13ow753o said:
Haha - I keep checking back to see something actually happening to do with a workbench, only to find you've been busy sorting out your TV! :D
I know I know!! I must look like a right tit haha.

Fortunately it's a thread about the workshop too so I won't get booted for being offtopic in my own thread.

Just didn't want to rush it and so managed to remain calm and take a moment to delay till Thursday (Probably Sunday, lol).
 
So it's Thursday. I've been awake for 20 hours as I've just finished nights and the top is glued up. There was much swearing.

I did a dry run with 8 clamps, all set to the right length so I could just go. Got the glue on, rubbed faces together to spread and then on with the clamps. The silverline ones are soooo much better than the others I bought from screw fix 2 months ago. They don't bind or anything. One problem though is that at 1500mm and them clamping the laminations, they are too long to just roll the top over with the beams wanting to interact with my ceiling. Were my horses 2in shorter it would have been fine. So I had to pick it up to spin it.

Never mind. One end all nice and flush, even aligned so there's minimal cutting waste afterwards. Other end looked like a hillbillies set of teeth and by now the glue is starting to make life exceedingly difficult. No amount of persuading with my chisel hammer will budge them. So clamps were added to bring them in to line.

I've a couple of ridges in the middle but nothing drastic. At least all the other glue ups are only 2 boards.

Next time: shorter clamps, be faster with the glue, open a window so I don't sweat like an Olympic sprinters love spuds in the final.

Pics to follow.
 
If you are not using biscuits when glueing pieces together a cheat is to knock a few veneer or panel pins into one side somewhere that won't be sawn or machined then nip them off leaving a few mil proud - when you cramp it up once the pins engage the other side the pieces won't then slip.
 
phil.p":1vfv9axr said:
If you are not using biscuits when glueing pieces together a cheat is to knock a few veneer or panel pins into one side somewhere that won't be sawn or machined then nip them off leaving a few mil proud - when you cramp it up once the pins engage the other side the pieces won't then slip.

Ahh yeah I've seen similar. The issue with these is that with the bows and so on in each bit of lamination, my odds of clamping it flat off the bat were slim and it was always going to need persuading. I actually had less of an issue gluing up my 8ft long 50mm thick dining table top than these!
 
Excellent news to hear you've got Glueing Stage 1 (of many) complete.

Cutting both ends of the newly laminated top by hand and square was... ... interesting. You may even need TWO windows open for that job.
 
NickN":19f9xhff said:
Excellent news to hear you've got Glueing Stage 1 (of many) complete.

Cutting both ends of the newly laminated top by hand and square was... ... interesting. You may even need TWO windows open for that job.

Yeah. I've got plenty of planing to do before I get that far!

Benchtop clamped up
uNtETGA.jpg


Not sure my blue clamps are big enough.
Ogq2gNn.jpg


Started on the aprons this afternoon. The first two took me a while to be happy that I was square but I got there. Had to remove a bit of a hump that didn't look like it wanted to clamp out. Now I have two nice mating surfaces ready for glue once I have some clamps free.

The other apron however. I cut 2 pieces for it. Both a smidgen twisted. This photo is of the less twisted one. Fortunately I have a spare length that I've now cut so I only have to unwind one board. Might take a while.
wAIZCWi.jpg
 
Back
Top