


Pekka Huhta
Established Member
I got my bathroom ready a few weeks ago and thought that someone could be interested on some of the details.
My bathroom was supposed to be my 2007 competition entry, but I ended up submitting only the bathroom cabinet for the competition.
https://www.ukworkshop.co.uk/forums/view ... hp?t=18644
https://www.ukworkshop.co.uk/forums/view ... hp?t=20271
But to the deck:
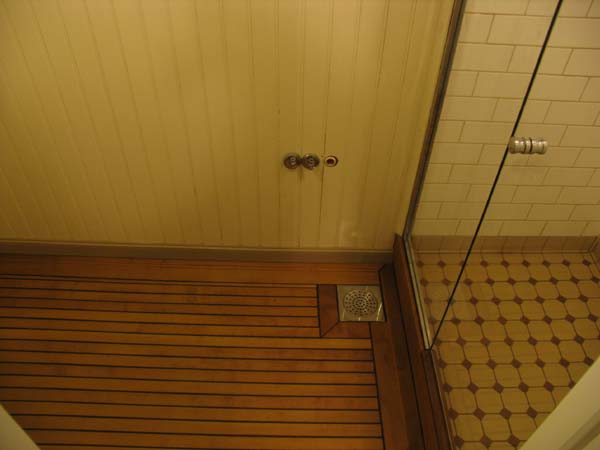
I don't remember where the idea originally came from, but I have been messing about in (wooden) boats since I was a kid, so it wasn't that far fetched when I started thinking "hmm, what kind of watertight floors I know" :wink:
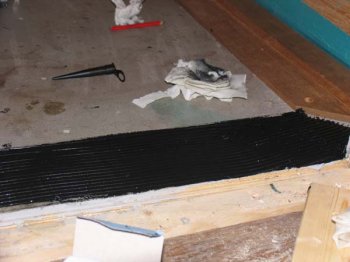
Under the deck I had 2x6" beams as the framing and two half inch birch plywood sheets glued together. I used 2 x 12 mm instead of one larger, because that way I could locate the seams on different places on different layers. And on top there is three coats of bathroom waterproofing compound.
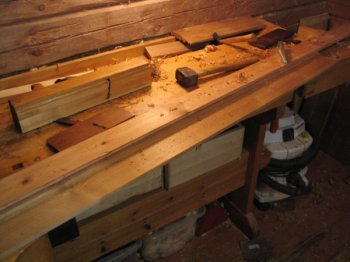
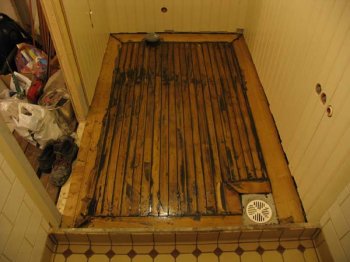
I did not want to use teak for the floor as I think i have far exceeded my share of tropical woods during my buoat-restoring years. Instead I used heat-treated birch, which comes very close in color and due to the heat treatement is also quite rot resistant.
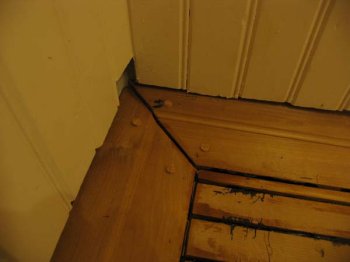
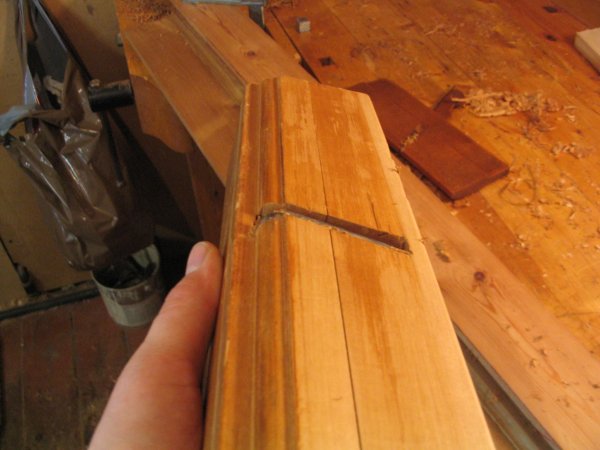
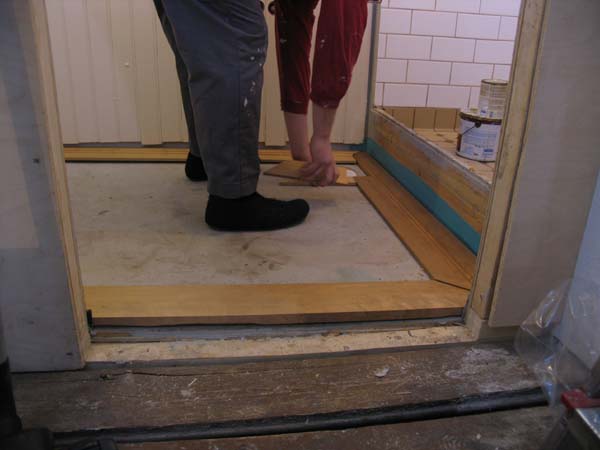
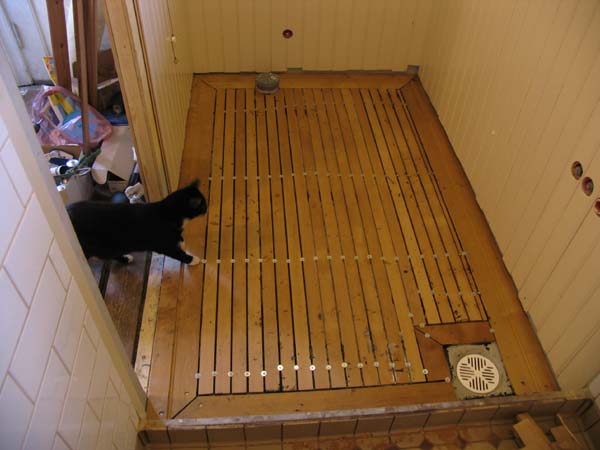
I started by measuring and cutting the frames or "gunwales" around the deck (floor). Usually on boats these are at least 2-3 times as wide as the decking strips. Also in this case some of them was covered under the skirting boards, so the "frames" were 150 mm and strips 50 mm wide.


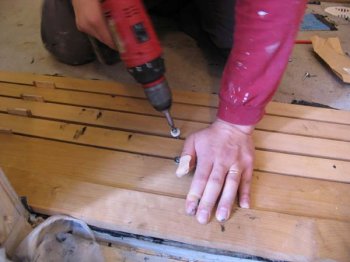
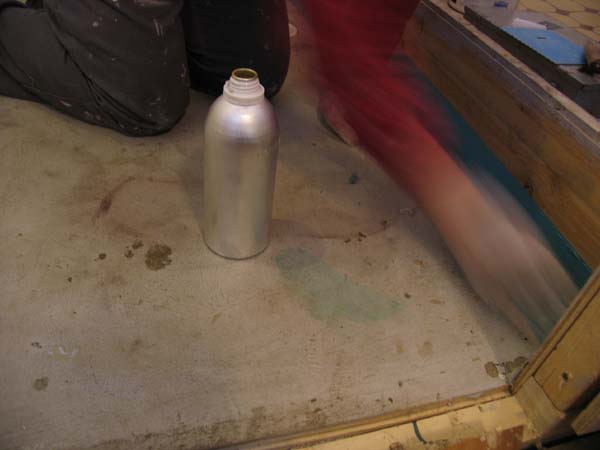
I primed the whole floor with Tremco primer, applied a quite liberal amount of Tremco PL200 glue to the floor and "combed" it with a toothed trowel so that there was an equal layer of adhesive all over. The frames were screwed straight through the wood and screw holes plugged.

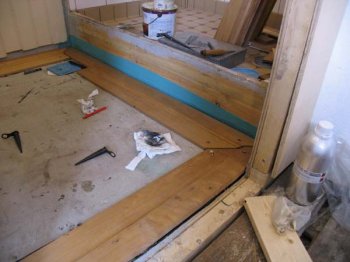
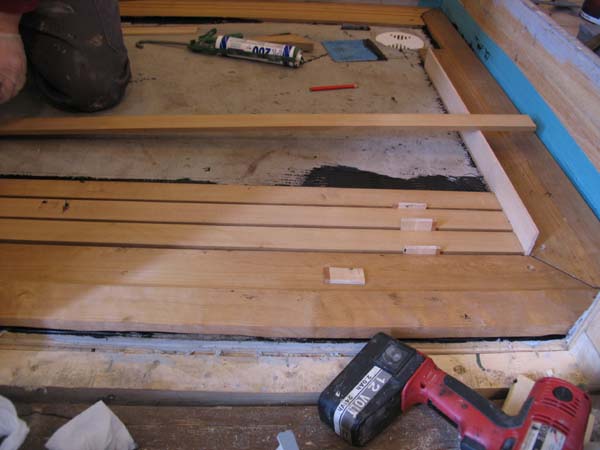
The strips were glued 3-4 at a time. I spread the adhesive, used wooden spacers for adjusting the gap between strips and used screws and big washers between the strips to hold them down.


Caulking was easy. Many instructions tell you to use tape on both sides of the seam, but it's useless as you have to sand the floor anyway. Only the corners should be taped, they were a pain to sand, scrape and chisel clean.
I first primed the seams, then caulked a small area at a time and then used a putty knife to clean the excess off.

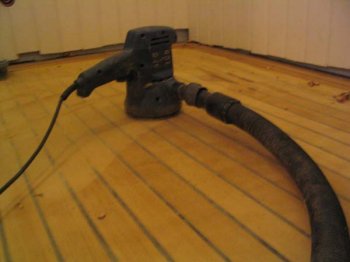
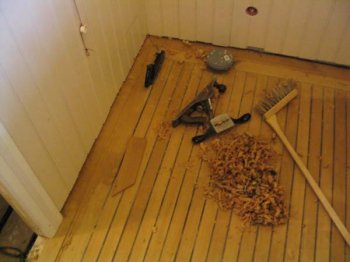
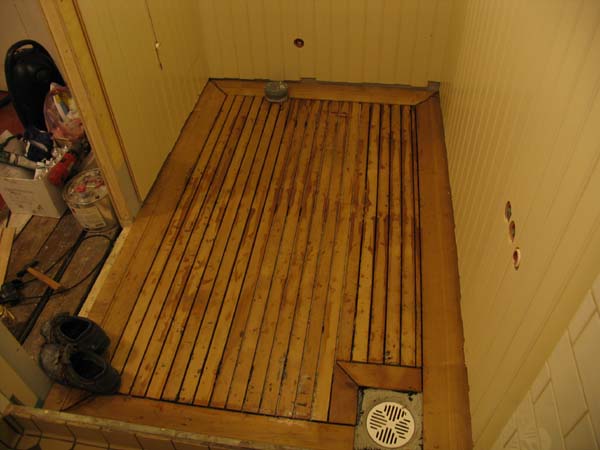
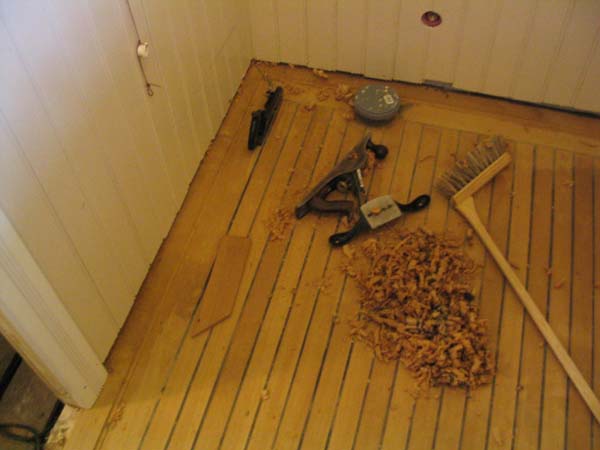
Sanding started with a belt sander, then with a ROS and finally I hand planed and scraped it clean. Hand planing is a personal perversion for me, but I have to admit that the surface improved very much by it. :wink:

Finally the surface was waxed 4 times with Osmo Color wax just to give the surface a bit of protection.


It wasn't as hard work as it may sound, I think that it took maybe two times as long as just tiling it. And I think it looks salty enough for a sailors loo
Pekka
My bathroom was supposed to be my 2007 competition entry, but I ended up submitting only the bathroom cabinet for the competition.
https://www.ukworkshop.co.uk/forums/view ... hp?t=18644
https://www.ukworkshop.co.uk/forums/view ... hp?t=20271
But to the deck:
I don't remember where the idea originally came from, but I have been messing about in (wooden) boats since I was a kid, so it wasn't that far fetched when I started thinking "hmm, what kind of watertight floors I know" :wink:
Under the deck I had 2x6" beams as the framing and two half inch birch plywood sheets glued together. I used 2 x 12 mm instead of one larger, because that way I could locate the seams on different places on different layers. And on top there is three coats of bathroom waterproofing compound.
I did not want to use teak for the floor as I think i have far exceeded my share of tropical woods during my buoat-restoring years. Instead I used heat-treated birch, which comes very close in color and due to the heat treatement is also quite rot resistant.
I started by measuring and cutting the frames or "gunwales" around the deck (floor). Usually on boats these are at least 2-3 times as wide as the decking strips. Also in this case some of them was covered under the skirting boards, so the "frames" were 150 mm and strips 50 mm wide.

I primed the whole floor with Tremco primer, applied a quite liberal amount of Tremco PL200 glue to the floor and "combed" it with a toothed trowel so that there was an equal layer of adhesive all over. The frames were screwed straight through the wood and screw holes plugged.


The strips were glued 3-4 at a time. I spread the adhesive, used wooden spacers for adjusting the gap between strips and used screws and big washers between the strips to hold them down.

Caulking was easy. Many instructions tell you to use tape on both sides of the seam, but it's useless as you have to sand the floor anyway. Only the corners should be taped, they were a pain to sand, scrape and chisel clean.
I first primed the seams, then caulked a small area at a time and then used a putty knife to clean the excess off.


Sanding started with a belt sander, then with a ROS and finally I hand planed and scraped it clean. Hand planing is a personal perversion for me, but I have to admit that the surface improved very much by it. :wink:


Finally the surface was waxed 4 times with Osmo Color wax just to give the surface a bit of protection.
It wasn't as hard work as it may sound, I think that it took maybe two times as long as just tiling it. And I think it looks salty enough for a sailors loo
Pekka