


lucky9cat
Established Member
Right, this is my first commissioned work! Not that I went out of my way to get it; or I’d do it again unless it was really worth my while. It is a pair of side tables I made for a friend; the dimensions were non-negotiable as the tables had specific locations. The bottom drawer had to be able to store CDs. As she had previously admired some of my Stickley Arts and Crafts work it seemed good to work along these lines.

I started by doing a plan on SketchUp. It takes me a fair amount of time to do anything on SU but gets easier and it gave my client a clear idea of what to expect. We must have gone through about two or three iterations.
It was to be in European Oak, which I got at Goodwillies in Waterlooville. I spent a couple of hours sifting through the stacks with a mate and got some very nice quartersawn boards only to find when I had cleaned them up, the grain changed direction all over the place and there were large colour variations along the boards. I was pretty miffed and posted this pic to the Finishing forum to see if anyone could help me make the colour more even.
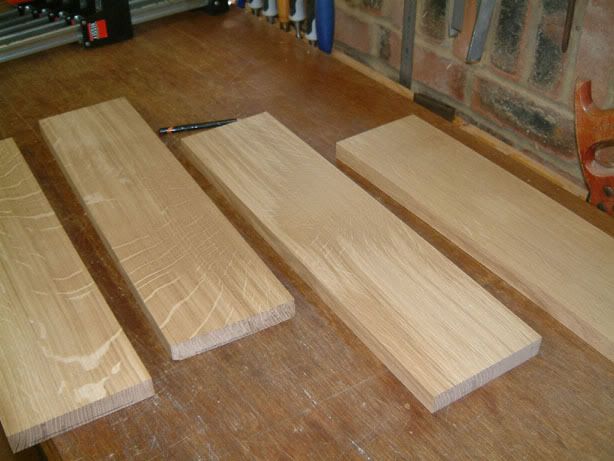
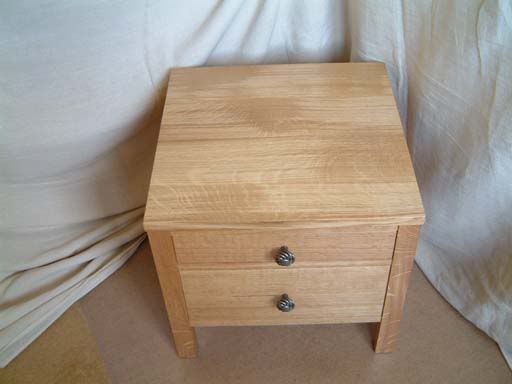
Thanks to Waka for suggesting working with the colours and using the variations to enhance the effect. I’ve now got some stunning table tops.
The wood lived in the dining room for a few weeks before I started the project. The pieces I worked on were taken to the workshop (garage) and returned at the end of the day. I wanted minimal wood movement once the job was finished. I’ve been caught out before!
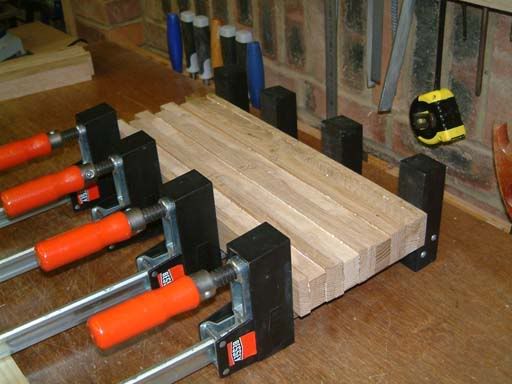
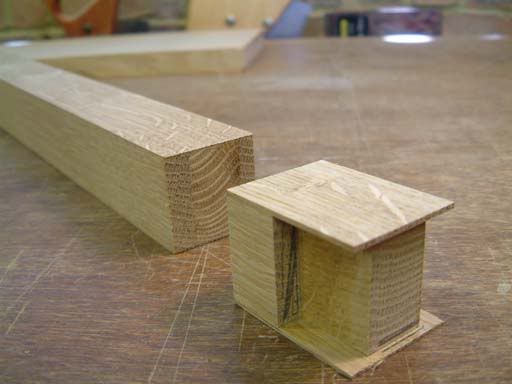
I like to have quartersawn ray-fleck on each face of the legs and acheive this by gluing a 3/16” veneer to each of the plain sides and then planing and thicknessing it down to about 1/16”. As the plain sides of the legs end up hidden it allowed me to use up a board where I really couldn’t get rid of some terrible tear-out problems I was having preparing it. This pic shows the four legs in the first stage of glue up, each consisting of three pieces, the inner core being the “bad” wood faced with nicely grained wood on each side. Well I wasn’t going to throw it away!
After being cleaned up, the plain sides were veneered to achieve quartersawn all round.
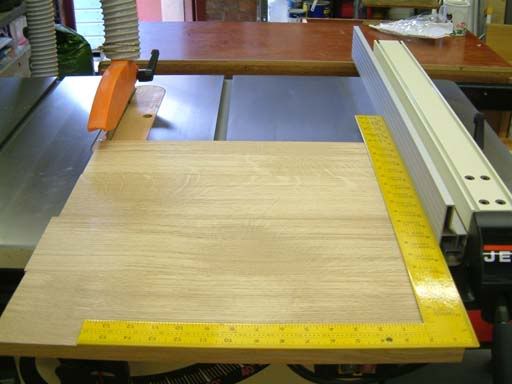
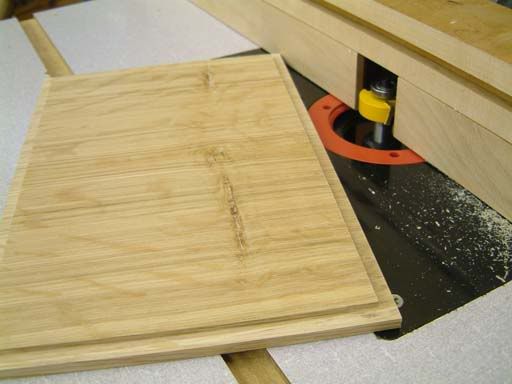
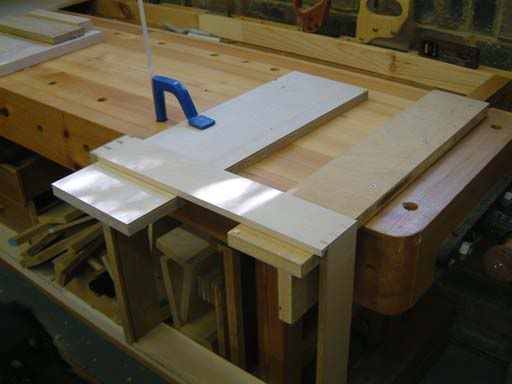
I glued up the tops next. I really needed a sled of sorts to do get the first cross-cut square. Not having one handy, I used double sided taped to attach a large square to the table top and was able to run it through against the fence. I got a nice clean cut. Note my zero clearance insert, made with a bearing guided router bit using the original insert as a template.
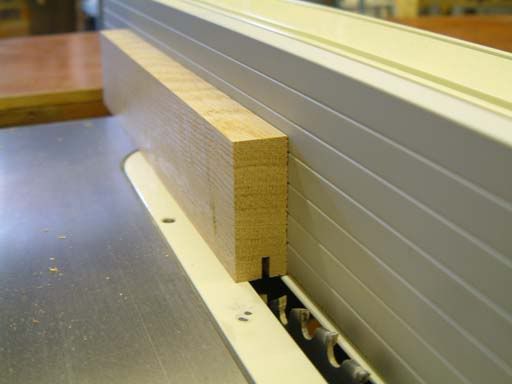
Next the side frame and panels. The slot to hold the panel was made in the rails and stiles with the table saw – one pass in each direction to centre the slot.
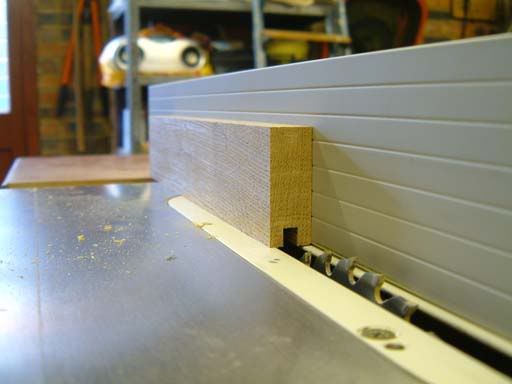
The rail tenons next. I use the table saw for the shoulder cuts, and then adjust the setting to cut the haunch.
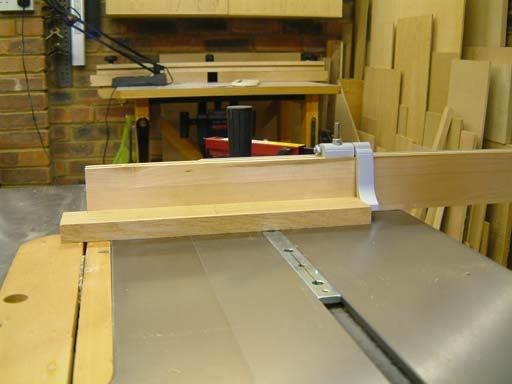
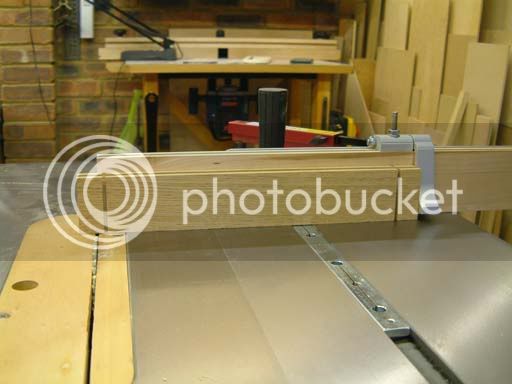
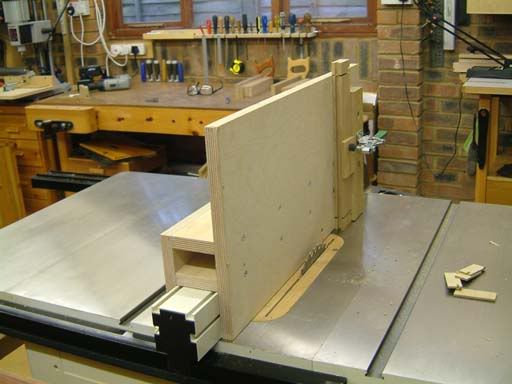
The cheeks were cut on my tenoning jig.
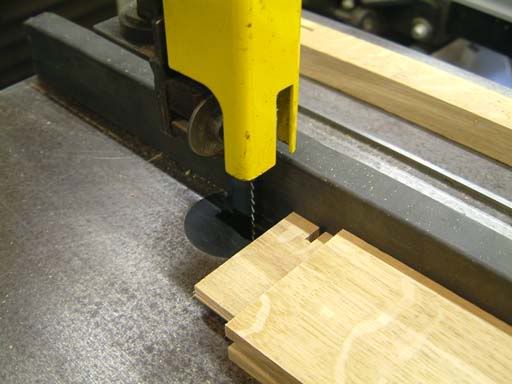
The haunch was finished on the band saw.
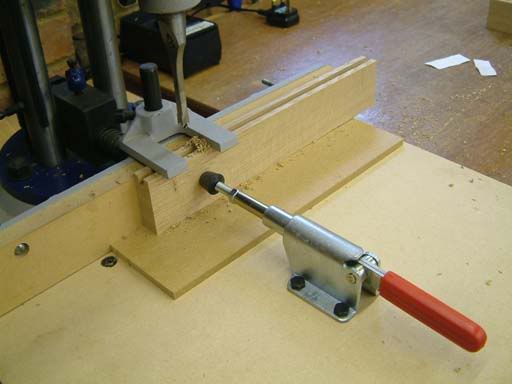
The mortices were cut with my dedicated hollow chisel morticer. Note the clamp I’ve rigged up to save the “thumb ache” from holding the wood tightly against the fence.
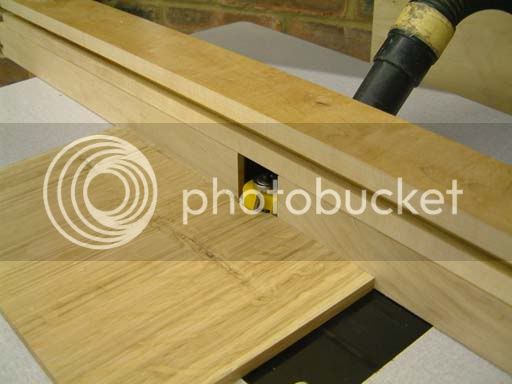
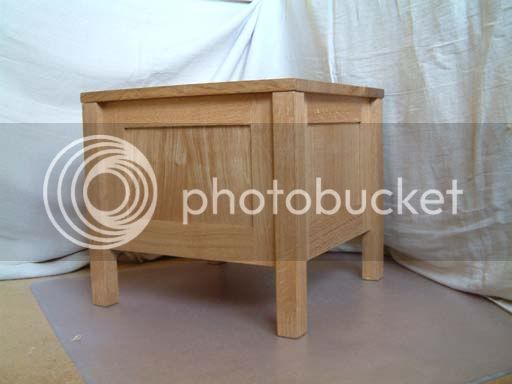
The panels were book-matched using the band saw to split them before planing and then joining them edge to edge. Even though the panels are small, I find that little details such as this really do enhance the final look. The tongues on the panels were cut on the router table. Once I start to work on a thinish panel such as this, I push on and get it in the glued up frame as soon as possible just in case the wood decides to move.
 St12
St12
The frame glue ups. Simple enough but six of them (two side tables). No glue touches the panel, which is cut with some float within the grooves to allow for wood movement.
Next comes the front drawer rails. The front edges are faced with thin pieces of quartersawn wood. The top rail is held in place with hand cut dovetails.
The middle and bottom rails are morticed and tenoned into the legs. The tenons have a shoulder on all four faces – I feel this is cheating a bit as it can hide imperfections in cutting the mortice. The mortices are hand cut as they’re not a regular size and are also offset towards the front.
The frames for the drawers to run on were made next, again held together by mortice and tenons. The front drawer rails form part of these frames. I had saved up some of the not so good looking wood for these frames.

I had previously glued the legs to the side frames using biscuits for alignment. The drawer frames were to be supported at the back of these sides by biscuits. The biscuit slots were then cut.

Now I could finish the glue up. You’ll notice in the picture a couple of holes in the middle drawer rail. This is to enable me to screw the top to the top drawer frame and get easy access with my screwdriver. The middle frame has two more holes in each side rail to enable six screws in all to hold the top down. I’ve spent too much time trying to put screws in inaccessible places to get caught by this again! Of the six screw holes in the top frame, the front two enable the top to be fixed securely whilst the other four are slotted to allow wood movement.
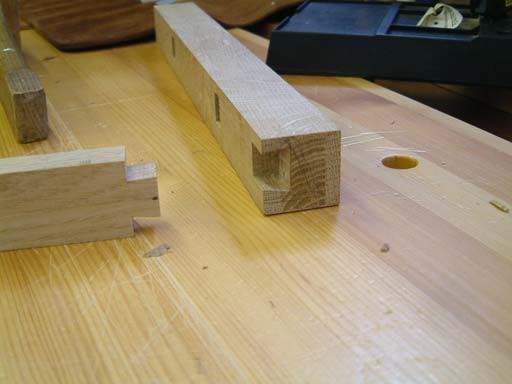
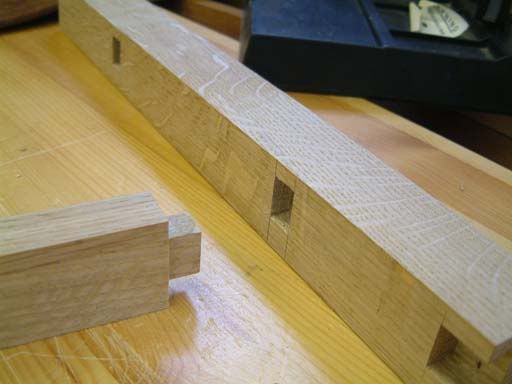
Next the drawers. Beech was used and the dovetails, half blind at the front, are hand cut. I like to start by cutting a shallow rebate (done on the router table) on the inside tail piece to aid aligning the wood when transferring the marking out to the pin board.
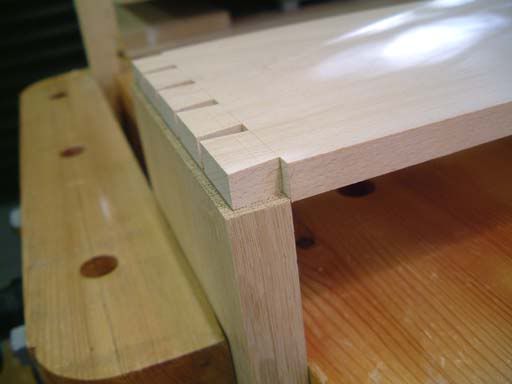
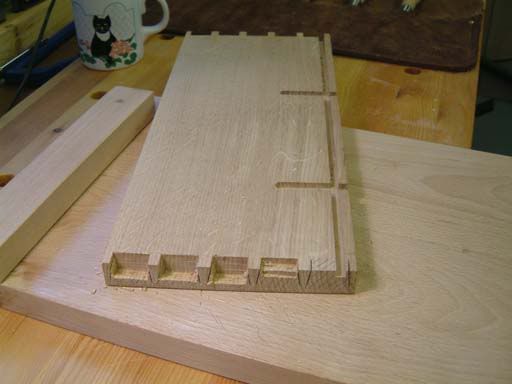
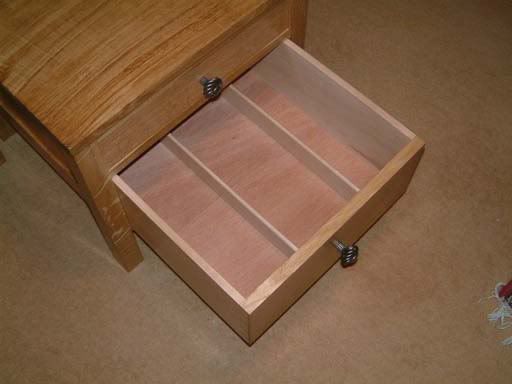
Hacking out the half blind tails to leave the pins – first with an angled saw cut and then by chisel. Note the grooves cut in the back of the drawer on my router table to take the dividers for the CDs. I find that any imperfections in the dovetails (and there are a few) are best fixed with slivers of wood tapped down into the joint once it is glued. I do this so that the slivers have their end grain showing – laborious, so with time I aim to get it right first time!
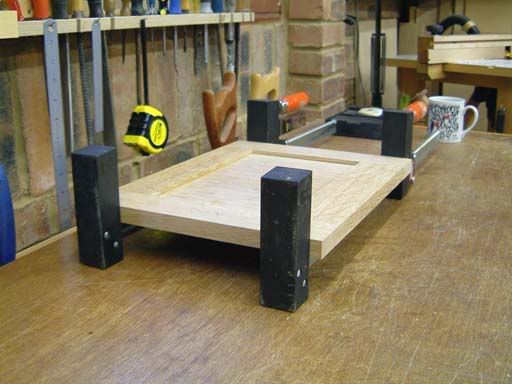
Gluing up the draw. I cut the pins about ½ mm short so that I can use clamps to pull it together without the pins protruding and getting in the way. The whole thing fits together pretty tightly so I can remove the clamps, measure the diagonals to check for square, clean up, and then leave for the glue to set.
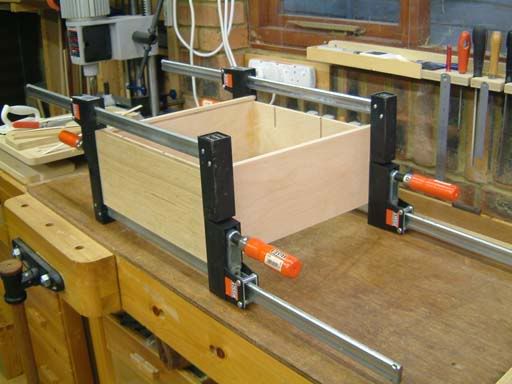
The wood clamped to the bench is a useful way of holding the drawers whilst cleaning up and adjusting their fit - this is one of the reasons I haven’t put the bottoms in yet. The bottoms will be marine ply and the CD dividers beech.
I finished all but the front face of the drawers with sanding sealer and then a light coat of beeswax. The rest of the piece received three coats of boiled linseed oil ragged on and then wiped off a little later. Well, actually I used paper kitchen towel. The tops received four coats of Liberon finishing oil, again, raged on and wiped off pretty much immediately. After each coat of finishing oil was completely dry the surface was rubbed down with the finest grade of Webrax to de-nib it and get rid of the gloss finish. Everything was then given two coats of beeswax, again applied with Webrax, with a polish in between. I like the natural linseed oil and beeswax finish best as you can still feel the grain. I only add the finishing oil to the tops to protect them from coffee cups and spills.
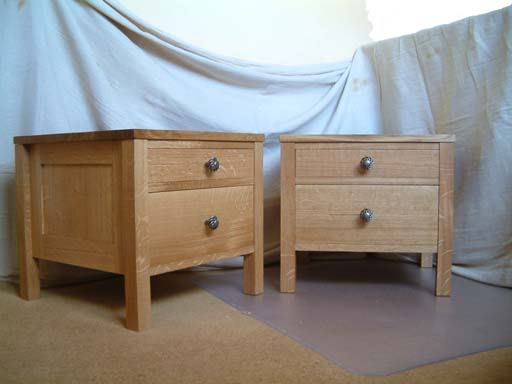
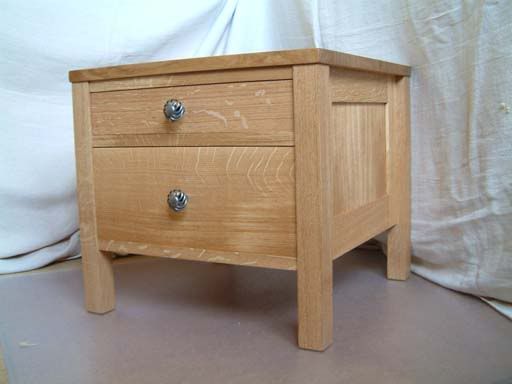
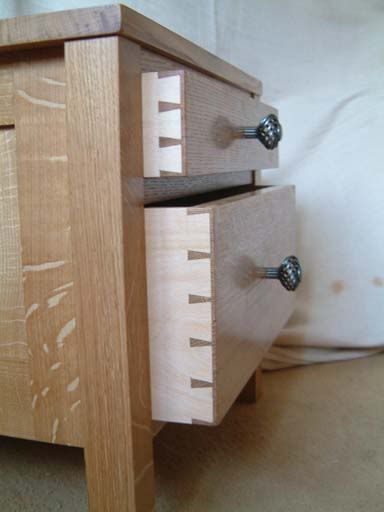
All in all, I’m pleased with the way they look. The drawer pulls were chosen by the client and I think they look the part. If I had the option I would keep them for myself but as it is, I’m happy to have the house space and build something else!
Right, What’s my next project …
Ted
I started by doing a plan on SketchUp. It takes me a fair amount of time to do anything on SU but gets easier and it gave my client a clear idea of what to expect. We must have gone through about two or three iterations.
It was to be in European Oak, which I got at Goodwillies in Waterlooville. I spent a couple of hours sifting through the stacks with a mate and got some very nice quartersawn boards only to find when I had cleaned them up, the grain changed direction all over the place and there were large colour variations along the boards. I was pretty miffed and posted this pic to the Finishing forum to see if anyone could help me make the colour more even.
Thanks to Waka for suggesting working with the colours and using the variations to enhance the effect. I’ve now got some stunning table tops.
The wood lived in the dining room for a few weeks before I started the project. The pieces I worked on were taken to the workshop (garage) and returned at the end of the day. I wanted minimal wood movement once the job was finished. I’ve been caught out before!
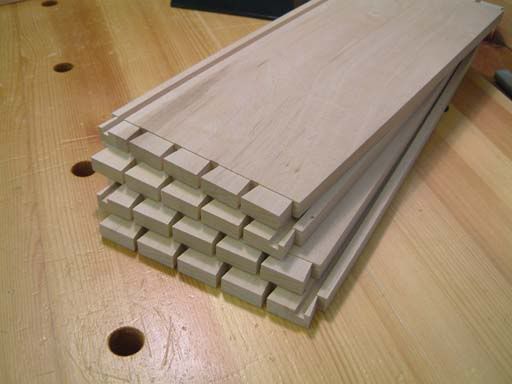
I like to have quartersawn ray-fleck on each face of the legs and acheive this by gluing a 3/16” veneer to each of the plain sides and then planing and thicknessing it down to about 1/16”. As the plain sides of the legs end up hidden it allowed me to use up a board where I really couldn’t get rid of some terrible tear-out problems I was having preparing it. This pic shows the four legs in the first stage of glue up, each consisting of three pieces, the inner core being the “bad” wood faced with nicely grained wood on each side. Well I wasn’t going to throw it away!
After being cleaned up, the plain sides were veneered to achieve quartersawn all round.
I glued up the tops next. I really needed a sled of sorts to do get the first cross-cut square. Not having one handy, I used double sided taped to attach a large square to the table top and was able to run it through against the fence. I got a nice clean cut. Note my zero clearance insert, made with a bearing guided router bit using the original insert as a template.
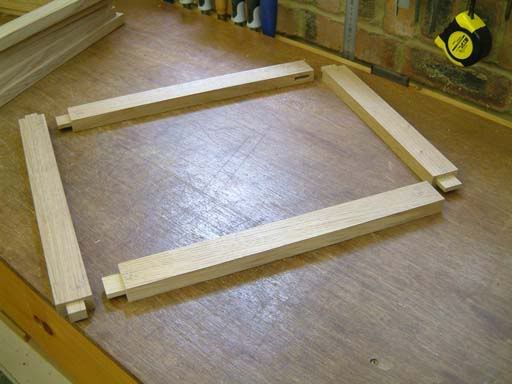
Next the side frame and panels. The slot to hold the panel was made in the rails and stiles with the table saw – one pass in each direction to centre the slot.
The rail tenons next. I use the table saw for the shoulder cuts, and then adjust the setting to cut the haunch.
The cheeks were cut on my tenoning jig.
The haunch was finished on the band saw.
The mortices were cut with my dedicated hollow chisel morticer. Note the clamp I’ve rigged up to save the “thumb ache” from holding the wood tightly against the fence.
The panels were book-matched using the band saw to split them before planing and then joining them edge to edge. Even though the panels are small, I find that little details such as this really do enhance the final look. The tongues on the panels were cut on the router table. Once I start to work on a thinish panel such as this, I push on and get it in the glued up frame as soon as possible just in case the wood decides to move.
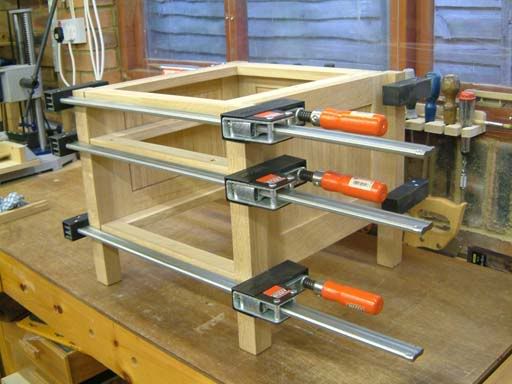
The frame glue ups. Simple enough but six of them (two side tables). No glue touches the panel, which is cut with some float within the grooves to allow for wood movement.
Next comes the front drawer rails. The front edges are faced with thin pieces of quartersawn wood. The top rail is held in place with hand cut dovetails.
The middle and bottom rails are morticed and tenoned into the legs. The tenons have a shoulder on all four faces – I feel this is cheating a bit as it can hide imperfections in cutting the mortice. The mortices are hand cut as they’re not a regular size and are also offset towards the front.
The frames for the drawers to run on were made next, again held together by mortice and tenons. The front drawer rails form part of these frames. I had saved up some of the not so good looking wood for these frames.
I had previously glued the legs to the side frames using biscuits for alignment. The drawer frames were to be supported at the back of these sides by biscuits. The biscuit slots were then cut.
Now I could finish the glue up. You’ll notice in the picture a couple of holes in the middle drawer rail. This is to enable me to screw the top to the top drawer frame and get easy access with my screwdriver. The middle frame has two more holes in each side rail to enable six screws in all to hold the top down. I’ve spent too much time trying to put screws in inaccessible places to get caught by this again! Of the six screw holes in the top frame, the front two enable the top to be fixed securely whilst the other four are slotted to allow wood movement.
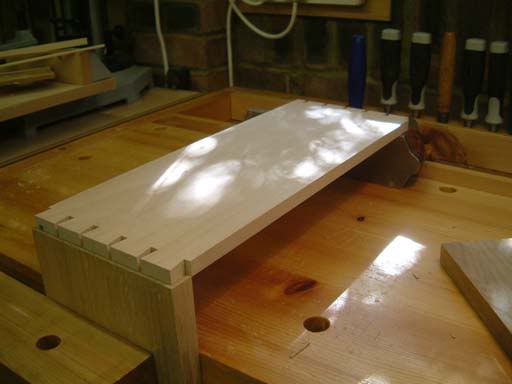
Next the drawers. Beech was used and the dovetails, half blind at the front, are hand cut. I like to start by cutting a shallow rebate (done on the router table) on the inside tail piece to aid aligning the wood when transferring the marking out to the pin board.
Hacking out the half blind tails to leave the pins – first with an angled saw cut and then by chisel. Note the grooves cut in the back of the drawer on my router table to take the dividers for the CDs. I find that any imperfections in the dovetails (and there are a few) are best fixed with slivers of wood tapped down into the joint once it is glued. I do this so that the slivers have their end grain showing – laborious, so with time I aim to get it right first time!
Gluing up the draw. I cut the pins about ½ mm short so that I can use clamps to pull it together without the pins protruding and getting in the way. The whole thing fits together pretty tightly so I can remove the clamps, measure the diagonals to check for square, clean up, and then leave for the glue to set.
The wood clamped to the bench is a useful way of holding the drawers whilst cleaning up and adjusting their fit - this is one of the reasons I haven’t put the bottoms in yet. The bottoms will be marine ply and the CD dividers beech.
I finished all but the front face of the drawers with sanding sealer and then a light coat of beeswax. The rest of the piece received three coats of boiled linseed oil ragged on and then wiped off a little later. Well, actually I used paper kitchen towel. The tops received four coats of Liberon finishing oil, again, raged on and wiped off pretty much immediately. After each coat of finishing oil was completely dry the surface was rubbed down with the finest grade of Webrax to de-nib it and get rid of the gloss finish. Everything was then given two coats of beeswax, again applied with Webrax, with a polish in between. I like the natural linseed oil and beeswax finish best as you can still feel the grain. I only add the finishing oil to the tops to protect them from coffee cups and spills.
All in all, I’m pleased with the way they look. The drawer pulls were chosen by the client and I think they look the part. If I had the option I would keep them for myself but as it is, I’m happy to have the house space and build something else!
Right, What’s my next project …
Ted
