3 projects at once! TV corner unit, wardrobe, storage unit

UKworkshop.co.uk

Help Support UKworkshop.co.uk:

This site may earn a commission from merchant affiliate links, including eBay, Amazon, and others.
I checked out 'Joyce' lat night and looked at a wardrobe I'built years ago that has zero clearance at the door to frame. I had used Joyce's recommended method of tapered mortices - zero to 1 thickness on the frame, 1 to 2 thickness on the stile.

2 mins in sketchup showed I need an angle of 6.1 degrees (14mm hinge short length/1.5mm hinge thickness), so with my new bixey protractor I'll make a ramp for the jig (i think it needs to be reversible as the slope is opposite for the frame and stile). Will post progress later.

BTW, for those of you tracking the state of the dining room table it is now clear and extended .......ready for the varnishing and decorators pyramids later today :)
 
I realised that the hinges I was using only had 4segments and the 'barrel' was thicker than the ones I used on the wardrobe. Luckily I found 6 pairs of these (I thought I had used them!) and they just needed to jig tweaking a bit (they are 2" not 50mm). With these I have 5 segments and the gap is 1mm.

So after many test cuts I started on the corner unit carcase, marking 41mm in from the top (rails are 40mm + 1mm gap) and 65mm from the bottom (45mm rails, 1mm gap, 19mm base)....almost forgot the base allowance!.......
and then with 4 mortices to go my old ELU MOF96E made a sad bearing noise and seized :( I may have spare bearings so will see if it can be resuscitated.

EDIT: The pole piece (magnetic ring that rotates inside the speed control) had broken into 3 pieces. When that fails the router goes to max+ speed so it then wrecked the top bearing. I've got a spare bearing (its a common size) and have ordered a new pole piece £10.05 delivered.
Meanwhile I sanded the corner unit peices and they are now being varnished.
 
Ive just rebuilt the router and run it in for 5mins at various speeds without any strange noises or smells so the new bearing and pole piece seem to be ok :).

I ordered the glass for the centre door of the corner unit today and have an expectation from daughter that the unit will be delivered next weekend....so tomorrow and Sunday are going to be busy and finally at least the corner unit will come together.

pics to follow on Sunday
 
visible progress this weekend - the corner unit main components have been assembled and the 3 solid wood pieces of the top joined together (with much use of heavy lump hammer .....too many dowels from the joint genie make it a tight assembly!). Photos of progress....

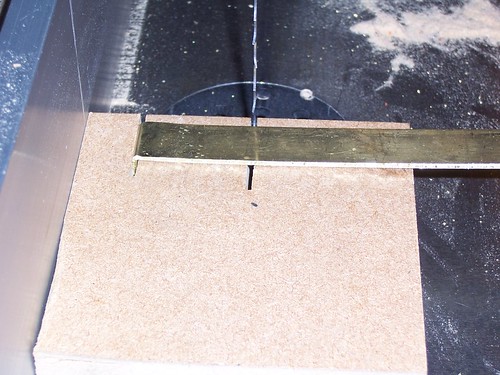
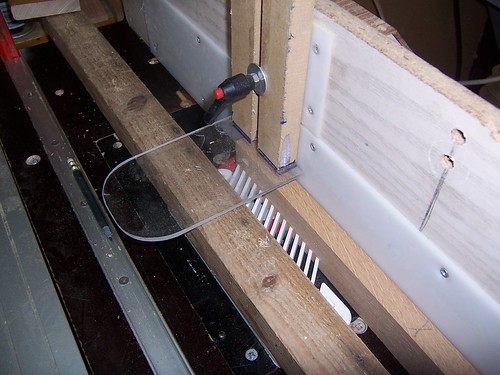
I decided to make brass 'buttons' to hold the top to the carcase (mainly because I forgot to allow for the wood button thickness and the shelf would not take a DVD with a wooden one fitted). after bending the right angle a simple jig cut the brass to length. 12 were made, drilled and slotted.

4356840395_b88377d2f0.jpg

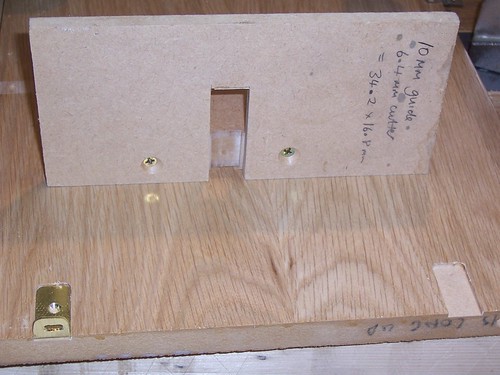
Then another simple router jig to make the cutout to house them..
4357588778_2c5566d65f.jpg

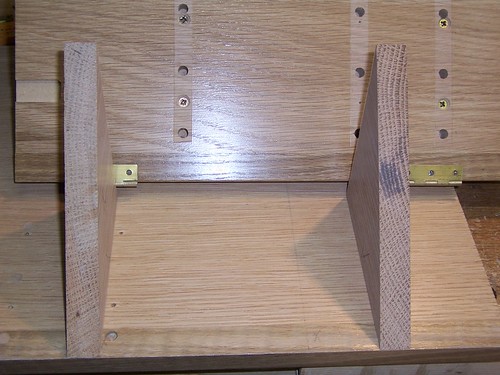
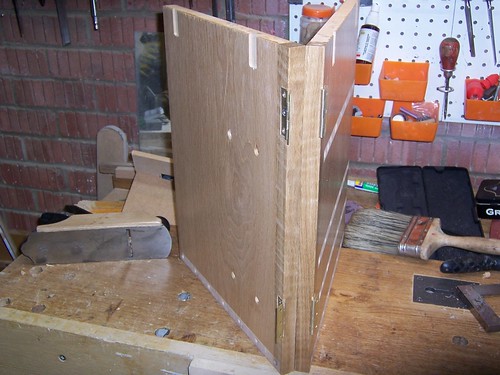
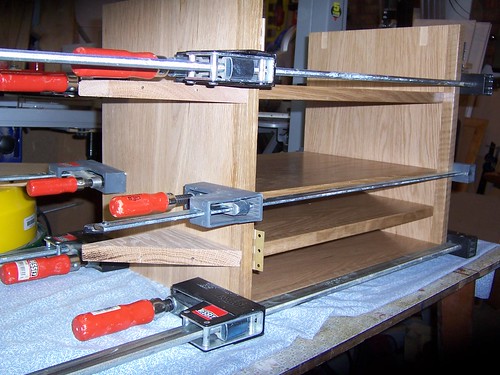
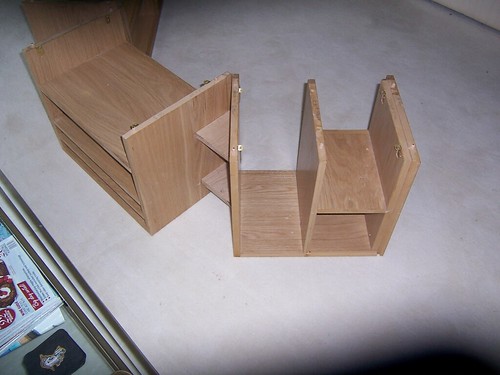
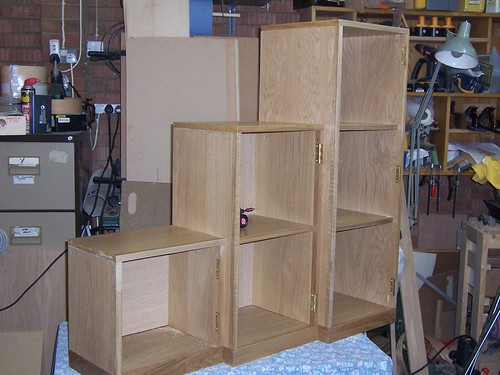
first part of the assembly was to fit 45degree wings to the verticals of the centre unit so that the other two would be held at the correct angle and meet properly at the front. I drilled through the shelf areas for the centre piece to avoid the screws being seen (you can see the screws in the other unit in the background)
4356841211_99980edf0c.jpg

then the verticals of the other units were offered up to pilot drill

4357589812_7539da98d4.jpg

then assemble the middle section - approx 50 dowels are an accurate but extremely tight fit...
4357590400_16696747cb.jpg

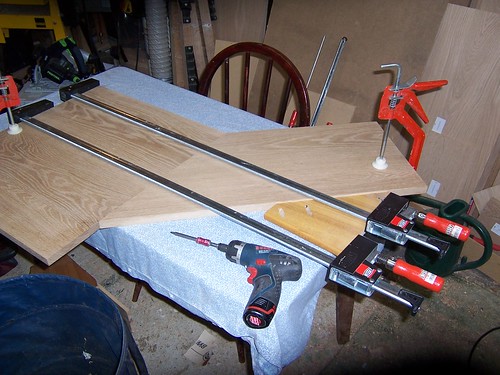
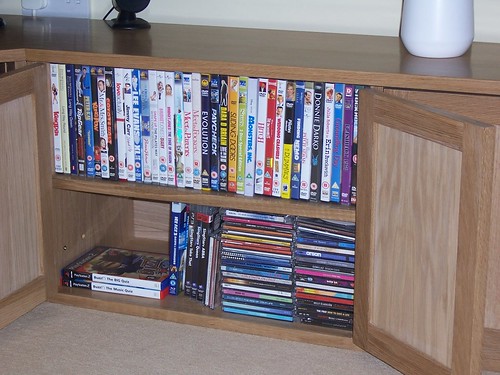
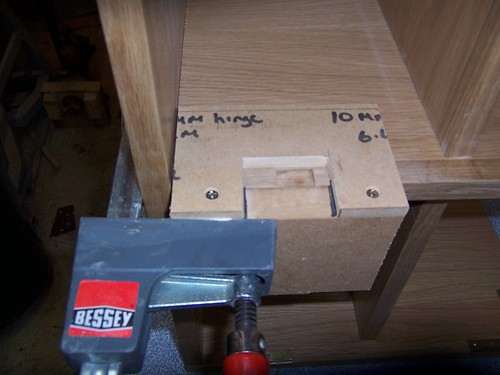
For the long side there are two shelves that meet at a middle divide. I drilled assuming 30mm dowels but then used 40mm dowels for this, putting 3 into each shelf (in alternate holes). this resulted in 10mm protruding that then fitted the other shelf.
4356842513_75c301ab6f.jpg

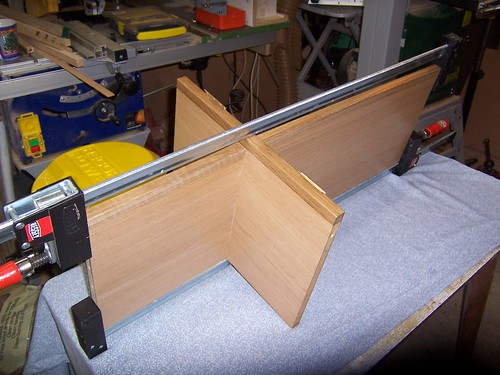
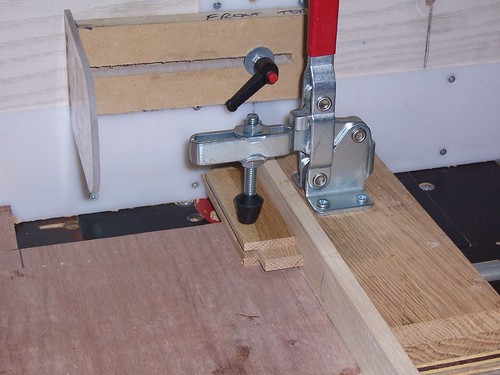
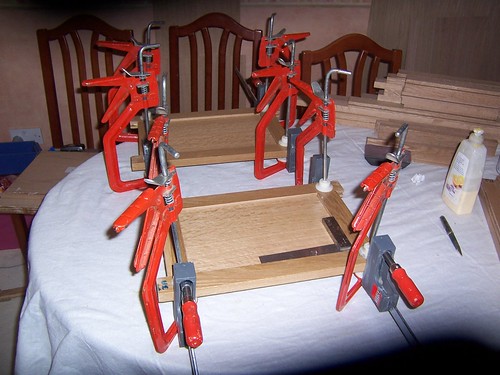
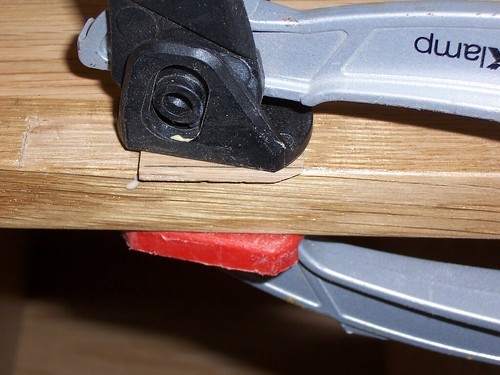
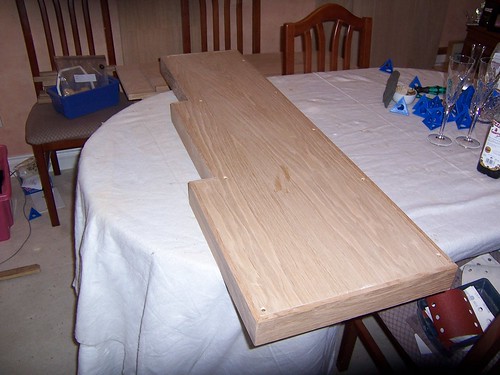
And so to the top - I used some scrap and pocket hole screws to get the right clamp grip. the screws are into the back edge which are not seen (and were removed when I routed the rebate for the back).. I haven't any picture for adding the second wing, but it involved a significant lump hammer and sacrificial wood screwed to the underside of the top, mainly in the 'void ' area. Dowels are very accurate but I think that in future I will make the holes slightly larger to enable assembly!

4357586298_c150ec6f25.jpg


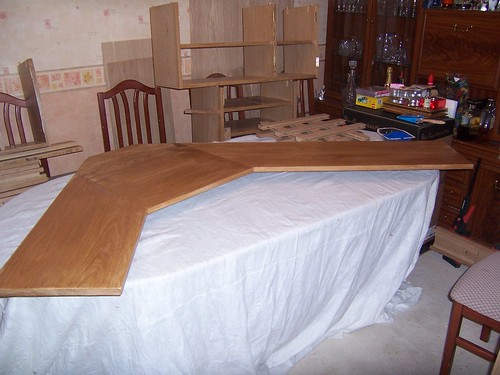
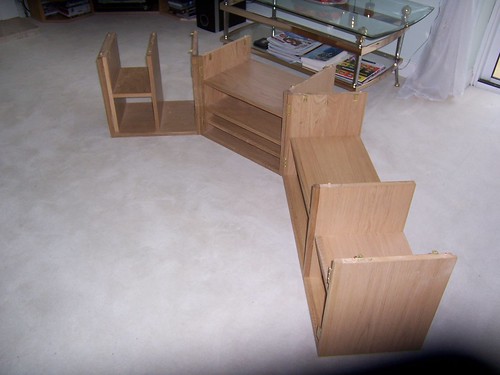
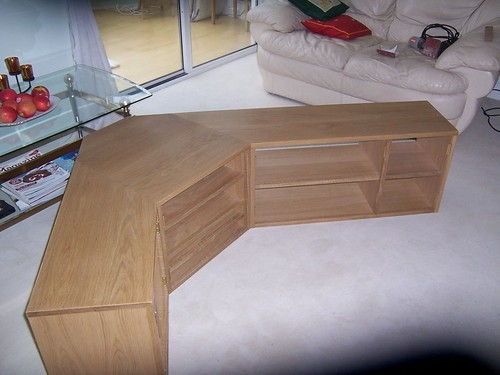
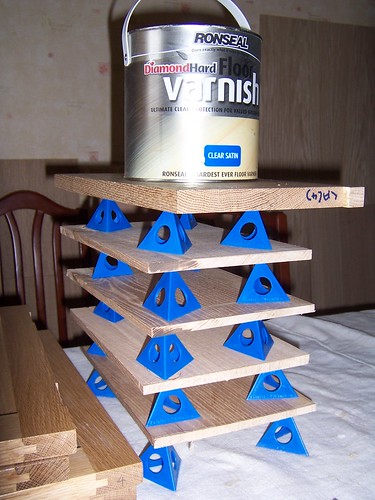
The top with the first coat of varnish (blotchy as its drying)..in the background you can see the assembled centre and long side unit
4356839841_5532d1f788.jpg

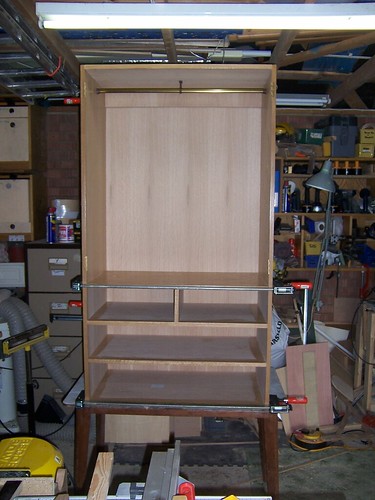
I have drilled dowels at the front of each unit to locate into the top. Likewise at the back, but I have enlarged those holes in the top into slots using an 8mm cutter , to allow for wood movement.

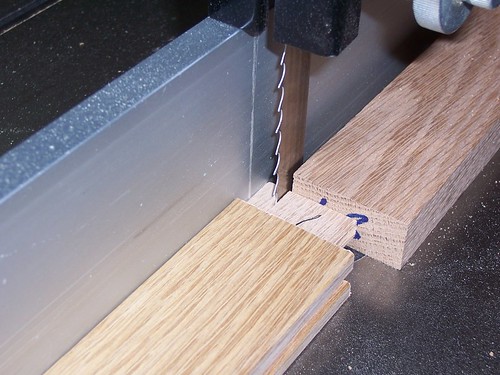
With that done, it was time for some handwork to plane the door stiles and rails...then back to machines to route the panel groove..(nice and safe!)
4356838605_152e27e9dc.jpg

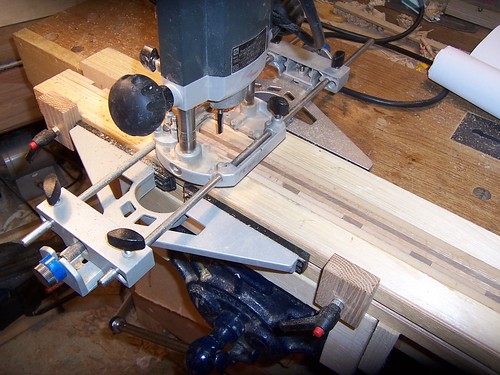
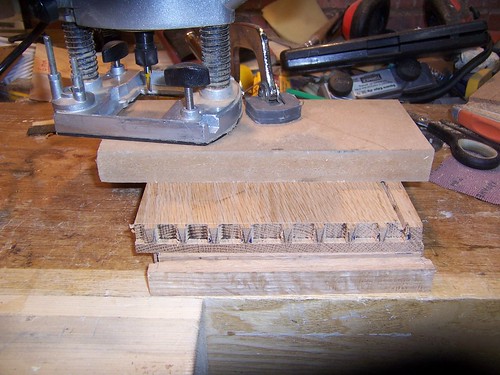
and then the first outing of the Steve Maskery mortice jig...I did 24 mortices in 22 minutes ( what looks like mortices in the pic are part of the jig - i havent fitted the laminate that would hide that)
4357587104_9d60e7b2bf.jpg

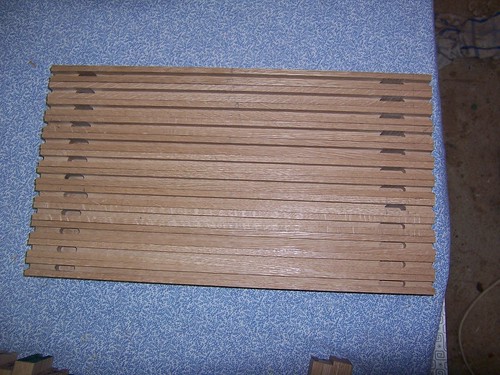
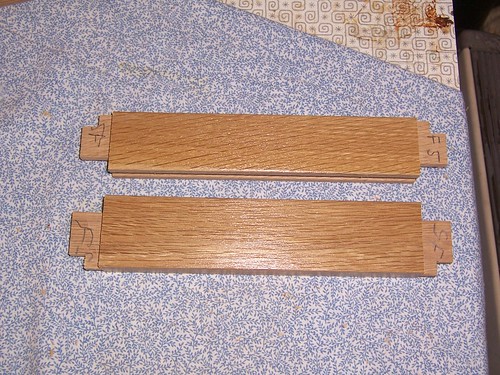
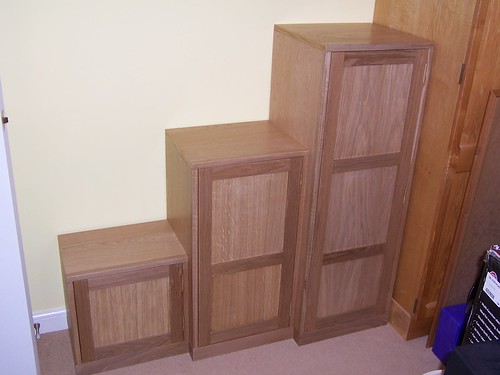
and the finished items (bottom mortices are 5mm longer than the top ones)

4357587672_b7366b19b8.jpg


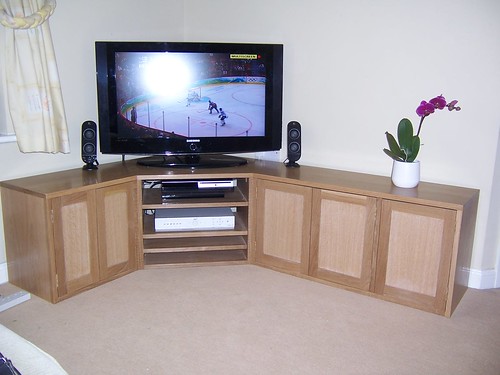
And that is where I'm at!

still to do for the corner unit are the rails and tenons (may make another SM jig for that), assemble the doors and varnish, cut the hinge rebates in the doors, fit the magnets for door catches and do a final test assembly of the top to the carcase.

Dave
 
Update from the past weeks efforts - the corner unit has to be delivered next Sunday so that has been the focus, but I have also progressed the carcass components of the storage unit and it's plinth (no photos of those yet).
cutting the door tenons on a version of Steve Maskery's jig (I need to sort out the cutter shield but my hands are well out of the way)
4384889825_8139469d6d.jpg

trimming the haunch with the bandsaw and a stop
4385652368_cf35fb7e04.jpg

finished tenon
4385652890_90dd12e28b.jpg

and the perfect fit (how does it go - 'right first time every time!) Given that the panels were veneered MDF they were fully glued in.
4385653560_e70066629c.jpg

Time to start test fitting ....the main 3 units
4384889201_ff28b5940b.jpg

4385651620_17b0cdb8c0.jpg

with the top fitted and the gloss knocked back with grey webrax
4385651782_925ce45b7d.jpg


No photos but I've also fitted the backs, cut the horns off of the doors and test fitted them and marked the hinge positions. One of my rulers is exactly 1mm thick so I sat the doors on that to get the clearance.
All that's left to do for the corner unit is cut the hinge mortices (router jig), fit and fettle the doors, make the two small drawers and cut some 8mm thick strips as a hidden plinth so it 'sits' on the carpet.
It's come together nicely but it is a relief when the top sits fine on all the dowel locators!
 
Dave this is an interesting thread. But the pics are a tad small IMO. Could we have them just a tad bigger? 450px is the minimum width I use.
 
thanks Wizer - I use flickr so will go back and change the links in the last post to be medium rather than small size.
EDIT - done
 
oh much nicer Dave. Makes things easier to see, cheers
 
not a good day....
first the glass supplier for the toughened glass for the centre door confirmed they had lost the order (now re-ordered for Thursday) then when I was cutting the hinge mortices in the door frames I realised that one was marked wrong....but no, it's the already cut mortice in the frame (the shelf divider vertical on the long side, lower hinge) - I'd cut it at 65 mm from the bottom rather than 46mm (i.e forgot to allow for the base thickness).

I'll post pics tomorrow of the problem and (hopefully) the fix.

I'm sure I measured at least twice!
 
:D The corner unit has been delivered and well received. I still have to finish the drawers (but progressed enough to size the front, back and sides of both).

I also fixed the misplaced hinge with a repair that is very hard to see from the front as I tapered the new piece in- no finished pics as they just wouldn't focus but I have added some WIP after lower down.

Unit in place (no handles yet as Katherine hasn't bought them!) The lower two areas in the centre are to store their two laptops. Note the wall socket to the right of the TV - this mandated the max height if the unit was to be close to the wall.

4394855595_2c1975ca15.jpg


And the DVD storage - the top shelf has 72 DVDs, the lower shelf stores the slightly smaller blu-ray and music CDs

4395622734_afc5535c25.jpg


hinge repair. I needed to finish the new mortice by hand because the unit base got in the way of the router

4395624708_89460a1001.jpg

4394858549_fa6df31535.jpg


Progress re the drawers and dovetails (and yet another use for the excellent painter pyramids)..drawer sides and front (x2 in the one piece)

4394856757_2e0cdf527b.jpg


using a 3mm cutter against a backstop to remove the bulk of the waste and get the depth consistent
4395621666_c3f342ce54.jpg


Now (next weekend) it's time to focus on the completion of the drawers and the assembly of the storage unit that has used many of the same techniques for the carcass and doors.

Dave
 
It's been a while since I updated this - births and funerals have taken precedence recently...

I still haven't quite finished the corner unit as the toughened glass still hasn't arrived (the glass company finally cancelled all outstanding orders and found another supplier so I should get it next week). I've now completed both the 3 tier storage unit and the wardrobe but realise i don't have a photo of the finished wardrobe - I'll sort that next weekend.

Construction followed the same principles as for the corner unit, with the addition of a shaped plinth for the storage unit made from solid oak with a 6 mm veneered MDF insert and suitably placed support frame. I've now been asked to turn some cone shaped handles for the corner and storage unit (this weekend's task).

4545865147_aee1530b3a.jpg

4545864963_8f775290e7.jpg

4545864749_a70ef47ab7.jpg

4546498586_845acfa620.jpg


and the one photo I have of the wardrobe! Before it was delivered the request came to add a lower rail to maximise the hanging space for baby clothes. All the drawers were dovetailed and made with 8mm sides and backs and 4mm ply bases, held in via a groove in the front and slips glued to the sides above and below (to increase the bearing surface).

There was also a simple plinth that raised it 120mm off the floor.

4545864123_e98a27a585.jpg


That's it! Started in December and finished in April.

Next job is to put up a floating shelf.
 

Latest posts

Back
Top