Victorian drum table

UKworkshop.co.uk

Help Support UKworkshop.co.uk:

This site may earn a commission from merchant affiliate links, including eBay, Amazon, and others.

gasman

Established Member
Joined
14 Nov 2006
Messages
1,005
Reaction score
289
Location
Near Oxford
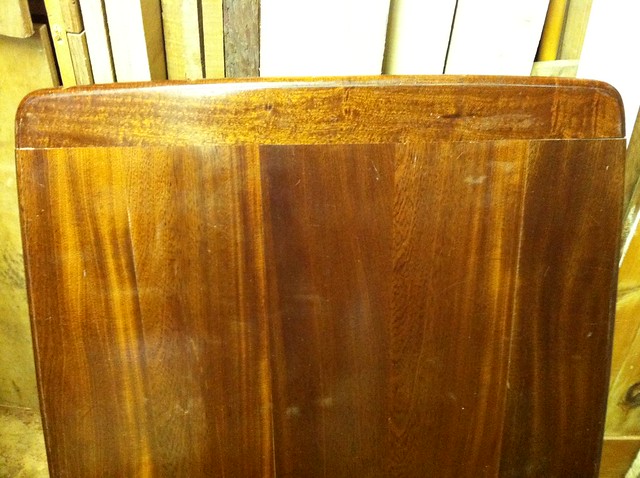
Been a long while since I posted a WIP. Mostly I have been doing stuff round the house but I am now faced with a bit of a problem. We have a mahogany dining table which looks out of place in our dining room as the other furniture is all light-coloured. My wife has never liked the table - it was made by my late father so has sentimental value to me but it is very big and I do not think was his best piece. It definitely looks out of place in the room where it is.
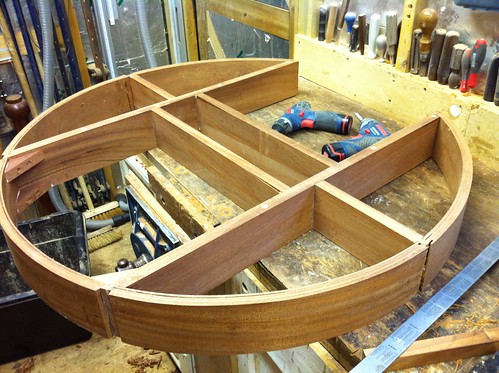
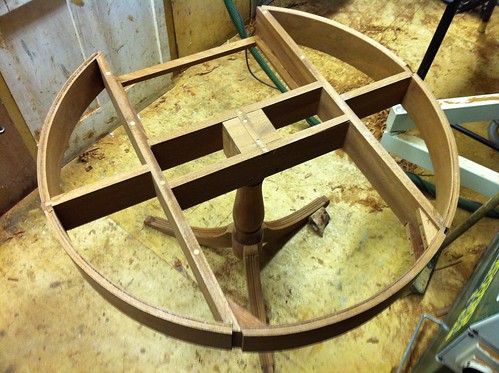
Anyway, I think it is going to have to go but I have come up with a possible solution which might be acceptable to my dear old Dad up there in heaven, to my mother, to my wife and to me.... I am going to turn it into a Victorian drum table similar to this one which should look much more in keeping with other furniture in the house.
5387115579

5387115569

The table top was 78x38 inches and nearly an inch think!
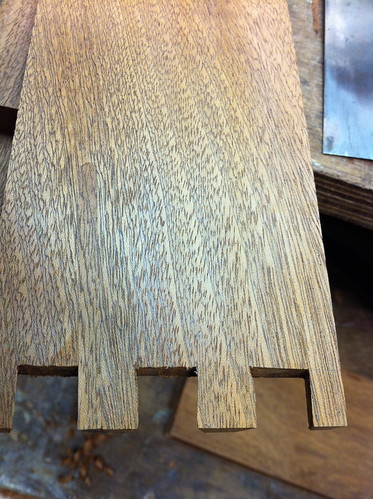
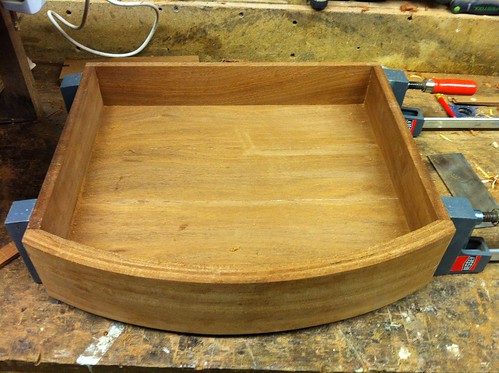
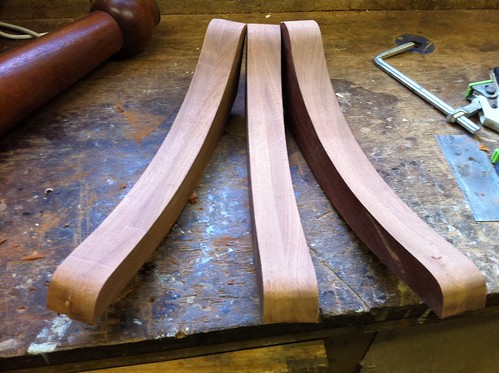
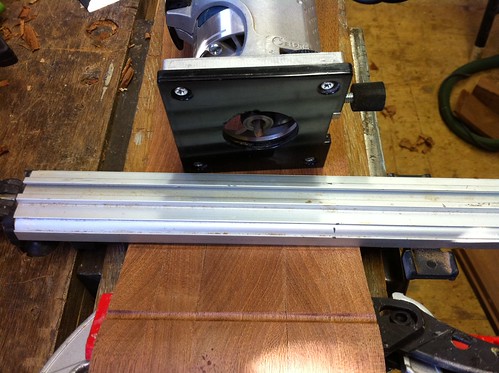
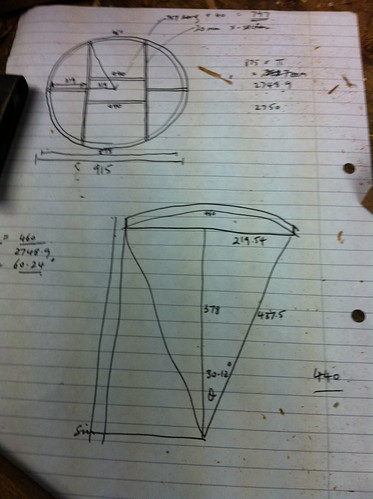
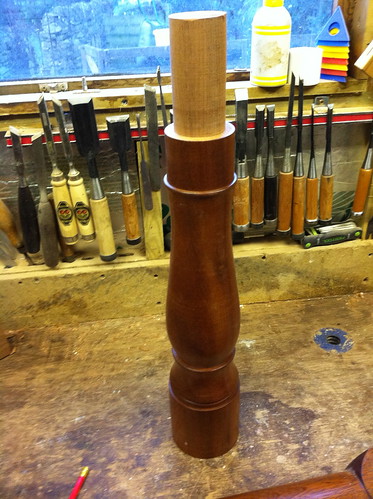
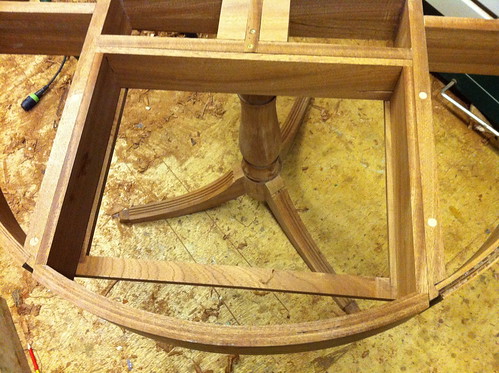
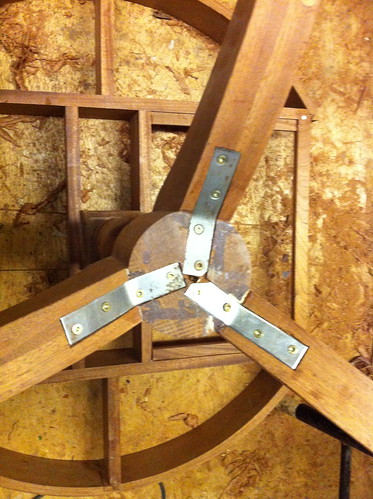
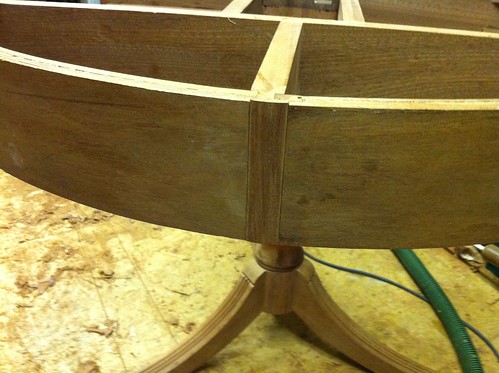
I have started work and will upload more later. There are no plans I can find for this sort of thing so it is all going to have to be made up as I go along.
Also I need to find some special touches and secrets to put into it.
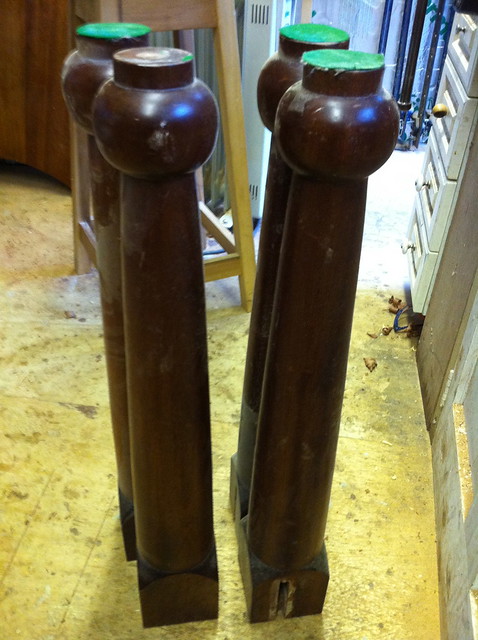
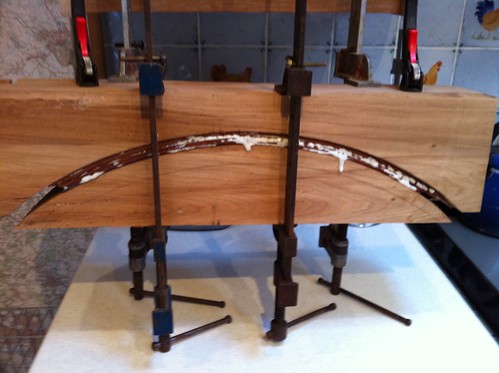
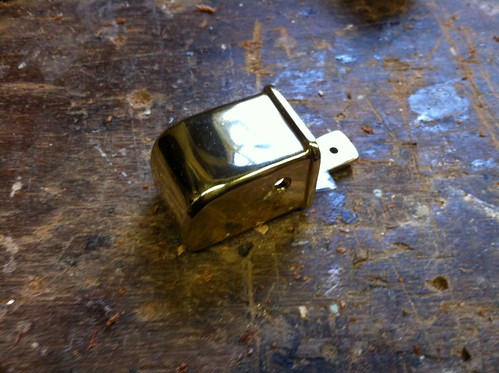
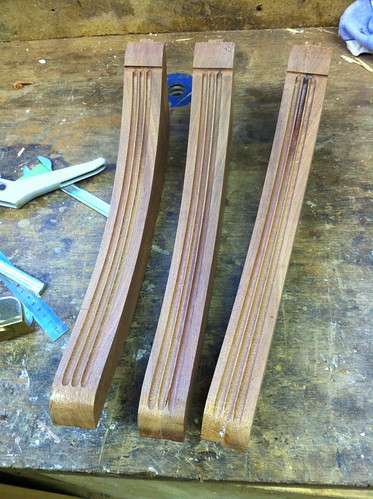
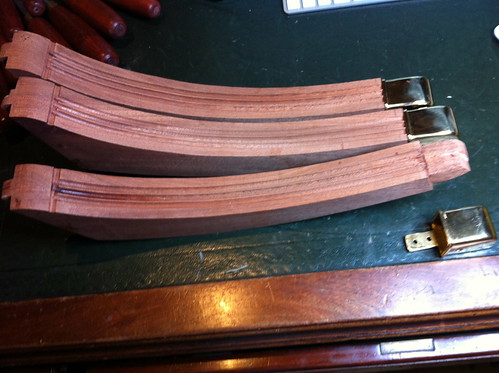
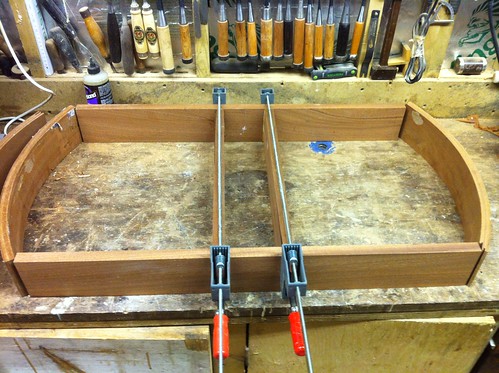
Just ordered some brass table leg 'cups' from Martins and have cut my laminating press to a 36 inch radius.
More to follow
Mark
Can't work out why the photos are not working - could it be that they are grabbed from the internet and not my own photos?
 
gasman":2a8jpgyy said:
Can't work out why the photos are not working - could it be that they are grabbed from the internet and not my own photos?

Mark:

Your links are actually pointing to the Flickr pages which include the photos, not just the photos themselves. I think you have to make them shareable or something under Flickr to grab them directly, though you can go to the page source and get at least a small version:
5387115569_e8c3e3a40a_m.jpg


Kirk
 
OK finally worked out how to post images after so long away!
I failed to take any photos of the table before dismantling it. Here are the legs - big and solid - over 4 inches diameter at the top
5389351695_941fee3097_z.jpg

The table top I have already cut into two. This half will eventually be the circular top of the new table unless I decide to put a leather inlay onto it in which case I will use MDF.
5389337329_0c7d35bc39_z.jpg

So I took the rails and cut them into 500mm lengths, then changed the saw blade for a rip and cut them longitudinally into 5 or so mm thicknesses, then thicknessed them all down to 3mm and ended up with 36 of these pieces each about 500 x 110 x 3
5389944634_93c311c11a.jpg

Then after making a 450 mm diameter laminating press from an old bit of green oak I glued up 6 of these pieces to make the first of 6 laminated side pieces
5389950676_263b3da565.jpg

Once these are all done I will know exactly how big the table top will me
Thanks for looking
Mark
 
Made some reasonable progress today... - it warmed up a bit and was almost reasonable in the shed for the first time in ages.
At the moment I am thinking this table is going to have an inlaid leather top, 2 curved drawers, 3 curved tapered legs with fluting on the curved surfaces going into a turned pedestal (one of the old table legs). However it is a bit hazy at present. Also I think the table top will have some sort of triple reeding around it to complement the fluting on the legs.
Even though it is vague, I have been getting on with the curved sides and the legs as I have a good idea of how I want them to be
I had been glueing up one laminated section of the table edge each day and leaving it to dry for 24 hours before doing the next one. So after 6 days I ended up with 6 curved laminated sections as follows. At the moment they are 18mm thick x 100mm deep and are all 460mm or greater in length but will eventually be cut down a bit in length when I have decided how it all will turn out. I think I am going to have a thin vertical piece of grain between each laminated section but need to work out how that will look with the reeded bit above it.
5401839522_979d415b8c.jpg

Then I started the legs. I had bought from Martin's some solid brass table leg cup ends
5401835454_b417713c8a.jpg

I made a template for the 3 legs from MDF, then cut out and joined together 20mm thick mahogany pieces and used a bearing-guided router cutter
5401237441_b46c9311d7.jpg

to get the legs to size
5401844988_01e7e7cba0.jpg

This is the first time I have even made anything 'properly' in mahogany and I like it alot - much less tearout than the oak, ash or walnut which I usually work with
With the 3 legs clamped together and using a clamp to guide the router I cut a channel across all 3 using a small cove cutting bit to mark the upper limit of the fluting on the legs. The little Bosch router is so useful - it is so small and controllable.
5401247315_4300b2159e.jpg

Then used a bearing-guided triple flute cutting bit in the router table (Axi) to produce fluting on the legs. Wished I had the Veritas beading tool to be able to do this by hand as it always makes me virtually cack myself using a router to do stuff like this!
5401851612_63b1da1b01.jpg

The the legs were tapered with a hand plane, before the table legs were all shaped to receive the brass ends and loosely fitted
5401252871_b6c54e3ba9.jpg

More next weekend - I have a busy week and prob won't get much done
Thanks for looking
 
Hi Mark.

Really enjoying this one, as I've got an old table to 'transform' at some time in the future.

I notice one of the flutes appear burnt. I seem to burn the wood about 10% of the time when routing. Can never decide if it's coz I'm moving the work too fast, if the routers running too fast, or if the bit's blunt. I don't think it's the bit as the next cut is often fine. As you were using a triple fluted cutter could it just be that the wood had a 'harder' section, as it's only that one section that appears burnt. If it is burnt, is there any recourse, or will it be a 'feature'?

Can't wait for the next installment.

Roy
 
doorframe":m38psm6u said:
Hi Mark.

Really enjoying this one, as I've got an old table to 'transform' at some time in the future.

I notice one of the flutes appear burnt. I seem to burn the wood about 10% of the time when routing. Can never decide if it's coz I'm moving the work too fast, if the routers running too fast, or if the bit's blunt. I don't think it's the bit as the next cut is often fine. As you were using a triple fluted cutter could it just be that the wood had a 'harder' section, as it's only that one section that appears burnt. If it is burnt, is there any recourse, or will it be a 'feature'?

Can't wait for the next installment.

Roy


Burn mark's are never a feature, and are usually sanded/scrapped away. You do get some dark lines in mahogany sometimes however.
 
Actually it is not a burn mark but superglue as a tiny bit of mahogany got knocked off which I stuck back on. I have since scraped it all off and it looks fine
Thanks
Mark
 
mtr1":2qp62hfw said:
Burn mark's are never a feature, and are usually sanded/scrapped away. You do get some dark lines in mahogany sometimes however.

I think you're right. I've tried (without much success) to disguise them behind the finish but they stand out like a sore thumb. In the style of Renee from Allo Allo, I just tell Mrs Doorframe "You stupid woman... they're a feature of this particular type of wood!"

I won't have enough spare wood to do the laminations as you have as the existing table is not that meaty. If I just face it with mahogany I would guess is it ok to just use pine laminations.

Roy
 
Yes I agree completely - You could laminate any old wood and then just have the top 3mm mahogany. To be honest, because of the sentimental value of this I am planning to use all the wood from this table so that it is still Dad's table but has just morphed into a slightly smaller one!
As I am going to use a leather inlay for the top I could also use MDF for the main part of the top and then just save the outside 2" mahogany edge
 
I had an unanticipated extra day in the workshop today and made good progress.
First some calculations and plans for the dimensions of the table top which needs to be quite accurate. The curved side pieces have 'splayed' very slightly after coming out of the press - but only enough to increase the diameter of the table from 900 to 910mmm so acceptable. I suspect that if I had used pine or some other softwood for most of the laminate and then just used mahogany for the outer laminate it would have splayed more than this??
5414166376_5cbbc8af91.jpg

Then I made up the framework for the top - all using the 22 mm old table top cut up. The drawer fronts have been roughly sized and just put there to see they will be OK. I have now cut these parallel to the sides and 10mm too long.
5414166382_1e435f2b32.jpg

Then I did some turning - very much an occasional hobby of mine and I am sure not a great job. But it was quite straightforward as I already had these huge legs from the old table which are over 4 inches in diameter at the top
5414166386_d4e8d1d005.jpg
. I sealed it with friction polish whilst it was still mounted.
Once this was done I marked the base out and cut slots every 120 degrees around the base with a router for the legs, flattened the curve at this point and and then converted these to very shallow dovetails with a chisel.
5414166412_9a5a4b1af4.jpg

I then glued up the legs one at a time clamping each one at the same time
I used another leg to provide the square bit which the table top will be mounted on and routed out a 2 inch cylindrical recess to take the top of the base. After a bit of cleaning up the base came out looking OK. It needs more careful cleaning up and I think will be fine
5414166404_ca36ac4442.jpg

Finally today I started the intricate job of preparing the other 4 curved sides and cutting the sides to take them accurately. This needed careful cutting using a guide-rail guided saw set at 32 degrees and then routing out an angled rebate in the ends of the sides. Hope this is clearer from the photo. One curved side piece is not long enough so I am having to use another spare piece cut off one of the others to extend it very slightly. The join should be hidden as I am going to have vertical pieces between each curved piece - difficult to explain but it will become clear in due course.
5414166394_47f4749a4c.jpg

Hope to get this finished if I can get another couple of good days
Thanks for looking
Mark
 
gasman":10hr7oy9 said:
5414166386_d4e8d1d005.jpg
. I sealed it with friction polish whilst it was still mounted.

I hope you don't reach for those painters pyramids too often Gman :shock: :shock: :shock:...edge down would be much safer - Rob
 
Some good progress over the weekend - starting to look like a table.
I made some decisions - first I finished off the curved sides of the drum table and then decided not to have 2 drawers which I know is a bit of a copout but I was running out of mahogany for the drawers and also one drawer will make it more stable.
So here is the top all structurally complete except for the drawer bit
5425320017_a77cfbc9a3.jpg

I decided to reinforce the curve side which would have been a drawer as it was a weaker join
5425930176_db0382eaf4.jpg

Then I started work on where the drawer will go and added some rails and a support for the front of the drawer
5425925464_ee16a5739e.jpg

Attaching the top to the pedestal base was next - routed out a slot in the top, and 'suspended' the top from it - then using a spirit level to make sure it was level with the floor I put 2 fairly heavy duty screws in each side
5426011712_2c26db0402.jpg

All that got me to here:
5425928366_f5184b06bd.jpg

I need to decide how to do the top - whether to inlay leather which I want (my wife does not so you can tell where that's going) etc etc. Also still waiting for an Axi triple beading router bit to arrive - which has been on back order for nearly 3 weeks
Can I ask what other people think about the top. If I used a leather inlay I could replace most of the top with MDF - which would obviously be more stable than mahogany. Also, I was going to make the leather inlay 2 inches smaller radius than the tabletop so there was a 2 inch wooden rim around it. I could therefore even cut up the table top so that the grain of the 2 inches of table outside the leather inlay all are radial (or even tangential) but not all pointing in the same direction - do you get what I mean?
I will try and finish the drawer this week
Thanks alot for looking
Mark
 
Last night I made the front drawer and cut all the dovetails
Those on the front curved edge I found a bit trickier than normal as I was cutting obliquely through different grain directions due to the curved, laminated front but it was Ok if one just took time and cut a little bit at a time
5432951448_fec914695b.jpg

Dry fitted the joint looks OK.
5432951966_7c393fcf21.jpg

There is just one pin on the back of the drawer which had a screw going through it which needs a bit of concealment once the drawer is assembled. It is on the inside and should be quite easy to scarf a piece in
5432423517_50d8daec28.jpg

I dry-assembled the whole drawer to check it would fit OK with the curved outside etc
5432343479_138155a1fd.jpg

Astonishingly there has been a change of plan and we are going to go with a leather inlaid top - so I have ordered an 800mm diameter circular leather top with tooling - and therefore I will be using an MDF top with edges of mahogany
I did one more thing which I know will horrify the purists, but I was worried about the strength of the base as the table is getting heavier and heavier and all the weight tends to splay the legs which just have a shallow glued sliding dovetail... so I put some metal brackets bent to shape and screwed them to the underside. I think I will cover them in due course but they make it much stronger
5432422991_433e9fff8b.jpg

Finally I cut the first of the short curved pieces which will go between the curved side pieces as follows:
5433031818_823e01770e.jpg

Thanks for looking
Mark
 
I know they won't be seen but, those Metal strips look awful and would irritate me just knowing they were there. I don't have an alternative in mind but I think I would have looked for another method. That aside... cracking job.
 
I take your point Studders and TBH I agree with you entirely. The trouble is it definitely needed something as it is fast becomeing a very heavy table. Wood which was thick enough to be effective would be visible. I have chiselled them out so that they are flush with the surface and I think that by countersinking the screws a bit I could put a thin wood 'cover' over the brackets so that it would not be seen. The other thing I wondered was Miller dowels or similar?
Thanks for your comments
Mark
 
Yes, I've been thinking about it today and........... I've yet to think of a way to do it that wouldn't involve drastic surgery.

OK Just paint the brackets Brown. :)
 
Looks great, in the past I've restored a few tri-pod tables, some come with the spider brackets on, and usually just need something done to the top. Some come without, and are usually in pieces. If the look of the spider(yours isn't a true spider as the central disc is missing that ties the three legs together) bothers you, you can file fleur de lys in the ends, just an idea feel free to ignore.
 
Thanks for your comments - I have some time this morning so may have another look at that and .
Meanwhile in an hour last night I scarfed in a piece of matching grain to fill that screwhole I had shown a photo of
5435555616_8030c6838e.jpg

and then finished the drawer - routed out a 1/4 inch groove in all 4 sides, joined the 4 pieces making up the drawer bottom and glued it all together
5434944917_6f95a91402.jpg

MTR! sorry to be thick - what are fleur de lys?
Cheers
Mark
 
Back
Top