Machining Box Joints

UKworkshop.co.uk

Help Support UKworkshop.co.uk:

This site may earn a commission from merchant affiliate links, including eBay, Amazon, and others.
You can reproduce the tablesaw-style jig on a router table - either shop-built or using something like the Incra positioner:

https://woodworkersworkshop.co.uk/produ ... nce-system

Router table or saw table - much the same results with either I reckon, although arguably easier with a saw blade for small (i.e. less than about 5mm) slots.

Cheers, W2S

PS I've just re-read your question - I think that saw-cuts are easier for small slots and router-cuts are easier for larger ones (in the absence of dado blades for the saw). The mid-point is probably 3 to 5 mm but your mileage may vary.

PPS Both techniques need to include guarding between rotating sharp thing and soft fleshy non-rotating bits
 
transatlantic":xjx4ayoa said:
But surely the jig I posted above is easier?

My name's not Shirley (sorry!).

A key advantage of the Incra-style one (which you could more easily build yourself than the template-based ones) are that there's no limit to the length of the workpiece (because each new cut references off the previous one).

The template-based jig you've linked to is more versatile and would work fine too. Both router-based solutions are less good with smaller cutters - personally I find it quite easy to snap a 2, 3, 4 mm straight router cutter making those kinds of cut, whereas a typical saw kerf might be 2 to 4 mm.

Cheers, Shirley
 
.

Price.

~90 quid isn't cheap for everyone, especially when you can make a table saw jig, for a normal blade for a lot, lot less. This is my project for next week.

Just watched the 3rd video above which seems to show the definition of "a right load of faffing about"...
 
I just logged in to ask a similar question, but mine was to ask the relative merits of cutting box joints with table vs hand held router.
That incra setup for router table doesn't look cheap...
 
This might not be of that much use to you but I made a box joint jig for use with my dado stack in the table saw from a few scraps. All told it took about half an hour:
VVeGZwa.jpg


Works brilliantly every time and is dead easy to use.
YFpjEtt.jpg


Those pics are from my toy chest thread in the projects section.

Your saw might not be able to take a dado but there are wide kerf grooving blades available that I think go up to about 10mm (don’t quote me on the exact size though please). The same style of jig could then be used if that’s what you’re after.
 
I tried a while back to make a RT box joint jig for octagonal boxes. I just about got it to work, but the results weren't pretty, and the jig became unexpectedly complex.

The tearout on a router table can be quite nasty, because the cutter is travelling sideways when it enters the wood, and as it goes deeper, one side is pulling wood fibres out from the surface. If you alter the geometry beyond square pegs (for hexagons or octagons) the entry/exit angles problem gets worse, and beyond the scope of just a zero-clearance sled to fix.

On a table saw, the cutting edge moves in a quite different way, with respect to the edge of the workpiece, giving you a much neater result. Getting the finger spacing correct is only one of several problems that arise once you change the stock from 90 degrees to the table to another angle.

If I was doing it again it would be a tablesaw thing, or by hand (which for one box would be quicker!).

E.

PS: I am no router table expert, so it is very possible I was just approaching it in a silly way. That said, I started with a well established sled idea that is used in commercial products.
 
powertools":1ixt98yl said:
How did this topic suddenly go from a cheapish dovetail jig to a top notch incra jig?

I was trying to illustrate the two basic methods (saw vs RT) - as with most woodworking you can use hand tools or power tools, you can buy expensive or cheap tools/jigs or make your own. For example, Matthias Wandel shows on YT how to make an equivalent to the Incra setup with a piece of threaded steel and some scrap wood.

I think that a weakness of Router based approaches, with larger cutters, has been ably pointed out - the cutter approaches the wood at an angle which - although a sacrificial backing board can help a lot - can produce chip-out. I already pointed out a shortcoming with smaller cutters. If you go carefully, with a sharp router cutter, you can quite happily make box joints - depending on timber - I've only used beech and decent quality ply - but have made about thirty different drawer carcasses using this method

Cheers, W2S
 

Attachments

  • Drawer.JPG
    Drawer.JPG
    126.5 KB · Views: 128
I think the Table Saw with the right jig wins hands down for quality of cut and versatility. With a router cutter, it's generally recommended not to take a deeper cut than the bit diameter, so for a 4mm cutter for instance you can only realistically use this with thin material and even a 12mm cutter you are limited to thinner box sides and risking heavy cuts for any appreciable thickness of material. With a Table Saw on the other hand you can box joint a 2x4 with 3mm fingers no problem if you choose.

Sent from my SM-N910F using Tapatalk
 
Woody2Shoes":1w0mqz63 said:
What could be simpler than this look: https://www.youtube.com/watch?v=vp47iGactyY

There are several problems the presenter of that video doesn't talk about:

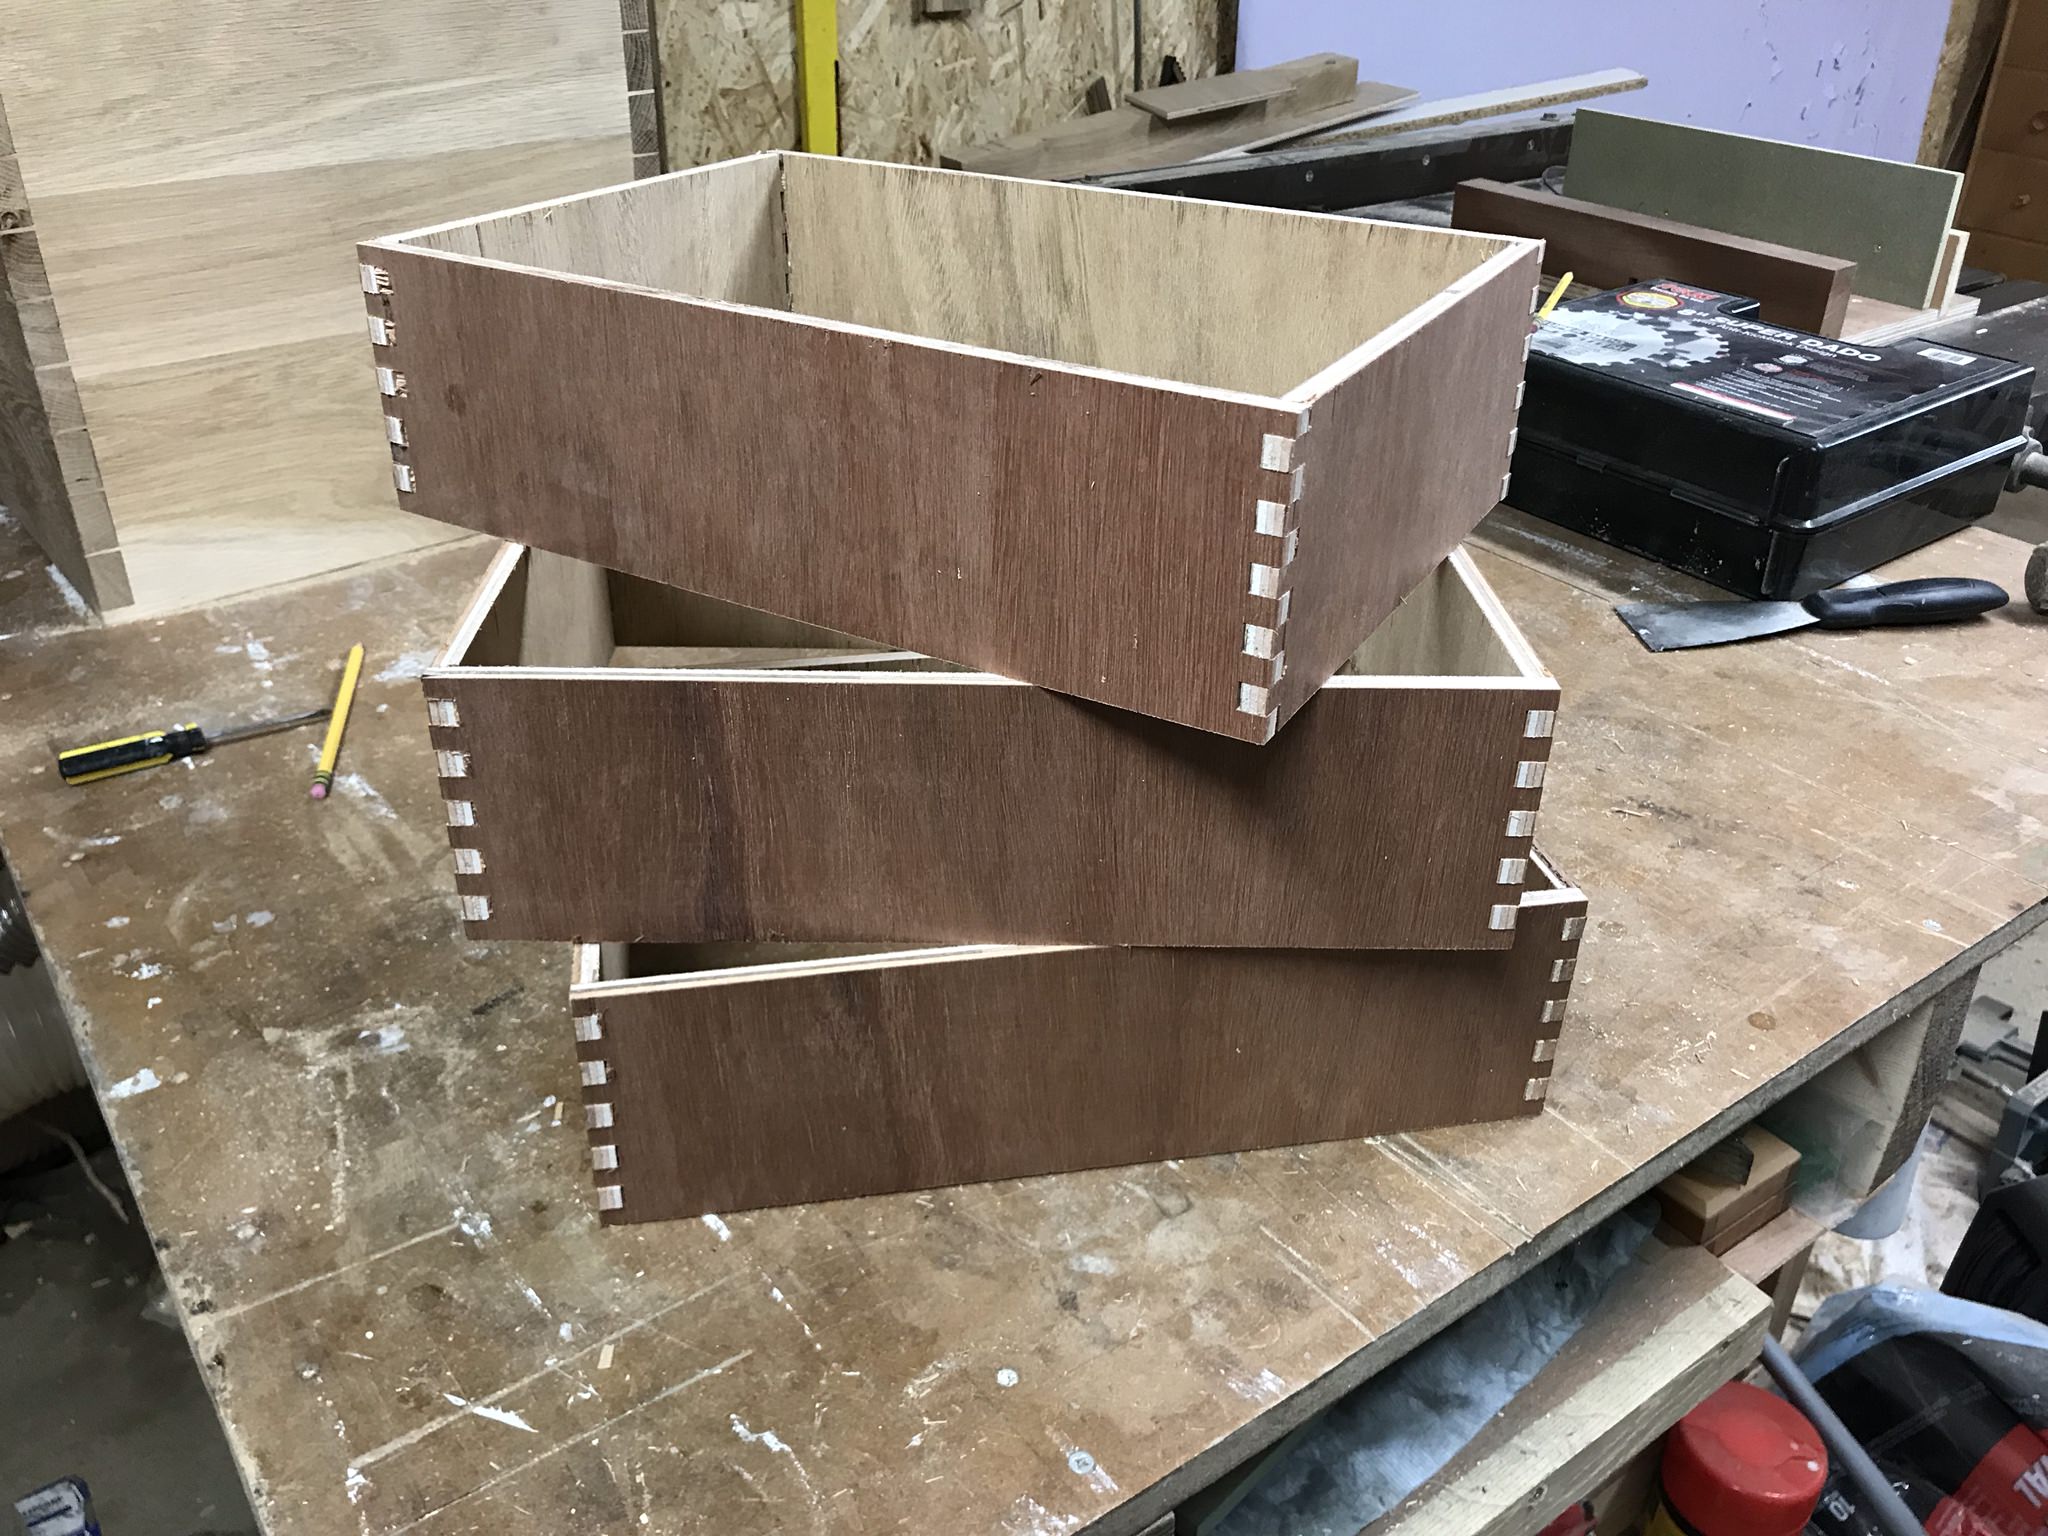
1. The most obvious one: you need micro-adjustment to get the spacing right, as the errors are cumulative. Steve Maskery did a YT video of a variant with a micro-adjuster (I based mine on his design). It works well, but adjustment is still difficult.

2. The indexing peg wears. I made mine of oak, the hardest wood I had conveniently available, and it easily became looser over time. I'd suggest something like Perspex instead (I didn't go that far, but it would probably have helped

3. If tearout is an issue (you can see it happening in that video around 7 mins in when he makes the first cut in close-up), it is very difficult to do much about. One approach is a sacrificial front piece, clamping the stock in a sandwich, but again that only works for a limited time.

4. They used an upcut spiral bit - it helps on one side of the cut -- in the close-ups that top right corner looks brilliantly crisp, but on the other side: tearout! It's also expensive. I suspect one other reason for the spiral bit is clearing the chips.

Basically, pretty much all the tearout issues are fixed on the tablesaw, as long as there is a tight sacrificial fence. It's certainly the case that one side of the workpiece wil be clean, so you have an exterior surface. I don't think you can guarantee this with a router table.

Finally, unlike through dovetails, you have to start with your stock at exactly finished dimensions, or at least you are referencing off an outer corner of the joint every time. Theoretically you have nothing to trim back to a smart finish - you can leave the fingers long, but that means an exact amount of waste. This is true of many systems, for example the mitre lock cutters I have are the same, but with through dovetails it isn't - you can work to scribed lines and, if you really want, leave the stock ragged (ish!).

If you are doing non-right-angles, as I was, you probably end up trying to index an acute angle on the workpiece against the surface of the sled: this really isn't fun.

I have yet to see a video where someone addresses all the issues.
 
Tearout occurs in this video of Axminster's Box Comb Jointer on a router in this video too

https://www.youtube.com/watch?v=MMYTWwDGynA

about 1.50 in. You'd have thought they'd have re-shot the video, but it's even there at the end when they make the joint.
I was thinking a router table and jig was the way ahead til this thread developed, definitely thinking to go ahead with the table saw option.
 
Chris152":2nu2sdjz said:
Tearout occurs in this video of Axminster's Box Comb Jointer on a router in this video too

https://www.youtube.com/watch?v=MMYTWwDGynA

about 1.50 in. You'd have thought they'd have re-shot the video, but it's even there at the end when they make the joint.
I was thinking a router table and jig was the way ahead til this thread developed, definitely thinking to go ahead with the table saw option.


ouch yeah - that did look pretty bad. It would be interesting to see the results with a spiral bit. I know they're expensive, but if they give good results, it might be worth the investment.

I'm always put off by the table saw method, as it's a lot more cuts and it still means investing in a flat tooth blade for nice results.
 

Latest posts

Back
Top