Making Traditionsl Sash windows

UKworkshop.co.uk

Help Support UKworkshop.co.uk:

This site may earn a commission from merchant affiliate links, including eBay, Amazon, and others.

rhrwilliams

Established Member
Joined
24 Mar 2014
Messages
136
Reaction score
2
Location
Kent, UK
So I had a long winded thread a while back about sash window research from 1720-1750 ish . Anyway I got round to making them finally this weekend. I've had so much help from various people I thought I better document what I have done in case someone else may find use for it .

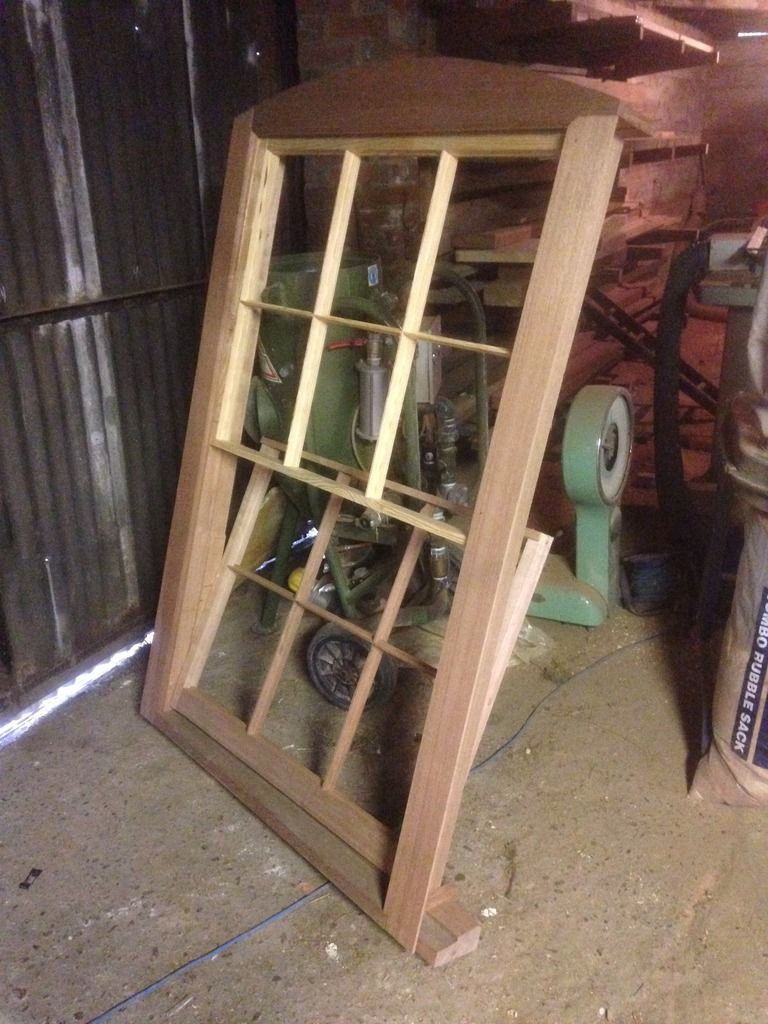
I've used a drawing from Jacob as the rough basis , although I have changed a few dims to make similar to some windows I found locally . I've never made a sash window before and didn't know what that would look like on the house so made a mock up first out of scrap wood I had knocking about ... a few cock ups but got them out the way in the mock up.

Here is mock up


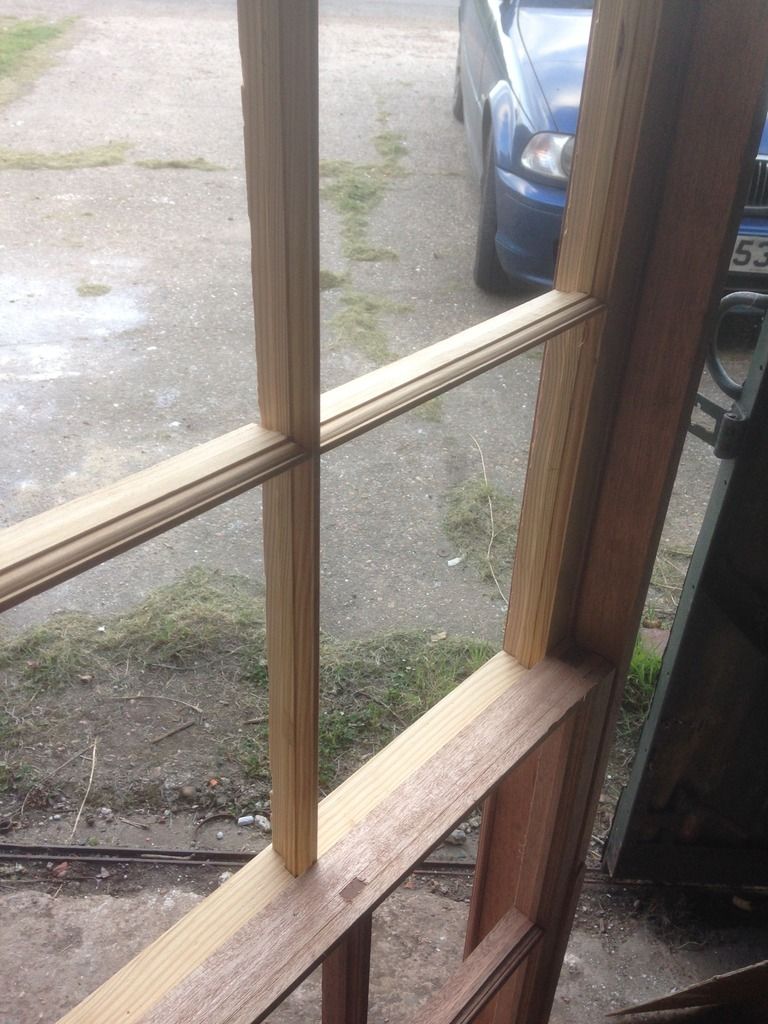
I ground two sets of profile cutters , one a for a 18mm glazing bar and one for 14mm. I'm using the 14mm one as I like it .
Simple Cutters like thes are actually much easier to grind than I thought. Took about 20 mins .


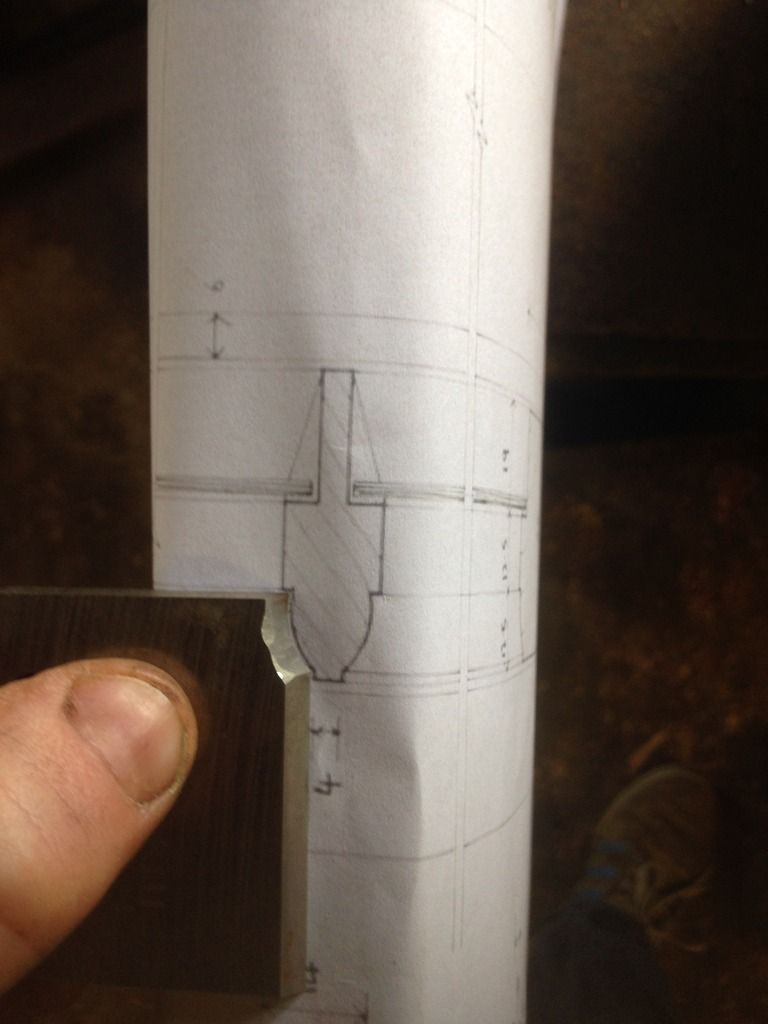
I then made a full size rod on plywood to match my drawing I made on CAD


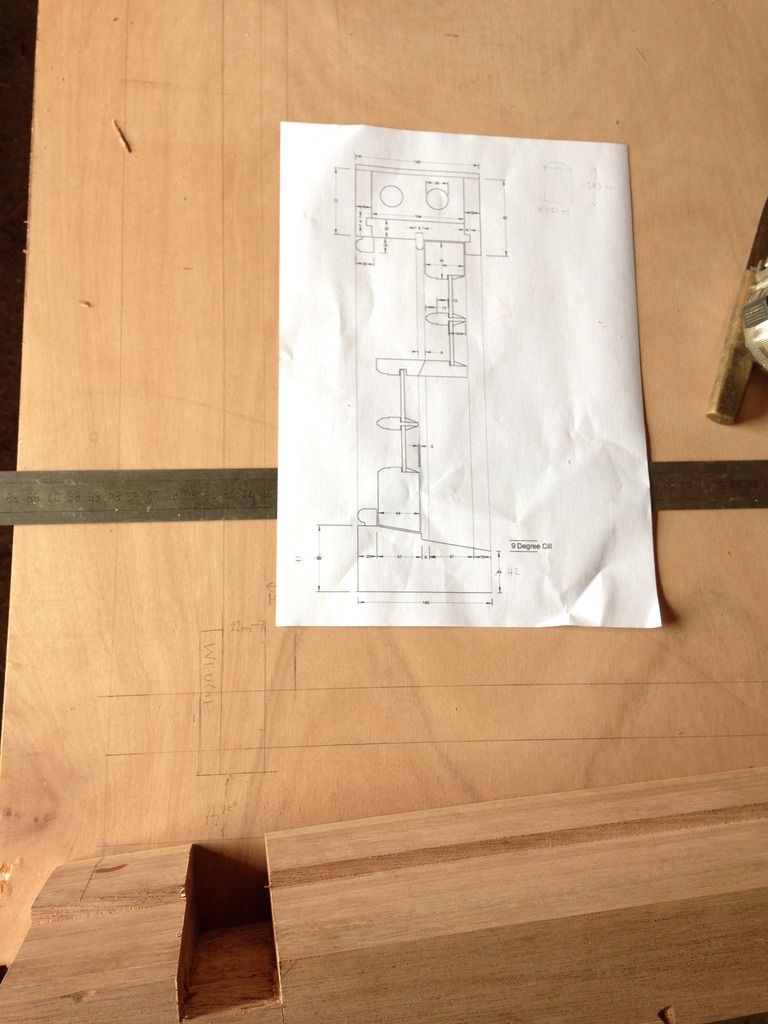
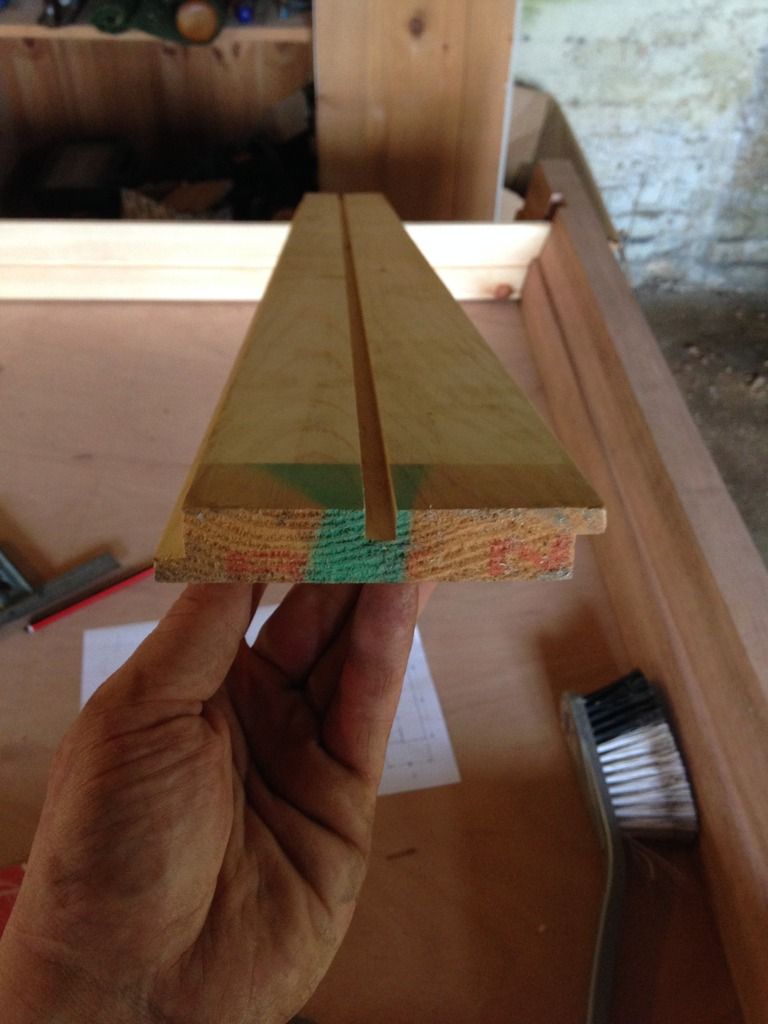
Then spent what seemed like forever planing timber for cill and box . Then machined the parting Bead groove and tongues for linings . I used a single £10 Euro cutter for everything from forming rebated to cutting the tongue .


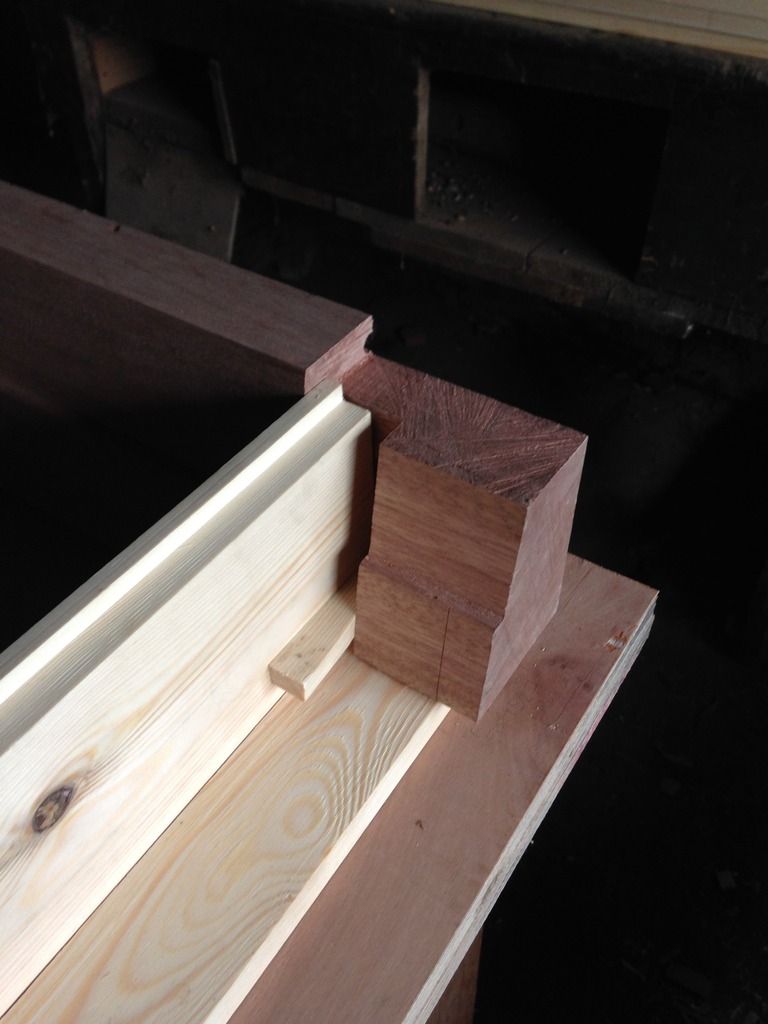
Then a big stack of wood appeared . Cut the housings in the cill and box frame head

 
Looks really good. Great to see the sash frame linings being properly made with tongue and groove joints rather than just nailed to together butt joints.
 
Thanks

Right so , machines all the rest of the timber inc the face lining detail.


and the curved top piece. I just cut this with a panel saw and curved it with a No.4 plane on the skew, seemed to work ok.

Cut the little hole thing for the piece of wood between the weights.


Cut the sash pocket. I just did it with a thin saw as I don't have a sash pocket chisel. Here is how....Bore 2 small holes in parting bead groove. Gut down Line. Then mark out ends and cut both sides. Knock out the middle with hammer , or tease it out with a chisel.


Cut the pulley holes. I wish I had a small router for jobs like these. But I don't so just got on with it.


Then put the thing together on the bench, checking its square. I squared it up, nailed and glued linings on and mitres face linings.
I then glued blocks on the corners to make it super strong.....I did wipe the glue off.


There will be a delay till I make the sashes as I have a few more boxes to make first.
 
So I have made 4 more boxes. Now onto the sashes.

Rough cut a load of sawn timber to size and plane up to size.


Then spend a long time very accurately making a width and height rod with all the markings on it. Mark up all the timber. I additionally did a full height drawing on my plywood as I didn't want to make any mess ups. Ive found the rod to be really important for accuracy. Ive made a few where I have not used a rod and instead used the bottom rail as the rod, but its quicker in the long run I find if making more than 1 !


I then use a marking gauge to set all the mortice / mould / rebate lines.

I then cut the mortices. I used a morticer and tidied up with chisel. For the thinner pieces such as the glazing bars I just mortice with the chisel as I find it quicker.

Then onto the Spindle Moulder and cut the mould and rebate. I have made a mini fence to to glazing bars. One side is for the mould and flip it over for the rebate. Basically I have done this as a) It is far safer as you can use it without your fingers being anywhere near the cutter b) it produces a better cut as the pieces don't wobble about over a big opening.

I make sure thin bits like glazing bars are extra long as the rebated end that comes out last is hard to get perfect , so I just make it long and cut it off...again also safer. (note - I am not preaching safety advice here and I know non limited cutters are not recommended / no power feed not reccomended etc etc so don't take advice from me on safety on dangerous machines!!)


Then I cut the meeting rail. I used a overhead planer to get the angle then a table saw to cut the rebate. I also formed the angle on the bottom rail on the overhead planer also. I like the overhead planer its great for rebates, angles etc etc and very very easy and quick to set up.


I then cut the tenons with a saw, or a chisel ...whatever is easiest. Then frank the bottom rail / top rail. Picture paints a thousand words;


Now to scribe....Ive struggled with this in the past , but its actually very simple, so will try to go into as much detail as possible. This is the scribe for the bottom rail , its sometimes called franking. Glazing bars will be dealt with by a separate method. Insert the tenon and line it up with the mould.....use a sharp pencil to trace the mould from the receiving piece;


Then use a gouge.......but if you don't have a gouge like me......use a small chisel to carve out the shape of the receiving mould;


TO BE CONTINUED
 
Ok so firstly, I was emailed by a forum member who suggested a better way of doing the haunch / Franking, where the material is taken from the rail, not the stile. Here we go (thanks Katelwood).


Next the glazing bars; Here is how I do it. I find this way I can get a super tight fit. Im sure there are other ways to do it too.
I put 3 lines in it , marking out the area of the scribe. The extra line is so I can get the dimension of the quirk.


Then cut it with a coping saw


Then cut the glazing bars. I mark them as one bar , then split last.


Then if its too tight, nibble a little out the glazing bar which the scribe goes into.


Then I pinned the corners of the bridle joint with a 1/4 inch dowel.


Glue up and wedge....


DONE ...Almost, I need to cut the rebates in the sides for the sash chords etc but will do this later.


There will be a 3 week ish delay while I finish the rest of the sashes and await delivery of a load of handmade cylinder glass.
 
Oh also, I cheated and bought parting bead from the shop. I was going to make it but forgot to order the spindle cutter. I am glad I bought it as frankly life is too short.
 
Thanks Roger. 14mm glazing bars ! I was going to use the cutters I copied from you a few years ago, but the smallest I could get the bars with those cutters was 18mm.
 
Back
Top