Sam Maloof Inspired Low Back Chair - Warning lots of Pics

UKworkshop.co.uk

Help Support UKworkshop.co.uk:

This site may earn a commission from merchant affiliate links, including eBay, Amazon, and others.

noddy67

Established Member
Joined
1 Feb 2006
Messages
253
Reaction score
5
Location
Nr. Tonbridge, Kent
I have long been a massive fan of Sam Maloof's furniture (I imagine like a number of people on this site) and have been particularly enamoured with his low back chair design.

I remember a number of years ago watching with great interest as Phil from Philsville hand plane fame (lovely planes by the way) as he made one. A stunning chair in my opinion. From memory Phil did it just by looking at photographs and working out his plans. Sadly my skill levels are a long way short of that.

A little while ago I stumbled across a couple of chaps in the US who sell plans for something similar and ended up buying them. The two that I bought are by Scott Morrison and Charles Brock. They each have a slightly different style but both include a video and some paper plans. Brock's also includes a booklet with some additional info.

I also managed to track down some 2" Cherry from Scawton sawmill which was recently delivered.

Time to build a chair.

Having enjoyed looking at many WIP builds on this site over the last few years I've decided it was time to give something back and I'm hoping to post a full build of this chair if anyone is interested.

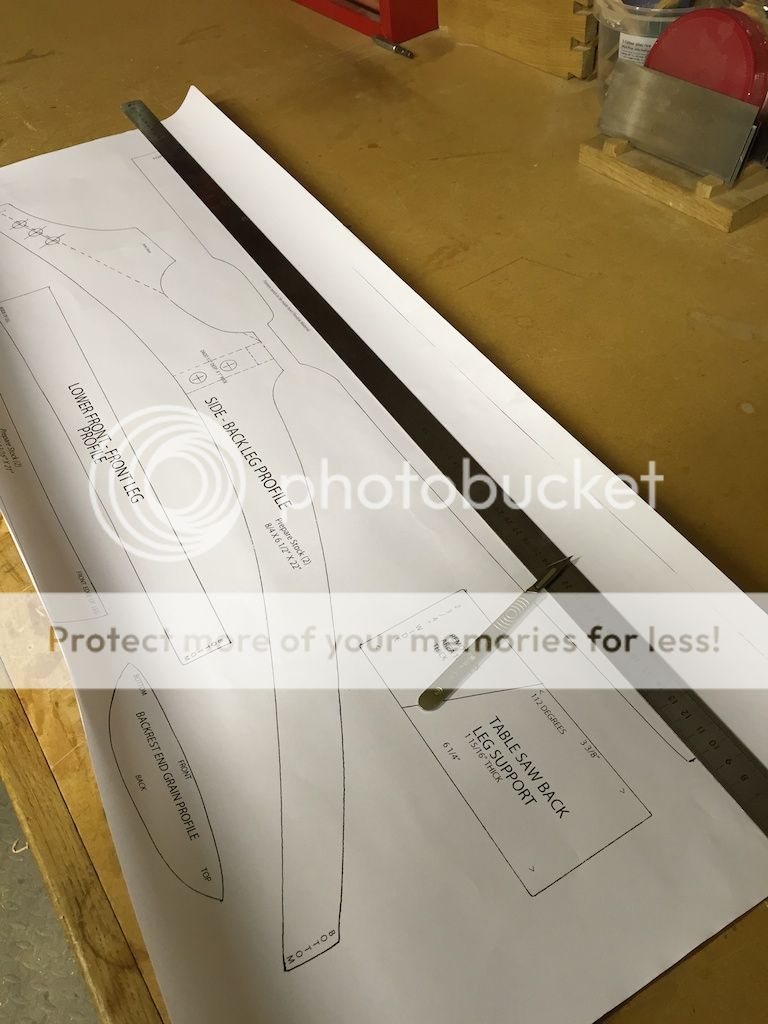
The first step was to cut out the paper templates and stick them onto some ply. Most went onto 6mm ply that I had around but a few needed to be flexible so I stuck those to a couple of bits of hardboard.

bench2%201_1.jpg
[/URL]

bench2%203_1.jpg
[/URL]


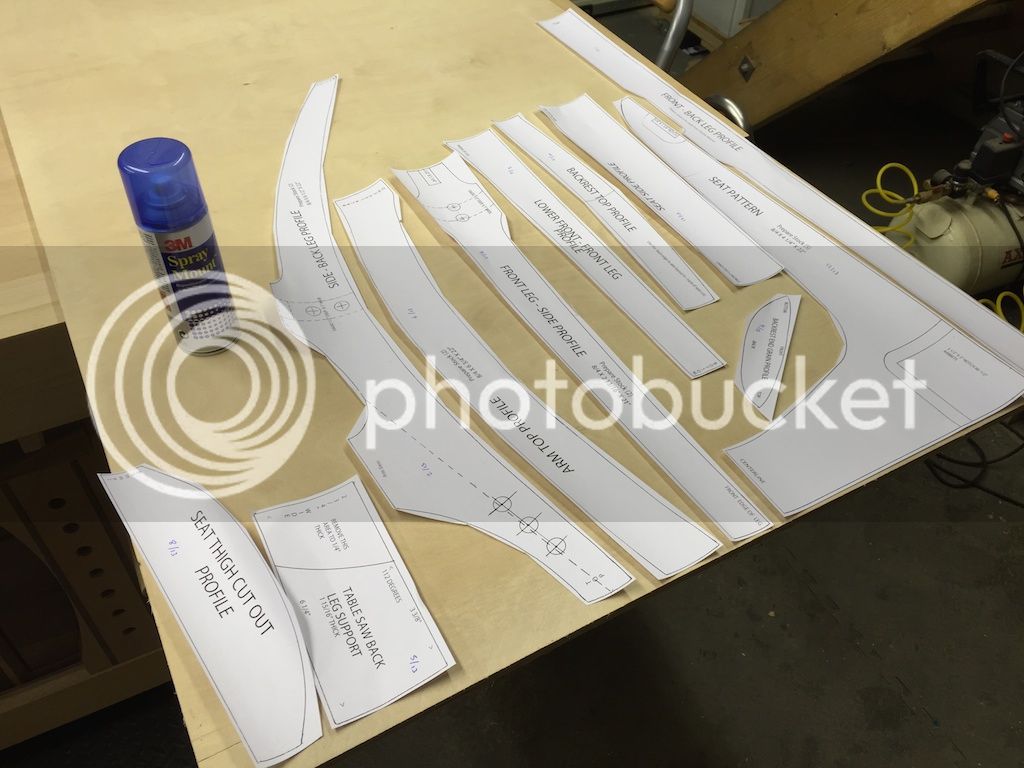
I then cut these out on the bandsaw and cleaned them up on the drum sander.

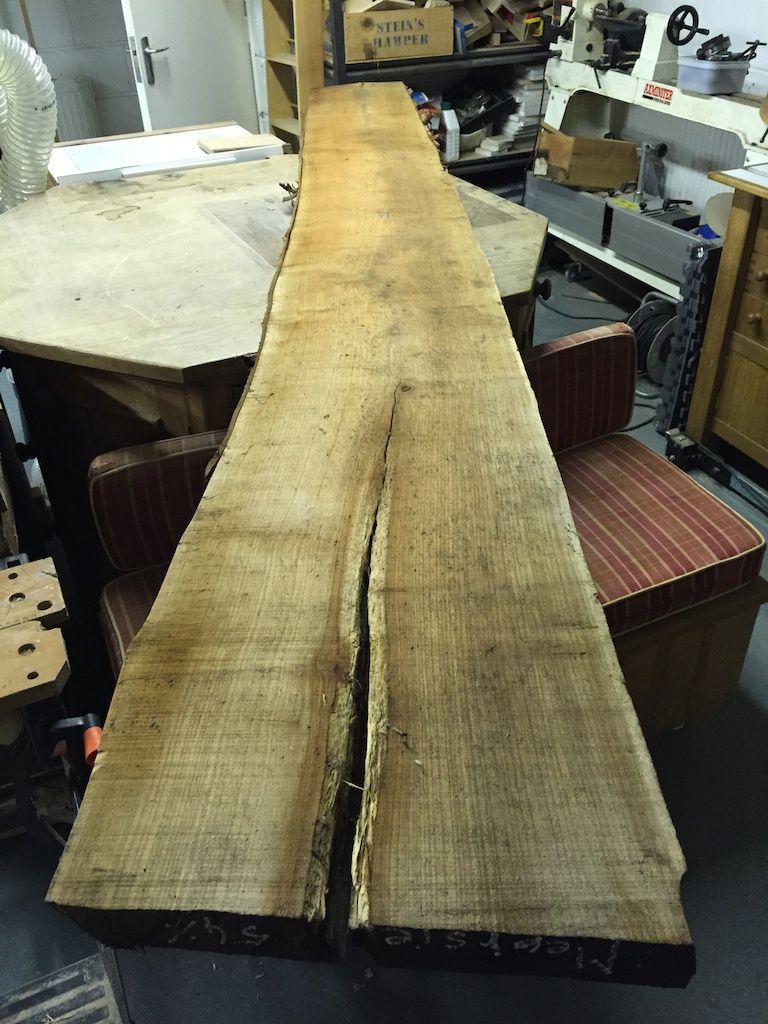
The four boards of cherry I'd bought all looking like this:

wood.jpg
[/URL]

Just moving them on my own was pretty hard work.

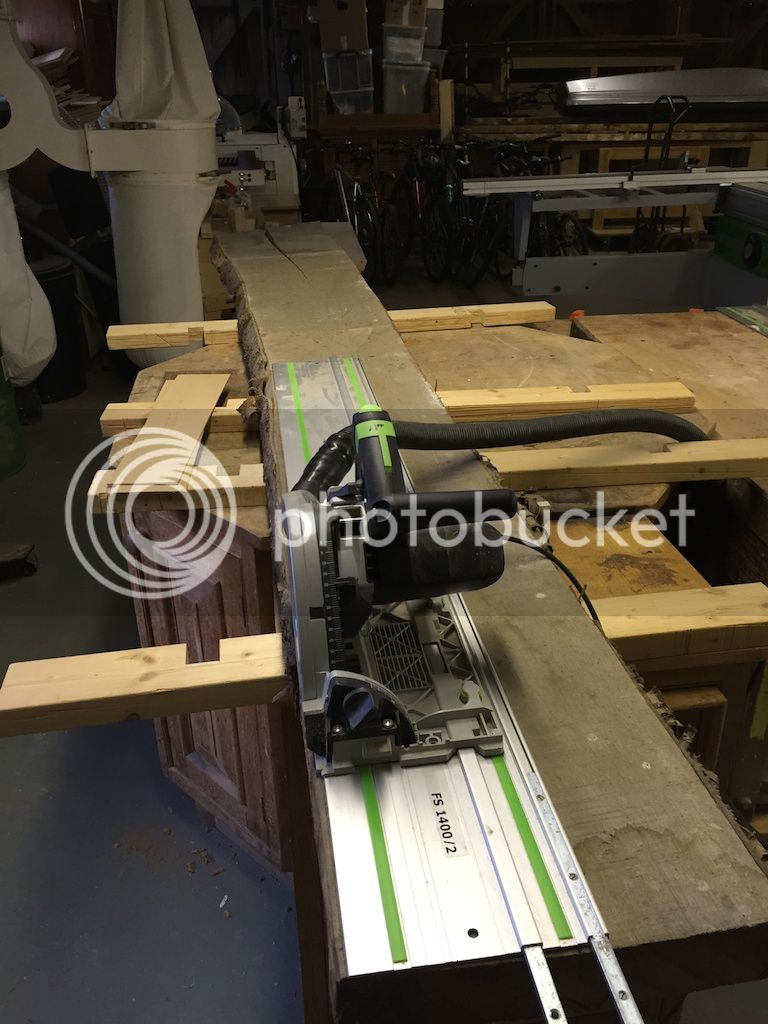
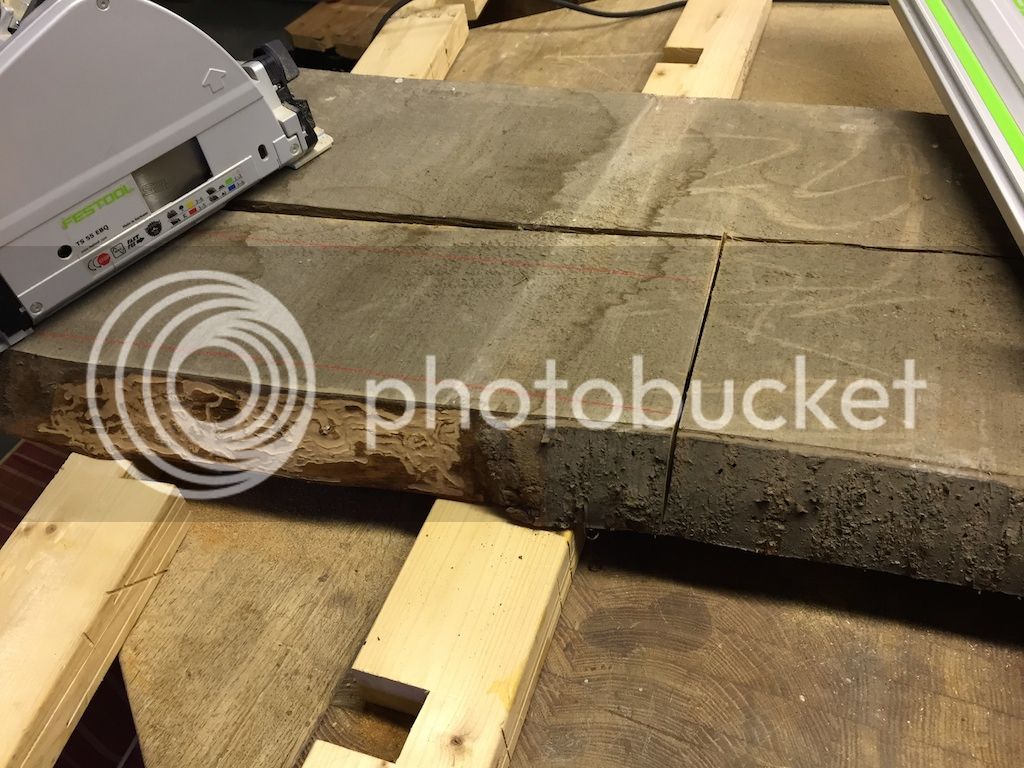
Given the split in the first board I tried to salvage as much timber as possible and used my track saw to start to portion up the wood.

bench2%207_1.jpg
[/URL]

bench2%209.jpg
[/URL]

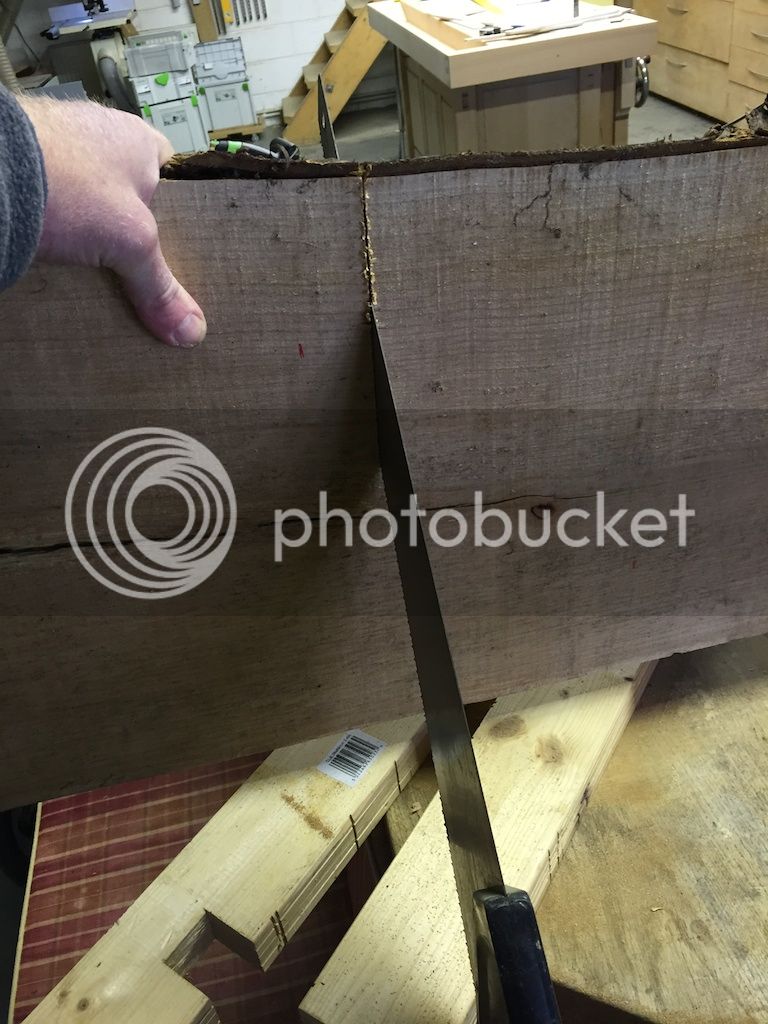
Sadly my saw blade wasn't quite large enough to make it all the way through which left me using a handsaw to finish the cut

bench2%2010.jpg
[/URL]

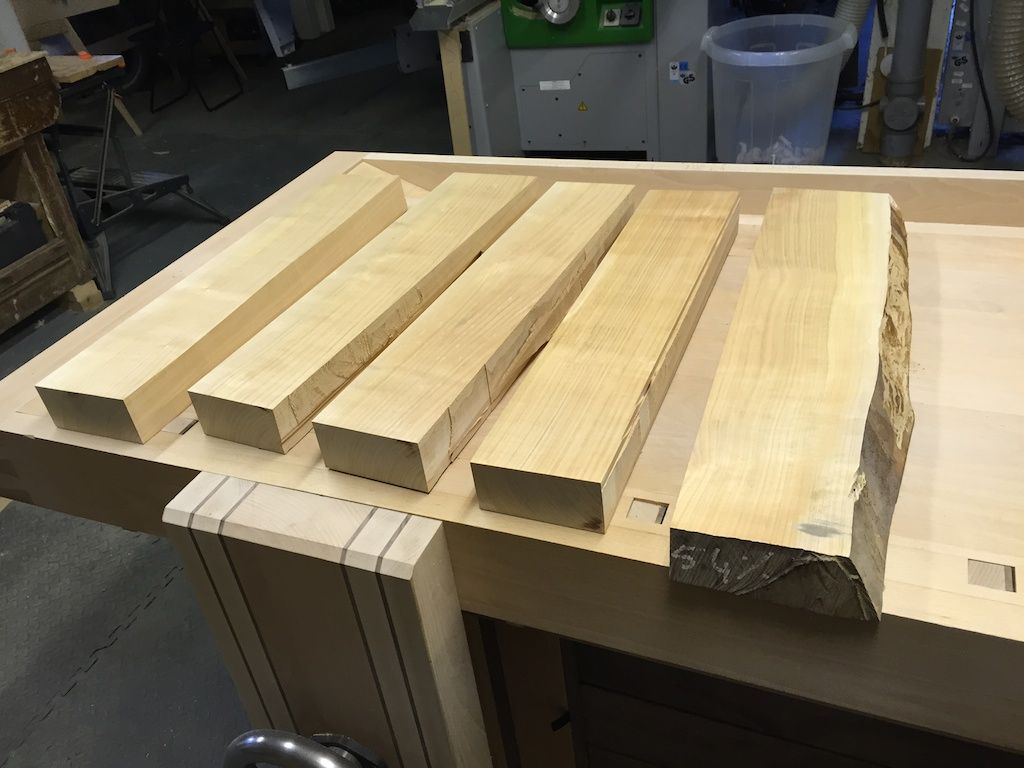
I couldn't stop myself and had to plane up a little of the timber just to see what it looked like. Lovely grain:

bench2%2011.jpg
[/URL]

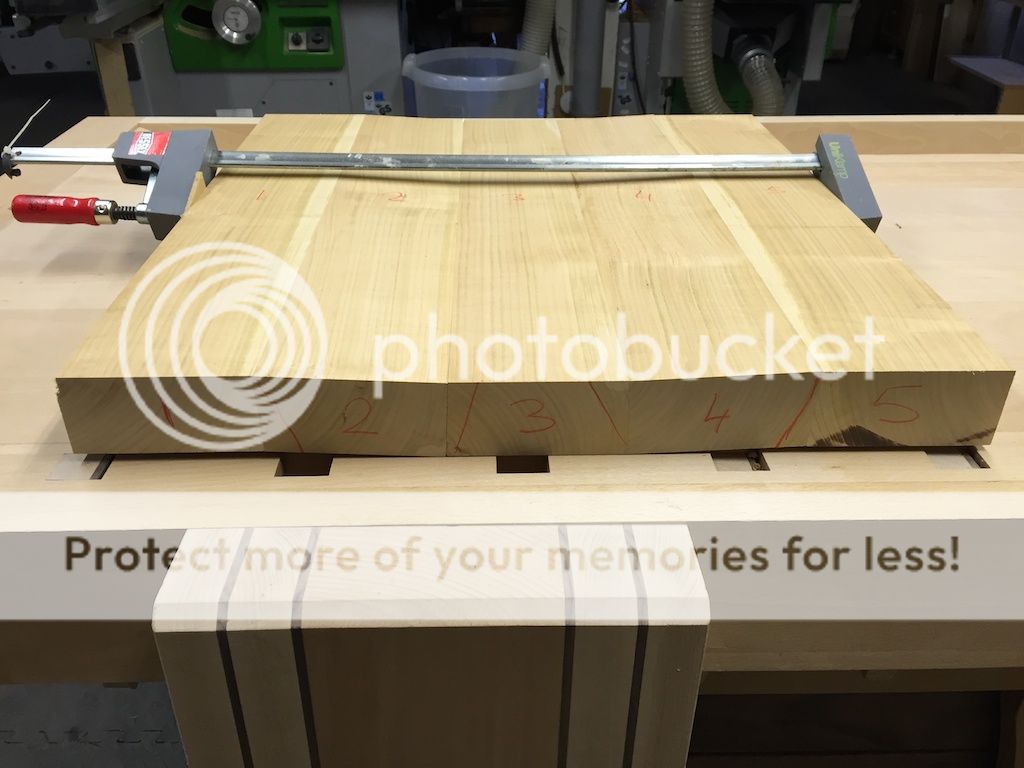
The first part to make is the seat. This requires 5 boards

bench2%2014.jpg
[/URL]

These get numbered 1 through 5 and then a 3 degree bevel is cut onto the sides of a few of them as seen below. I used my planar to do this setting the angle:

bench2%2019.jpg
[/URL]

You end up with the 5 boards forming a "smile":

bench2%2021.jpg
[/URL]

Thats the first instalment. More to follow.
 
OOO! I am looking forward to this WIP. Thank you.
xy

BTW. In the Archery world there is a very long standing competition for the Scawton Silver Arrow.
It involves long distance shooting and beer. Sounds like a nightmare. Still a Yorkshire tradition.
I wonder if it is the same Scawton. Anyone?
xy
 
Hi Noddy
I too am an admirer of Maloof style of furniture.
I have a couple of questions
What was the reason for getting 2 sets of plans , from different people.
What is the difference between the two sets of templates? Size wise, have you compared them side by side?
I have recently watched the video by Scott Morrison for the Ultimate workshop stool. I'm thinking of trying that first as there isnt as much shaping on the legs and I'm guessing as its more a test bed for me to do bits of shaping as an experiment. Once I have done this I think it won't be too arduous to make up templates for the lowback.
Would like to hear your views on this.
Keep the pics flowing.
Danny
 
Hi Danny. I first bought the Morrison set and while the plans are fine and the video ok I wasn't completely blown away. I watched it a couple of times and still had a fair few questions. I then happened to have a friend coming over from the States and wanted to order a couple of bits and pieces from Highland Woodworking and for him to bring them over for me. I saw the Brock plans and it was a kind of impulse buy (they were doing a deal for the Low Back Chair and his Rocker). To be honest I'm glad I did. Certainly if I was only going to get one set it would definitely be the Brock set. Much more detail - maybe I was just looking for a bit more hand holding.
I think the Morrison chair is slightly larger than the Brock set, certainly the seat is.
Also like the look of Morrison's workshop stool.

I think the hard part of these chairs is the sculpting. Never done any carving before, let along power carving but hoping it will be doable.

Made a bit of progress today so will post a few more pics later on.
 
Made some progress today.

I forgot to mention in my earlier oat that I reinforced the seat joins with three dominos per join. These are located close to the bottom of the seat so they won't appear when I start to sculpt the seat.

The next stage was to mark out and cut the sections on the outside of the seat that will accept the leg joint. For the rear leg this involves cutting out a 3" x 2 1/2" piece from the rear corner of each side and for the front leg a shallow dado.

Marking out for the rear joint:


I then cut the two rear joints on the table saw using a backer board to help reduce tearout:


And trim out the corner with a chisel:


Here are the two front dados cut


Using a router plane to fine tune the depth of cut


With those done the next stage is to rout a 1/2" rebate around the inside edges of the joints. I had previously bought a couple of router bots that Brock recommends for this project from Highland Woodworking in the US.


I did a couple of test cuts on some spare stock and then with a certain degree of nervousness routed each of the four joints.


Here was my first screw up (or at least the first one that I know of). A moment of carelessness and the router slips a bit. Hoping that I will end up sculpting away this lower section of the seat and I'll be ok. Grrrrrr


More to come.
 
There is a part of me wishing to know what the finished chair going to look like.
But then I like the guessing/anticipation too!
I like the 'smiley' seat. For power carving, I'm not sure exactly to what shape, I have used an Arbortech in an angle grinder.
http://www.arbortech-tools.com/tools/Ar ... Pro-4.html
Apart from the cloud of bits I was very suprised by the potential for a smoother finish than I expected. Watch grain direction.
xy
 
Hi xy. If you want to see some examples of what the chair should / could end up looking like here are a few builds worth looking at:

http://richard-wile.blogspot.co.uk/2013 ... egins.html

http://sauerandsteiner.blogspot.ca/2012 ... ck-up.html

https://forum.canadianwoodworking.com/s ... n-progress)

This third link has some great examples of rocker builds too. Interesting Youtube feed as well.

I milled up some stock and laid out and cut the front and rear legs.


cutting them out on the bandsaw.


I also started trying out some carving on the seat using my new toy:


with 24 grit paper on it


Its very aggressive and removes material pretty quickly.


This is how the seat currently looks in a jig ready for glue up.


Planning on using Titebond 3 although this is the first time I've worked with Cherry so I'd welcome any thoughts on minimising a glue line if anyone has any.

Then it was back to the front legs. First up is marking out and cutting a dado on three sides, 3" from the top.


The depth of which is fine tuned using a router plane. Not had a lot of opportunity to really use one of these before. Its a lovely hand tool and ends up giving a beautiful finish. A real joy.


Next up is to round over the inside edges either side of the dado with the round over bit in the router table:


Here you can see the rounded edge. Also I hadn't cut the dado quite deep enough so more fine tuning required.


Here is the first joint starting to come together


and a better fit


Thats all for now.
 
Thats good progress, well done. I have an arbortech but I saw Morisson used a Galahad nobbly tungsten cutter (which I was quite impressed with) 1st then 24 grit on the seat. Im guessing the sandpaper takes a lot longer and more dust but will get the same result.
How are you going to do the back? One big lump of cherry to get the curve or cut the front curve and glue/laminate to the back of it with lots and lots of clamps?
Keep the pics coming,
 
Lovely stuff. Nice straight grain, how much was the cherry if you don't mind me asking?

Looking forward to further instalments.
 
Danny, probably going to go with one piece across the back although had considered joining a couple of pieces to allow the grain to run vertically. Not sure yet.

Graham I bought four blears all about the same size as the one in the photo and it cost about £270 for about 6 cu ft inc delivery. So far I've managed to get all the parts minus the back rest out of one board so would think I have enough timber for 3 chairs from this lot.
 
Apologies for the delay in posting. Been some progress in the shop but hadn't got around to updating the post.

I ran the smoother plane over the inside faces of the seat components in preparation for glue up having previously used dominoes to reinforce the seat.


Then I notices a split at towards the rear of one of the middle seat sections. Hoping this will be sufficiently far back that it will be removed and won't be a problem but glued it anyway just in case.


I drilled the two screw holes in each of the front legs at the drill press using a miller dowel bit.


Next came time to start preparing the rear legs. This involved attaching a template to the rough cut stock with double sided tape and attaching it to my template jig and running it against the flush router trim bit.


Ever have one of those days when things are just going too well and then disaster strikes. This was one of those. Big time! Somehow I managed to catch the workpiece the wrong way and it snagged on the router bit. From a beautifully smooth surface to this in a heartbeat.


Fuming I decided that it was time for a break from the shop. Will think about it tomorrow when the smoke has cleared.

I figured I might just get away with it and decided to continue with the same leg and see whether it would still work. Cleaned it up with a hand plane, spoke shave and a cabinet scraper. Wont know until I start to cut the joinery.


Then it was time to glue up the seat using the jig shown below and a few clamps.

And on to the joinery on the rear legs, cut at the table saw.


Then it is time to round over the inside edge of the rear leg at the router table.I stuck a small piece of ply to the top edge to allow me to run it flush up against the router fence.


Giving the following. Hear you can see I had another crack, this time right on the joint location. Some more glue and painters tape and fingers crossed.


Here is the first look of the shair starting to come together


The rear leg joint


A profile shot of the chair with the arm blank clamped on it.


That it for now.
 
Good to see progress. I was about to send out the search party. Are you putting off doing the finishing of the seat? :lol:
 
Hi Danny,

Yes I wanted to get the joinery cut first before moving on to the seat. Ended up buying a Saburr carving disc which helped a lot. Will post the next round of pics as soon as I get the chance. Cheers
 
hi noddy

I am building the same chair low back, from the brock plans. Got to sanding and shaping, takes a long time to make. i have added a pic showing progress at the minute. have fun with it, i build it in oak as its cheap, mistakes dont cost as much. will work my way to walnut in future.
 

Attachments

  • sculpted dining chair for sanding - Copy.jpg
    sculpted dining chair for sanding - Copy.jpg
    25.7 KB · Views: 1,209
Missed this the first time - I love Sam Maloof's stuff but those pointy arms look a bit dangerous?
Noddy hasn't posted for quite sometime.

Rod
 
Back
Top