Crooked Tree
Established Member
This is actually a "work complete" posting, but as it was a Christmas present for my father and I intended to make another one for a user of this forum, I decided not to post until after the big day.
The plan was to make a small plane using available materials (brass and wood). I decided upon a bullnose because he does not have one that works. Originally it was going to be a riveted brass-wood-brass sandwich, but I was inspired by posts on this forum (mostly the impressive Aled plane kits) to try dovetailing a brass sole. As I had never done anything like this before I made a prototype/concept demonstrator first.
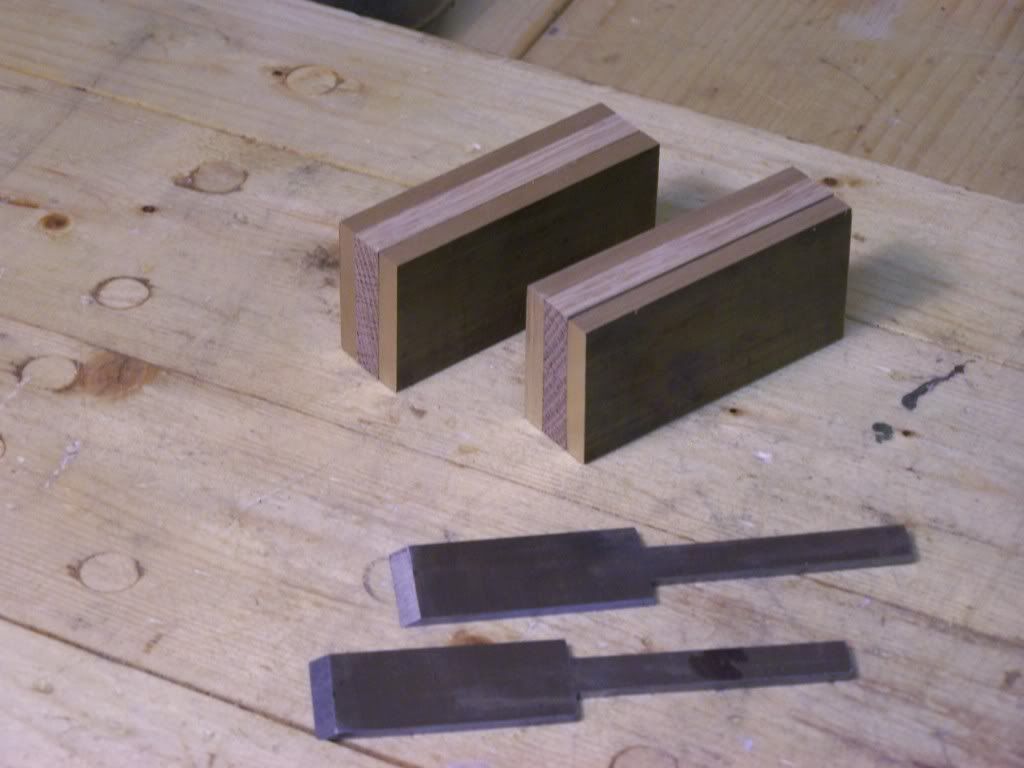
Materials prepared: brass bar from an offcut; oak stripwood; 2nd hand stanley 2" plane blade cut in half (had to use a tungsten carbide rod blade when I got to the hardened bit) and ground on a bench grinder.
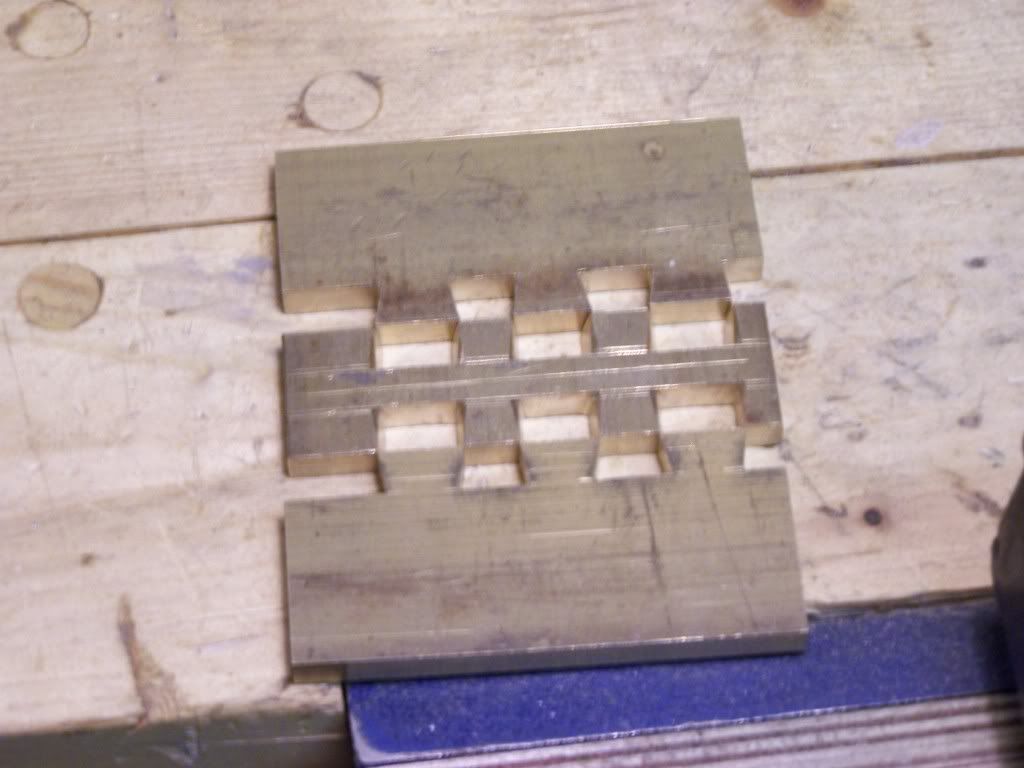
Dovetails filed
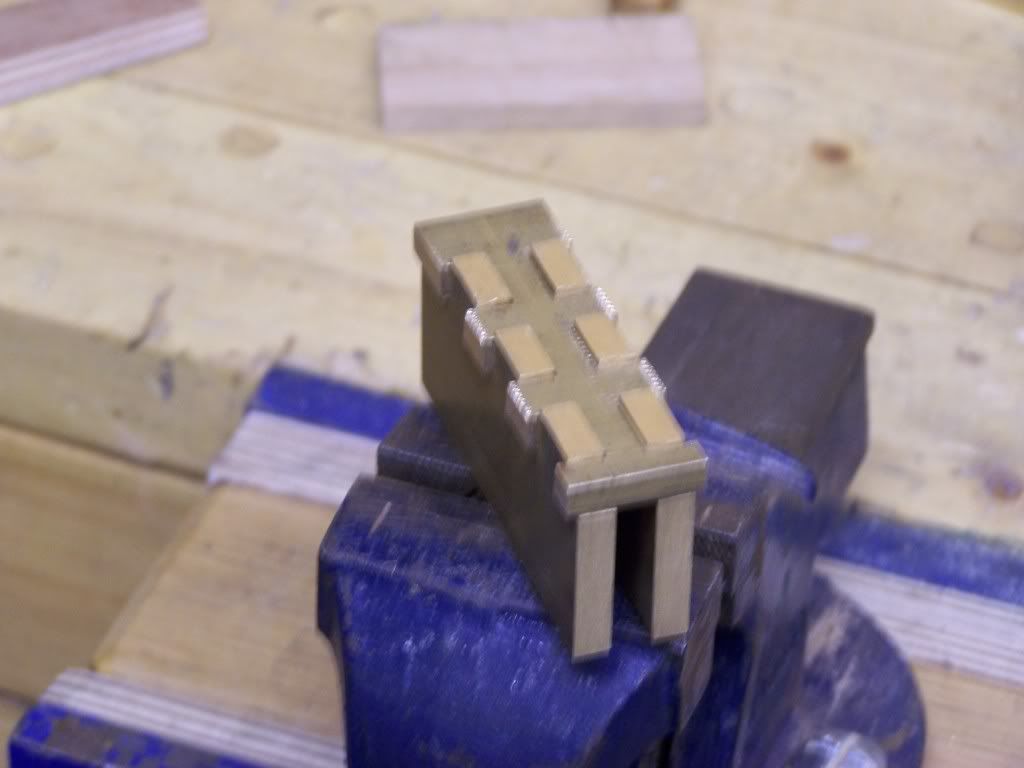
Initial assembly - this took some hammering/squeezing with a vice.
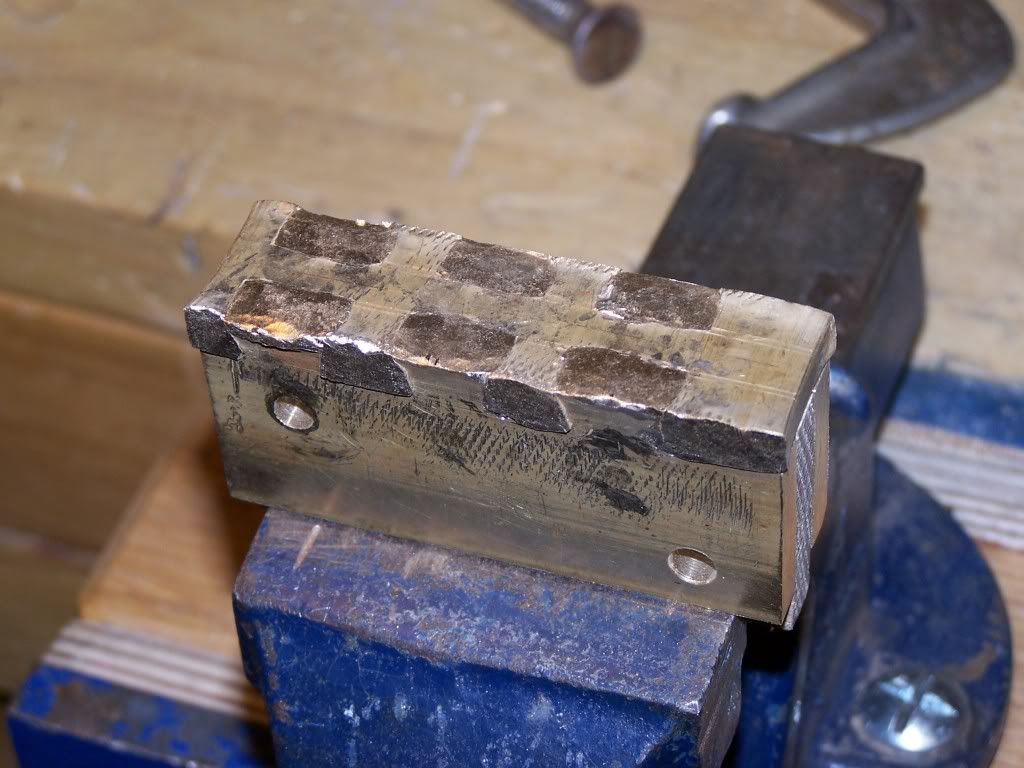
Peened... and what a mess! Didn't think I would be able to recover this.
Looks better with some filing.
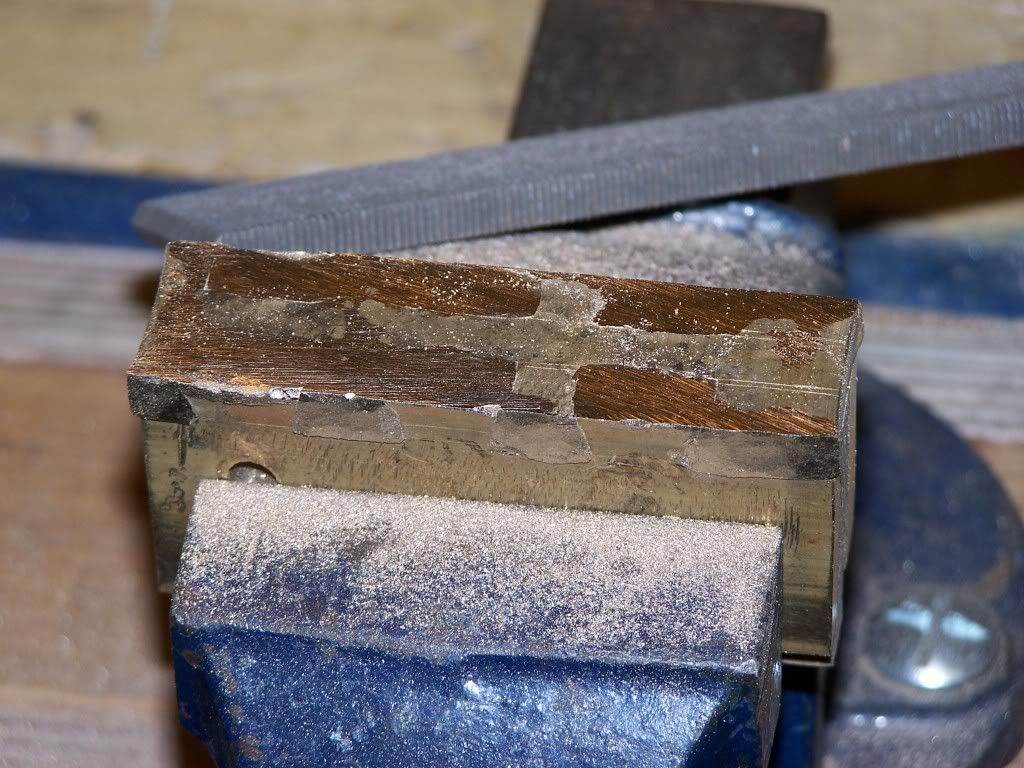
Cutting the wedge
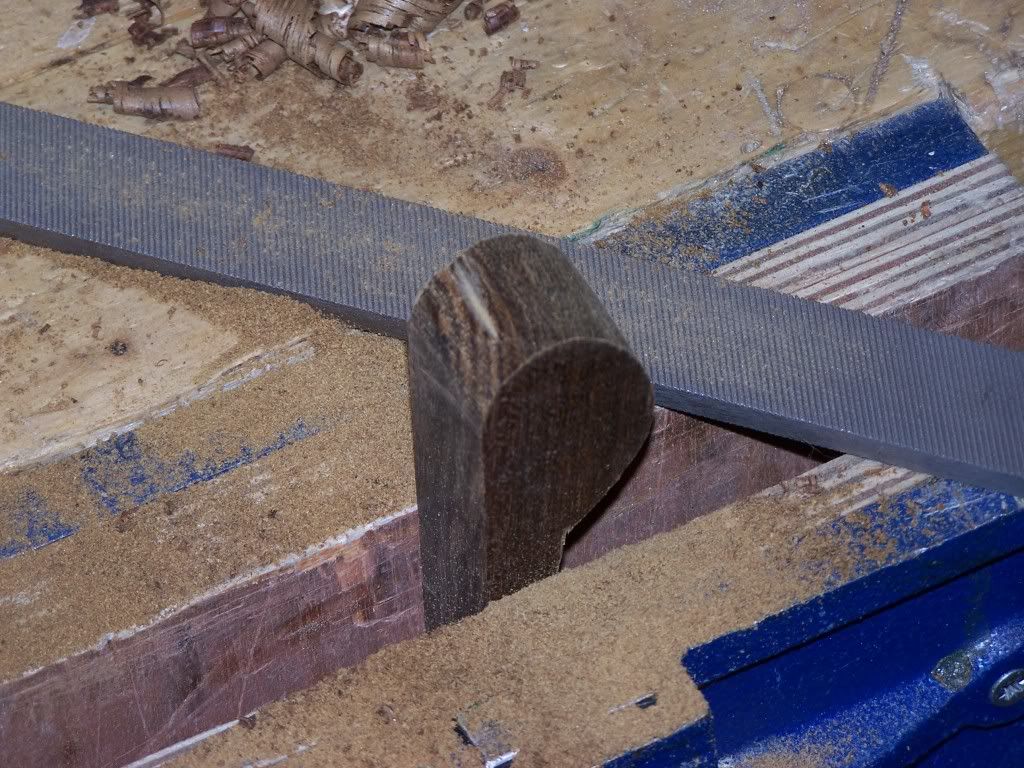
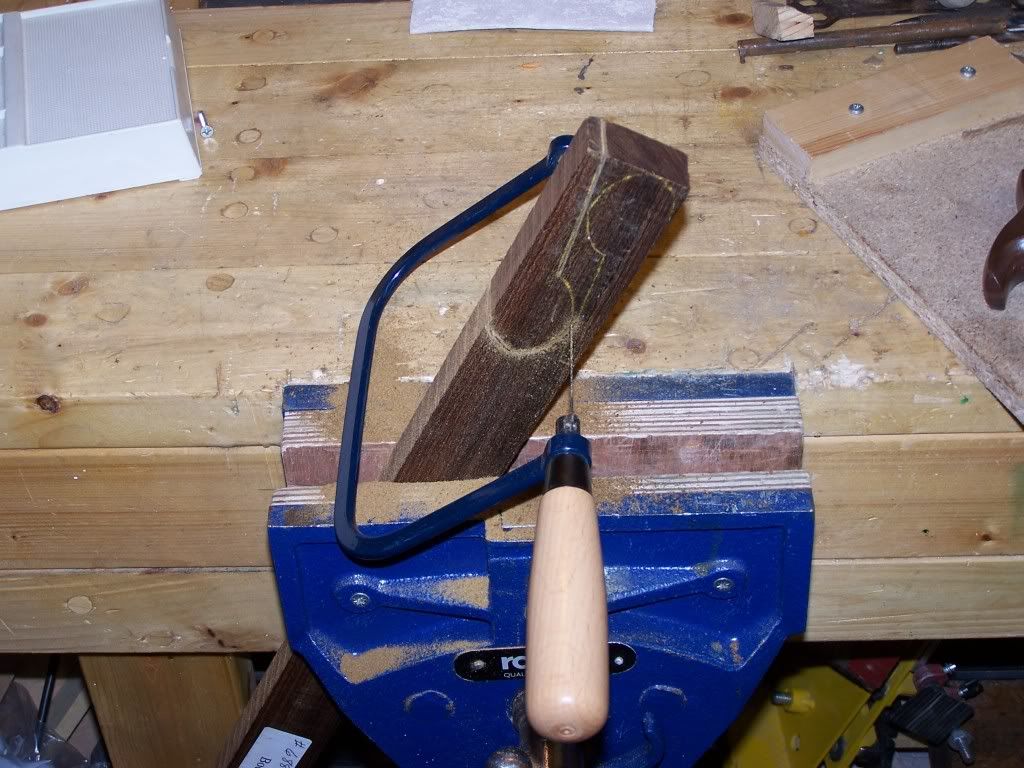
Shaping the wedge
No pictures of the riveting through the oak infill - I was too ashamed by the mess I made. It took many hours and 2 sets of rivets. I think the problem was that I drilled too large a countersink for them, resulting in their crumbling with my attempts to spread the end such as to fill the countersunk hole. This resulted in a few pock marks in the plane sides left by bits of brass which broke away from the rivet heads.

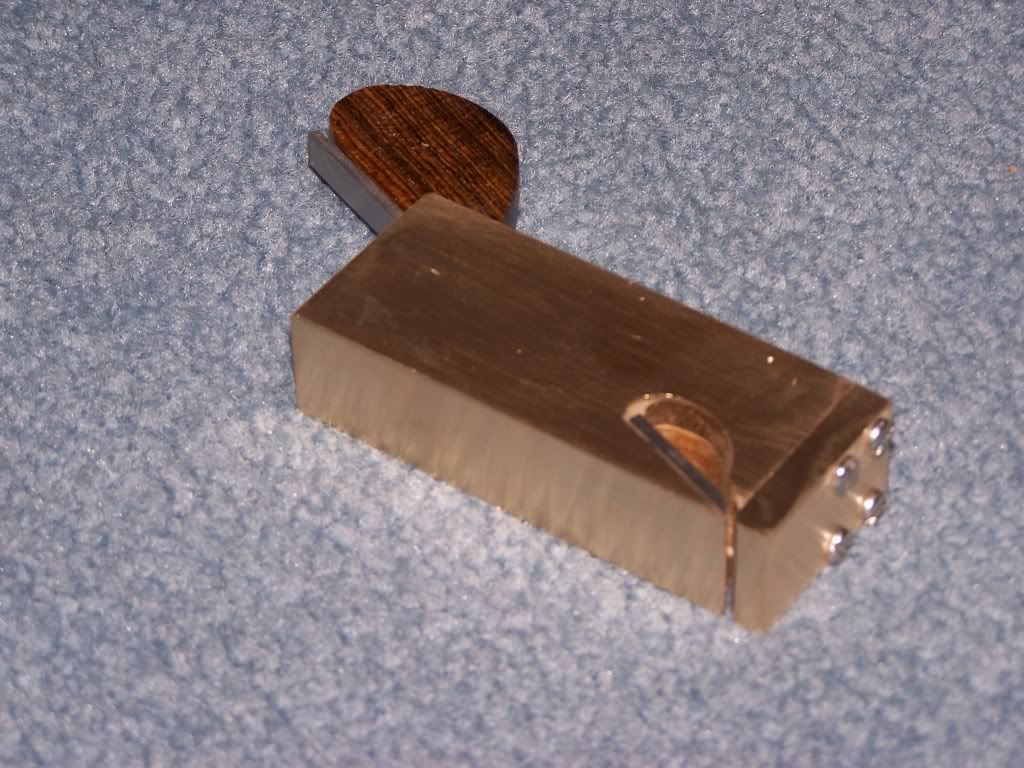
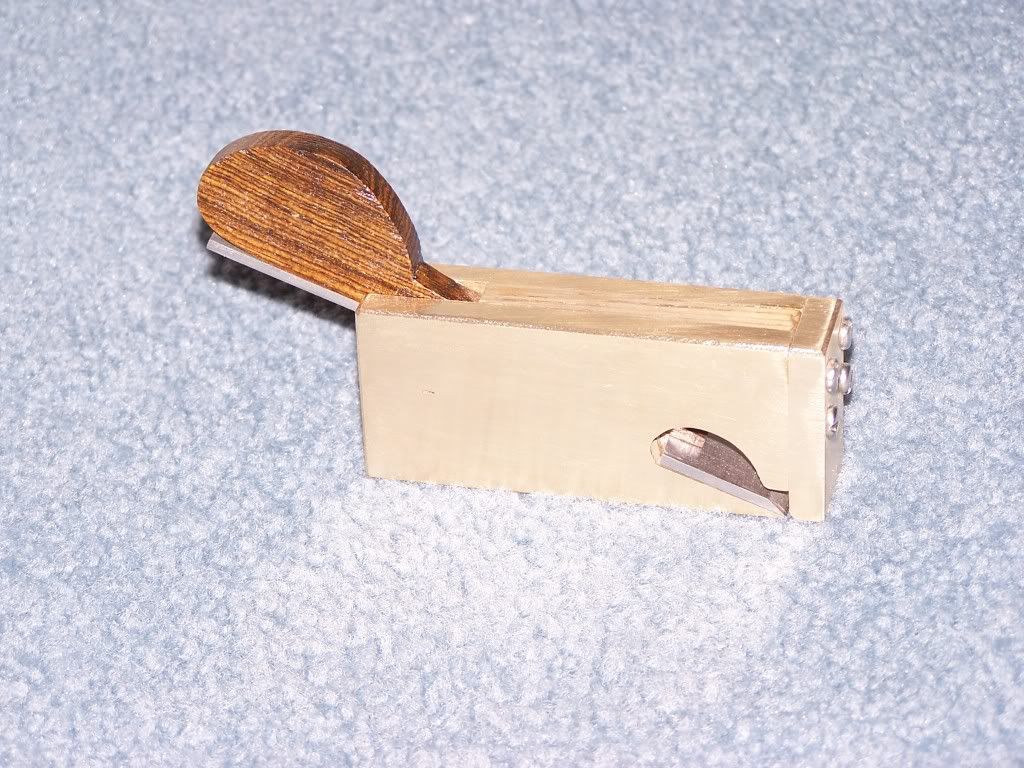
Finished! Just in time (Christmas eve).As you can see, it has some faults: pock marks from dodgy riveting; sides not quite square to base, even after much filing; nose must be removed to sharpen the blade; wedge needs to project further forwards on the blade. These may be improved upon when (if) I find time to make the Mk2. This time I felt that I was going to make things worse if I made further attempts to rectify the faults.
Having spent far longer than planned making this, there was only one recipient on Christmas day.
My father seemed pleased with it, which is the main thing.
The plan was to make a small plane using available materials (brass and wood). I decided upon a bullnose because he does not have one that works. Originally it was going to be a riveted brass-wood-brass sandwich, but I was inspired by posts on this forum (mostly the impressive Aled plane kits) to try dovetailing a brass sole. As I had never done anything like this before I made a prototype/concept demonstrator first.
Materials prepared: brass bar from an offcut; oak stripwood; 2nd hand stanley 2" plane blade cut in half (had to use a tungsten carbide rod blade when I got to the hardened bit) and ground on a bench grinder.
Dovetails filed
Initial assembly - this took some hammering/squeezing with a vice.
Peened... and what a mess! Didn't think I would be able to recover this.
Looks better with some filing.
Cutting the wedge
Shaping the wedge
No pictures of the riveting through the oak infill - I was too ashamed by the mess I made. It took many hours and 2 sets of rivets. I think the problem was that I drilled too large a countersink for them, resulting in their crumbling with my attempts to spread the end such as to fill the countersunk hole. This resulted in a few pock marks in the plane sides left by bits of brass which broke away from the rivet heads.
Finished! Just in time (Christmas eve).As you can see, it has some faults: pock marks from dodgy riveting; sides not quite square to base, even after much filing; nose must be removed to sharpen the blade; wedge needs to project further forwards on the blade. These may be improved upon when (if) I find time to make the Mk2. This time I felt that I was going to make things worse if I made further attempts to rectify the faults.
Having spent far longer than planned making this, there was only one recipient on Christmas day.
My father seemed pleased with it, which is the main thing.
 There does not appear to be a rename option.