You are using an out of date browser. It may not display this or other websites correctly.
You should upgrade or use an alternative browser.
You should upgrade or use an alternative browser.
Post a photo of the last thing you made
- Thread starter DTR
- Start date


Help Support UKworkshop.co.uk:
This site may earn a commission from merchant affiliate
links, including eBay, Amazon, and others.
MikeG.
Established Member
Well, he certainly knew what he was doing. There's some skill in that.
Buckeye
Established Member
Sorry for your loss Ross M. Thanks for sharing the picture and story behind that piece.
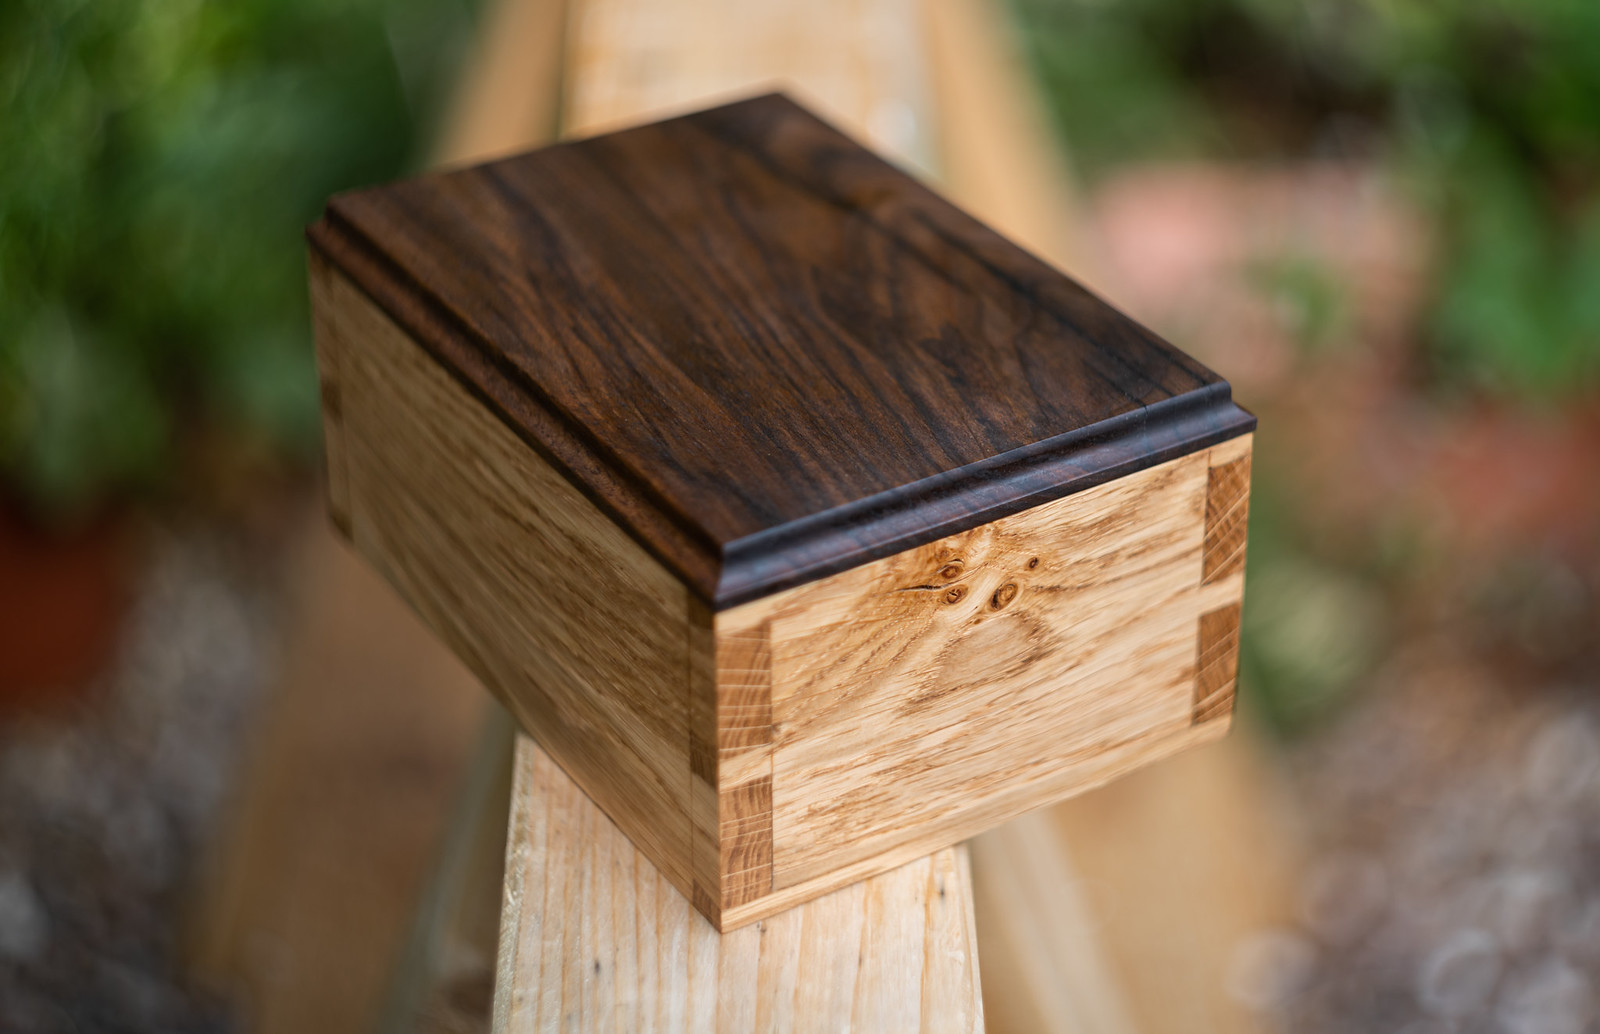
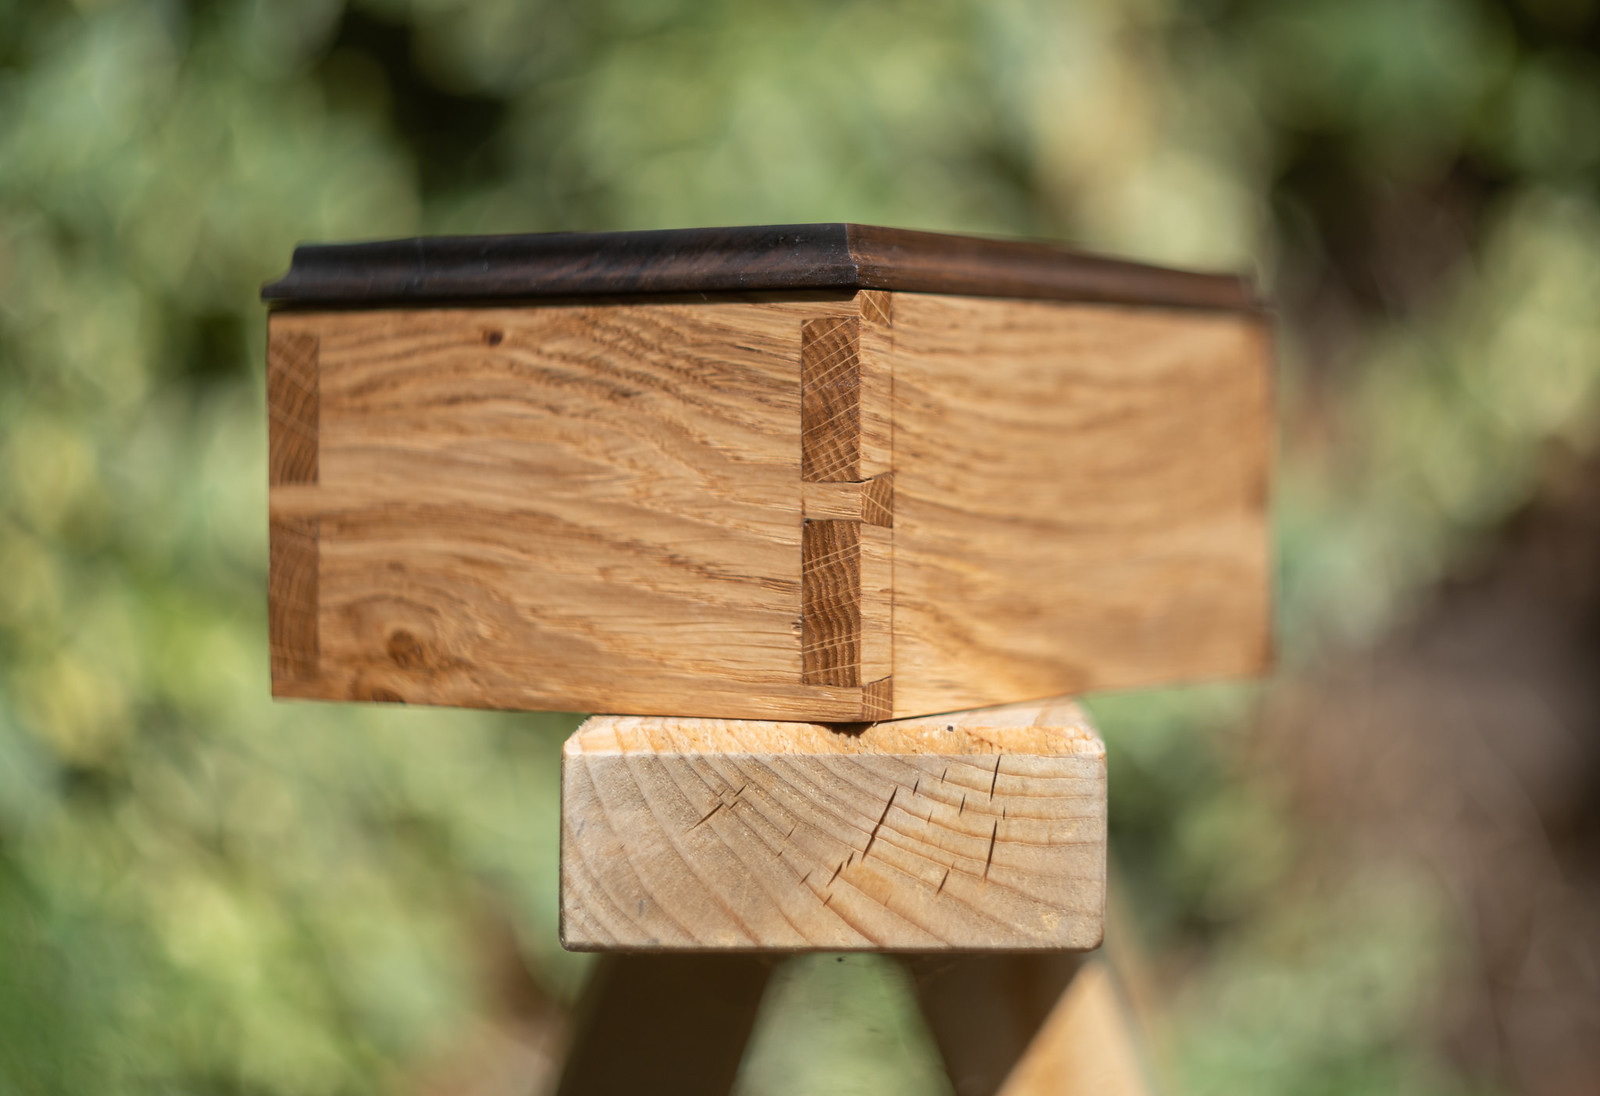
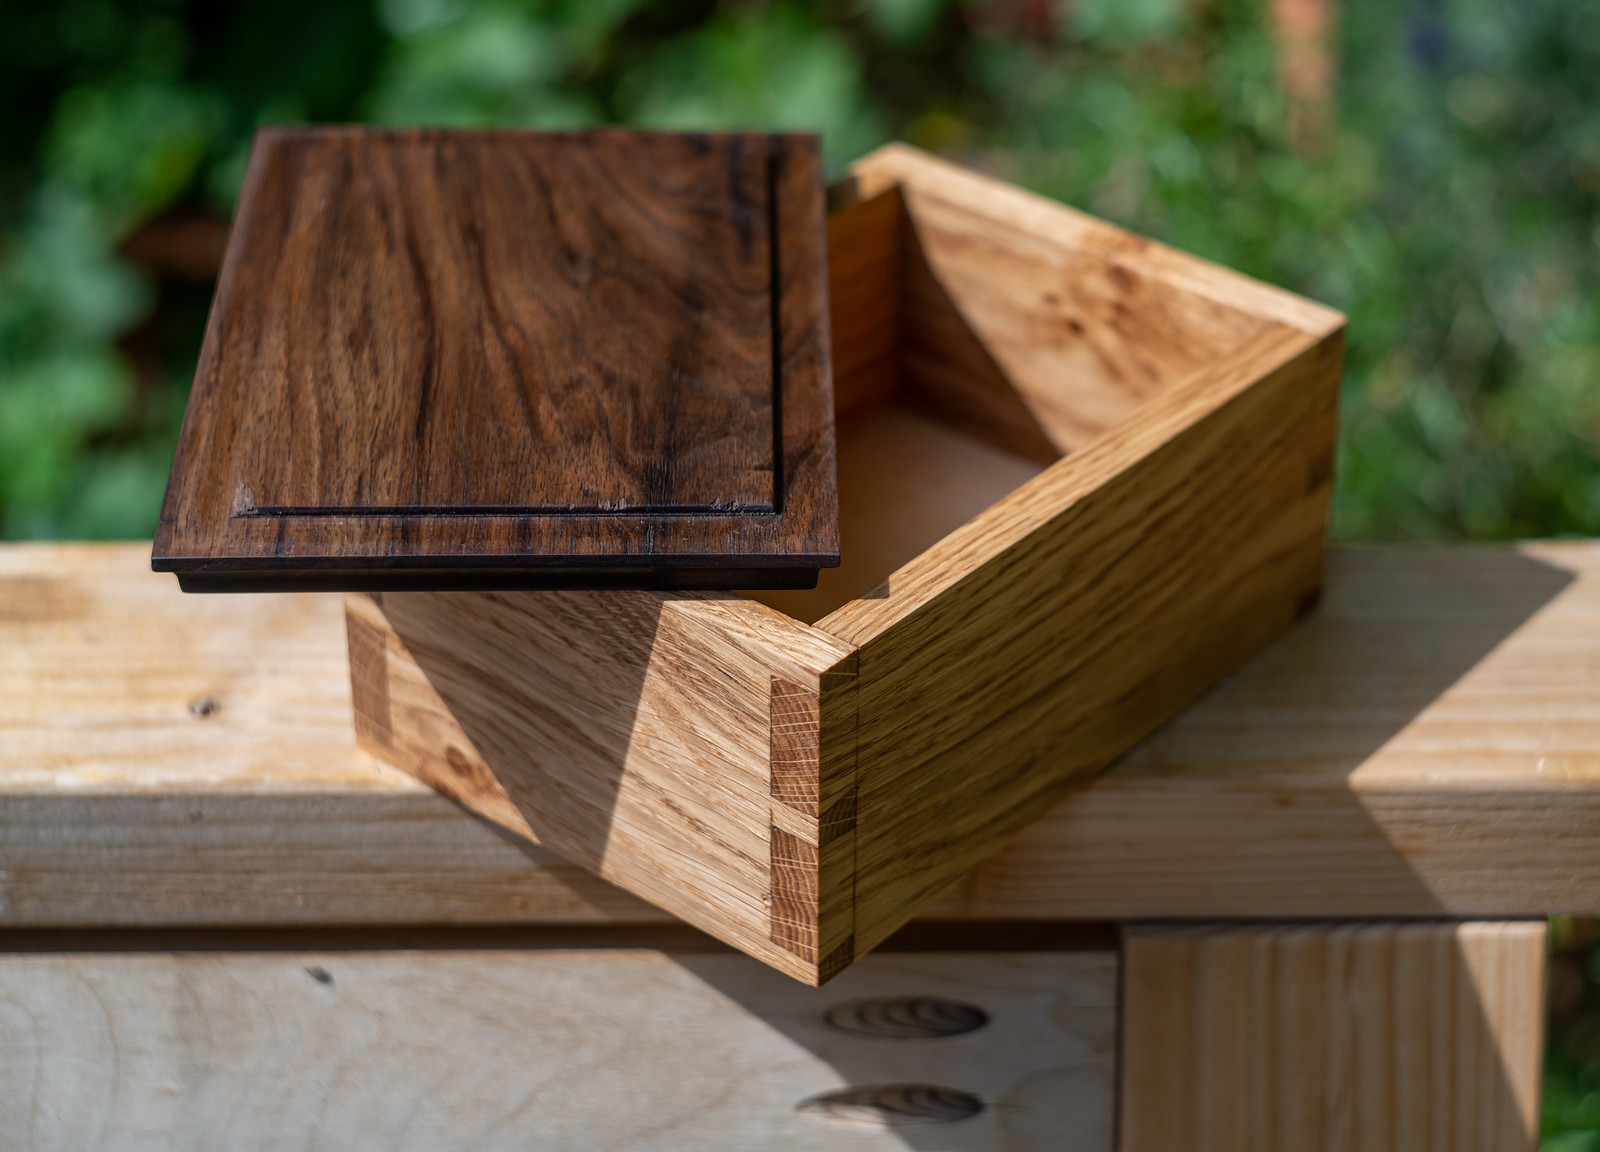
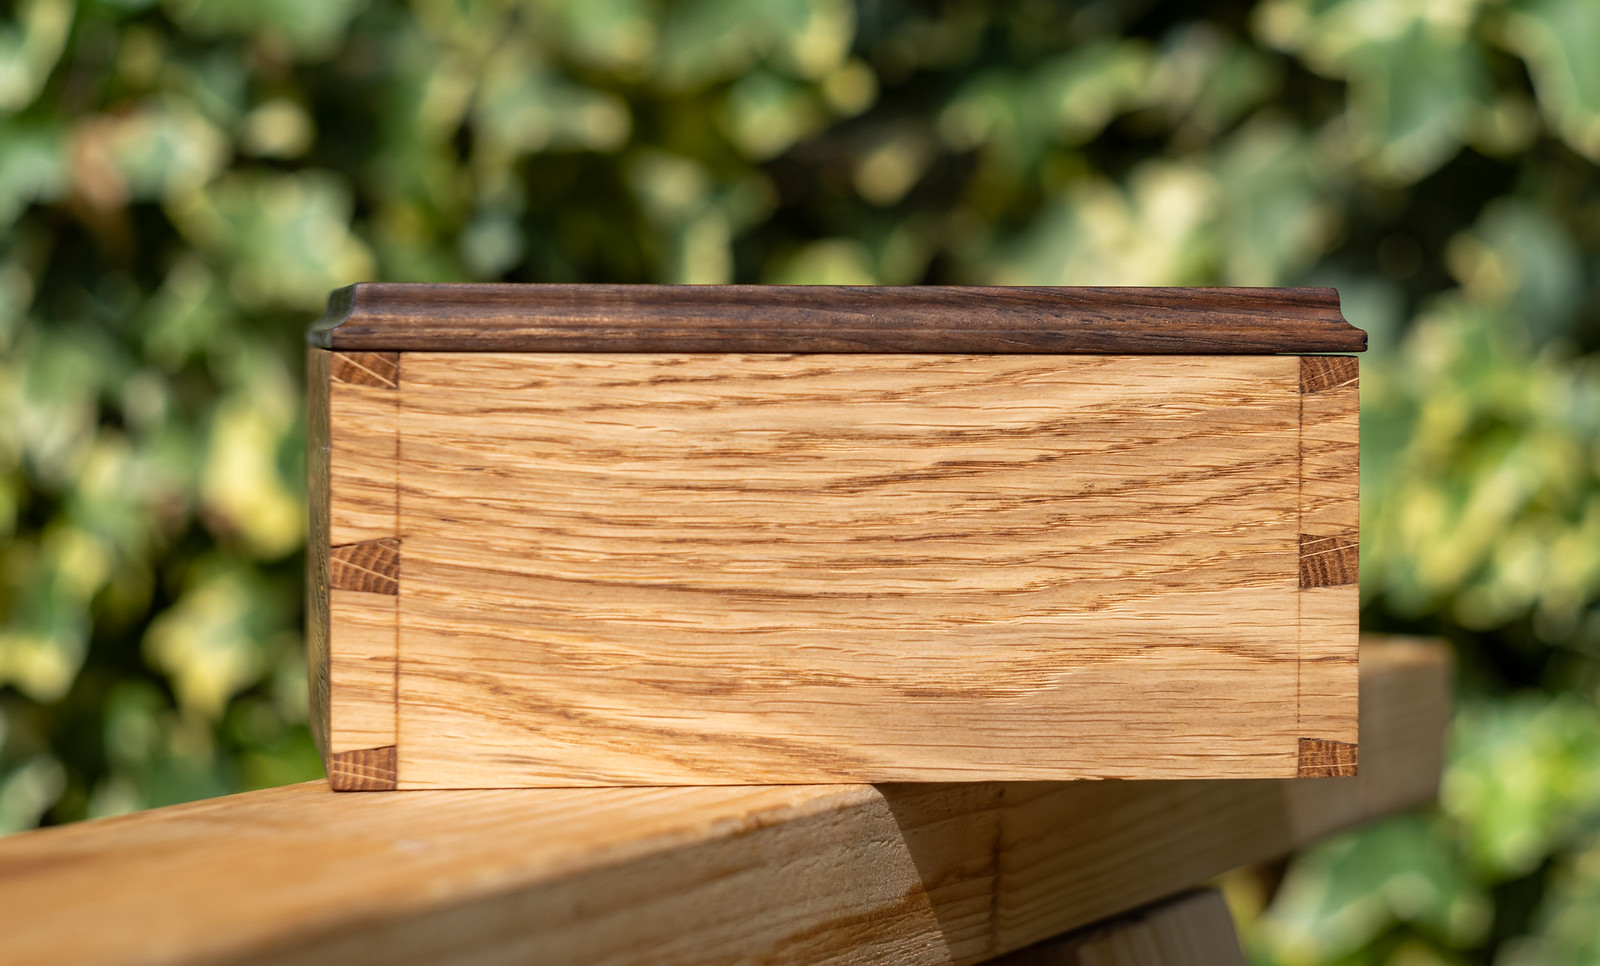
I made a small box as I really wanted to have a go at the first attempt of cutting dovetails.
Was a good learning experience with plenty of mistakes made through the process.
The original plan was to leave the back higher so I could attach the lid but forgot to include the overlap of the sizes on the measure so it ended up being too small #-o. Meanwhile, I had already planned the rest of the board to size so had to reuse that piece as one of the sides and came up with a new lid design.
For the lid, I took the opportunity to give a try at using a Stanely 45 I was gifted by a good friend to cut the bottom of the lid which worked perfectly along the grain but made a mess across the grain despite me knifing the edge.
Anyway here it is, English Oak for the sides and English walnut for the top
 DSC_1032 by Bruno Santos, on Flickr
Was a good learning experience with plenty of mistakes made through the process.
The original plan was to leave the back higher so I could attach the lid but forgot to include the overlap of the sizes on the measure so it ended up being too small #-o. Meanwhile, I had already planned the rest of the board to size so had to reuse that piece as one of the sides and came up with a new lid design.
For the lid, I took the opportunity to give a try at using a Stanely 45 I was gifted by a good friend to cut the bottom of the lid which worked perfectly along the grain but made a mess across the grain despite me knifing the edge.
Anyway here it is, English Oak for the sides and English walnut for the top
DSC_1032 by Bruno Santos, on Flickr
stuckinthemud
Established Member
Sheath took about 30 hours to carve. Apple finished with tinted Danish oil. Ojime bead took another few hours. The netsuke I carved a few years back, ojime and netsuke are carved from the same fallow deer antler. The glue line is a bit disappointing but something weird happened when I split the timber, like a tiny warp or twist as the tension came out of the wood? The thing would not clamp back together even though when I dry-trialled it everything look really snug, when it came out of the clamps ( 1 clamp per inch) there was still a tiny gap in places. I even took it apart, cleaned up the joint and tried again. I ended up splining it.


xy mosian
Established Member
That is impressive, both as a whole and as separate items. I like the Owl in the netsuke particularly, but the time and attention to detail in the cone of the sheath is very evident.
Nice work.
xy.
Nice work.
xy.

There so much good work posted on here it's hard not to end up commenting. But that is rather special. Amazingly I even know what netsuke is or are I suppose. Any photos of the blade? Always did like a knife, me.stuckinthemud":3aeixvk0 said:Sheath took about 30 hours to carve. Apple finished with tinted Danish oil. Ojime bead took another few hours. The netsuke I carved a few years back, ojime and netsuke are carved from the same fallow deer antler. The glue line is a bit disappointing but something weird happened when I split the timber, like a tiny warp or twist as the tension came out of the wood? The thing would not clamp back together even though when I dry-trialled it everything look really snug, when it came out of the clamps ( 1 clamp per inch) there was still a tiny gap in places. I even took it apart, cleaned up the joint and tried again. I ended up splining it.
stuckinthemud
Established Member
You're very kind, thank you. The blade is a bog standard Swedish carving knife I bought because I love them, I've had 3, but I've misplaced 2 of them over the years. It has a 2 inch blade and is very battered but then it is used every day.

Been a viewer for a while, but just joined UKW. I came here for advice and to learn more., hopefully much more!
Made this coaster holder last weekend.

Layers are: Mahogany (reclaimed), Maple, Wenge, Maple, Padauk, Maple, Wenge, Maple, Mahogany (reclaimed)
Added felt to the bottom and brown leather on the inside to support the coasters (not shown in this image).
Finished with de-waxed shellac and danish oil.
Made this coaster holder last weekend.
Layers are: Mahogany (reclaimed), Maple, Wenge, Maple, Padauk, Maple, Wenge, Maple, Mahogany (reclaimed)
Added felt to the bottom and brown leather on the inside to support the coasters (not shown in this image).
Finished with de-waxed shellac and danish oil.
Attachments
Fidget
Trying
I have been trying to find some furniture that I like for my refurbished conservatory but as usual I couldn't find anything, so I made this sofa/bench. My own design although I'm sure I have probably been influenced by outside sources. Oak that I bought off Gumtree for about £30 finished with Osmo. Domino joinery, I'm a little scared of M&Ts, I just know that I would **** it up somehow. I've strengthened the joints on the long rails with some huge wood connector screws.
I'm quite pleased how it's turned out. Next week A whole load of upholstery stuff and a friend with a sewing machine are turning up and it will get full length box cushions
I'm quite pleased how it's turned out. Next week A whole load of upholstery stuff and a friend with a sewing machine are turning up and it will get full length box cushions
Attachments

Dr Al
Established Member
Today I made a simple jig to allow me to run a router over the surface of a bit of wood as a pseudo planer/thicknesser. It allows the router to travel anywhere on the surface at a fairly consistent height, so if the wood is shimmed stable (held down with double-sided tape) one side can be machined flat and then it can be turned over and machined on the other side.
Made it out of a length of 40 × 40 × 4 mm aluminium extrusion I had lying around, along with some UHMW tape. It currently runs on some t-slot extrusion that came out of a skip a while ago but I haven't got enough left for two good length runners (I had to borrow the long length from my welding arm support).
I might actually have to buy some material to finish it off :shock:


I did a quick proof-of-concept test with a bit of walnut that was very much not flat and it worked very well. It leaves light track marks in the surface of the wood, but a few seconds with a random orbital sander (or, I imagine a plane, which would probably leave a nicer finish) gets rid of them.
Made it out of a length of 40 × 40 × 4 mm aluminium extrusion I had lying around, along with some UHMW tape. It currently runs on some t-slot extrusion that came out of a skip a while ago but I haven't got enough left for two good length runners (I had to borrow the long length from my welding arm support).
I might actually have to buy some material to finish it off :shock:
I did a quick proof-of-concept test with a bit of walnut that was very much not flat and it worked very well. It leaves light track marks in the surface of the wood, but a few seconds with a random orbital sander (or, I imagine a plane, which would probably leave a nicer finish) gets rid of them.
Attachments
Like your style Dr Al. I use a wooden jig thats sits on steel box section that I clamp to the top sides of my bench. It's not perfect but it's fairly accurate and cheap. I have 2 long lengths left over from making cramps with sash heads that I kept back for making doors (at some point, hopefully) that I cramp down as runners, they are long enough to be cramped at the ends of he bench. It's height adjustment that I find the headache. I use spacers but a properly adjustable solution using wingnut type fixings would be better and not that complex. I think my set up is geared towards slight larger bits of wood though.
Have you seen these type of dedicated cutters? Just in case it helps...
https://www.wealdentool.com/acatalog/Surface-Trim.html
https://www.wealdentool.com/acatalog/On ... g_250.html
I was also just gifted a small p/t but I haven't got around to trying it yet. All my woodwork lately being of the mdf architrave/door restoration/hanging/repairing etc diy variety.
Wooo. It's exciting stuff now.
Have you seen these type of dedicated cutters? Just in case it helps...
https://www.wealdentool.com/acatalog/Surface-Trim.html
https://www.wealdentool.com/acatalog/On ... g_250.html
I was also just gifted a small p/t but I haven't got around to trying it yet.
All my woodwork lately being of the mdf architrave/door restoration/hanging/repairing etc diy variety. Wooo. It's exciting stuff now.
Dr Al
Established Member
Bm101":2l4qjn2c said:Have you seen these type of dedicated cutters? Just in case it helps...
https://www.wealdentool.com/acatalog/Surface-Trim.html
https://www.wealdentool.com/acatalog/On ... g_250.html
I hadn't seen those, so thanks for sharing them. Only one will fit my jig at the moment (I made it for my smaller router, which will only take 1/4" or 8mm cutters), but it will hopefully improve the finish, so probably worthwhile.


Trainee neophyte
Established Member
If I was Welsh I would say, "That's tidy, that is". Because it is.Rob_Mc":1d44xq0o said:A rack to hold my parallel jaw clamps.
... more importantly it keeps my work area tidy so I don't keep tripping over them. Simple construction but effective and space efficient. Made from free material too ... an old window sill board the builders kindly left behind in my loft.
Blackswanwood
Still Learning


Similar threads
- Replies
- 605
- Views
- 46K
- Replies
- 44
- Views
- 3K