DBT85s Workshop - Moved in and now time to fit it out

UKworkshop.co.uk

Help Support UKworkshop.co.uk:

This site may earn a commission from merchant affiliate links, including eBay, Amazon, and others.
PAC1":zzi5fkgw said:
If you are going to use the roof space for storing a substantial amount of timber you should leave two or three middle ties/joists out as otherwise you will not be able to get timber up there.......

:lol: :lol: You might want to have a read back through the thread. That's precisely what is happening.
 
The storage area of the end done so far is in the region of 2.5m deep, 2.7m wide and about 0.8m tall. The other end is about 1.5m deep.

I've no idea how much weight I'll end up putting up there, but with this I should also be able to hang stuff between the ties (right mike?). So I could build some storage that goes up into the gap between the joists.

Incidentally. The weather is still not great here today, but its not raining quite as hard. I'm trying to work out a plan of action for the next couple of days before the weather gets very good again (I think its hitting 28 on Wednesday!).

I have materials on site for OSB lining, noggins, breathable membrane, insulation and battens. What I don't have enough of is material to close off the eaves, I don't think. The weather basically picks up from tomorrow so maybe I'll do noggins and the last 3 ties today and once the worst of the weather ends tomorrow I can OSB the walls. Not sure how well they'll cope with rain.

Incidentally, Mike, the bulk of the insulation I have here is 60mm thick. Is 120mm in a 148mm rafter enough of an air gap above?

PAC1":5779i9n8 said:
If you are going to use the roof space for storing a substantial amount of timber you should leave two or three middle ties/joists out as otherwise you will not be able to get timber up there or back down when there is a stack of timber. The piece of timber has to approach horizontal before it hits the roof and in order to approach horizontal there needs to be sufficient space allow the other end to come up. You can get a length shorter than the length of your joist up and swing it around but if there is already timber and other stuff in the roof space you cannot.
You then should (probably) fix the unrestrained rafters with metal ties to the wall plate
I have a 3m section with no ties in for that very reason. Though I don't know yet what I'll end up putting up there.

Mike hasn't mentioned any extra bracing on the rafters with no ties, but I can add some if required.
 
MikeG.":1pzib8lr said:
PAC1":1pzib8lr said:
If you are going to use the roof space for storing a substantial amount of timber you should leave two or three middle ties/joists out as otherwise you will not be able to get timber up there.......

:lol: :lol: You might want to have a read back through the thread. That's precisely what is happening.

Better it is said twice than not at all :lol: :lol: :lol:
 
DBT85":1qib3636 said:
........Incidentally, Mike, the bulk of the insulation I have here is 60mm thick. Is 120mm in a 148mm rafter enough of an air gap above?

It's more about the drape of the membrane than an air gap. The necessary air gap is above the membrane, and below the tiles. So long as the membrane drapes OK (ie it hangs down between rafters), then that might just be OK.

Mike hasn't mentioned any extra bracing on the rafters with no ties, but I can add some if required.

There's no need for anything other than what we've designed already.

Are you lining the underside of the rafters with OSB?
 
Ah ok, 30mm should be enough to drape in there I guess? I can always have a look see.

Yes, the plan is OSB on the underside of the rafters. I can't wait to cut the slots for the ties. Yay.
 
As I said, crappy weather again today though it did brighten up eventually.

All I did today was get the ridge supports down, cut the last 3 rafter ties and got them fitted and the M16 bolts in place. Well that and swept the Atlantic out of my workshop.

50023025508_1f72014af9_c.jpg


The weather is improving basically from now so I'd like to get it water proof by next weekend if I can.

I reckon I can use offcuts of 50x100 and the 25x100 I ordered for use on the corners of the cladding to get the eaves closed. That will mean I can get it all covered in membrane at least.

Early start tomorrow, noggins cut and in and then maybe start on the OSB. "That'll be fun" he said.

Since it was rubbish today I did a Maskery and baked some chocolate chocolate chocolate cookies.
50023569216_9c2b159c26_c.jpg
 
Got all my eaves fillers cut and in place. Just got to take them all out to treat the ends.

I'm thinking of it sticking out 45mm from the top plate. 25mm for the batten and then the thin edge of this FE is 10mm. There would be 10mm hanging over the top. Sound reasonable?
 
DBT85":20bldrnd said:
Got all my eaves fillers cut and in place. Just got to take them all out to treat the ends.

I'm thinking of it sticking out 45mm from the top plate. 25mm for the batten and then the thin edge of this FE is 10mm. There would be 10mm hanging over the top. Sound reasonable?
45mm overhang from plate is what I made mine, 25 batten and 8mm Hardie plank. so 12 mm over.
 
Great, thanks Phil.

Even if its wrong at least we are wrong together :lol:

Done for today now. Doesn;t look like much but it felt productive.

Used all of the offcuts for the studs to make the noggins first. Naturally the gaps are not all perfect so I had a quick measure and made them in batches that were close enough and then went around and trimmed those that needed it, treated the ends and got them nailed in.


Then it was time to tackle the closing of the eaves. I still had some 50x100 left over but sadly the offcuts from my noggins were about 40mm short, so I had to use what was left of the stud offcuts. I set up a stop block and cut everything to 570mm, slightly larger than any gap between rafters. I literally ran out with the last one cut. I now probably have 12m of 530mm offcuts.

That solved one angle, the rise was dealt with by using the 25x100 that I'd ordered for the cladding corners, so more will be needed later.

50026831487_1a0c7f29b8_c.jpg


With everything cut I started to screw the first one together and remembered I had a nail gun. That was much easier.

50026028918_26111234ae_c.jpg


All nailed together it was time to trim each one to size and use the Mk3 Persuader to encourage them to sit snugly without putting undue pressure on the rafters. Each one was fitted with the previous ones still in place to ensure it will still fit when actually nailed in place.

With that done they could all be taken out and treated. Jim has come through with an electric planer as I don't have one so I can do that before getting the roof membrane on. I see me digging a french drain at his house next month in payment for his assistance overall.

50026569966_c6e4239348_c.jpg


Looks like so little but it was a satisfying day in the end.

Tomorrow it's time to get those fitted then get my OSB cut and the walls lined. I can then bring up the estimated 75 half sheets of insulation I need for the walls and roof from the farmyard. Bought at a farm auction a year ago for £130 for about 120 600x2400mm sheets of 60mm? That'll do nicely.
 
DBT85":2tww56ia said:
Got all my eaves fillers cut and in place. Just got to take them all out to treat the ends.

I'm thinking of it sticking out 45mm from the top plate. 25mm for the batten and then the thin edge of this FE is 10mm. There would be 10mm hanging over the top. Sound reasonable?

That assumes that the top board arrives at the eaves as a whole board. I'd leave a little more, personally.
 
MikeG.":1wnpjjez said:
DBT85":1wnpjjez said:
Got all my eaves fillers cut and in place. Just got to take them all out to treat the ends.

I'm thinking of it sticking out 45mm from the top plate. 25mm for the batten and then the thin edge of this FE is 10mm. There would be 10mm hanging over the top. Sound reasonable?

That assumes that the top board arrives at the eaves as a whole board. I'd leave a little more, personally.
My boards were 8mm flat, so was certain the top was 8mm, not sure the size of the FB here.
 
Unproductive today, all I managed was to fit those rafter fillers and plane them down.

Tomorrow, tomorrow the OSB will go up.
 
DBT85":28ulwujk said:
Unproductive today, all I managed was to fit those rafter fillers and plane them down.

Tomorrow, tomorrow the OSB will go up.
That was slightly more productive than me :(
 
Thanks for that Phil. Appreciated.

Something approaching work was done today, though a further 2 hours were lost as I needed to get some more cut end goop. Seems to be like rocking horse teeth.

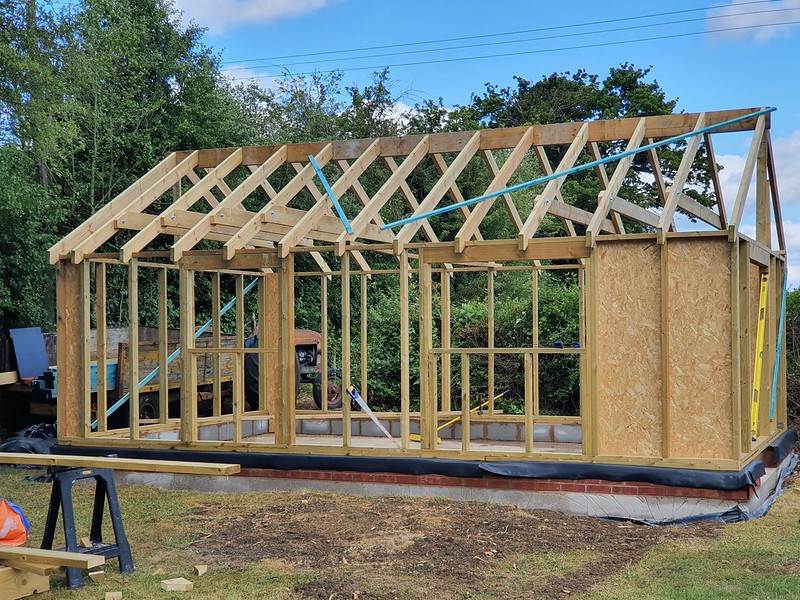
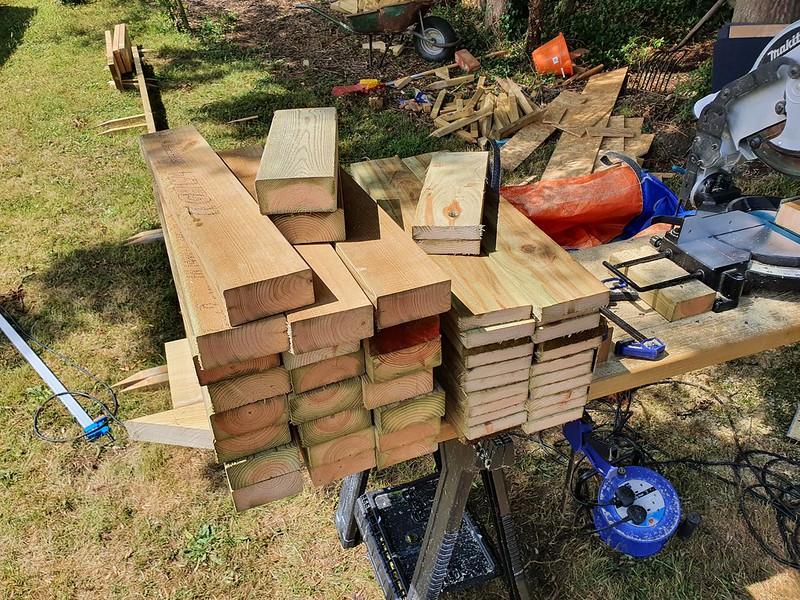
Despite wanting to crack on with the boarding I knew I'd need the gable studs (ladder?) done, so I set about that. The first issue being I have no bits of 50x100 on hand that are longer than 530mm. A shame as I have 40 odd of those. That size would at least serve for the 4 smallest studs, so I used some up to get those done to hone my plan. If I got something wrong I had lots of offcuts to redo it on.

With the 4 small ones complete I could resaw the 50x150 offcuts I had kicking around down to 50x100. The Evolution table saw dealt with that easily enough and then I could offer each up to mark it accordingly, carefully noting which side needing chopping out and numbering each one so I knew where it needed to go when I was done. Rather than chopping and changing everything around I did all of the ones where the right side needed chopping out, then all the ones where the left side needed chopping out.

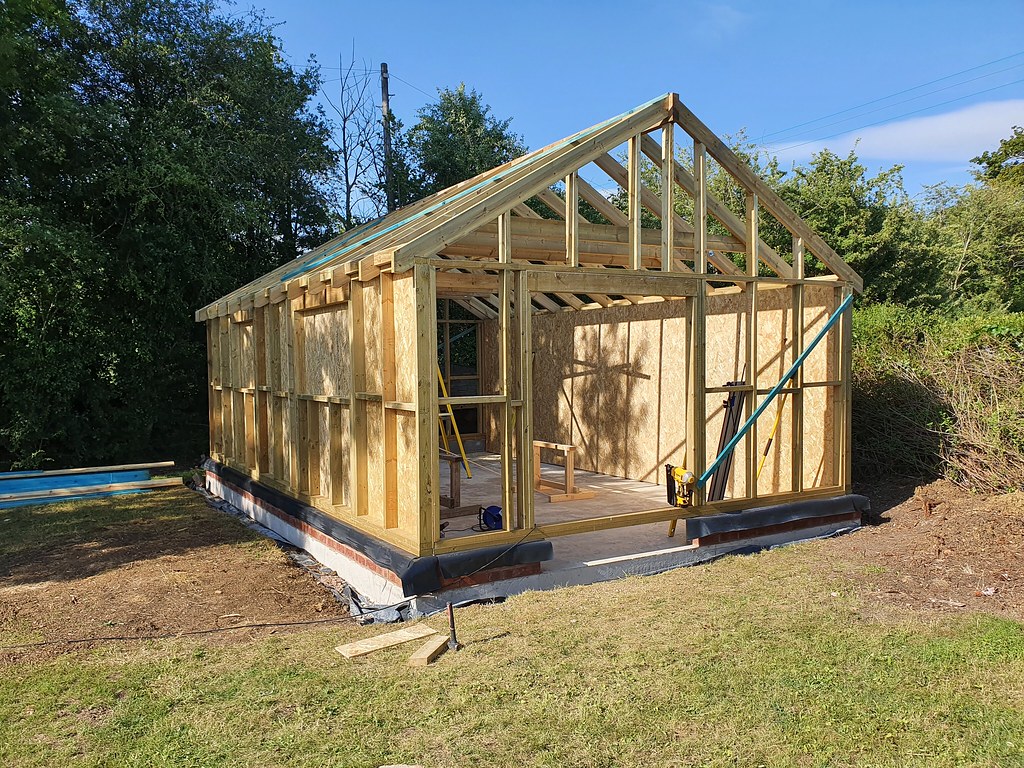
Gable studs done and rafter fillers trimmed
50033613478_aa1a9e7b00_b.jpg


Naturally it was just as I was treating these ends that I ran out of the cut end treatment.

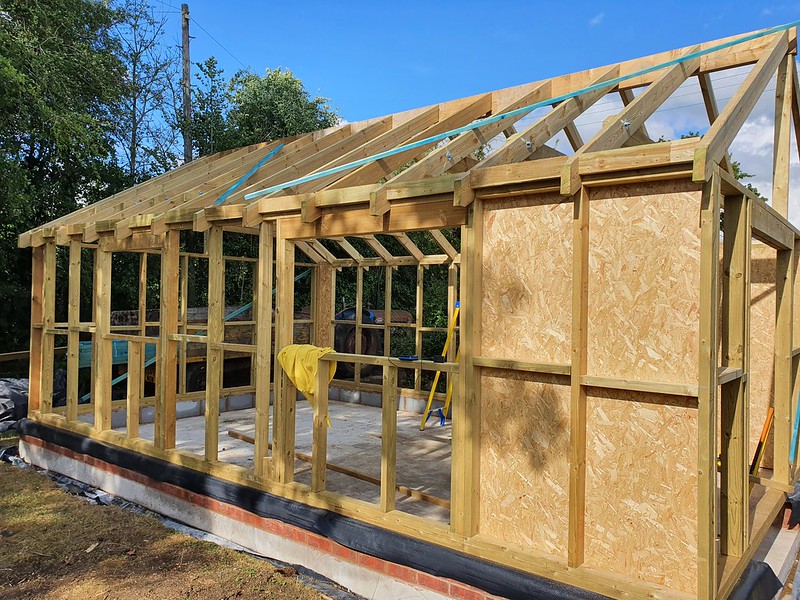
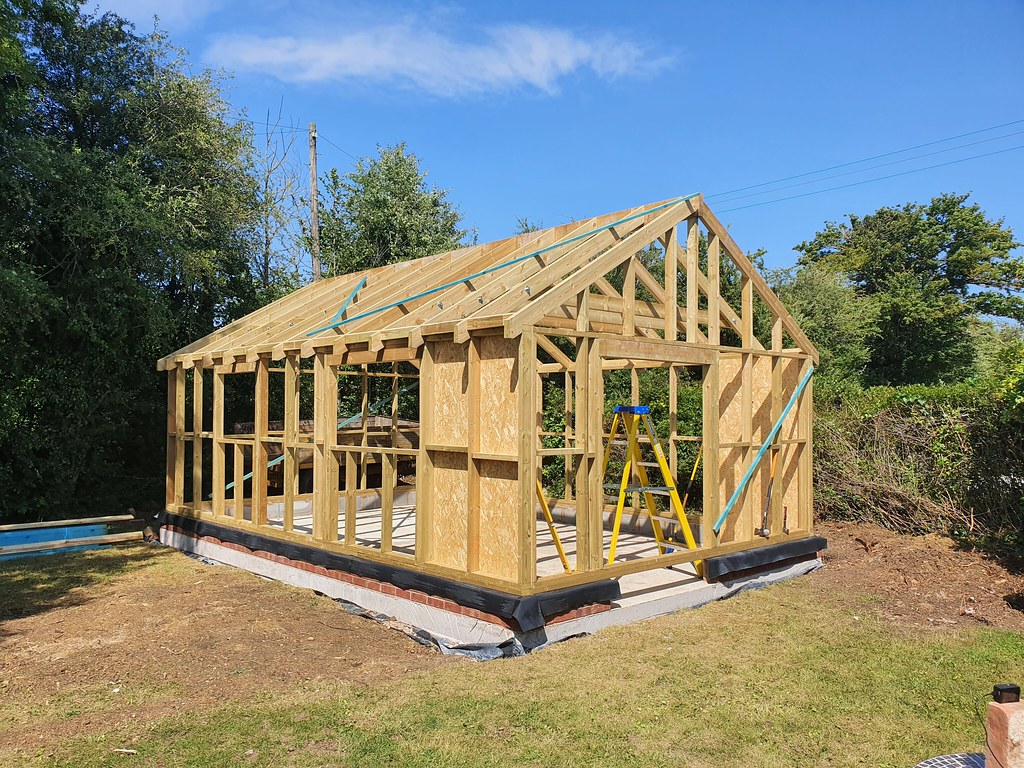
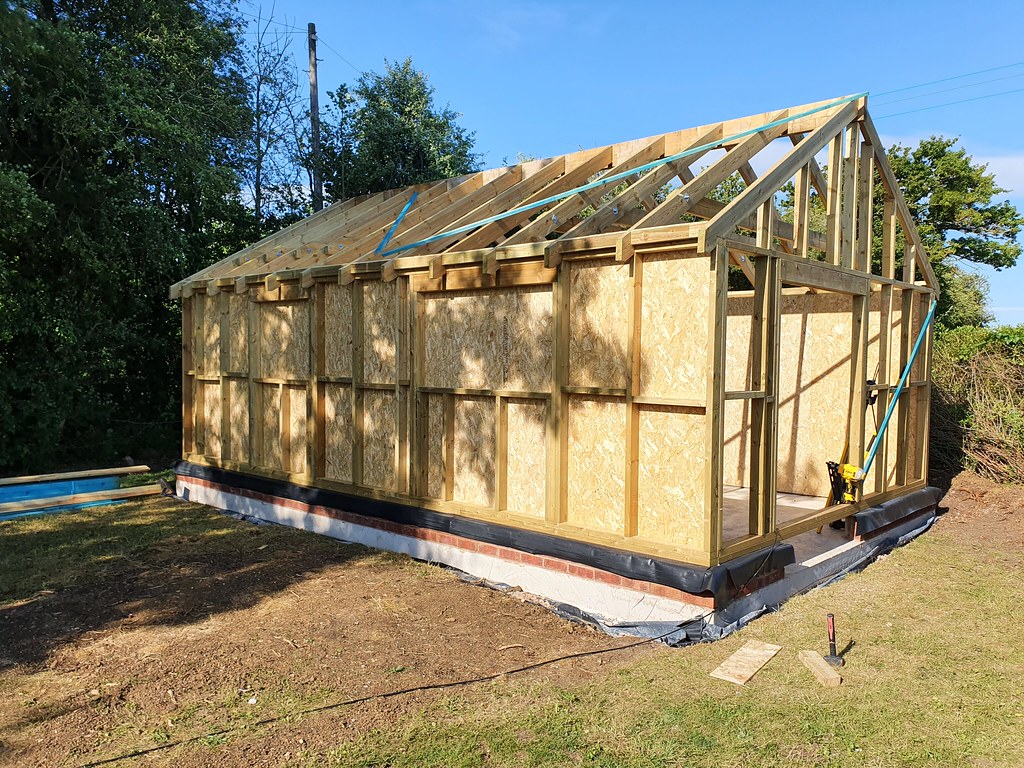
Anyway, with those all done and fitted I could finally start getting some OSB up. These were still out on the driveway where they were delivered so for the first time I had to actually lug materials round to the workshop. I wanted to get the long side walls done first as those were the easy ones. 4 and a half sheets each side.

First up I trimmed 4 all at once with the tracksaw but I didn't bother doing it again as it was too much of a faff lining all 4 up to be cut the same. The sheets are cut to be about 25mm shy of the floor as I'll run some kind of skirting around to finish it off, and there will be a floating floor anyway. It wasn't long before I'd got my method down and I had both sides sorted. I can already see and feel a difference between the new sheets and the ones that have been up a few days and been rained on. Needs must.

It would be nice if the nail gun beeped at you when it knew it only had x nails left. It knows its running short as it won't fire if its only got 3 or 4 left, so just beep at me a bit before so that I've not got a sheet held up ready to nail only for it to not fire and then I notice I'm out. I was going through those 50mm nails quite quickly while putting the sheets up!

50034152121_70a9524065_b.jpg


50034151771_f5ac85be14_b.jpg


50033612628_42c52d6c5f_b.jpg


Tomorrow I'll have to run a little timber into the gables for the diagonal tops of sheets to nail to. Then the fun of boarding those out and then the underside of the rafters! Yay.

The video for the framing is nearly done so hopefully it won't be too long. I know you're all on the edge of your seat.
 
Those "little" jobs take ages. They're so important, too.

This is all looking very good. You must have a good sense of the space now, having been through the "it's waaaaay too small" and "wow, it's bloody huge" stages. And I'll bet you're damn pleased you've got a nail gun.
 
Oh at no point has there been a "its too small" feeling. It started out as "its ducking huge" and as the bricks went in and then the walls it felt smaller, but still a great size. It feels so airy even with those side walls lined. Fine, its an open air workshop at present, but its just going to be so nice to work in.

The nailer worked a lot today so yes, well worth it. Also handy as you can secure things one handed while your other hand, foot, calf and knee hold things up!

Made me laugh earlier when I started watching a video of an American talking about their "tiny" workshop and it was at least this big. They have no idea.
 
I now have 12 of the framed panels that SheptonPhil has on their way (an offer from the seller for 12 for £256).

The bigger question now is how am I going to mount them. I don't have a flat ceiling like Phil and obviously I have the vaulted section.

Mike, how did you illuminate yours as it has a similar profile inside?
 
I started with flourescent tubes, but replaced those over my bench with 3 600x600 LED panels. I just rebated some scrap to make a frame top and bottom, and slid the panels in. Two on the skilling (sloped ceiling), and one on the flat (underside of the joists).
 
DBT85":2t14peu7 said:
I now have 12 of the framed panels that SheptonPhil has on their way (an offer from the seller for 12 for £256).

The bigger question now is how am I going to mount them. I don't have a flat ceiling like Phil and obviously I have the vaulted section.

Mike, how did you illuminate yours as it has a similar profile inside?
i briefly looked at the site for those light panels and i seem to recall they did a hanging kit, if they didnt some one else might or you could make a hanging system from ordinary chain, looking at the pics of the panels there is a nice tall side on the panel to fix chain to.
toolstation do 10m of chain for £7.54 https://www.toolstation.com/bright-steel-chain/p79827
just checked the site again and it is listed as suspension kit (expensive for what it is though)

https://www.ebay.co.uk/itm/LED-Flat-Pan ... 2749.l2649
 
Back
Top