Wood for bandsaw box

UKworkshop.co.uk

Help Support UKworkshop.co.uk:

This site may earn a commission from merchant affiliate links, including eBay, Amazon, and others.
Nope. #-o
Start with your long sander front down touching the wood, with the back right up high. Push forwards, at the same time raising the front and lowering the rear as you cross the wood.
Rock the sander forwards and back while moving it from front low to front high.
 
Update time.

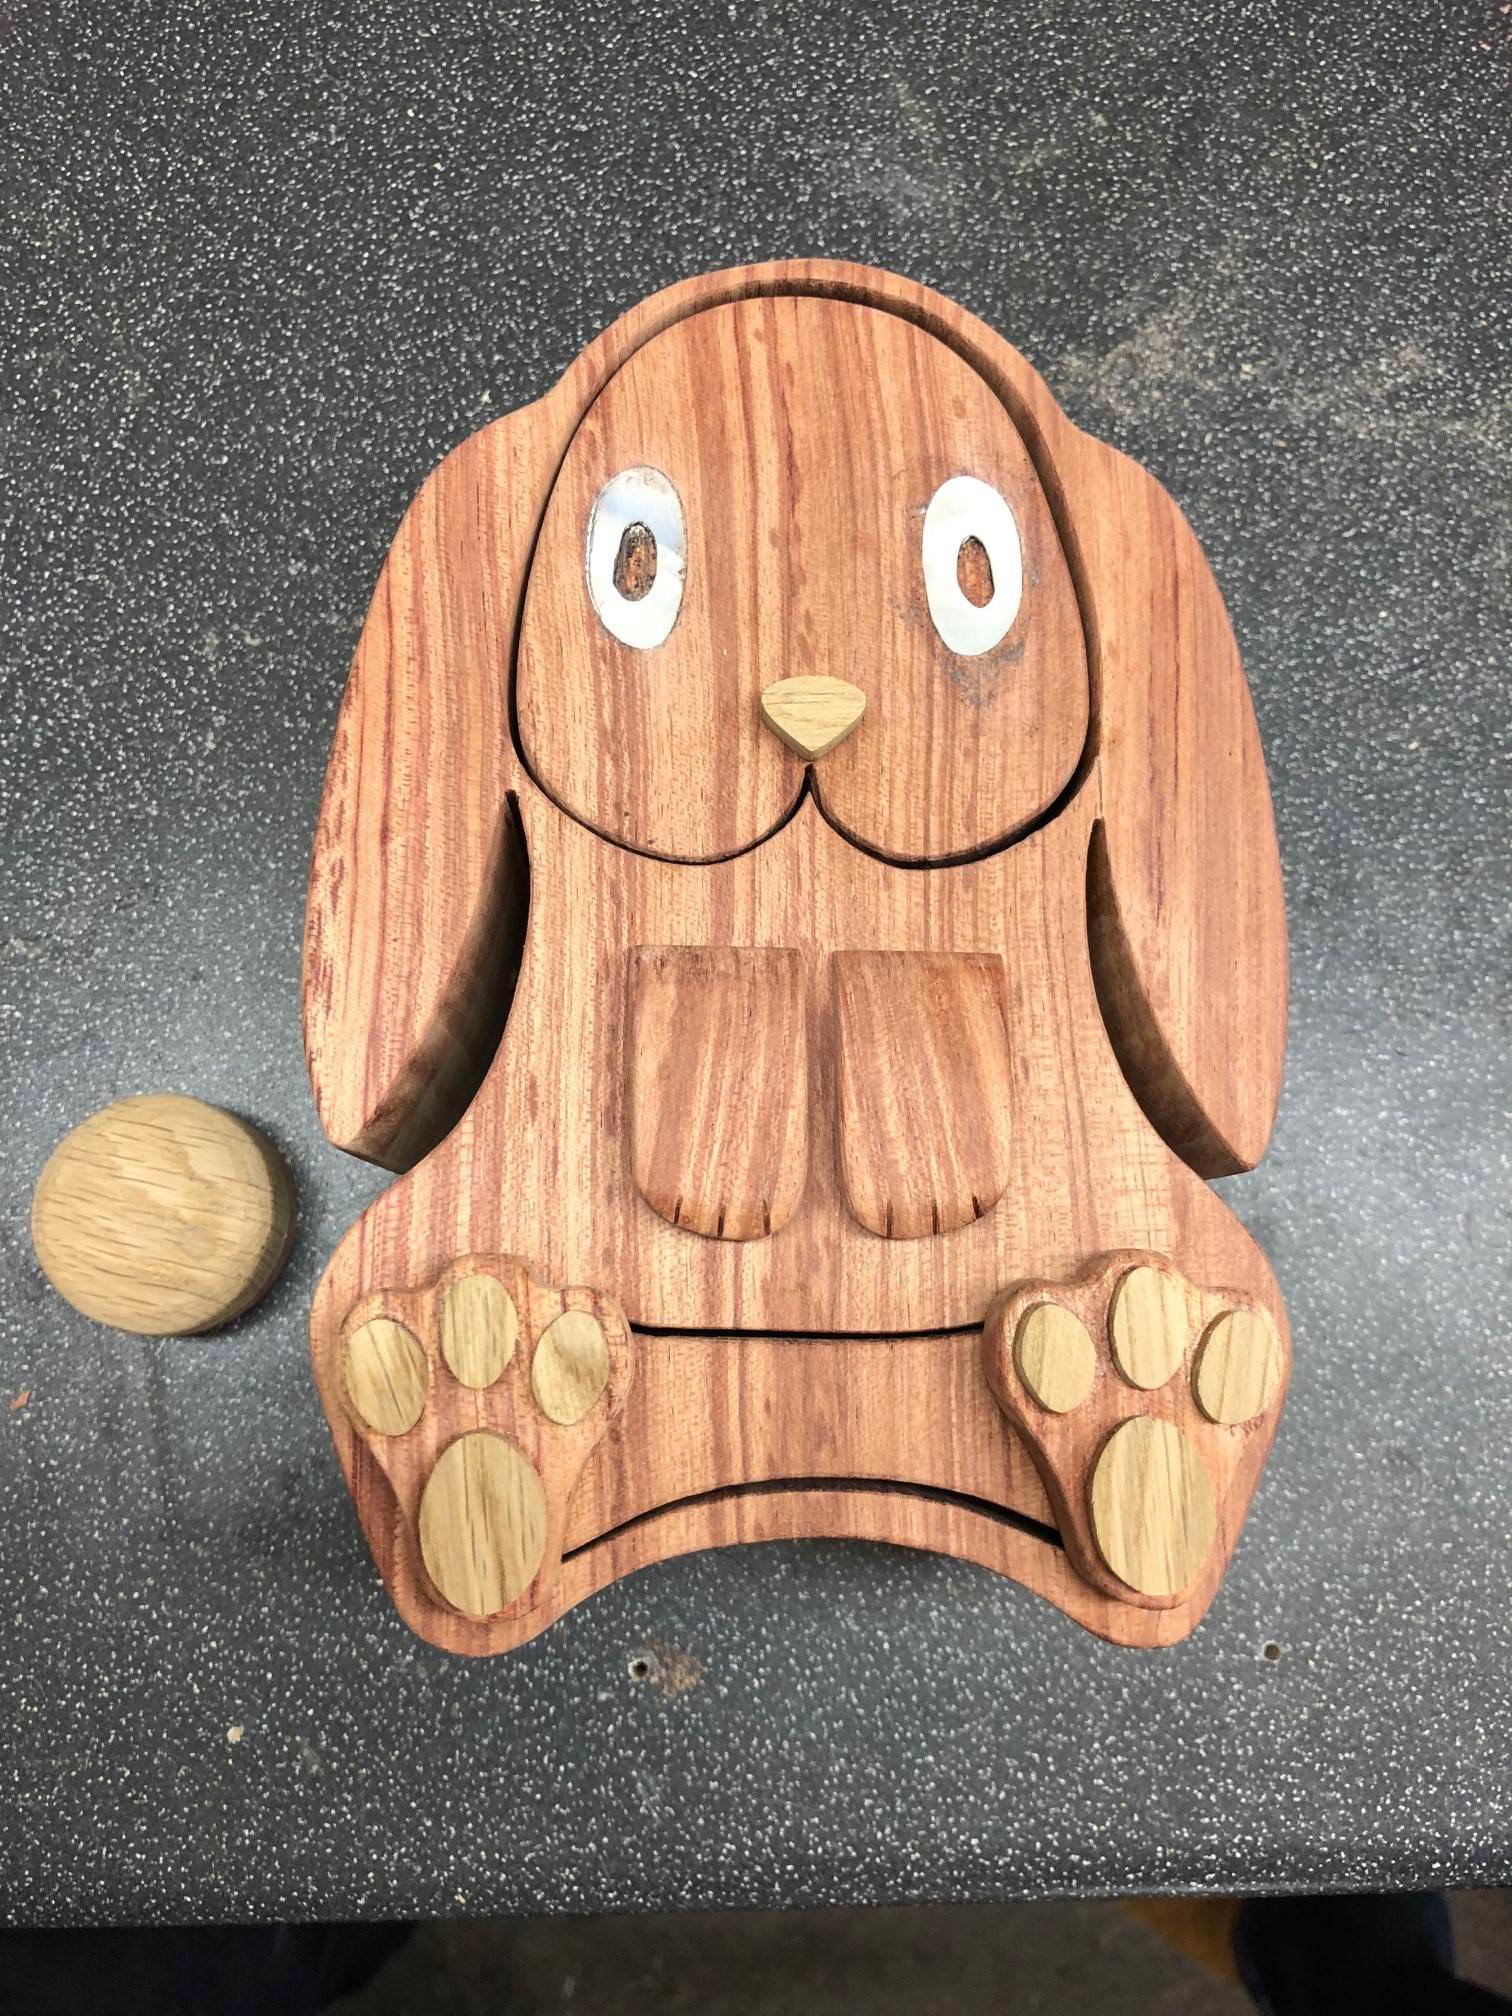
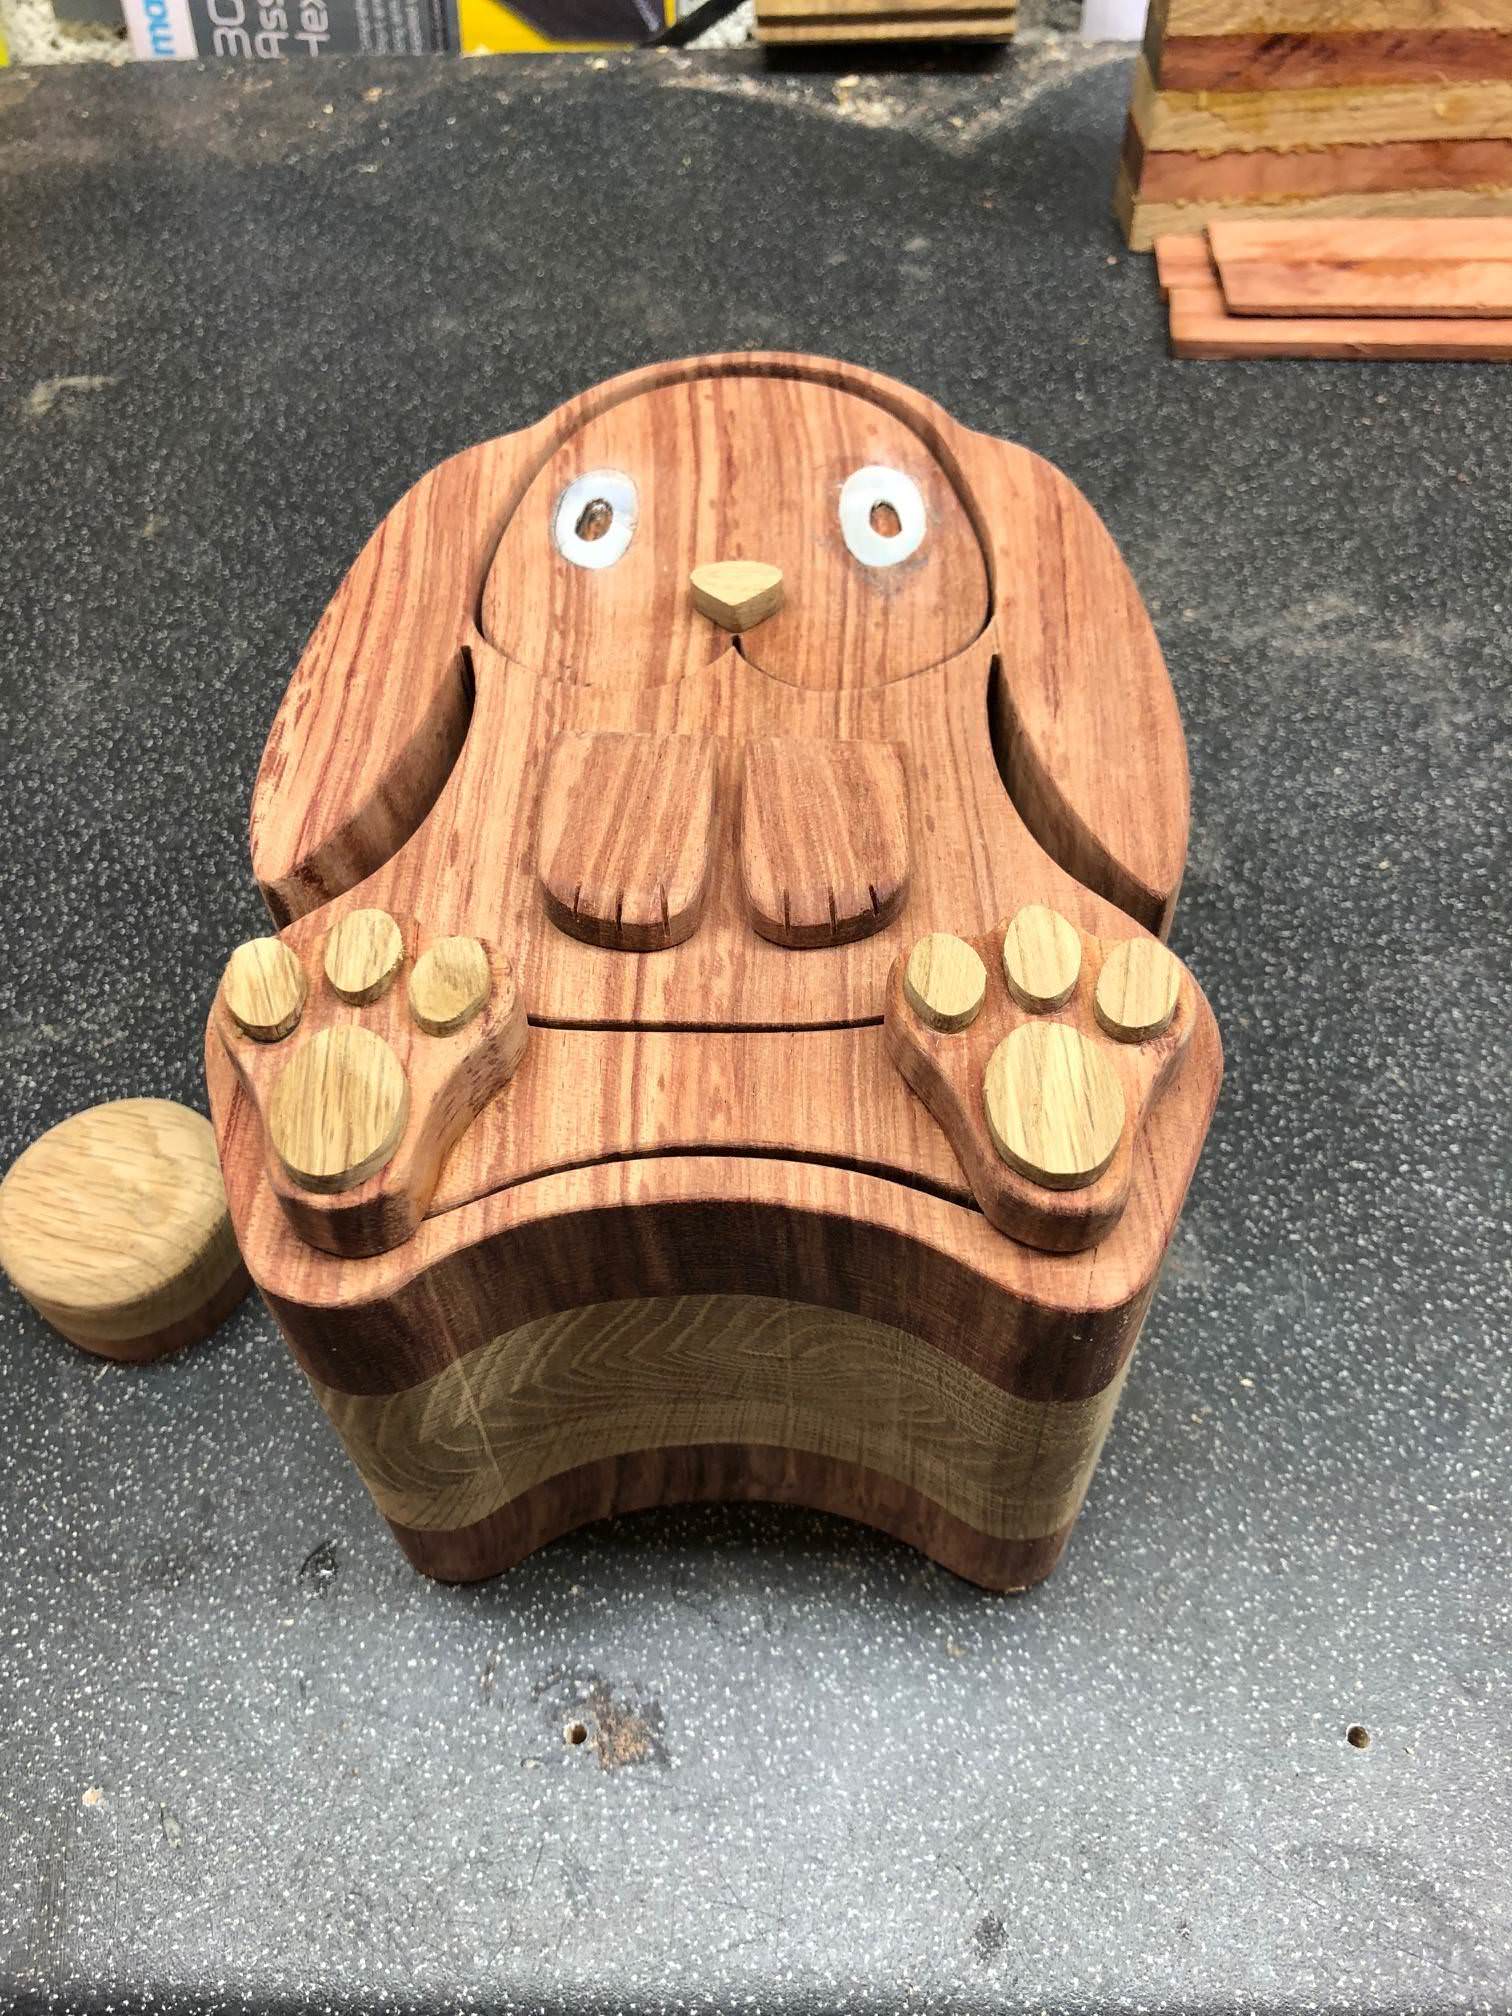
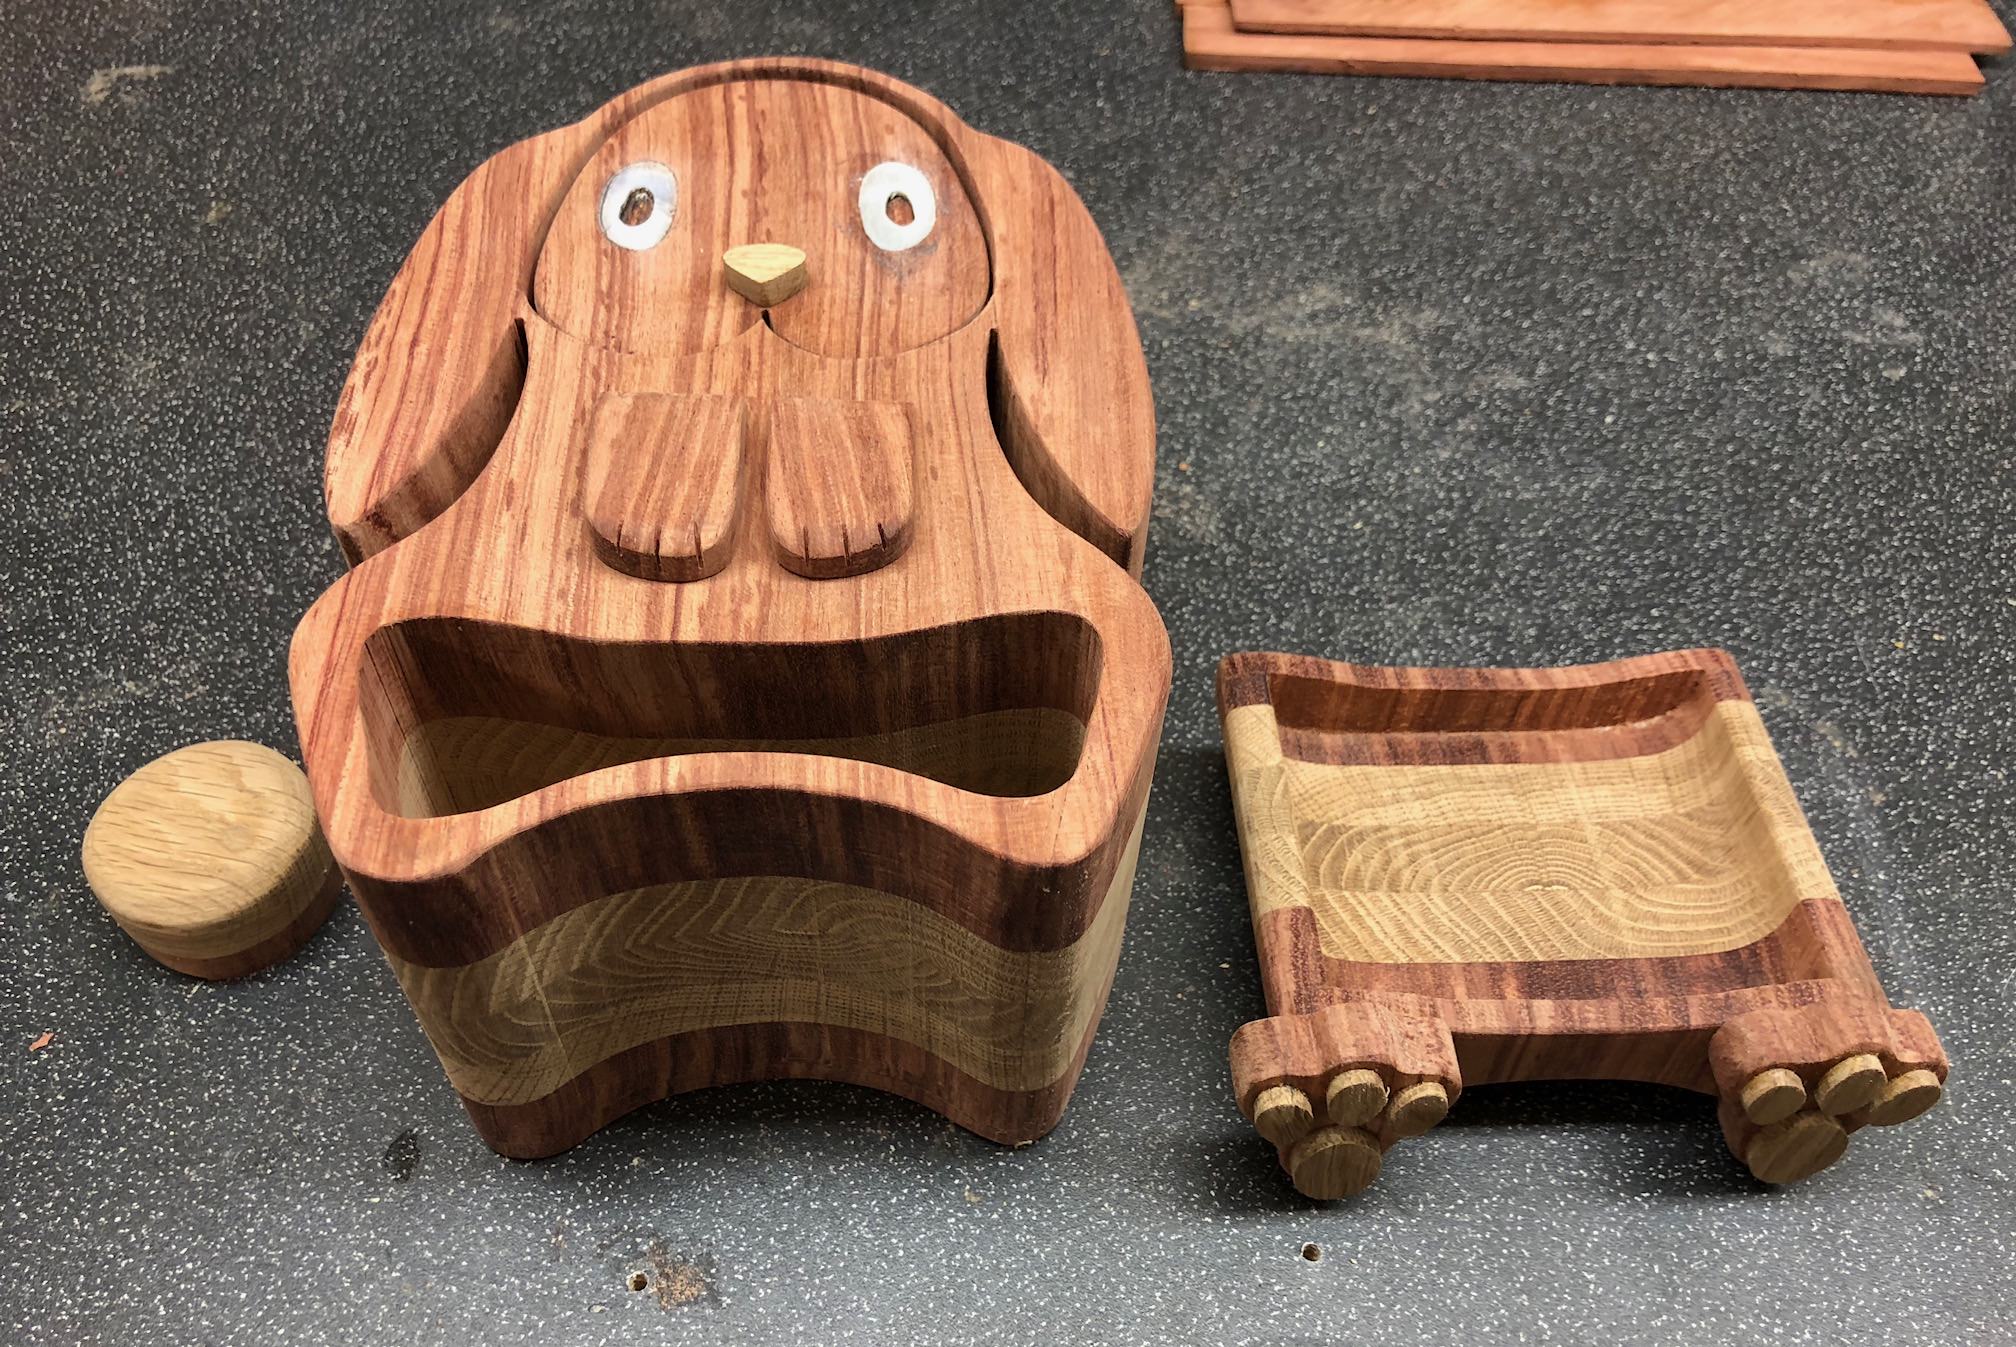
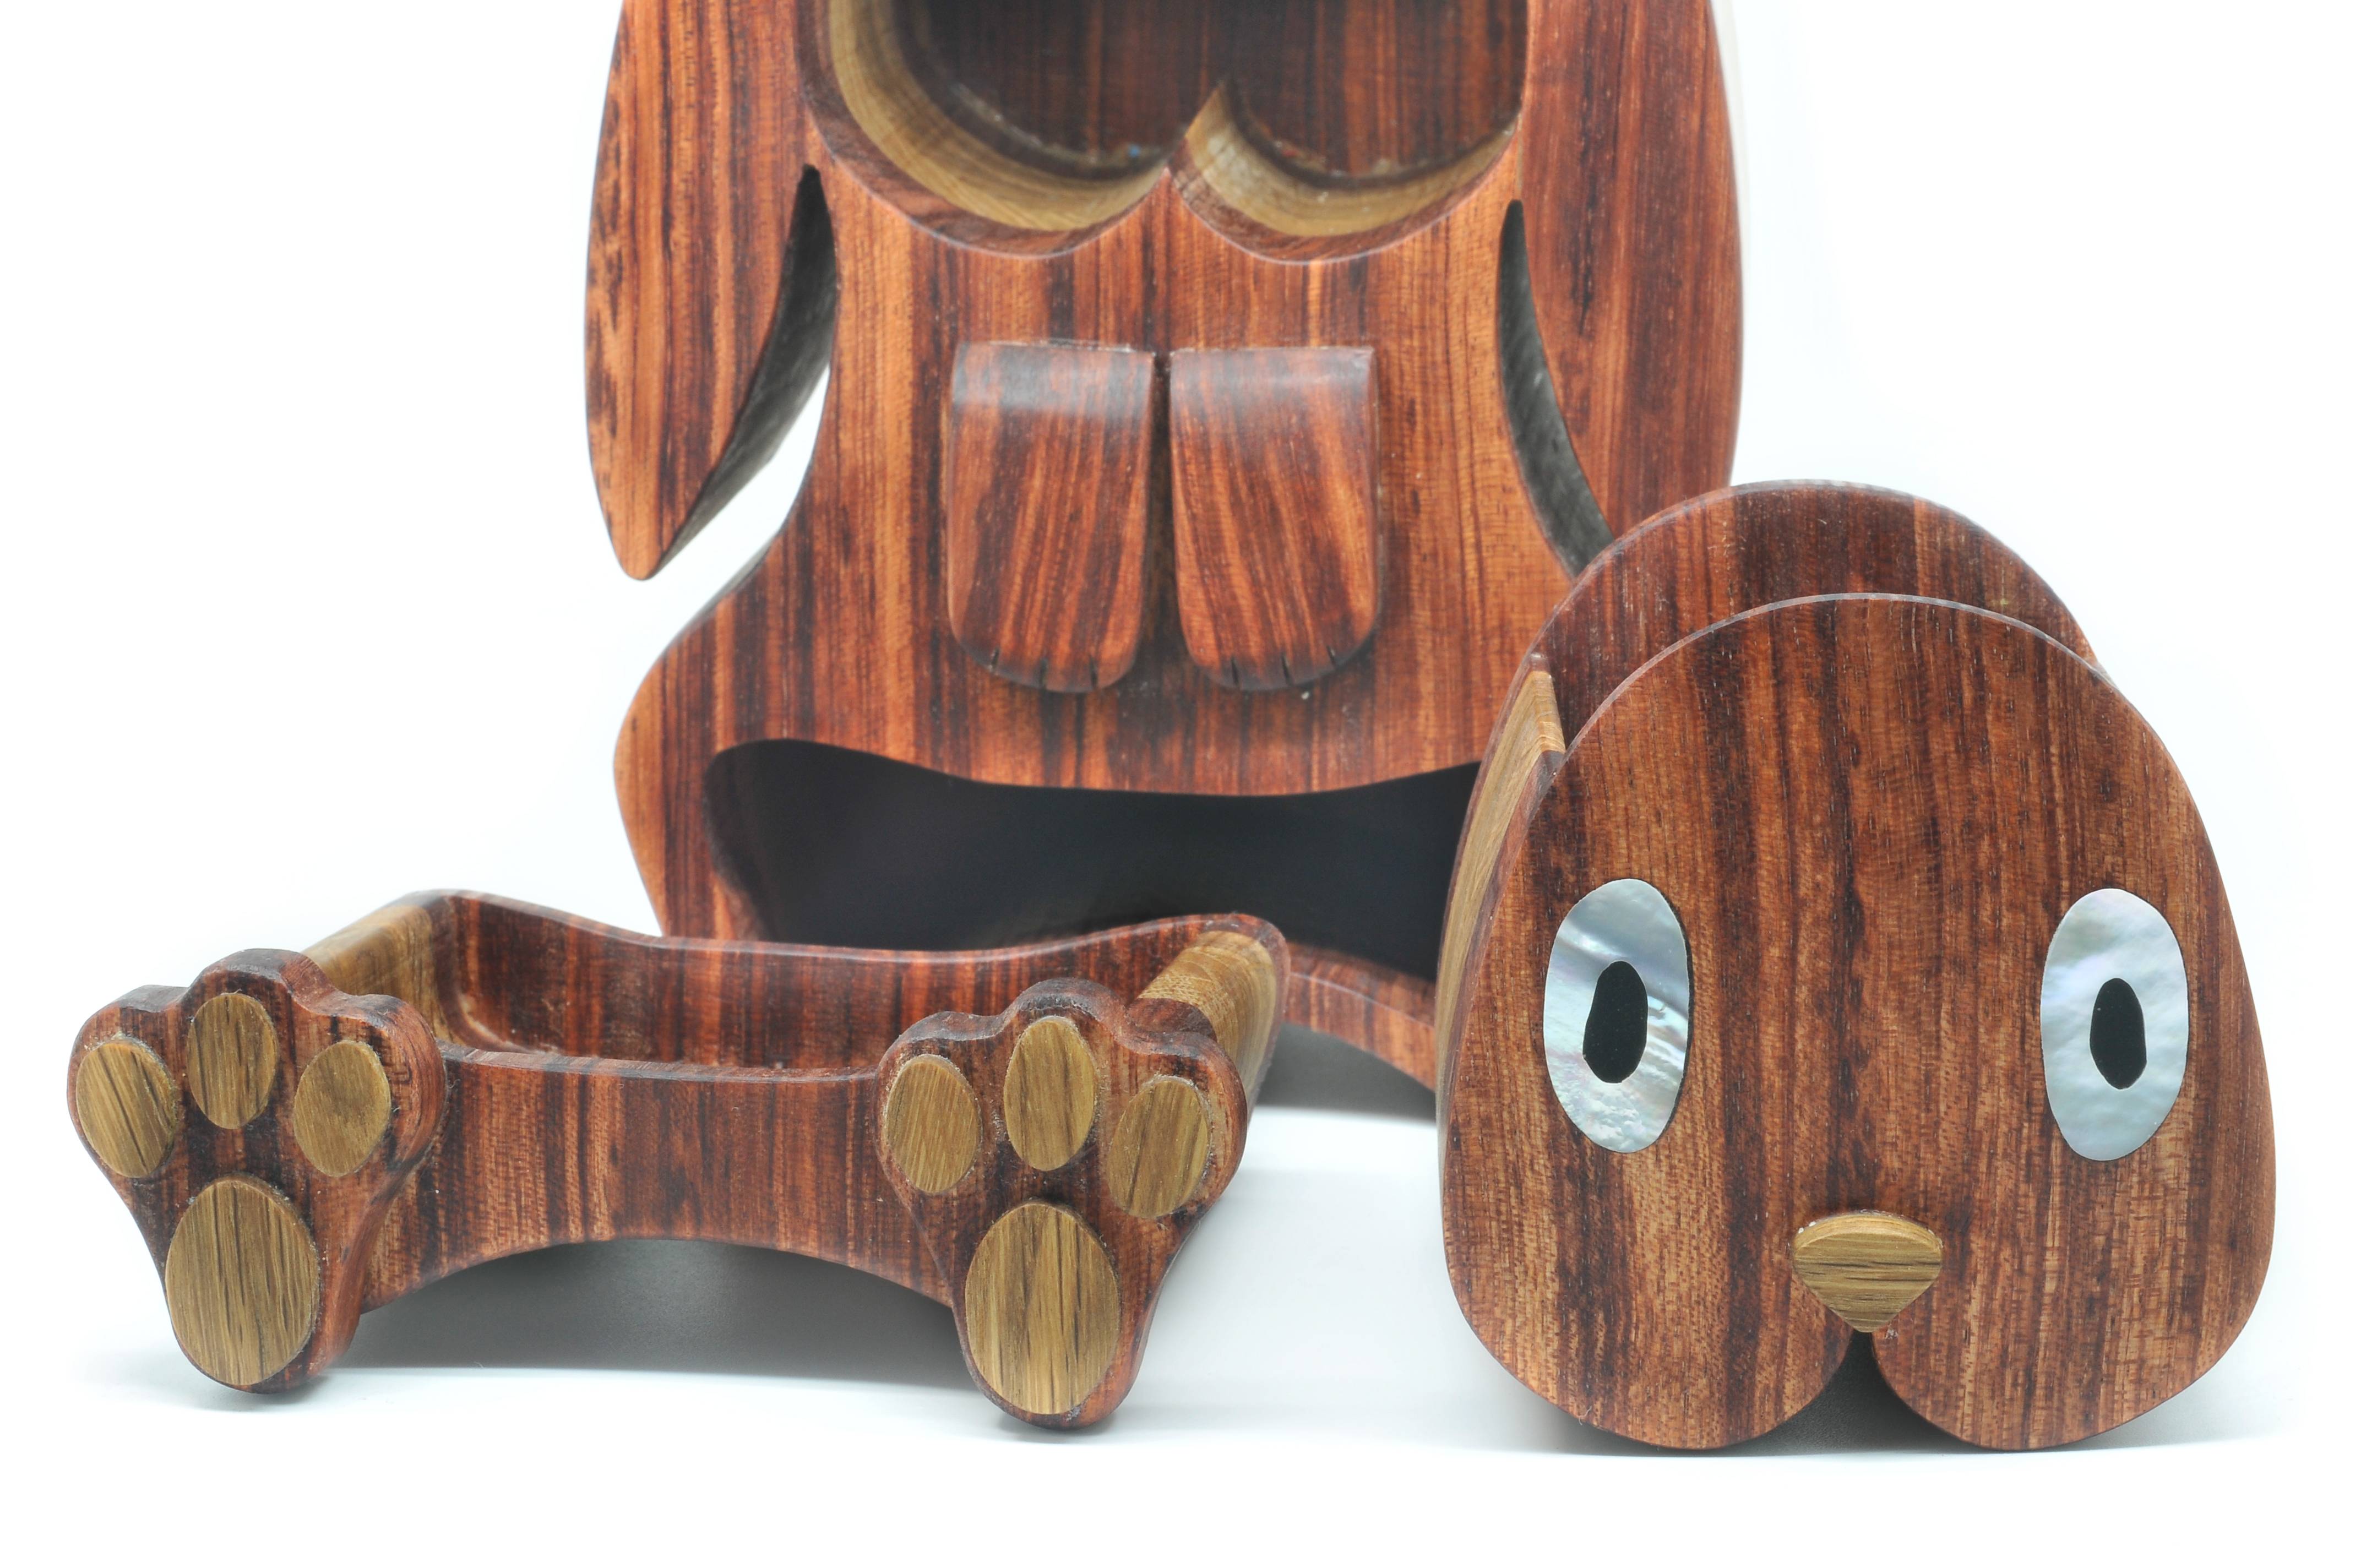
Made the paws and feet, the health and safety guys would be horrified if they saw how I made the pads for the feet! :oops:

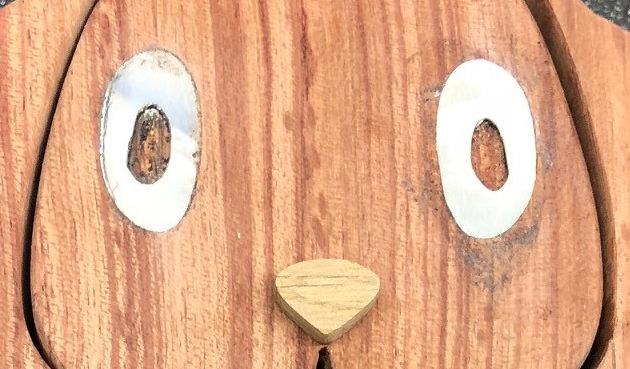
So still having my fingers I did the bit I was dreading, inlaying the eyes. I've gone into a bit of detail here in case it's of use to anyone.

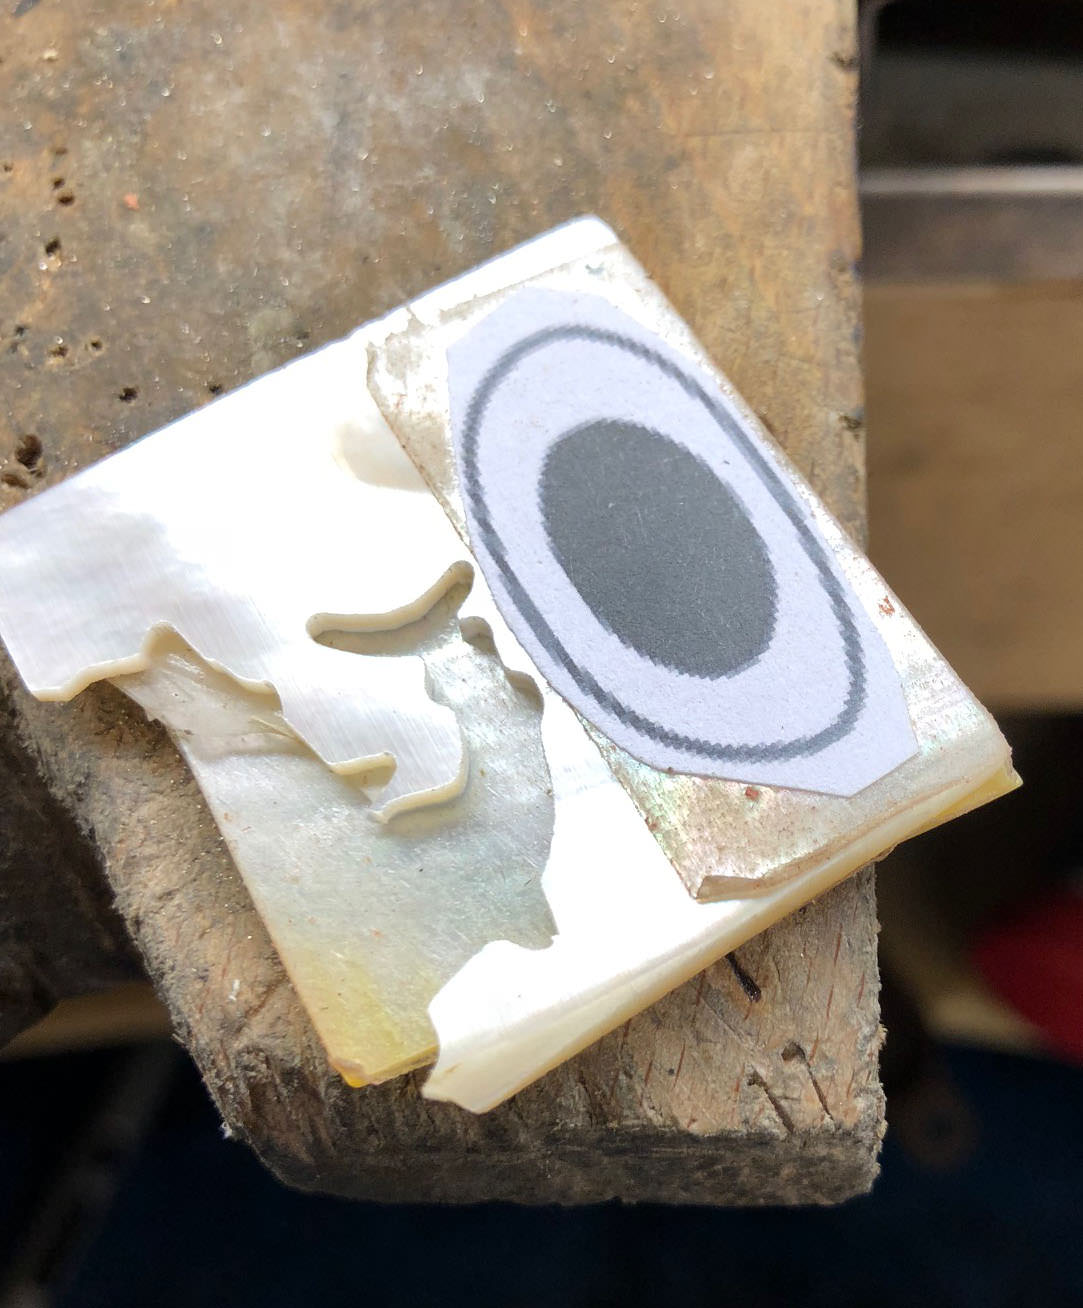
Wanted to use mother of pearl for the eyes, it cuts and sands fairly easily, stuck the diagram on the M.O.P. I taped double sided taped two sheets together so I only had to make one cut and hopefully end up with 2 identical eyes. The shape cut out with a very fine blade jeweller's saw.

t22Hd6S.jpg


jlLnpVN.jpghttp:


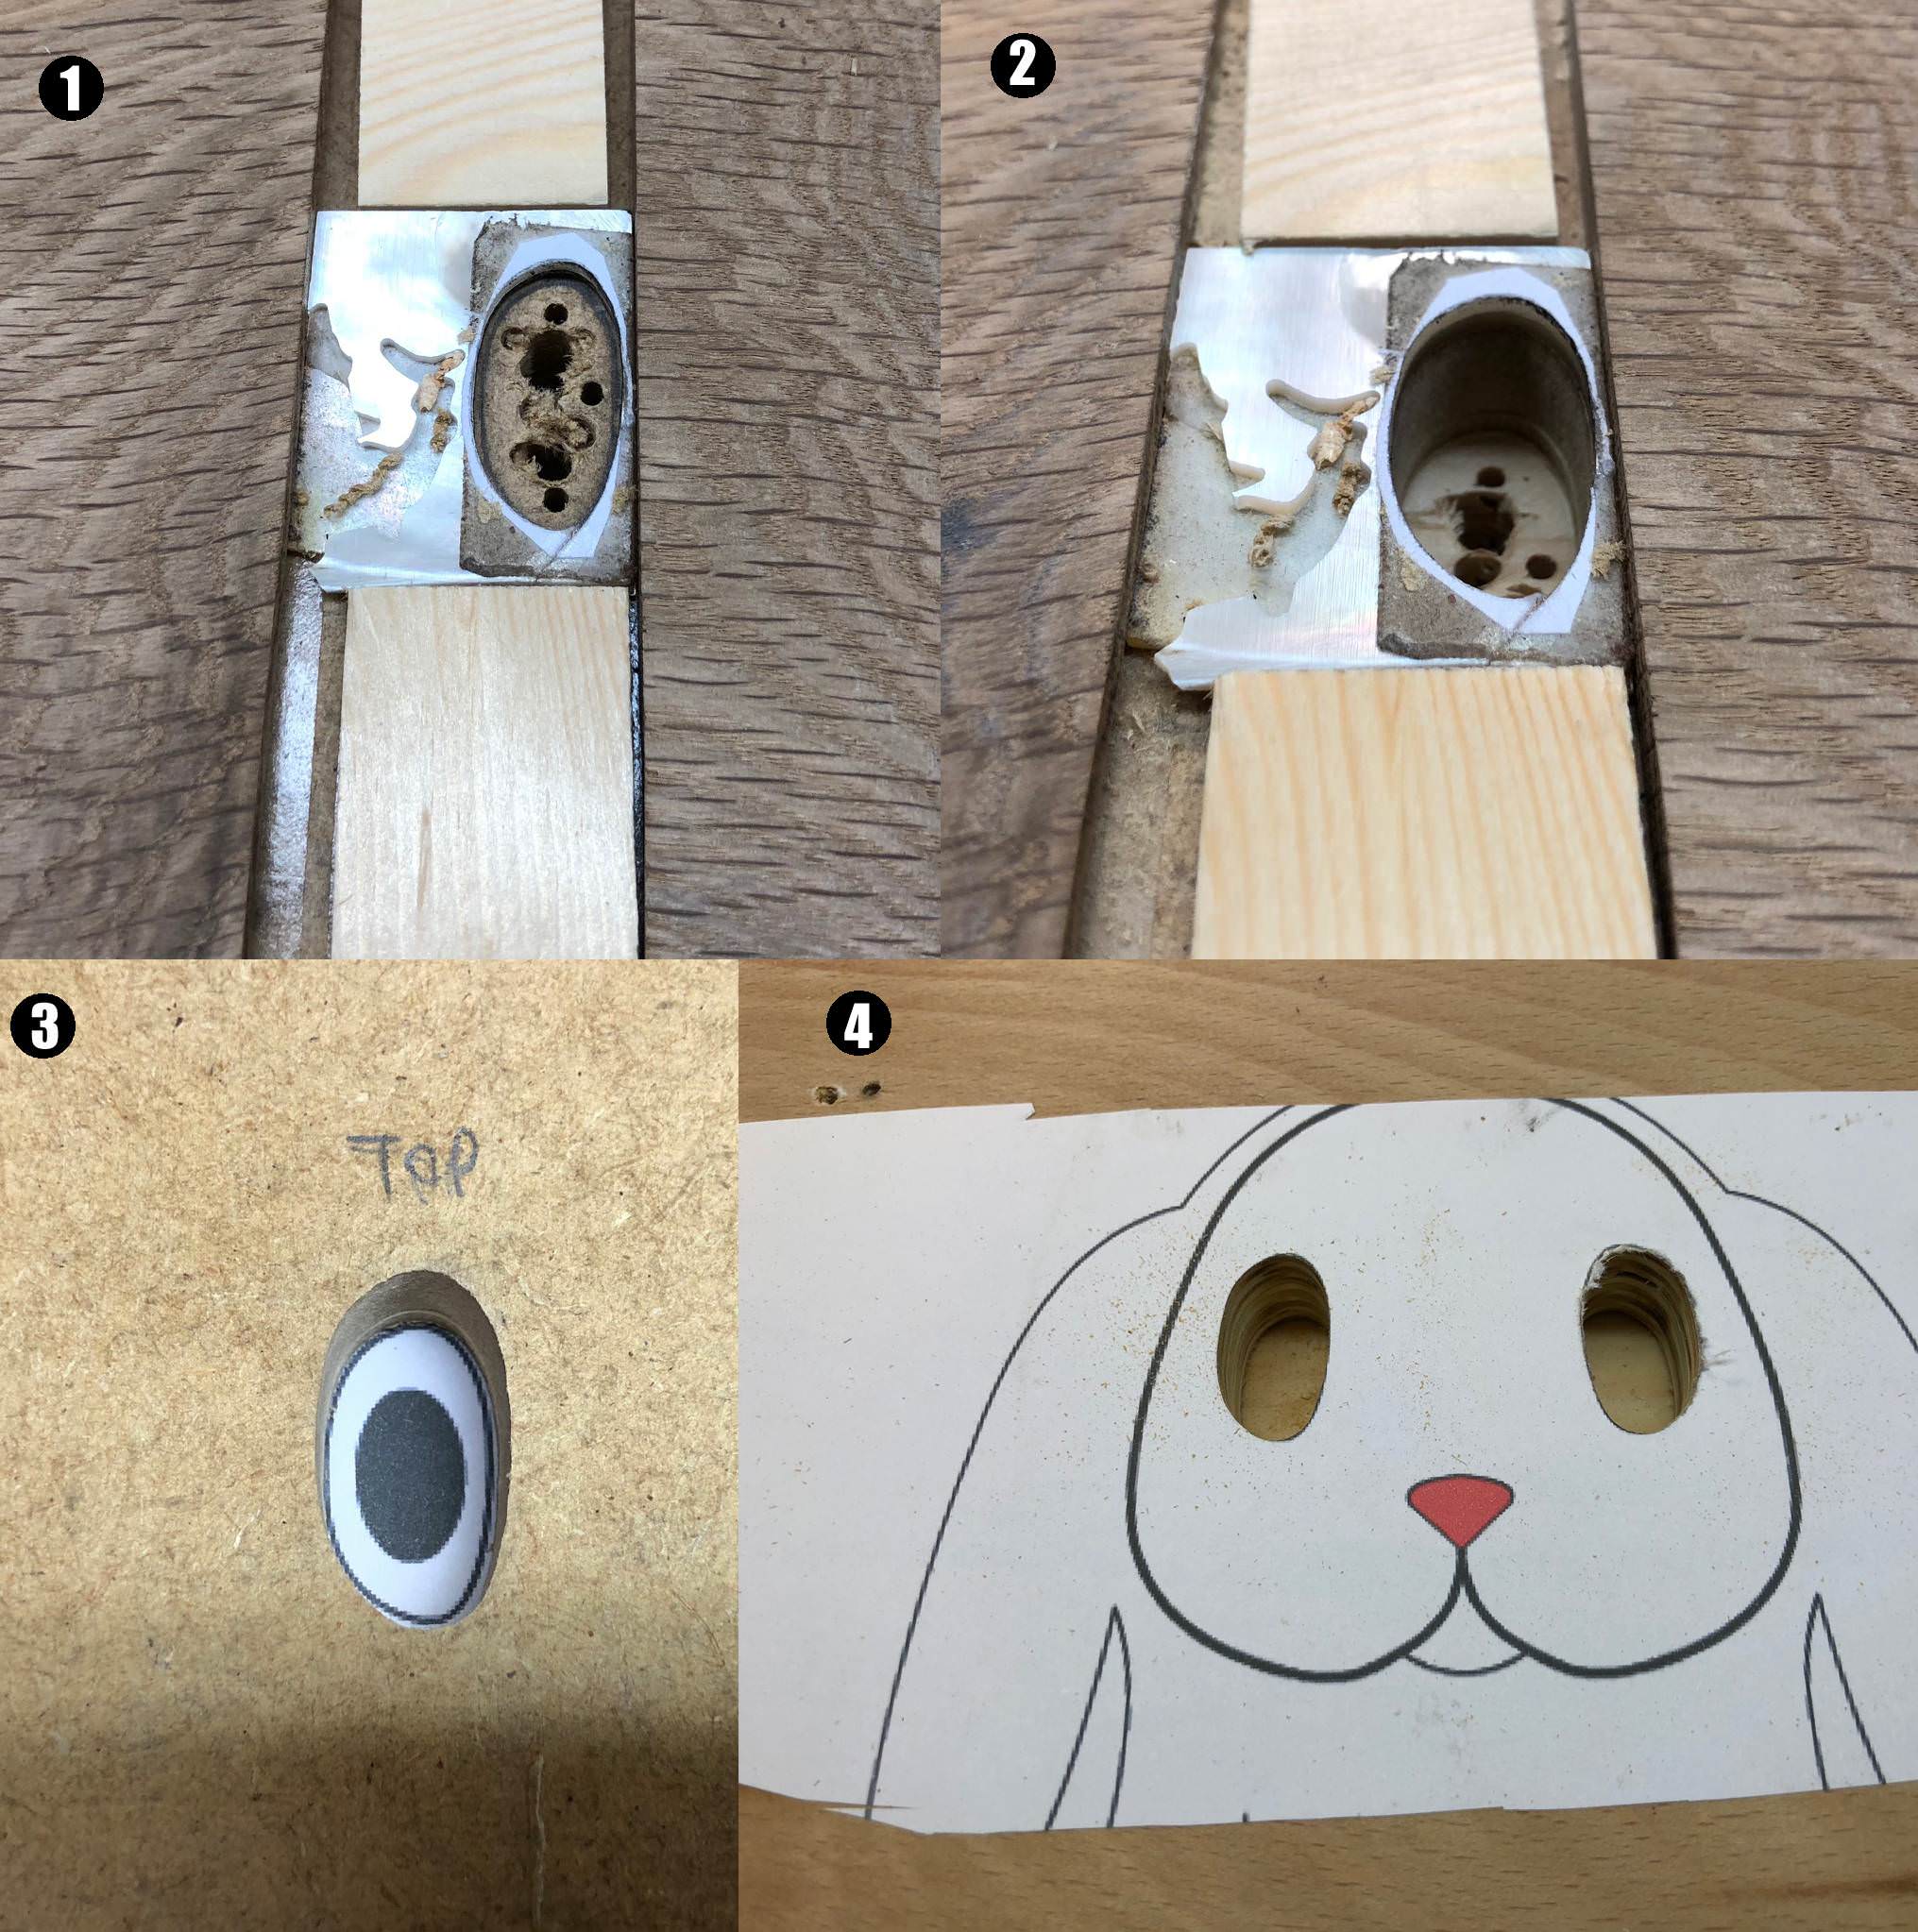
Then needed to make a routing template for the inlay....

U904OpH.jpg


1. stuck the offcut onto some MDF and reinforced edges with scraps
2. routed it out with a template routing bit, the mother of pearl just about thick enough for the bit's bearing
3. got one eye template on 12mm thick MDF
4. transferred it on to 18mm ply to make a complete pair of eyes template

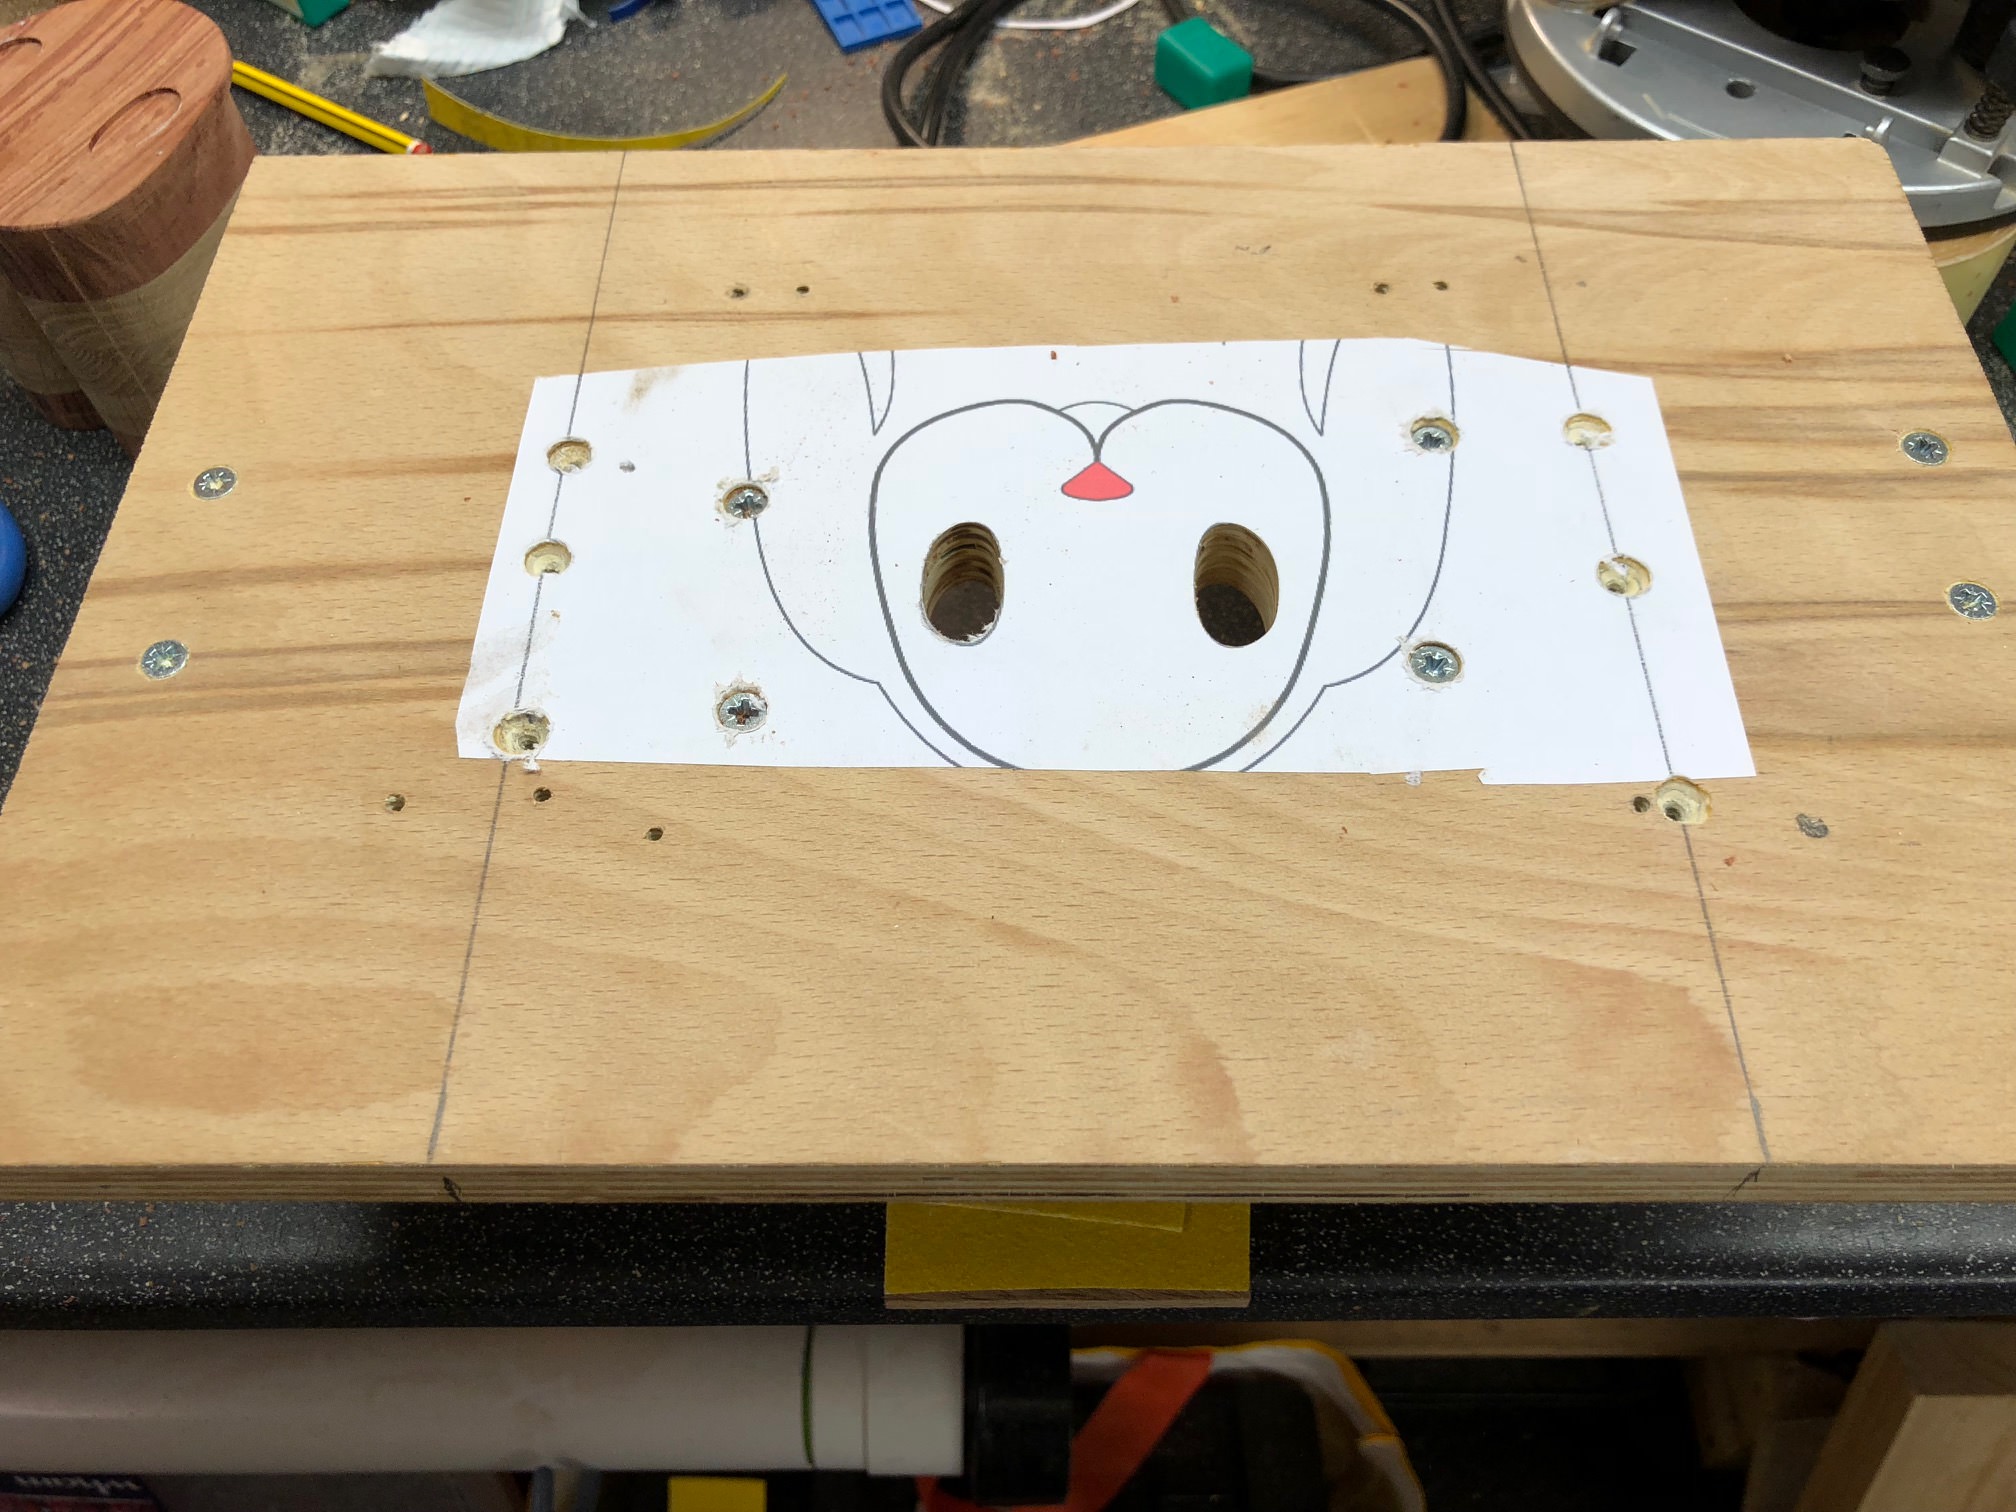
I'm doing all this to try and make a jig that's silly person-proof!

made that into a crude table

OWKzkXu.jpg


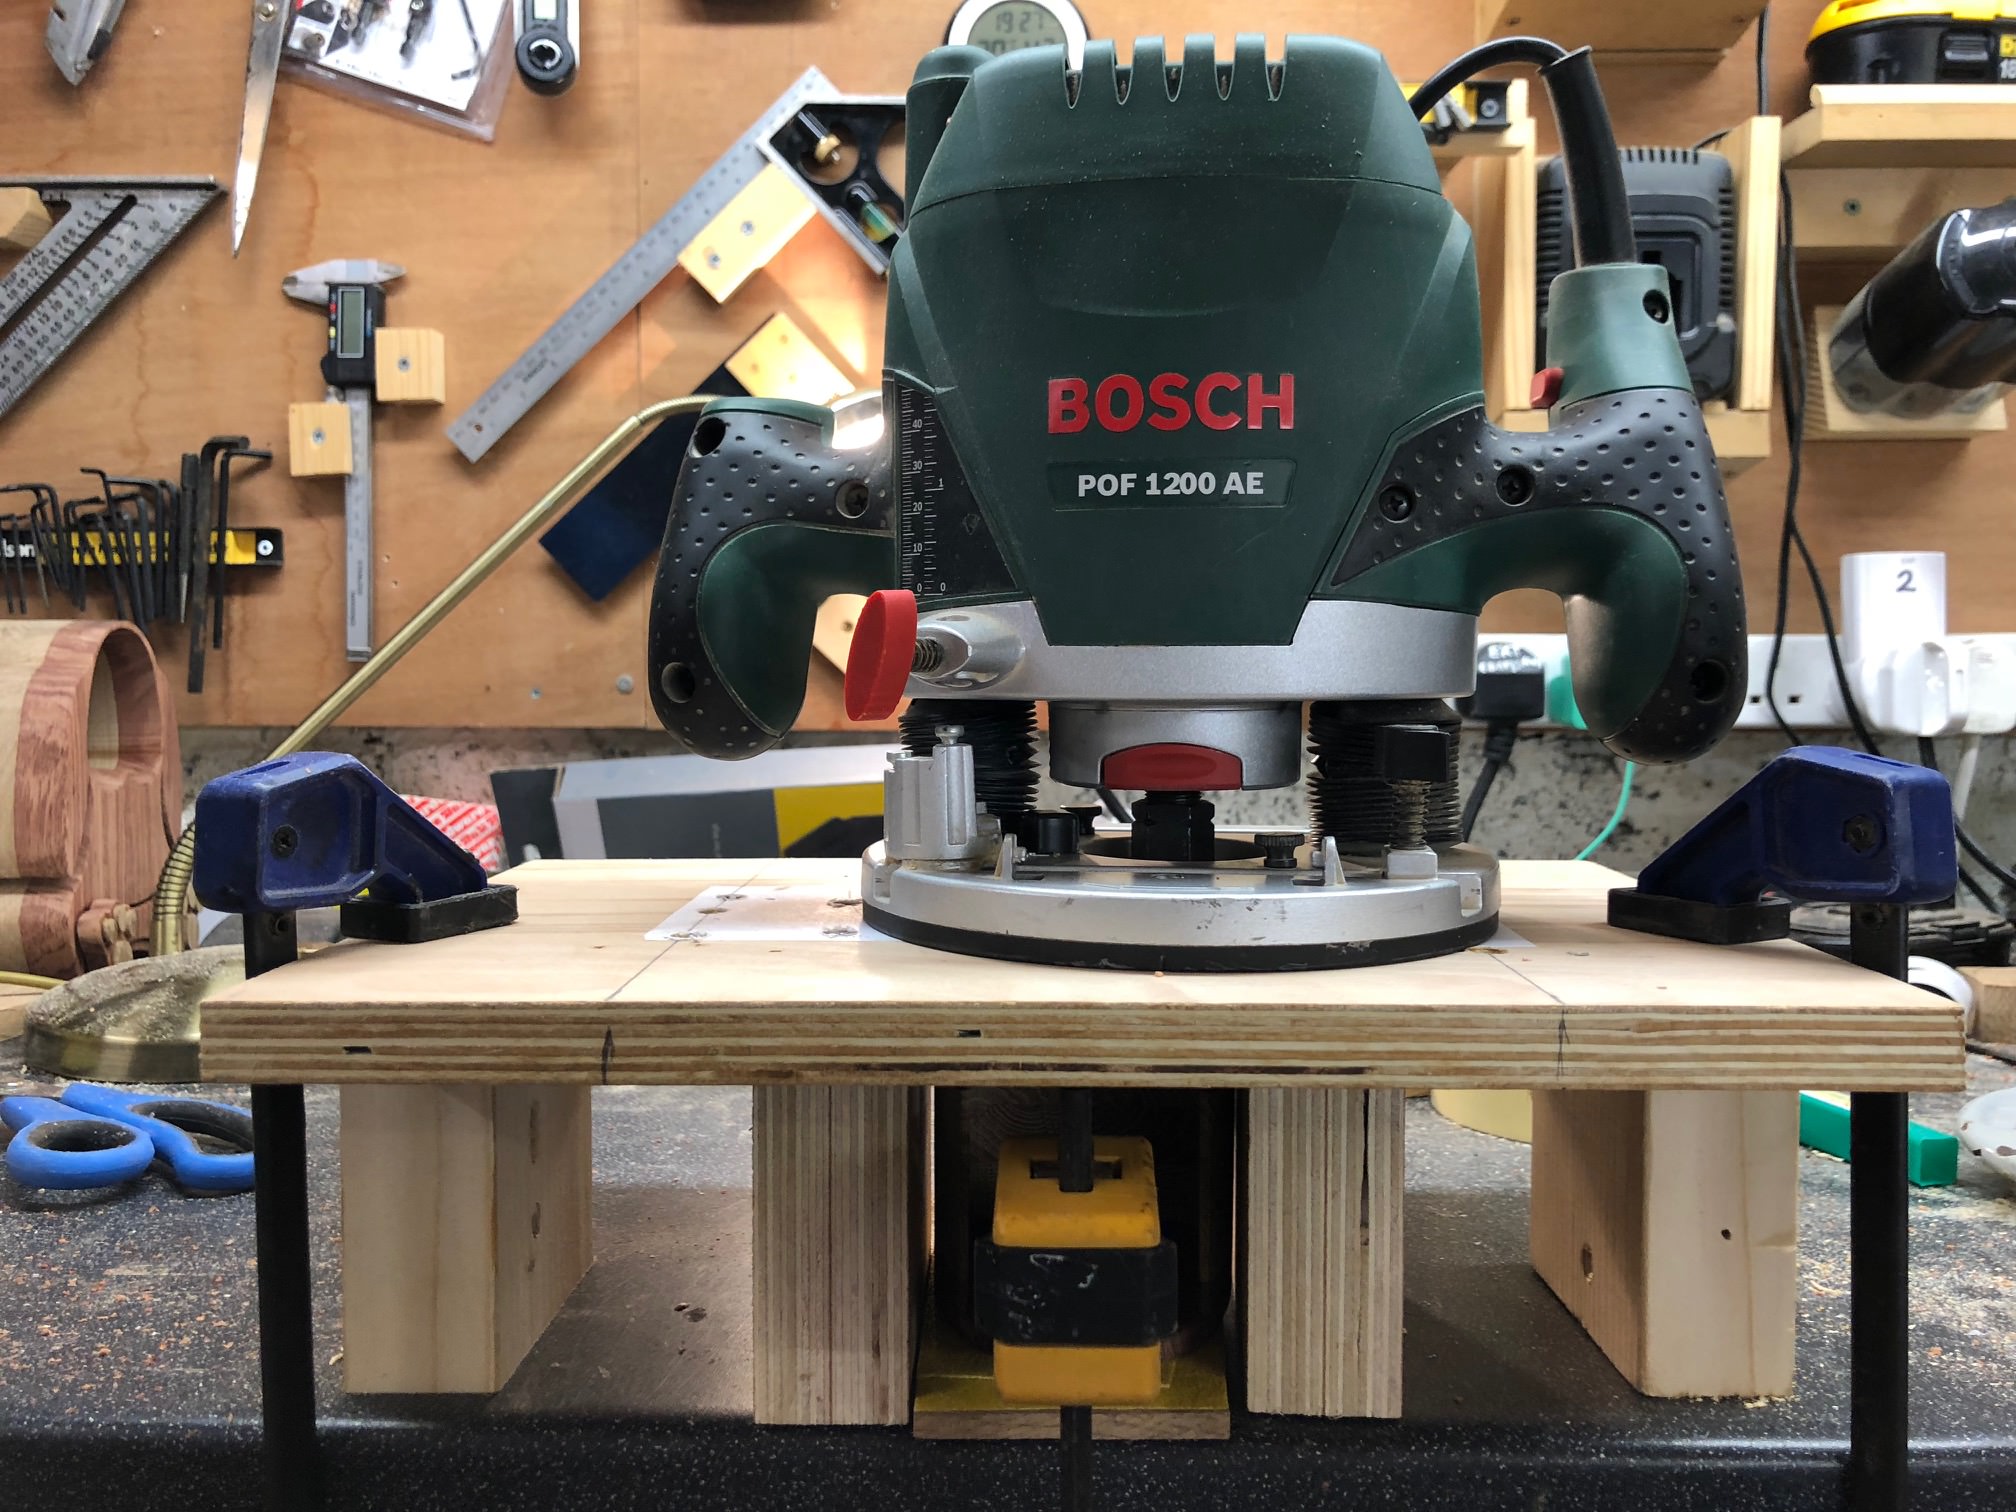
Everything clamped up one day I'll get one of those fancy DeWalt laminate trimmers but until then, time to Bosch it out! All this work just to rout out a couple of 1.2mm cavities.

lhgiSFb.jpg


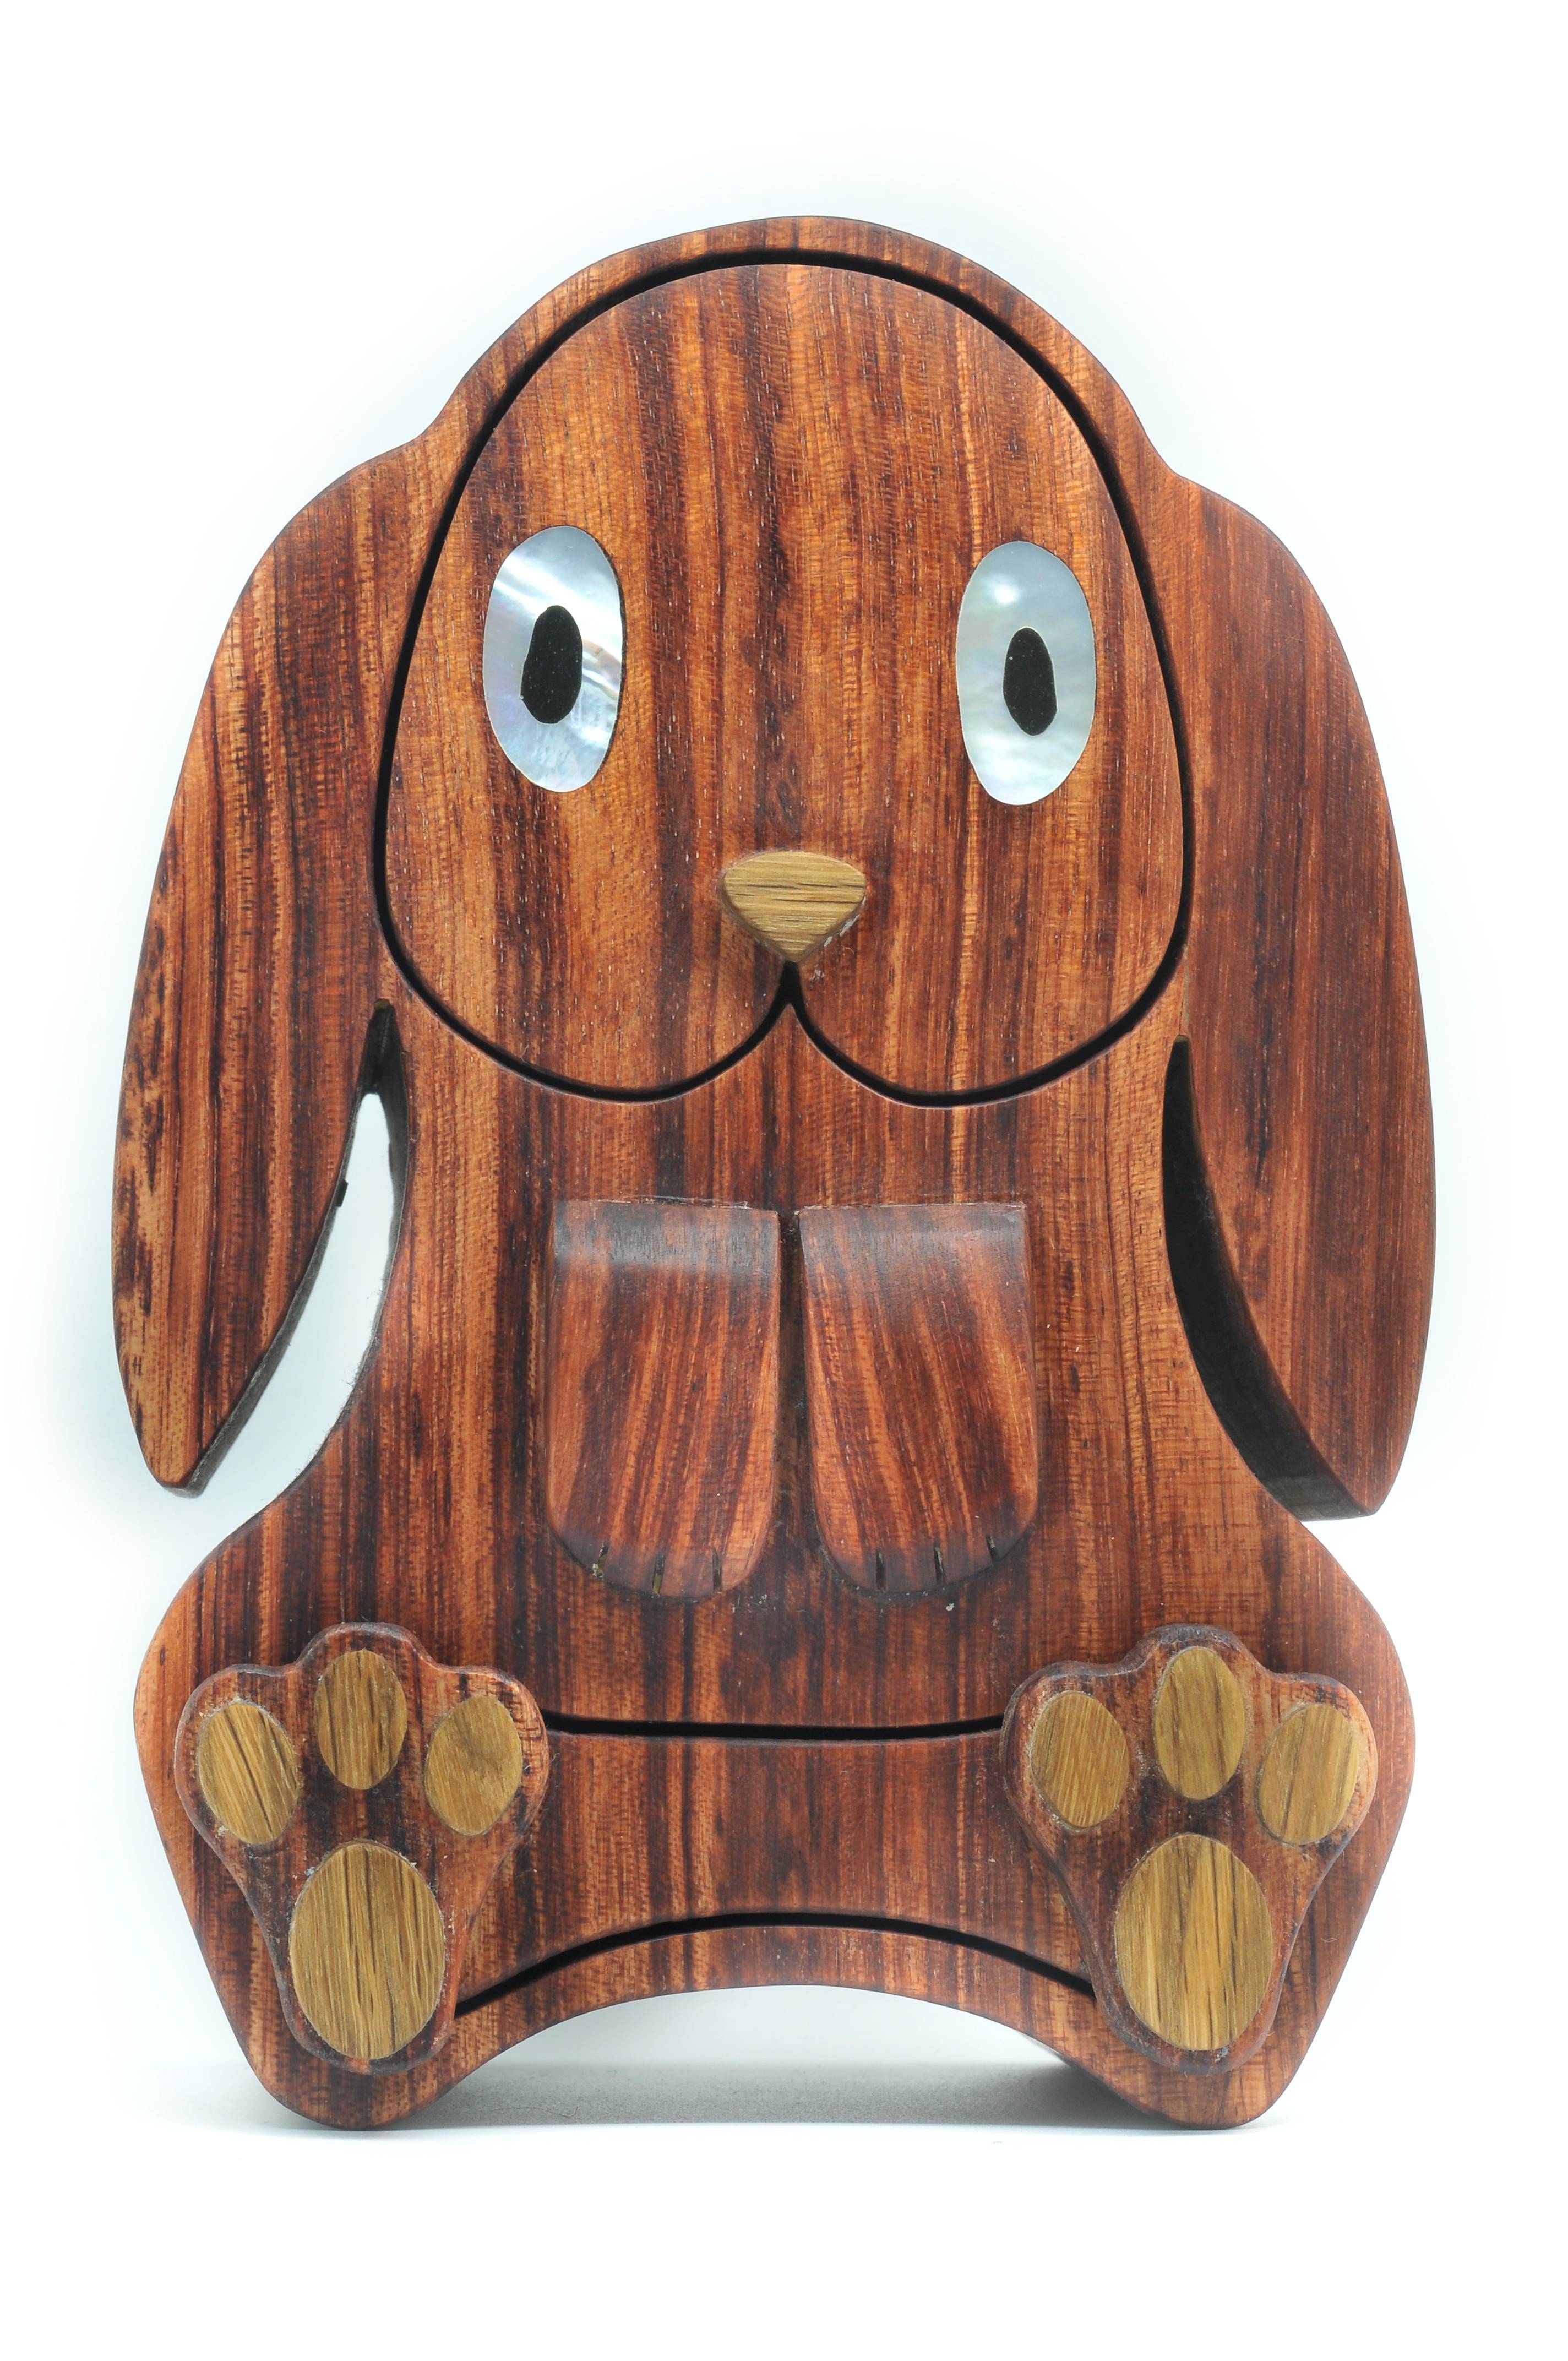
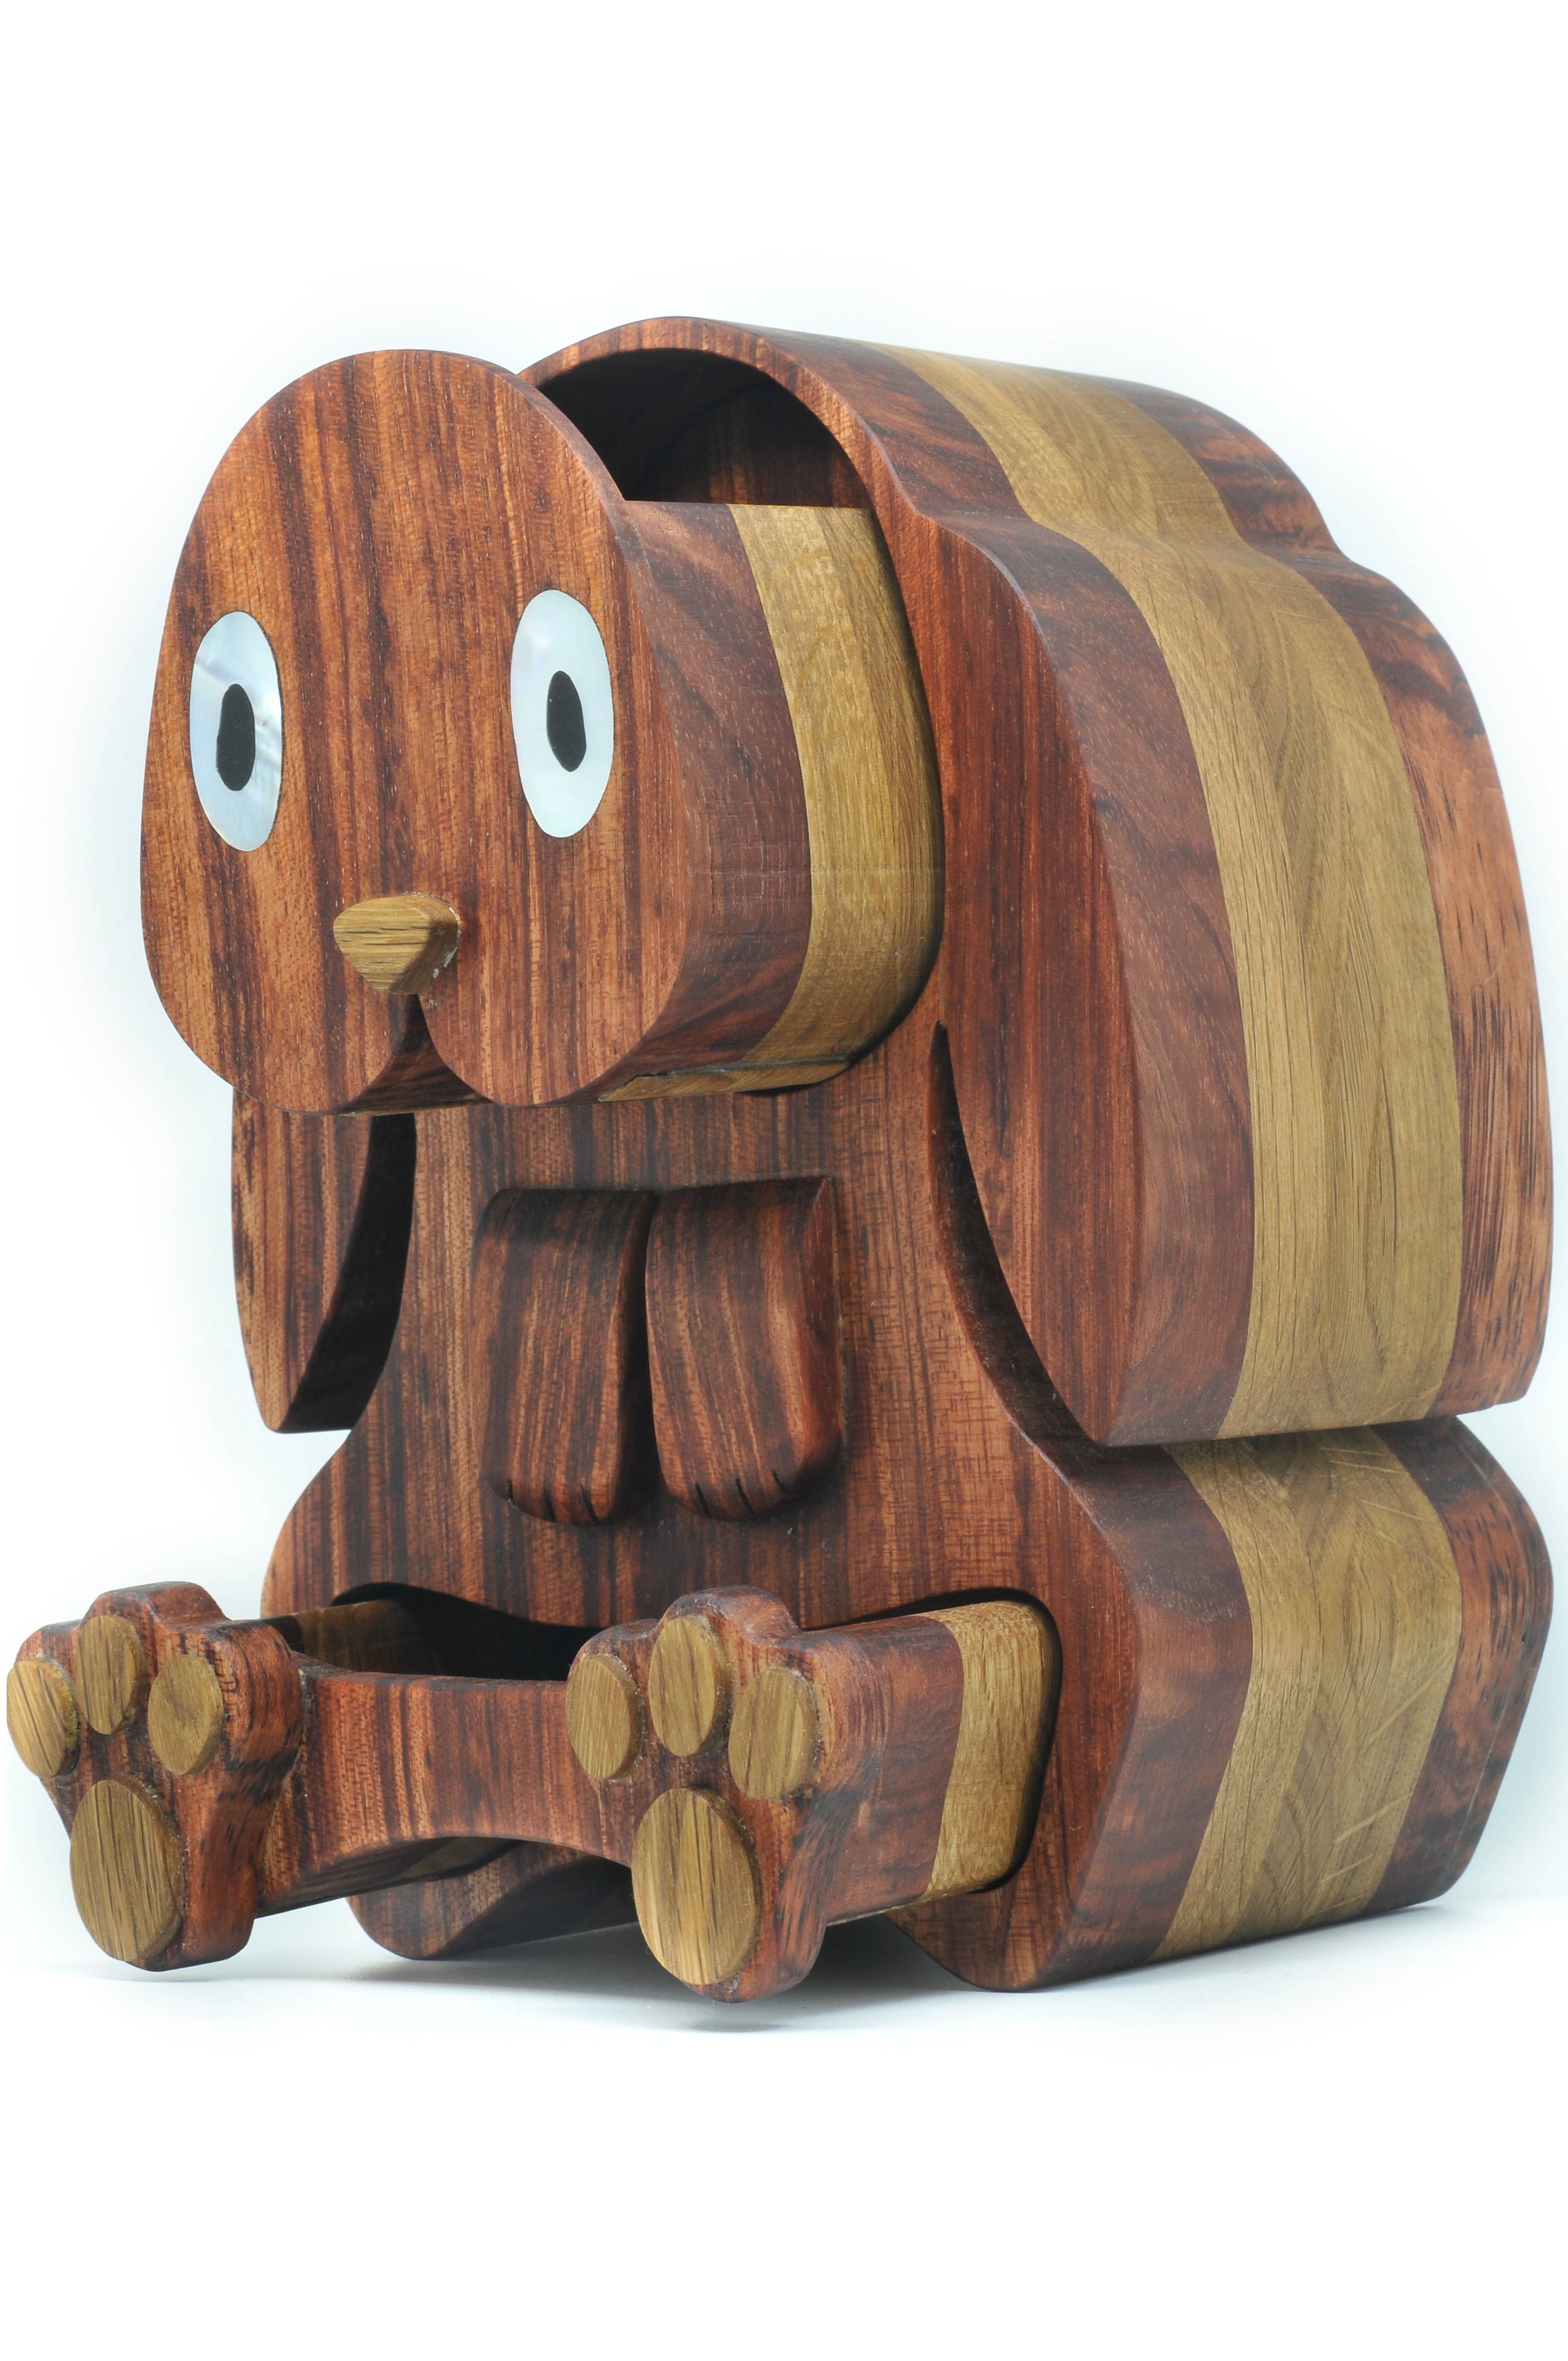
Final result, not bad fit.

jpWNlsj.jpg


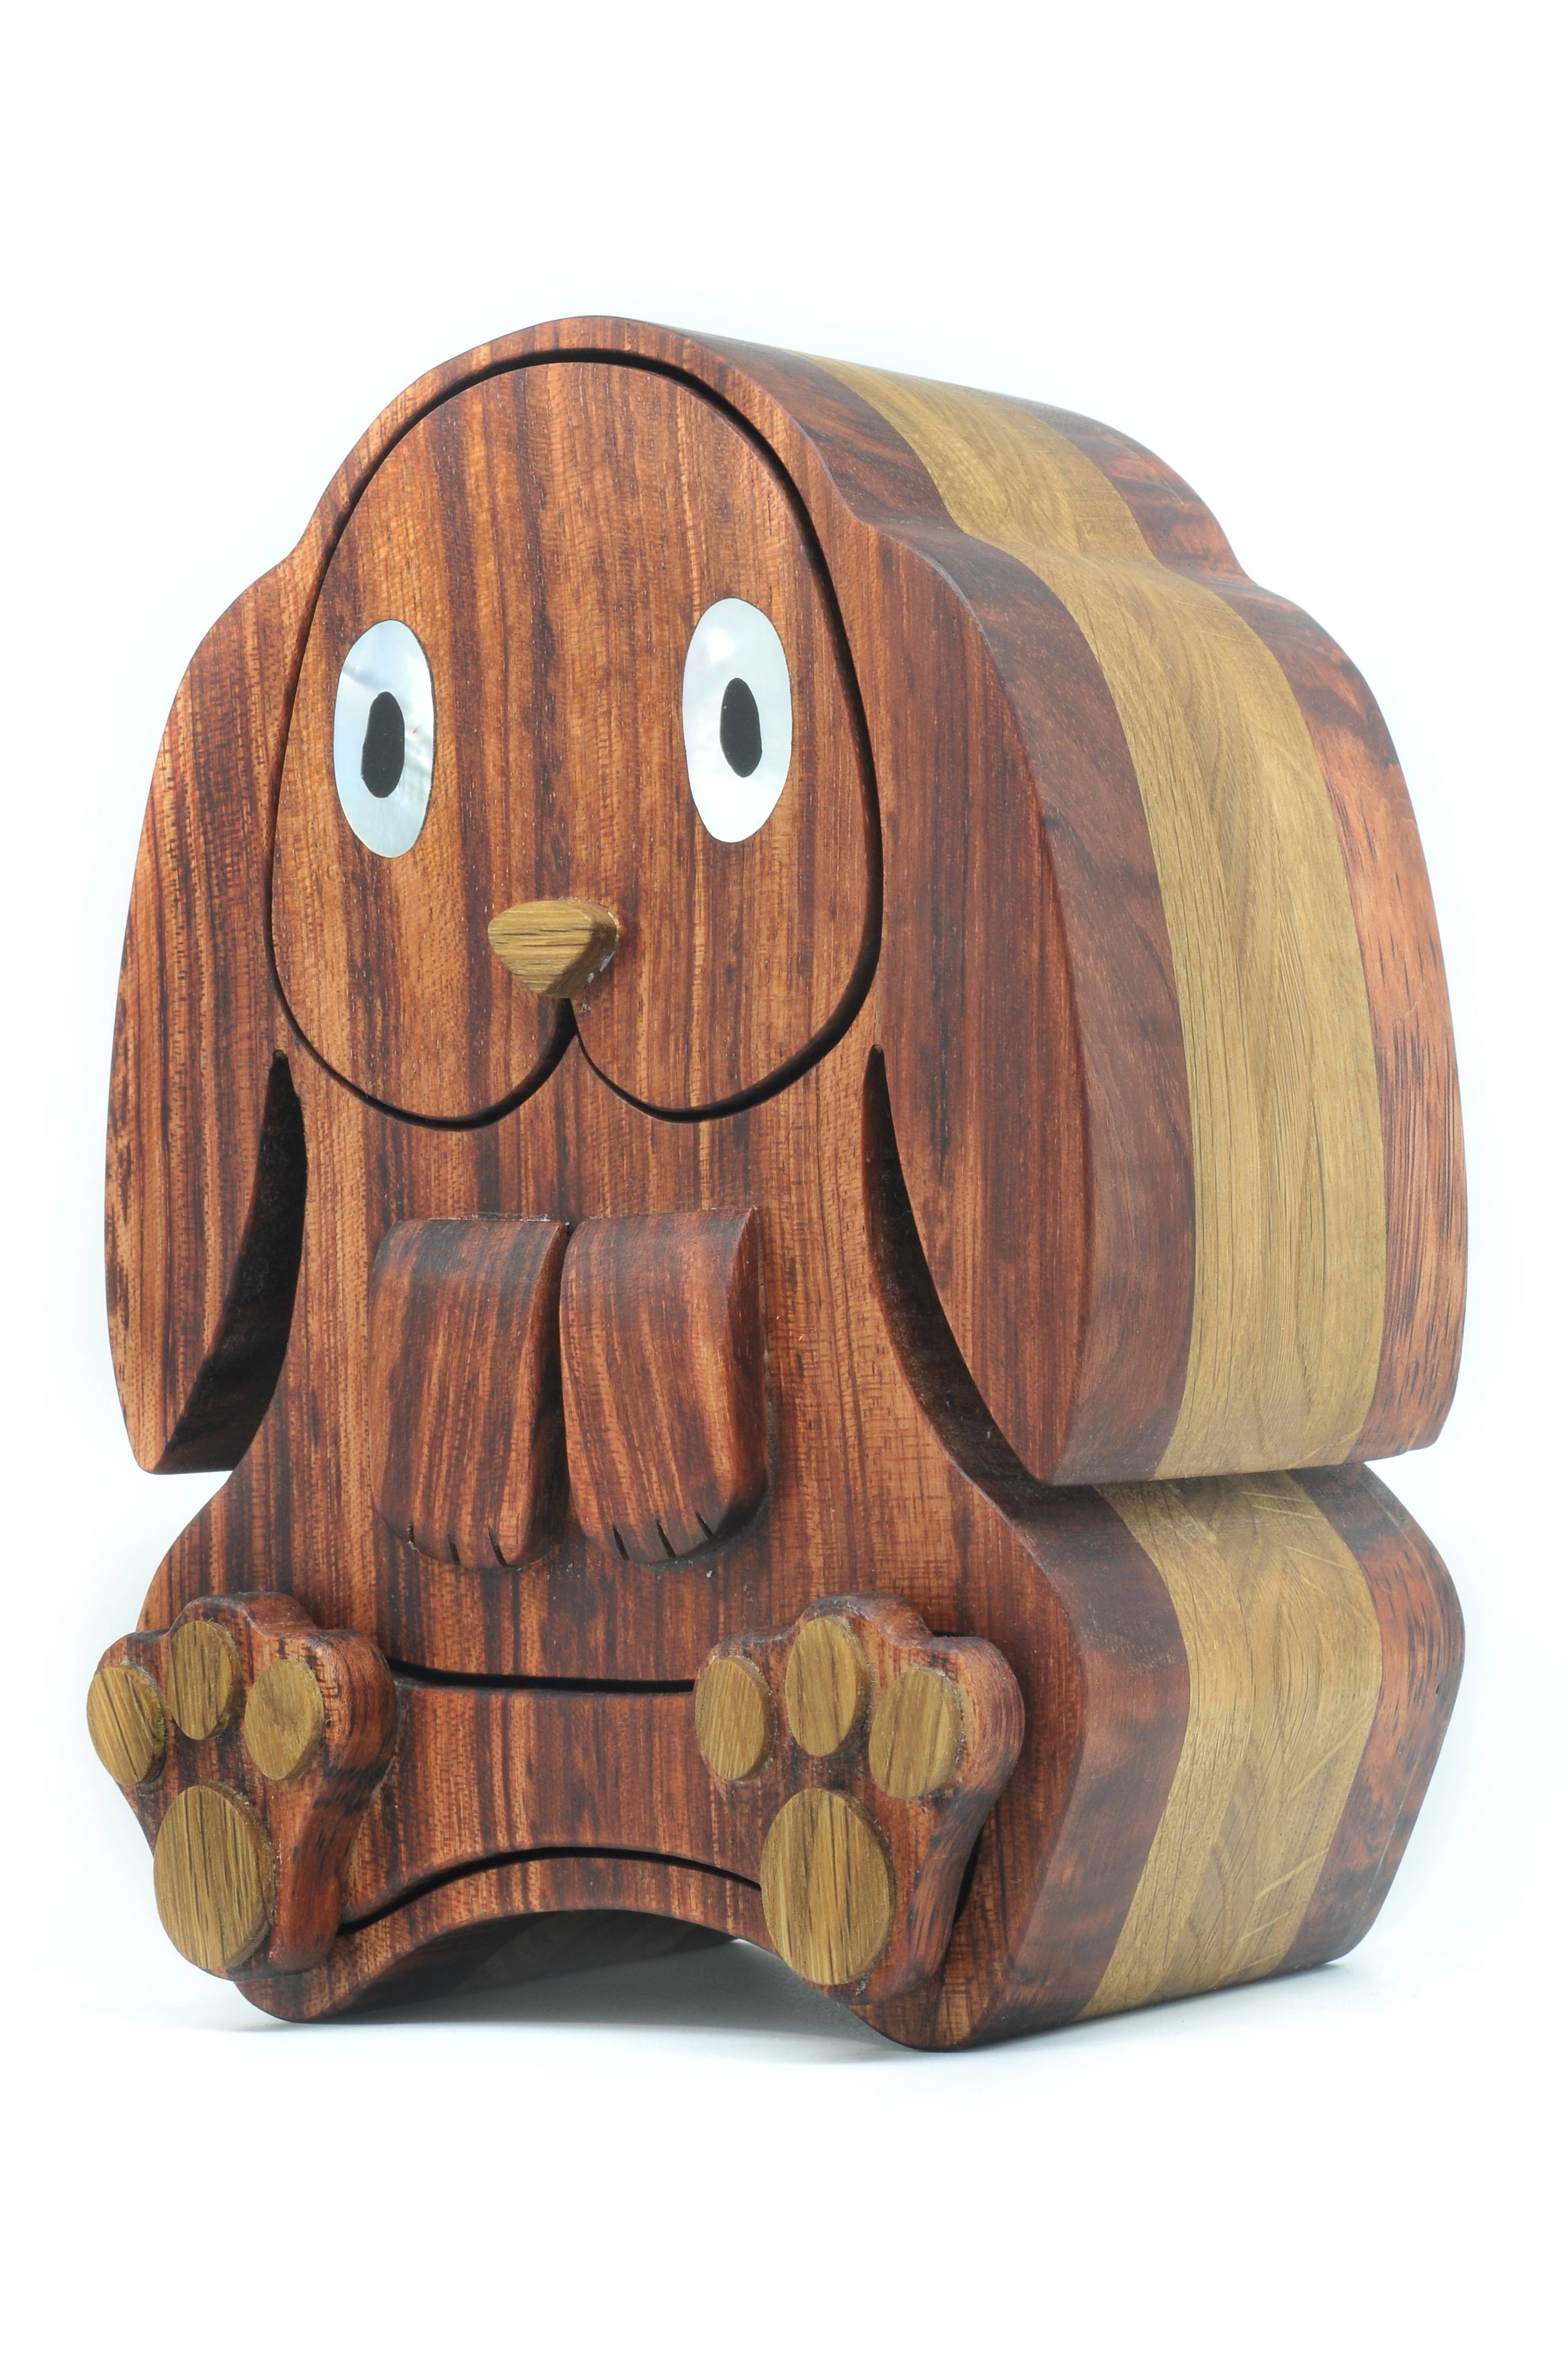
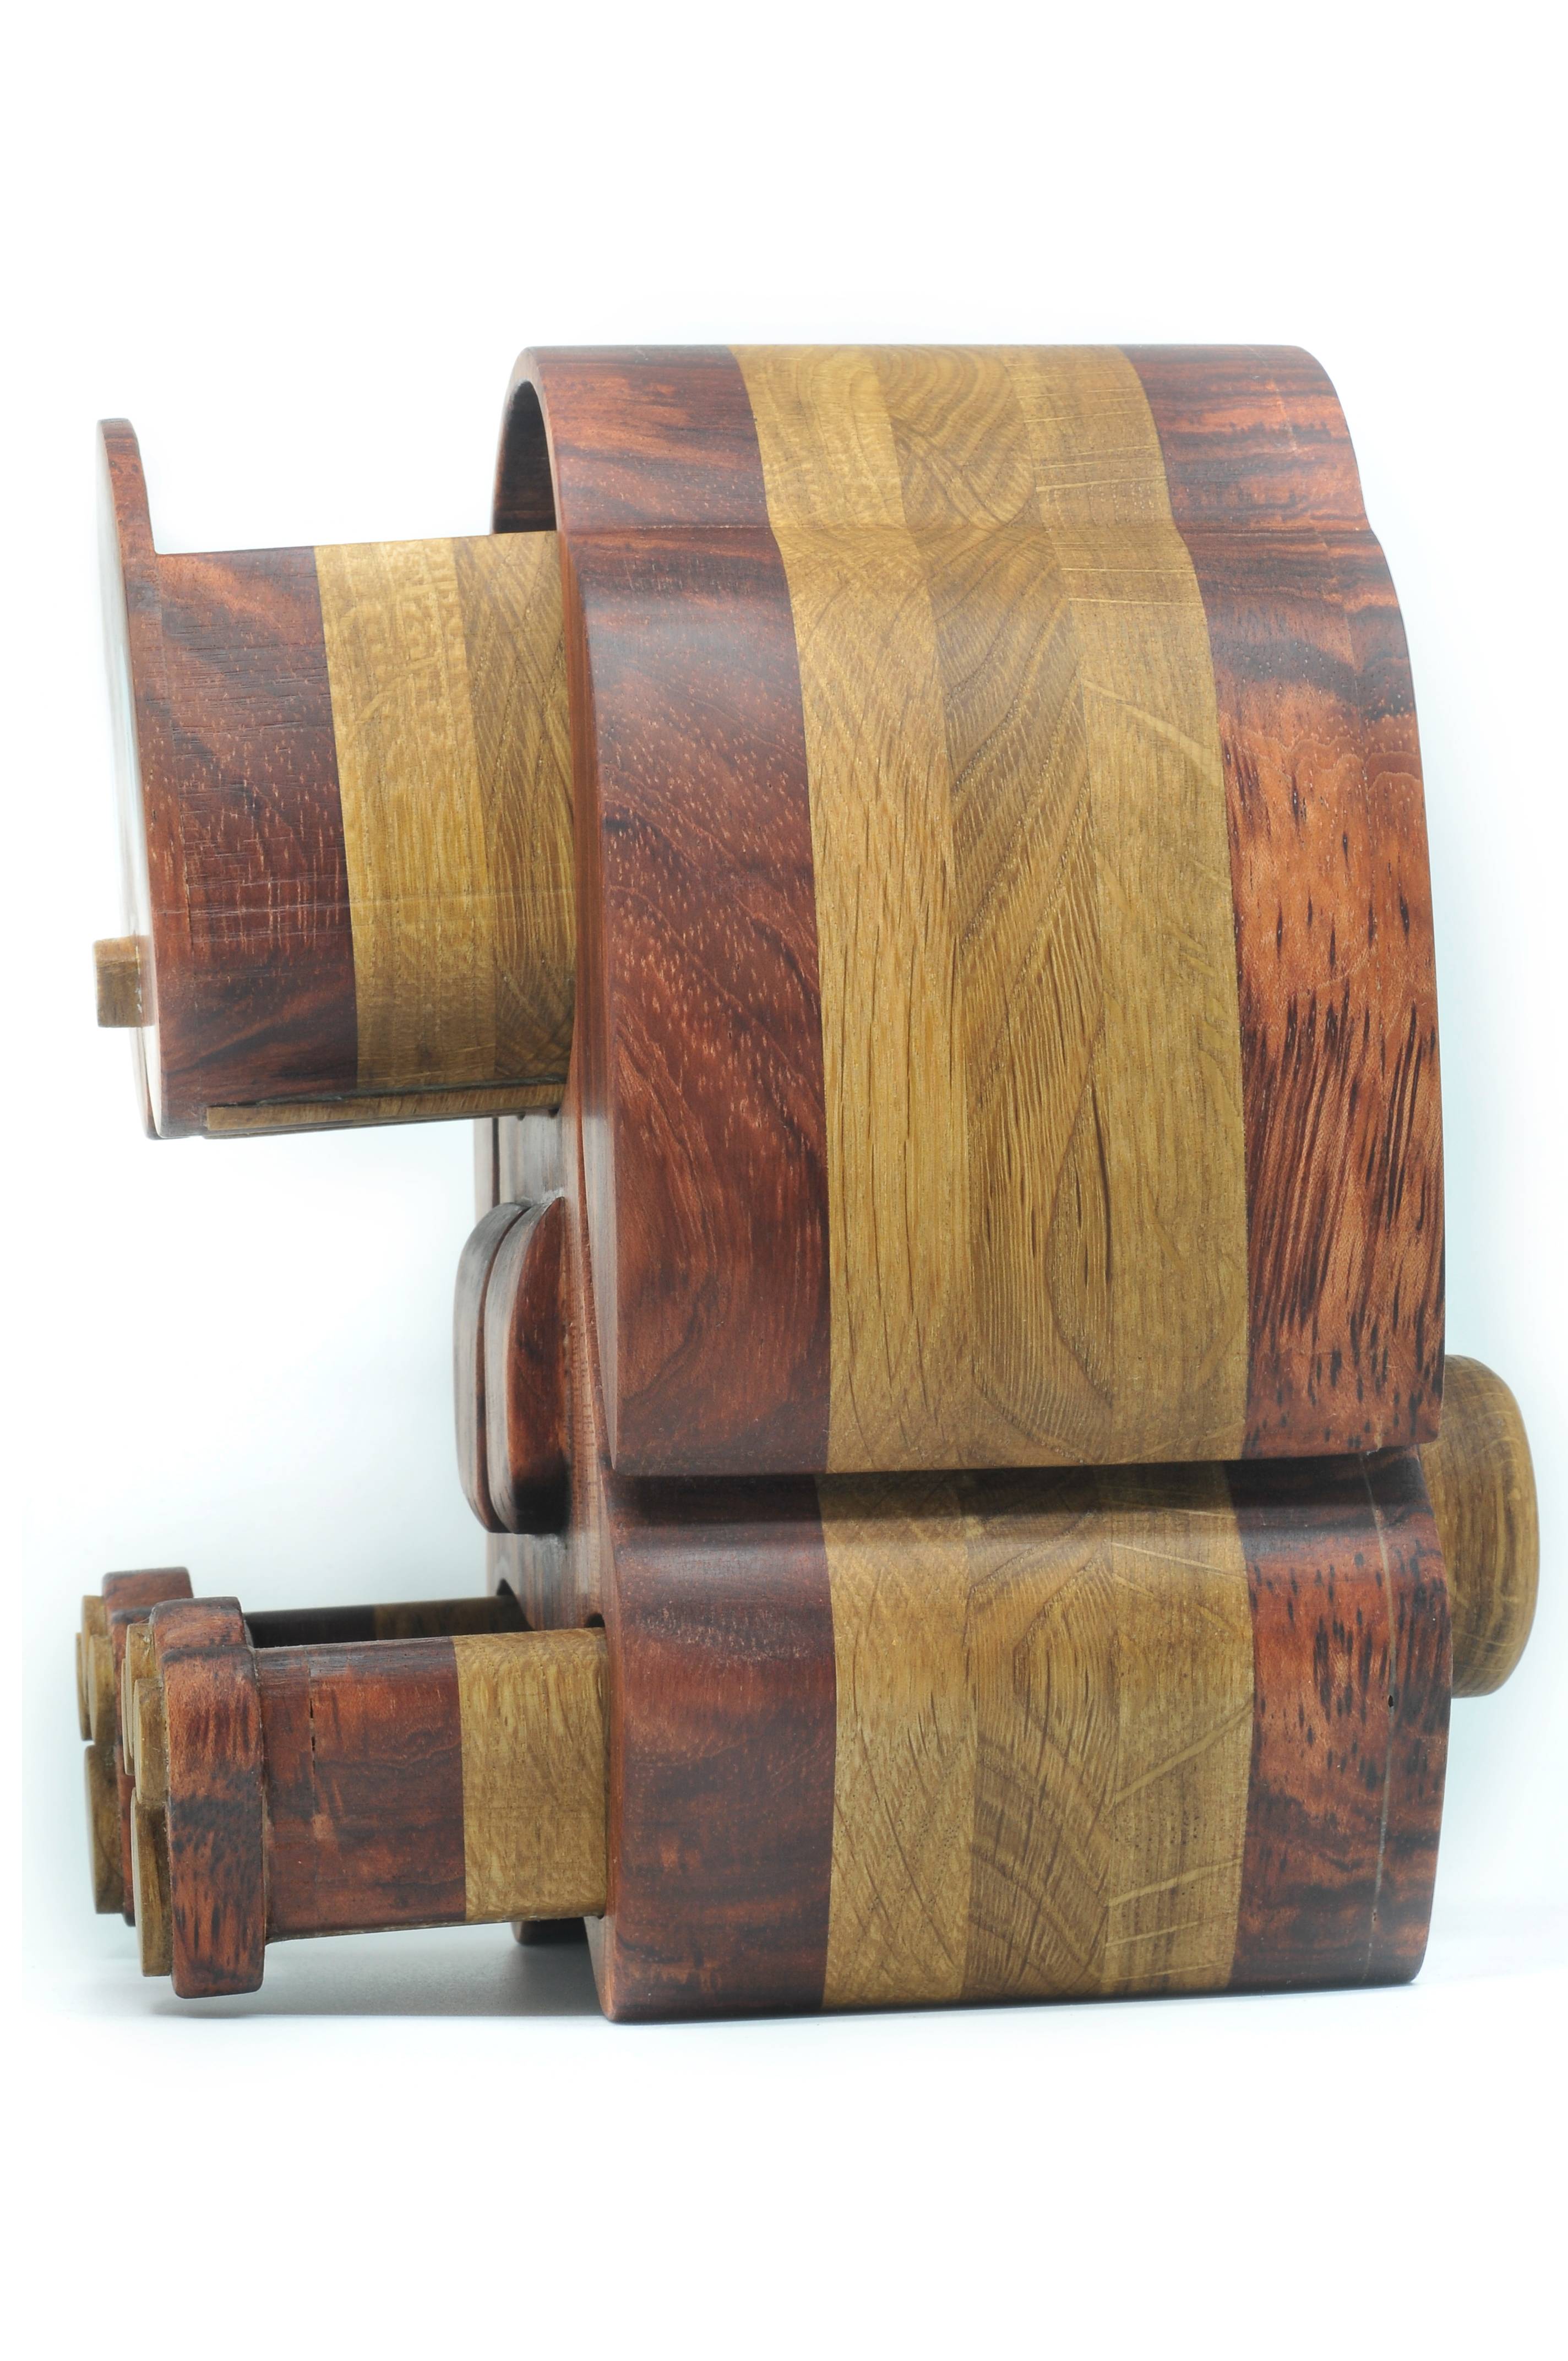
So with eyes installed, still need to do middle bit, gonna fill that with black paint coloured epoxy, here's the latest state of play:

BscANuj.jpg


ZUgtjqE.jpg


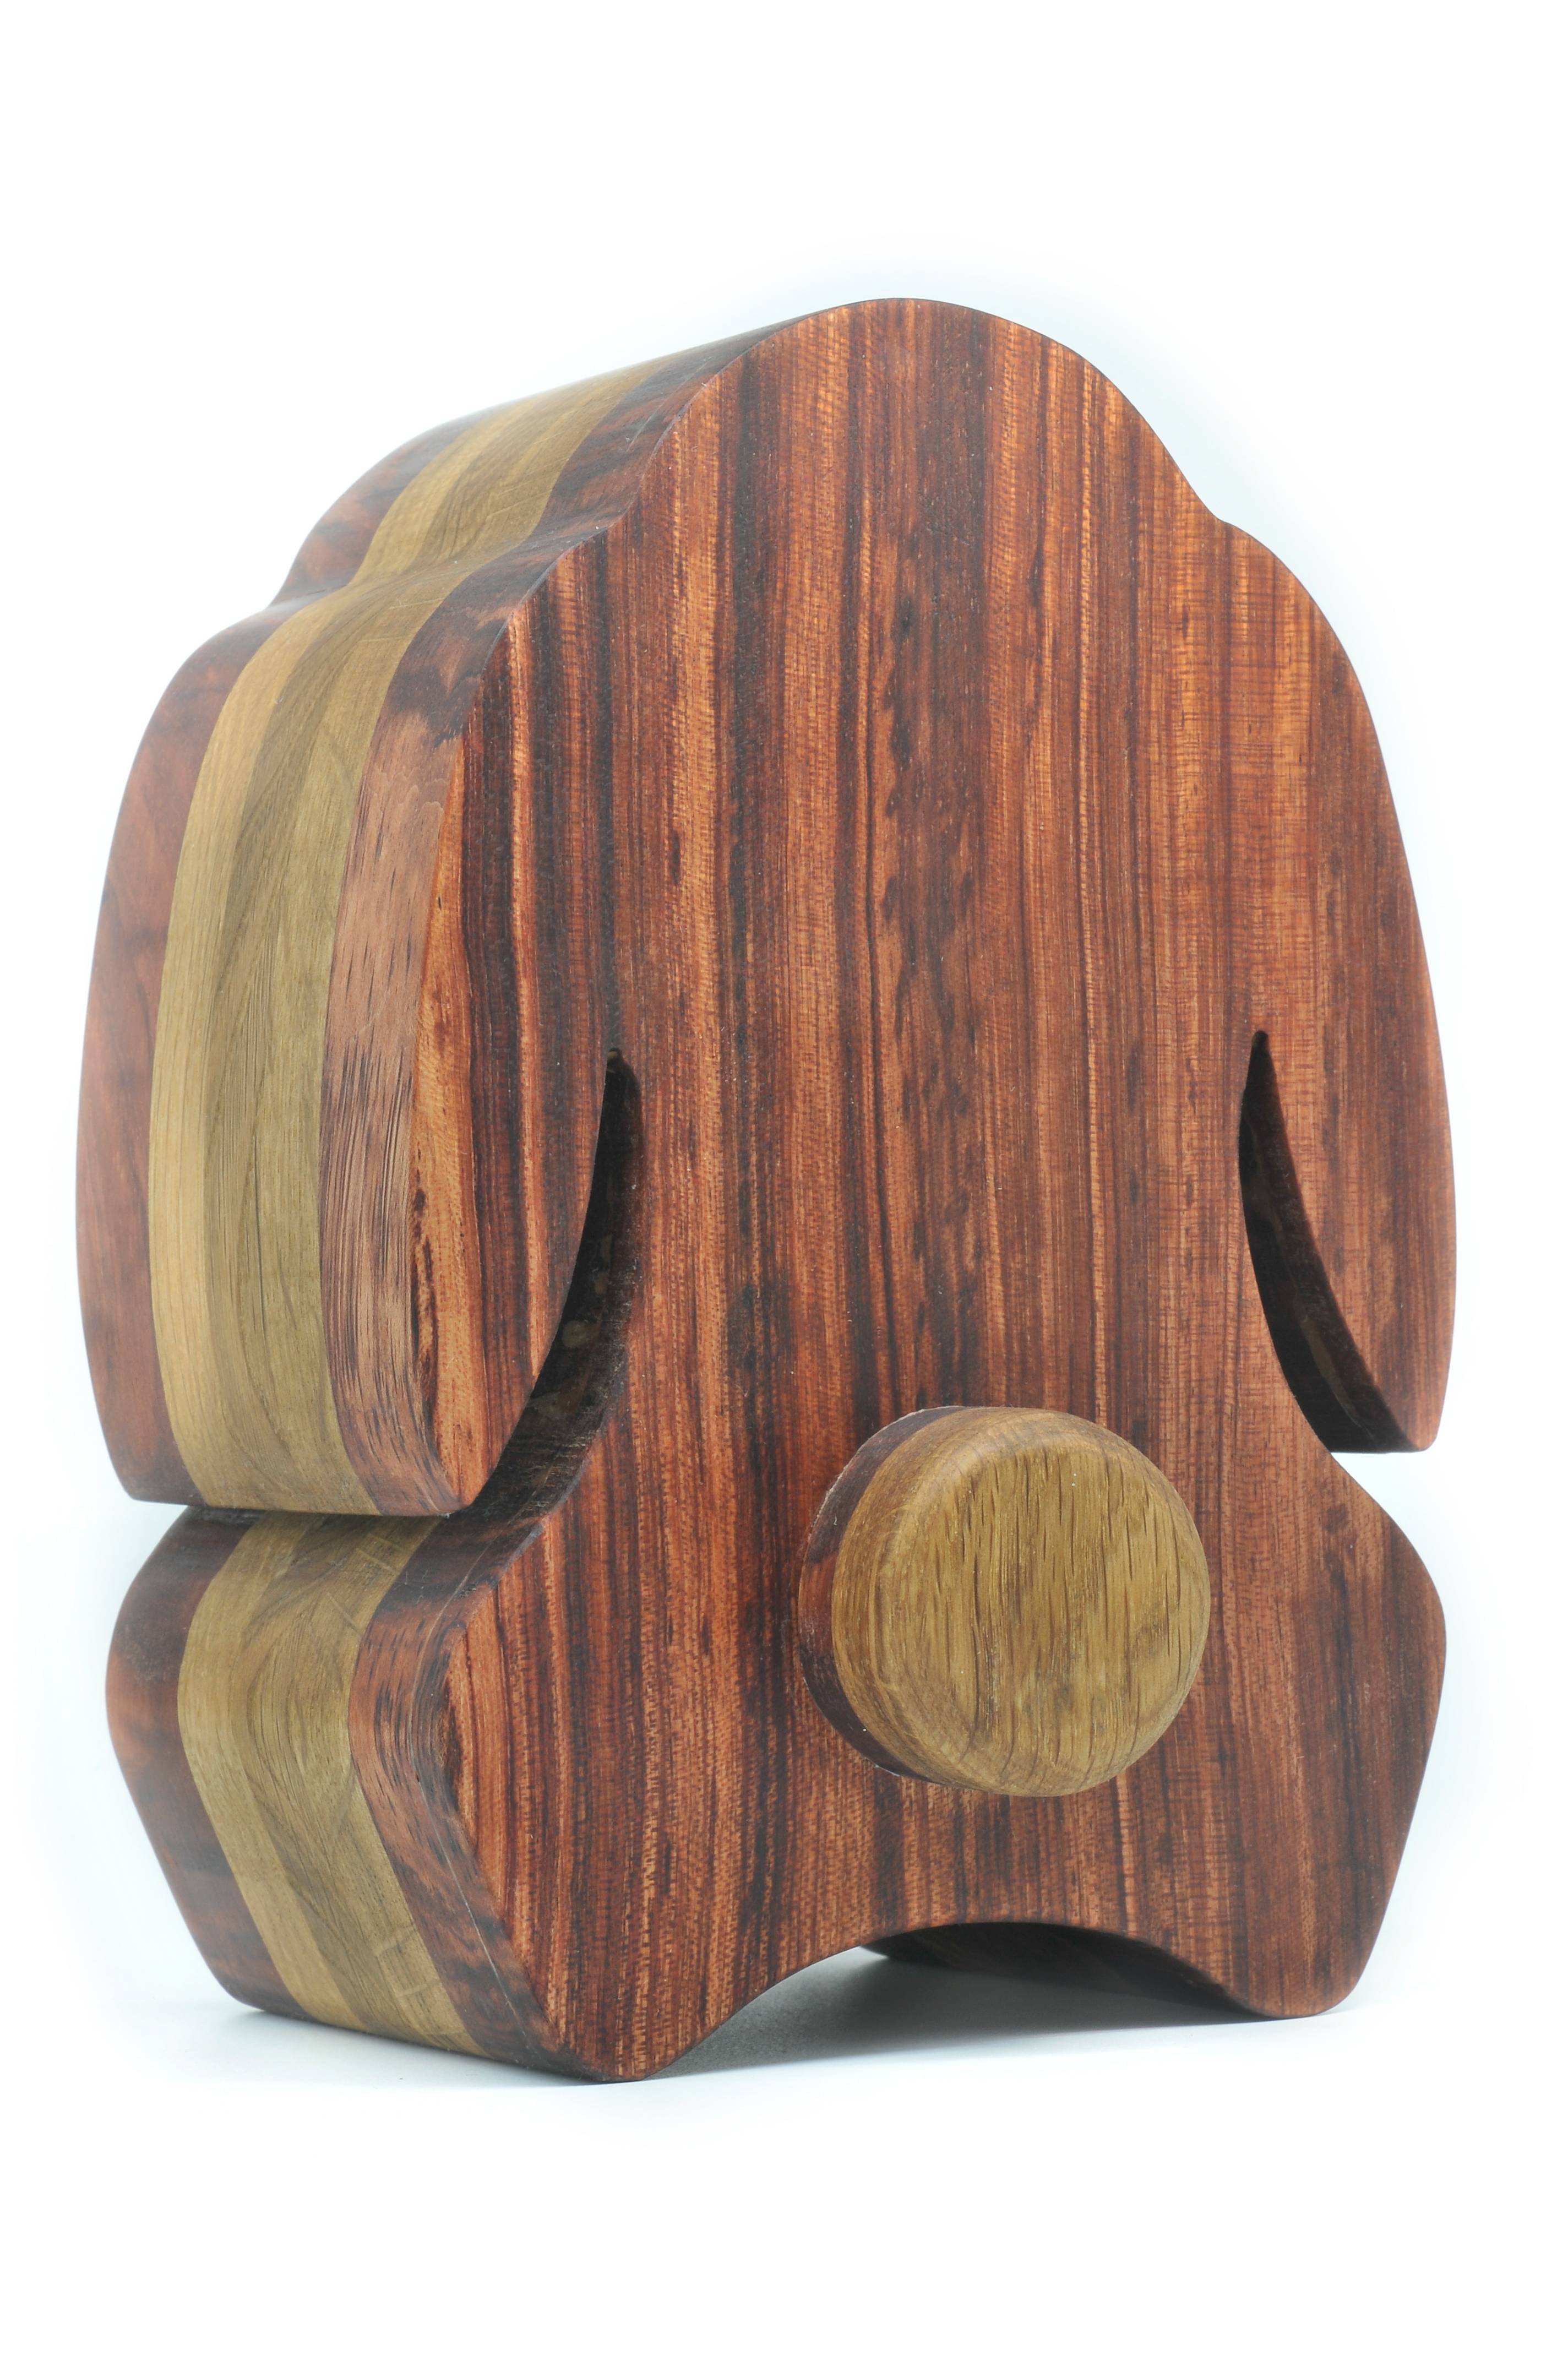
round bit to the left is the tail to be glued on later.

QqaZizl.jpg


Haven't glued on the nose or paws yet. I'm a bit concerned about the nose as it's to be the drawer pulling knob but it's a tiny, not much surface area for the glue to hold. Wondering if I should screw it from the inside of draw?
 
=D> =D> =D> =D> =D> =D> =D> =D> =D> =D> =D>
youve put more effort into those eyes than I do in three whole boxes. :shock: :shock: :shock:

A true labour of love.
If you dont want to screw the nose on from the inside (although thats fine as long as you drill pilot holes to stop the tiny piece of wood splitting) you could pin it from the front, using blind holes in the front of the drawer and back of the nose. use a roughed surface brass pin and epoxy it in.

Keep up the good work. 8) 8)
 
Cheers Bob!

Apart from the pressures of time I'm really enjoying making this.

I ordered the flocking kit but might leave it out, only really got one more weekend to finish it.

Ah, like the idea of a pin. Think i'll try that. Would you drill a small pilot hole for the pin or just gently hammer it in both ends?
 
DO NOT HAMMER A PIN in wood that small, it will split.
You might not even have enough wood in the drawer front to allow a blind hole. but if you do, drill a hole thats a push fit to the pin in both sides. the epoxy will give you a sliding shear force rather than a straight glued direct force. Theres no weight in the drawer to warrant any thing on the heavy side, you just want to stop the handle falling off.

If there isnt enough force, you can drill a pilot hole through the drawer and a blind pilot in the back of the handle and use the smallest wood screw you have that will reach. If flocking, put the screw in first and just go over it.
If not flocking, a brass screw head looks better than any other finish.
Remember, you are NOT lifting heavy weights, youre just sliding a light piece of wood along.
I would want 3 days minimum from flocking before letting someone put stuff inside and handle it.
 
Update time, pretty much finished now, will probably give it another coat of wax, see if I can improve the (very low) sheen I have now.

I expoxied the nose in with a brass pin, seems to be holding up.

Final round of pics...

O6ojiOJ.jpg


1EgDfir.jpg


gratuitous ass shot...
FkSIoq5.jpg


exploded view (looks like E.T. )
dxZVDiz.jpg


exploded view side
tnzaALB.jpg


drawers out
qnBGIXq.jpg


I finished it with 4 coats of boiled linseed oil and then (one so far) coat of Black Bison wax. I'm not happy with the finish though, not shiny at all and lost some of the lovely redness of the bubinga.

For anyone making your own box, I wouldn't recommend this finish. Ask Bob about his wipe on poly instead!

If I started again I'd do a few things differently. I'd cut off the back (or as Bob suggest, put contrasting back on afterwards to avoid a visible glue line), and then cut out the insides before cutting out the outside shape. That way if your sawing is a little off you can add a bit to the outside and you avoid a thin edge like I have at the top of this.

Apart from finish I'm quite happy with it, hopefully she'll like it when I hand it over tomorrow night! :ho2
 
Oscar (I know, but I like Oscar! :D )

I dont think youll have any problems with handover :lol: :lol: 8)

I like the feet and arms, very cute.
That face still sets off freudian responses in my animal brain though #-o #-o #-o (hammer) (hammer) (hammer) , hopefully the recipient will much more high class than me, which I have to admit wont be all that difficult 8) 8)

A very nice bandsaw box.
 
Very well done Oscar. That,s a great box for starters and far more complex than my first some 4 years ago. Lots of scope for the future so keep it up and have a great Christmas.
Malcolm
 
Many thanks for your kind comments chaps!

She loved it! (hammer) :ho2 :deer

She didn't realise I made it at first, so I'm gonna take that as a compliment (unless she thought I bought it at Poundland? #-o )

Lucky for me she liked the smell of the Black Bison wax, personally I think it reeks!

Woodworking tip for everyone here, you can disguise any mistakes if you stuff the drawers with Lindt chocolates! :wink:
 
OscarG":1w70uqqf said:
Woodworking tip for everyone here, you can disguise any mistakes if you stuff the drawers with Lindt chocolates! :wink:

:lol: :lol: =D>
 
Back
Top