


sploo
Somewhat extinguished member
I wanted to have a go at making a copy of Frank Howarth's inside out Xmas ornament (https://www.youtube.com/watch?v=AbAAdwlHudo). It'd be about the fourth thing I've ever turned (ignoring a few practice spindles), but hey, it's all just jabbing chisels into a chunk of timber eh?
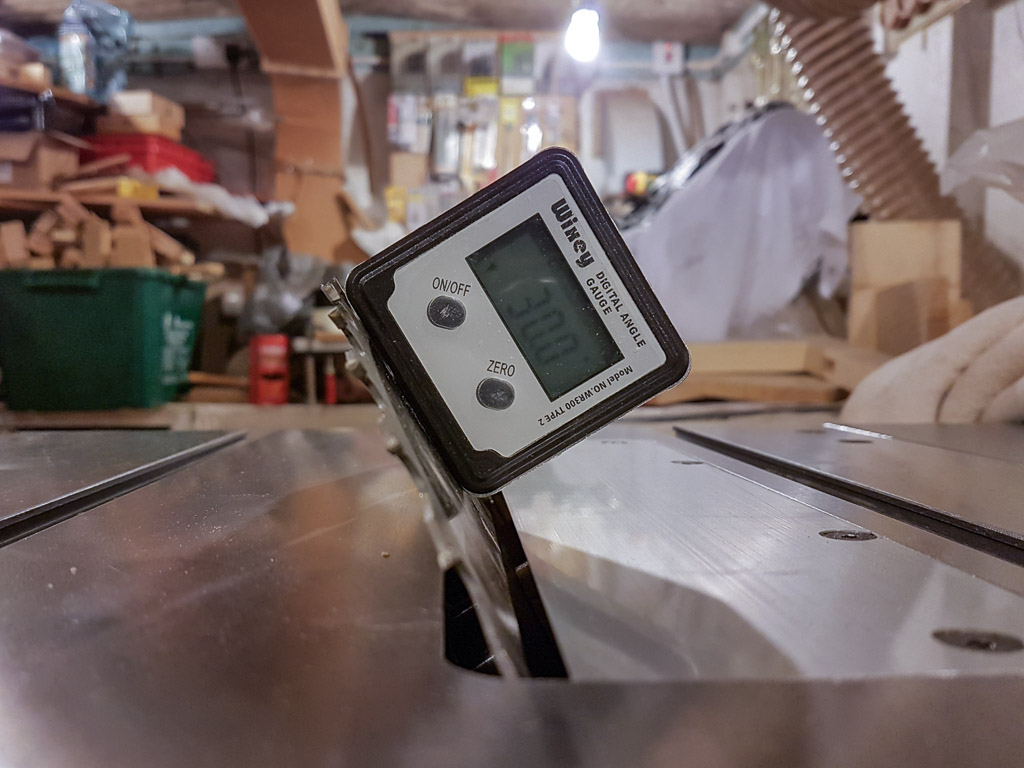
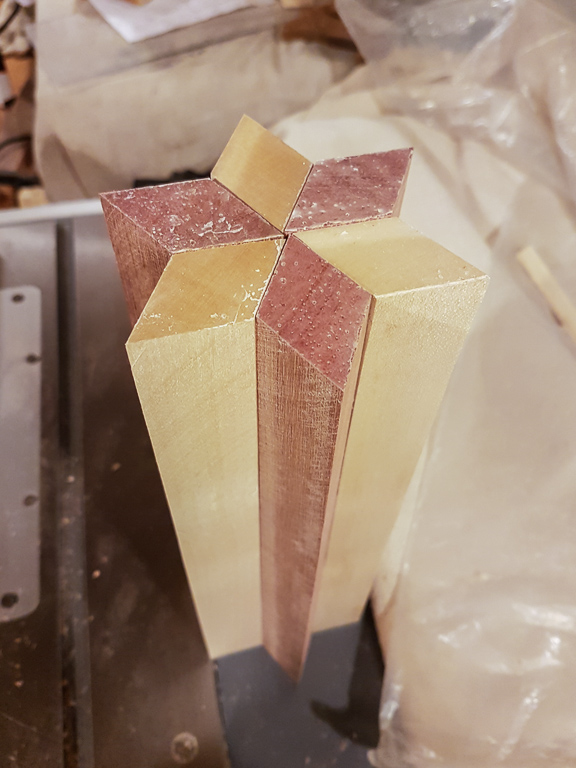
I got some sycamore and purple heart, and started to prepare suitable stock:

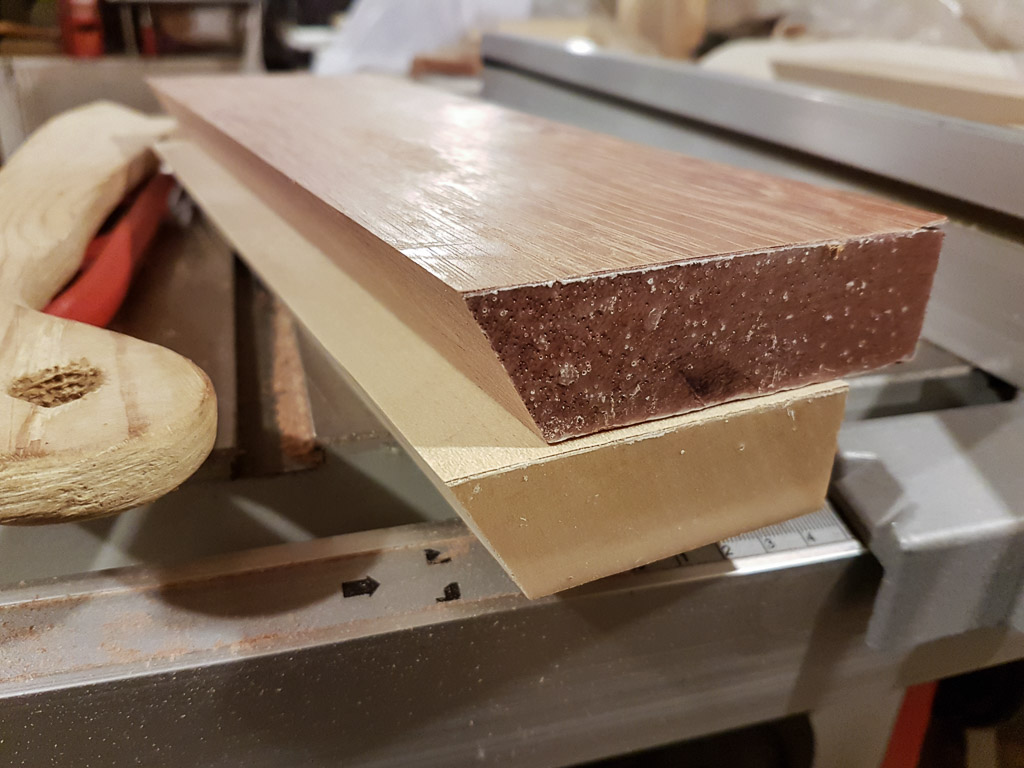
Then through the table saw:
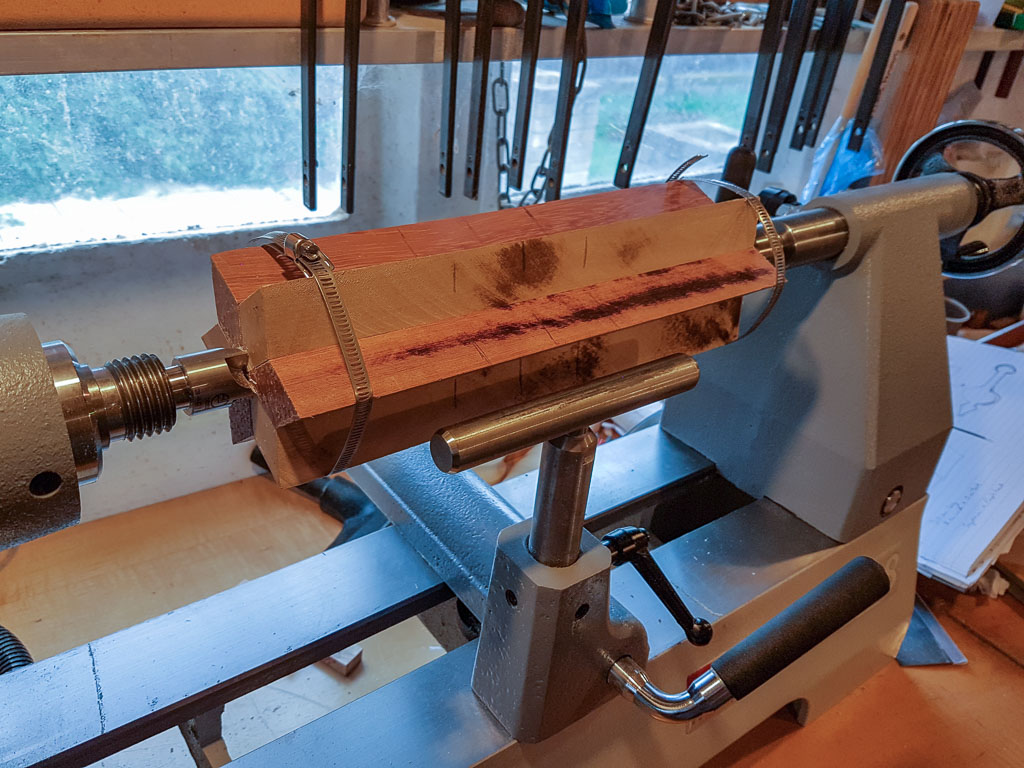
My initial attempt at the inside out turning part (just holding the pieces together with hose clamps) wasn't a good idea. In the end I screwed a block to the end:
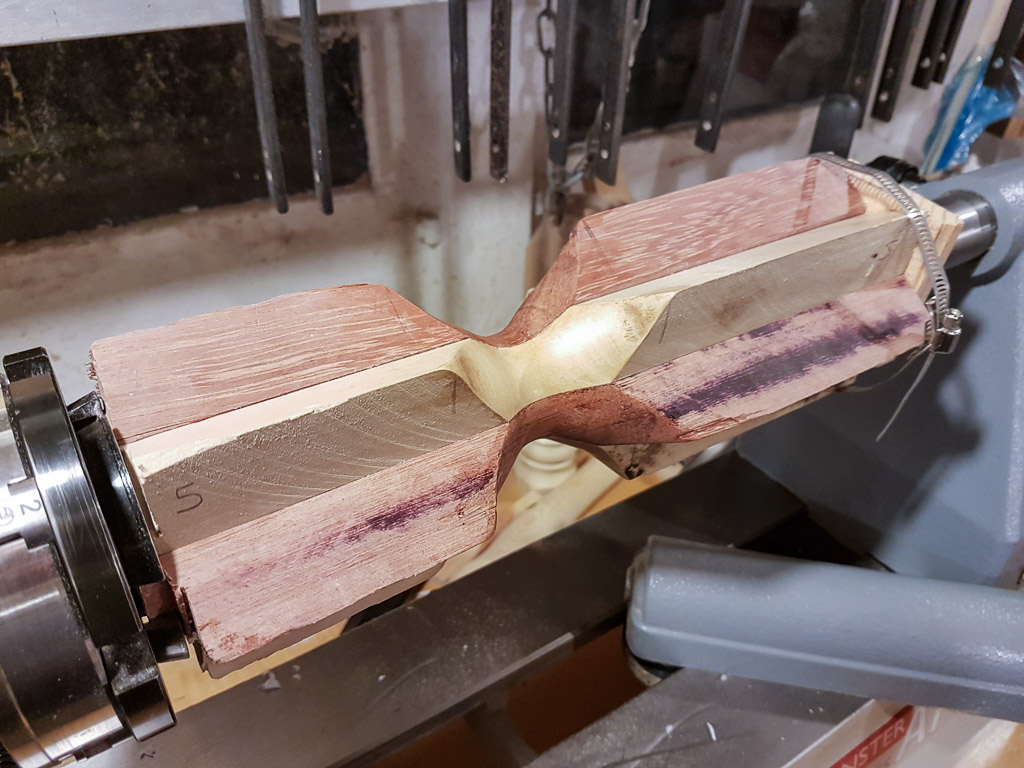
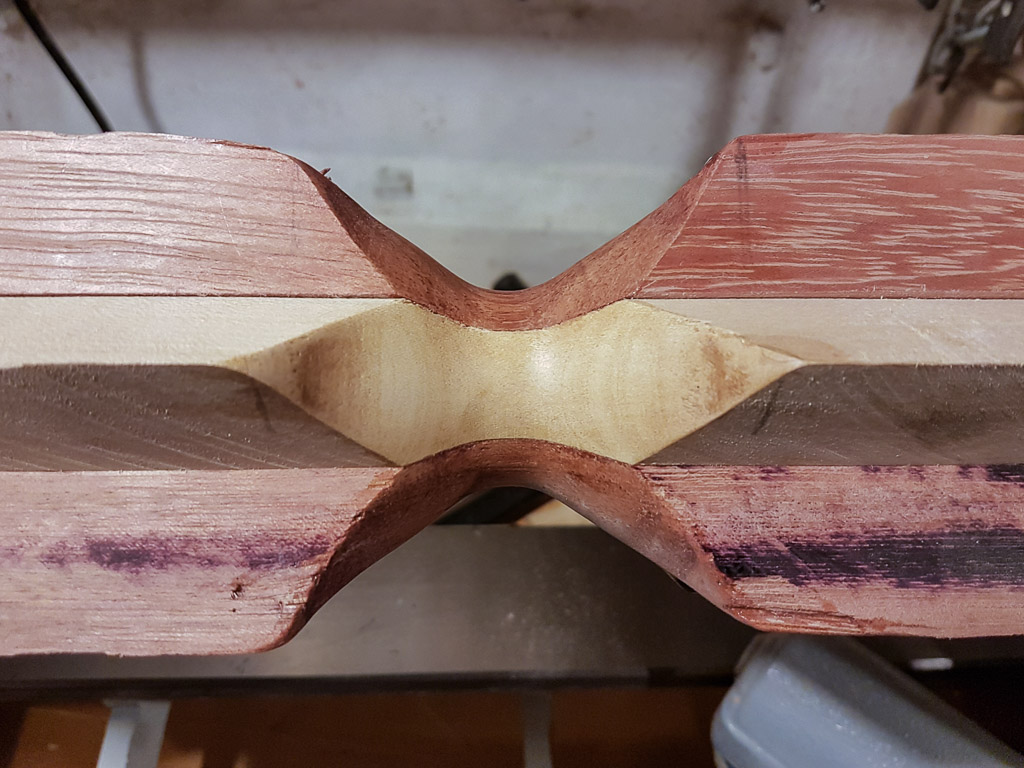
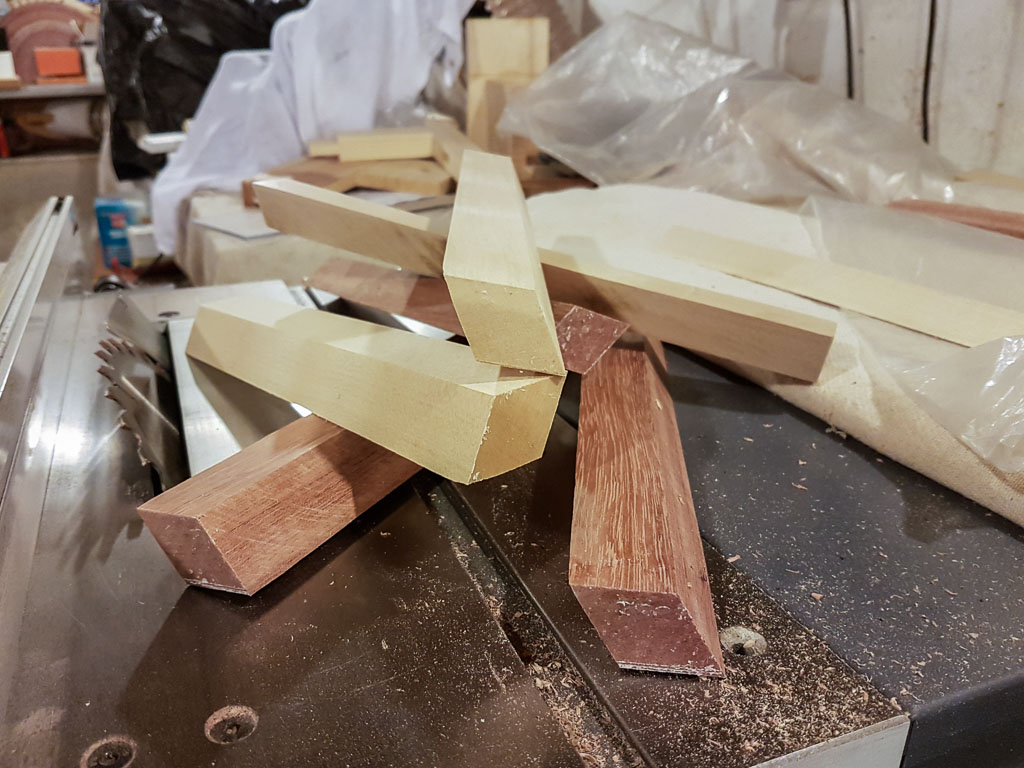
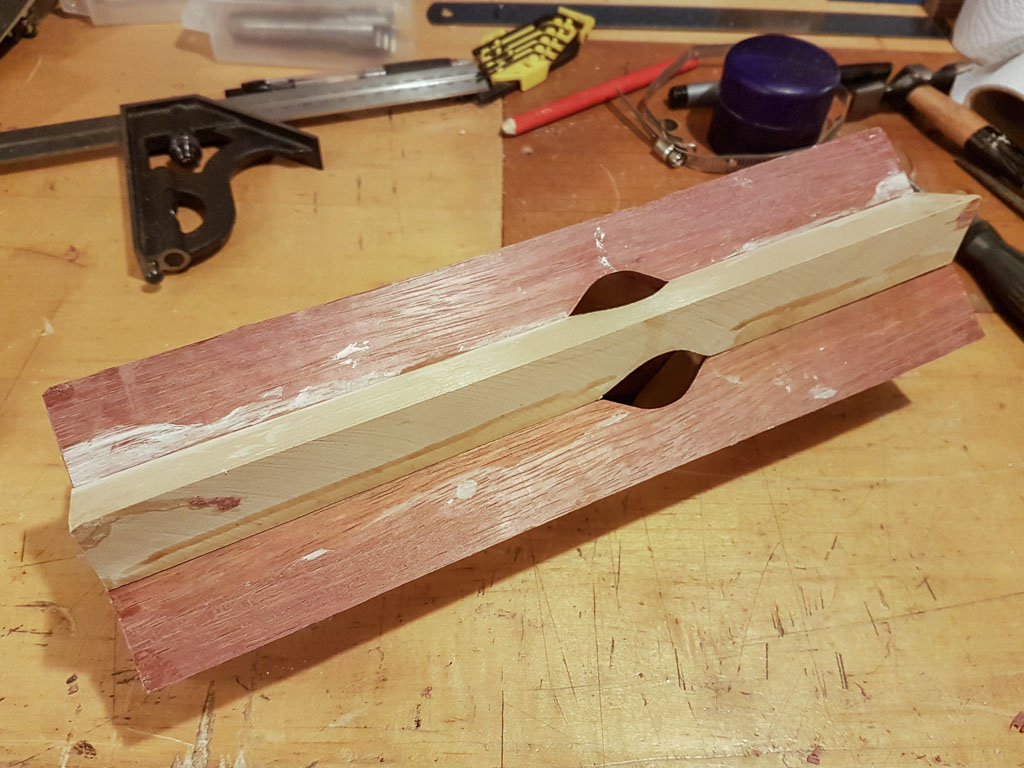
The above cut was insufficient - when you flip the diamond shaped segments over you see no gap if you haven't gone beyond the middle of the diamond. I went back and cut a bit more, and got:
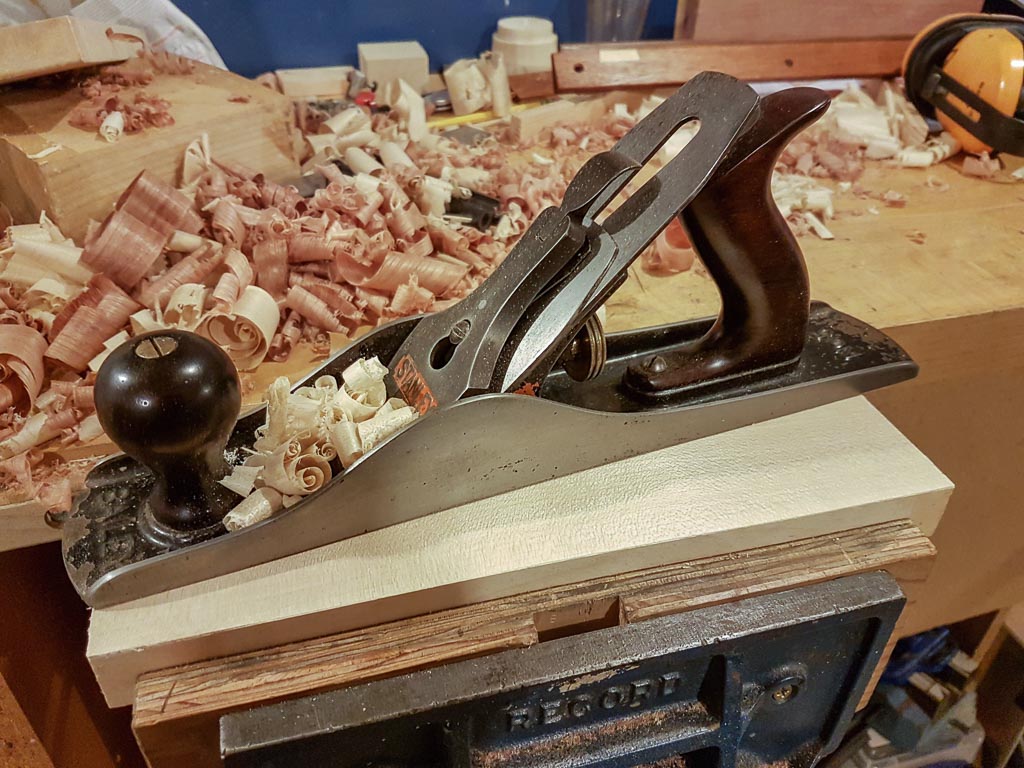
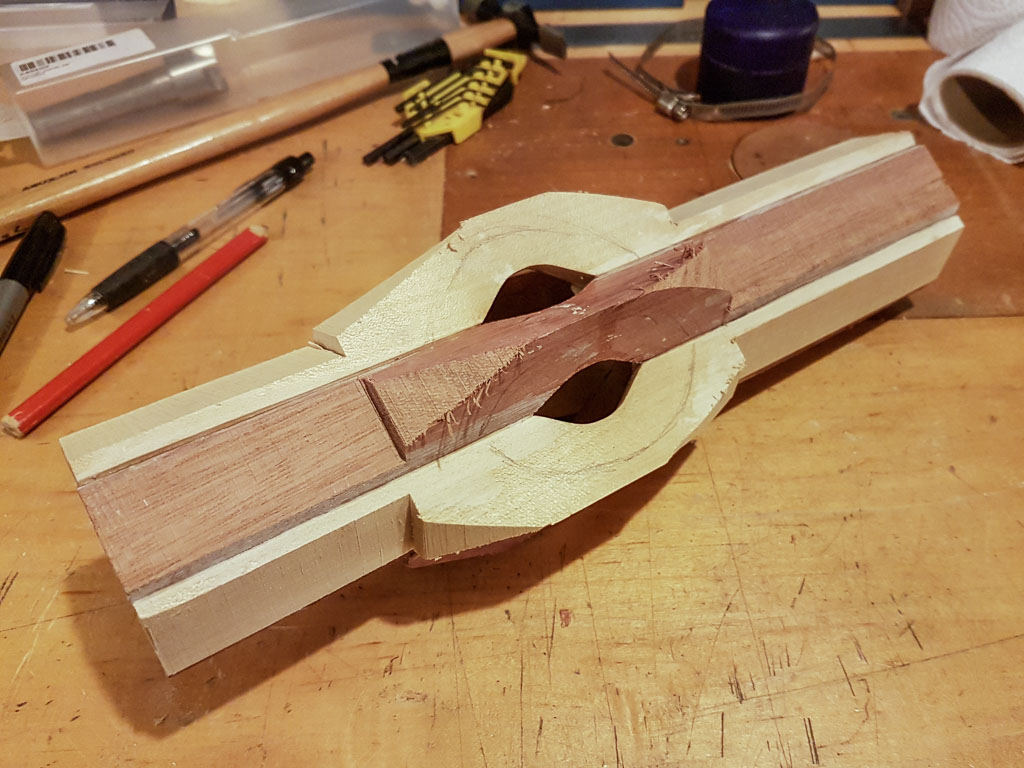
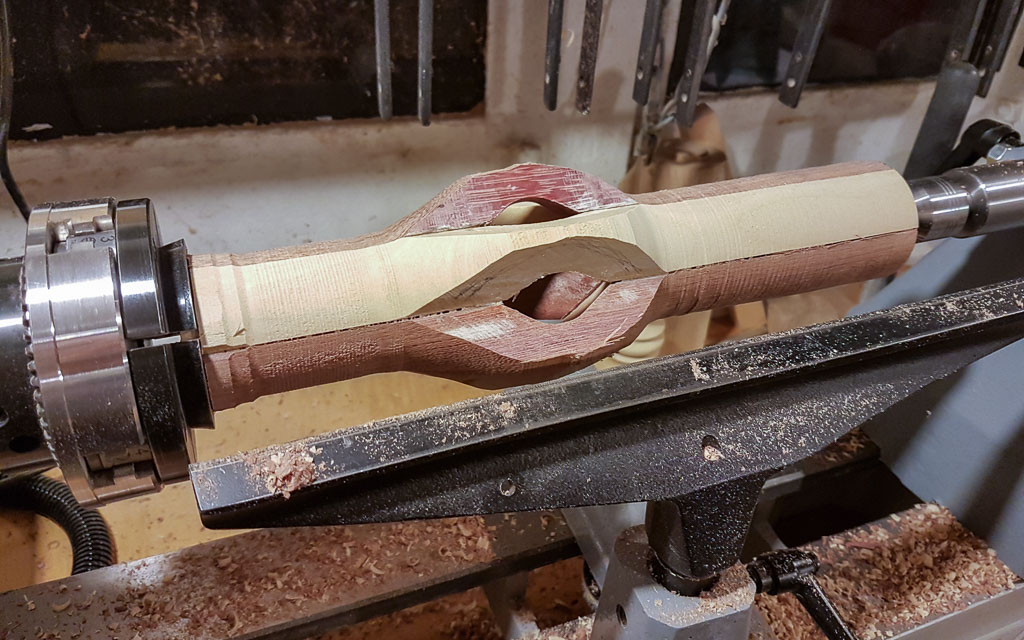
I used the bandsaw to remove a quantity of the waste, and started to round the spindle over. The second shot shows a problem; my hand plane skills aren't "engineering" standard, and so the pieces don't fit together perfectly. I did glue it in two sets of three, but should have spent more time ensuring the mating faces were flat before final gluing:
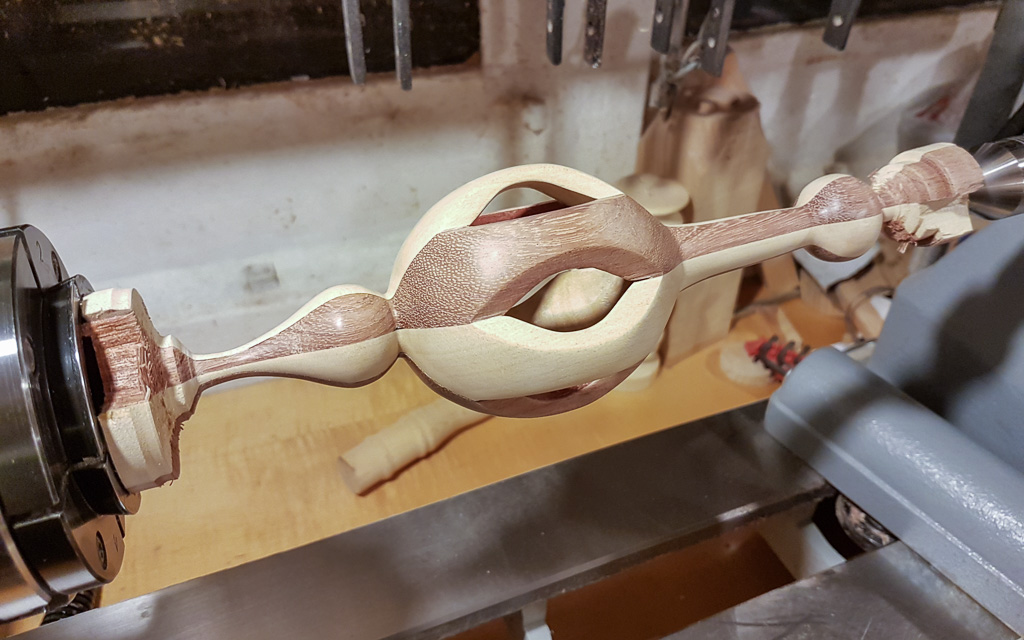
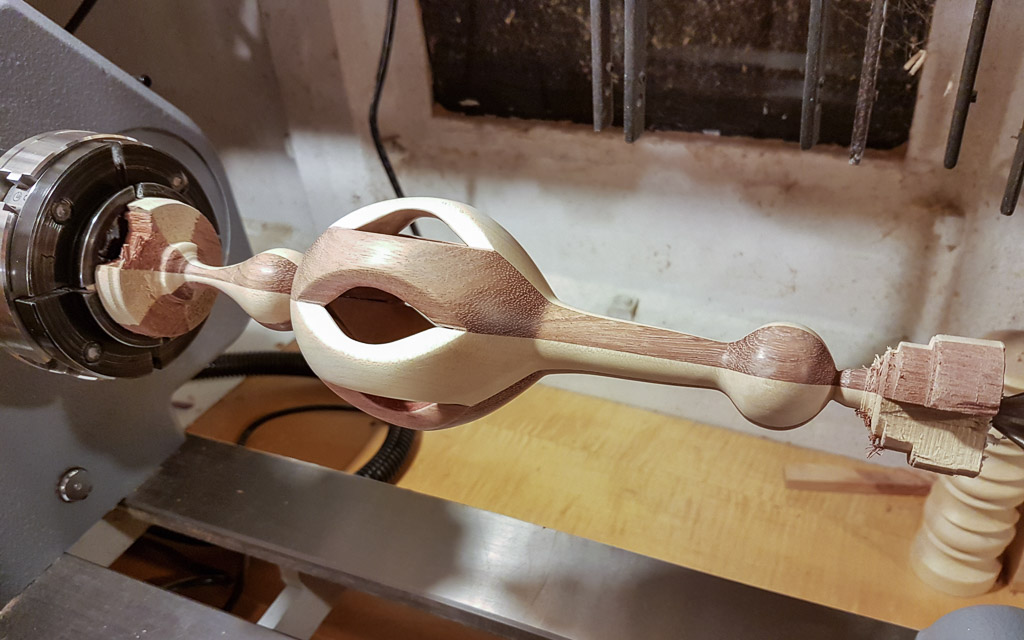
After some time with just about every tool I own, a massive catch that flicked the piece off the lathe, and a lot of sanding, somehow this appeared:
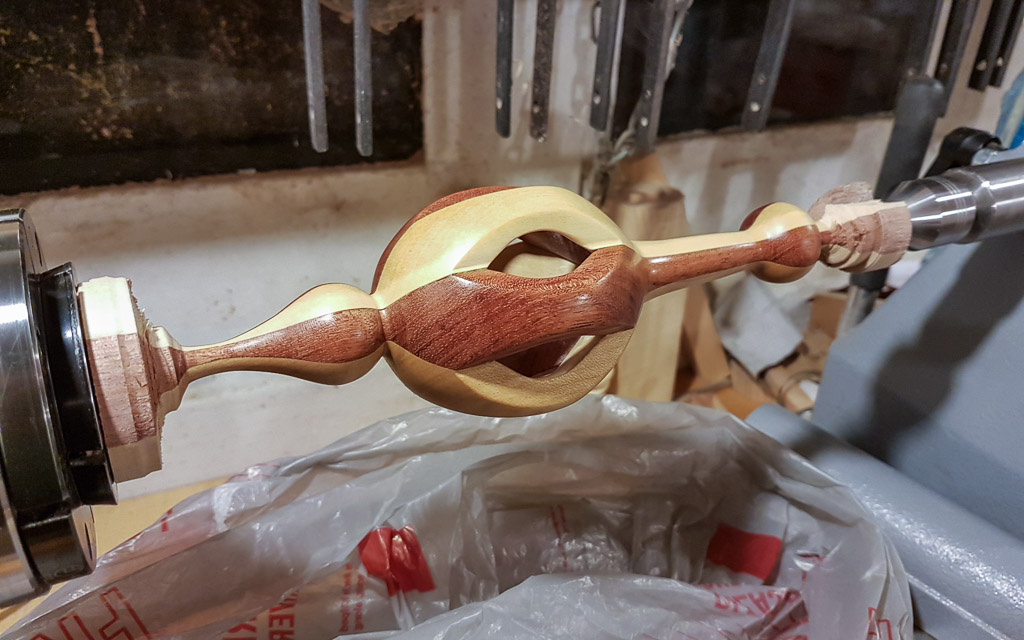
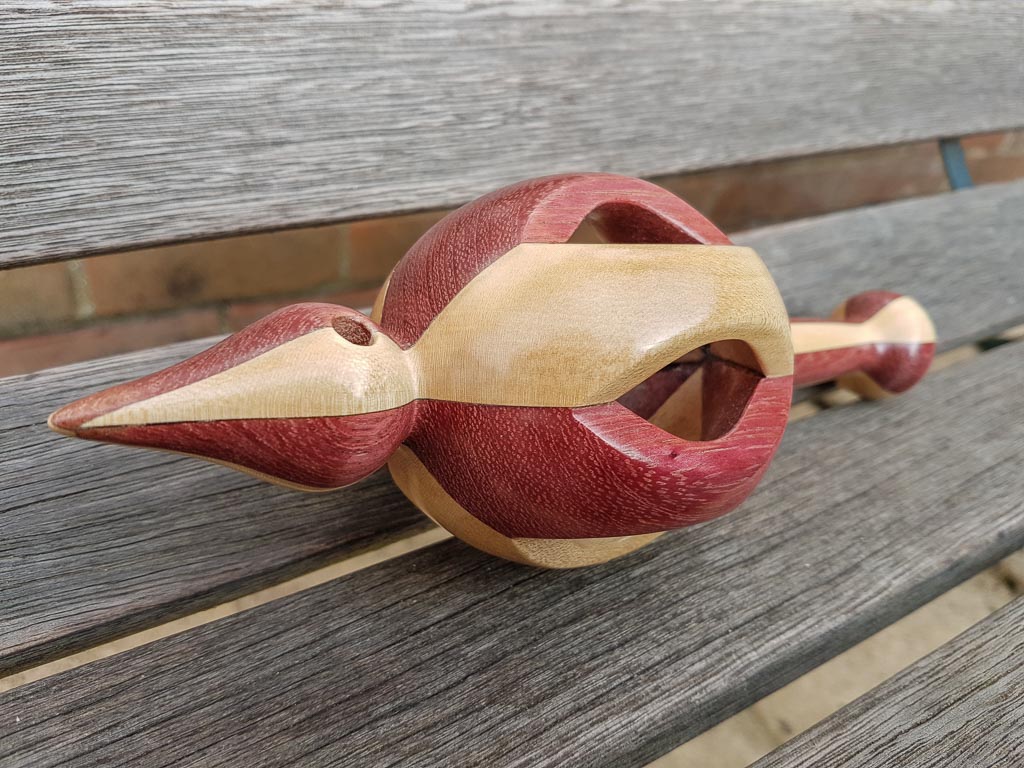
I added some Danish oil for "pop", but the purple heart was still looking distinctly brown - it usually reacts (and turns purple) much quicker, so I'm not sure what was wrong with this stock:
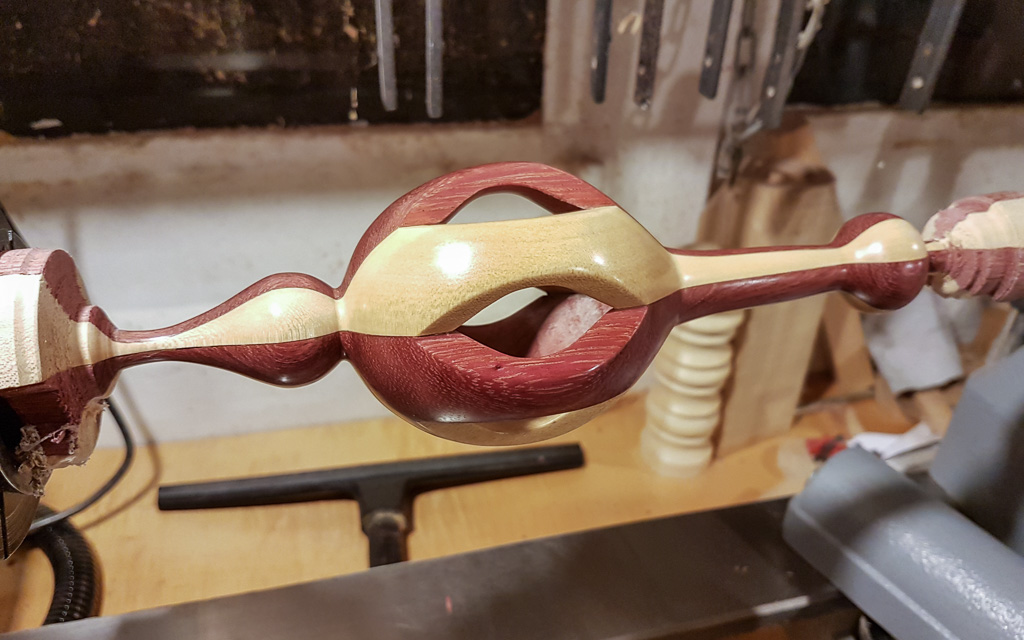
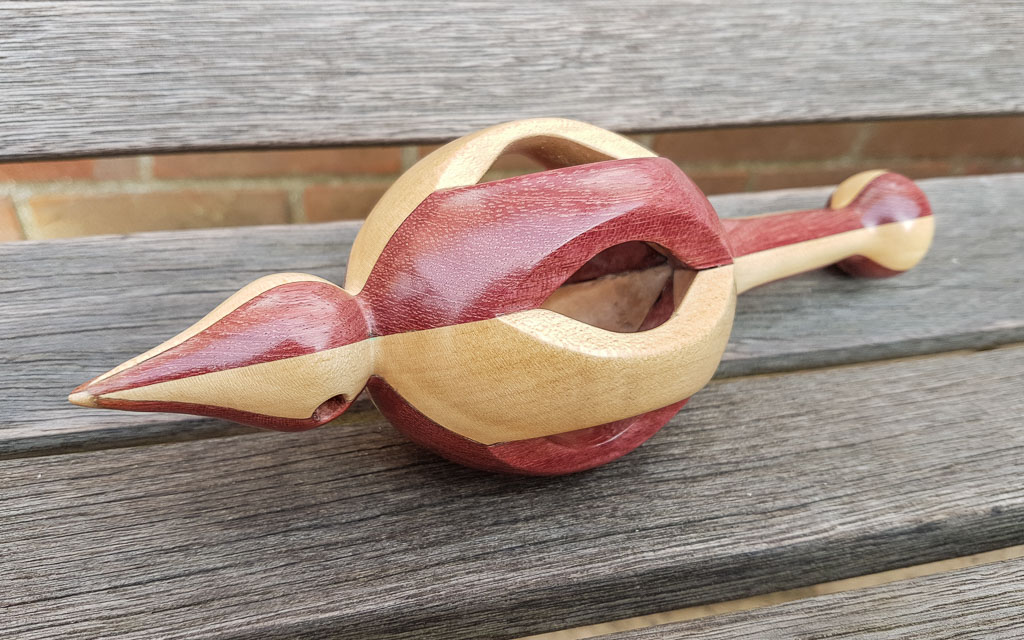
Fortunately the next day it was looking a lot better, so I applied sanding sealer then wax, and finished turning it off:
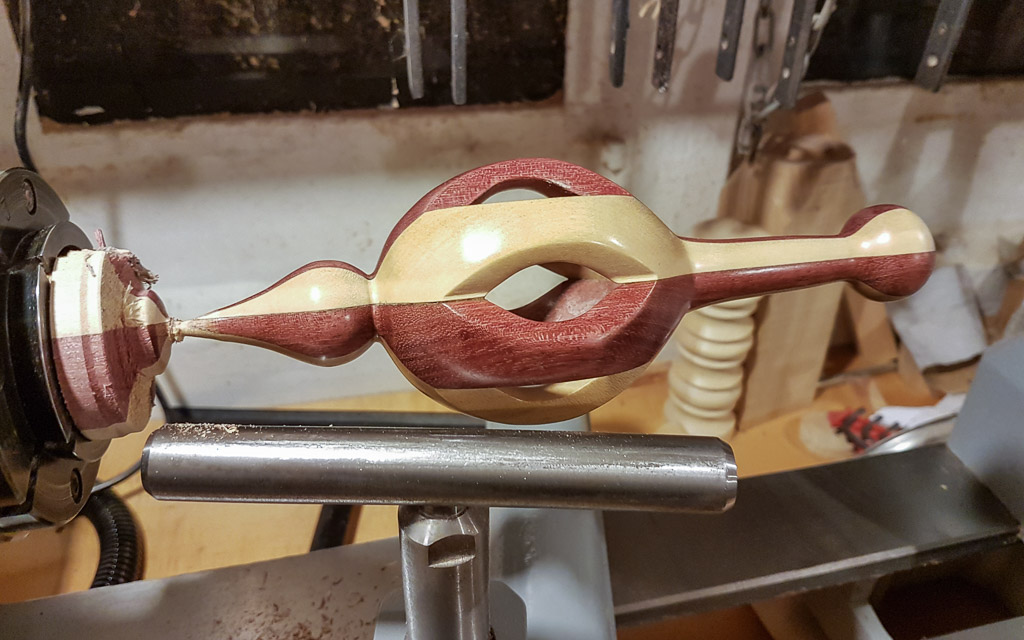
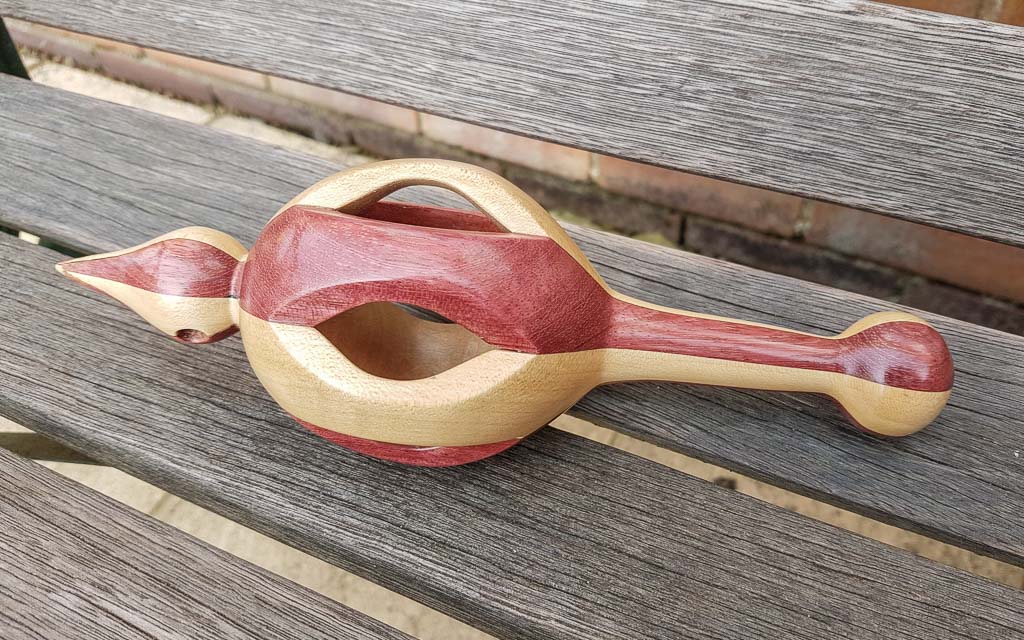
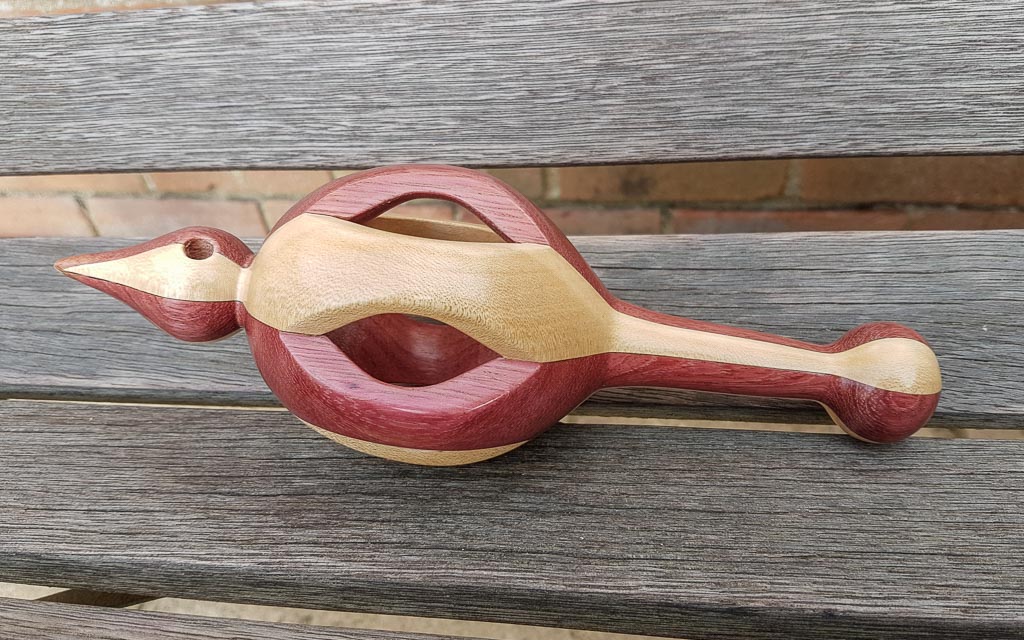
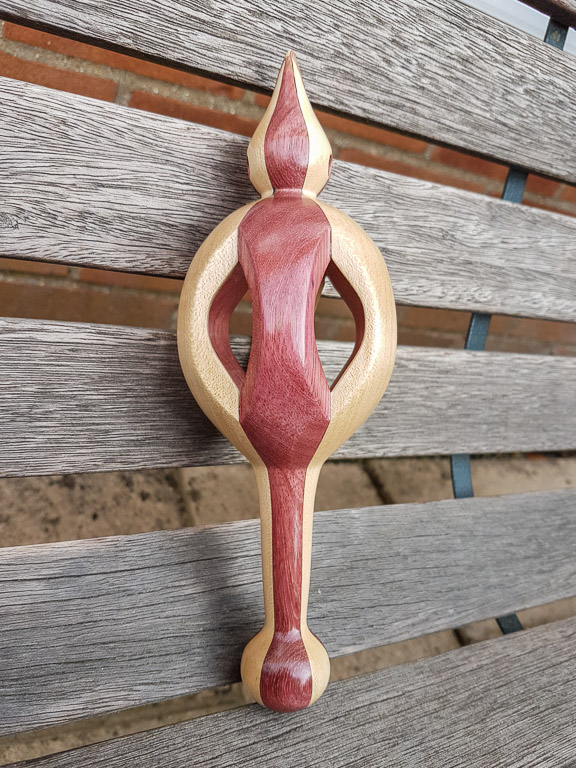
Finally a hole drilled for hanging, and we're done:
I got some sycamore and purple heart, and started to prepare suitable stock:
Then through the table saw:
My initial attempt at the inside out turning part (just holding the pieces together with hose clamps) wasn't a good idea. In the end I screwed a block to the end:
The above cut was insufficient - when you flip the diamond shaped segments over you see no gap if you haven't gone beyond the middle of the diamond. I went back and cut a bit more, and got:
I used the bandsaw to remove a quantity of the waste, and started to round the spindle over. The second shot shows a problem; my hand plane skills aren't "engineering" standard, and so the pieces don't fit together perfectly. I did glue it in two sets of three, but should have spent more time ensuring the mating faces were flat before final gluing:
After some time with just about every tool I own, a massive catch that flicked the piece off the lathe, and a lot of sanding, somehow this appeared:
I added some Danish oil for "pop", but the purple heart was still looking distinctly brown - it usually reacts (and turns purple) much quicker, so I'm not sure what was wrong with this stock:
Fortunately the next day it was looking a lot better, so I applied sanding sealer then wax, and finished turning it off:
Finally a hole drilled for hanging, and we're done:
") ). I wouldn't dream of running a TS without one. The only reason the guard was off was because it wouldn't fit for that cut.
). I wouldn't dream of running a TS without one. The only reason the guard was off was because it wouldn't fit for that cut.

