I'll need something to put my tools in...

UKworkshop.co.uk

Help Support UKworkshop.co.uk:

This site may earn a commission from merchant affiliate links, including eBay, Amazon, and others.
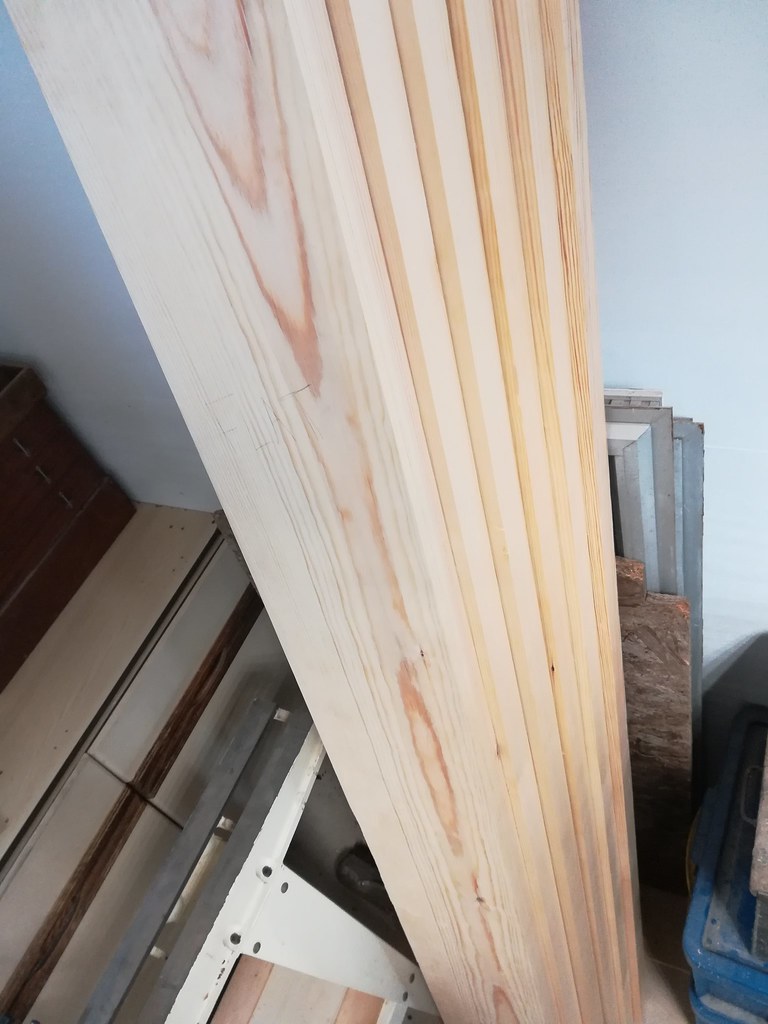
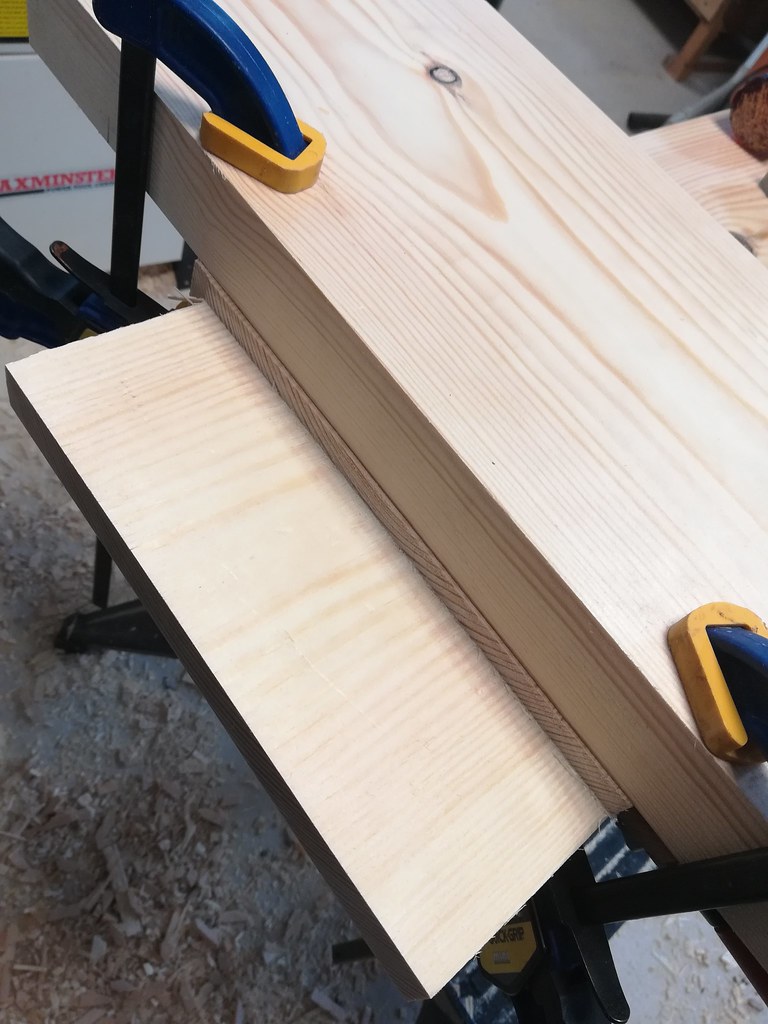
I found the time to have a good look at the planer last weekend, I changed out the blades for new ones, fiddled with everything that I could fiddle with, and got it running much more happily than before. My inability to use it properly however, is not adjustable by turning a screw, so I managed to plane down a twisted board to make it thinner, but still twisted...
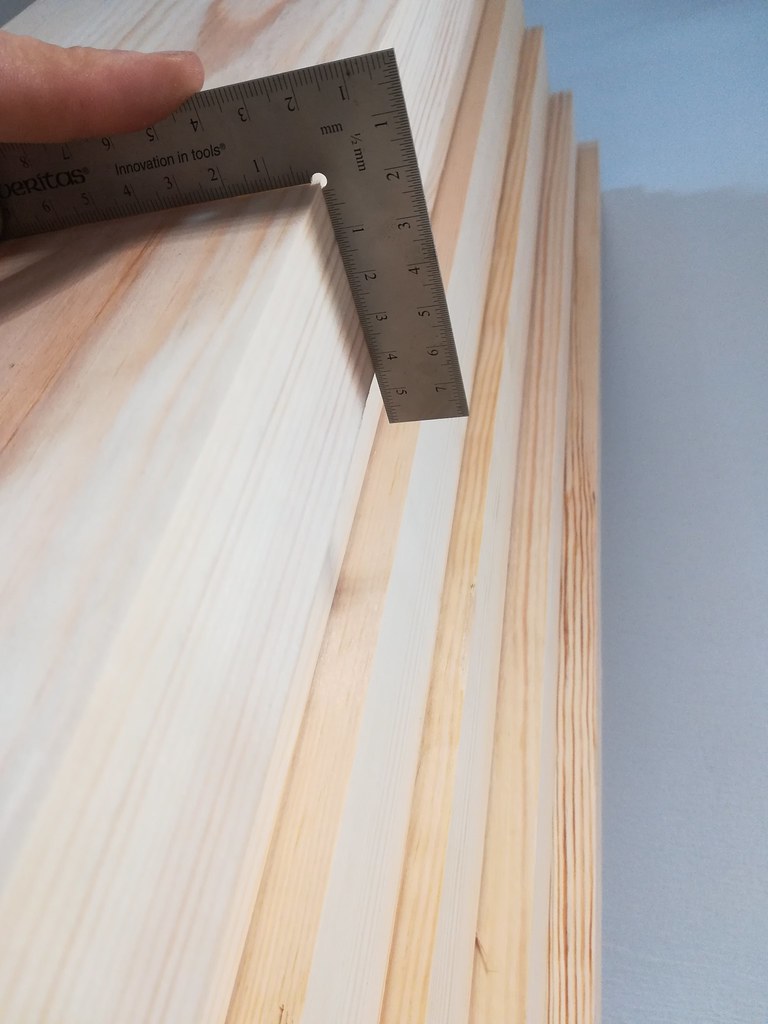
I think the issue was the length of my plane surface versus the length of the board, with 2000mm long planks it's tricky not to rock the plank halfway and just keep planing the twist in! I decided with this length to hand plane the twist out to save it becoming firewood. It was a good excuse to dial in my big plane (I think it's a 6) and knock up some winding sticks, I quite enjoyed it to be honest.

I'll save the planing of the rest of the planks for when I have an extra pair of hands to see if we can't control things a bit better, so I went back to finishing off the threshold.


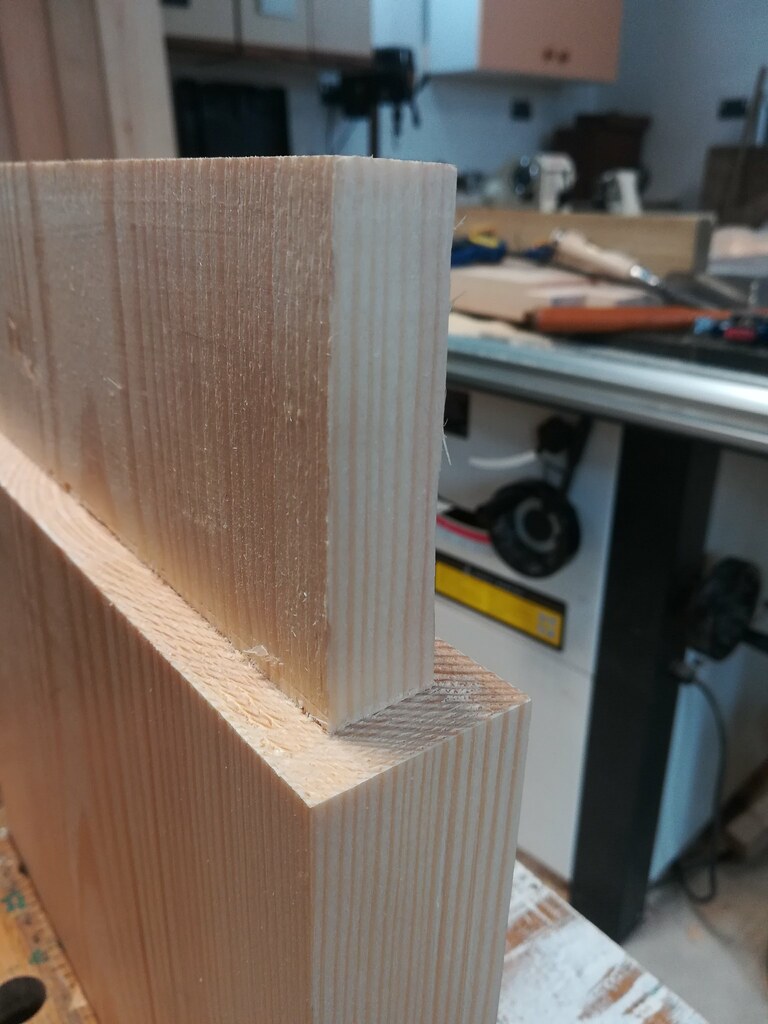
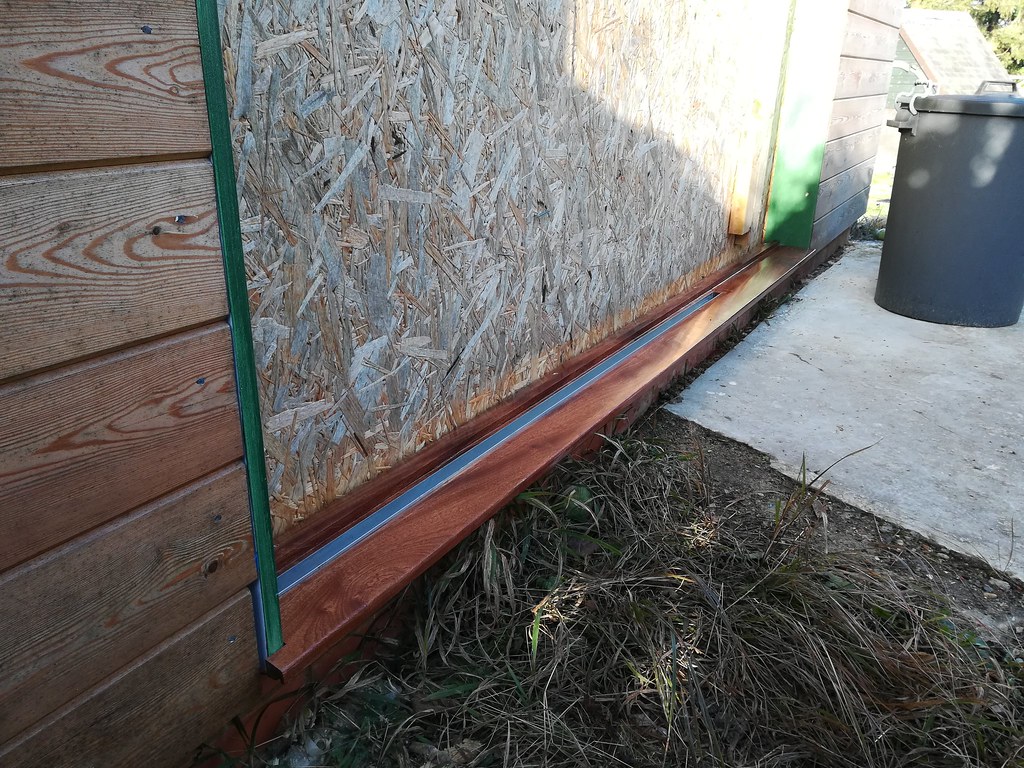
After cutting the slot for the bottom guide rail, I test fitted the threshold and realised that the part of the threshold on the outside of the guide rail is only supported by the tiniest sliver of brickwork underneath, the overhang is such that it's almost all floating in free space.
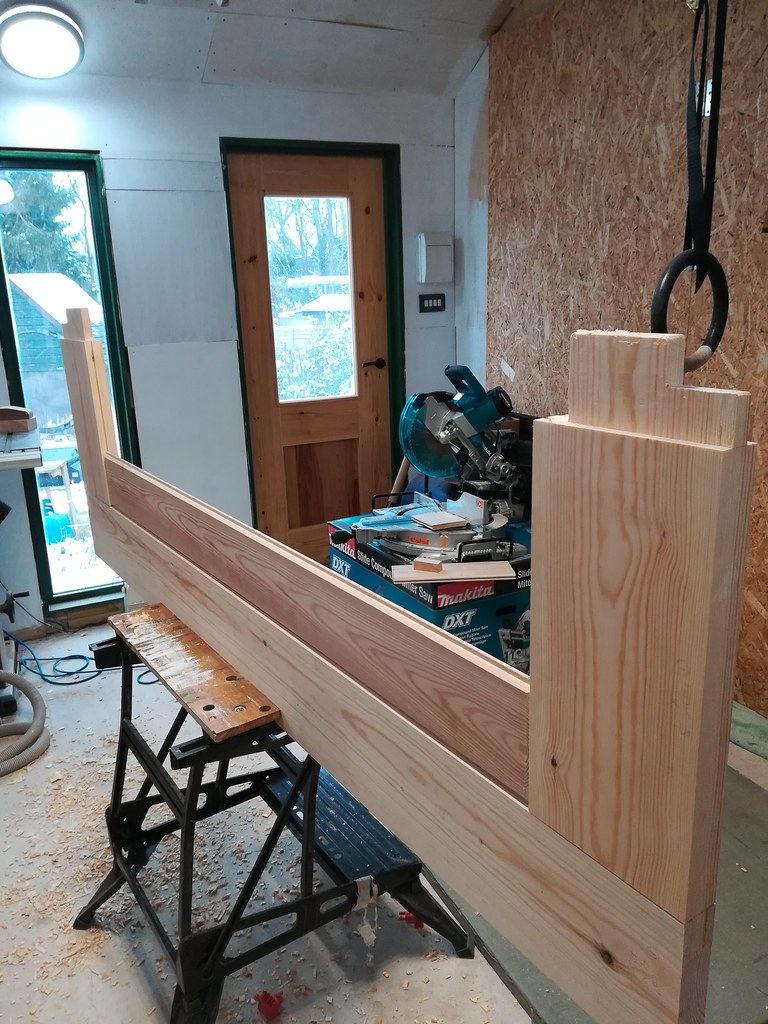
Clearly that's not going to last 5 minutes and I can't rely on gluing the guide rail in place to create enough support, that smacks of bodgery, or at least more bodgery than I am comfortable with.
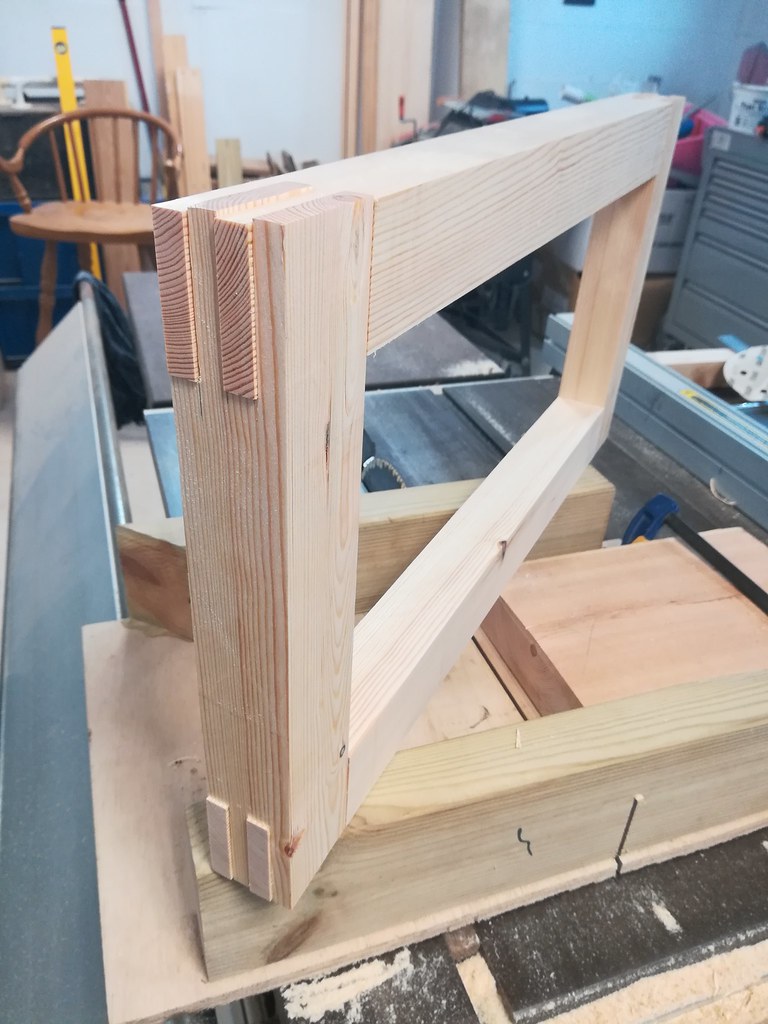
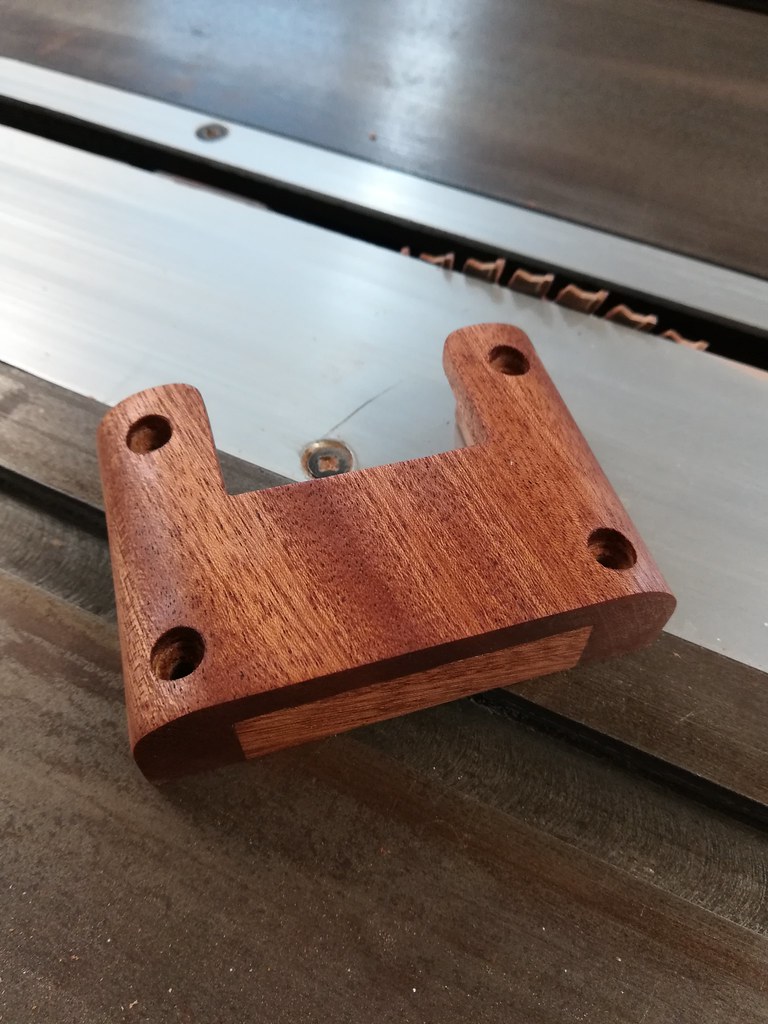
I decided to hack up some spare bits of the heavy gauge top rail and make some support brackets for underneath. The plus side of this is they set the height of the guide rail and give me something to screw the guide rail into, meaning I don't have to glue it all together. The material has a pressed form on the flat face (so it's not actually flat, it's a very shallow corrugation) and I left 10mm returns on the brackets so they are very stiff. A couple of routed slots and this ended up impressively sturdy, hurrah for cantilevers:

[url=https://flic.kr/p/EBTas8]

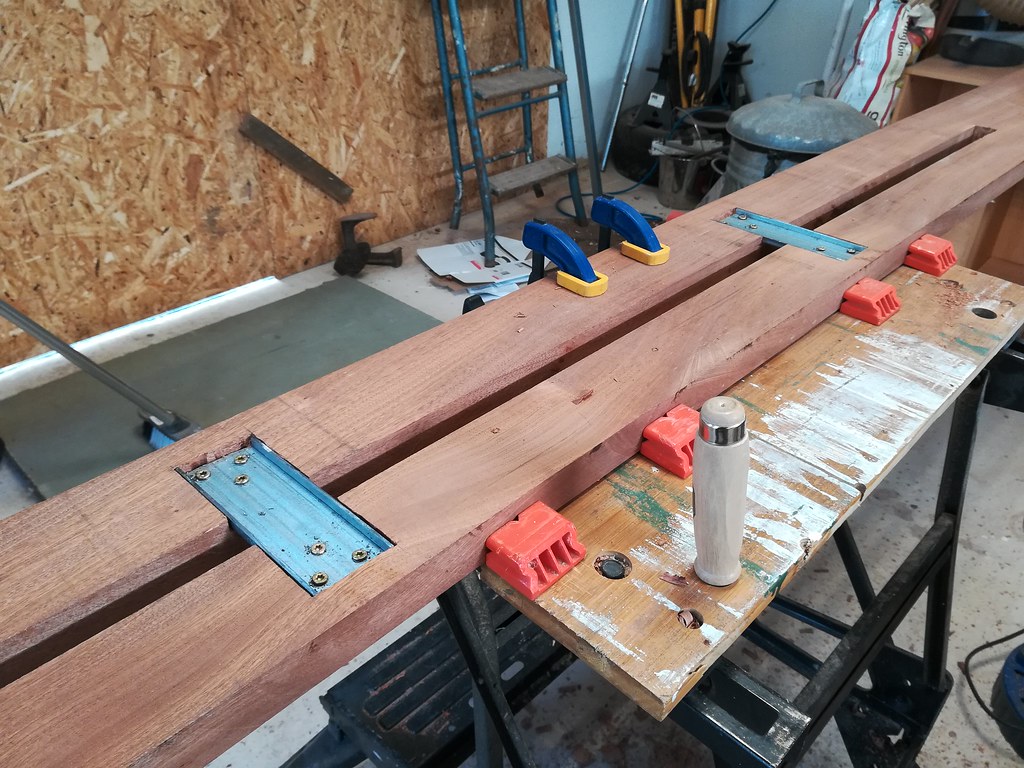
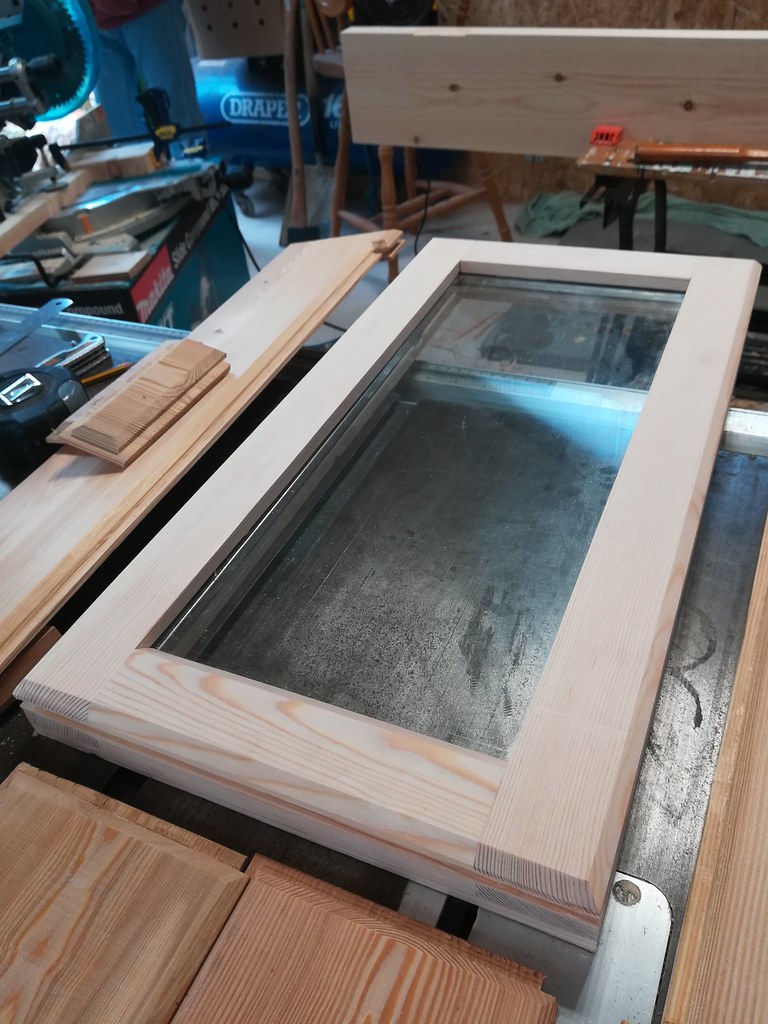
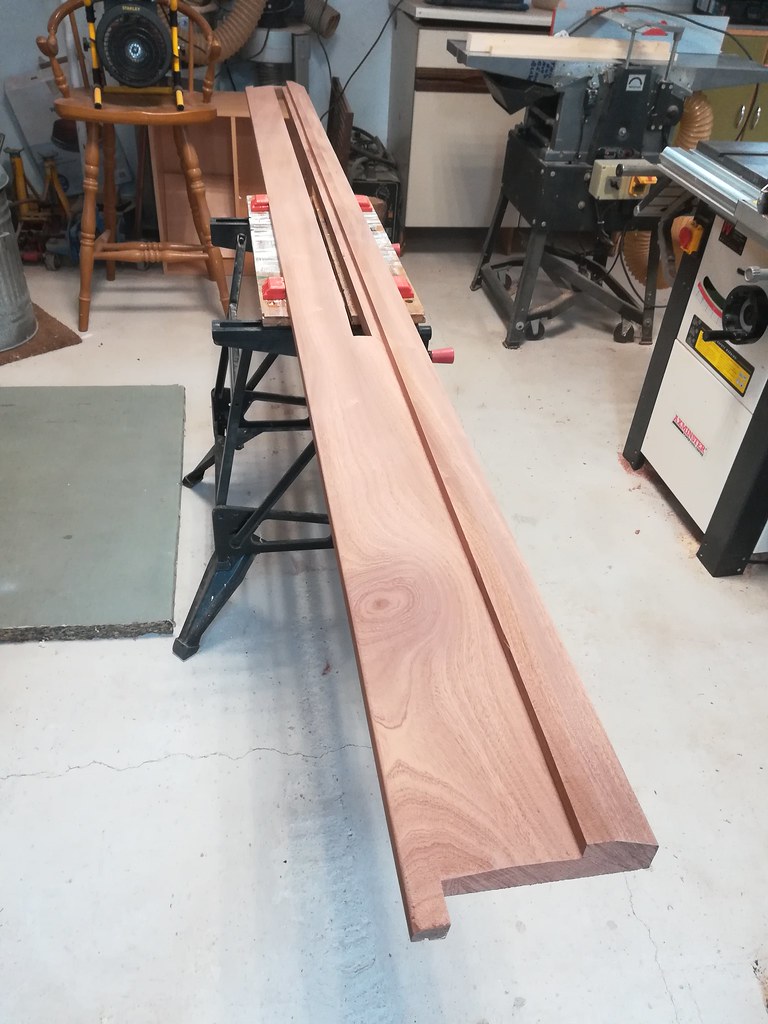
A test fit went well so I started to varnish the threshold, this bit of Sapele has a really nice feature right where the right hand personnel door will go so i'll get to see it every time I open the door:

[url=https://flic.kr/p/24gXTK6]

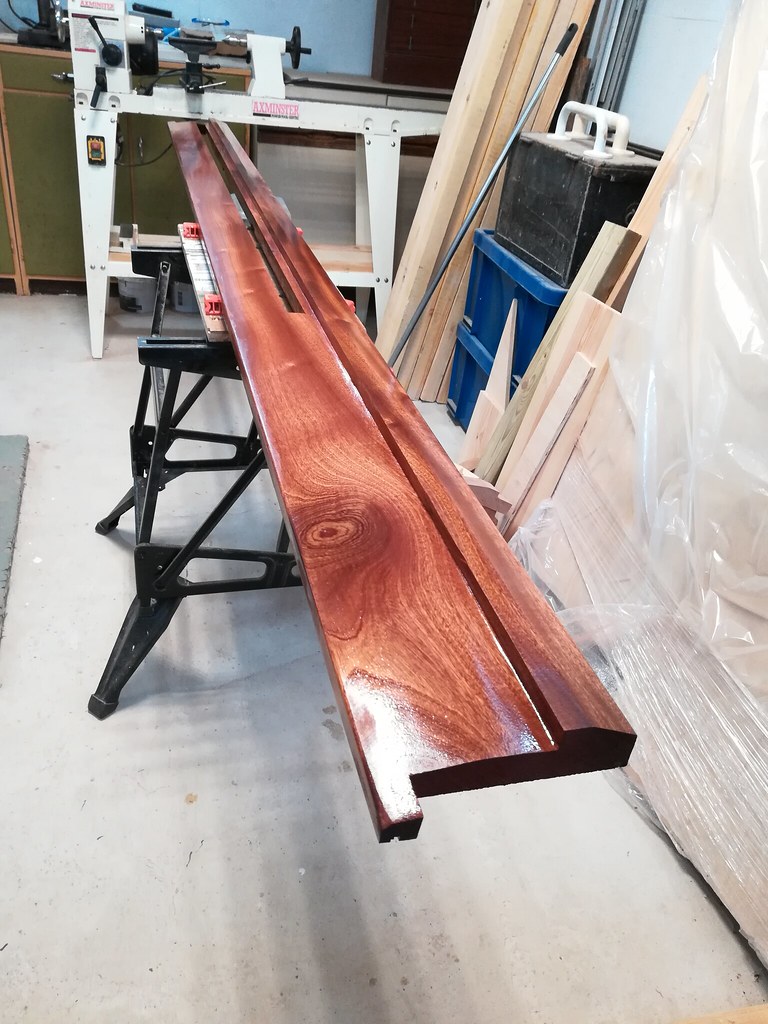
I'll finish the varnishing this week and get it fixed into place at the weekend. Then the entire frame will be set in place and I can take some accurate measurements to ensure the new door fit a fair bit better than my side door!
 
Dan I never had much use for planning down or thicknessing long boards, did you have mobile timber supports at both ends of the operation for that length?
I would think it is a skilled operation needed to tackle removing twist when planning out on that length, I hope you looked up on youtube videos to see how others cope. The cover over the blade does not hold the timber to table it is there to keep your hands from avoiding the spinning blades I would also comment.
 
Thanks John, you know what, despite YouTube usually being my go-to source of information for things like this, i've not searched this particular issue, I should definitely do that. Perhaps a roller support could be my extra set of hands, i'll look into getting one.

A little progress this weekend, I gave the threshold 3 coats of linseed varnish throughout the week so by the weekend it was looking mighty shiny. I screwed it into the brickwork and with the help of some shims, managed to get it lovely and level.


The other little job I managed to squeeze in between other, non-woodwork commitments was this:


I have a remote for the dust extractor but as the extractor is now mounted on the ceiling, the remote would just end up wherever I absently placed it, and i'm sure it wouldn't have been long until it went missing. My solution was this little holder that I put right next to the power socket for the extractor, and I made sure the buttons were accessible even in the holder, so I needn't ever really take it out. Even I should have a hard time losing it now...

 
Dan, I recall an incident some years ago with the Jet extractor, do not depend on the gadget to switch off the power supply use the mains at the end of a woodwork session in shed. You might hear an electric interference noise if you leave the mains on. Advice I got from this forum years ago.
 
Thanks John, I've already heard the hum when it is apparently off so I do make sure to switch it off at the plug after use, that's why I put the remote right next to the extractor plug on the wall :)
 
SO jealous of your space!

If I recall correctly it is tricky to accurately flatten a board beyond twice the length of your planer bed (ie a planer with a bed 1 m in length will flatten a 2 m length of board but struggle to accurately flatten a 3 or 4 m length).

When I was new to my planer/thicknesser (an old Elu) I used the Woodwhisperer video to give me a lot of ideas
Woodwhisperer planer set-up
 
Quick update of a little bit of progress, I bought myself an extra pair of hands for the planing:


Well worth the £20-ish price tag, it's sturdy and has both a large roller head and multiple ball bearing head, although quite what situation would demand one head type over the other i'm not sure.
It's been really helpful though, once set to the right height it receives the planks so smoothly that you can't even feel a bump, making the planing process much more reliable as I can keep my hands and focus on one part of the plank at all times.

With my new helper I was able to get a flat face and a perpendicular face on all 6 stiles with a minimum amount of passes and very little hand planing to tweak them.


Next weekend i'll flip the planer to thickness mode and get the stiles down to size.
Then i'll need to cut them accurately to length, which reminded me that I should get my chop saw back from my dad, but that in turn reminded me that I wanted to get a new chop saw without rearward moving rails to keep my future chop saw station nice and close to the wall, so i'm currently hovering over the 'buy' button on a shiny new Makita 10", the LS1019L. It's more than i'd like to pay but I found a review that says it's pretty hard to beat and has almost as much capacity as a 12", I can't see myself regretting the purchase in the long run.
 
Now is not the time for anyone to pipe up with a terrible review of the new Makita chop saw because i've just parted with a sizeable sum of money and it will be with me tomorrow... :)
 
Morning all,

I've not made progress for a couple of weeks as I got hit by a winter virus which put me out of action for a while, I even missed out on frolicking in the snow a couple of weeks ago!
Anyhow, i'm back up to full health again now and made some good progress this last weekend.
The new mitre saw arrived, and what a beautiful shiny thing it is! I've not had an opportunity to properly set it up and check everything is square yet but it seems to cut pretty well out of the box. I cut all my stiles and rails to final length and have no complaints so far, the supplied dust bag does an impressive job of dust collection, shame it won't fit when I mount the saw against the wall...
I'm still learning when it comes to sharpening blades, but I feel like my chisels are getting sharper and sharper as time goes on, so the first set of mortices ended up pretty neat and a went lot quicker than the last.
I also routed a groove to accept the cladding panels, if I use 3 full cladding planks then i'll need to space them as wide as they will go to ensure I fill the gap. This could be a problem when things contract in the summer, my thinking is to glue all three planks together pre-spaced, then the expansion/contraction will happen at the join with the stiles, where I can make a larger, separate tongue to fill the groove-to-groove join on one side which should be large enough to account for summer shrinkage.

2 mortices done and trialling a cladding plank:


I also tried half-lapping a piece of cladding, I have enough cladding to do all three doors but probably not enough to do it in full lengths. As I decided I didn't want any centre rails, I will need to join some planks to get the lengths I need. It went ok although these planks do like to cup so i'm not sure if the joint will hold, although once it's encased in the door then it shouldn't be able to fall out completely.


In retrospect I could have used two more similar coloured planks!
Here is the door dry fitted, this will be the left half of the bi-fold doors, so will just have a long, vertical pull handle on it, which i'm planning to make myself from some steel section, it will be a good excuse to get the welder out and get some much needed practice!


I still need to chisel cutouts for 3 hinges on BOTH side of this door, I have 9 hinges in all to do so it seems like a good opportunity to build a small jig, perhaps I will rout them out...
 
A little update from me, my elbow got a bit upset after the frantic chiseling last week so I had to ease off a bit.
I routed a chamfer on the inside edge of the stiles and rails to match the cladding panels, and glued the door up. The less said about the glue up the better, I may or may not have glued the frame together once without actually inserting the cladding panels...
I used the same method I used before to try to end up with a flat door, I laid the door on flat runners on the floor and checked for any rocking, fortunately this time it seemed to be flat of it's own accord, so no adjustment was required. I got it to within a mm of square too, result.

My next cock up was not long in coming, I marked up the first set of hinges on the door, chiseled the first recess out, stepped back and realised I had done it on the wrong face of the door. Seriously I need to stop these silly mistakes, for a hobby this woodworking lark requires significant concentration!
I glued in a filler piece and will plane that flush next weekend. Once I actually managed to get the hinge recesses in the right place, I did a fit up which went considerably better than my first door, I think the door and the frame both being actually square this time may have had something to do with it...


You can see my hinge booboo in the last picture, this photo was after I had cut it on the correct face but before I inserted the filler piece which is why it spans the whole width of the door.

I also cut the tenons for the centre door rails, I decided to stop trying to be accurate and fast, and just went for accurate, so I snuck up on all the final sizes instead of trying to cut them first time, i'm hoping this next door will be a step above in terms of tight joints.
 
Dan you are an honest man, many members have not described their actions and thoughts so openly I suspect over the past 15 users :wink:
I like the door panels appearance.
 
Hehehe, thanks John, if I pretend all these mistakes didn't happen then I can't really claim to be learning anything! Although the mistake:learning ratio doesn't seem to be improving yet...
 
Another small update from me, still having some degree of elbow trouble so I'm being forced to keep the workload low, which is a shame as motivation is high at the moment.
I cut the centre door rail tenons, as I mentioned last week I stopped pretending I could cut things to the right dimension and perfectly square first time and actually took my time to sneak up the finished size.
I used a trick I saw on the YouTubes, clamping another piece of wood above the edge you want to chisel so you have a vertical reference to put the back of your chisel against:


It works okay but the subsequent hammering tends to push the guide piece away from the line so you have to reset it each time, it's good to get you started though.
The result of a bit more time and effort with these tenons was a finished product that i'm pretty pleased with, certainly hte est i've managed yet:


When I deem my elbow healthy enough to cut some mortices i'm hoping I can cut those just as nicely to get a good fit.

So while I can't do the motices, I picked off one of the smaller jobs, the frame for the window in the central door. I decided to try cutting box joints on the table saw with a sled, i'd love to make a proper box joint jig like Mr Wandel's but in the meantime I just set up the cuts by hand each time. Once again, a bit more care in the setting up and I got some pretty good joints first time, no chiseling or filing required!


That's just a dry fit up, I pulled it apart to rout (route?) the groove for the window pane, and had a hell of a time with the router table, just trying to cut a slot with a straight bit turned into a scary experience, it kept grabbing the work and doing all sorts of unexpected things, I finished the grooves by hand because I was fearing for my fingers. I've no idea what the problem was, the table is usually so well behaved.
Next week will be much the same, chipping away at jobs i'm happy to expose my elbow to, I've a climbing holiday in May and I want the elbow fixed and happy for that, so if that means no mortice cutting before then, then so be it.
 
Have a look at utube vids. again, also bear in mind grain directions on a router table.
Also never trap the bit on the wrong side of a router fence and timber being routed. Also stops are needed if you are dropping in.
 
I forgot to mention I got a bench grinder last week, it's an 8 inch Sheppach one with with a grey medium and white fine wheel on it, i'm pretty happy with it although I had to take the base off and fiddle with the wiring to get the integral lamp to work, aside from that it seems good.
I used it in anger for the first time this week when I had to re-shape an old junk skinny chisel that I had, it made very short work of that. I want to make some kind of small jig to hold blades to the correct angle, although i'm guessing there is some kind of commercially available product?

On to this week, I got a rare day free on Sunday so was able to make some good progress.
I glued up the small window for the centre door, I decided to glue it up with the glass in place, it will mean tearing the door apart to replace the glass but it was a custom sized piece from the old house so i'd probably need to replace the frame as well if it ever needed replacing. It did mean the construction is nice and simple which in turn meant the finish was pretty good by my standards:


I then modified some cladding panels to fit around the window, giving me a complete centre section for the door. It still needs cutting to width to fit the door but I can now mark it up against the rails with the desired spacing between cladding panels to get a perfect final width, instead of doing a whole lot of maths and hoping I hadn't missed 2mm here or 3mm there.


I'm quite pleased with the detail:


I also threw together a little leather strop, my chisels keep getting sharper and hopefully this will help continue that trend:


(Chisels are now shaving sharp, getting better!)

I also received a late birthday present from my parents, this beautiful japanese chisel. Unfortunately they gave me a storage box to go with it which has 9 conspicuously empty slots...


Not had a chance to sharpen that bad boy yet, can't wait!
 
Dan please do not put that new Japanese chisel to your new grinder. Go to forum and request information at the hand tool section .
 
Don't worry John, I try to make my mistakes on cheap bits of wood, not on expensive tools! This one won't be going near a grinder :)
 
Back
Top