


NickN
Established Member
Having amassed a fair few hand saws of various types and sizes during the past year or two, I thought it about time I made a storage solution of some sort for them, preferably wall-mounted to keep them tidy and out of the way. I spent several weeks researching a few different possibilities and studying ideas for a saw cabinet or saw till. One that often came up was the 'Galoot' saw till but it's the one with a rather poor design of dovetailed top/back rail. Others had drawers which I didn't want to do, or were not an appealing design.
In the end I decided to create my own version from American White Oak but with the shape of the sides based on the creation of Blended Woodworking and Youtube's 'treebangham'. This involves two quarter ellipses (I believe they are an ovolo and a cavetto), separated by a fillet. The sides would be dovetailed at the bottom to hold a pin board across the bottom of the cabinet.
Most designs call for mortise and tenons for joining the back rails to the sides, leaving a very thin wall to the rear of the mortise as you might imagine. As I had decided to support the cabinet using a French cleat on the top rail, I changed all the back rail's joints to a lapped single dovetail, the tail being on the rail so that once assembled, the rail would keep the sides together. It also meant good strength for the top rail which would ultimately be supporting all the weight via the cleat, as I could reinforce the joint with screws from the rear.
To support the saws themselves I decided on a large diameter dowel rod into each side, which would then allow me to use the bottom shelf to put things like saw sets and small files on. The upper two rails also would have a section mounted on them with kerfs to house the saw blades. I left the top of the saw cabinet open and unobstructed to allow room for the longest saws of 28-30 inches.
The finish I used, after sanding down to 400 grit, was two or three coats of Antique Oil, rubbed over with a cloth between each coat, followed by, depending on the colour of each piece, either one or two coats of Liberon Black Bison Medium Oak Paste Wax.
Following is a pictorial record of progress, which has been around five months - building my workbench got in the way but it proved useful for the final assembly work.
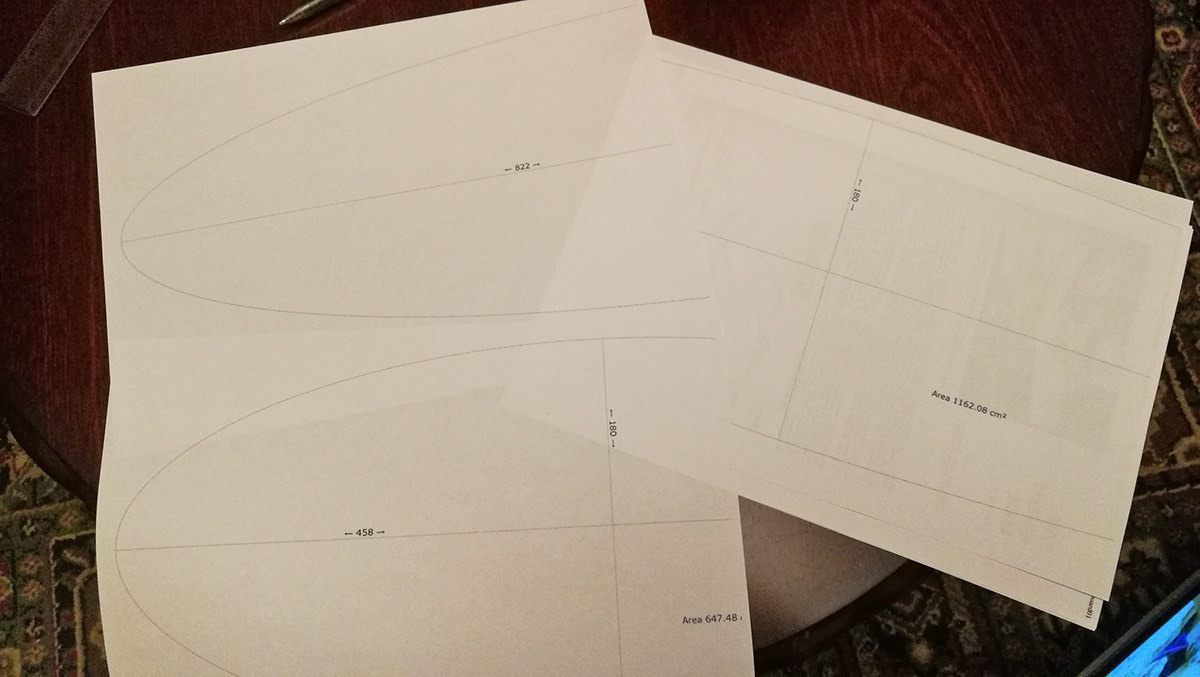
The ellipses on paper, created using an online ellipse generator and printed out on A4.
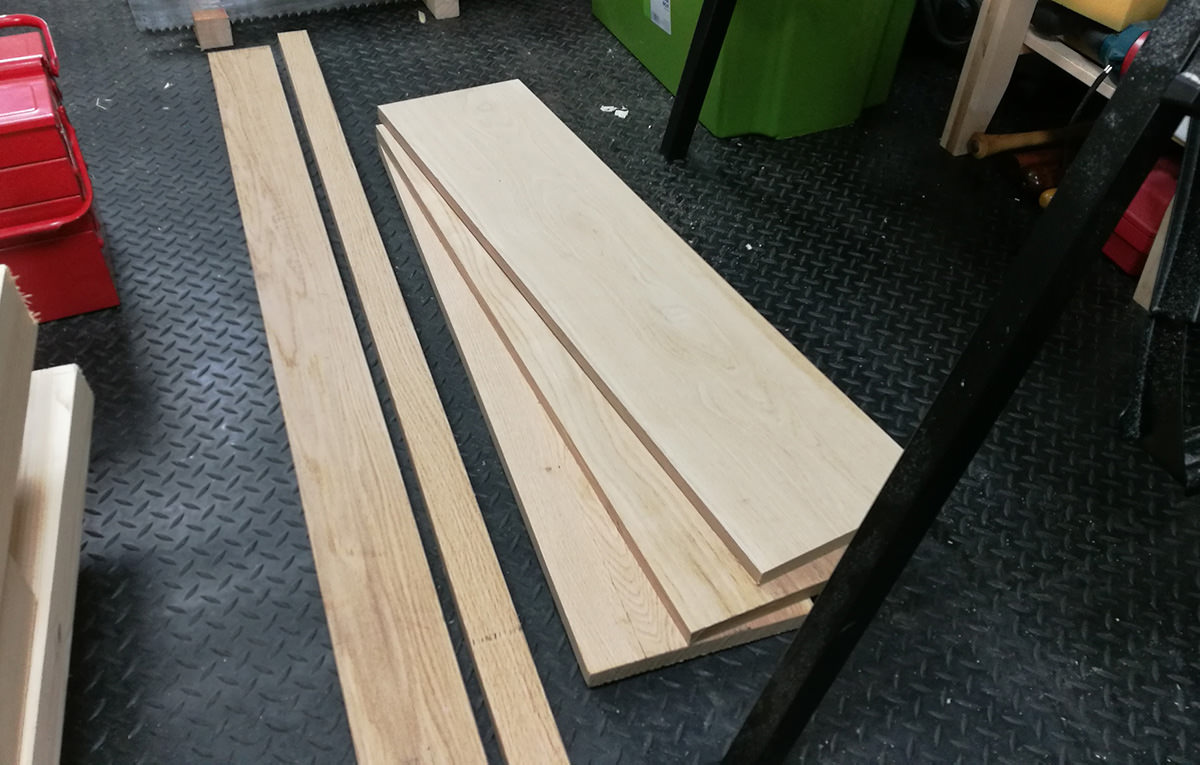
The timber used in the project.
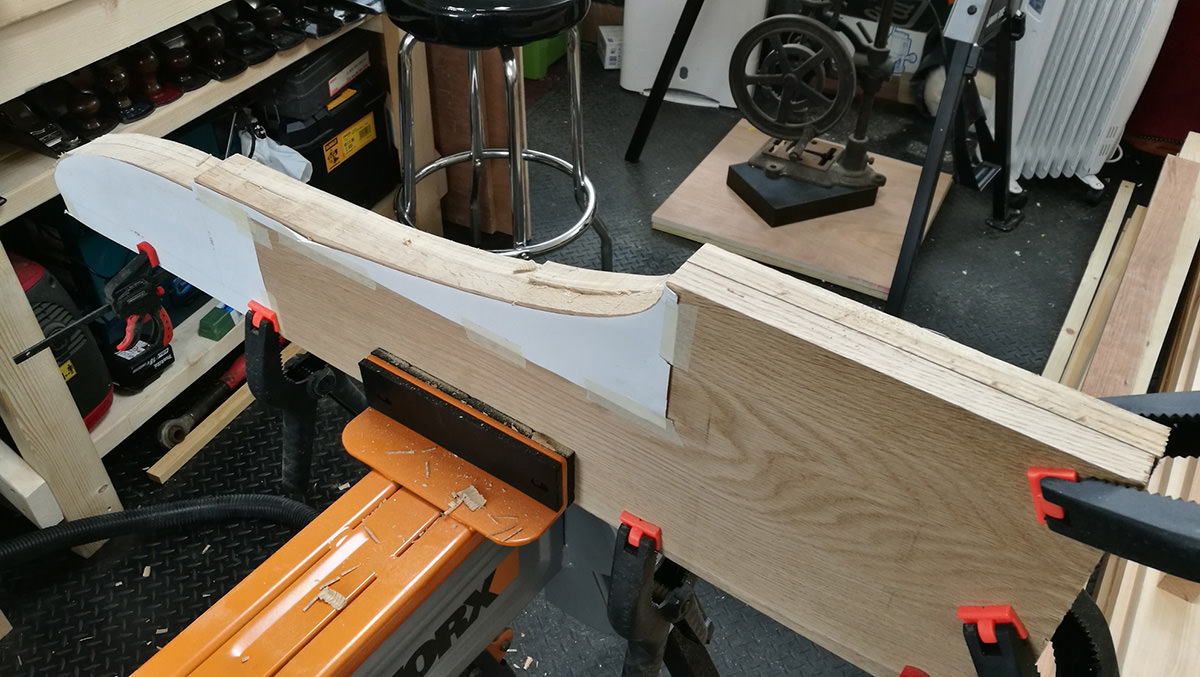
The ellipse templates in place on the board being used, ready for cutting. I didn't have a bandsaw at this point so had to use a hand saw and several cuts, followed by planing, rasping and a spokeshave to get the final shape.

At least I could do both sides at the same time, some small compensation for the difficulty in doing it completely by hand.
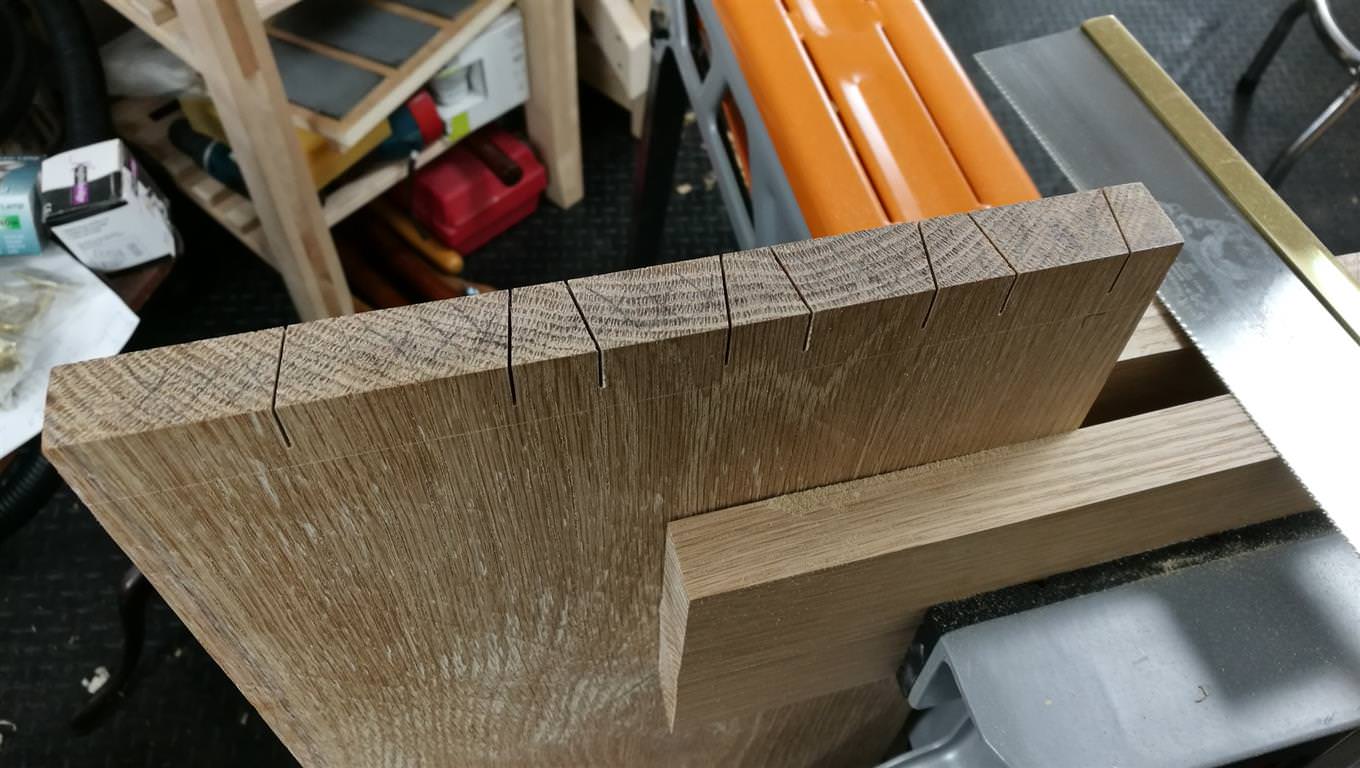
Once I'd shaped the sides, time to get the dovetails cut - again I was able to do both tail sides at the same time with the tails first method.

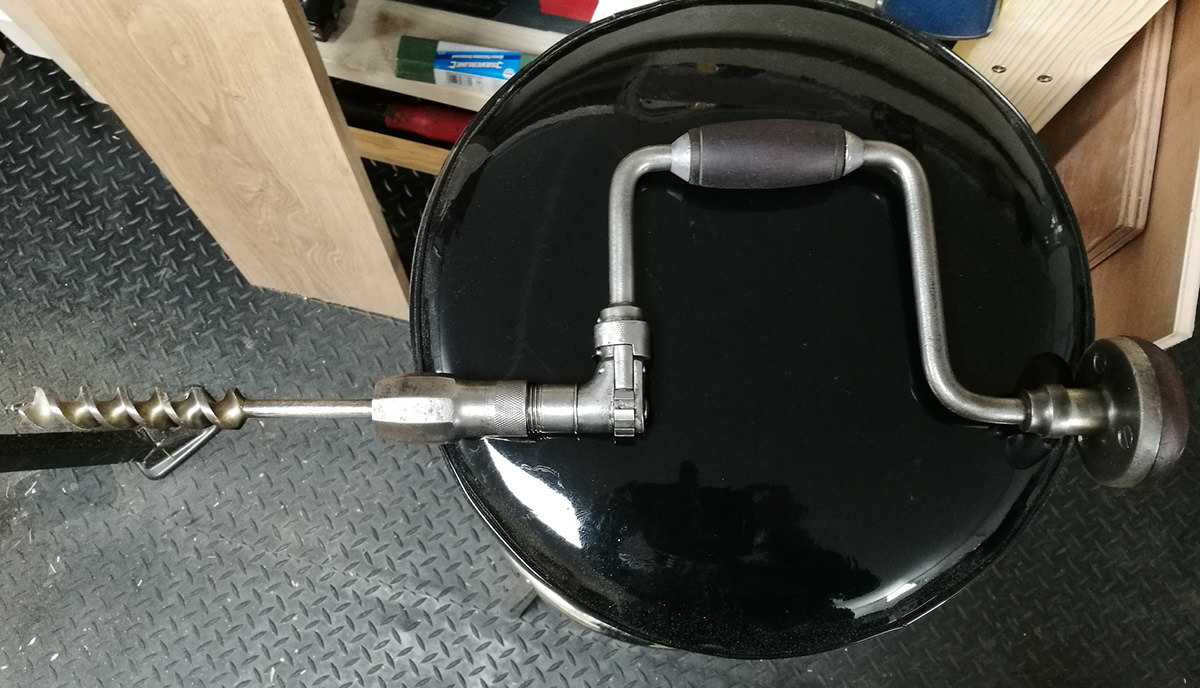
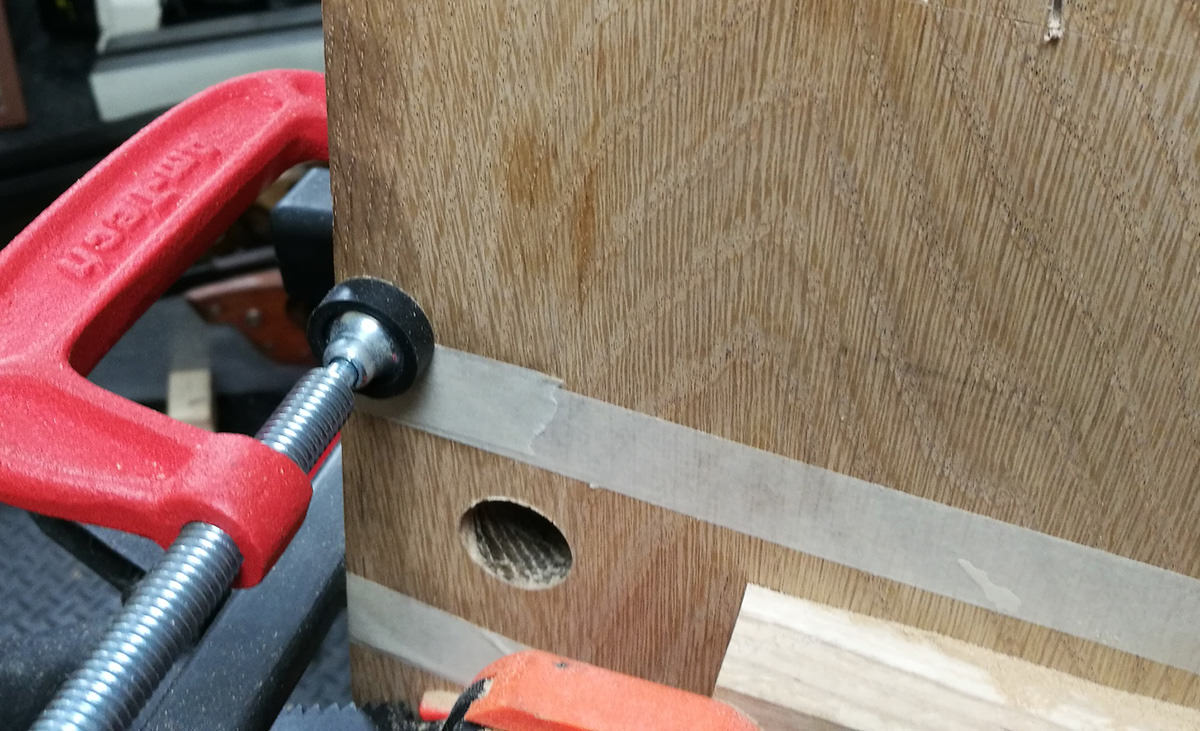
My torture instrument, aka 10" brace - that was HARD work getting through oak with a 22mm bit. Since then I've bought a 12" brace!
The completed hole in the side.
Next was the pin board or bottom board, planing square and removing twist.
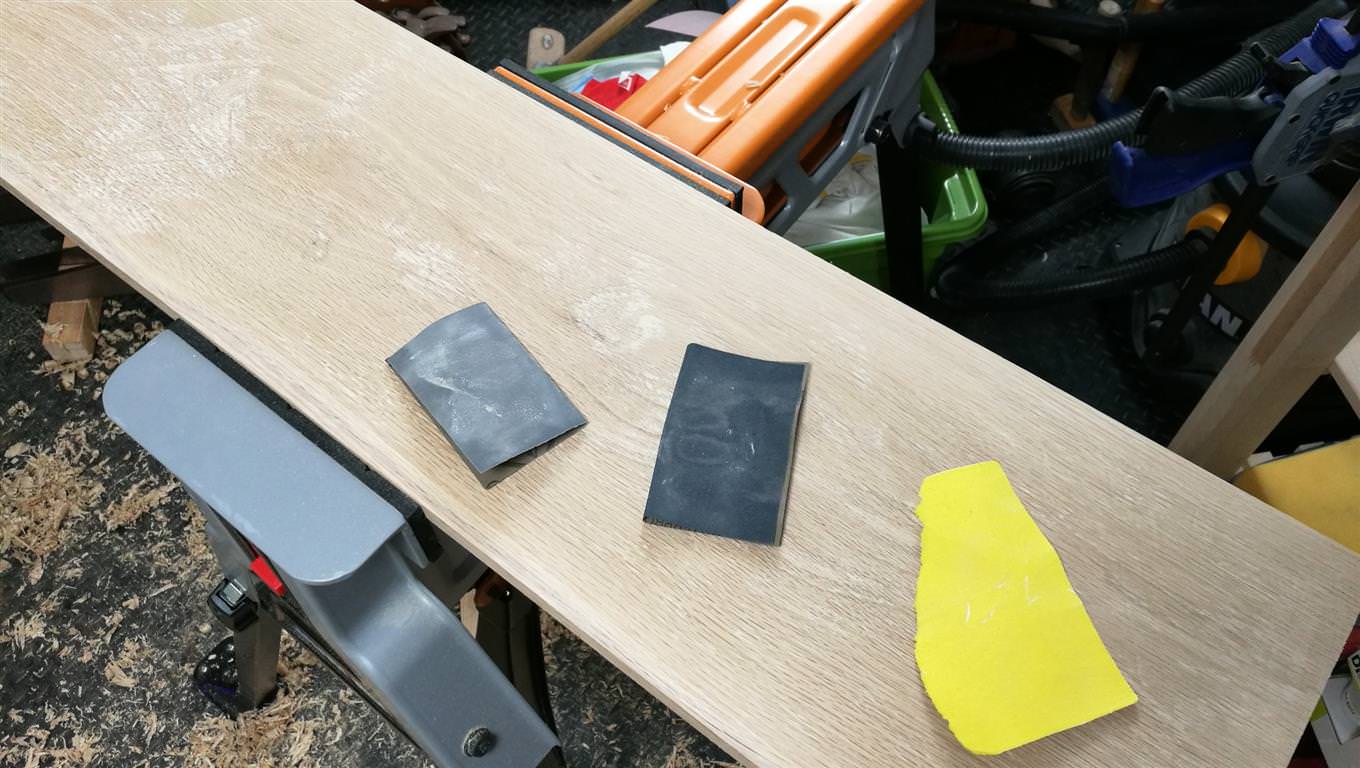
Sanding the pin board, using 120 then 240 and finally 400 grit. The other boards received the same treatment.
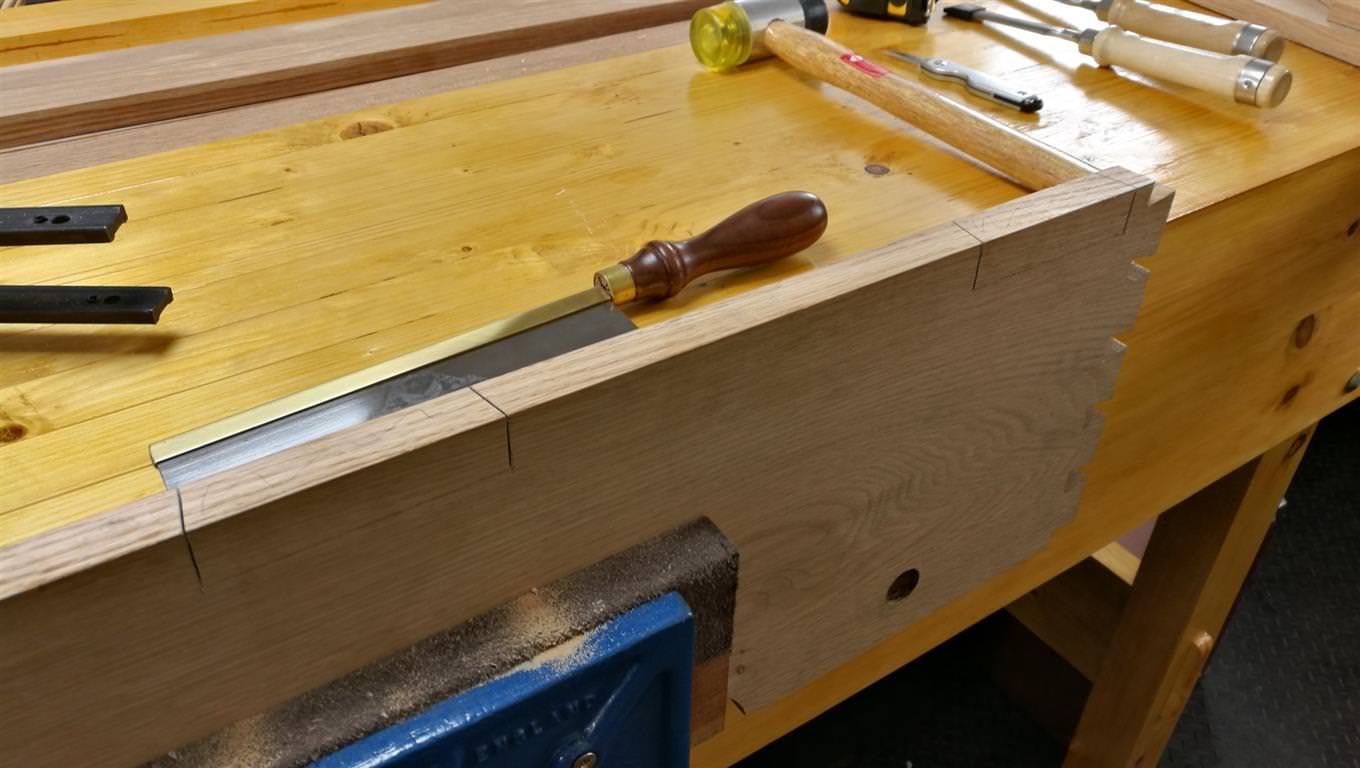
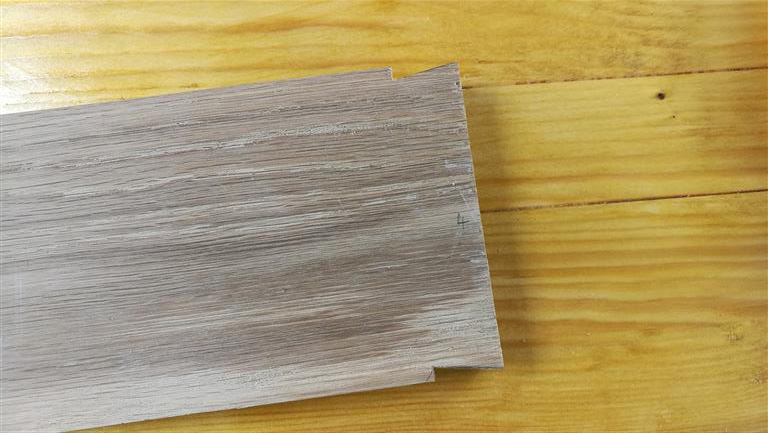
The completed tail boards.
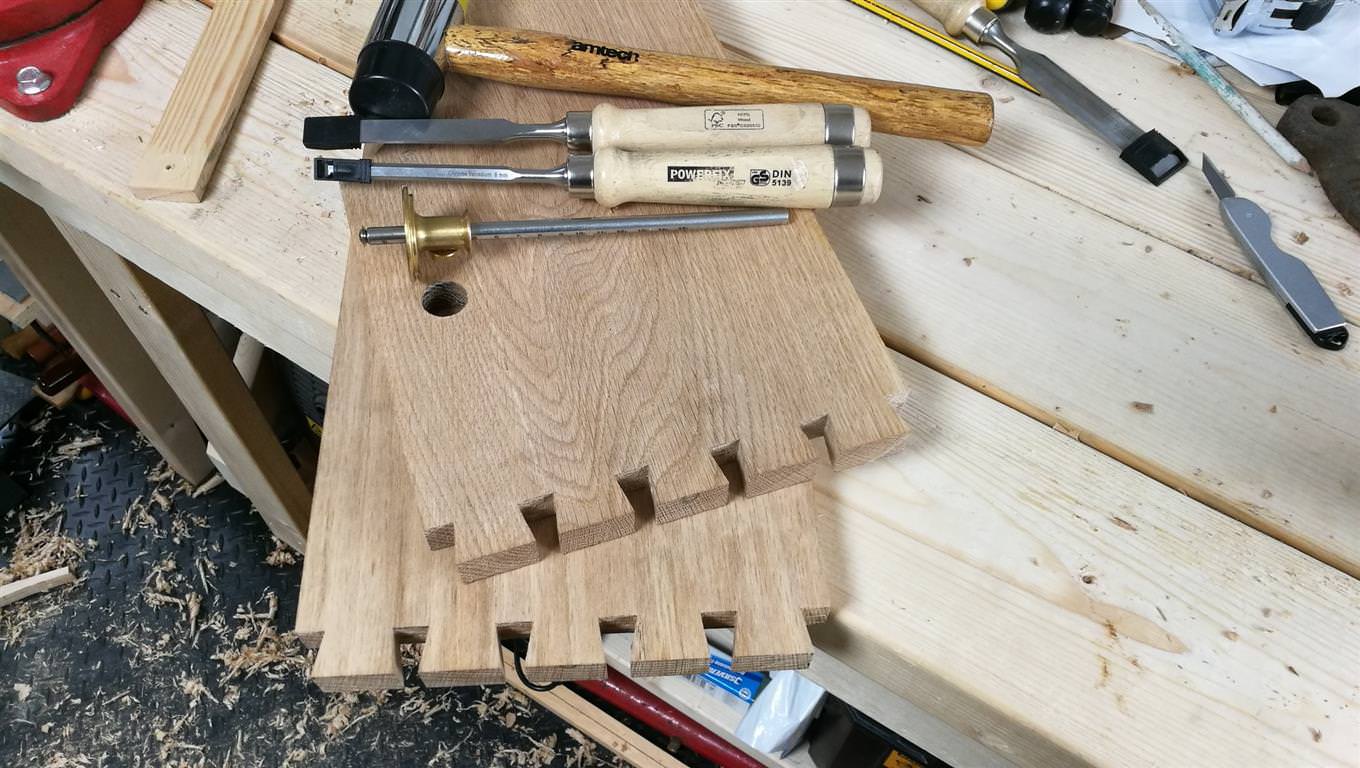
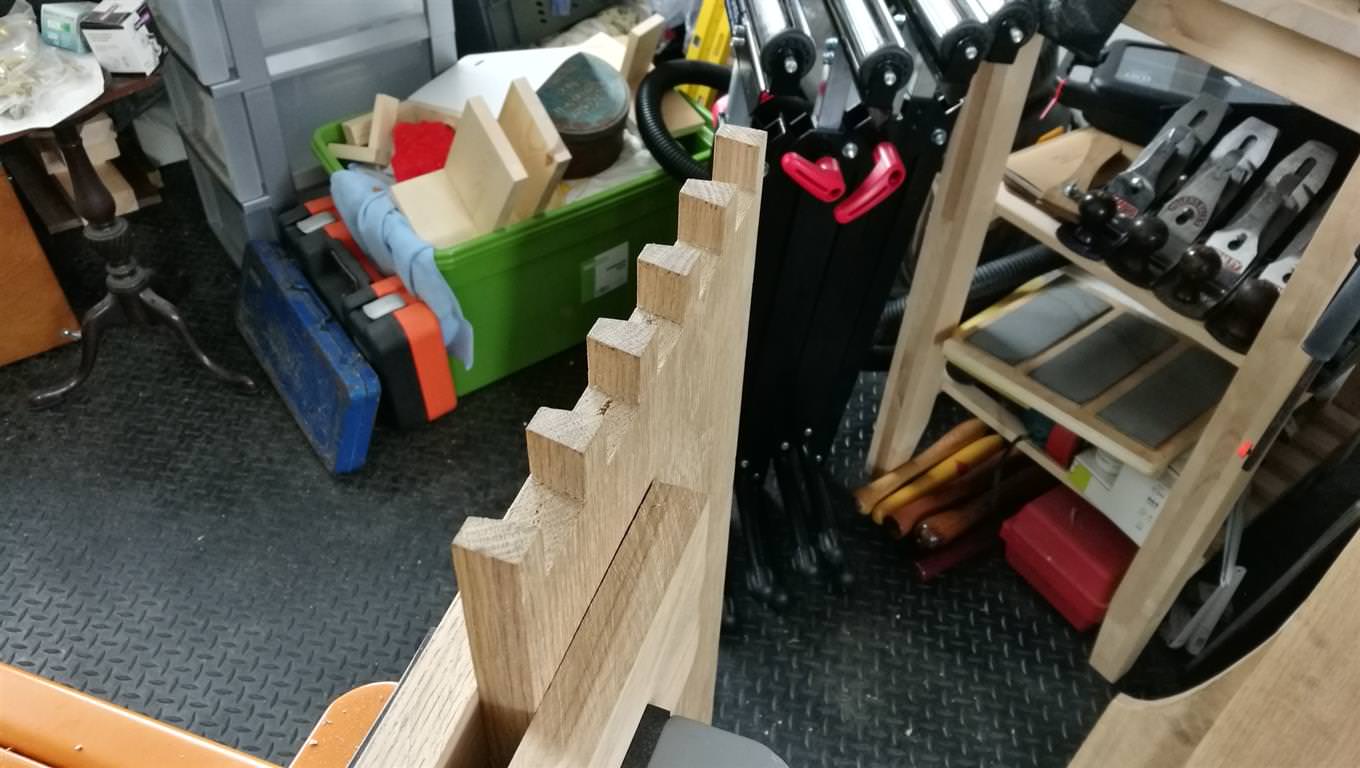
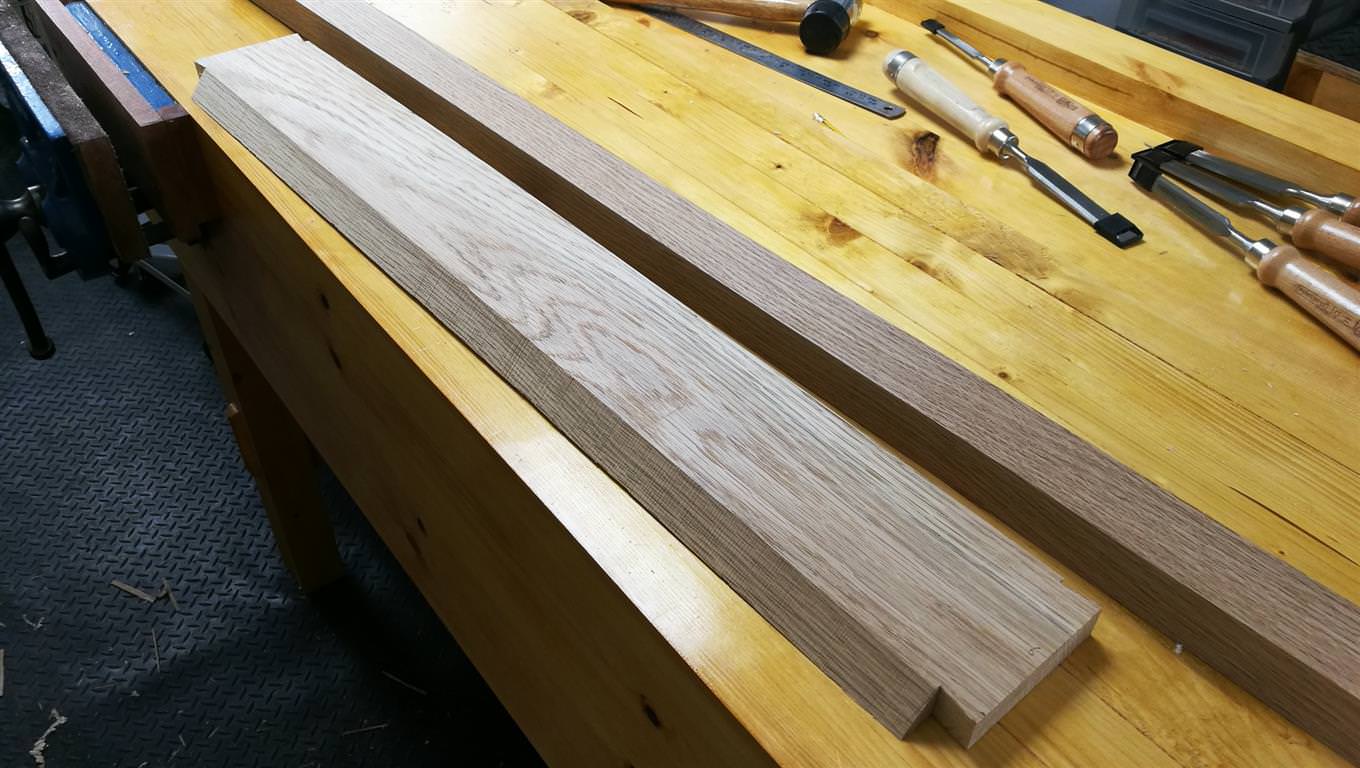
Cutting the pins.
Pins completed.
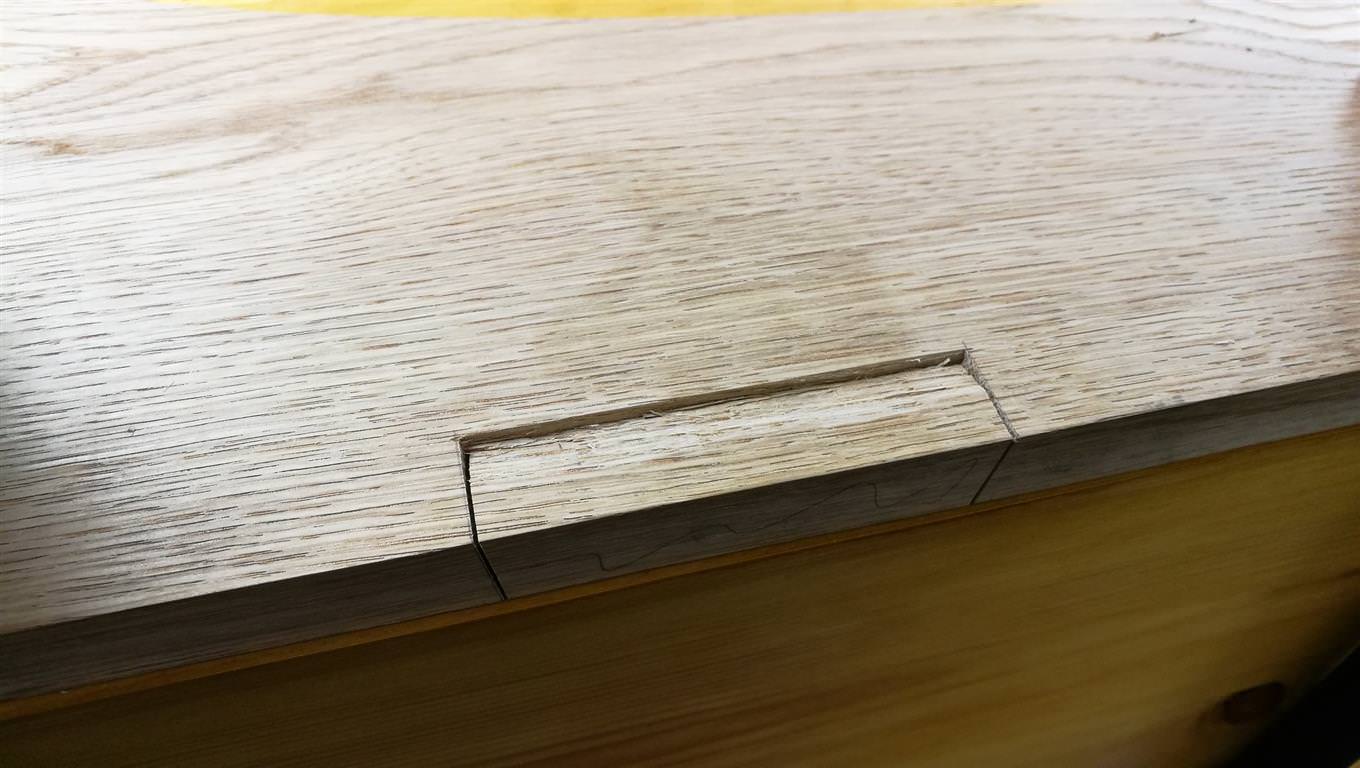
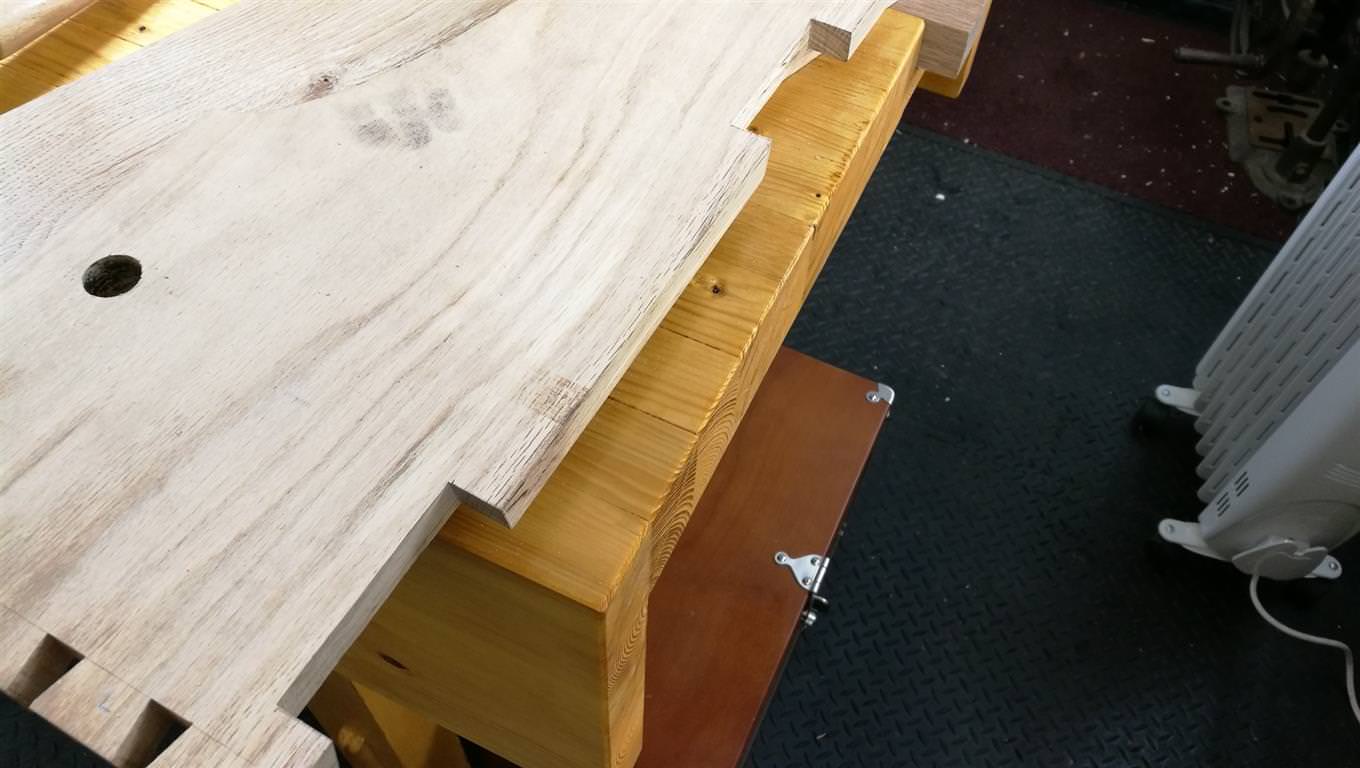
Sawing, chiselling and completing the recess for the lapped dovetail in the side boards.
Creating the tail on the back rail boards.
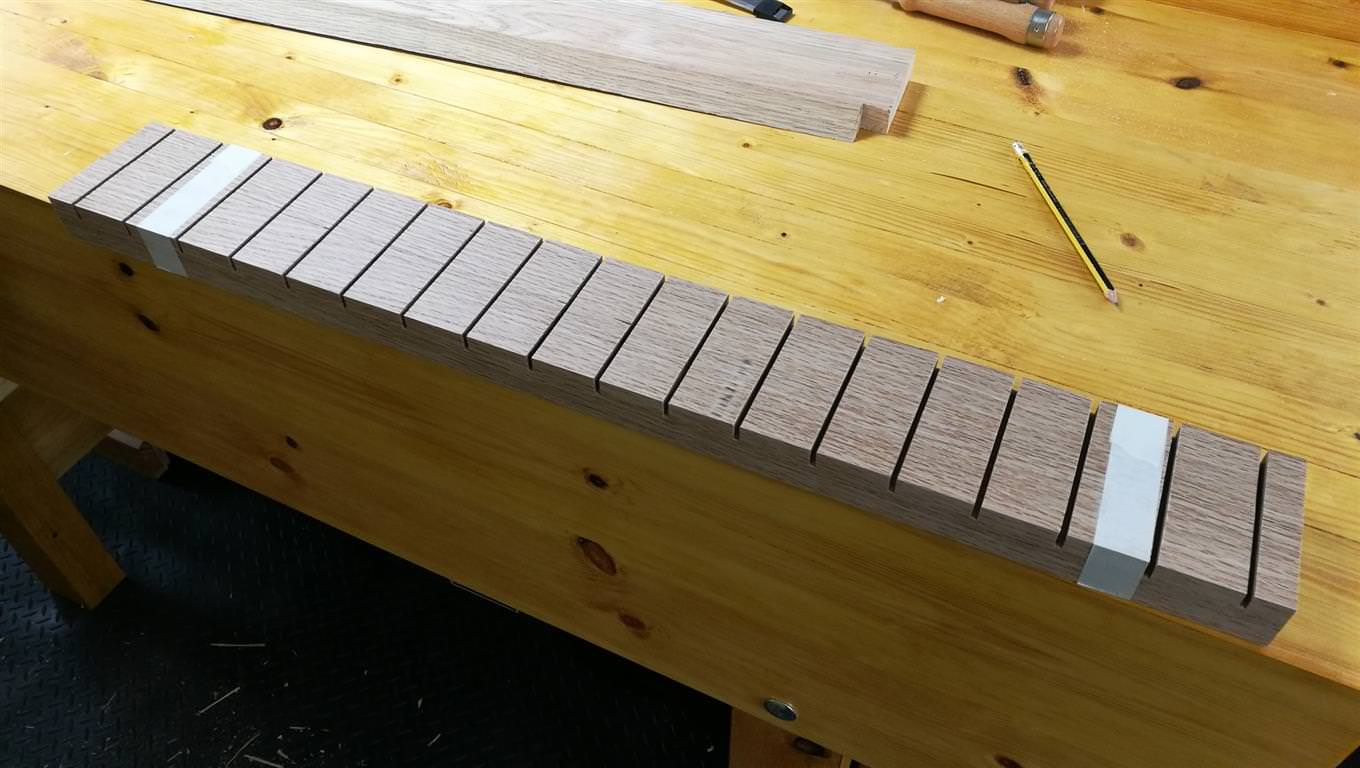
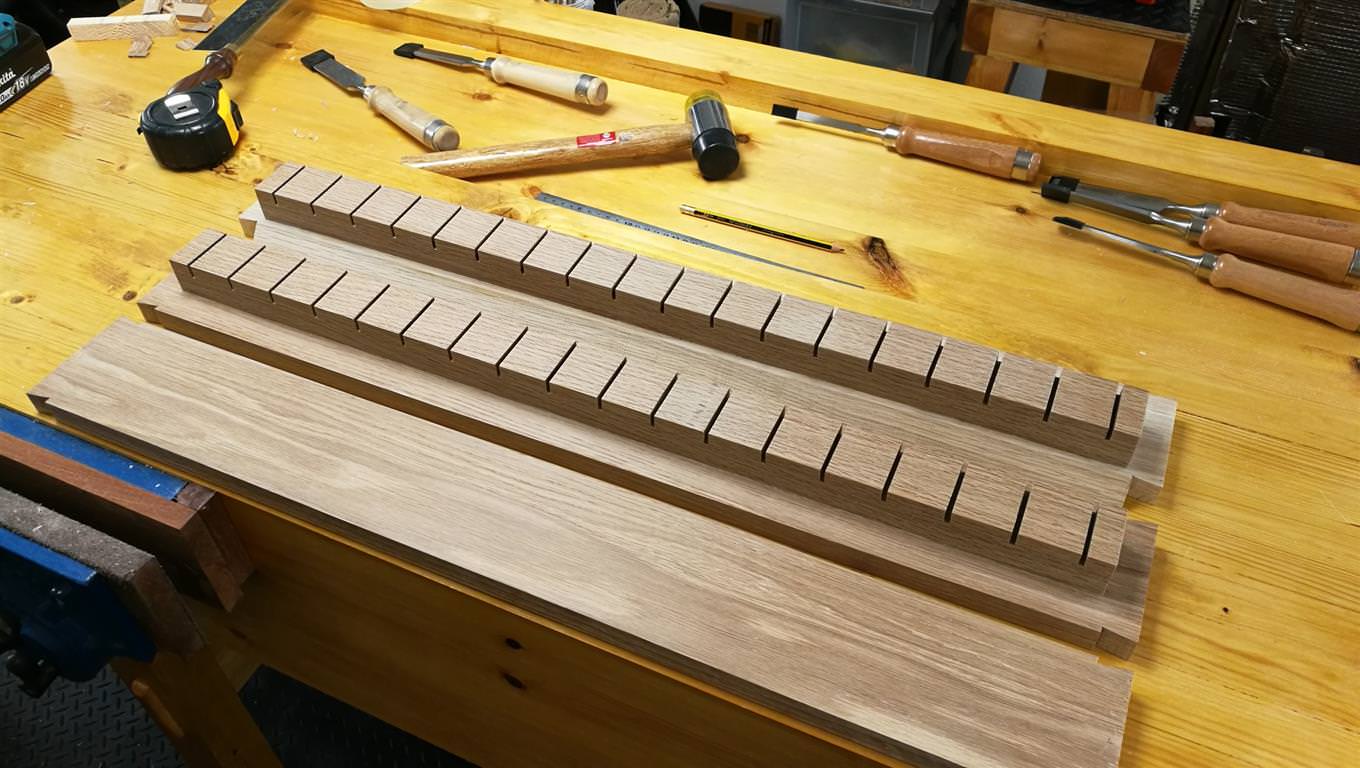
One of the back rails, the top one, with the French cleat angle cut in, and next to it, the section which will be kerfed and mounted on the rail.
The two square sections with kerfs created using a mitre saw.
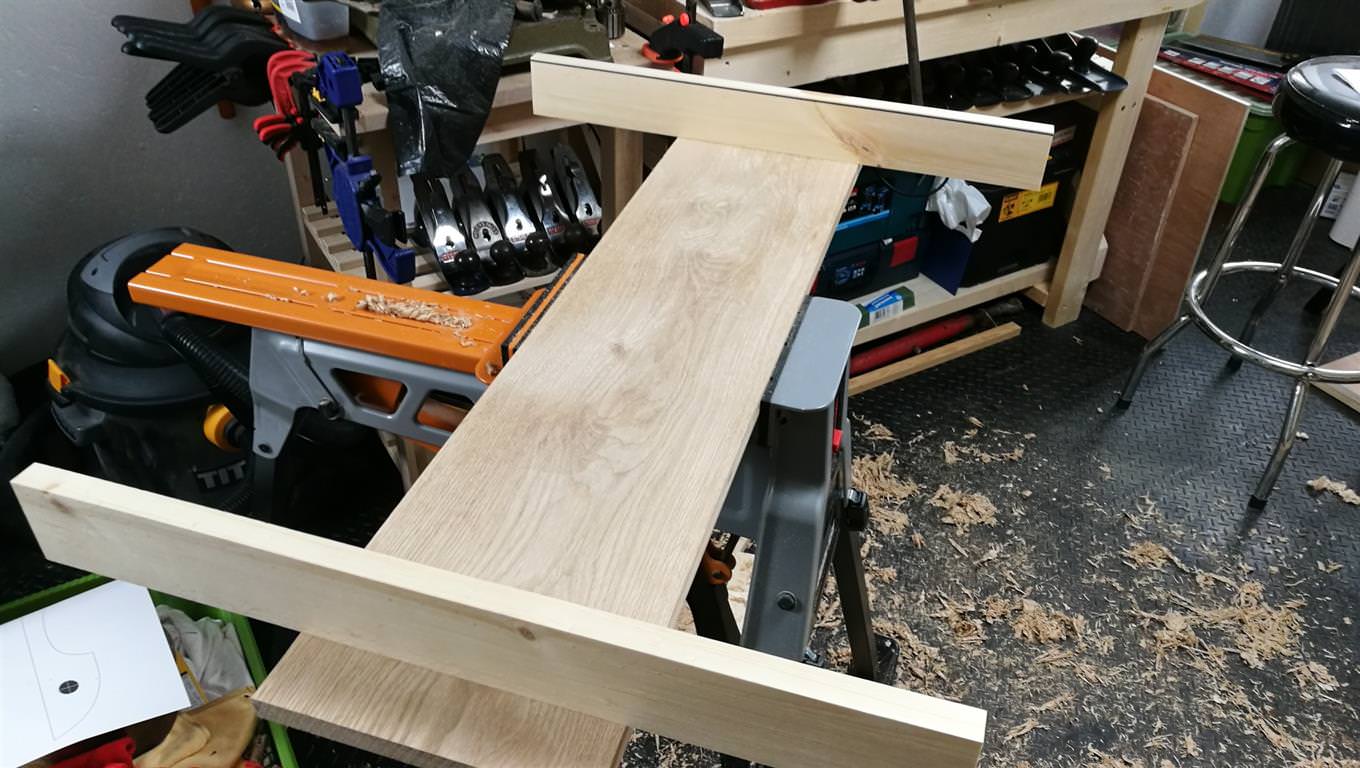
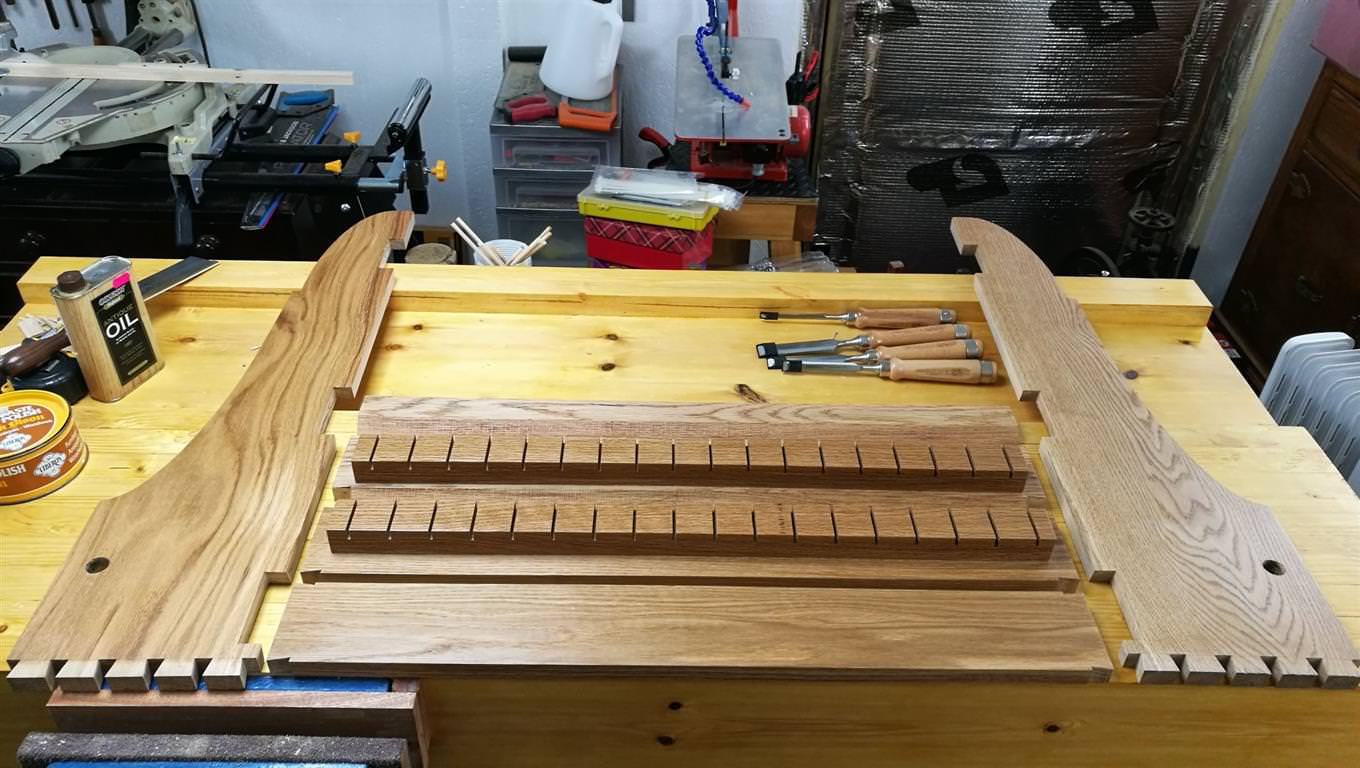
All three back rails ready for assembling to the sides.
Doing a spot of finishing on the parts which will become inaccessible once assembled, using Antique Oil.
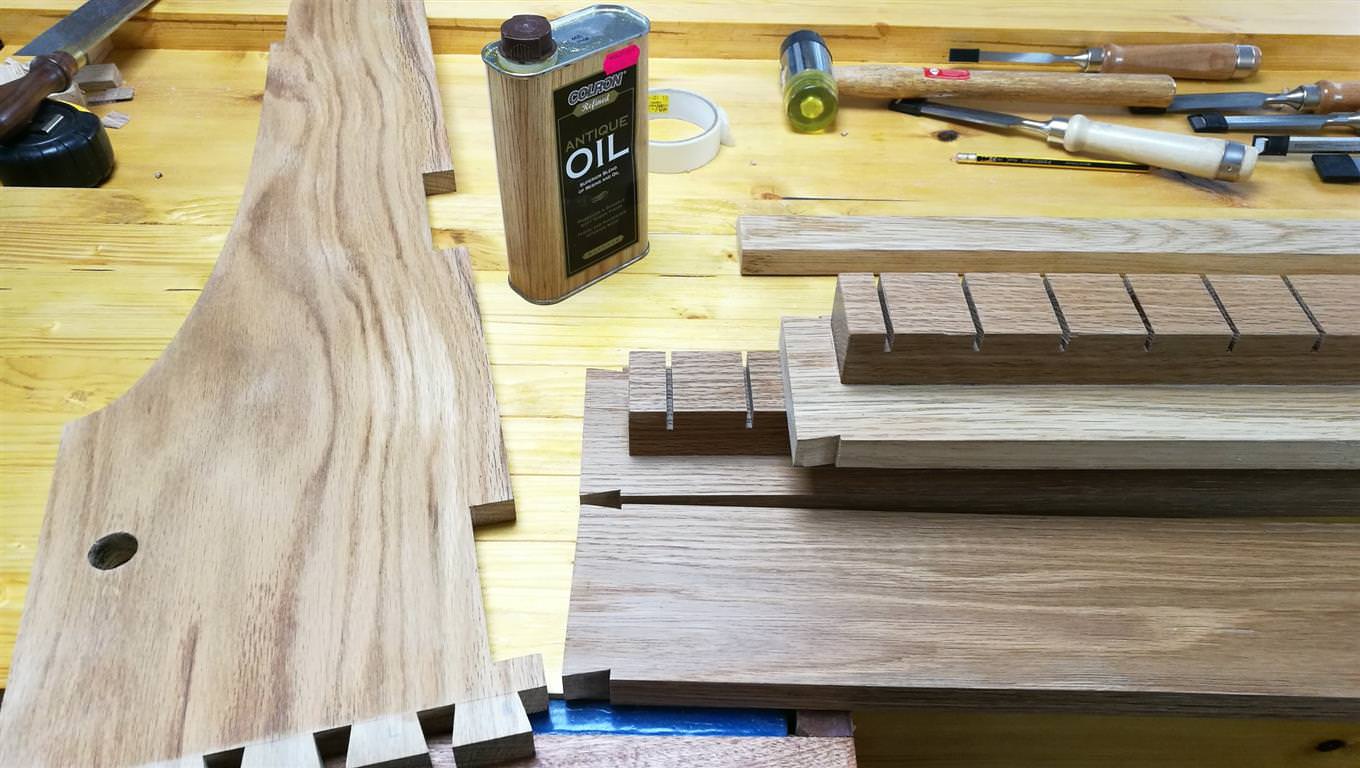
The back rails and sides ready for assembly - the bottom board was also ready but I forgot to include it in the photo!
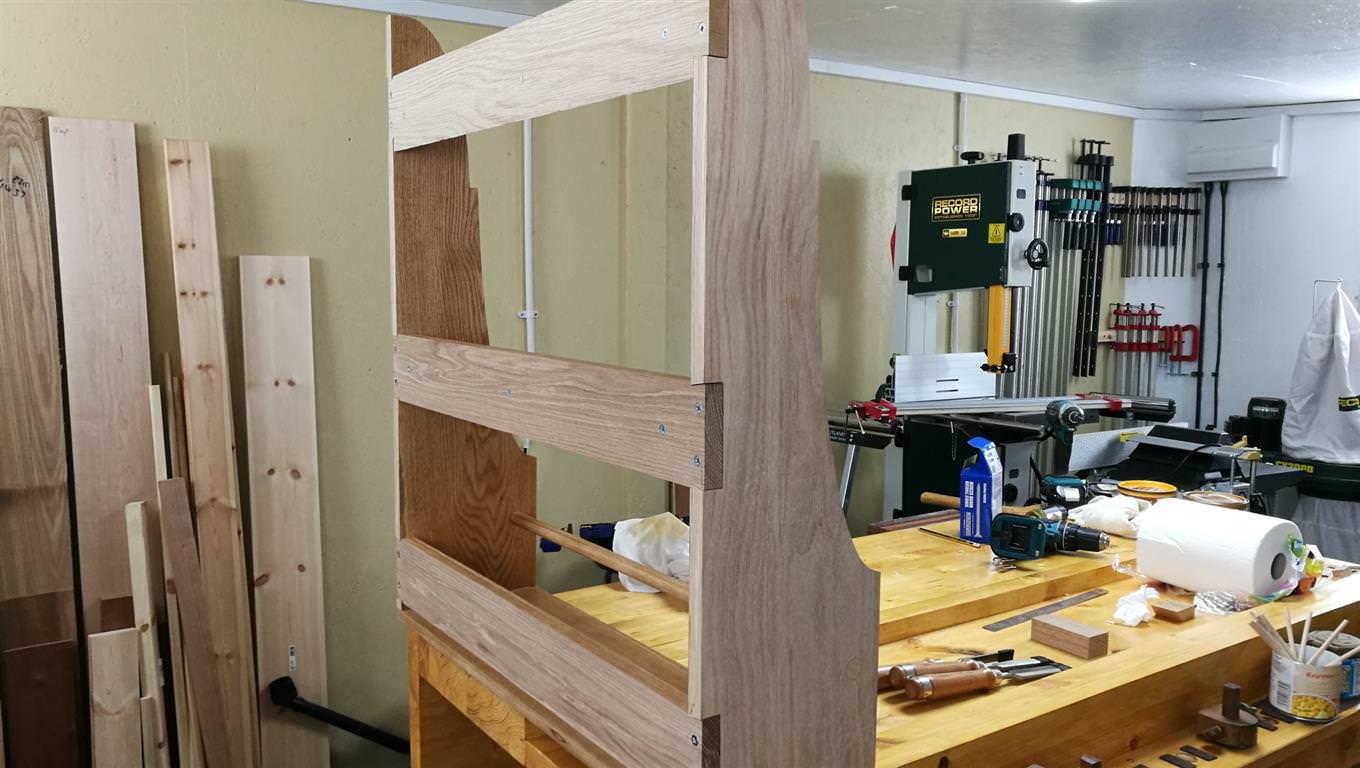
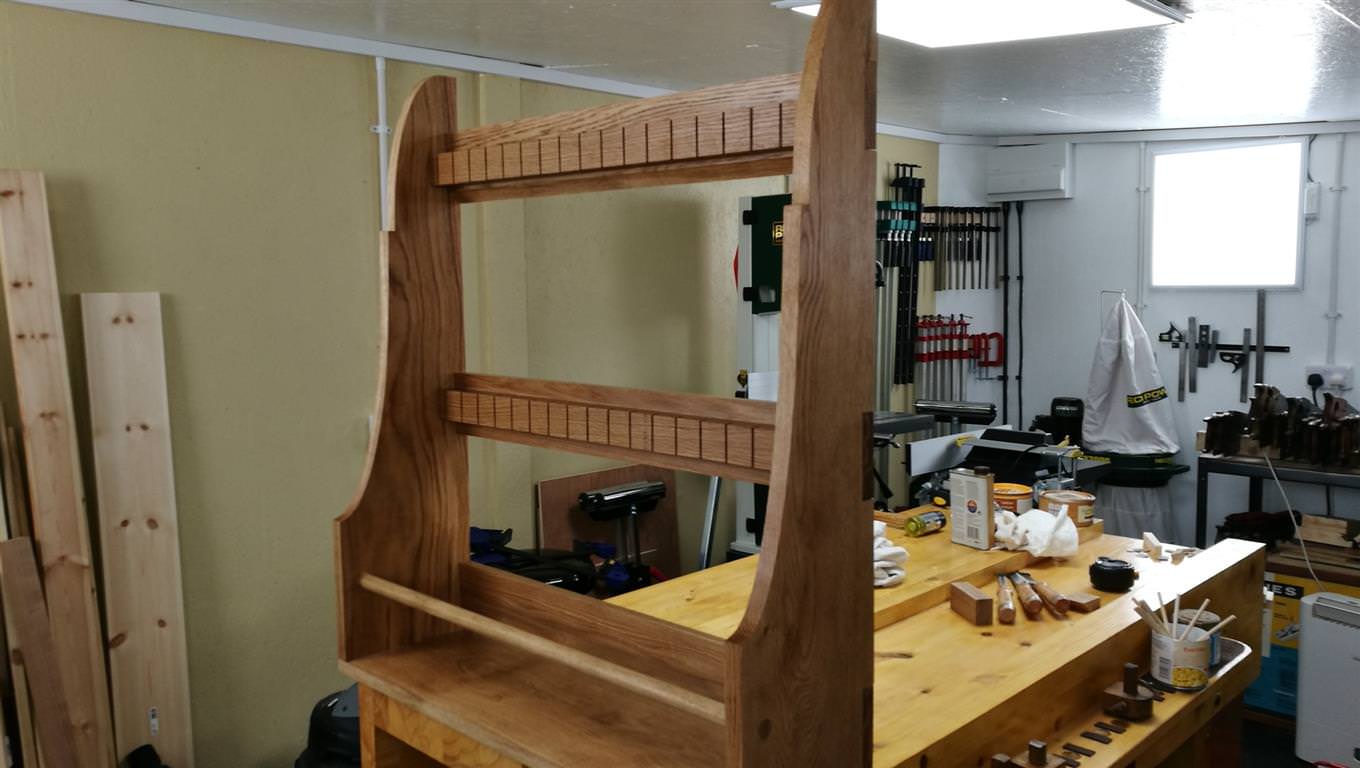
First assembly, glueing up, before finishing.
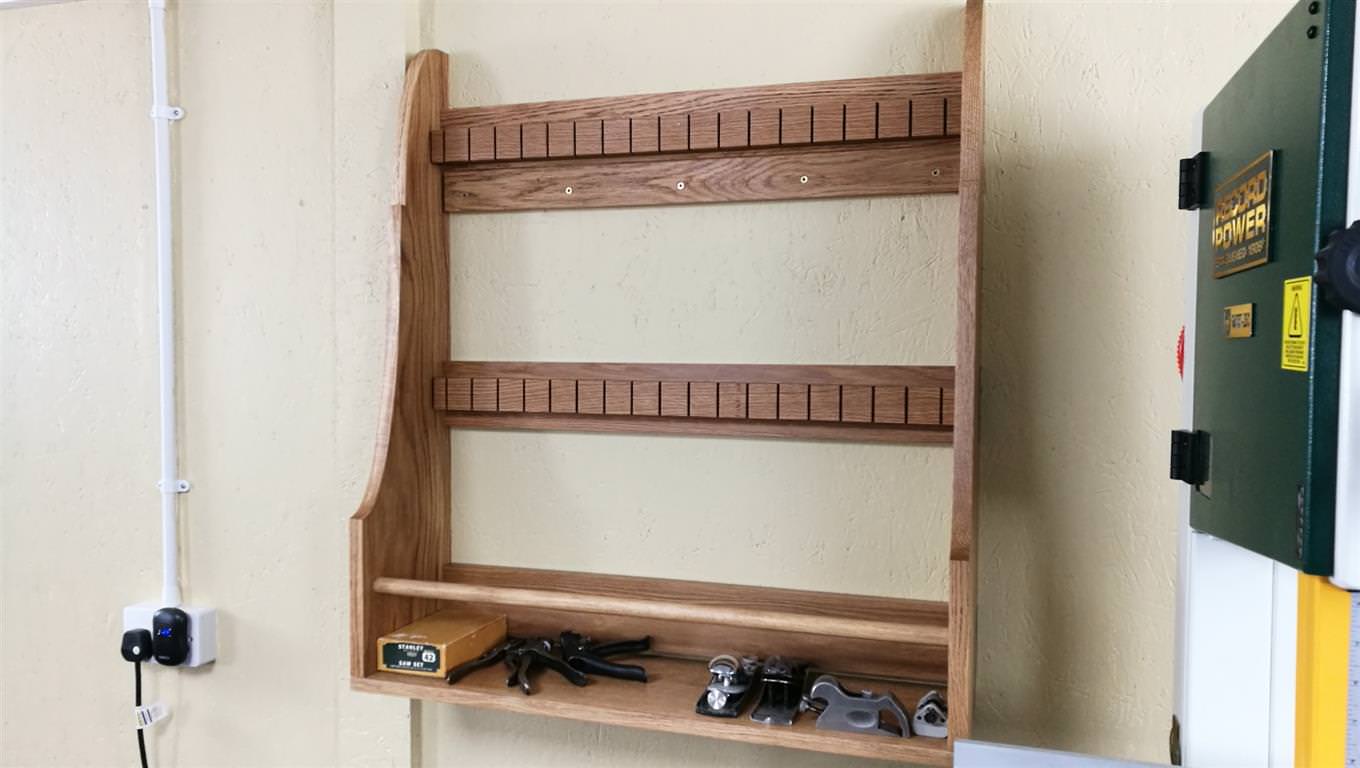
After finishing and before wall mounting.
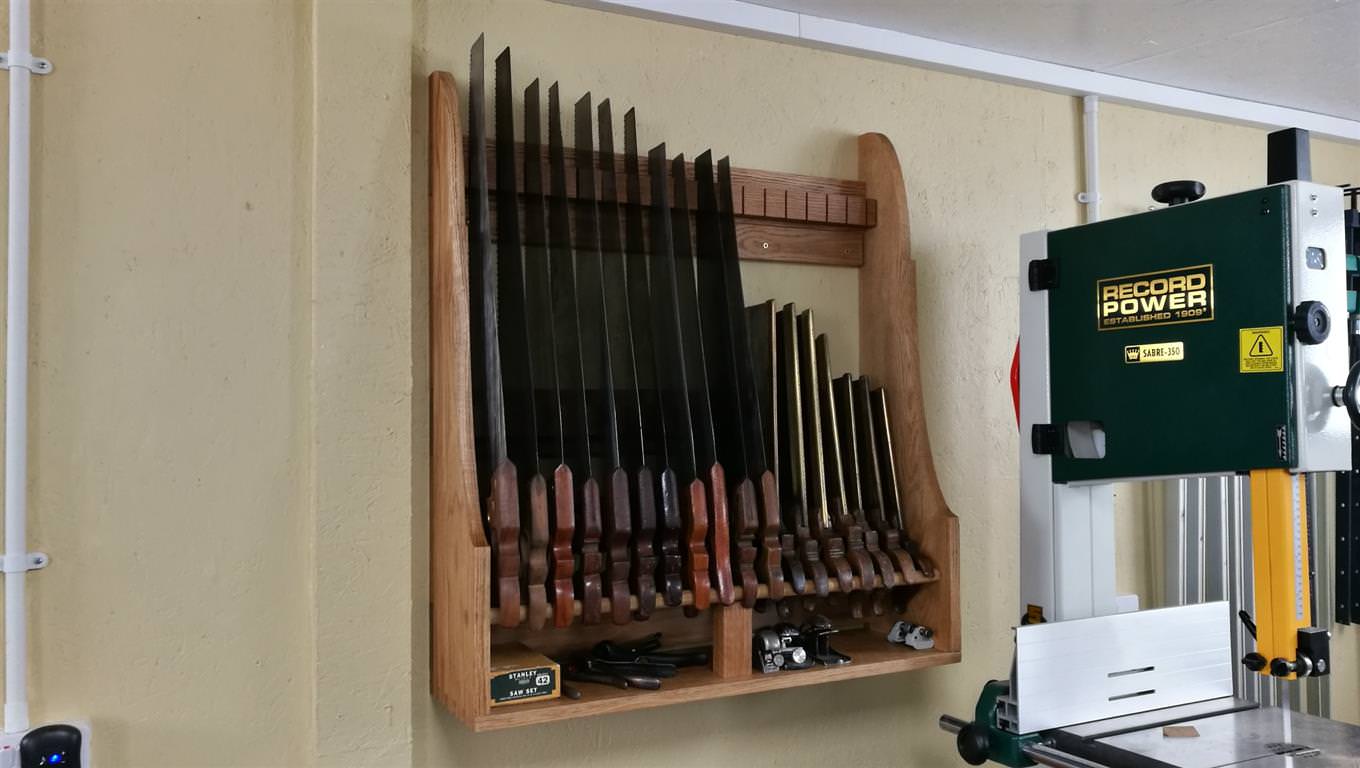
Finally on the wall! If you look closely you'll see the lower part of the French cleat screwed to the wall, underneath the top rail.
And filled with saws! I needed a central support as the dowel rod did bend ever so slightly with all the weight, which I was half expecting so had prepared a piece ready.
Took a long time to get there but wow, was it worth it once I did?! You bet!
Any comments welcomed, as always.
In the end I decided to create my own version from American White Oak but with the shape of the sides based on the creation of Blended Woodworking and Youtube's 'treebangham'. This involves two quarter ellipses (I believe they are an ovolo and a cavetto), separated by a fillet. The sides would be dovetailed at the bottom to hold a pin board across the bottom of the cabinet.
Most designs call for mortise and tenons for joining the back rails to the sides, leaving a very thin wall to the rear of the mortise as you might imagine. As I had decided to support the cabinet using a French cleat on the top rail, I changed all the back rail's joints to a lapped single dovetail, the tail being on the rail so that once assembled, the rail would keep the sides together. It also meant good strength for the top rail which would ultimately be supporting all the weight via the cleat, as I could reinforce the joint with screws from the rear.
To support the saws themselves I decided on a large diameter dowel rod into each side, which would then allow me to use the bottom shelf to put things like saw sets and small files on. The upper two rails also would have a section mounted on them with kerfs to house the saw blades. I left the top of the saw cabinet open and unobstructed to allow room for the longest saws of 28-30 inches.
The finish I used, after sanding down to 400 grit, was two or three coats of Antique Oil, rubbed over with a cloth between each coat, followed by, depending on the colour of each piece, either one or two coats of Liberon Black Bison Medium Oak Paste Wax.
Following is a pictorial record of progress, which has been around five months - building my workbench got in the way but it proved useful for the final assembly work.
The ellipses on paper, created using an online ellipse generator and printed out on A4.
The timber used in the project.
The ellipse templates in place on the board being used, ready for cutting. I didn't have a bandsaw at this point so had to use a hand saw and several cuts, followed by planing, rasping and a spokeshave to get the final shape.
At least I could do both sides at the same time, some small compensation for the difficulty in doing it completely by hand.
Once I'd shaped the sides, time to get the dovetails cut - again I was able to do both tail sides at the same time with the tails first method.
My torture instrument, aka 10" brace - that was HARD work getting through oak with a 22mm bit. Since then I've bought a 12" brace!
The completed hole in the side.
Next was the pin board or bottom board, planing square and removing twist.
Sanding the pin board, using 120 then 240 and finally 400 grit. The other boards received the same treatment.
The completed tail boards.
Cutting the pins.
Pins completed.
Sawing, chiselling and completing the recess for the lapped dovetail in the side boards.
Creating the tail on the back rail boards.
One of the back rails, the top one, with the French cleat angle cut in, and next to it, the section which will be kerfed and mounted on the rail.
The two square sections with kerfs created using a mitre saw.
All three back rails ready for assembling to the sides.
Doing a spot of finishing on the parts which will become inaccessible once assembled, using Antique Oil.
The back rails and sides ready for assembly - the bottom board was also ready but I forgot to include it in the photo!
First assembly, glueing up, before finishing.
After finishing and before wall mounting.
Finally on the wall! If you look closely you'll see the lower part of the French cleat screwed to the wall, underneath the top rail.
And filled with saws! I needed a central support as the dowel rod did bend ever so slightly with all the weight, which I was half expecting so had prepared a piece ready.
Took a long time to get there but wow, was it worth it once I did?! You bet!
Any comments welcomed, as always.
