New rear handles (totes) for hand planes

UKworkshop.co.uk

Help Support UKworkshop.co.uk:

This site may earn a commission from merchant affiliate links, including eBay, Amazon, and others.
Planebasics":1dfs45iq said:
A fairly simple method to drill a hole in a plane tote- since I can't post a link or domain/page references the method can hopefully be found in an article by Neil Mitchell 'How I Drill Holes in Plane Totes by Neil Mitchell.'
Assuming you mean this: http://www.cianperez.com/Wood/WoodDocs/ ... gTotes.htm

That's a good method - it ensures the drilling angle is consistent; though obviously you could still misalign the holes (not that it's hugely critical).

One small problem is that you would need a reasonable amount of extra stock, and with bubinga being pretty expensive I didn't want to have much waste material.
 
Planebasics":3ucic3rx said:
I assume cherry would be strong enough?
Yes, almost any hardwood would be strong enough, softwoods too in fact. In short sections most woods are surprisingly strong.

When it comes to tool handles once you get past just being strong enough not to break in use durability is about how the wood resists bumps and scrapes and it's here that the much harder woods come into their own, hence the excellent condition of rosewood handles 100+ years old. But you could make quite a durable plane tote and front knob using the right piece of pine.
 
sploo":3oaruvic said:
One small problem is that you would need a reasonable amount of extra stock, and with bubinga being pretty expensive I didn't want to have much waste material.
Not necessarily, make what would be the waste block from pine. Or MDF for that matter :)
 
ED65":413zxgx1 said:
Not necessarily, make what would be the waste block from pine. Or MDF for that matter :)
Yes, that's a fair point. Thinking about the piece of stock (that would contain the tote) and the size of the waste material around the ones I did you might just about have enough to cut a straight line at an angle on the top to use for the last drilling operation when it's upside down. There wouldn't be that much to rest on though.

What I did was simply put the pieces in a drill press vice and lower the drill bit in front of the piece (checking it against the relevant line on the template). It didn't take much to get the pieces at the right angle before drilling.
 
Progress.

I'd used rasps and files to do the final shaping some time ago. I shaped the #4 handles to be similar to the plastic handle from my modern #4, but I've noticed that the older #4 model often has a really thin top rear (somewhat like a horn). I really like that, but it would be more vulnerable to damage.

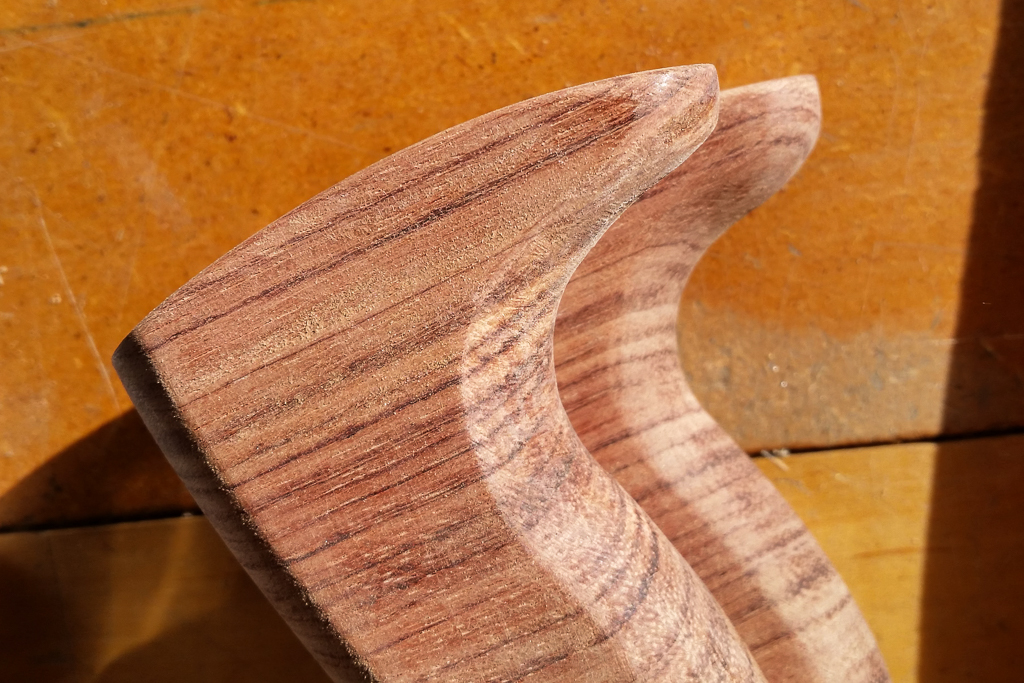
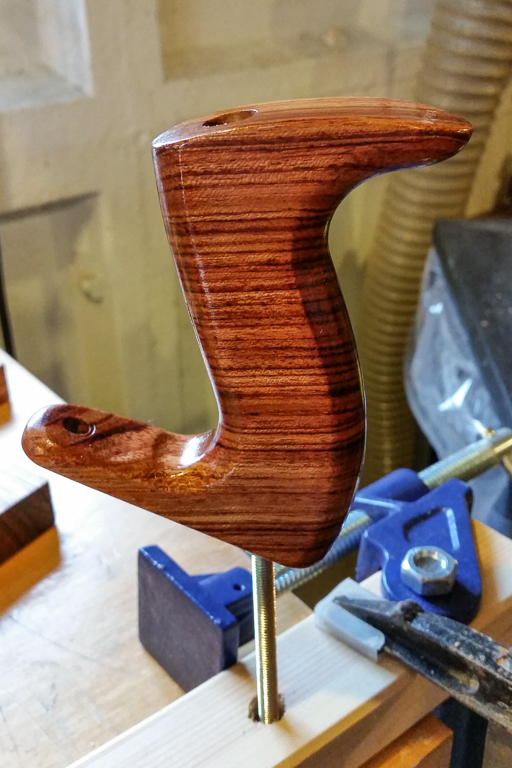
I decided to attack the top/rear section again. I didn't want to take out too much, but in comparison to the unmodified one below it is a bit thinner:

20160218_121344.jpg


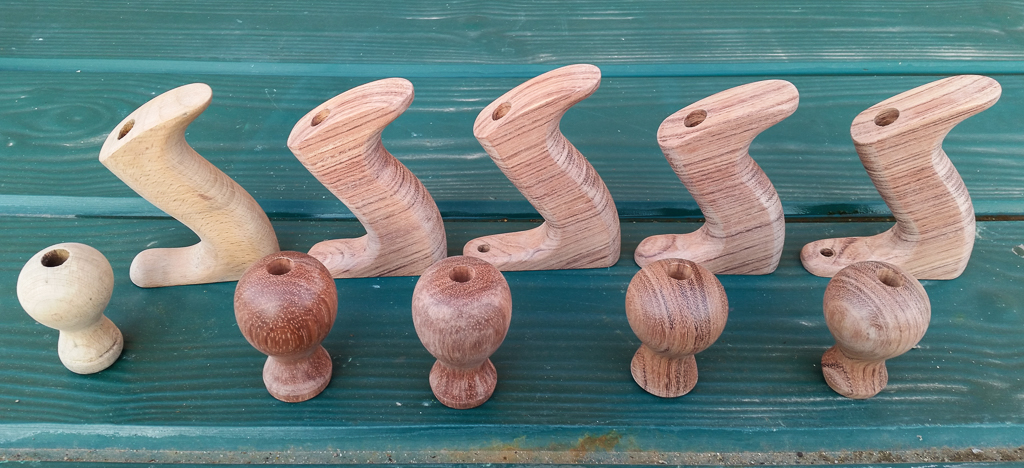
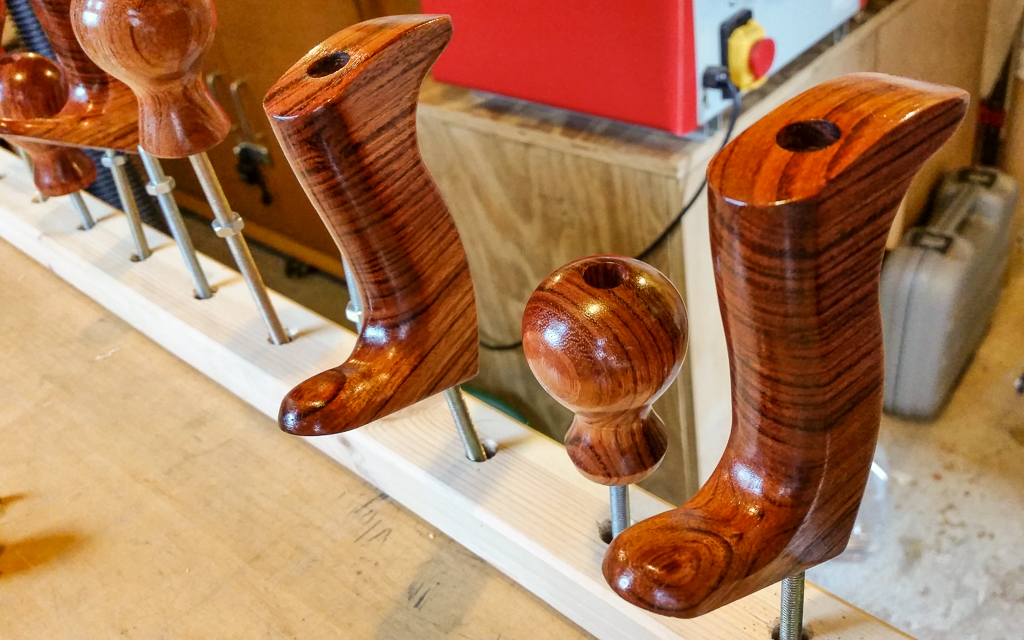
Lots of sanding later, we have a full compliment of two #4 handles, two #4 1/2 / #5 / #5 1/2 handles, two tall knobs and two short knobs (the knobs were turned by my dad). On the left are a beech pair from a Record #3:

20160218_160352.jpg


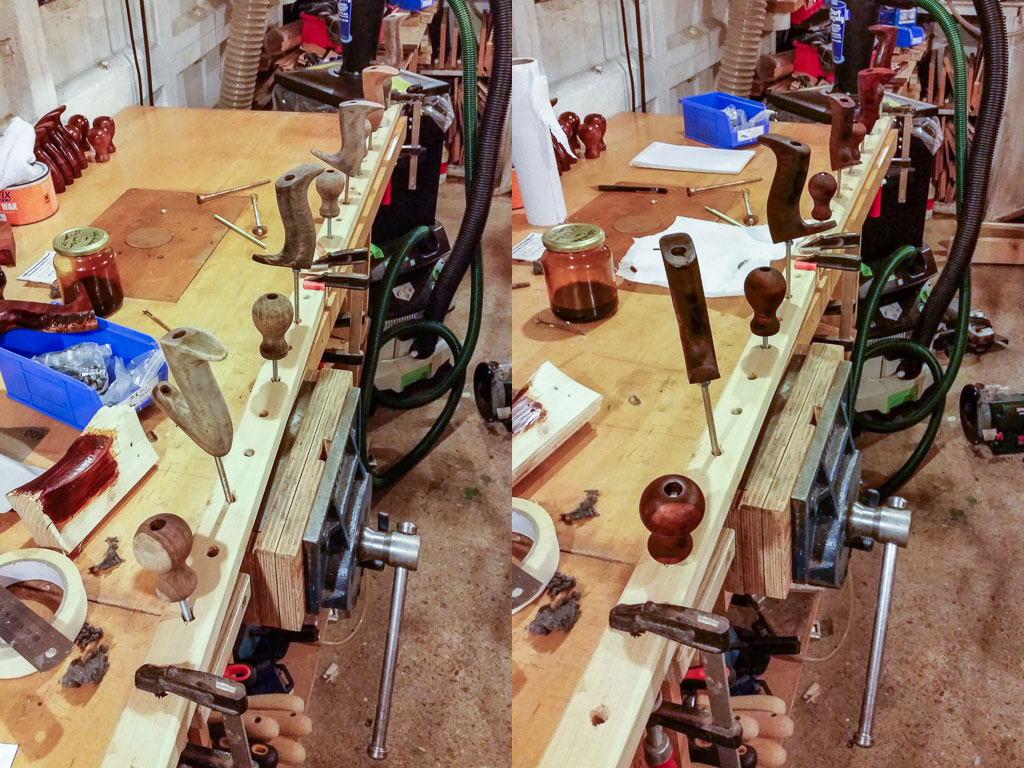
And wiped down with some white spirit:

20160218_161053.jpg


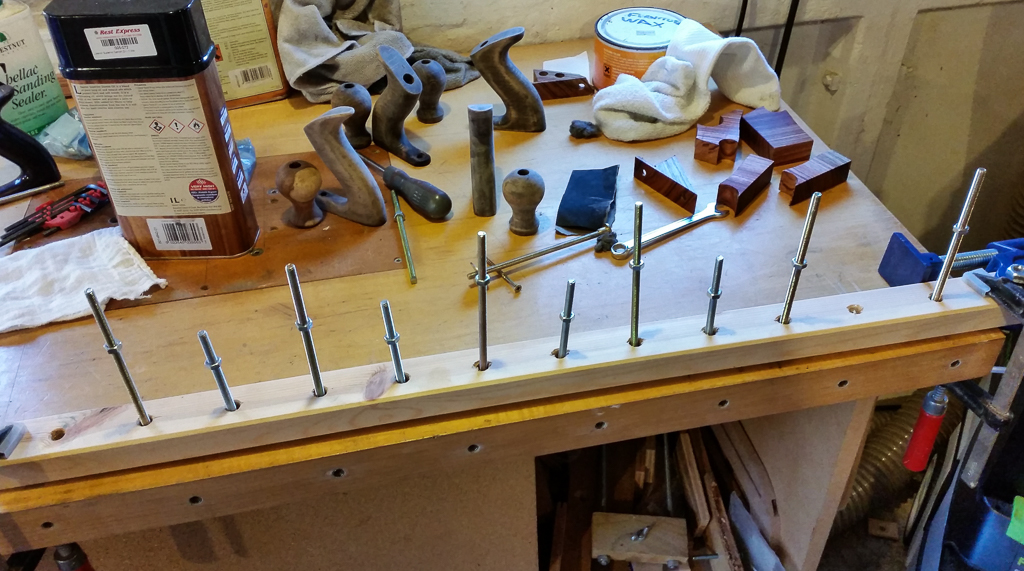
A DIY clamp with some M6 bolts and nuts re-purposed as a stand (in the background you can see some of the original handles and knobs, now sanded):

20160218_162026.jpg


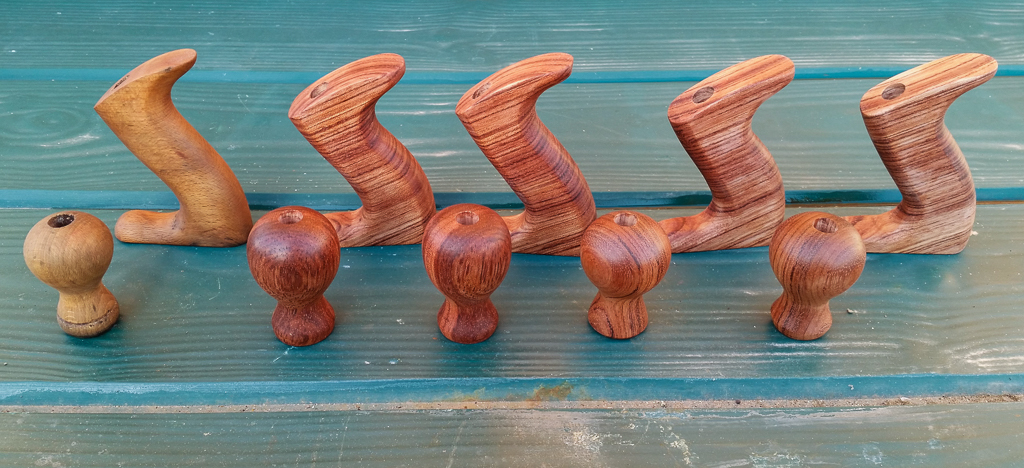
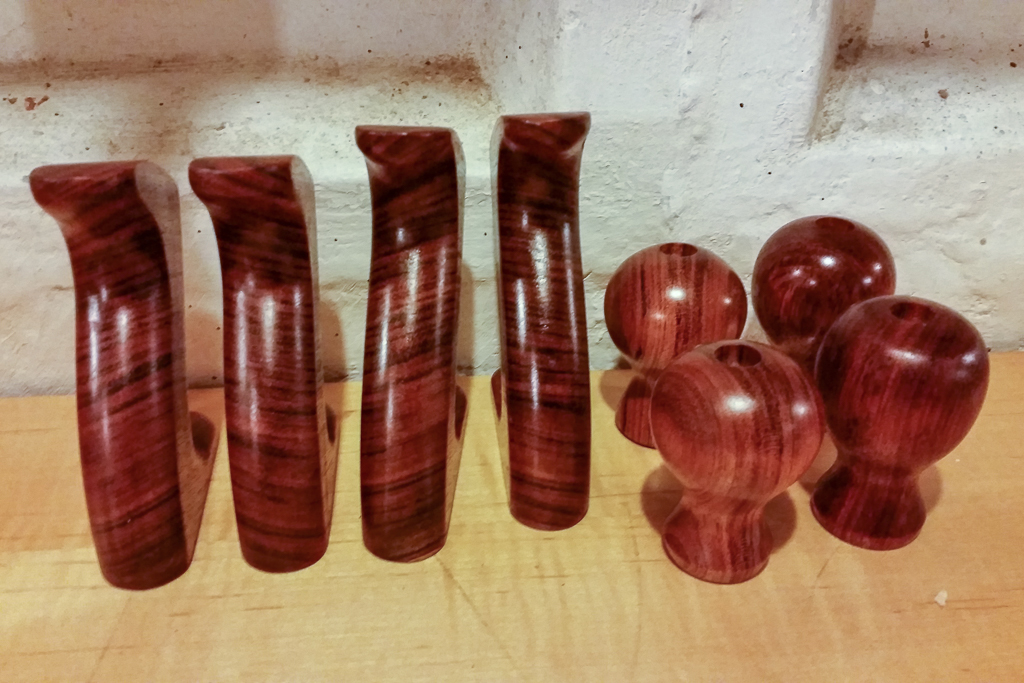
First coat of Danish Oil - looking good:

20160218_163317.jpg


24 hours later, a light rub with some 0000 steel wool, and coat #2 now looking really good:

20160219_155037.jpg


20160219_155356.jpg


The DO images above are wet (so very shiny). However, I've noticed that even once dry, they're much better than the test pieces I'd done. I think I probably didn't spent enough time sanding the test blocks to the same surface finish as the actual handles and knobs.

Unfortunately the beech front knob and rear handle came out different colours once oiled. I understand they would have originally been stained dark brown (a previous owner had removed the coating before I bought the #3).

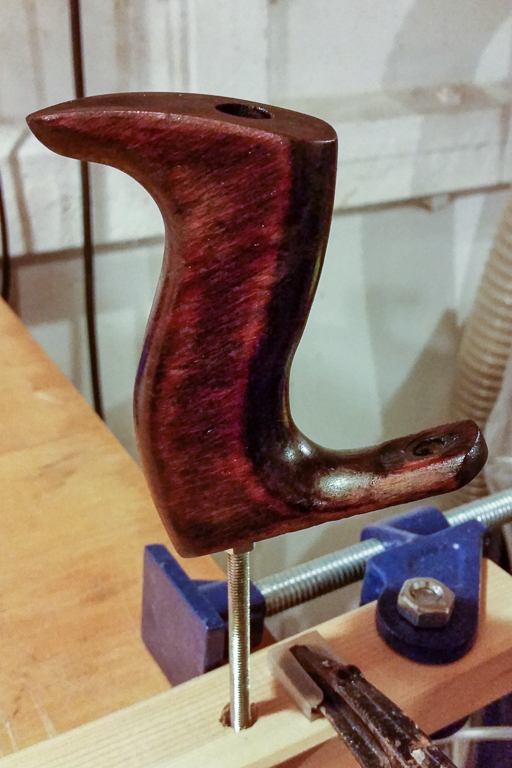
I've got some brown leather dye that I've mixed with shellac that I'm going to use on the old handles and knobs; as whilst they've sanded off OK the actual wood isn't that impressive, and they're a bit patchy - hence I felt a dyed shellac would be better than DO. I'll just use the tinted shellac on the beech parts and leave the single coat of DO on. I don't immediately need the other handles (apart from one pair for a #4 1/2, and the beech ones for the #3) but it seemed a good idea to restore them as they might prove useful in the future.
 
sploo":3v42b2wf said:
The DO images above are wet (so very shiny). However, I've noticed that even once dry, they're much better than the test pieces I'd done. I think I probably didn't spent enough time sanding the test blocks to the same surface finish as the actual handles and knobs.
Yes how finely you prepare the surface makes a very big difference with any penetrating finish.

Your handles look excellent! Congrats to you and your dad.
 
ED65":10lnfd5b said:
sploo":10lnfd5b said:
The DO images above are wet (so very shiny). However, I've noticed that even once dry, they're much better than the test pieces I'd done. I think I probably didn't spent enough time sanding the test blocks to the same surface finish as the actual handles and knobs.
Yes how finely you prepare the surface makes a very big difference with any penetrating finish.

Your handles look excellent! Congrats to you and your dad.
Thanks. The third coat went on today, and I think that's enough given I'll shellac them. I'll leave them to cure for a week now though.

I've only got ready mixed shellac, but a 2:1 ratio of shellac (Chestnut Sanding Sealer, IRC) to Fiebings Dark Brown leather dye seems to be good. A few coats, followed by a full strength of just shellac, looks as though it'll be right for the older handles.
 
Everyone's efforts here have given me much food for thought. There is a lot of really good work here. Eventually I want to have a try at making a new handle for my juuma Low Angle Bevel up Plane. (The handle is a bit small for my hand) I think I need a band-saw first though.
 
toitoi":unk44do2 said:
Everyone's efforts here have given me much food for thought. There is a lot of really good work here. Eventually I want to have a try at making a new handle for my juuma Low Angle Bevel up Plane. (The handle is a bit small for my hand) I think I need a band-saw first though.
Before there were bandsaws there were coping saws and they are still just as capable of doing the cutting if you don't yet have or can't afford a bandsaw.

The work will go much slower of course and you'll pay for the difference in price between the two tools in sweat equity! But there shouldn't be any difference in the finished product.
 
toitoi":192kanla said:
Everyone's efforts here have given me much food for thought. There is a lot of really good work here. Eventually I want to have a try at making a new handle for my juuma Low Angle Bevel up Plane. (The handle is a bit small for my hand) I think I need a band-saw first though.
As ED65 notes, you don't need a bandsaw. I think you'd really need a drill press to get the long bolt hole accurate, so that can be used with Forstner bits for the inside curves. A coping saw would then handle the rest of the curves. Though, you could even rough cut with a tenon saw and carefully chisel out the curves (chisel needs to be really sharp though).
 
The third coat of Danish Oil has had 24 hours to dry, so those handles have now been set aside to cure. Tonight I put a first coat of the dyed shellac on the old (scraped and sanded) handles, and I'm amazed how well they've turned out with just a single application:

20160221_175901.jpg


20160221_211425.jpg


I have a pine test block (bottom left in the first image) that I was using to try the mix. I think that three dyed coats followed by a near full strength clear shellac coat works well. I use the same dyed brush and transfer a little of the dyed shellac to the clear as both a thinner and a mild tint. I felt the 2:1 shellac:dye mix is a bit thin in terms of build without that final coat.

Based on how they're turning out, had I known they'd look that good I might not have bothered making the bubinga handles, but I'm glad I did as I've learned a lot in the process.

BTW In the jar in the above images is approx 48g of Chestnut Sanding Sealer (shellac) and 22g of Fiebings Dark Brown leather dye (nearly 2:1). There's easily enough to do the handles and more, and given the dye is £6 for 118ml, it's a dirt cheap mix.


Finally, here are the dried bubinga handles (a rather fuzzy pic unfortunately):

20160221_211617.jpg


Once the new handles have had a week to cure, I'll put a coat of clear shellac on them, and then wax them along with the old handles. Then I guess I'll actually need to use the planes to make something :wink:


n0legs":dstyjizd said:
That's gorgeous =D>
Thanks! I am a bit surprised frankly. I'm still waiting for Captain self generated mistake to appear!
 
sploo":shn77h6w said:
n0legs":shn77h6w said:
That's gorgeous =D>
Thanks! I am a bit surprised frankly. I'm still waiting for Captain self generated mistake to appear!

Now don't think like that :wink: I reckon you've got this handle/knob refinishing beat =D>
 
n0legs":3jxlmvk7 said:
Now don't think like that :wink: I reckon you've got this handle/knob refinishing beat =D>
Plenty of time to screw it up dear boy :wink:

Normally I'll get something just about finished... then drop it on the floor and damage it. I don't think I'd even used my Veritas Router Plane before I managed to drop one of the handles on the floor and dent it #-o
 
sploo":ug1fdupb said:
toitoi":ug1fdupb said:
Everyone's efforts here have given me much food for thought. There is a lot of really good work here. Eventually I want to have a try at making a new handle for my juuma Low Angle Bevel up Plane. (The handle is a bit small for my hand) I think I need a band-saw first though.
As ED65 notes, you don't need a bandsaw. I think you'd really need a drill press to get the long bolt hole accurate, so that can be used with Forstner bits for the inside curves. A coping saw would then handle the rest of the curves. Though, you could even rough cut with a tenon saw and carefully chisel out the curves (chisel needs to be really sharp though).

I had that same thought, but there goes the excuse to buy a small bandsaw! #-o
I have had my eye on one at a local tool handler. It is not too big and seems to do what I want. It is manufactured by Holzmann in Austria. Has anyone here had experience with this brand? My biggest problem is room for a machine. I have a smallish hobby room in the attic.

I guess the thought of using a coping saw for the cuts is just scaring me off a little. I need to finish my bench first though, then on to projects like this.

I do have a bench top drill press already and forstner bits so that part isn't an issue.

I need to source some kind of hardwood locally for a decent handle.
 
sploo":31av4ez7 said:
n0legs":31av4ez7 said:
Now don't think like that :wink: I reckon you've got this handle/knob refinishing beat =D>
Plenty of time to screw it up dear boy :wink:

Normally I'll get something just about finished... then drop it on the floor and damage it. I don't think I'd even used my Veritas Router Plane before I managed to drop one of the handles on the floor and dent it #-o

Doesn't that just give it some character? Usage marks just say to me when I see them, "This is a tool that is used for its intended purpose".
 
toitoi":a6g8sv1w said:
I had that same thought, but there goes the excuse to buy a small bandsaw! #-o
I have had my eye on one at a local tool handler. It is not too big and seems to do what I want. It is manufactured by Holzmann in Austria. Has anyone here had experience with this brand? My biggest problem is room for a machine. I have a smallish hobby room in the attic.

I guess the thought of using a coping saw for the cuts is just scaring me of a little. I need to finish my bench first though, then on to projects like this.

I do have a bench top drill press already and forstner bits so that part isn't an issue.

I need to source some kind of hardwood locally for a decent handle.
TBH A coping saw will be less "scary" than a bandsaw; in the sense that it's entirely under your control. With either tool I find it's a good idea to undercut (i.e. a couple of mm away from the line) then do final shaping with a sander or rasps and files - it's all too easy to slip and overcut if you try to get close.

I don't know the Holzmann brand. I did have a tiny desktop bandsaw many years ago. Obviously they're not exactly industrial quality, but they're perfectly good for cutting out shapes.

For material; see if there are any woodturning shops or timber yards - or better yet a wood recycling centre. I would recommend making a prototype from pine first to iron out mistakes (it helped me a lot).


toitoi":a6g8sv1w said:
Doesn't that just give it some character? Usage marks just say to me when I see them, "This is a tool that is used for its intended purpose".
I'm fairly certain Veritas didn't intend their plane to be bounced across a concrete floor by someone with the dexterity of a drunken ape :mrgreen:
 
sploo":19olys0z said:
toitoi":19olys0z said:
I had that same thought, but there goes the excuse to buy a small bandsaw! #-o
I have had my eye on one at a local tool handler. It is not too big and seems to do what I want. It is manufactured by Holzmann in Austria. Has anyone here had experience with this brand? My biggest problem is room for a machine. I have a smallish hobby room in the attic.

I guess the thought of using a coping saw for the cuts is just scaring me of a little. I need to finish my bench first though, then on to projects like this.

I do have a bench top drill press already and forstner bits so that part isn't an issue.

I need to source some kind of hardwood locally for a decent handle.
TBH A coping saw will be less "scary" than a bandsaw; in the sense that it's entirely under your control. With either tool I find it's a good idea to undercut (i.e. a couple of mm away from the line) then do final shaping with a sander or rasps and files - it's all too easy to slip and overcut if you try to get close.

I don't know the Holzmann brand. I did have a tiny desktop bandsaw many years ago. Obviously they're not exactly industrial quality, but they're perfectly good for cutting out shapes.

For material; see if there are any woodturning shops or timber yards - or better yet a wood recycling centre. I would recommend making a prototype from pine first to iron out mistakes (it helped me a lot).


toitoi":19olys0z said:
Doesn't that just give it some character? Usage marks just say to me when I see them, "This is a tool that is used for its intended purpose".
I'm fairly certain Veritas didn't intend their plane to be bounced across a concrete floor by someone with the dexterity of a drunken ape :mrgreen:

Every village here has a saw mill. But they mostly only have pine and once in a while some Beech. The other hardwoods have been depleted from the forests here over the centuries. Sadly.
The saw I am contemplating is a floor standing model.
My "fear" of the coping saw has nothing to do with safety and more to do with my abilities!
 
Back
Top