My back yard workshop build

UKworkshop.co.uk

Help Support UKworkshop.co.uk:

This site may earn a commission from merchant affiliate links, including eBay, Amazon, and others.

Alex

Established Member
Joined
31 Mar 2007
Messages
177
Reaction score
4
Location
Derby
Posted this in another forum,meant to post here as well so here it is.
It all started in July when we had two huge trees out at the top of yard. Things got a bit quite on work front so thought I'd upgrade.
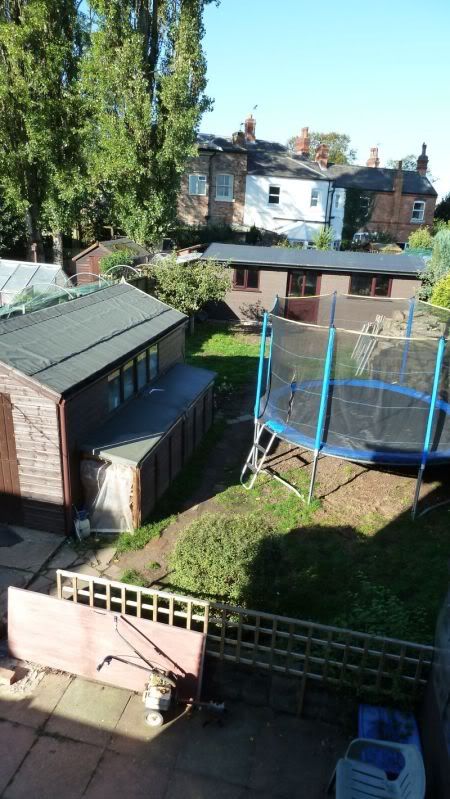
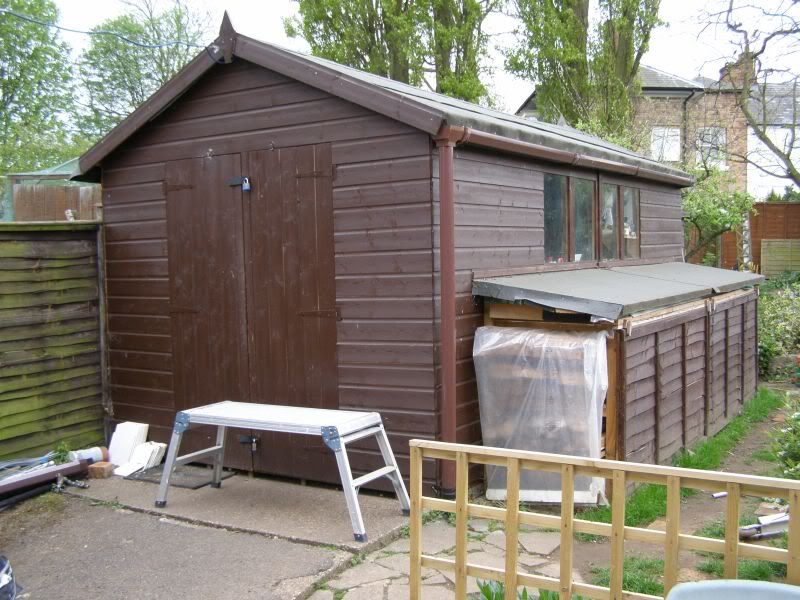
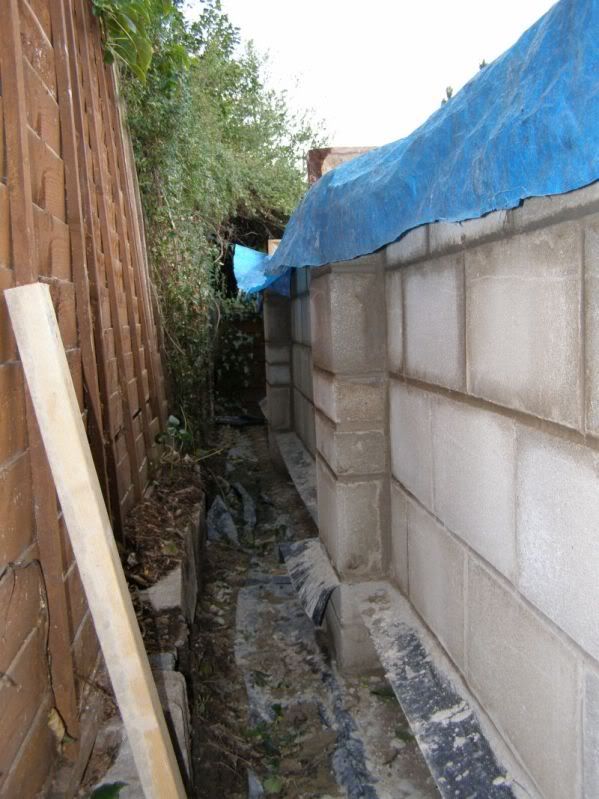
My existing meagre workshop for past two years since we moved. 8'x16' a bit tight.
previousworkshed.jpg

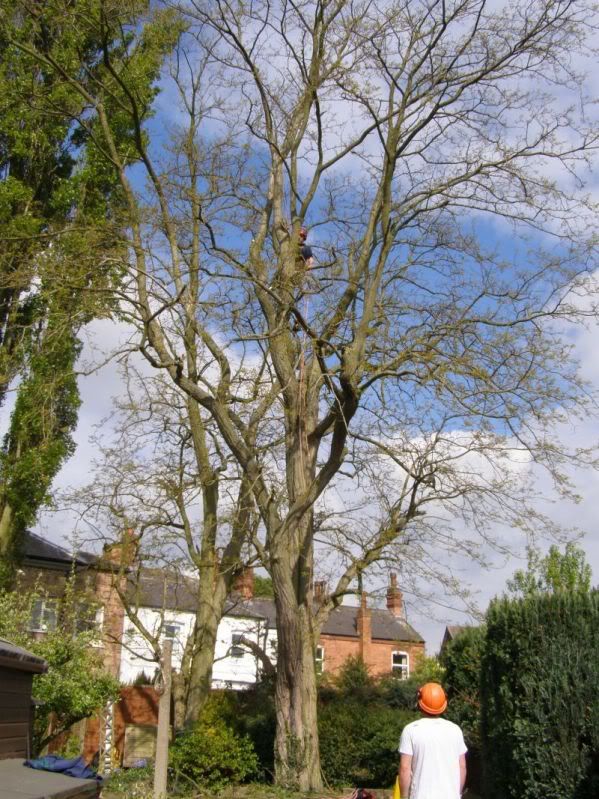
Two huge Acacia's coming down. Got two tree surgeon in.Took both down in day and shredded any thing up to 5". :shock:
treescomingdown1.jpg

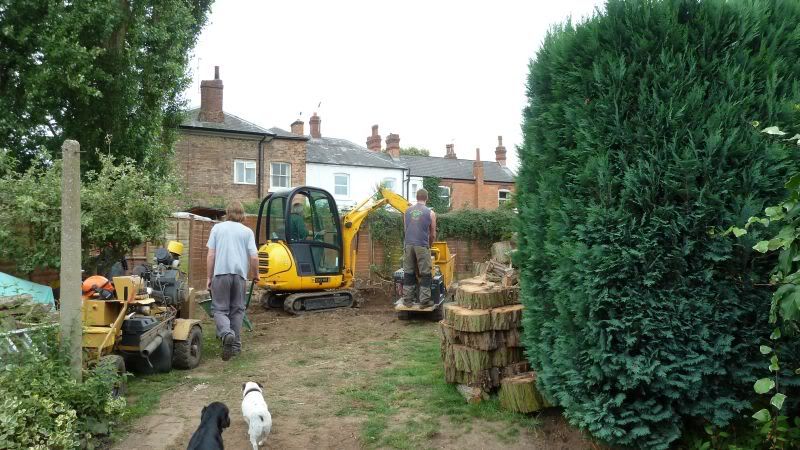
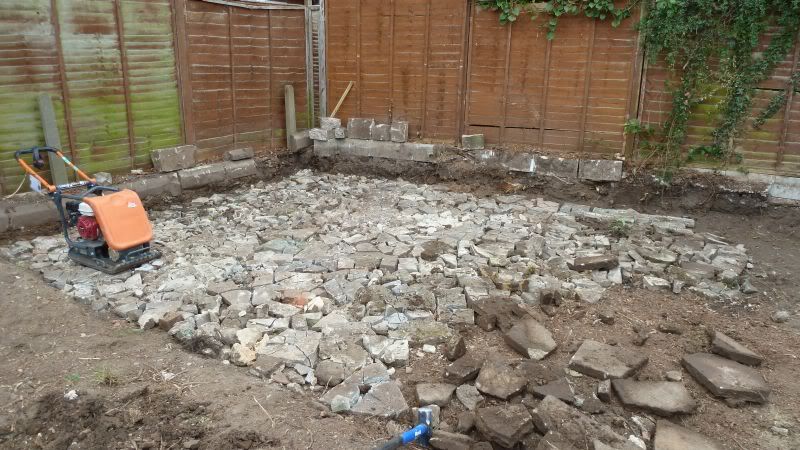
Then got them back with jcb, root grinder and track dumper. These are all mates so I dug in and helped. We took out two 10 ton grab lorries of dirt and grab was compacting to get more on. It was really good black friable topsoil full of compost, shame really.
JCBminidiggerandtrackeddumper.jpg

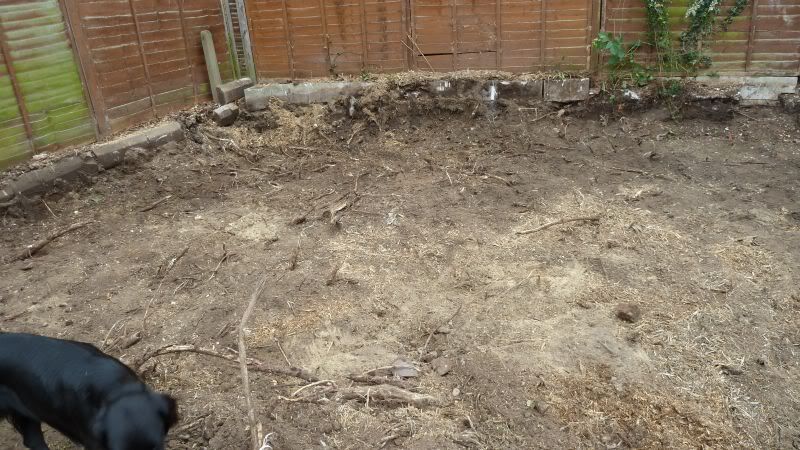
After we finished up for day. Still loads of work leveling cutting out stray roots. The finish hole was a foot deep at shallow end and nearly two at the back.
Holeaftertheyleftlotsrootstoclearandsquareup.jpg

hardcorebrokenupandcompacted.jpg

fourinchhardcoredown.jpg

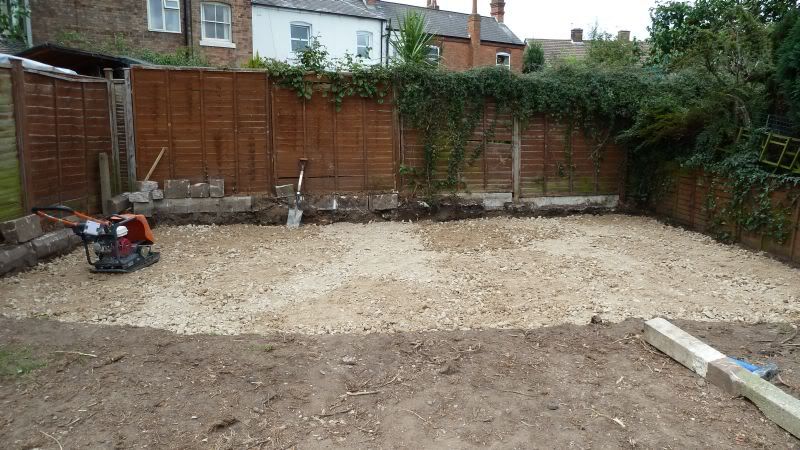
Compacted then 8x2s screwed together as shuttering. Blinded the hardcore with sand only inch so used landscape fabric then 1000 gauge dpc.
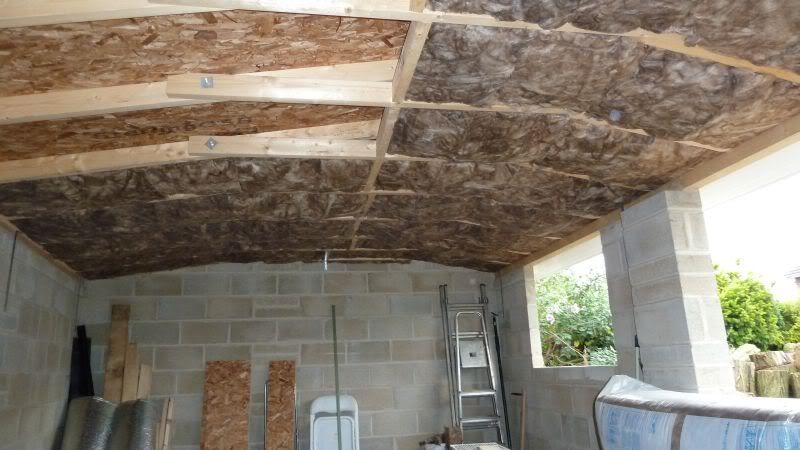
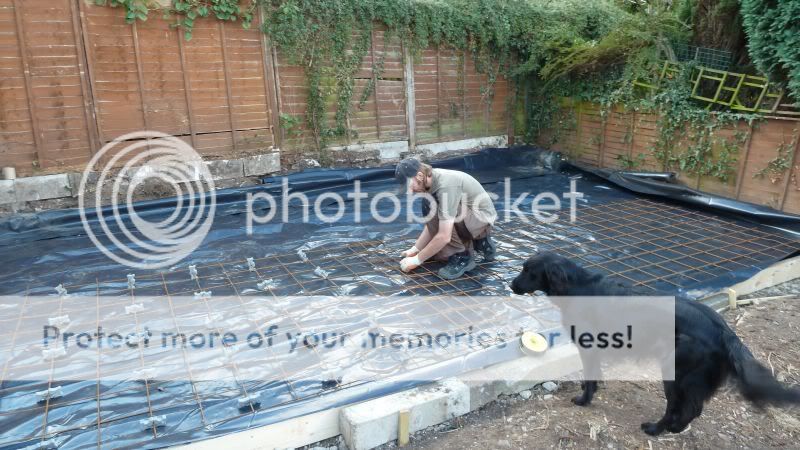
Reinforced with double layer of 6mm steel mesh.
startedstichingmeshtogetherwithspacersthatdidntwork.jpg

Concrete pour day. Extra strong c30 pumped 50m. Only had wife, tiny size 8 thing to help shake/tamp concrete down, lucky the pumped concrete was good move and placed right. So stuck poker in moving frequently and shacked concrete pretty level. Still needed tamping but wife was just about able to manage.
concretemixertruck.jpg

concretepumpandtruckbackingup.jpg

startofconcretepour.jpg

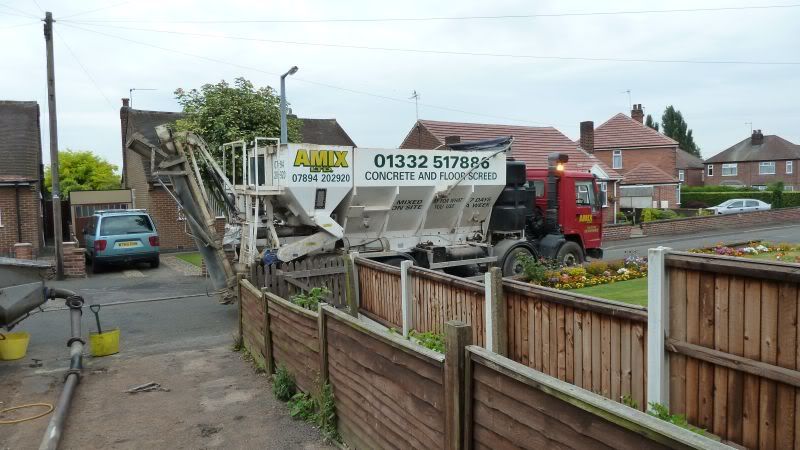
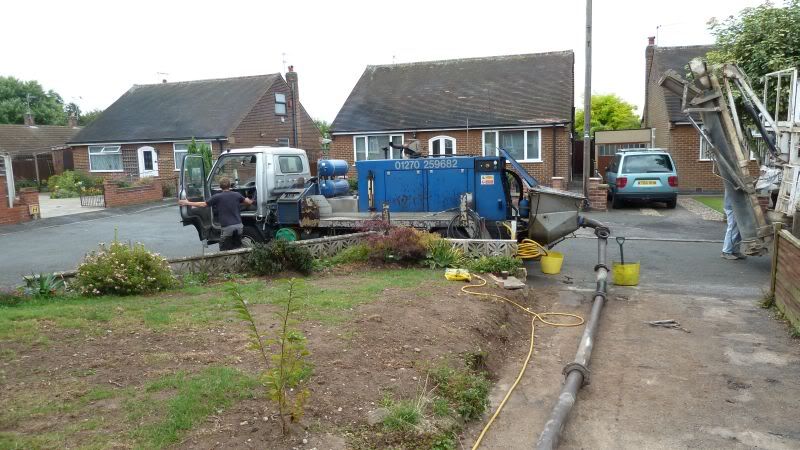
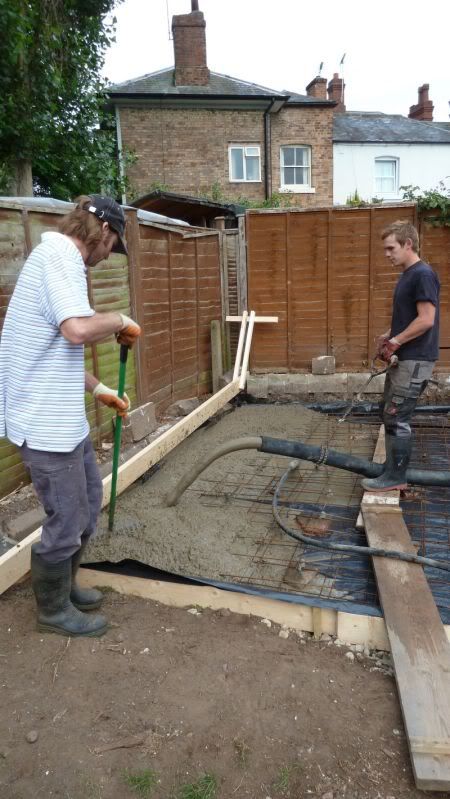
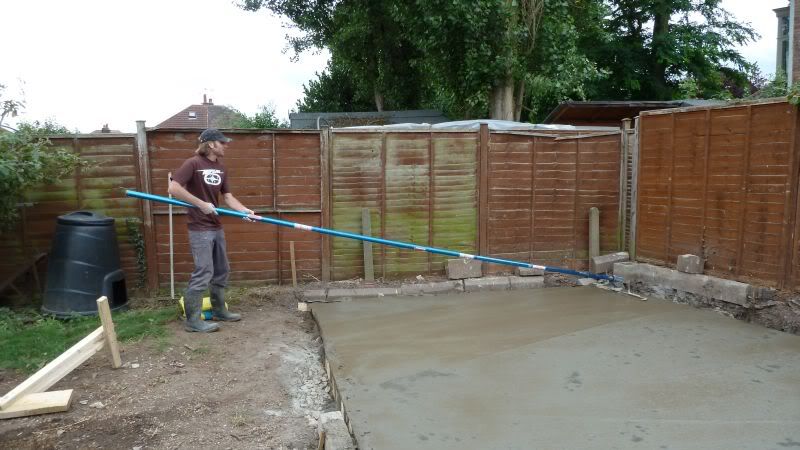
Concrete pump 6 cubes in just over hour. The tamping took another hour. I also hired big blue float which worked brilliant had to have couple cups of tea waiting for concrete get hard enough. Got the floating done round 12 so loaded back in van and headed back hire place, minute i got the a52 we had freak heavy rain, heavyist I've seen in uk for 5 min then sun again!!!!!!!!!! So lost extra silky smooth finish now left with semi pitted.
floatingtheslab.jpg

dayaftersurfacedamagerubbletofillaroundslab.jpg

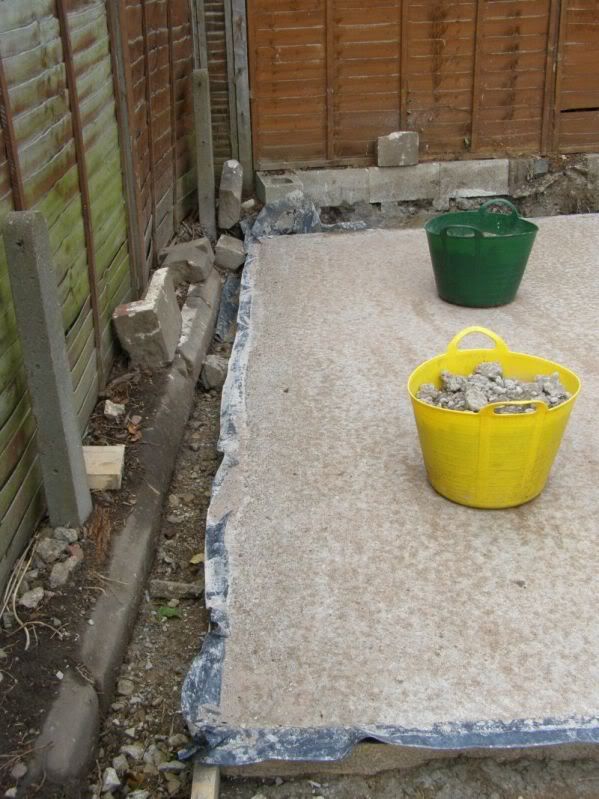
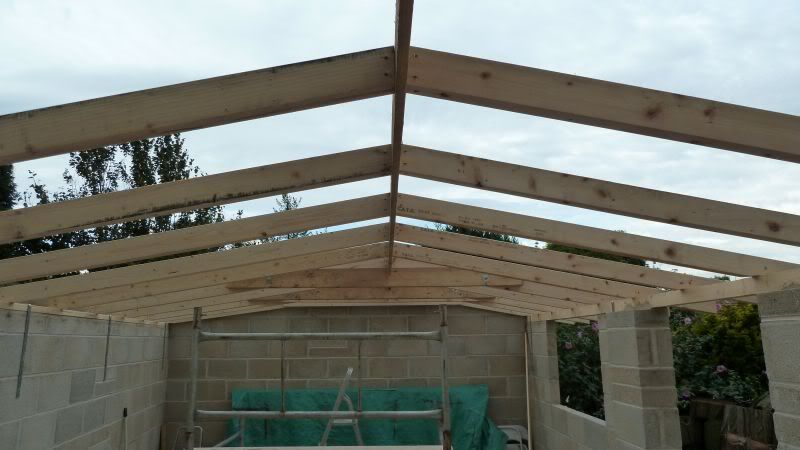
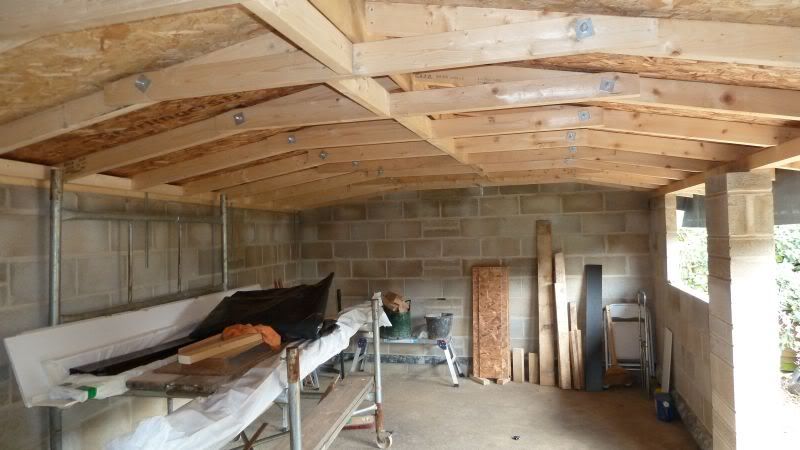
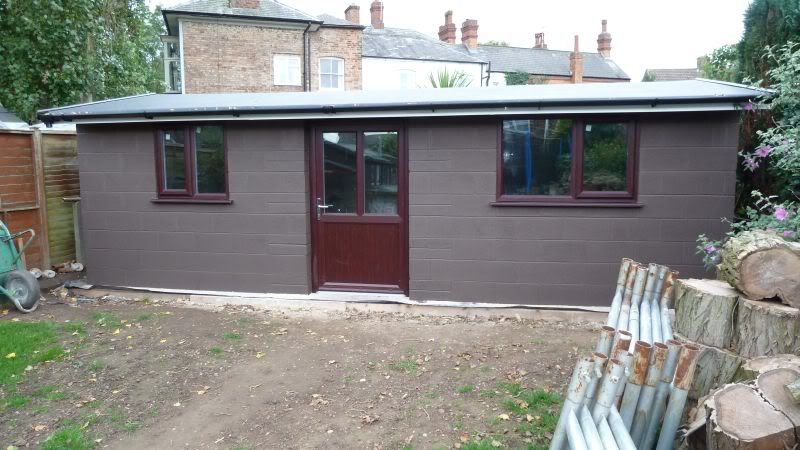
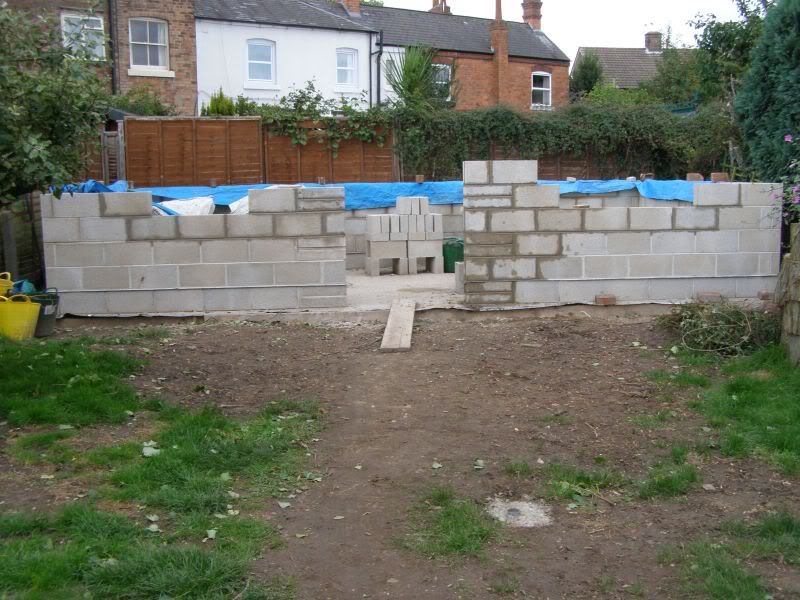
The observant of you will realise she's not square! :evil: After digging out I found back fence on right went a further 4' back. So not wanting to waste i made the decision to square building on front with back wall running off. Slab size was something like 7.5m length with left side 3.5m and right 4.5m. Made roof very interesting.
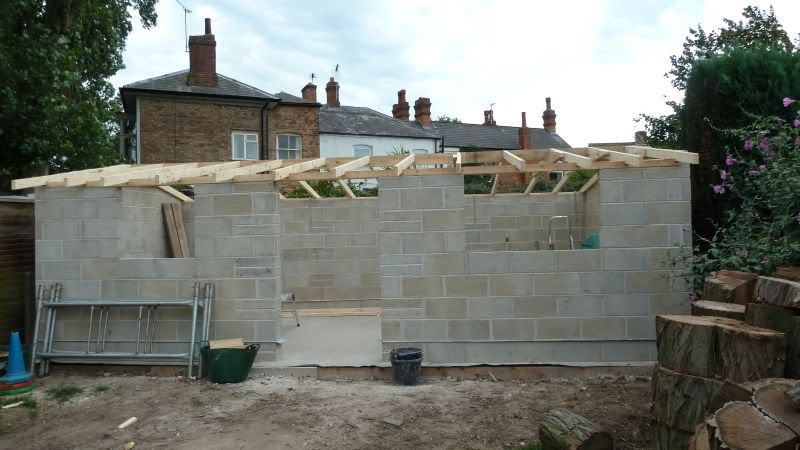
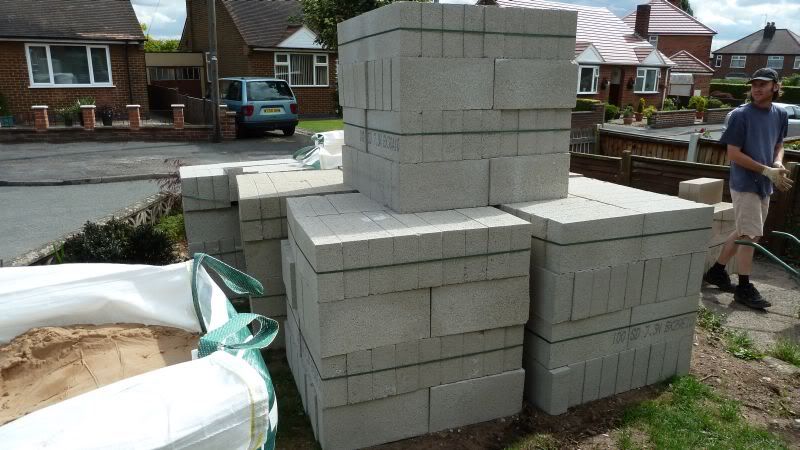
Taken delivery off 500 odd 6,3Newton blocks sand + cement.
blocksandbuildingsanddelivered.jpg

Blocking took two weeks been on and off with kids on holiday and rain.
fridaysprogress.jpg

Tuesdaysprogress-backwallwithraincoverson.jpg

Tuesdayprogresssofar.jpg

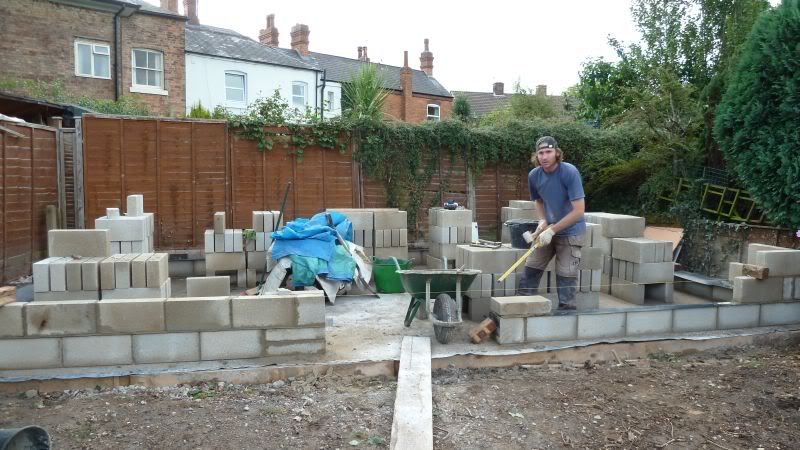
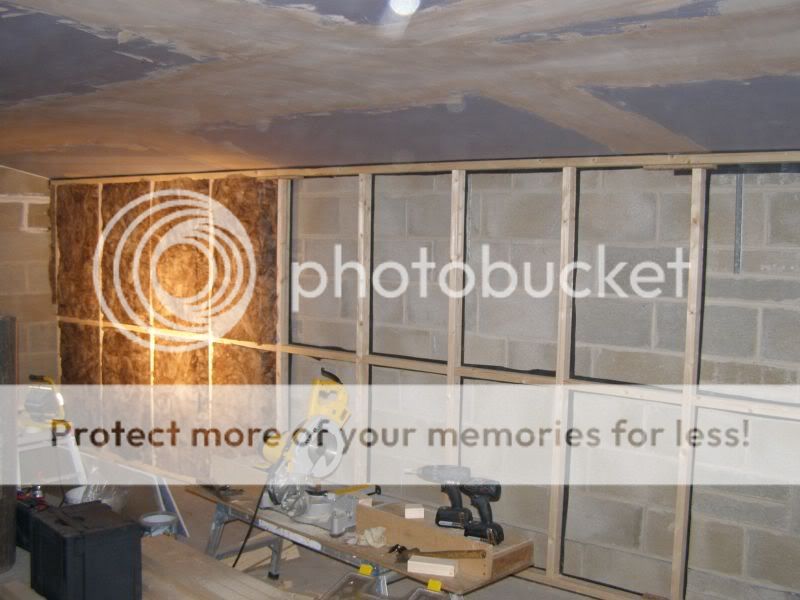
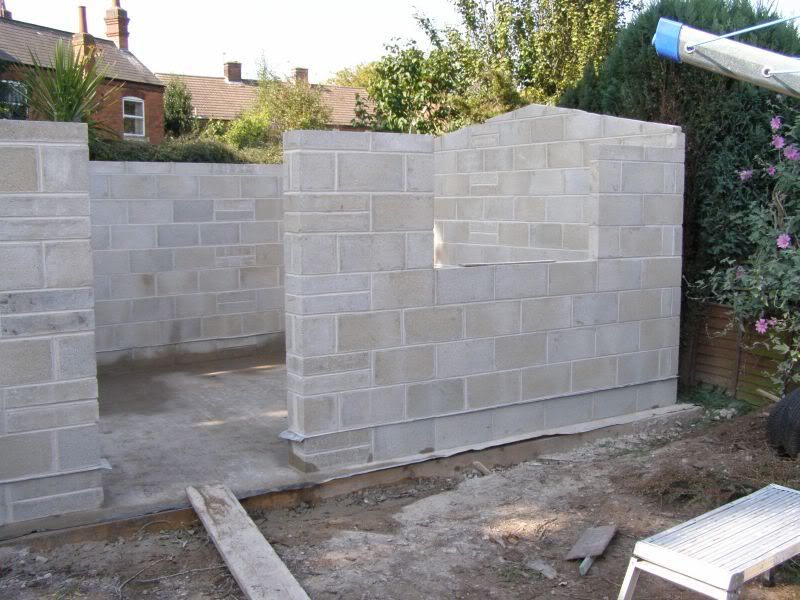
Back and side walls where build with pillars on the outside.
Tuesdaydownbackwallshowingpillarsandspace.jpg

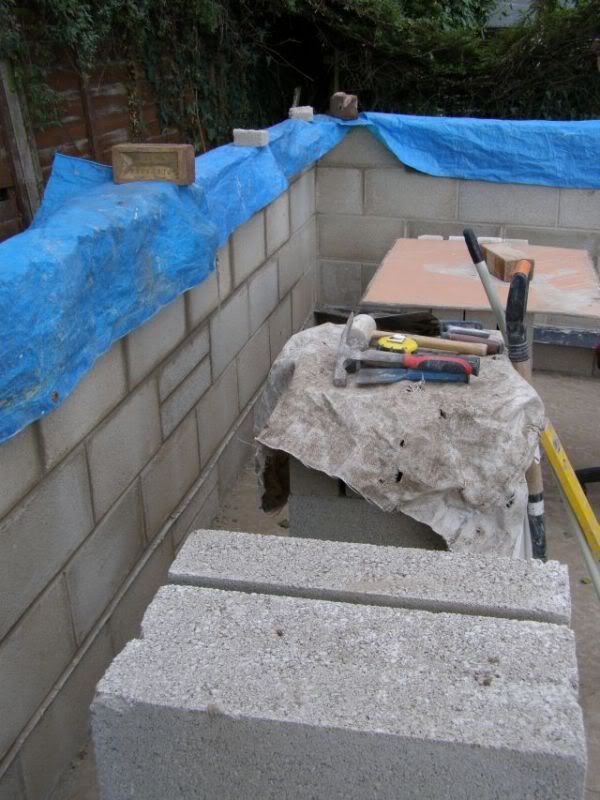
Was really getting into this block laying groove when it was all done. :D
Blockingdone.jpg


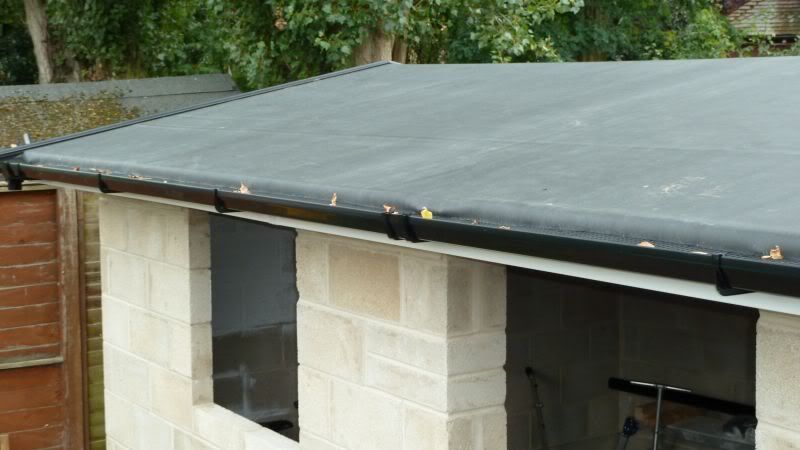
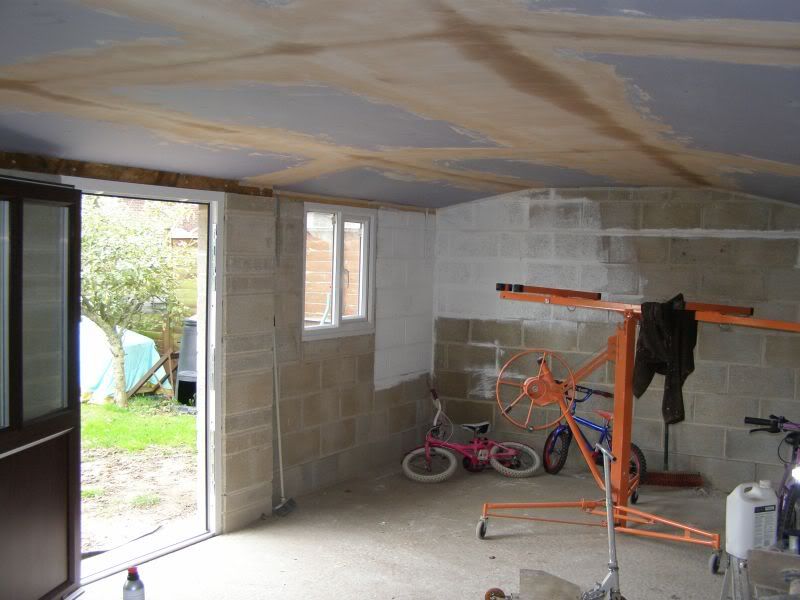
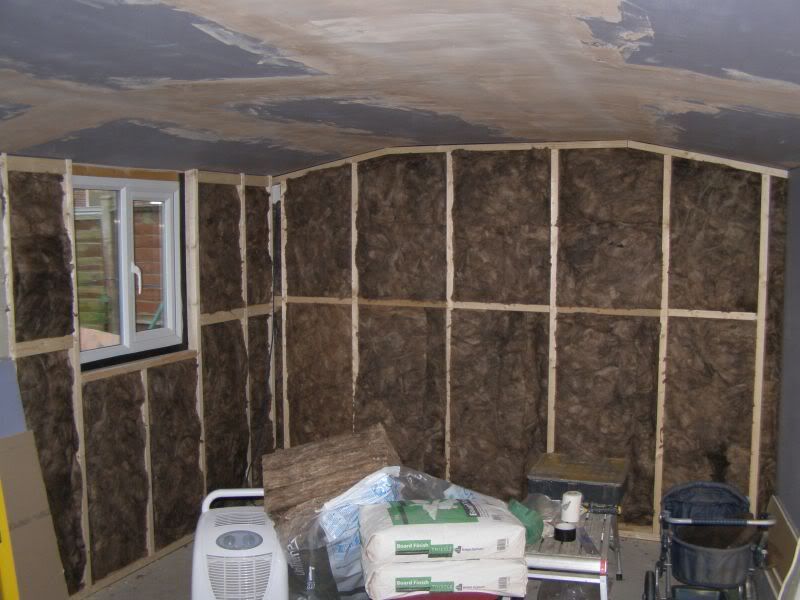
As you might have guessed by now. I'm staying with in permissible building sizes before needing BC or planning. So shallow pitch.
 
Roofer hat on now.5x2s with 4x4 wall plate on front and 4x2 wall plate back.Rafters tide.
Front kept all square with other side of apex been slightly twisted. Not really noticeable at all. :D
insidetie.jpg

rooftimbergoingon.jpg

osbroofboardson.jpg

Roof covering is EDPM rubber for flat roof. I order it as one sheet 5x8m weighed an absolute ton well actually 80kg. I nearly died after picking it up off back of courier truck staggering up the drive and placing on trailer which instantly tipped up to reveal 80kg warning ticket.
rubberroofdryfit.jpg

Insideroofview.jpg

Rubber roof glued down one side per day. I went with complete upvc eave detail, no maintance.
Eavesdetail.jpg

I also went with upvc windows, I now sacrilage but just wanted to get done.
Windowin.jpg

windowsin1-1.jpg

Insulated with 75mm cavity rockwool. I had 1000 gauge dpm left so stuck that over.
Acoustic soundboarded and joint skimmed and thats as far as got at the mo.
Edit that was on 15 Oct. I've only got back to it this week doing studding external walls and insulating.

insulationbattsgoingin.jpg


1stlotofplasterboardjointskimmed.jpg


Painted top coat outside on Saturday.16 Oct. Nice Bitter chocolate to camouflage it a bit.
shedpaintedbitterchocolate.jpg

paintedroundtheback.jpg

shedpaintedpotraitview.jpg

I've got more internal work, thinking about insulating walls and boarding over with more acoustic board.
Still got electrics then a 800mm paved path.
Moving day is in view.... :lol:
 
I'm impressed... The low-pitch seems to work well for the space. Higher pitches look more quaint but I suspect the building would have dominated the space too much with a higher pitch.
 
cambournepete":2z5az3sv said:
Looks good, but ...

matt":2z5az3sv said:
I'm staying with in permissable building sizes before needing BC or planning.
But you're very close to the boundaries so you might need permission anyway...

Certainly looks to be withing 1 metre.
 
Thanks Matt and Pete. Yeah keeping roof low and painting brown really made it less imposing on the garden. Only ceiling height is very low inside now, 2,1m height in middle flat bit and 1,930m at lowest so no loft storage or over head racks!:(

I did check with our local planning they said it falls into permissible out building as long as it's build of substantial non flammable material hence block build. I suppose it's down to your own planning dept interpretation but here's the rules from planning portal.

Outbuildings are considered to be permitted development, not needing planning permission, subject to the following limits and conditions:

* No outbuilding on land forward of a wall forming the principal elevation.
* Outbuildings and garages to be single storey with maximum eaves height of 2.5 metres and maximum overall height of four metres with a dual pitched roof or three metres for any other roof.
* Maximum height of 2.5 metres in the case of a building, enclosure or container within two metres of a boundary of the curtilage of the dwellinghouse.
* No verandas, balconies or raised platforms.
* No more than half the area of land around the "original house"* would be covered by additions or other buildings.
* In National Parks, the Broads, Areas of Outstanding Natural Beauty and World Heritage Sites the maximum area to be covered by buildings, enclosures, containers and pools more than 20 metres from house to be limited to 10 square metres.
* On designated land* buildings, enclosures, containers and pools at the side of properties will require planning permission.
* Within the curtilage of listed buildings any outbuilding will require planning permission.

Building Regulations

If you want to put up small detached buildings such as a garden shed or summerhouse in your garden, building regulations will not normally apply if the floor area of the building is less than 15 square metres and contains NO sleeping accommodation.

If the floor area of the building is between 15 square metres and 30 square metres, you will not normally be required to apply for building regulations approval providing that the building contains NO sleeping accommodation and is either at least one metre from any boundary or it is constructed of substantially non-combustible materials.

This section provides you with general information to help you comply with the Building Regulations when constructing a new outbuilding within the boundaries of an existing property, such as:

* garage or carport
* summerhouse or shed
* greenhouse

Building a new garage attached to an existing home would normally need building regulations approval.

Building a new attached carport (open on at least two sides) would not normally require building regulations approval if it is less than 30 square metres in floor area.

Building a detached garage of less than 30 square metres floor area would not normally need building regulations approval if:

* the floor area of the detached garage is less than 15 square metres.
* the floor area of the garage is between 15 square metres and 30 square metres, provided the garage is at least one metre from any boundary, or it is constructed from substantially non-combustible materials.

If you want to convert an integral or attached garage into habitable use, building regulations will normally apply, view specific information for garage conversions.

In many cases, these structures will be exempt from requiring approval under the Building Regulations if they meet certain exemption criteria.
 
Alex":36hig028 said:
and is either at least one metre from any boundary or it is constructed of substantially non-combustible materials.

Are you ok with the wood and felt roof, rather than tiles?
 
Alex, that workshop looks very nice, I am envious.

I'll bet many a valued project will be made in there, enjoy!
 
Nice build you have done there! The moving in doesn't look to far away now and I look forward to seeing it complete. :wink:
 
Nice job.
What happened to the dogs: they featured before the floor got poured :lol:
 
'Bin meaning to ask. In one of the photos there's an orange thing with a 'cement mixer' type handle which I don't recognise. Would I be correct in thinking this is something for getting plasterboard panels up to ceiling height? Is it the sort of thing that they would have at a hire shop?

Tony
 
shipbadger":25mv4hll said:
'Bin meaning to ask. In one of the photos there's an orange thing with a 'cement mixer' type handle which I don't recognise. Would I be correct in thinking this is something for getting plasterboard panels up to ceiling height? Is it the sort of thing that they would have at a hire shop?

Tony

Yes that's a board lift - wish I had one, but would need to empty the shop and clear the rubbish in the garden first. :oops: Yes HSS and the like do hire them out.

http://www.hss.com/g/69940/Panel-Lifting-Winch.html

HIH

Dibs
 
Dibs-h":2mwc635v said:
Yes that's a board lift - wish I had one, but would need to empty the shop and clear the rubbish in the garden first. :oops: Yes HSS and the like do hire them out.

http://www.hss.com/g/69940/Panel-Lifting-Winch.html

HIH

Dibs

You know, Dibs, with you killing yourself getting those plywood sheets up in your shop, you ought to consider renting one. The bottom section folds up, and the top part comes off--when they're not set up they're really pretty small. Yes, you'll have to move the stuff around in your shop, so that may be deciding factor. But it will go pretty fast. A friend of mine and I did almost all the ceiling drywall in my shop (~450 sq ft, 9 to 11 ft height) in a day using a lift like that.

Kirk
 
kirkpoore1":2dsmcsgc said:
You know, Dibs, with you killing yourself getting those plywood sheets up in your shop, you ought to consider renting one. The bottom section folds up, and the top part comes off--when they're not set up they're really pretty small. Yes, you'll have to move the stuff around in your shop, so that may be deciding factor. But it will go pretty fast. A friend of mine and I did almost all the ceiling drywall in my shop (~450 sq ft, 9 to 11 ft height) in a day using a lift like that.

Kirk

I had a look on Ebay and they can be bought for a little more than the cost of a weekend's hire, so will probably look into that. Are there any issues if you want to butt boards up to each other?

Cheers

Dibs
 
Yes the orange jobby is a board lifter. I bought it 5 years ago and its worth it's weight in gold specially as I work alone. The lifter made light work fitting the sound block plasterboards weighing 35kg each and quite flexible. Buy one,you now it makes sense. :twisted:
Waka,yeah I'm busy insulating internal walls. I had planned on doing floating wood floor on insulation but I stuffed up having door made with low threshold. I'm going to have to make do with foam mats.
Ok I've studded all the internal walls with 3x2 cls then insulated with 75mm high density cavity batts followed with plastic vapour barrier and soundblock plasterboard.
backwallstud.jpg


morestudwork.jpg


somemorestuds.jpg
 
Dibs-this how I use board lifter. Clear floor stack boards on far wall face out,ceiling face. Wheel board lifter over to stack tilt top 90deg flip board hooks into position to catch board. Lift board two foot high onto hooks and tilt top back to horizontal position and lock tilt. Wheel board over to approx position and jack board up not to hard up against yet,on sloping ceiling the head will tilt to follow pitch. You just then nudge the lifter about to get board into final position and jack it up tight. And of course it can bring boards down as easy, just keep your hand on wheel while releasing the brake, for those tweak cuts. :oops: I don't even bother trying to work out cuts now I just jack them up and then put some marks on for cuts far easier. :D
Edit just to say board hooks are moved out of the way after lifting to horizontal position. So no problem for butt joints. The rubber caps on support arms hold the board from slipping.
Board lifter in action!
boardlifter.jpg
 
Dibs-h":18uajt39 said:
I had a look on Ebay and they can be bought for a little more than the cost of a weekend's hire, so will probably look into that. Are there any issues if you want to butt boards up to each other?

Cheers

Dibs

There are two good parts to buying one: You can keep it as long as you need it, and you can sell it for about what you paid for it. Try to find a used one locally--no shipping costs then, and who wants to import something else from China?

As Alex said, once on the lift it raises up easily, and when it reaches the ceiling it will tilt to match the surface. It's surprisingly easy to use.

Kirk
 
Back
Top