More thread cutting?

UKworkshop.co.uk

Help Support UKworkshop.co.uk:

This site may earn a commission from merchant affiliate links, including eBay, Amazon, and others.

Jonzjob

Established Member
UKW Supporter
Joined
19 Mar 2007
Messages
5,290
Reaction score
377
Location
Ex nr Carcassonne, France. Now Corston Malmesbury
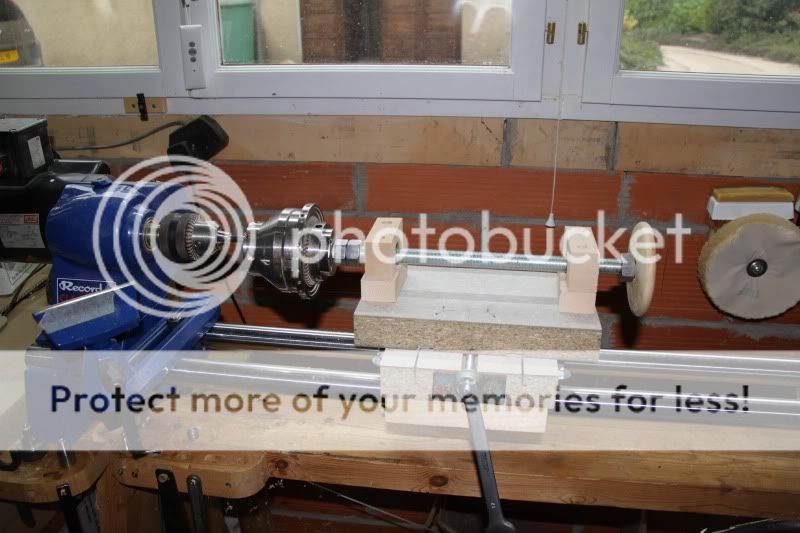
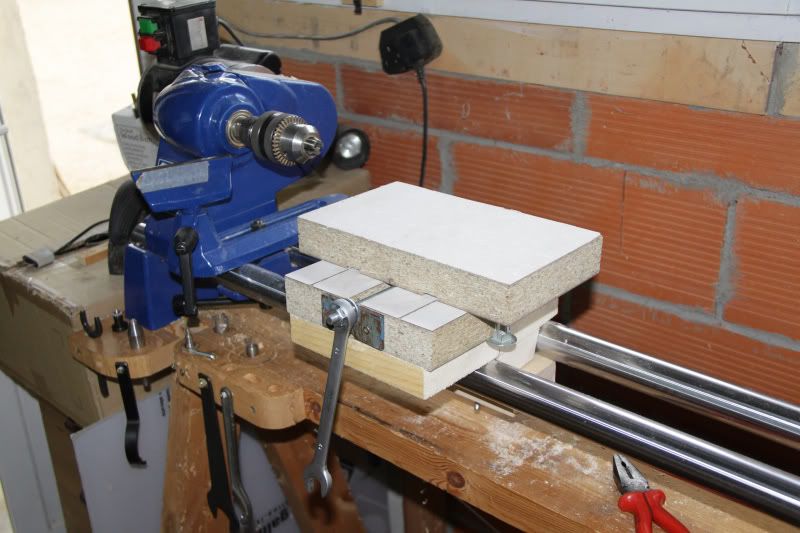
I decided to have a try at Technomadges thread cutting idea. I don't have the X/Y table so I decided to press an off-cut of a worktop I put in our laundry room. A bit rough and ready, but it seems to be going OK so far?

Threadcut1.jpg


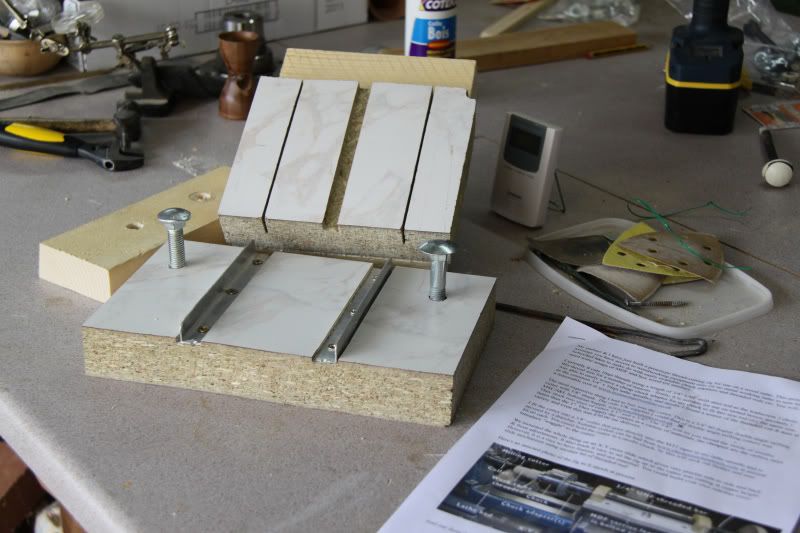
The slide is fitted with some ali angle that I had and I cut the slots in the base with my Ryobi One thin kurf circular saw. Even managed to get the cuts straight. Recessed the angle in the slide. The top surfaces are together so they are slippery.

Threadcut2.jpg


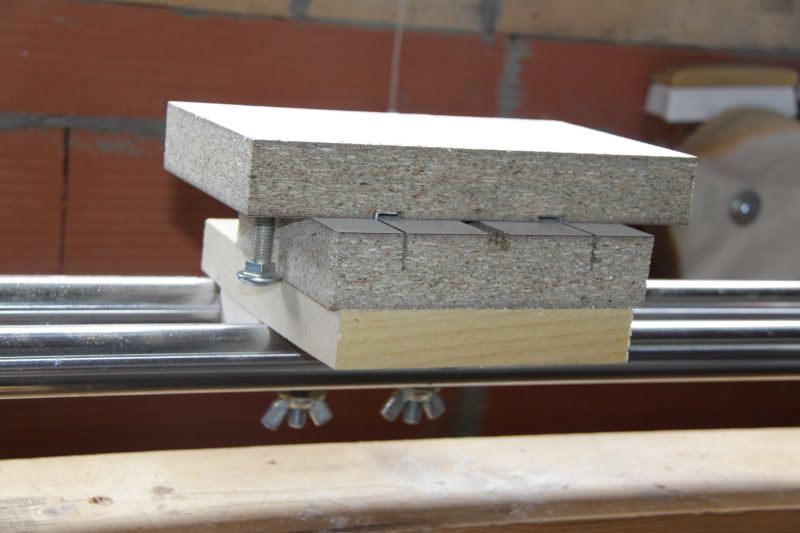
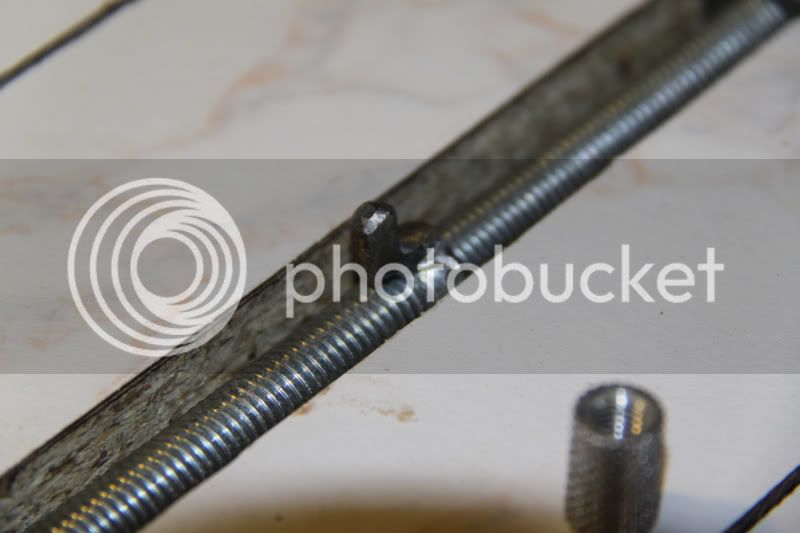
Then a slot was routed in the base to take a screwed rod and 2 metal plates were made to hold it.

Threadcut3.jpg


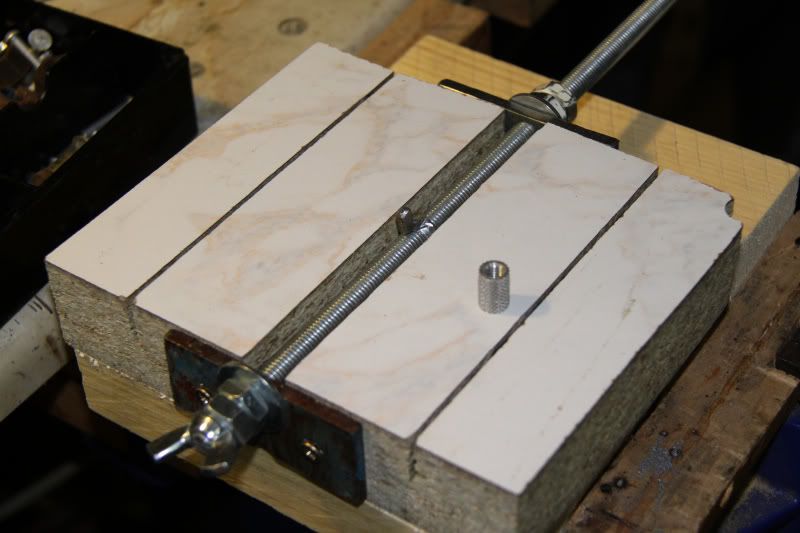
I made a carrier pin out of a wing nut and recessed a captive nut into the slide to take the wingnut 'pin'

Threadcut4.jpg


And now I am waiting for some friends to bring me some 3/4 16 threaded rod and nuts for the chuck. That is the thread on my chuck fortunately.

Threadcut5.jpg


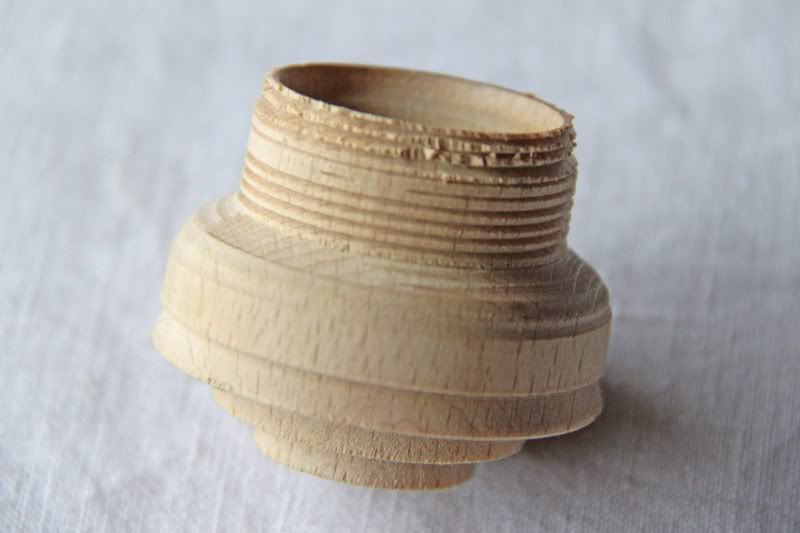
I'll post again when it moves on!! It seems solid on the lathe and I keep my fingers crossed!
 
I'll be watching this with interest, the original thread cutting jig was a work of genius but a bit expensive for my tastes, this looks like precisely my sort of project
 
I still had to buy the cutter that Teknomadge had and I couldn't get the carbon steel so I settled for the HSS version. But it does look promising.

Something that I didn't mention was that to stop the slide rising I put 2 large coach bolts with the heads under the base edge. That seems to work? Time will tell.
 
I'd be tempted to go for a serious bit of overengineering and put some slots in the bottom for the coach bolts to run in
 
Excellent looking jig, John. As the sideways movement (across the bed) is something you set at the start of each thread cut, it looks to be perfectly adequate. I only used an engineering cross slide because I managed to obtain one cheaply and have some other ideas also for it's use.

Your jig looks to be considerably lighter in weight to mine - which takes two people to mount on the lathe!!!

Kym
 
Thank you Kym. It took a bit of head scratching, but it seems to be quite stable. Shame that the French have never heard of 3/4 16 thread?

Until it gets the threaded rod, etc, it weighs about as much as a couple of sq feet of kitchen worktop. So quite light. The left/right is quite easy because of the round bars on the CL1 and when it tightened it is solid? I hope?? I should get the rod, cutter and all next week when my friends return to their peniche on the Canal du Midi early next week.
 
Hi John

That looks like a really good piece of adaptation. :D :D :D :D

I will watch with interest as I have an inclination to make a similar jig.

Regards,

Mikec
 
A bit late to suggest it :( , but another potential answer to keeping the top down on the base might be to splay out the two ali rails into slots at an angle to the top surface, rather than their being vertical? (If you see what I mean - like a hollow version of the mitred base of an engineering cross slide?)
 
I can see a problem with the splaying idea Dick. The slots that they run in are a very tight clearance fit, if that makes sense. The splayed angle would have to be bolt straight and for me that would be near impossible :oops: :oops:

Another way, I suppose, would be to leave them at 90 deg and cut the base they are on at an angle. Really easy the way I did it and with the coach bolts you have the wide head and a handy square under it to adjust the length so that it just nearly touches the under side..

Which ever way you did the splay it would have to be VERY accurate!
 
Splaying the ali would just be asking for trouble, it's far too soft to reliably be used for such purposes after you've bent it
 
Jonzjob":18mnh3f9 said:
I can see a problem with the splaying idea Dick. The slots that they run in are a very tight clearance fit, if that makes sense. The splayed angle would have to be bolt straight and for me that would be near impossible :oops: :oops:

Another way, I suppose, would be to leave them at 90 deg and cut the base they are on at an angle. Really easy the way I did it and with the coach bolts you have the wide head and a handy square under it to adjust the length so that it just nearly touches the under side..

Which ever way you did the splay it would have to be VERY accurate!

Yeah, can see all the problems - I'd been thinking along the lines of angling the base on which the ali angles fit, but even then, as you say, it would be complex.

But at today's Scottish Woodcraft show I did buy appropriate UNC taps and dies to see if I can do something similar.
 
Well, after a patient wait :roll: :roll: my mate arrived with the threaded rod, nuts, washers, cutter, oh yes and all the kit for my 3 phase lathe conversion!!

So, before we got almost washed away today, just over 2" of rain since this morning, I decided to crack on with it.

I ccut a couple of beech wood blocks and cut them so that a pair of me new nuts sat snugly in them and to make sure they stay snug epoxied them in to. Cutting the bar was good fun and I had remembered to put a nut on it to sort out any deformed thread. 2 nuts locked up together on the 'chuck end' and the beech blocks/nuts wound onto where I wanted them.

I then turned a 'turning handle' for the other end and cut out a nut shaped hole in the middle with my Fien Multimaster and pressed another nut into that. That went onto the other end along with another locking nut.

The whole assembly was screwed onto the top of the slider and the chuck fitted. It turned really well right from the start so I thought what the hell! I took the MT out of my Jacobs chuck and screwed the chuck onto the headstock thread anf fitted the little cutter.

I stood back to see what it looked like and realised the chuck assembly was to close to the front of the slider plate, so out came the screws, moved it to the middle, lined it up carefully and screwed it down again..

I had a bit of beech that I had turned for another job and didn't use that went into the chuck and I slid the whole lot along the bed bars until it was in range as it were. It looked very low to the cutter but I tried it anyway. Push the button and off we jolly well go. I gingerly wound the slide in and waited for the bang! All that happened was some wood came off :shock: I wound away, but the cutter was cutting too deep and 'fraying' the top of the threads.

I turned the bit of beech down to a cylinder again, put everything back and decided the cutter was too low. Off came the chuck assy again and I cut a couple of 1" blocks to lift it level and tried again, this time I could see what I was doing. The first part of the cut was too deep, so I wound it out until it wasn't cutting and wound it slowly back until I ahd what is in the second photo.

1stthreadturner.jpg


1stthread.jpg


Chuffed to deeeeth I am! 8)

Edit : - I got so carried away there that I almost forgot one of the most important things!

THANK YOU KYM FOR YOUR GREAT IDEA! :eek:ccasion5: :eek:ccasion5: :eek:ccasion5:
 
Glad you got all your bits and pieces and were able to complete your jig. Now you'll have all the fun of making the male & female parts to screw together and of setting up the cutting jig to get the correct thread depth :)

I've found it helps to not cut the threads too deep (especially on softer/coarser woods like ash & elm) so the tops of the threads are left slightly flat, rather than overcut and frilly - the frilly bits always tear off and leave a visually messy looking thread (although it will probaby work).

The hardest part working out how many mm to add on to the diameter of the female part to make the male spigot fit correctly when threaded in wood. (The "correct" amount for UNC in metal is 1.68mm, but this is far too deep for wood and results in frilly-topped threads) I've done a fair bit of testing now and found that making the male spigot 1.2mm larger in diameter than the female hole seems best for wooden threads - they come out with neat flat tops and the two pieces screw together well without being too loose or too tight.

The other thing to watch out for is concentricity. I now very carefully mark each workpiece as to how it fits in the chuck so I know it will go back in and run concentrically when I come to thread the piece. Of course, if you are lucky enough to own several chucks, you'll have the advantage of leaving the female piece in one chuck and cutting the male spigot using another chuck, so the pieces never come out until after they are threaded.

The cutter can get quite hot in use especially inside box lids of harder woods - which risks leaving scorch marks on the threads. I solved this problem by using my dust extractor with a narrow nozzle up as close as possible to the cutter - the airflow cools the cutter as the suction removes the dust!
(mental note to self : try this trick when drilling using forstners too)

I look forward to seeing your first threaded turnings.
 
Back
Top