ro
Established Member
Well, its been a very, very, very long time since my last post, but I've recently started to get back into woodwork, so I thought I'd share my latest project.
After reading about low roman workbenches on the Lost Art Press blog (https://blog.lostartpress.com/2016/08/06/a-well-oiled-roman/) I got a little infatuated by the idea and had to make one. A trip to Yandles netted me a slab of lime and some ash for the legs. A quick flattening of the slab with a jack plane, ripping to width, boring 4 x 40mm holes (blooming hard work with an 8 inch brace) and turning up some legs later and I had this


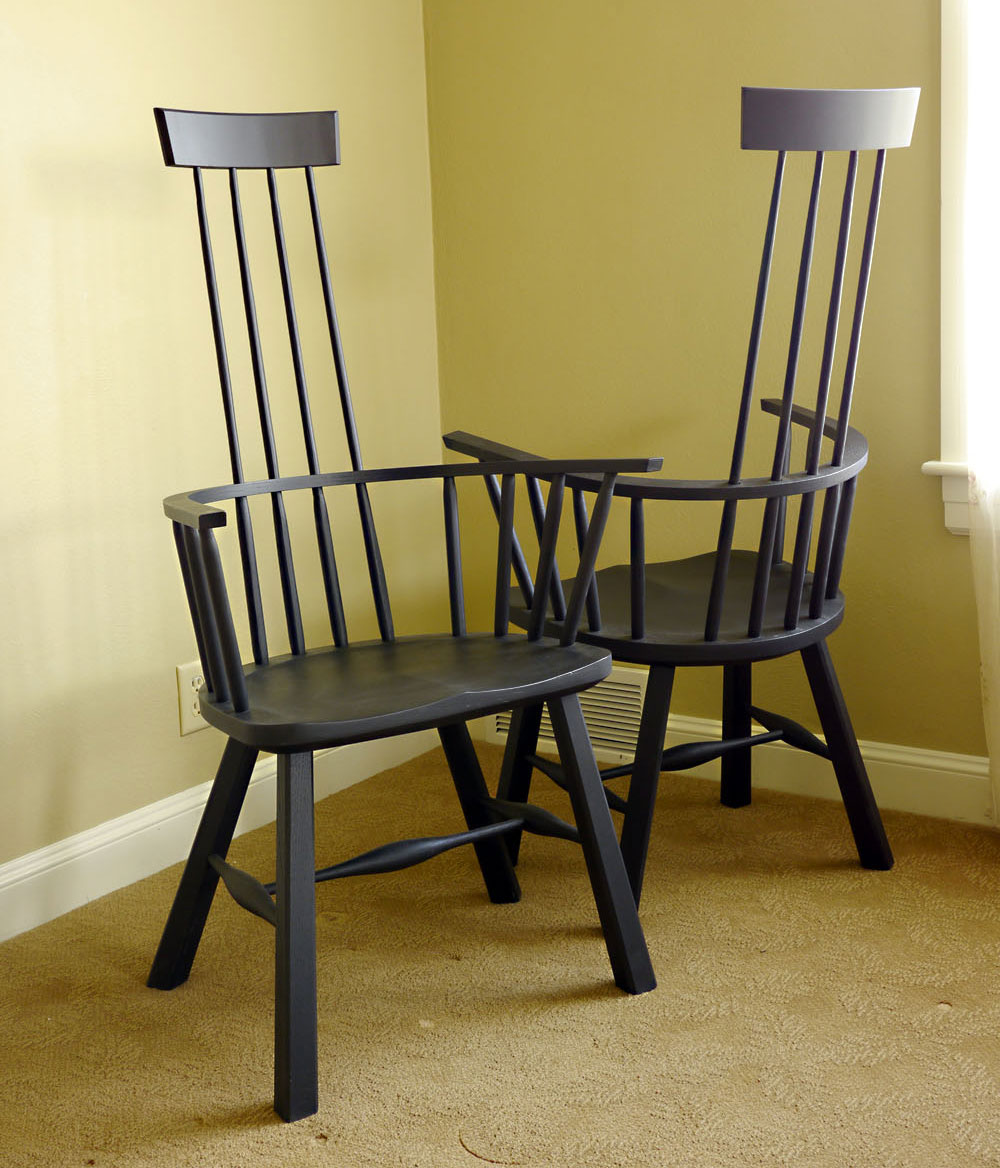
Anyway, the plan is to make a low back version of the 2 high back chairs above, using the low workbench instead of my normal one. Now, I hate ripping, so I'm going to use my bandsaw for that, and I haven't decided whether I'll turn or shave the spindles. But apart from that, I want to explore workholding on this low bench. Currently the bench only has 2 peg holes at the end to give me a planing stop, but I'm sure I'll add more as I find out what I need.
So, while I was at Yandles, I managed to grab a lump of sycamore for the seat

The first job was to cut it to width. The bench excels at this. It's the same height as my saw benches so all I had to do was put one at the end and saw away. The extra length of the low bench made it much easier than using two smaller saw benches.

After checking for cupping and wind, i found one corner was higher than the rest, so a bit of work with the jack plane removed that. No clamping was necessary, I simply sat on the part of the slab that i wasn't planing!

As I mentioned before, I hate ripping, so I used my tracksaw to establish a nice clean edge on one side. Again, the bench acted like a big, stable, saw horse.

From here I needed to crosscut the piece into 2 equal halves and join them together along the edge I had just sawn to give me a blank for the seat. The sawn edge needed to be jointed and this gave me my first workholding problem. I would normally put the piece into the vice on my normal bench and edge joint it with a plane, but here I had no vice and the piece wouldn't balance on the opposite edge.

So, I bored a couple of holes 4 inches apart, turned up a couple of pegs with square tops and cut a wedge with a 1 in 5 slope out of some scrap oak.

Placing the piece against one of the pegs i used the wedge to hold it fast. This worked better than I had hoped, although the wedge needed a bit of hammering to get it to stay. Next time I'll try a wedge with a 1 in 6 slope and see if that holds any easier.

To release the wedge, I knocked the end of the workpiece with a lump hammer. The lightest of taps released the wedge's hold. I'm definitely going to use this method again. If anything it's easier and quicker to set up than a face vice and planing with one knee on the bench was really comfortable.
Leaving the waney edges on made for an "interesting" glue up. I could not get clamps to pull flat and at least once considered ripping the edges square, but I want to see i I can incorporate the natural edges in the design.
In the end I used an embarrassing number of clamps and blocks to hold it together.

Next, the legs!
After reading about low roman workbenches on the Lost Art Press blog (https://blog.lostartpress.com/2016/08/06/a-well-oiled-roman/) I got a little infatuated by the idea and had to make one. A trip to Yandles netted me a slab of lime and some ash for the legs. A quick flattening of the slab with a jack plane, ripping to width, boring 4 x 40mm holes (blooming hard work with an 8 inch brace) and turning up some legs later and I had this
Anyway, the plan is to make a low back version of the 2 high back chairs above, using the low workbench instead of my normal one. Now, I hate ripping, so I'm going to use my bandsaw for that, and I haven't decided whether I'll turn or shave the spindles. But apart from that, I want to explore workholding on this low bench. Currently the bench only has 2 peg holes at the end to give me a planing stop, but I'm sure I'll add more as I find out what I need.
So, while I was at Yandles, I managed to grab a lump of sycamore for the seat
The first job was to cut it to width. The bench excels at this. It's the same height as my saw benches so all I had to do was put one at the end and saw away. The extra length of the low bench made it much easier than using two smaller saw benches.
After checking for cupping and wind, i found one corner was higher than the rest, so a bit of work with the jack plane removed that. No clamping was necessary, I simply sat on the part of the slab that i wasn't planing!
As I mentioned before, I hate ripping, so I used my tracksaw to establish a nice clean edge on one side. Again, the bench acted like a big, stable, saw horse.
From here I needed to crosscut the piece into 2 equal halves and join them together along the edge I had just sawn to give me a blank for the seat. The sawn edge needed to be jointed and this gave me my first workholding problem. I would normally put the piece into the vice on my normal bench and edge joint it with a plane, but here I had no vice and the piece wouldn't balance on the opposite edge.
So, I bored a couple of holes 4 inches apart, turned up a couple of pegs with square tops and cut a wedge with a 1 in 5 slope out of some scrap oak.
Placing the piece against one of the pegs i used the wedge to hold it fast. This worked better than I had hoped, although the wedge needed a bit of hammering to get it to stay. Next time I'll try a wedge with a 1 in 6 slope and see if that holds any easier.
To release the wedge, I knocked the end of the workpiece with a lump hammer. The lightest of taps released the wedge's hold. I'm definitely going to use this method again. If anything it's easier and quicker to set up than a face vice and planing with one knee on the bench was really comfortable.
Leaving the waney edges on made for an "interesting" glue up. I could not get clamps to pull flat and at least once considered ripping the edges square, but I want to see i I can incorporate the natural edges in the design.
In the end I used an embarrassing number of clamps and blocks to hold it together.
Next, the legs!
Attachments
-
 DSC07269.jpg202.3 KB · Views: 1,740
 -
 high backs.jpg223.1 KB · Views: 1,740
 -
 DSC07275.jpg208 KB · Views: 1,740
 -
 DSC07280.jpg196.3 KB · Views: 1,740
 -
 DSC07286.jpg201.5 KB · Views: 1,740
 -
 DSC07288.jpg211.4 KB · Views: 1,740
 -
 DSC07290.jpg161.7 KB · Views: 1,740
 -
 DSC07295.jpg157.5 KB · Views: 1,740
 -
 DSC07297.jpg152.7 KB · Views: 1,740
 -
 DSC07304.jpg252.7 KB · Views: 1,740