Featherboards with the tablesaw

UKworkshop.co.uk

Help Support UKworkshop.co.uk:

This site may earn a commission from merchant affiliate links, including eBay, Amazon, and others.
Some overthinking going on here!
I've been using two standard push sticks for years now and it's become second nature.
Instead of thinking about it I'd strongly recommend just doing it until it becomes natural and easy.
Not only safer but also gives much better control of the workpiece.
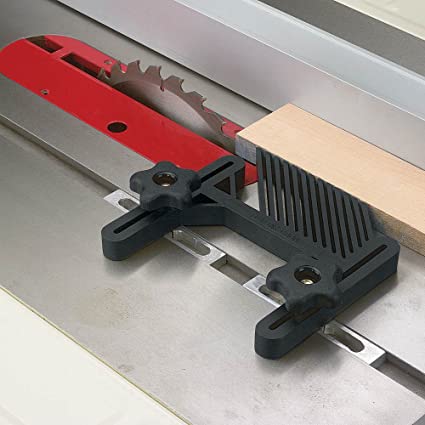
They aren't expensive but I make copies in ply so that they are always around. Can be modified to hold down thin stuff etc. May be accidentally modified if you get too near the saw, but that's the whole idea - you can hold tight close to the blades without risking your fingers.

push12 copy.jpg

PS I use two push sticks just about every time on TS or planer. There are occasions when you don't need to - big pieces where you hands are well away.
 

Attachments

  • push12 copy.jpg
    push12 copy.jpg
    280.2 KB · Views: 90
I have an auxiliary fence with two featherboards, fore and aft, which I use with dado stack for rebates and grooves. They work very well indeed. There is a thread on here somewhere about them.

There is a fundamental problem with your original scenario, though. In your diagram you are ripping with a full-length fence. The fence should not extend beyond TDC of the blade.

If you are cutting MDF, PLY or trimming wide panels, then by all means use a full-length fence, it will offer more support, especially on wider pieces, but for ripping as you have drawn, you should be using a short fence. It allows some room for the wood to move into if it decides to spring apart, otherwise the rest of the workpiece just gets forced sideways into the blade.
 
I thought that MrTeroo was having a go at me for minute but it seems you have upset a few people I know nothing about that.
Back to your question there are many things we would need to know inorder to give a sensible reply. If you have a high end saw with a precision long fence I suppose if it made you feel safer you could use feather boards fixed to it but you would increase the friction and make it more difficult to push the work through and on small cuts it would be more difficult to push the work past the blade when the cut was finished.
On my saw I have both a long and short fence but almost always use the short fence because I consider that to be the safest option but if I fitted a hold down device of any sort to it it would tend to lift the unsupported end of the fence as well as hold the work down creating a very interesting situation that I have no wish to experience half way through a cut.
 
Steve Maskery":mcquozqm said:
I have an auxiliary fence with two featherboards, fore and aft, which I use with dado stack for rebates and grooves. They work very well indeed. There is a thread on here somewhere about them.

There is a fundamental problem with your original scenario, though. In your diagram you are ripping with a full-length fence. The fence should not extend beyond TDC of the blade.

If you are cutting MDF, PLY or trimming wide panels, then by all means use a full-length fence, it will offer more support, especially on wider pieces, but for ripping as you have drawn, you should be using a short fence. It allows some room for the wood to move into if it decides to spring apart, otherwise the rest of the workpiece just gets forced sideways into the blade.

That was just a random image from google to show the type of push stick. Ignore anything else in the image :p
 
transatlantic":jl01g6sr said:
Steve Maskery":jl01g6sr said:
I have an auxiliary fence with two featherboards, fore and aft, which I use with dado stack for rebates and grooves. They work very well indeed. There is a thread on here somewhere about them.

There is a fundamental problem with your original scenario, though. In your diagram you are ripping with a full-length fence. The fence should not extend beyond TDC of the blade.

If you are cutting MDF, PLY or trimming wide panels, then by all means use a full-length fence, it will offer more support, especially on wider pieces, but for ripping as you have drawn, you should be using a short fence. It allows some room for the wood to move into if it decides to spring apart, otherwise the rest of the workpiece just gets forced sideways into the blade.

That was just a random image from google to show the type of push stick. Ignore anything else in the image :p
Actually - with a crown guard in place you can safely use a longer fence and push the workpiece past it with a push stick.
The main reason for a short fence is so that the back end of the workpiece doesn't get nicked or lifted by the blade as it goes past, it falls away instead.
 
Jacob":3bym5emh said:
Instead of thinking about it I'd strongly recommend just doing it until it becomes natural and easy.


PS I use two push sticks just about every time on TS or planer. There are occasions when you don't need to - big pieces where you hands are well away.


Don't get me wrong, I've tried using two push sticks plenty of times, and each time I'v come away thinking that I had less control than using one (with my left hand pusing the piece against the fence (far away from the blade)).

One of the main problems I have with them, is when cutting narrow pieces, say 50mm between fence and blade, no matter how close you get the push stick to the blade (to try and keep the piece aligned with the fence), the piece still wants to rotate as you end the cut. Where does the second stick come into play here?
 
Without actually going to the workshop and having a go:
both sticks press in AND down with the birdsmouth shape
right hand push stick firmly planted on the near end all the way through
left push stick planted on the side of the workpiece before it gets to the blade and moved back as it progresses. - touching all the time until the waste is just about to drop off and the cut is complete.
I can't see where the rotation comes in. Maybe fence not far enough forwards?
Does that make sense?
 
Jacob":2vxyobln said:
Without actually going to the workshop and having a go:
both sticks press in AND down with the birdsmouth shape
right hand push stick firmly planted on the near end all the way through
left push stick planted on the side of the workpiece before it gets to the blade and moved back as it progresses. - touching all the time until the waste is just about to drop off and the cut is complete.
Does that make sense?

Right - so your 2nd push stick is effectively doing what this featherboard is doing. Although your push stick can also apply pressure downwards, it's not really needed as the blade is spinning down.

71vMq2wFJmL._SX425_.jpg


[Not my photo]

As soon as you pass that point though, the piece can still rotate or lift up. Your only point of contact is at the front of the board.
 
transatlantic":3bkup602 said:
No riving knife!! That's your problem. Even better with a crown guard added
Right - so your 2nd push stick is effectively doing what this featherboard is doing.
Yes. Though the left hand stick would be moving - feeding forwards a bit then slide back and repeat
Although your push stick can also apply pressure downwards, it's not really needed as the blade is spinning down.
Both sticks pressing down and in, keeping everything firmly held, just as you would if using two hands.
..
As soon as you pass that point though, the piece can still rotate or lift up. Your only point of contact is at the front of the board.
You push through and hold down with the right hand stick, as far past the blade as far as necessary. Once the workpiece is cut and past the riving knife, waste dropped off or flicked away, you can put your left hand stick on to the far end to push/pull it through.
 
I should have looked at the vid! MW shows exactly why those funny shaped push sticks are dangerous and then shows how to do it with two normal push sticks in the first minute of his vid:
https://www.youtube.com/watch?v=gdIQY_7T26k
That's exactly as I was describing how I do it except I'd add a riving knife.
He doesn't show how you can reach the far end as the cut is completed but still behind the blade. You keep it in control and push/pull it out if necessary.
He goes to a lot of trouble to make a copy of the stick - if you haven't got one to copy a rough freehand sketch would do for starters.
PS I'm amazed that he doesn't use a riving knife or a crown guard - they are such simple and obvious safety measures.
 
I suppose one issue that no-one seems to have directly addressed is holding rough sawn wood tight to the saw table and rip fence. All the examples illustrated in to YouTube videos linked to in this thread only seem to address hold down devices used on material that's already been squared up and trued.

I've never really found featherboards useful for sizing rough sawn material because there's generally not enough flex in the fingers to cope with the variations in the material, e.g., varied thickness, and warp of one sort or another. Some power feeders can cope with this to some extent, but not always. I've not come across sprung loaded wheel type devices that can cope with rough sawm material, which might be an option. Such devices may be out there, and I've simply not come across them.

Generally, for ripping operations, whether with rough sawn or trued up solid wood, I just use standard practice, i.e., short set rip fence, riving knife, crown guard, and a couple of bird's mouth push sticks, much as Jacob and others have described.

Sheet goods follow much the same procedure, although there are times when I'll set the fence longer, and even times when I'll set the fence so that there's no support parallel to the blade, but this only really comes into play for some cross-cutting operations of both solid wood and sheet goods on machines with a sliding table, e.g., for cutting a series of short pieces, or perhaps for cutting the shoulders of tenons: the latter operation requires the type of riving knife that can be set about 0.5 mm lower than the blade's arc, plus a crown guard on a separate arm. Slainte.
 
Jacob":35ga3aph said:
He goes to a lot of trouble to make a copy of the stick - if you haven't got one to copy a rough freehand sketch would do for starters

As mentioned previously, I have tried the two stick method, so am not short of push sticks :)

Jacob":35ga3aph said:
He doesn't show how you can reach the far end as the cut is completed but still behind the blade. You keep it in control and push/pull it out if necessary.

That is the bit I am having trouble understanding. I don't see how you can control that last stage due to the shape of the stick.

I guess what you're refering too can be seen @2:09 in that video, ... But I don't see how you have control there. You can't push the piece into the fence, ...you can only push down.
 
Two push sticks for me. I just tend to make them out of offcuts of whatever sheet goods I have. 18mm+ thickness, couple of inches wide, maybe 18 inches long. Cut one end at a 45degree angle, then take a right angled notch out of that to create a basic birdmouth. Job's a good 'un!
 
transatlantic":34ys4z0d said:
You can't push the piece into the fence, ...you can only push down.
You can - you are pushing down and slightly into the fence with the right stick, and with the left stick you are pushing into the fence as you are pushing forward. It works, at least I find it works well.
 
3 shoes -skinny, medium and big in all 3 dimensions. Replaceable stop if you want.
 
Back
Top