East Meets West - BU Japanese Smoother

UKworkshop.co.uk

Help Support UKworkshop.co.uk:

This site may earn a commission from merchant affiliate links, including eBay, Amazon, and others.

jimi43

Established Member
Joined
12 Mar 2009
Messages
6,921
Reaction score
13
Location
Kent - the Garden of England
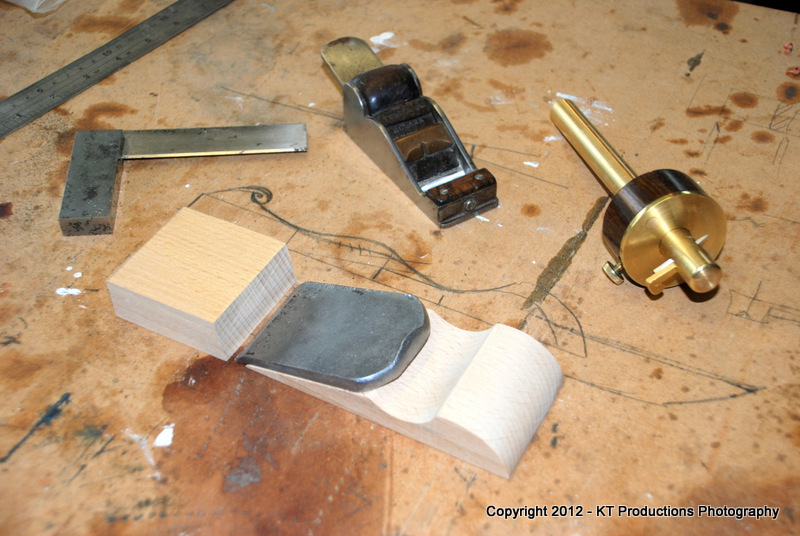
Ok...since there are those here with eyes approaching those of an eagle...(yes Andy!)....I thought I had better show you all what I have been up to lately.

Fuelled by a fine Japanese iron from our dear friend Pekka and his "accidental" hoard of planes...and selecting a likely candidate...I set about deciding what to do with it.

I probably will eventually make a kanna (Japanese Plane)....but since I like to push the boundaries a bit..I thought I would see how it would work the other way up...in a Western smoother. So...all I needed was something wooden to hold it...and that was what this was for....

DSC_1237.JPG


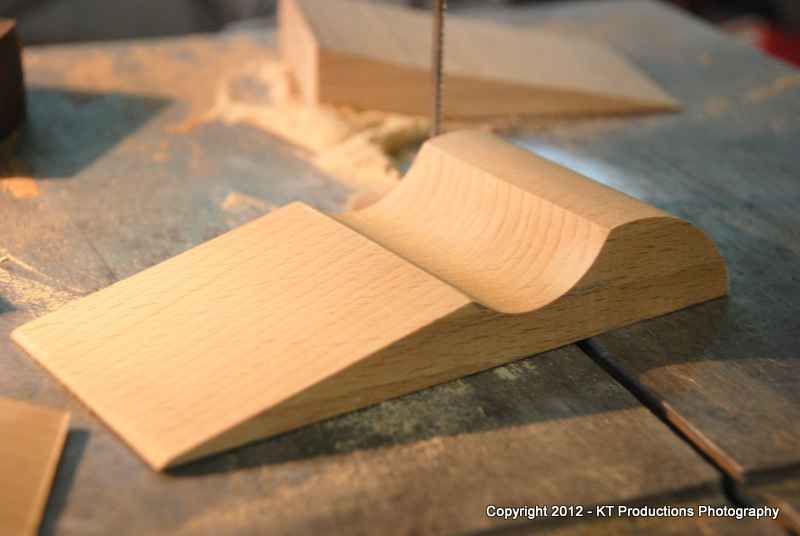
No...it's not a potential group of woodie wedges Andy...as you now know. :wink: ...but this is where it is going:

DSC_1245.JPG


This is where things get a little confusing..push or pull?

Later on that one! :mrgreen:

Ok Rob (Platt)....you are either a great expert on wood or was it just luck but yes...it's partly Australian but only in wood species...

DSC_1249.JPG


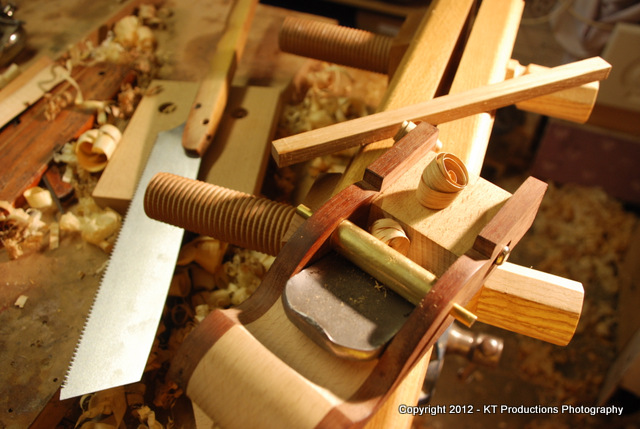
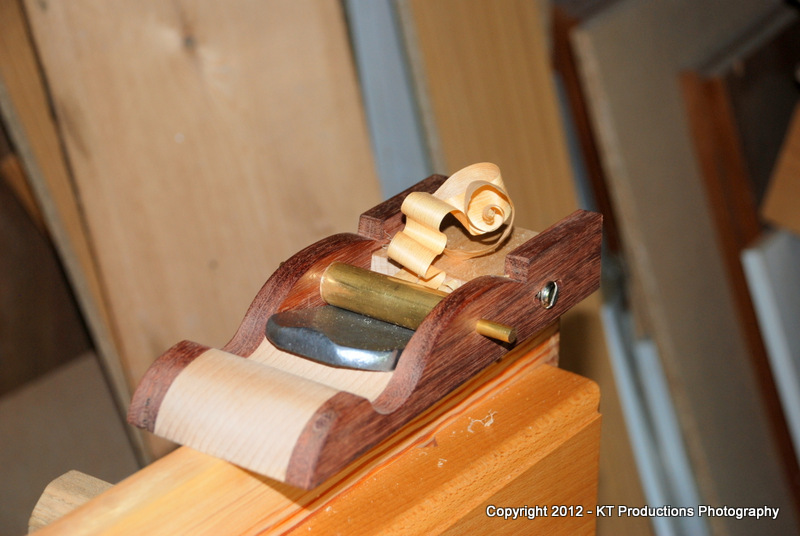
...Western Australian Jarrah....the only bit I have now...and from a sleeper (as can be seen!)....makes the sides...

DSC_1261.JPG


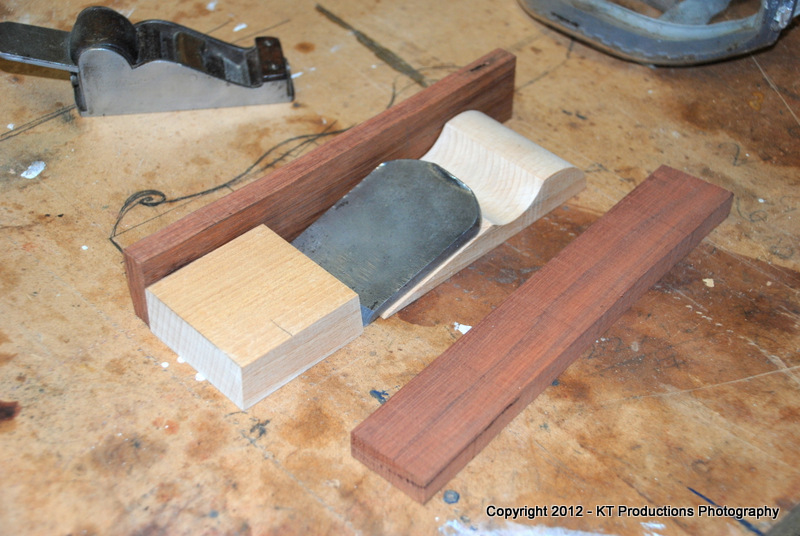
....with a bit of shaping....

DSC_1265.JPG


...and put together to check the layout...

DSC_1277.JPG


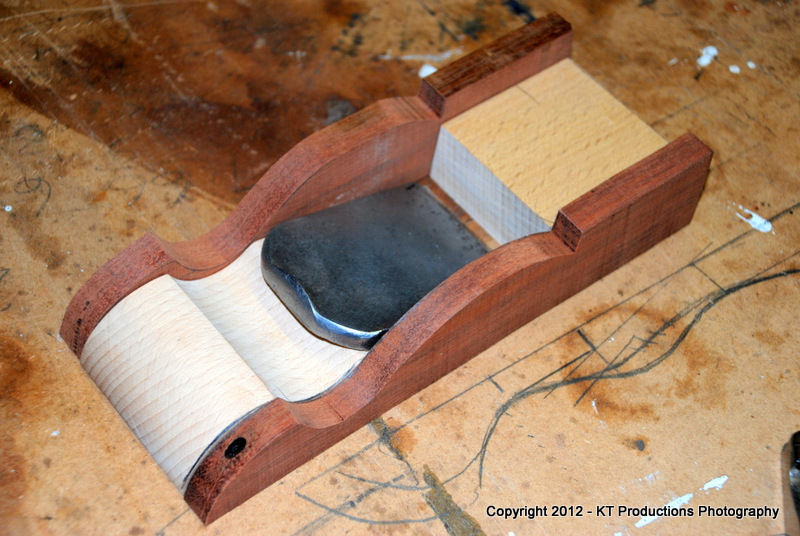
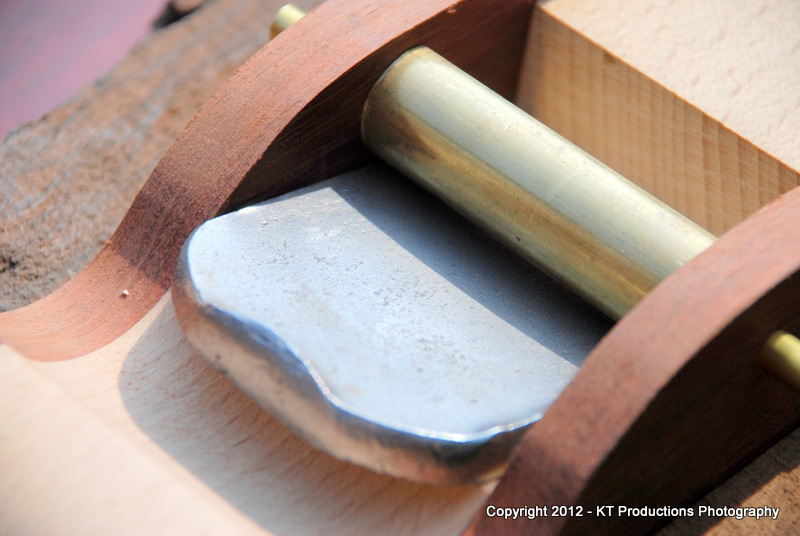
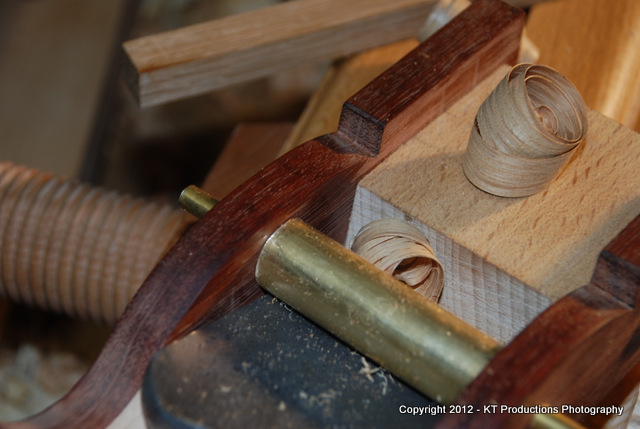
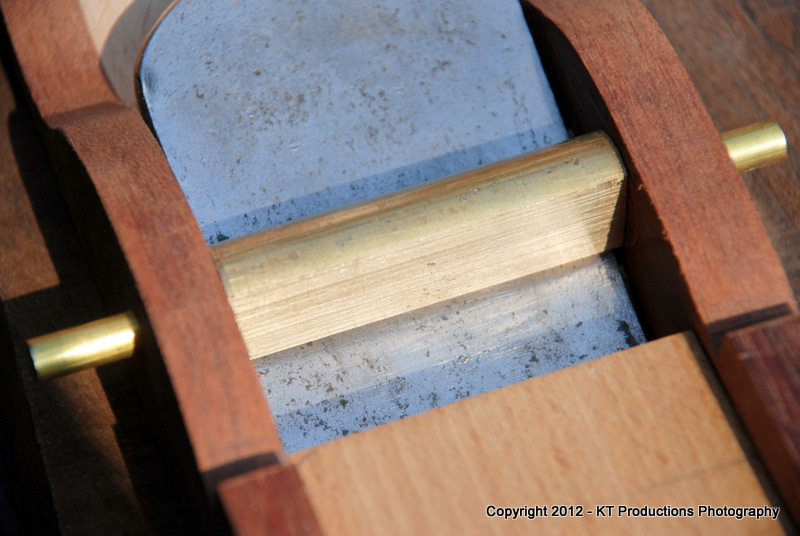
A brass rod was then used to form a flat (yes I know it's round) cross wedge bridge....

DSC_1298.JPG


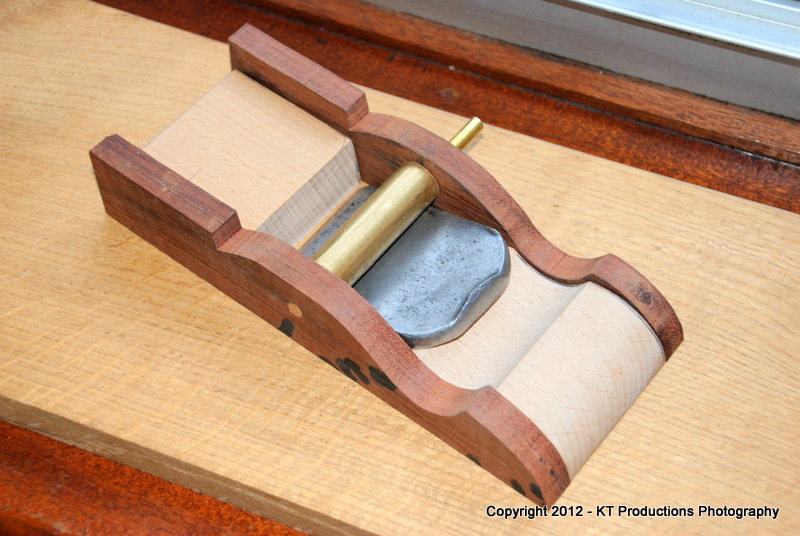
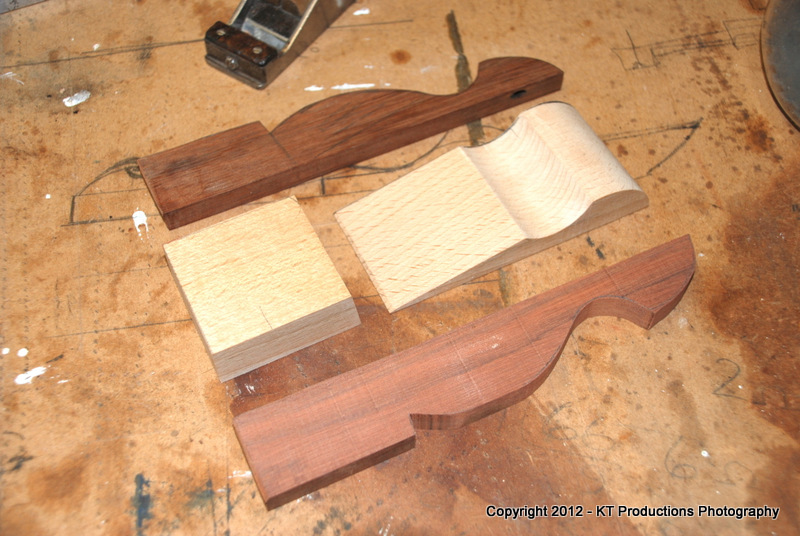
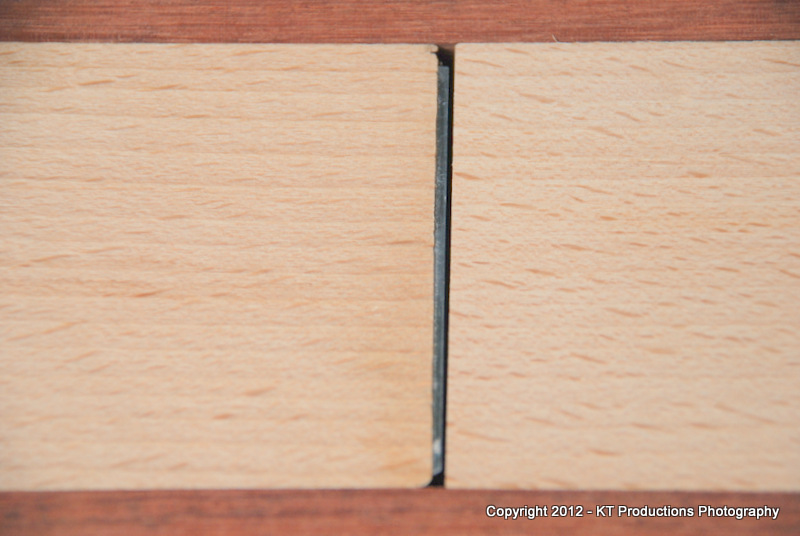
I want to be able to set the mouth...so just for now...the front moves back and forward...

DSC_1316.JPG


Inside the block are two rebates...one on each side...in which a lignum vitae tongue is glued. This runs in rebates in both of the sides and is locked in place by bolts into captive nuts...

DSC_1323.JPG


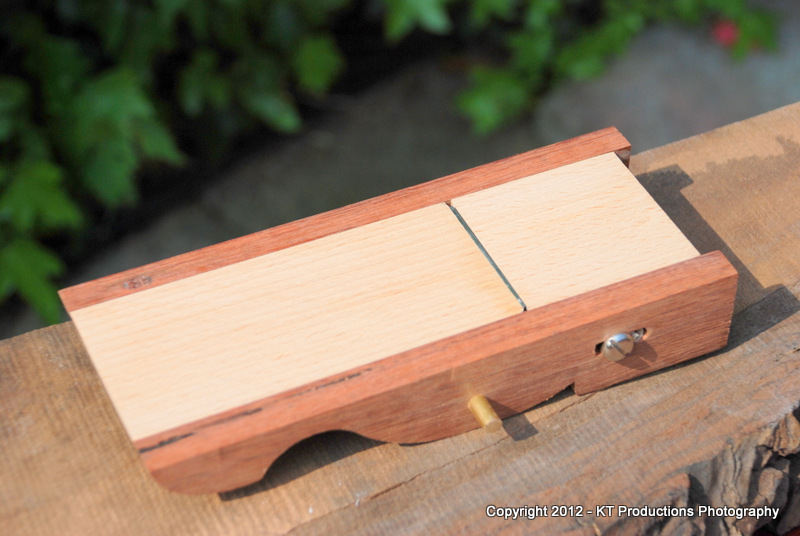
This results in a very fine mouth for the finest finish....

DSC_1324.JPG


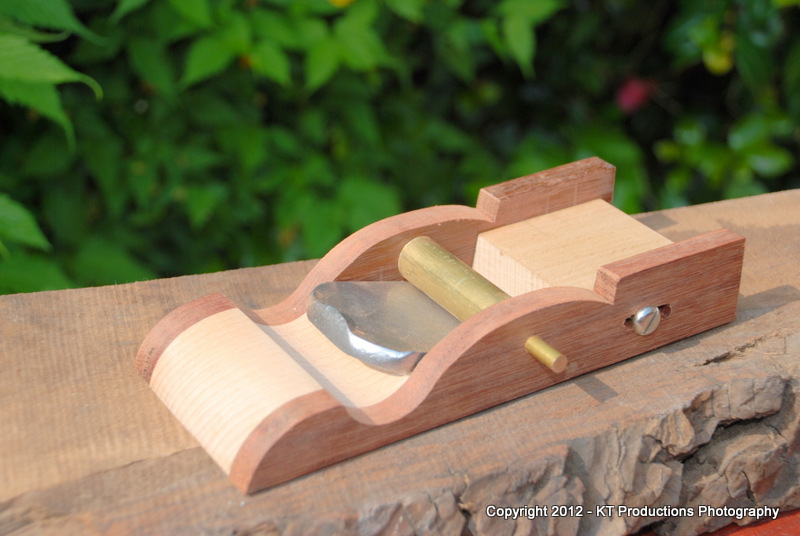
At this point...a major Eureka Moment... :idea: occurred quite by accident.

The round bar being half transformed into a flat...and being impatient to see how it formed...I left the other side rounded...

DSC_1319.JPG


At this point I tried the iron for fit...and then couldn't get it out!!! HEEEELLLLP!

The reason for this was that the bar had rolled round and locked the iron against the bed...a cam action!

I swore...a lot! And then it hit me...if I couldn't get it out..then it wouldn't come out...and once set would stay there!

And so the CAMWEDGE was born!! 8)

I also found (obviously! DOH!) that tapping the iron in hard..released it!

DSC_1327.JPG


So...a wedged plane iron...without a wedge! 8)

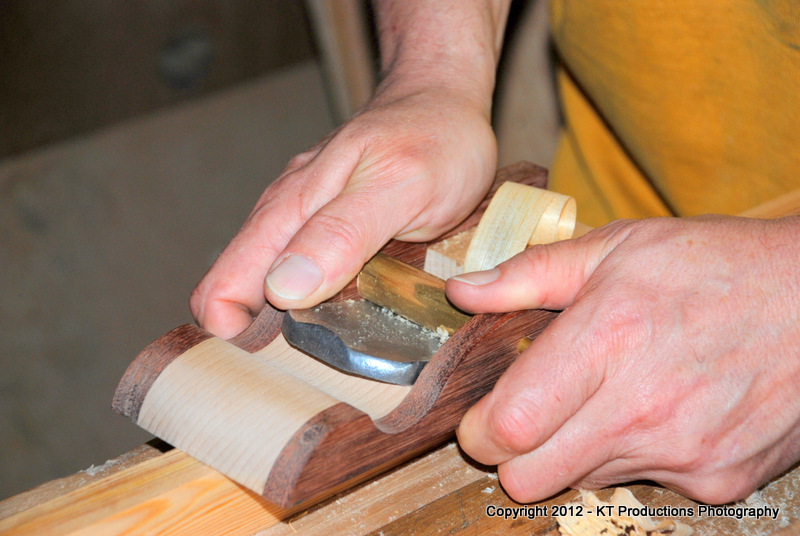
Right then...how does it perform....first FORWARD....

DSC_1339.JPG


....and Alfie confirmed....
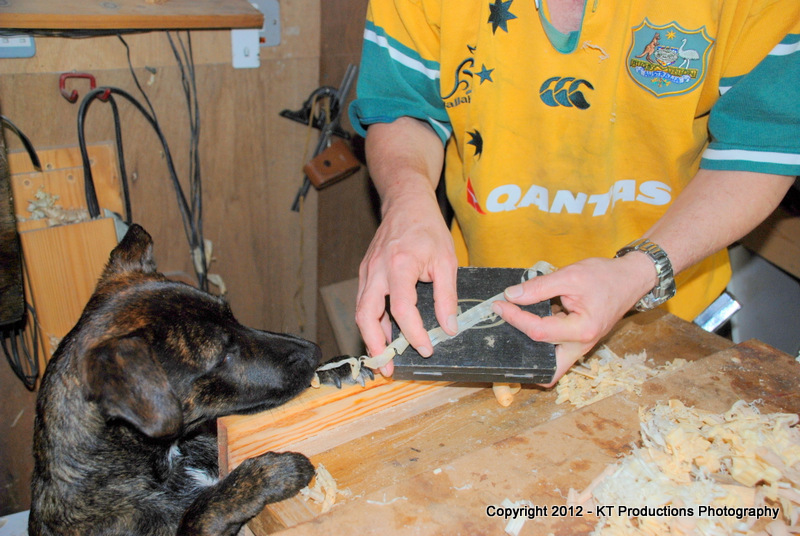
DSC_1341.JPG


....it WORKS!

DSC_1342.JPG


...and BACKWARDS....

DSC_1346.JPG


...so when Douglas brought round my Moxon vise to test...he also tested the camwedge plane...

DSC_1348.JPG


...and also backwards too!

DSC_1351.JPG


...even with a coarse set!

I know it probably won't win any beauty contests just yet (but watch this space)....but now I have proved it works...more refinements will be made...and further tests done...but for the first outing...it appears to fly!

Doesn't it Alfie,,,,,,,

DSC_1334.JPG


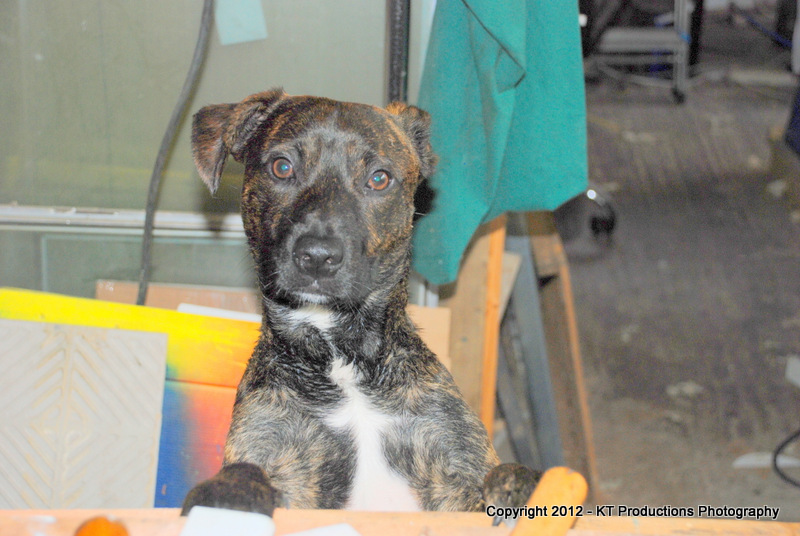
Yes Dad...you're MAD Dad...totally BONKERS Dad.....!

But fun!

Cheers guys and gals!

Jim
 
very nice jim, may i also add alfies photo skills are really coming along.

where's the jarrah from?

adidat
 
adidat":2191yw10 said:
very nice jim, may i also add alfies photo skills are really coming along.

where's the jarrah from?

adidat

Western Australia mate...it says it on the plank! :mrgreen:

Ok...seriously...it comes from a guy I get my turning wood from...two samples he sent me ages ago...I used one for the microscope stand...and one for this...

I was just waiting for the right tool to use it on and the contrast with English beech worked for me.

It is one of those woods that looks a bit plain until you finish it off...and then it glows...as readers of Derek Cohen's site will attest!

Jim
 
Looking good Jim! Very original, and nice to think of the bits converging towards your workshop from the other side of the world.

I know you said it's not finished yet - so I am expecting something a bit less starkly functional than the screw heads on the mouth adjustment - at least put one of your special washers under them!
 
AndyT":24wms0ud said:
Looking good Jim! Very original, and nice to think of the bits converging towards your workshop from the other side of the world.

I know you said it's not finished yet - so I am expecting something a bit less starkly functional than the screw heads on the mouth adjustment - at least put one of your special washers under them!

Thanks Andy...and yes..I did want to be a bit multi-national on this one.

The screws are awful. I just had two the right length and the right thread to fit the encapsulated nuts. All that bit comes apart....and the plan is to have a more elegant system...sunken...the works. But after all...there was not much point in going to all that length if it didn't work at all....and I fully expected it not to.

The front (or back depending whether you push or pull)...will have either a bun or a tote of sorts...that's what the two unfinished tabs above the sliding part are for...anchor points.

The racing back will have a "spare wheel" shaped lump with a strike plate eventually. But since it is a rather radical design...I wanted to figure out how to hold it...where to put the holding aids and how to shape them after I've had a play for a while.

Cheers my friend

Jimi
 
Nice plane, Jim :D
It is unusual without a wedge but very functional.
I like the contrasting woods
The plane appears working well; what about the low angle beech seat? I knew 30 degrees as a limit for avoiding sole damage when the blade is in place but it seems this does not happen in yours. You did a adjustable mouth also....cool :idea:
Ciao
Giuliano
 
That cam action is very interesting - do you think you will stick with using it or revert to wedging in the traditional manner? I'm just trying to imagine it .... and I'm getting the iron held very hard in the wrong places and not hard enough in the right place ... but then I haven't had enough practice at imagining using a plane I have only just seen, having only just woken up . I'll have some more tea .... :?
 
Brilliant. =D> I'm glad how innovative it looks like.

If you think of it, the japanese iron must have a mind of it's own, saying: "I did not need a wedge on the japanese plane so I'll damn well won't have one now"... :D As the iron is wedge-shaped it really does not need a separate wedge, so you get a much deeper into the "east meets west"-idea than you thought. It's also a thoroughly Krenovian plane with the glued sides and pin construction of his planes, short iron and a low center of gravity. With an aftertaste of 1800's infill planes. Yummy.

I would have imagined the mouthpiece screws the other way around: an oval hole in the mouthpiece and just one long bolt through the cheeks so you need to loosen oly one screw (or small thumbscrew) to move the mouthpiece. It works beautifully the way you built it, adjustment would just have been slightly easier.

I hardly can wait for the final shape of that plane.

Pekka
 
pekka

the infill moulding plane on your blog is excellent, i especially love your way of marking and sharpening the scraper.

adidat
 
Hi Guys...thanks for the feedback..it is most helpful

I think I am going to need a few modifications...understanding why the Camwedge works anyway...I think I must have drilled the centre hole slightly off centre hence accidentally creating a cam. This would have meant nothing at all had I moved on...cut the rest of the round off...and ended up with the more traditional bridge bar....

Don't worry...I am testing the wedge idea too!

The cam actually works this way...

Set the iron too far first...push against the wood as if cutting...and it pushes the iron backwards. The brass cam tries to rotate backwards but can't because it is too big but it jams the iron against the bed.

And it stays there! Solid as a rock. And since the iron is thicker than a reject from Britain's Got Talent...it doesn't chatter at all...it is firmly held..all the way along by its own rigidity.

The iron is bevelled with a single bevel at 28 degrees...the bed is 12 degrees so the effective angle is 40 degrees....I will be testing other Japanese irons at different bevel angles as I prototype this plane.

Eventually I plan to have a thin lignum vitae sole as I think at the low bed angle...the life of the rear of the mouth is possibly limited otherwise.

Giuliano...I thought you might like the idea...it's right up your street. The trouble I have now is I don't want to finish it yet because I want to play with it quite a bit. It is really a tactile shape and open to a huge number of permutations when holding it...I can get some interesting adjustment techniques going by planing towards me...holding the back of the iron and the sides and then putting a slight bias towards the iron which makes it adjust itself for a coarser cut! Really!

I'm wondering if a lever on the cam would be an interesting addition!

Don't forget...the other side of the iron (the back)...has a dip in the middle too...so the cam is acting on two spots only...

DSC_1320.JPG


I will try to take more pictures to show this...

Pekka. I'm afraid you started this mate! The iron is excellent and thanks once again for trawling through your many (81 wasn't it? :shock: ) planes and selecting a suitable iron. It couldn't be more perfect.

Strangely...two came up on FleaBay about the same time I received it...and I put a minimum bid on one and got it! So now I have two "specially forged" irons.

I did some research on the one you sent me...

Nihon Hagane ("Japan Steel")

Yoshiwakamaru (the master maker)

Betsu-uchi ("specially forged")

As I said to Andy...the bolts are replaceable "test" fittings to just get on with the prototype...believe me...that will change. I will probably make V2 with a much more innovative mechanism...I'm thinking about cam locks on that too...but we shall see. I want to make it interesting and new where possible. Life is more fun that way!

Cheers

Jim
 
The blade is obviously outstanding and has the stiffness and mass to behave very well. I think the camlock idea is potentially very smart as the fewer parts the better maybe, but the controlled setting thereof - may pose challenges. But even at this stage it sure does perform well. A new east<>west trend here maybe?
Very nicely made too, looks great. Not so sure about the shirt.
 
Ok Rob (Platt)....you are either a great expert on wood or was it just luck but yes...it's partly Australian but only in wood species...
wouldn`t deny any part of that statement but this was a coincidence
qantas planes
all the best
rob
 
Rob Platt":3eqkl7ky said:
Ok Rob (Platt)....you are either a great expert on wood or was it just luck but yes...it's partly Australian but only in wood species...
wouldn`t deny any part of that statement but this was a coincidence
qantas planes
all the best
rob

Yes...I realised what you meant only today...but I was too embarrassed to admit that I didn't get the joke first time!

It wasn't until Douglas said...he was not sure about the shirt that it clicked! (homer)

Jim
 
Jim,

Are you planning to relieve the sole as in japanese planes? i have been experimenting with a Japanese smoother from Dictum over the last few months and really like it.

Jim
 
yetloh":36jfoxmb said:
Jim,

Are you planning to relieve the sole as in japanese planes? i have been experimenting with a Japanese smoother from Dictum over the last few months and really like it.

Jim

Jim...I'm a bit ahead of you there...V2 (using a really thick iron which I just received)....will be a scraper...with a difference...initially to shave the front and rear sole for this very purpose.

Of course...it might also come in a bit handy for other scraping jobs and I haven't got one in my armoury yet...so that will also fill a gap.

So...yes is the answer to that....and I am going to relieve the mouth with V cuts at the ends too....I'm getting very tiny jammed fibres there. I also need to relieve the tips of the edge on the iron in the traditional way a bit more than it is now...the grinding to remove a huge chip has all but removed this.

I've been working on English oak scraps today...really deep cut...

DSC_1388.JPG


....and it's performing really well. I am getting used to the camwedge...and I intend to add a lever now...just a short stub in the shape of an infill lever cap...flat bottom bolted into a recess....thin top with twin thumb indentations so that I can control the cam action more positively.

DSC_1393.JPG


Some things I have noticed so far....the very wide sole is extremely useful and controllable....you have far more feel over the angle of the sole to the stock and on thin stock...which I use most...this is very important.

Tomorrow I will be testing on hardwood end grain.....and I might even see how it performs on wide panels...

I could even find a washer or two Andy! :wink:

Jim
 
Back
Top