Wood Monkey
Established Member
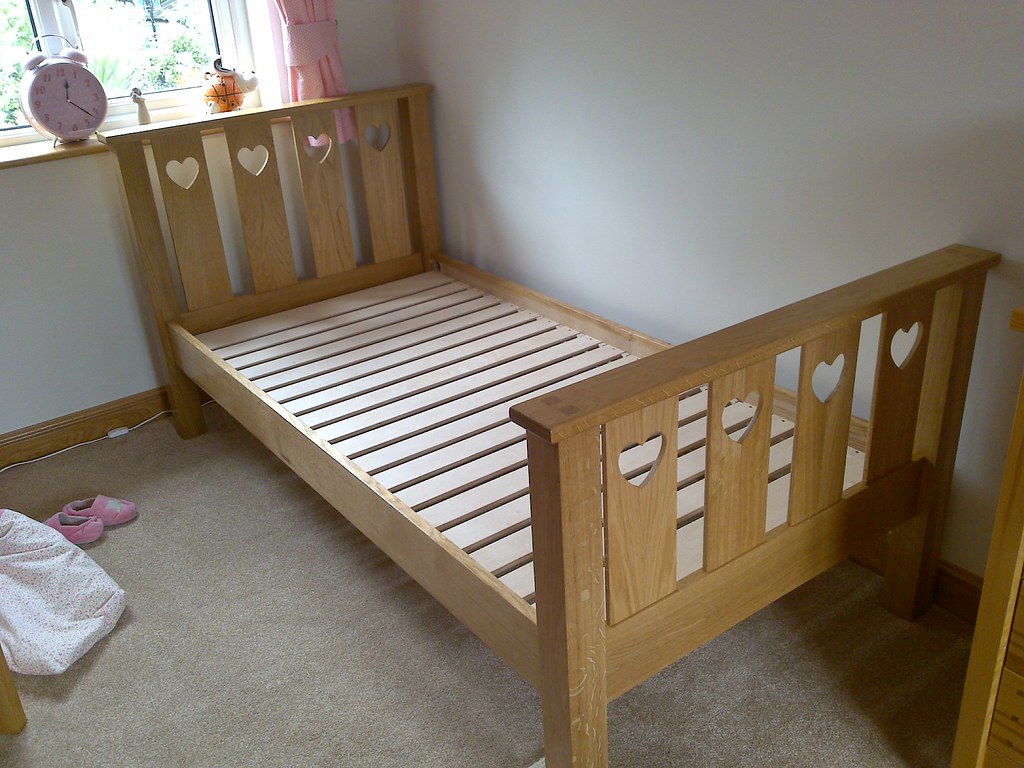
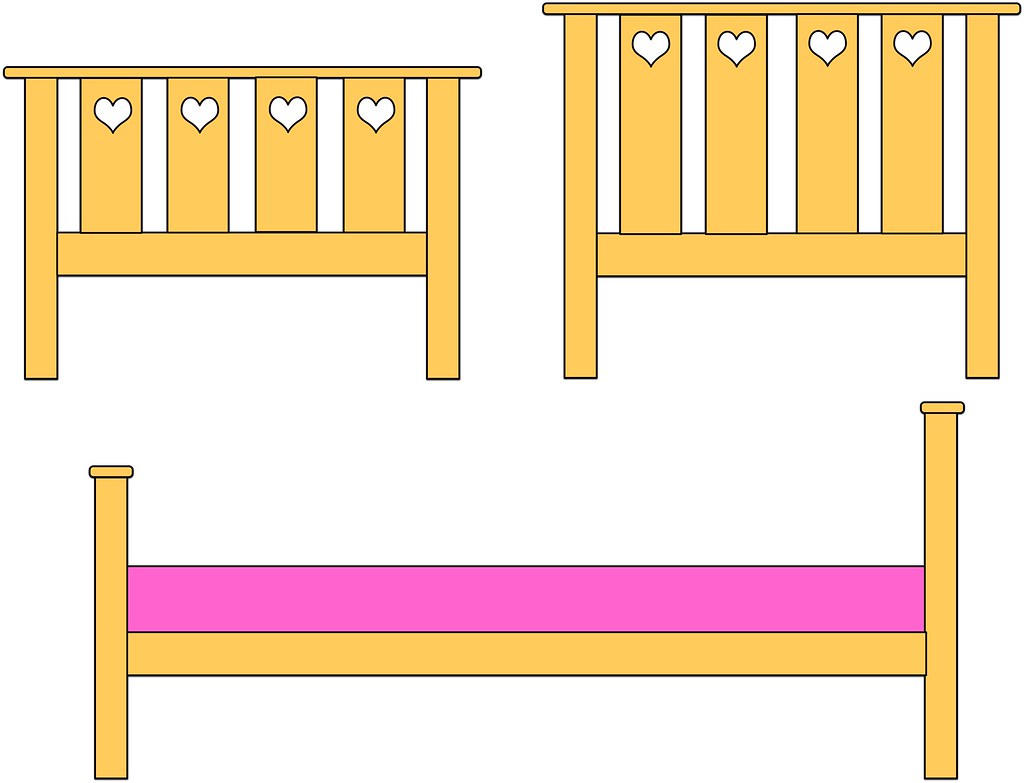
I’m building a bed for my daughter. Here’s the story so far and I’ll add more as I go.
The design is fairly simple as this 2D sketch shows (I need to get up to speed with Sketch-up….!).
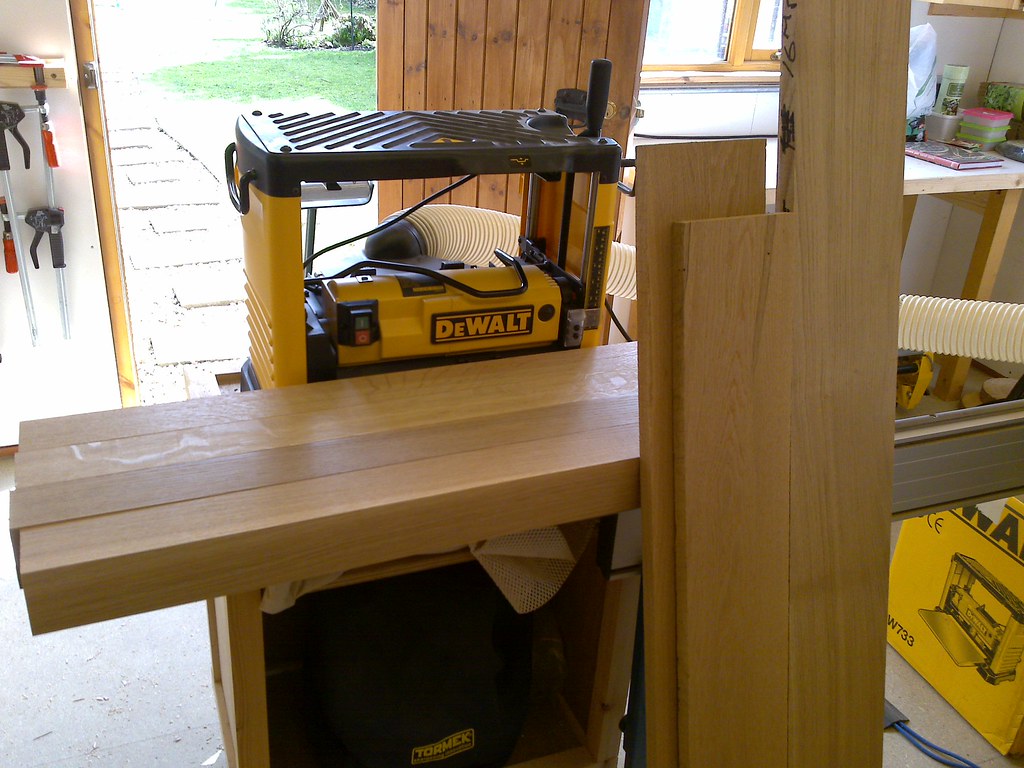
I’ve chosen Oak. This was the first opportunity for me to use my new thicknesser in anger.
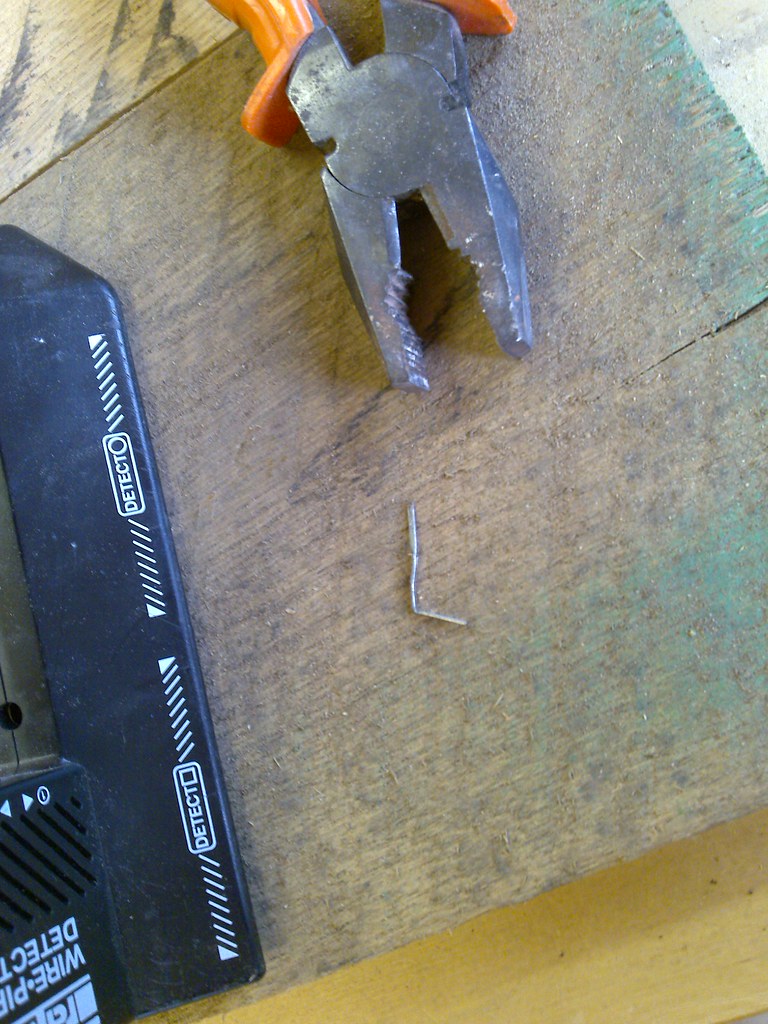
… a quick scan for blade chipping aliens and a brush down to remove surface grit is always wise….!
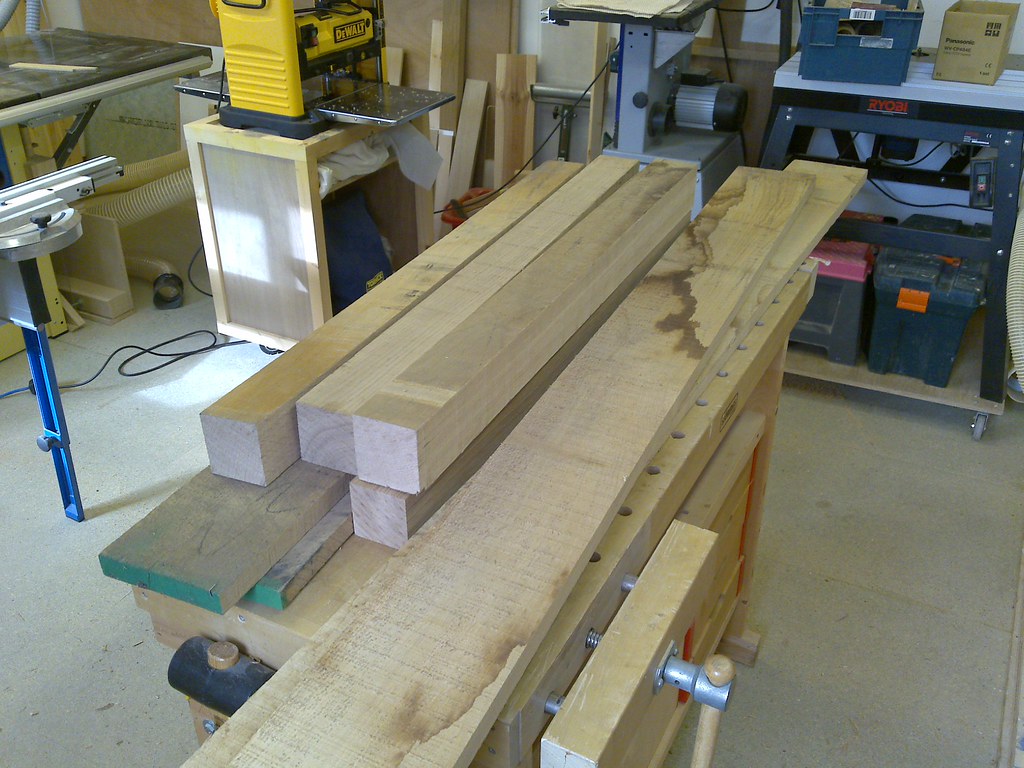
I bought the timber from WL West in Petworth and was able to rummage through the extensive piles of saw timber in their sheds and pull out suitable pieces and check them as I went to ensure they were reasonably true. This saves me a lot of workshop time as I was simply able to square off the timber on the table saw before running through the thicknesser. The end results were very pleasing.
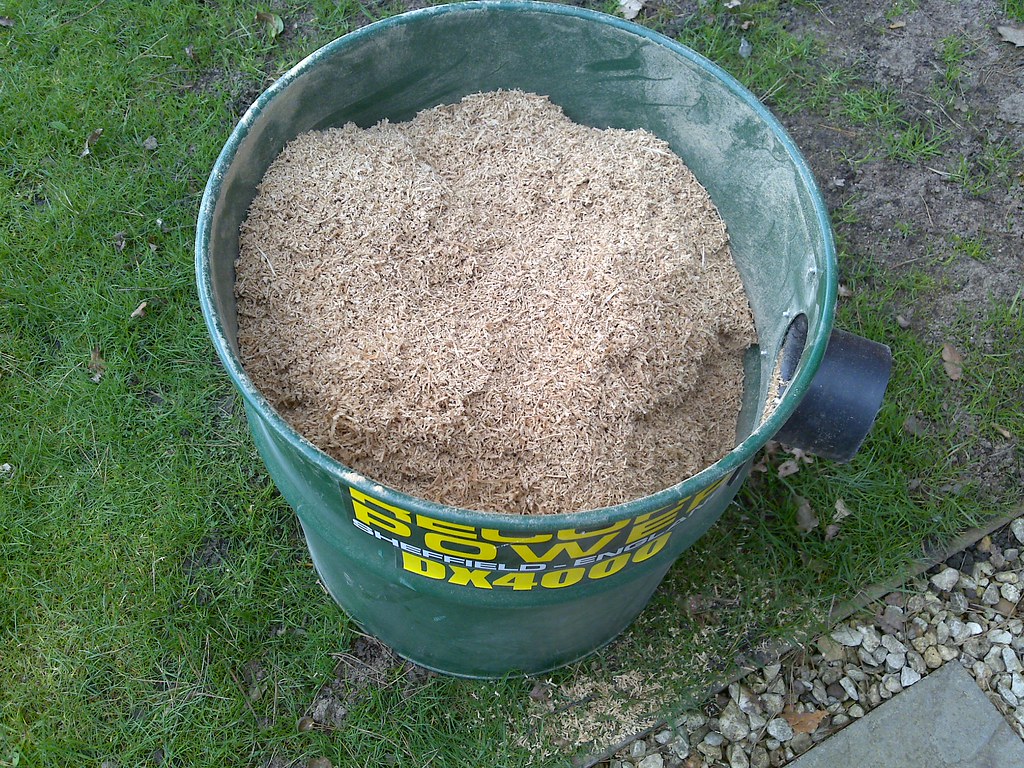
The DX4000 is the perfect partner for a thicknesser. This was empy before I started.
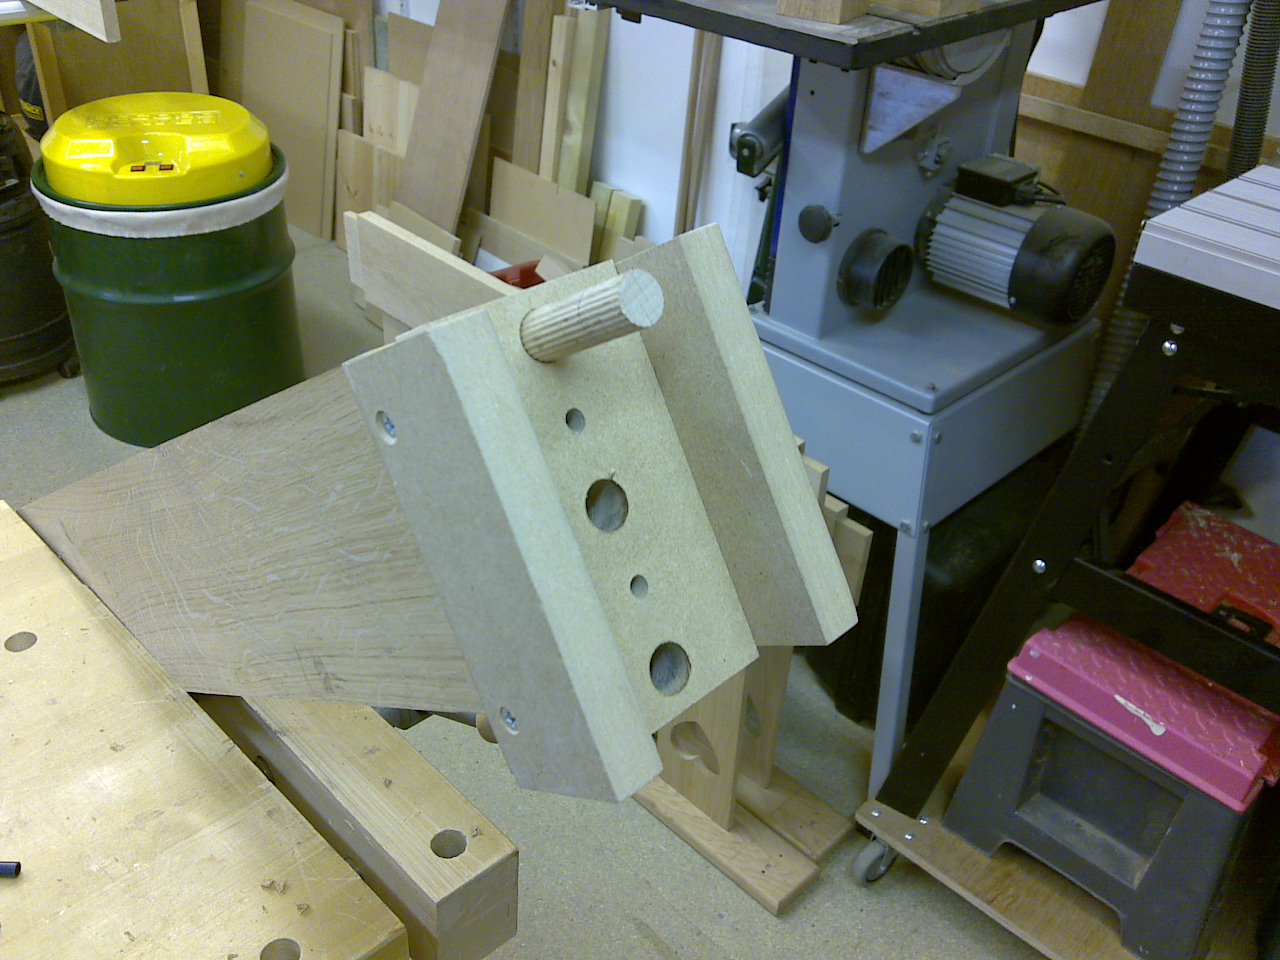
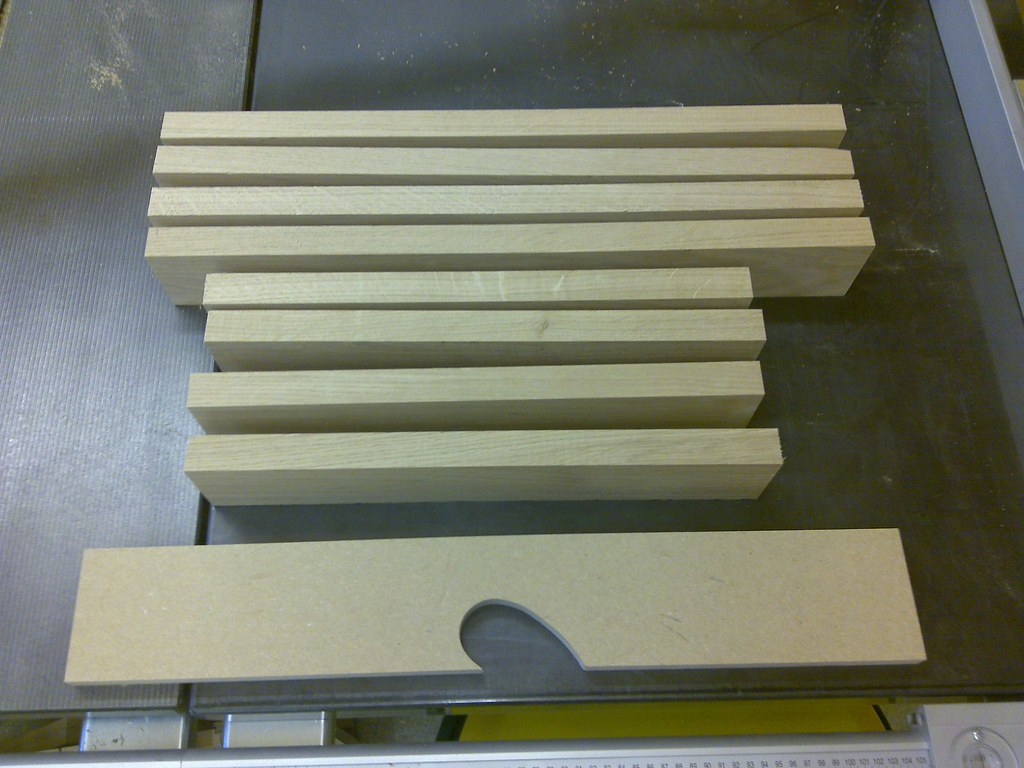
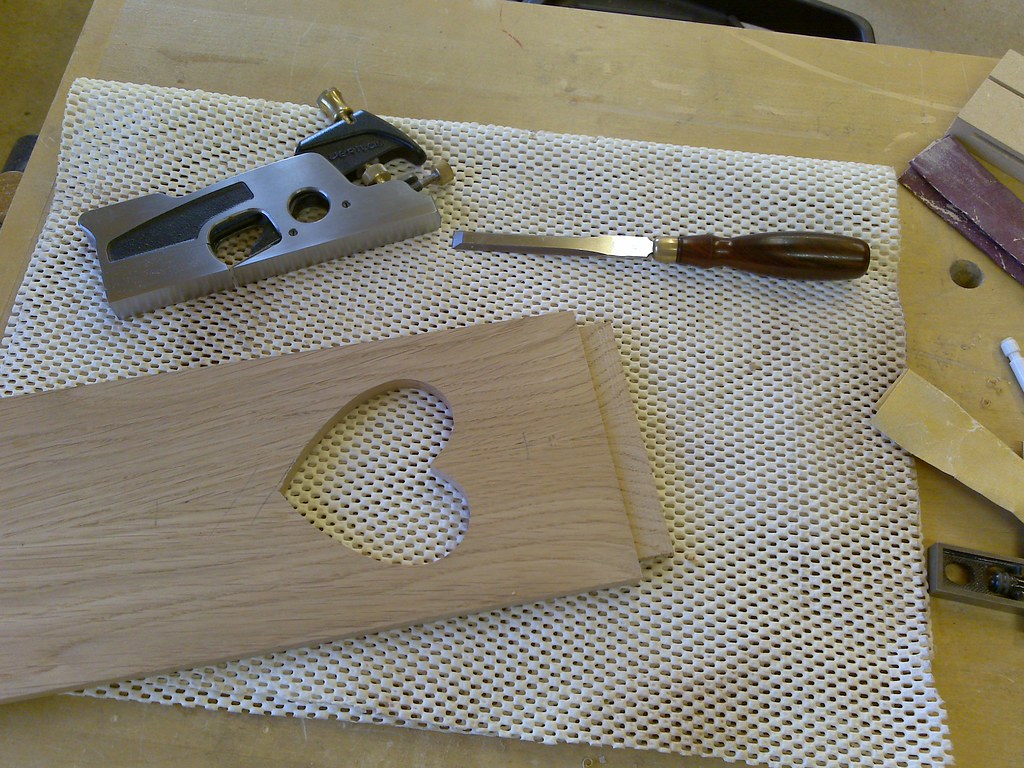
I chose to make the heart panels first because I couldn’t visualise the finished size and I couldn’t start to mark up the top and bottom rails for the head and foot boards. I hand drew half a heart on a piece of MDF and rough cut it before sanding with various size drums mounted in bench top drill press. You can see it at the bottom of this picture before I glued 2 guides on to make a cradle. The rough cut parts can also be seen in this picture.
I trued up the edges on my small benchtop planer (oops, no guard) before re-sawing them to give a book matched finish. I then machined them down to the final dimension .
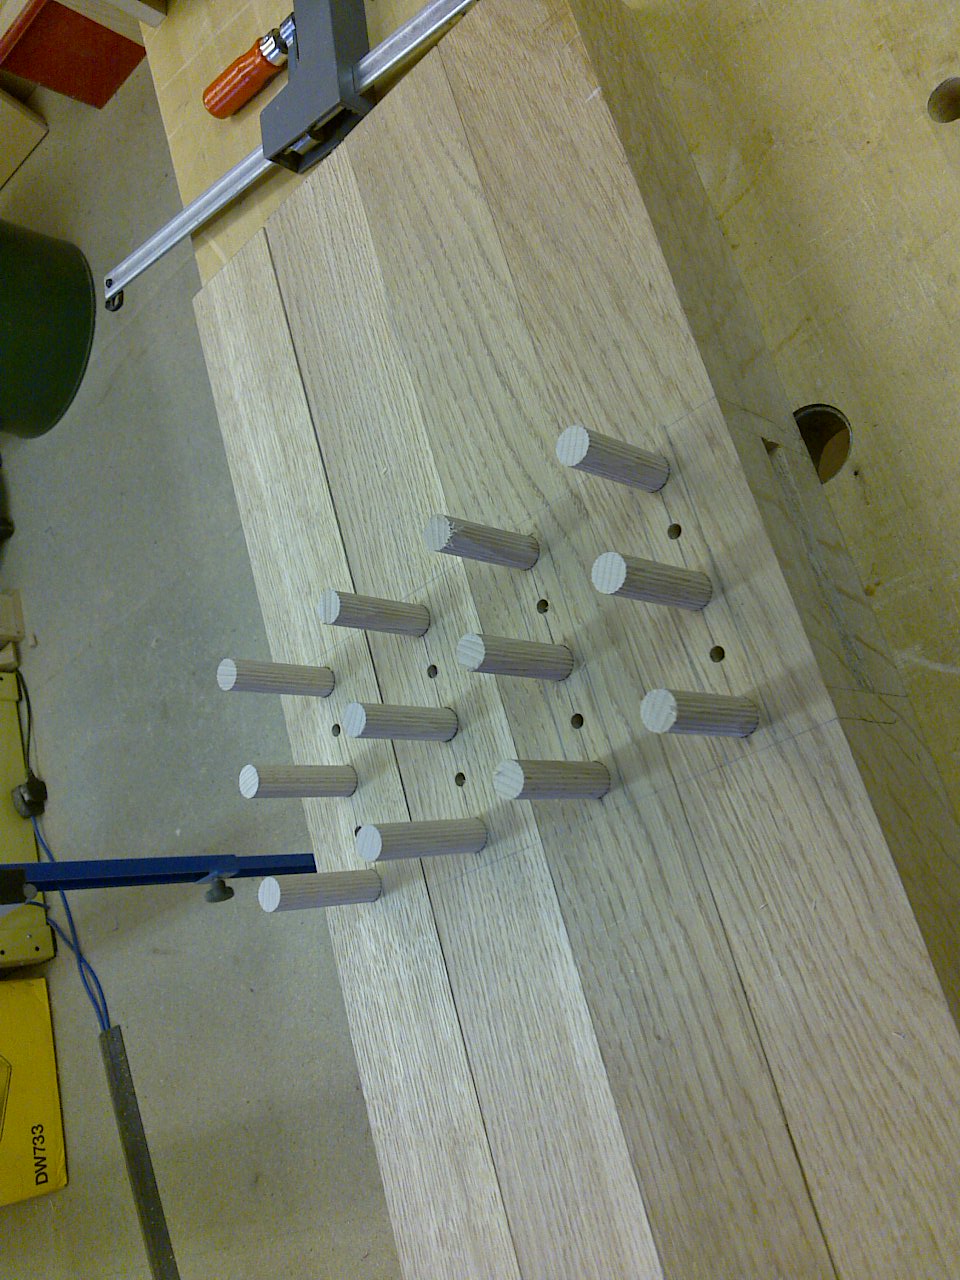
I marked each heart half out and then removed the bulk of the waste by making a series of cuts on the band saw.
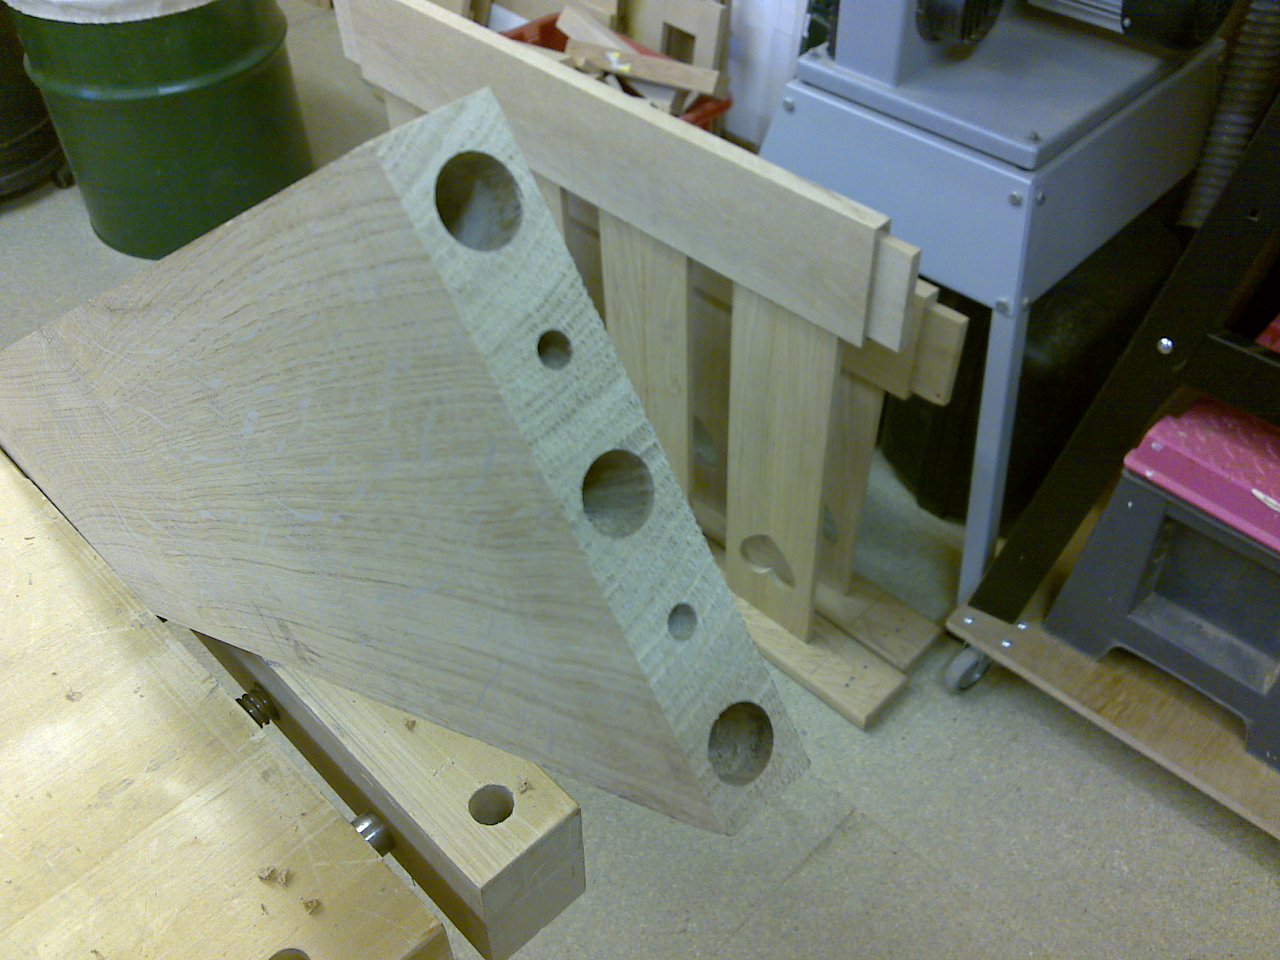
Then I routed out the final shape on the router table using a top bearing pattern bit. In this picture you can see the 2 guides I glued to the heart template and this allowed me to hold the piece on the template without any mechanical fixing. I clamped a 100mm hose to the edge of the table to catch the worst of the dust and with both motors running on the DX this proved very effective.
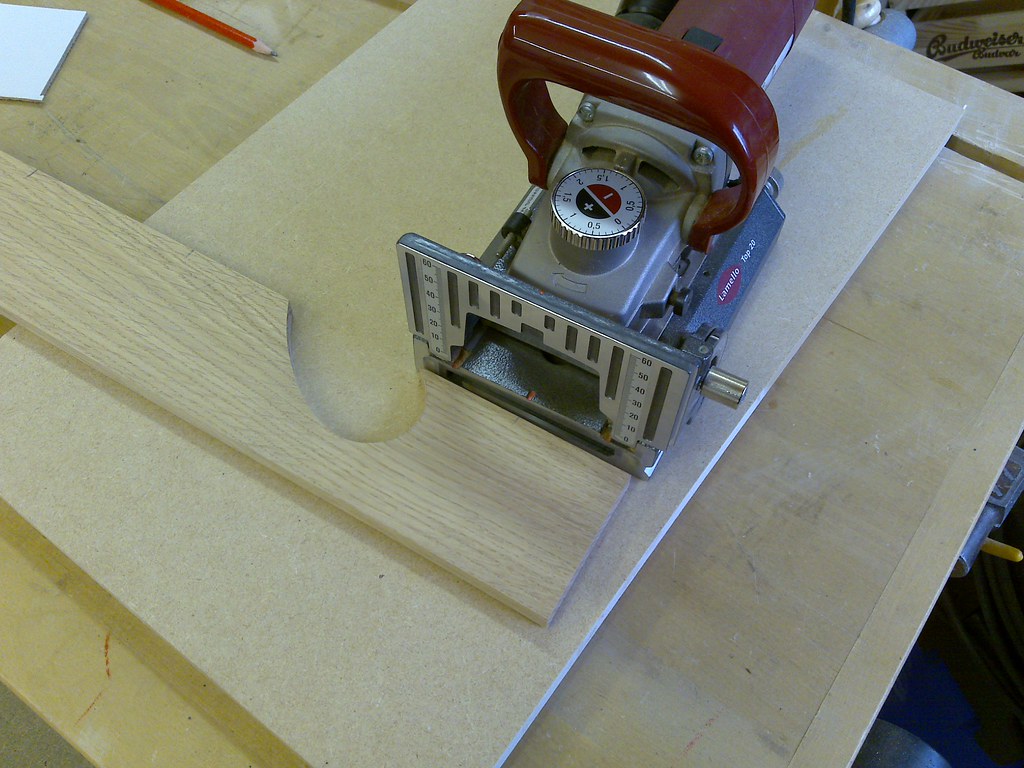
The panels are 11mm thick and I was concerned that this may be too thin for biscuits, but a test piece seemed to hold up well.
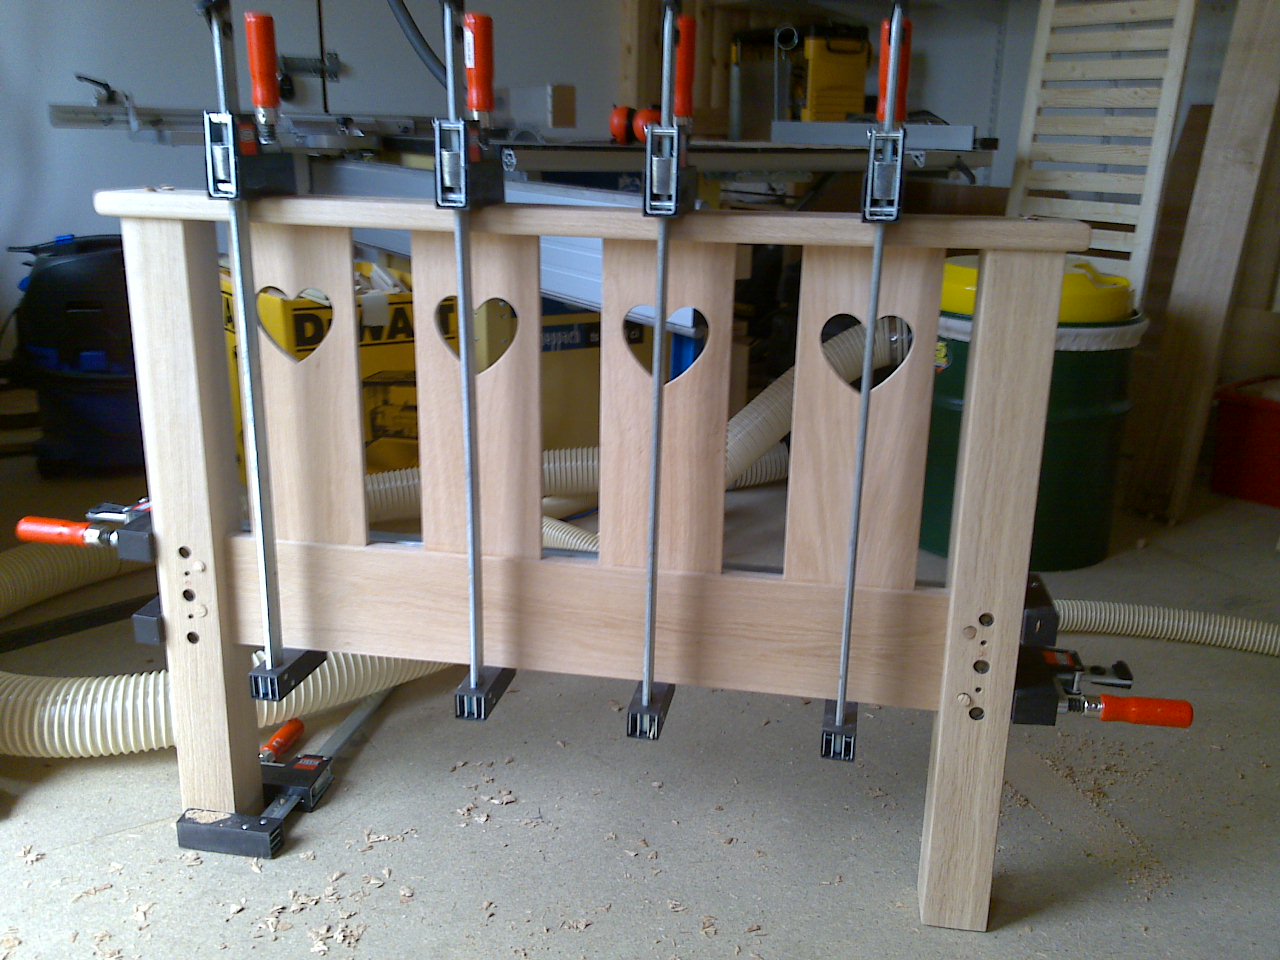
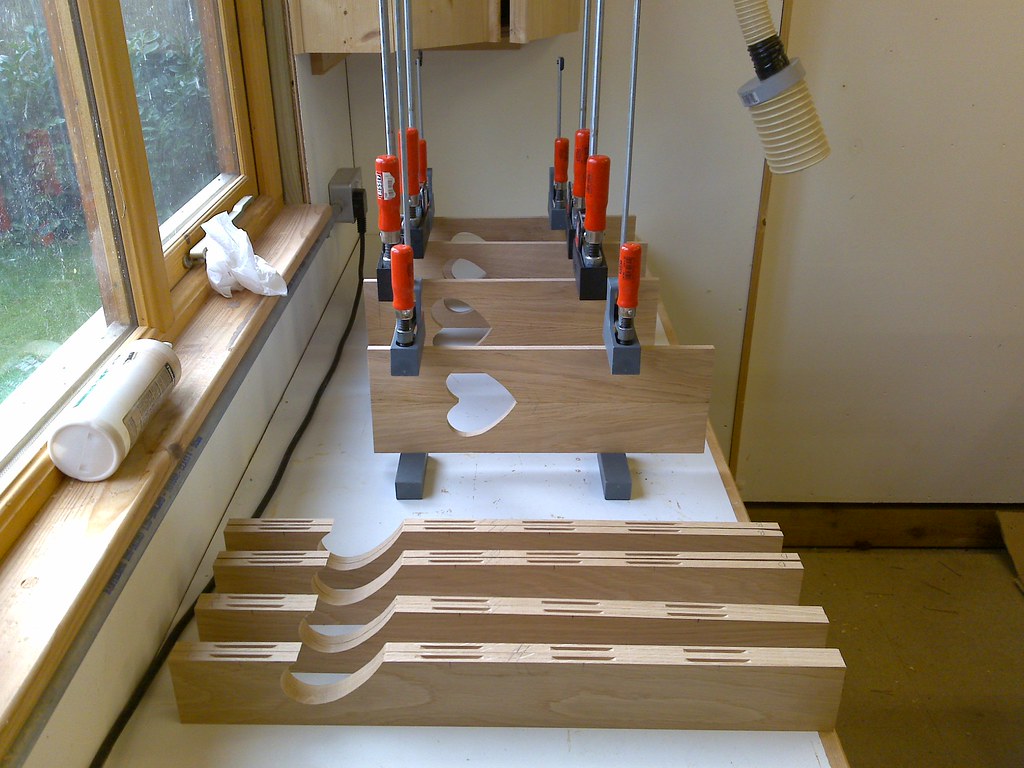
Insufficient clamps of a suitable size meant the glue up was done in 2 parts. I was very pleased with the end result.
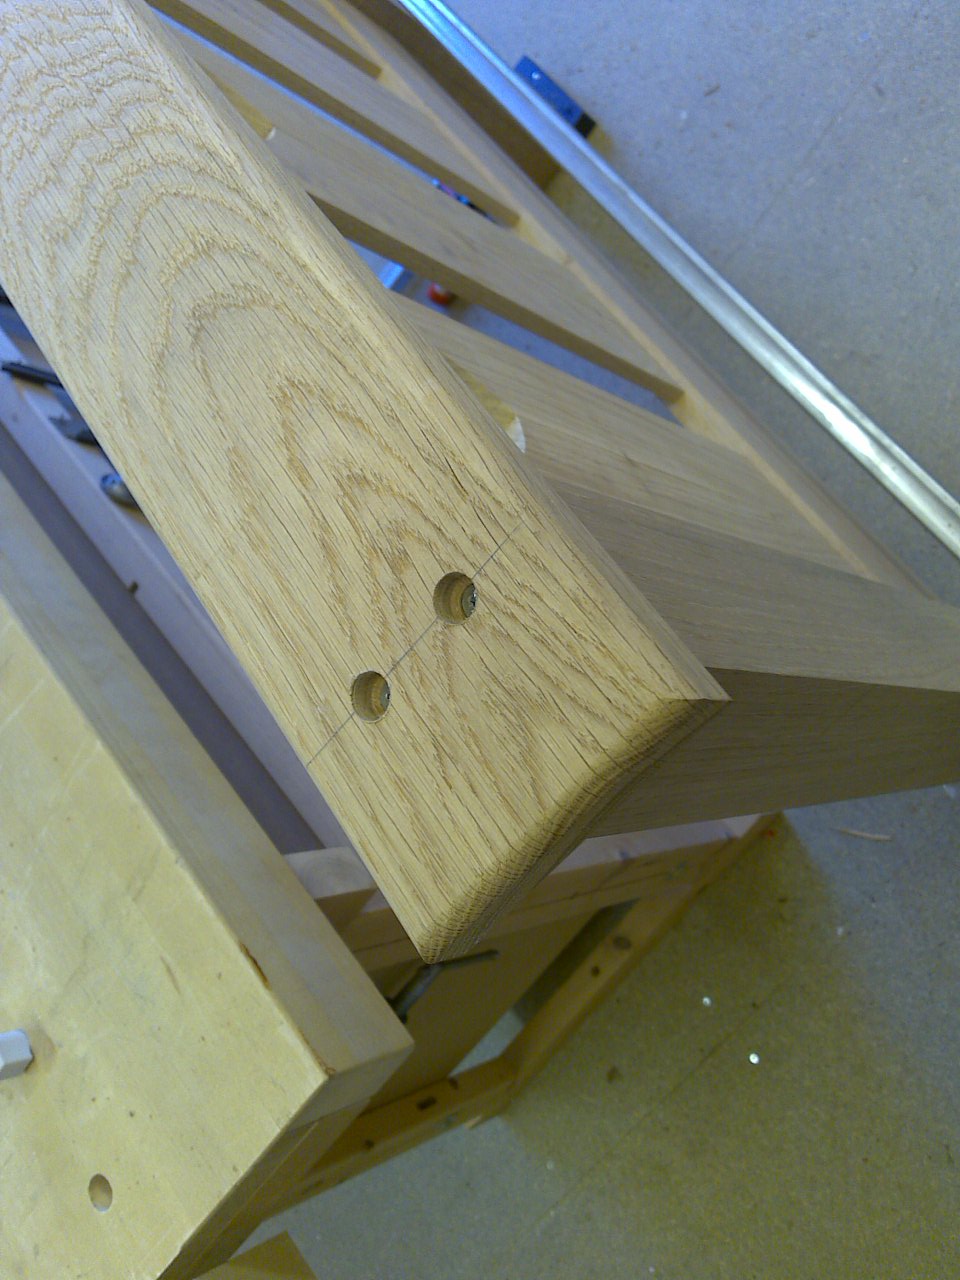
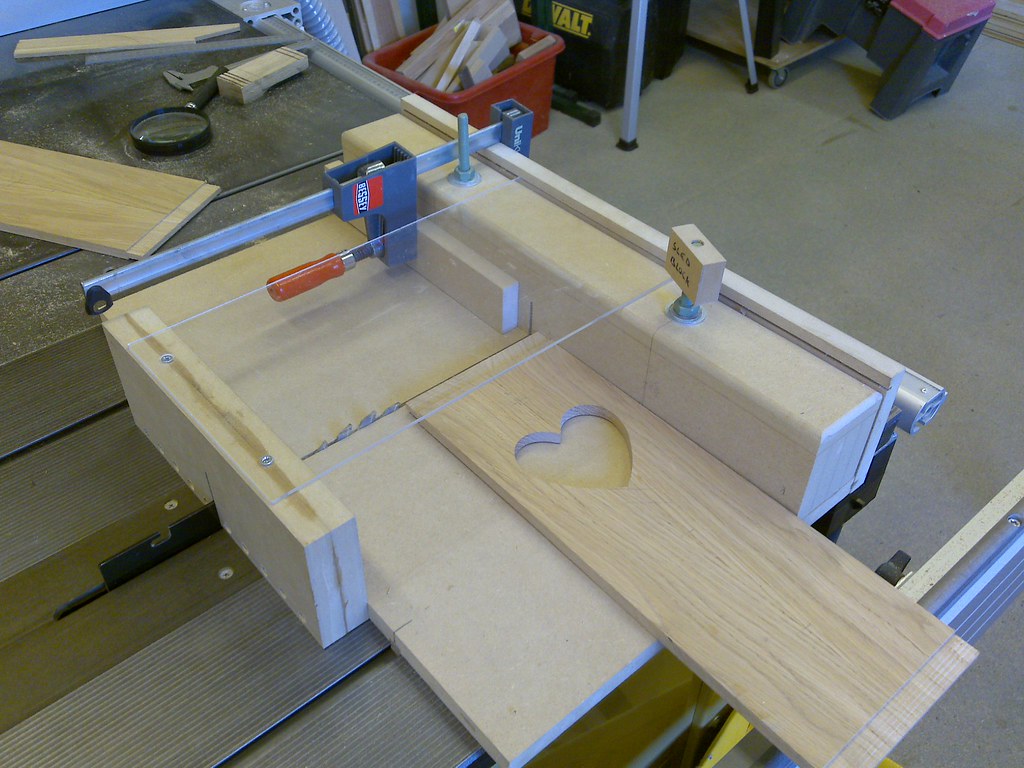
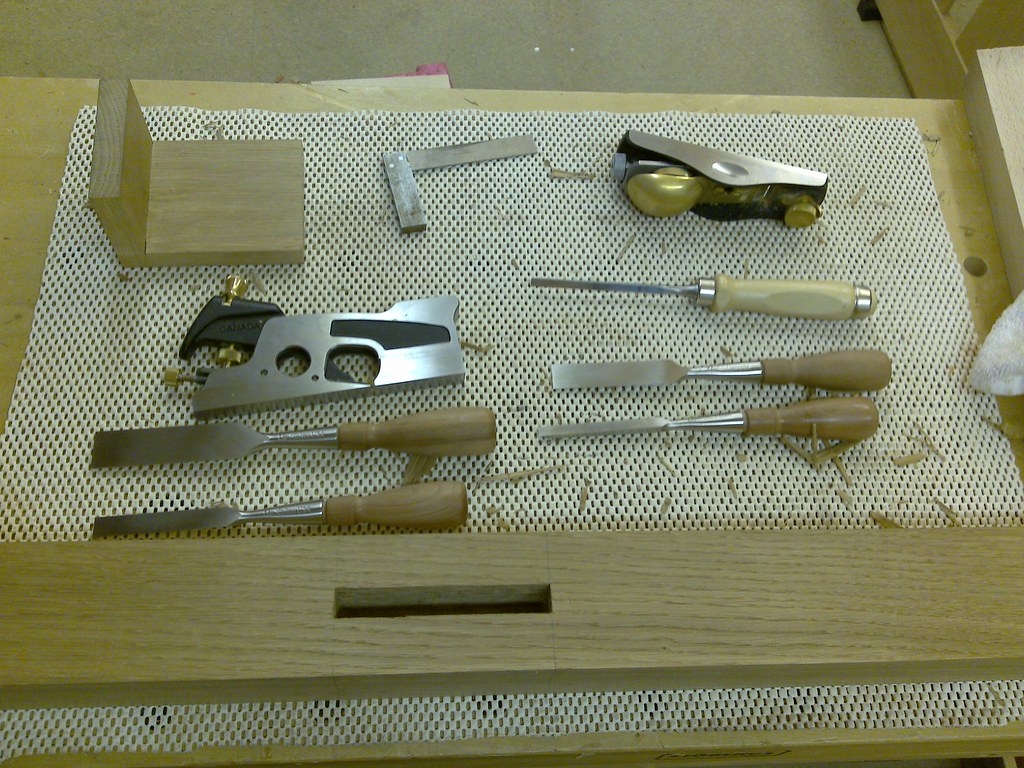
Once these were dry I cut the tennons using my small shop made sled with a stop block clamped to it to ensure accuracy on the shoulders. I've found this sled to be very accurate as it runs in both mitre slots without any sideways movement and makes up for the woefully poor fit of the standard Scheppach mitre gauge. I made multiple passes to rough cut the cheeks and then removed the perspex guard, raised the bladed and made the final shoulder cuts with the same stop block in place.
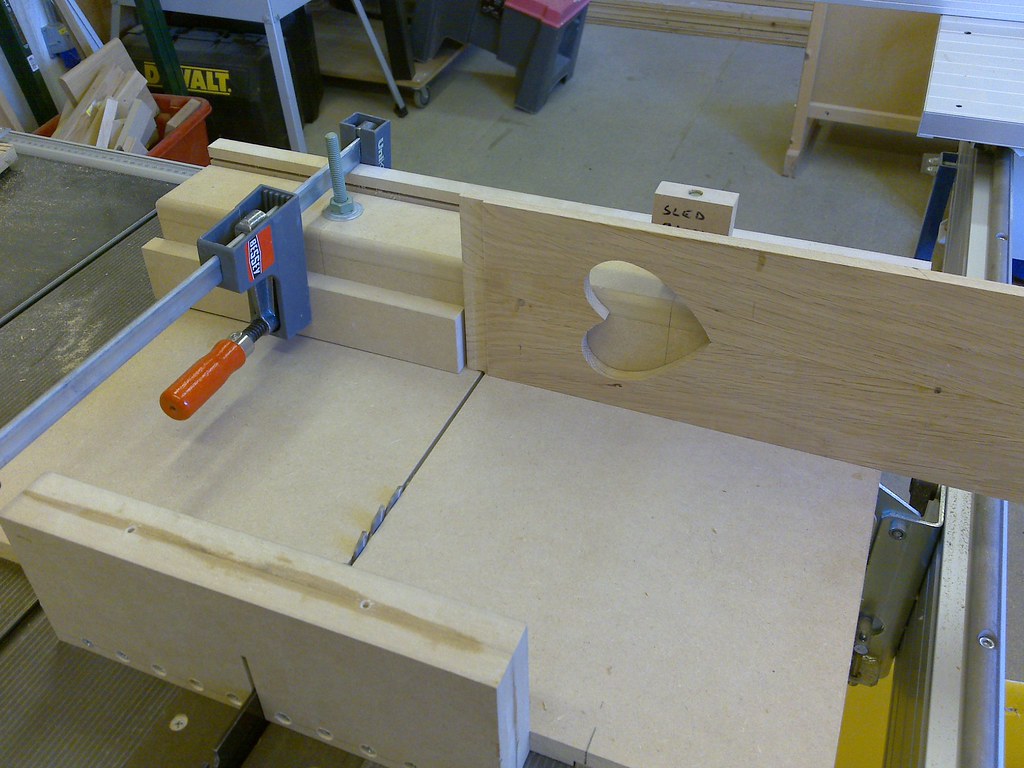
I cleaned up the cheeks a little, but will fine tune them later once the mortices were cut. You can see the book matching in this photo. I’m pleased I took the extra time to do this.
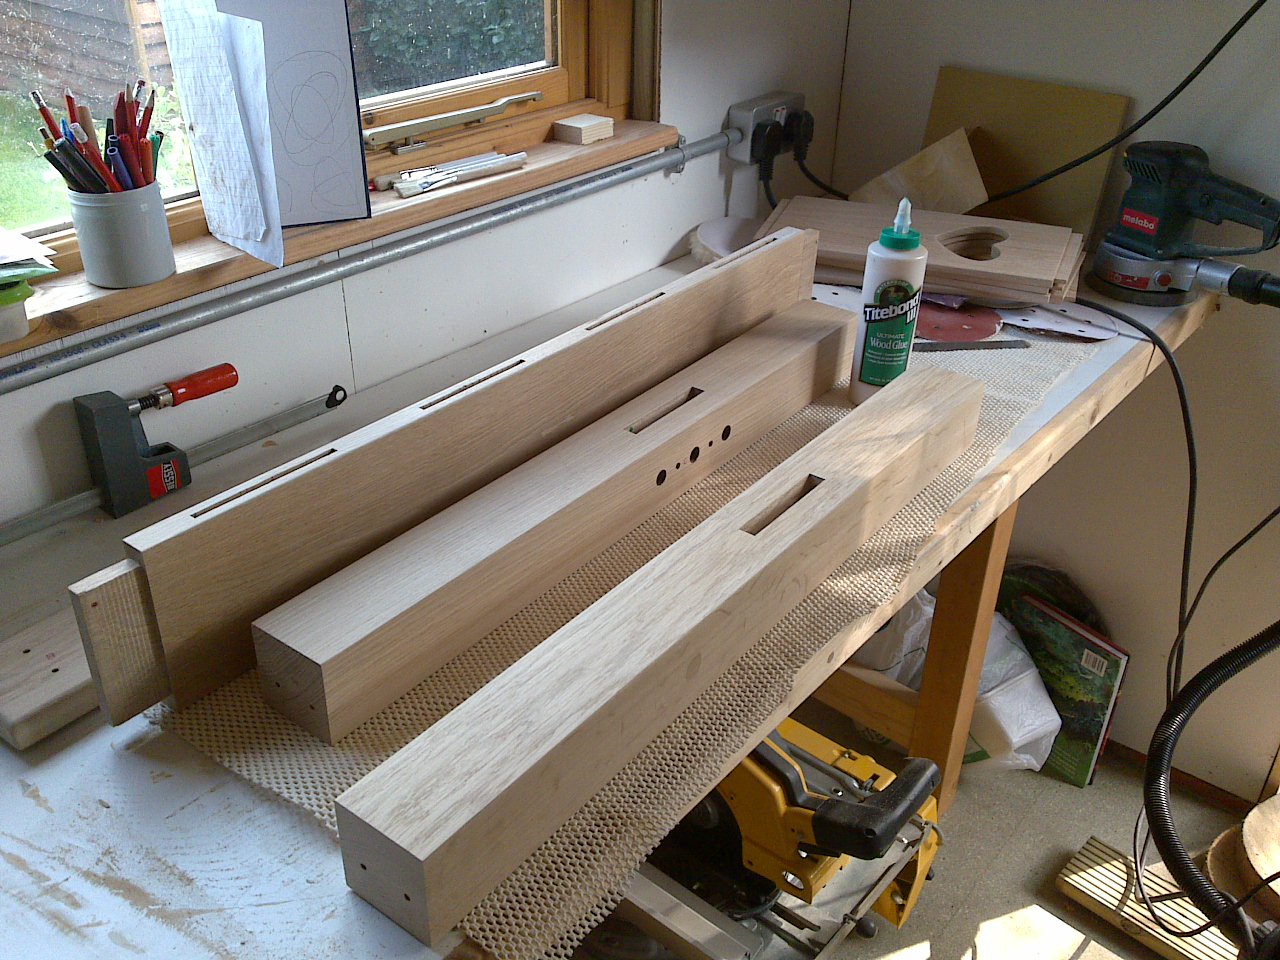
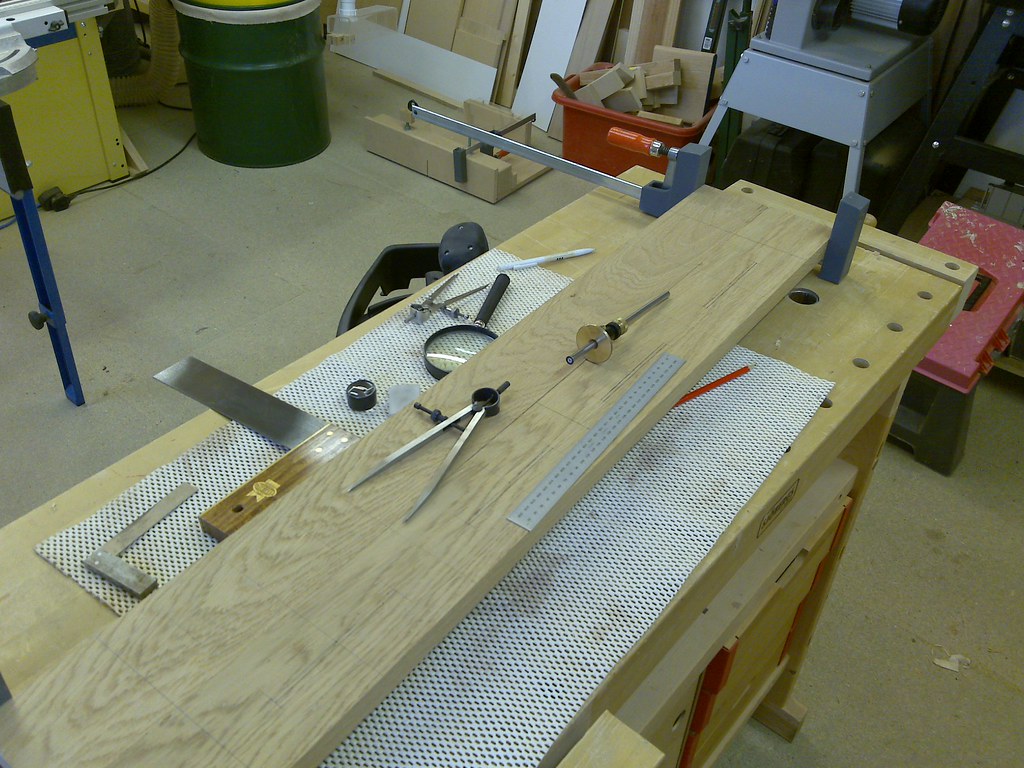
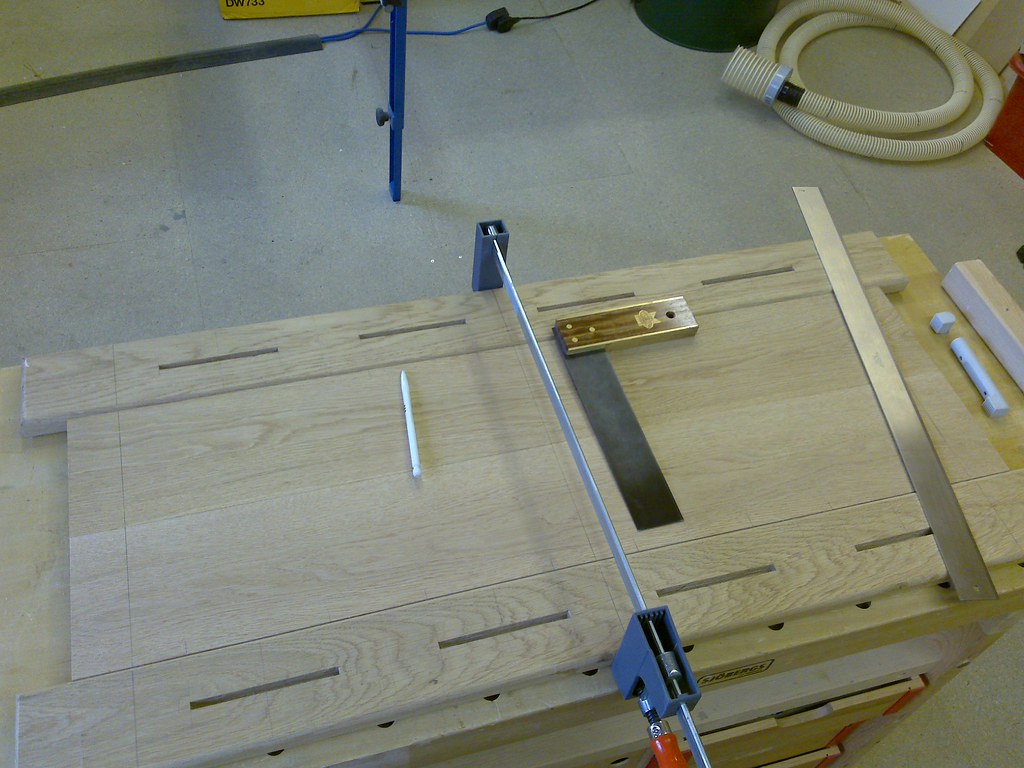
With the panels all cut I could mark out for the mortices on the top rails.
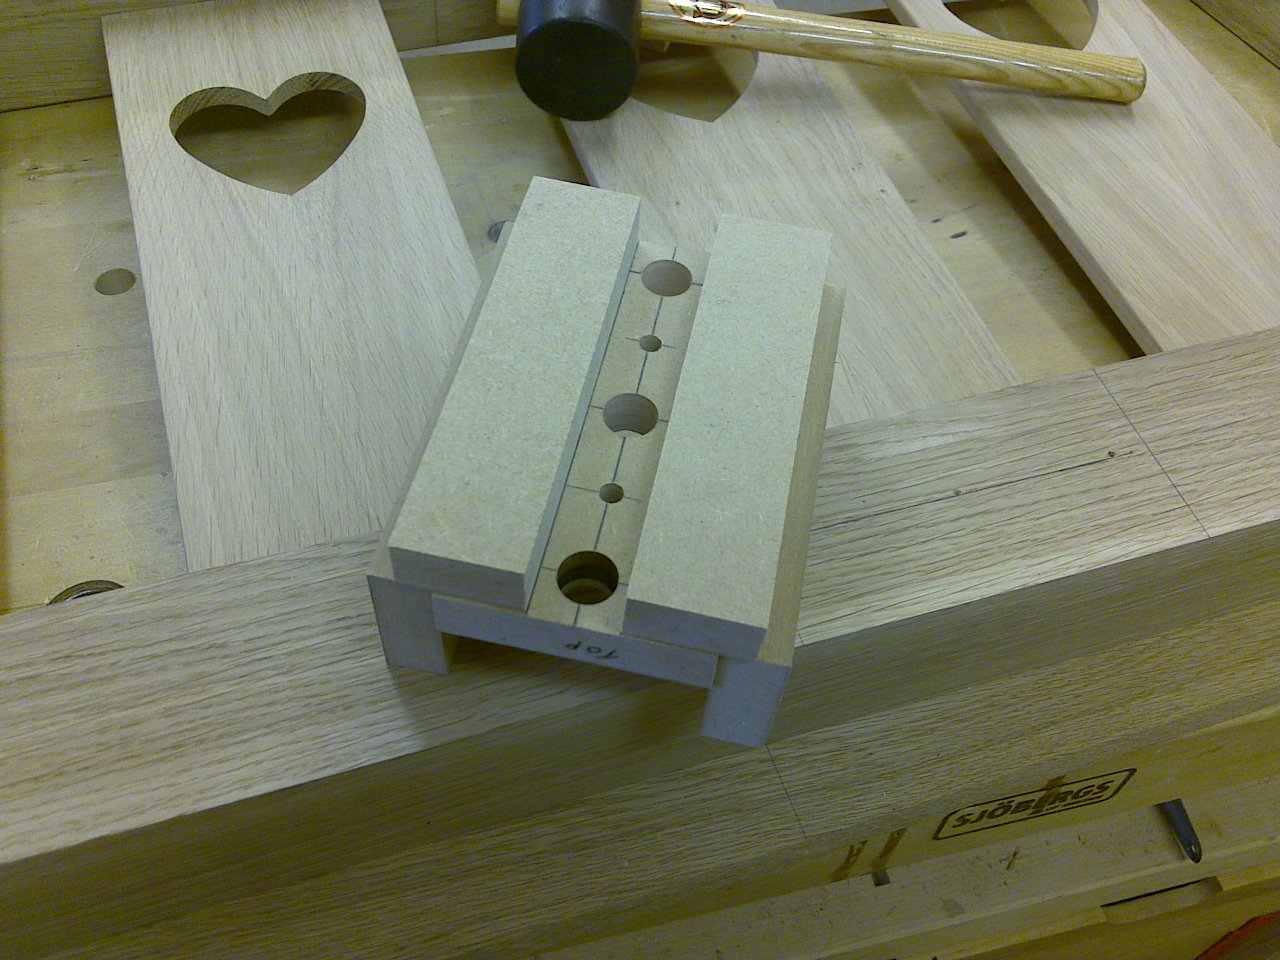
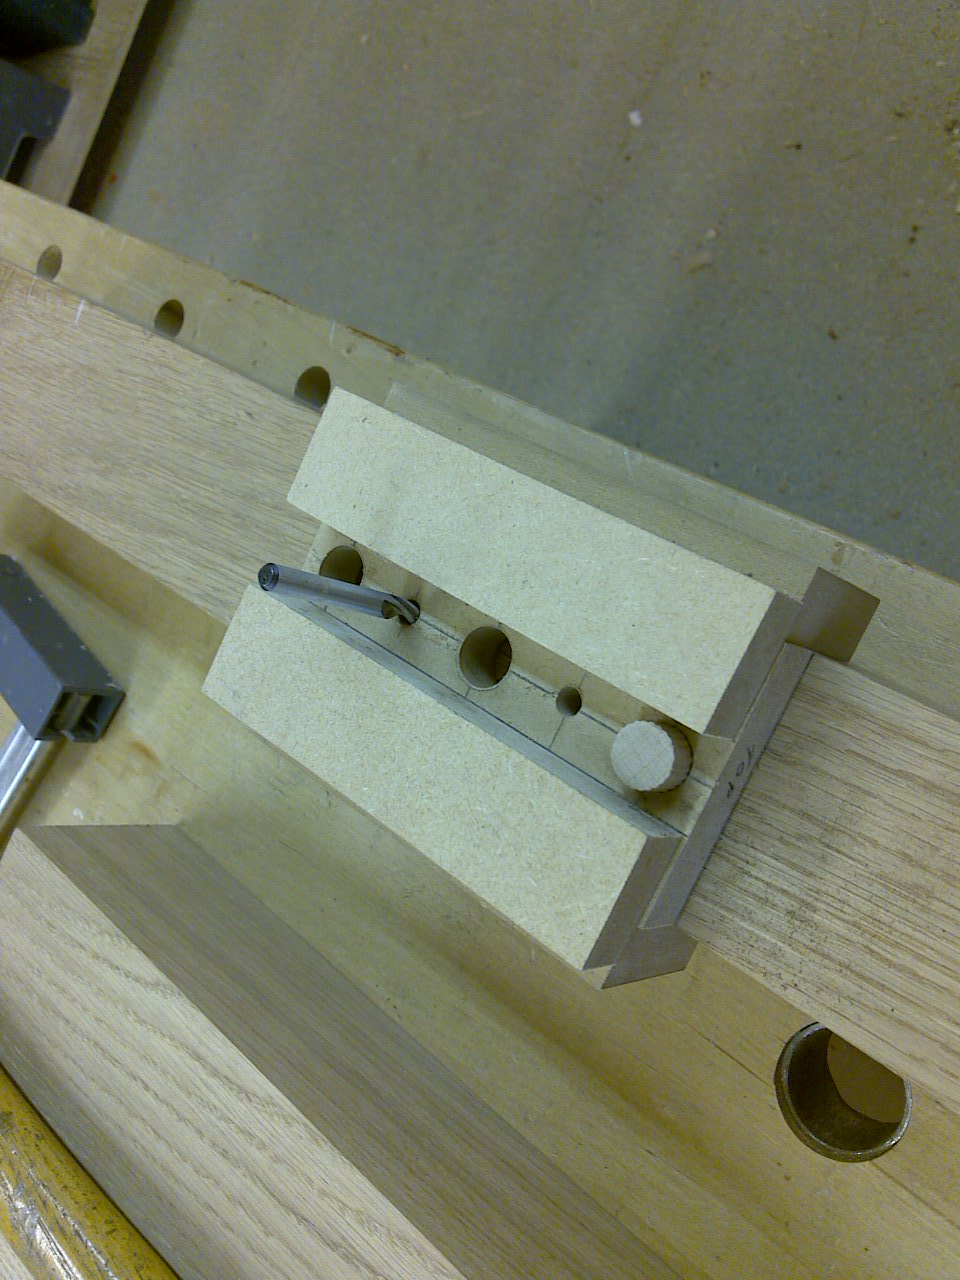
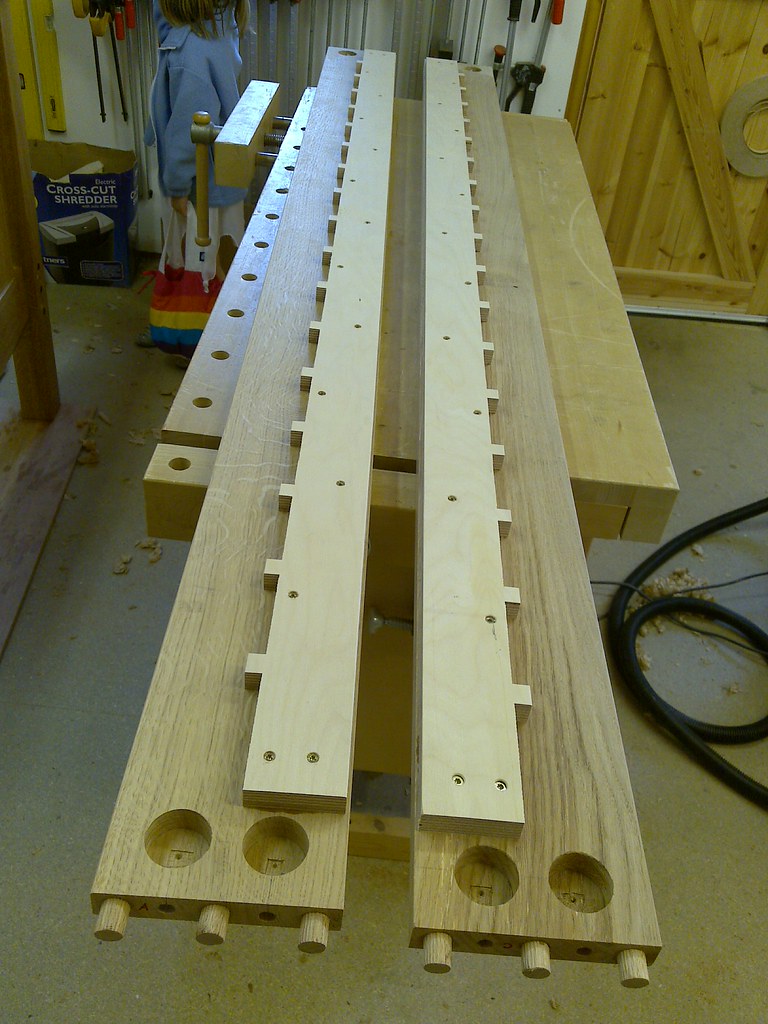
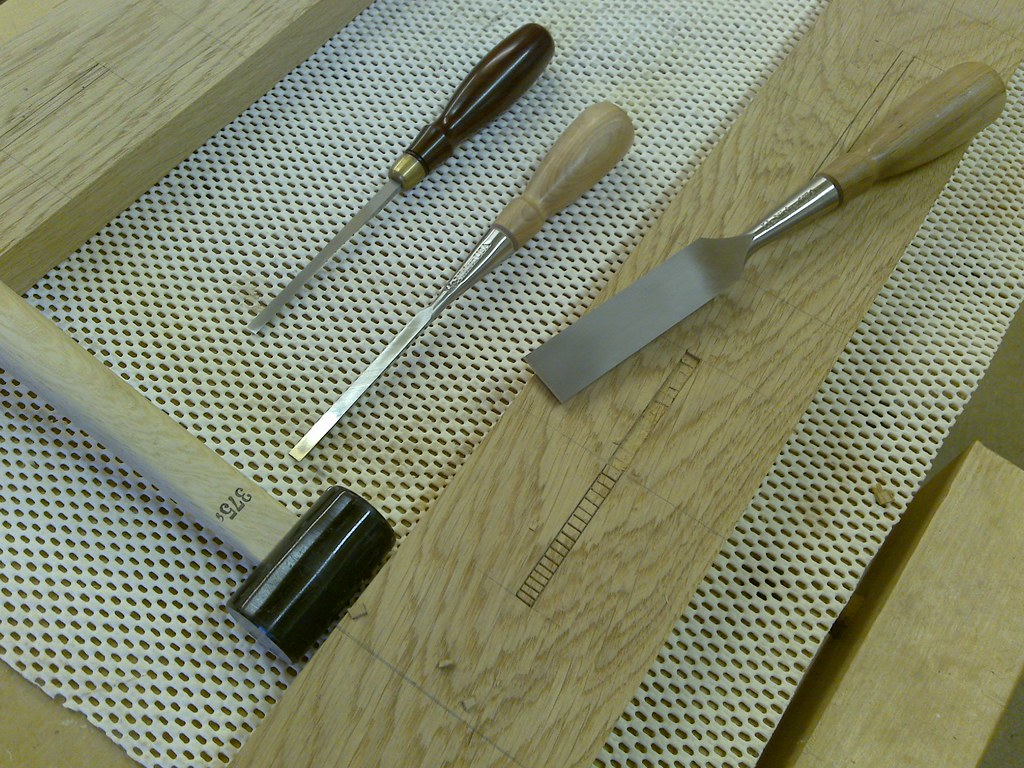
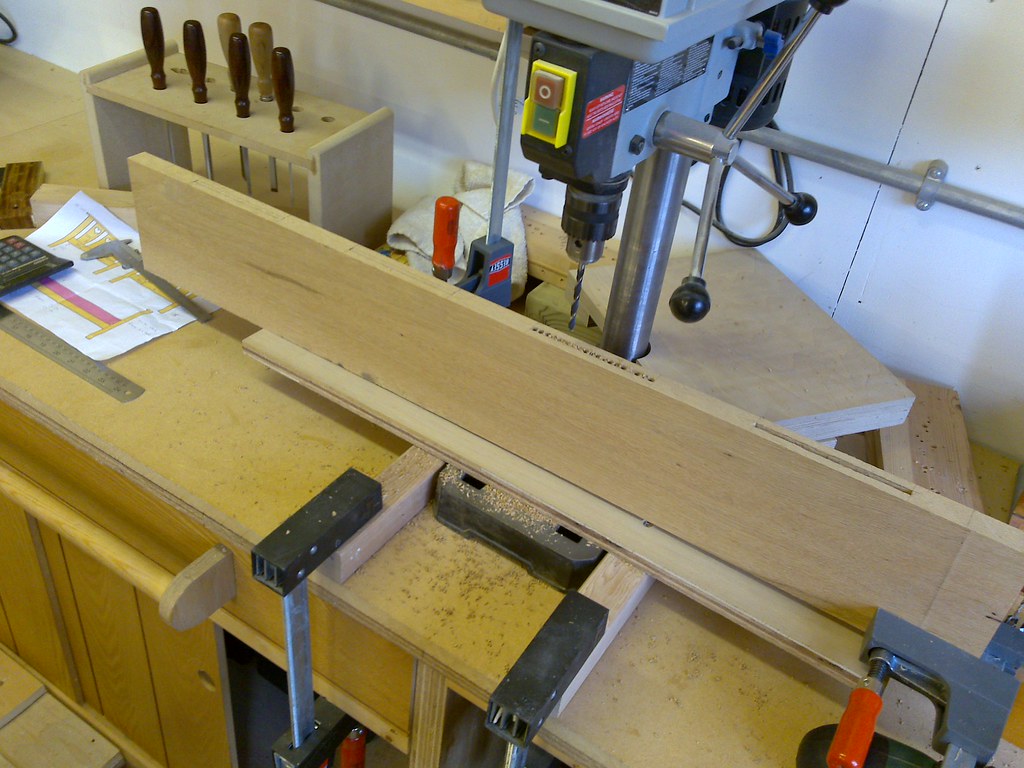
The first few mortices were cut by making a series of small chops and then slowly cutting out the waste, but this was painful, so I resorted to a set-up on the drill press. I have a morticer, but it is currently not mounted anywhere and my smallest chisel is too big. I reused this method to cut the mortices on the bottom rails, but not before more marking out.
Once both sets of top and bottom rails were cut I started work on the legs. The tennons on the bottom rails were cut on the sled as before and the mortices in the leg (actually just 1 leg as I ran out of time) were cut using a similar set-up as before on the drill press.
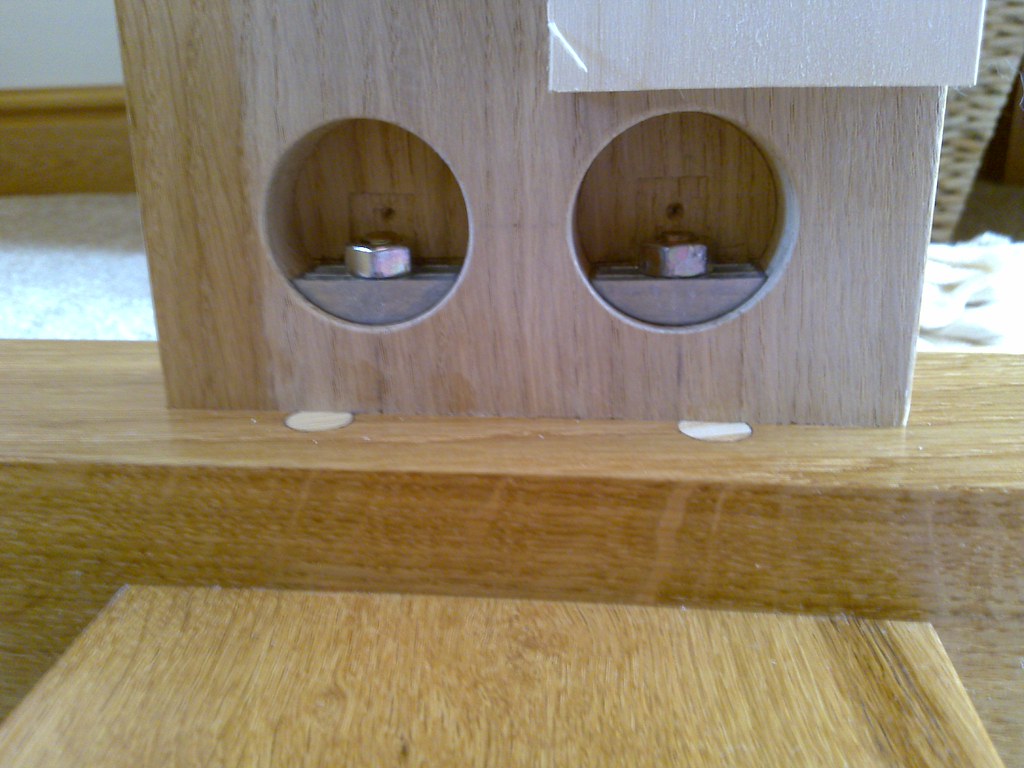
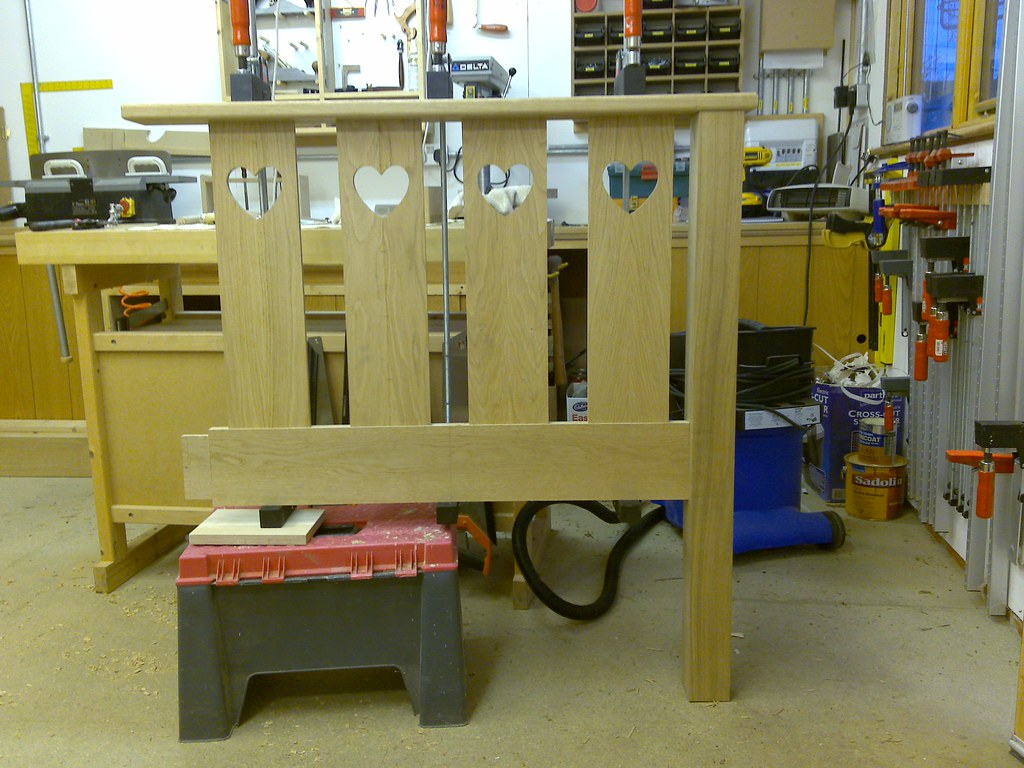
I couldn’t resist a quick dry fit before packing up for the weekend. I bet you’re all wondering what the joint method is on the top of the leg… Me too. More about this next time.
Jon
The design is fairly simple as this 2D sketch shows (I need to get up to speed with Sketch-up….!).
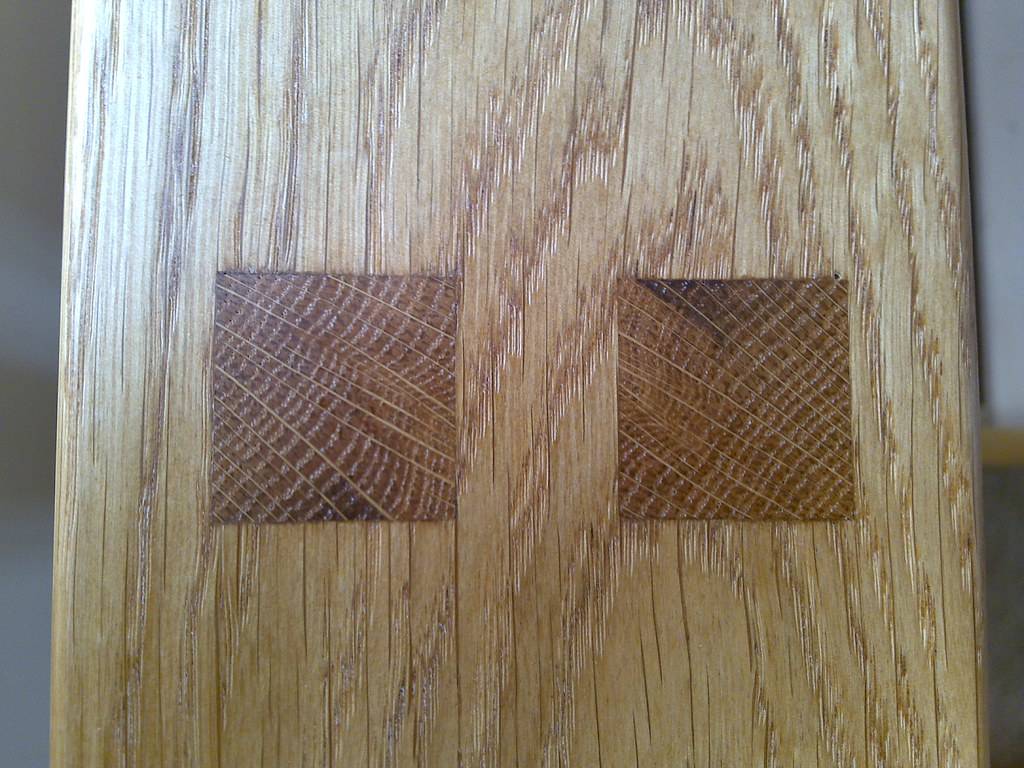
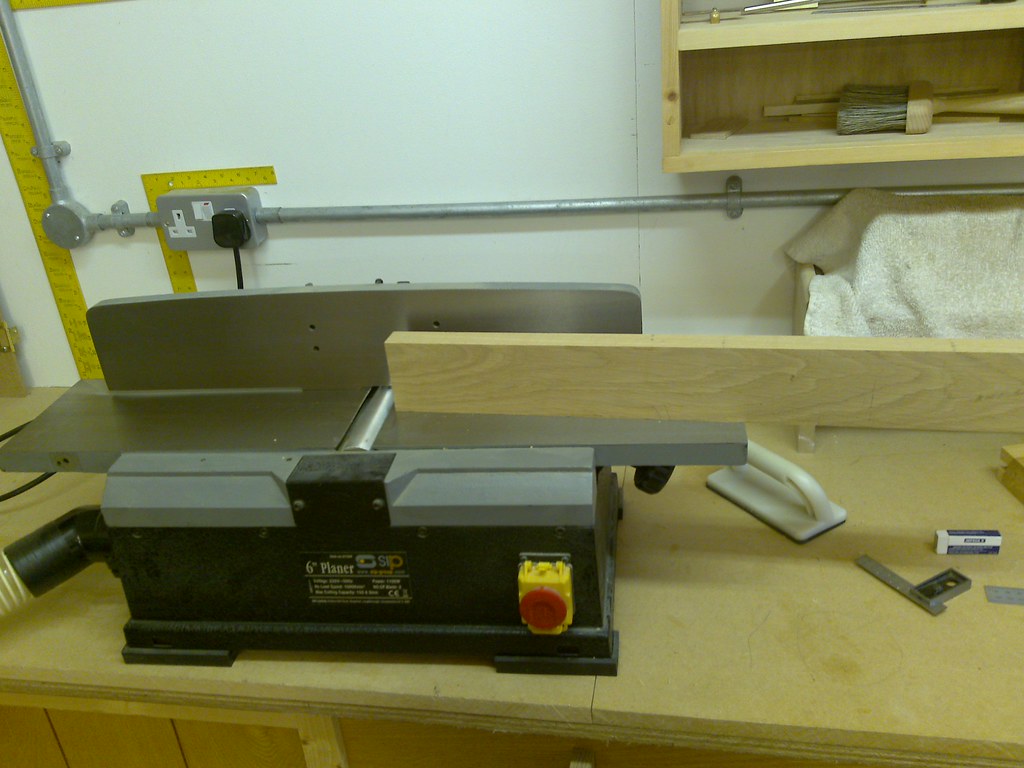
I’ve chosen Oak. This was the first opportunity for me to use my new thicknesser in anger.
… a quick scan for blade chipping aliens and a brush down to remove surface grit is always wise….!
I bought the timber from WL West in Petworth and was able to rummage through the extensive piles of saw timber in their sheds and pull out suitable pieces and check them as I went to ensure they were reasonably true. This saves me a lot of workshop time as I was simply able to square off the timber on the table saw before running through the thicknesser. The end results were very pleasing.
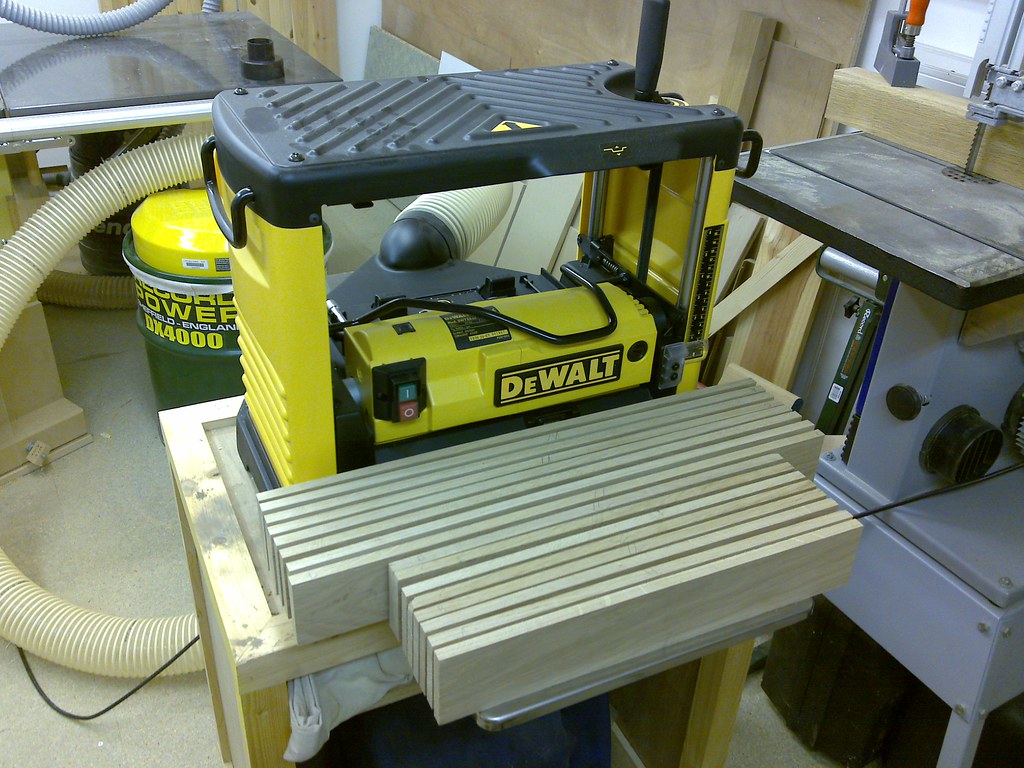
The DX4000 is the perfect partner for a thicknesser. This was empy before I started.
I chose to make the heart panels first because I couldn’t visualise the finished size and I couldn’t start to mark up the top and bottom rails for the head and foot boards. I hand drew half a heart on a piece of MDF and rough cut it before sanding with various size drums mounted in bench top drill press. You can see it at the bottom of this picture before I glued 2 guides on to make a cradle. The rough cut parts can also be seen in this picture.
I trued up the edges on my small benchtop planer (oops, no guard) before re-sawing them to give a book matched finish. I then machined them down to the final dimension .
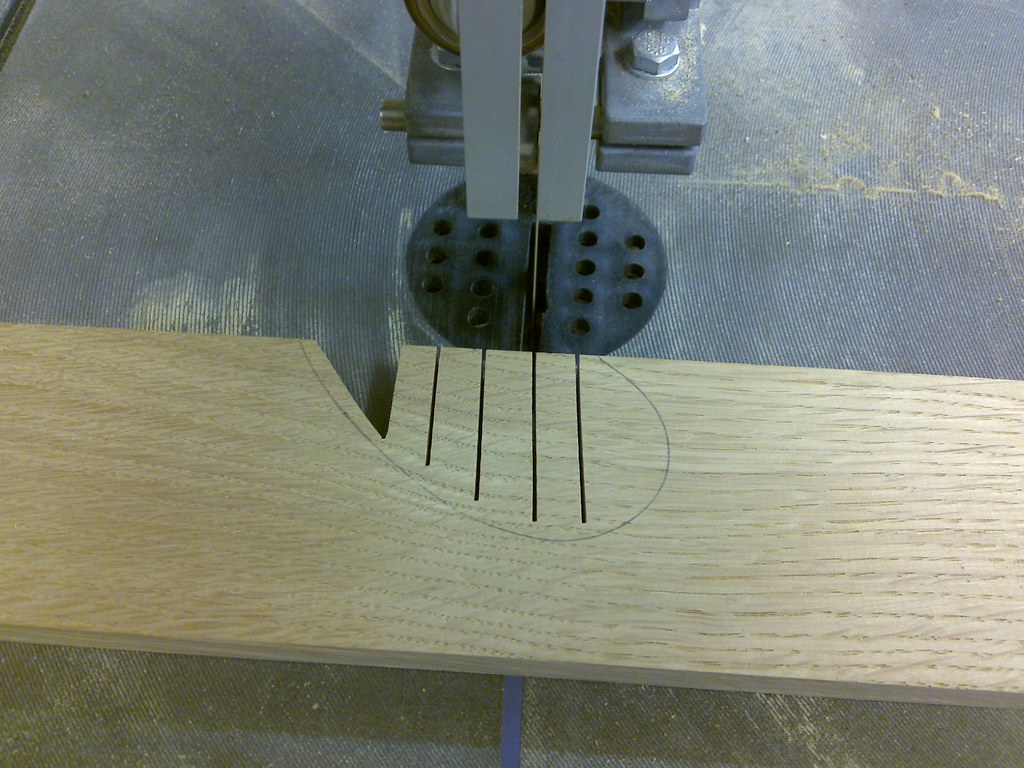
I marked each heart half out and then removed the bulk of the waste by making a series of cuts on the band saw.
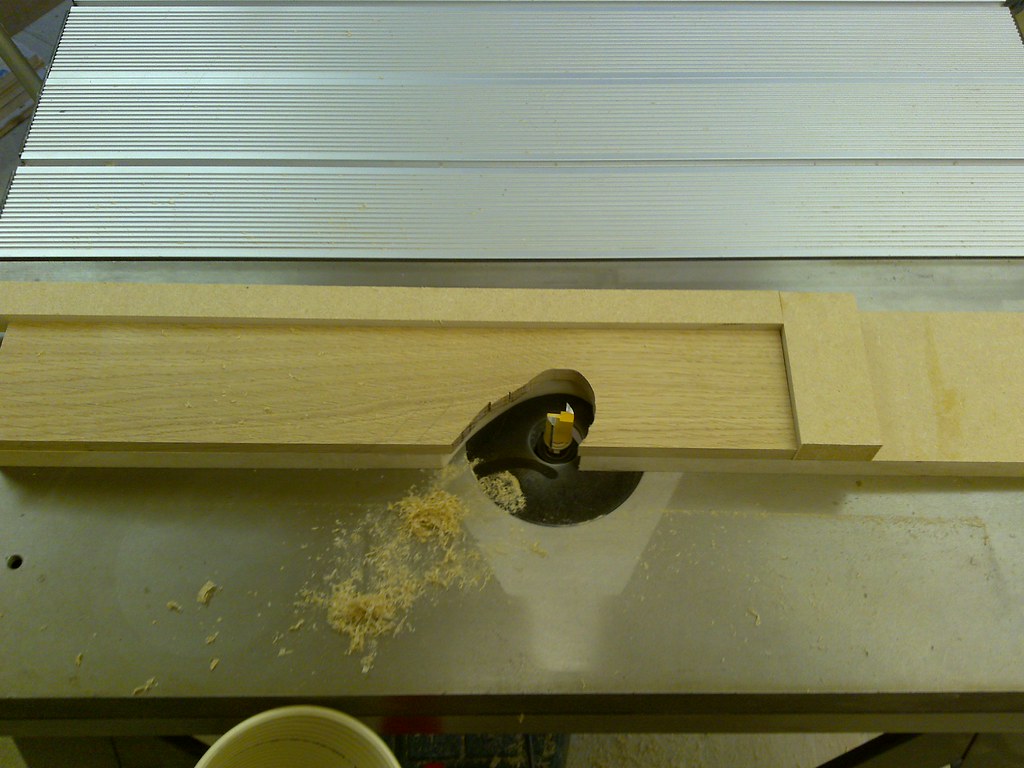
Then I routed out the final shape on the router table using a top bearing pattern bit. In this picture you can see the 2 guides I glued to the heart template and this allowed me to hold the piece on the template without any mechanical fixing. I clamped a 100mm hose to the edge of the table to catch the worst of the dust and with both motors running on the DX this proved very effective.
The panels are 11mm thick and I was concerned that this may be too thin for biscuits, but a test piece seemed to hold up well.
Insufficient clamps of a suitable size meant the glue up was done in 2 parts. I was very pleased with the end result.
Once these were dry I cut the tennons using my small shop made sled with a stop block clamped to it to ensure accuracy on the shoulders. I've found this sled to be very accurate as it runs in both mitre slots without any sideways movement and makes up for the woefully poor fit of the standard Scheppach mitre gauge. I made multiple passes to rough cut the cheeks and then removed the perspex guard, raised the bladed and made the final shoulder cuts with the same stop block in place.
I cleaned up the cheeks a little, but will fine tune them later once the mortices were cut. You can see the book matching in this photo. I’m pleased I took the extra time to do this.
With the panels all cut I could mark out for the mortices on the top rails.
The first few mortices were cut by making a series of small chops and then slowly cutting out the waste, but this was painful, so I resorted to a set-up on the drill press. I have a morticer, but it is currently not mounted anywhere and my smallest chisel is too big. I reused this method to cut the mortices on the bottom rails, but not before more marking out.
Once both sets of top and bottom rails were cut I started work on the legs. The tennons on the bottom rails were cut on the sled as before and the mortices in the leg (actually just 1 leg as I ran out of time) were cut using a similar set-up as before on the drill press.
I couldn’t resist a quick dry fit before packing up for the weekend. I bet you’re all wondering what the joint method is on the top of the leg… Me too. More about this next time.
Jon
")