


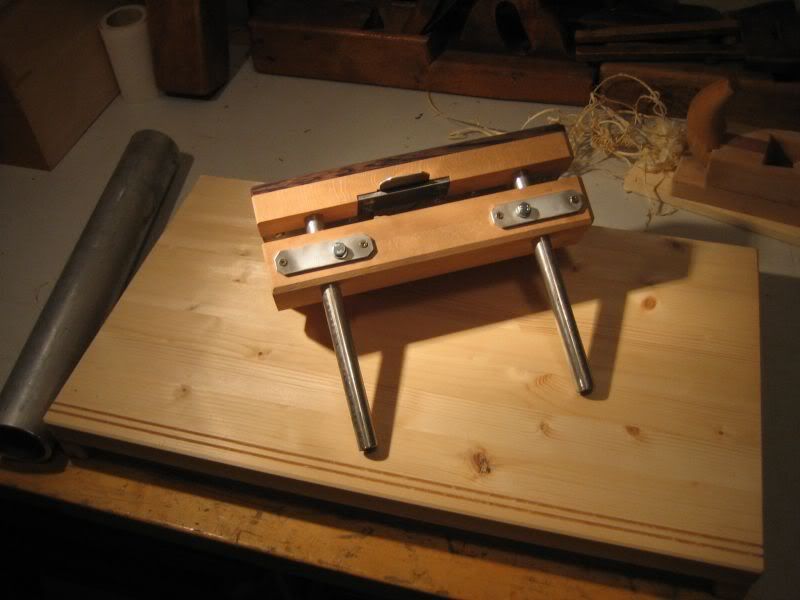
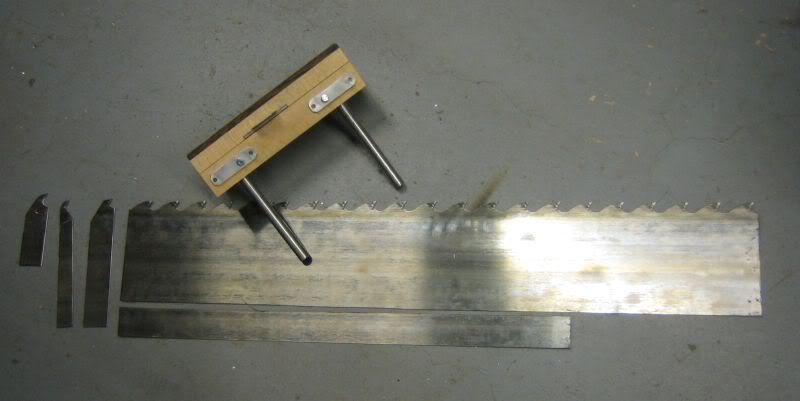
This came to me when I happened to get a piece of one impressive blade of large sawmill bandsaw for large timber.
The blade is carbide tipped. At first I thought it would be a plow plane for narrow grooves or such, but ripping has became it's own turf.
It was done from scratch to finish in an evening, or so. Pretty much in a heat of the moment, just to test out the concept. It's not very detailed or shapely work, instead some hastiness can be seen indeed.
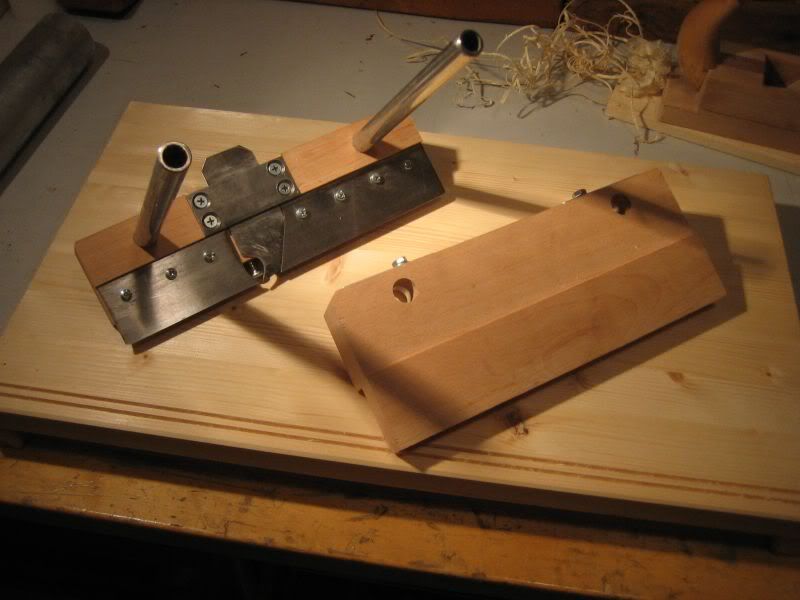
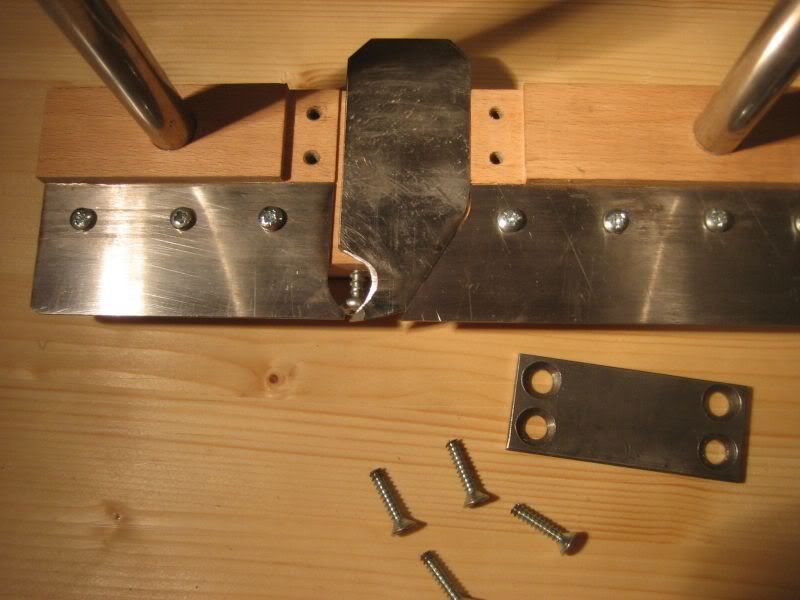
I used the tools and materials I had at hand, stainless steel tube, aluminium profile, steel, beech and wenge. Fast epoxy glue was used. There were no actual blueprints in use, I just rotated everything in my head, and it kinda can be seen, too.
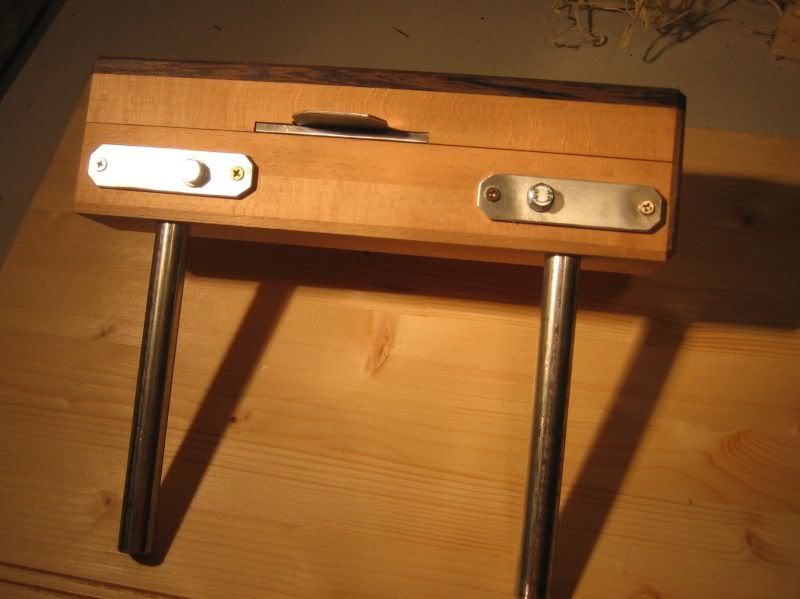
These are a year or two old pictures, right after I made it. I have replaced the locking system machine screws with wing screws, otherwise it is pretty much the same in appearance. The saw blade skates are 1,5mm thick, and original width of the carbide tip was something like 2,5mm, which I have since honed down to 1,7mm. The profile of the tip is trapezoid. It is very easy to push, and the carbide tip seems to have eternal lifespan in this application.
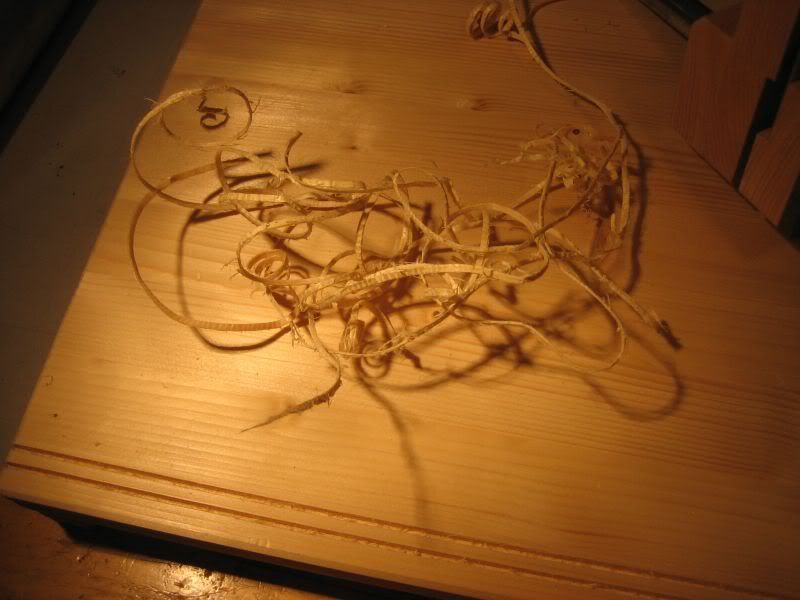
Of course it will not replace a proper tablesaw or circular saw, but sometimes it is just nice to work in silence. And there is no dust either, because shavings can be almost 3mm thick depending on the wood. A bit of evolution could find more applications for it, but I have not developed it any further than this.


That's about it.
Samu
The blade is carbide tipped. At first I thought it would be a plow plane for narrow grooves or such, but ripping has became it's own turf.
It was done from scratch to finish in an evening, or so. Pretty much in a heat of the moment, just to test out the concept. It's not very detailed or shapely work, instead some hastiness can be seen indeed.
I used the tools and materials I had at hand, stainless steel tube, aluminium profile, steel, beech and wenge. Fast epoxy glue was used. There were no actual blueprints in use, I just rotated everything in my head, and it kinda can be seen, too.
These are a year or two old pictures, right after I made it. I have replaced the locking system machine screws with wing screws, otherwise it is pretty much the same in appearance. The saw blade skates are 1,5mm thick, and original width of the carbide tip was something like 2,5mm, which I have since honed down to 1,7mm. The profile of the tip is trapezoid. It is very easy to push, and the carbide tip seems to have eternal lifespan in this application.
Of course it will not replace a proper tablesaw or circular saw, but sometimes it is just nice to work in silence. And there is no dust either, because shavings can be almost 3mm thick depending on the wood. A bit of evolution could find more applications for it, but I have not developed it any further than this.
That's about it.
Samu
 Those woods can be pretty tough ones sometimes.