workshop build

UKworkshop.co.uk

Help Support UKworkshop.co.uk:

This site may earn a commission from merchant affiliate links, including eBay, Amazon, and others.

pitch pine

Established Member
Joined
3 Jul 2007
Messages
268
Reaction score
17
Location
northumberland
Inspired by "simple garage construction" I thought I'd post a few photos of my efforts. I will also be learning how to post photos so please be patient!

My foundations were dug by hand and consisted of a "rubble trench" with a french drain away from the lowest corner.

DSCF0002.jpg


The trench is about 2 feet deep and was hard work. My neighbour built a rockery from the stone I removed!

DSCF0005.jpg


Going to have my tea now, back later.
 
So after digging the foundation trench it was partially filled with gravel (approx 25mm) and then I cast 12 plinths in concrete to support the sill beams.

foundations1.jpg


I used scaffold board to make the forms and painted old engine oil on the inside as a release agent. When the plinths were cured I built them up to the final height with some natural dressed stone.

DSCF0023.jpg


This shows the foundations complete with the sill beams in place. On top are the wall plates. Each long side is 2 pieces scarfed together. The timber is reclaimed from the Morecombe Bay rollercoaster, 8x4" section and a mixture of different pines including alot of very heavy resinous pitch pine. The corner joint of the wall plate is a simple lap. I used a Shark saw for alot of the cutting which was good, but often needed to stop and clean the resin from the blade with paraffin.

DSCF0024.jpg


This shows the detail at a corner plinth. In the run up to this build I had read about and looked at loads of timber framed buildings and I knew that off the ground with ventilation was good, especially with having a timber floor.

I built the frame as a kit using the foundations for layout. Later on I have a photo of the roof structure "mocked up" on the sill beams.

Will post more later.
 
Interesting so far!

Tell me, why didn't you just cast a concrete slab.......your floor would have been quick, solid, warm, strong and about 18 inches lower down!

Mike
 
Hi pitch pine


Your shop take me back to when i made my workshop , your using the exact same method as i did , nice one look forward to following this post , keep it coming . Those timber will certainly out last your lifetime nice beams .hc
 
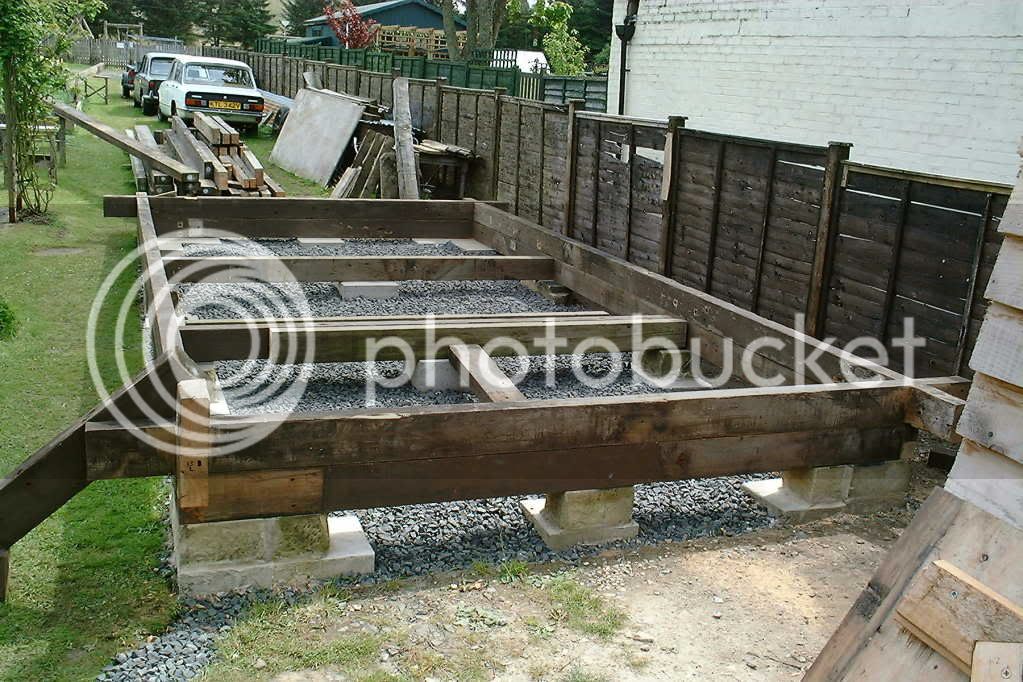
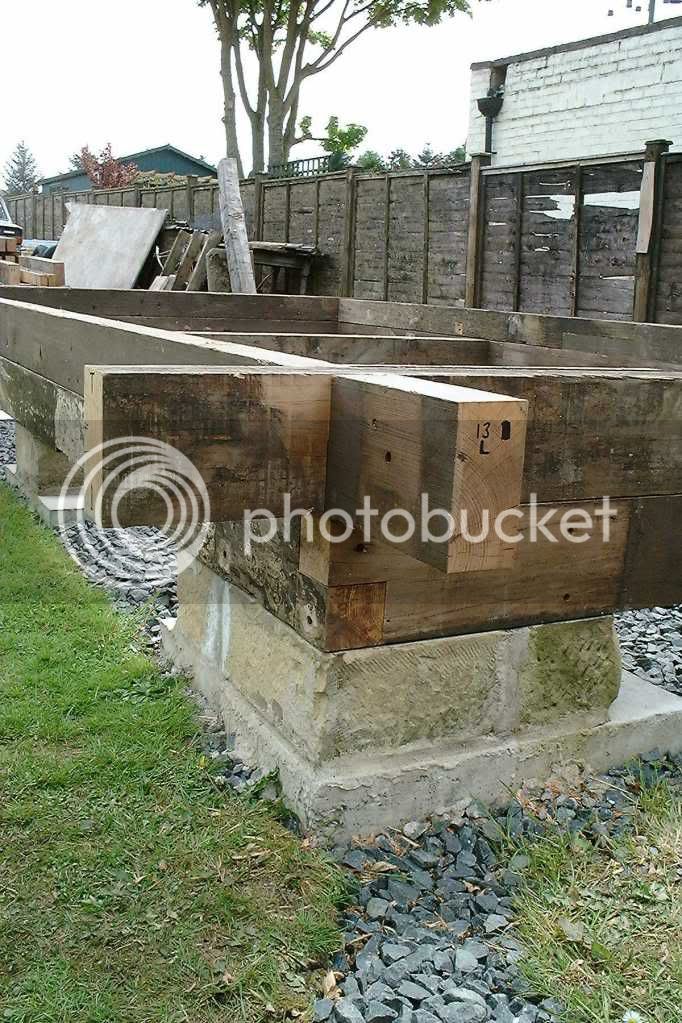
Mike I really wanted a wooden floor so thats why. Also my labour is free and time wasn't an issue......I might not mix the small amount of concrete I used by hand if I did it again though.....

Andrew yes it is a Dolomite. Extra points if you can work out which model!

Martin it is nice to know others go down the over-engineered route.

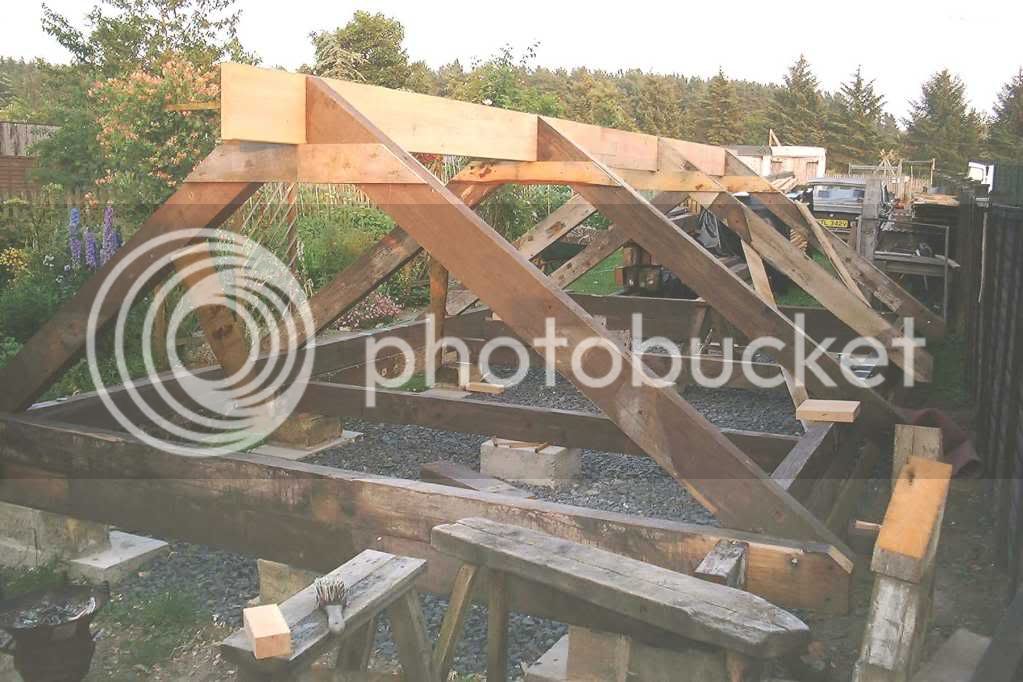
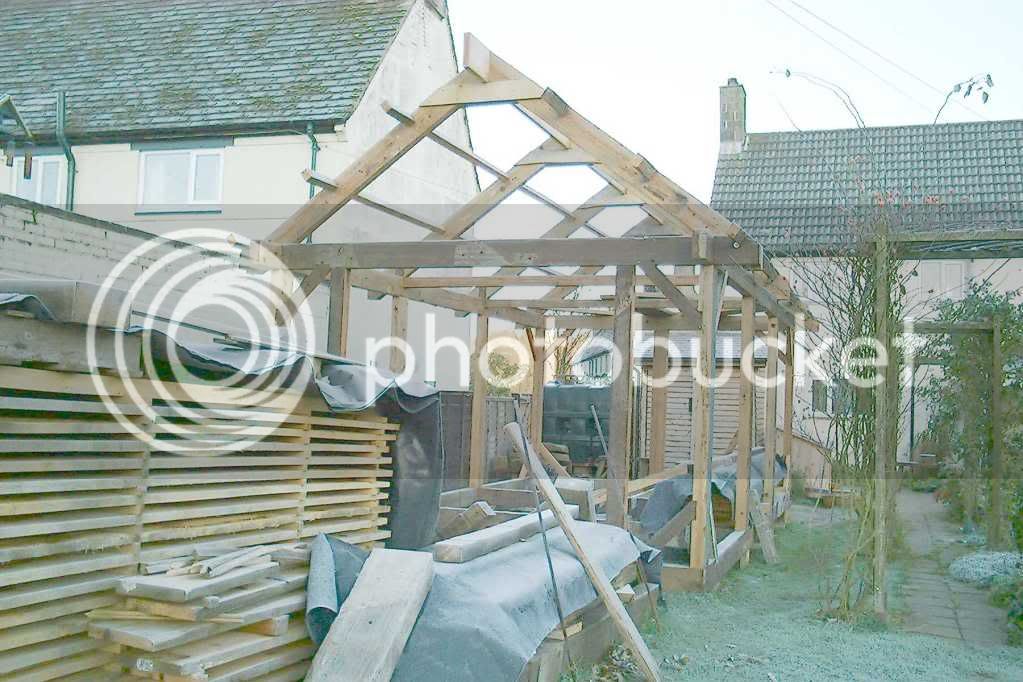
So this shows the roof timbers cut and trial fitted on to the wall plates:

DSCF0055.jpg


The rafters are full 8x4" section with a birdsmouth to seat on the wall plate. The end pairs are bolted to the wall plate with stainless steel studding. The ridge beam is a piece of Douglas Fir scarfed in the middle, probably not necessary for the structure but I wanted one. I had never used Douglas before and it is a lovely timber to work. Easy to shape, good looking nice smell. I think it would make an excellent frame in itself.

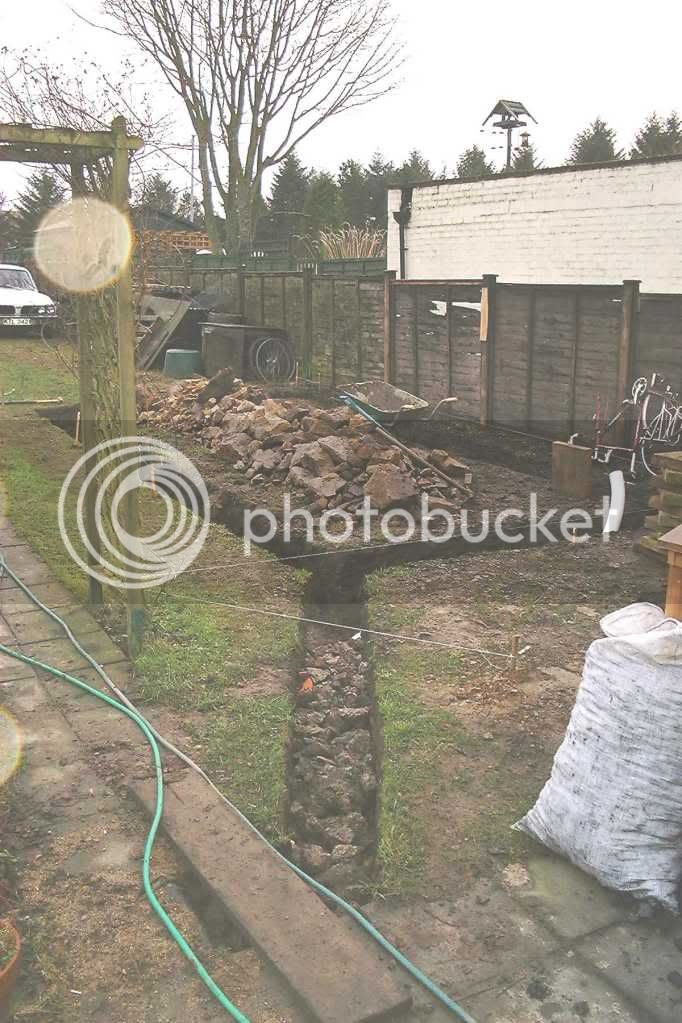
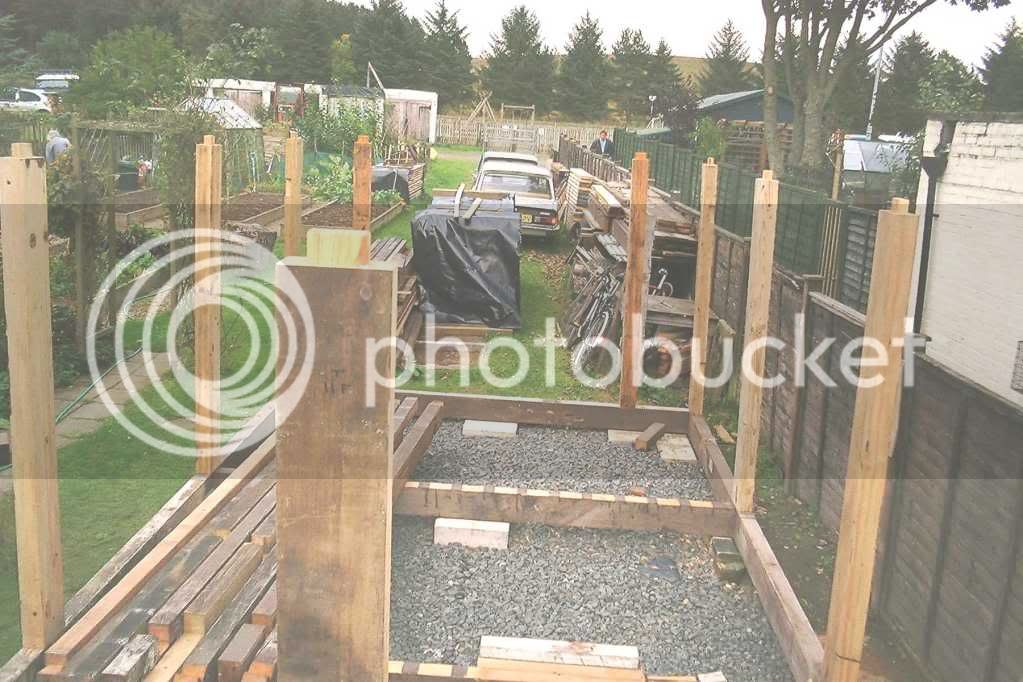
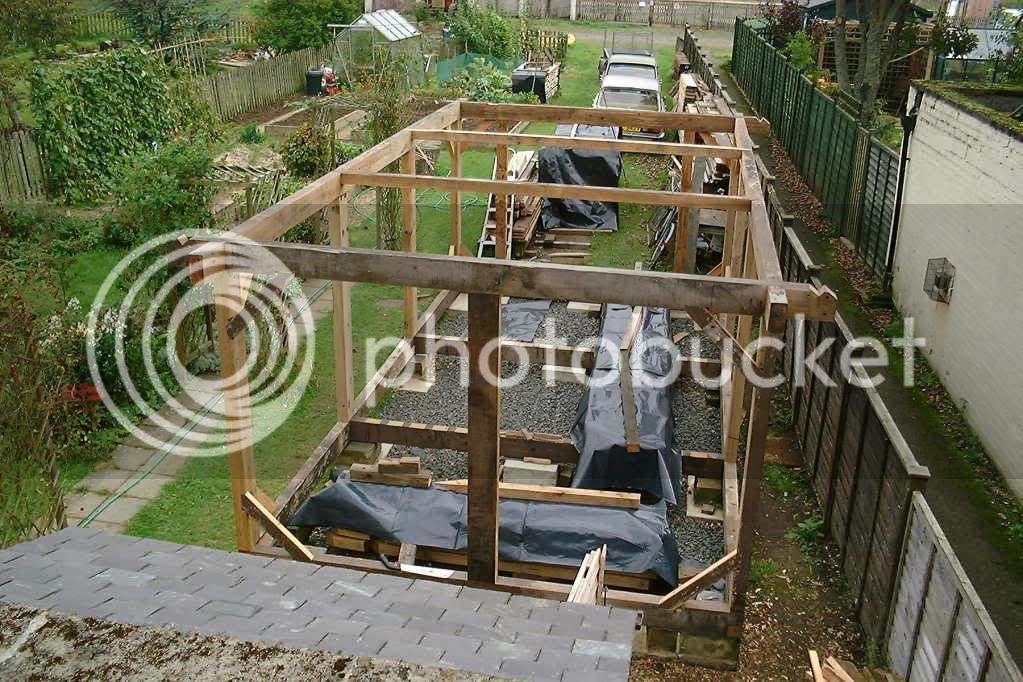
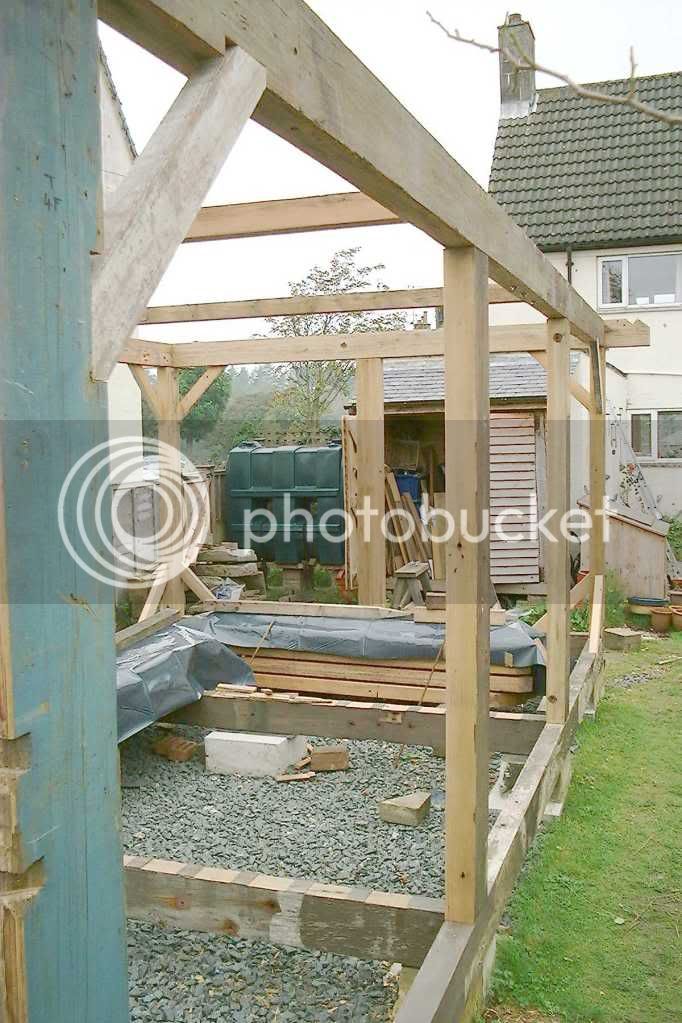
By this stage my head was swimming with ideas for different joints and methods of construction. To give you a picture before I started this build I had read loads of books which was helpful, but did induce building paralysis for 18 months.....so I did it all "wrong" and started without clear plans just rough ideas. I gave myself a kick up the backside by buying the timbers (longest were 23' !) stacking them in the back garden so everytime I went out there I saw them and thought I must start building. It worked.

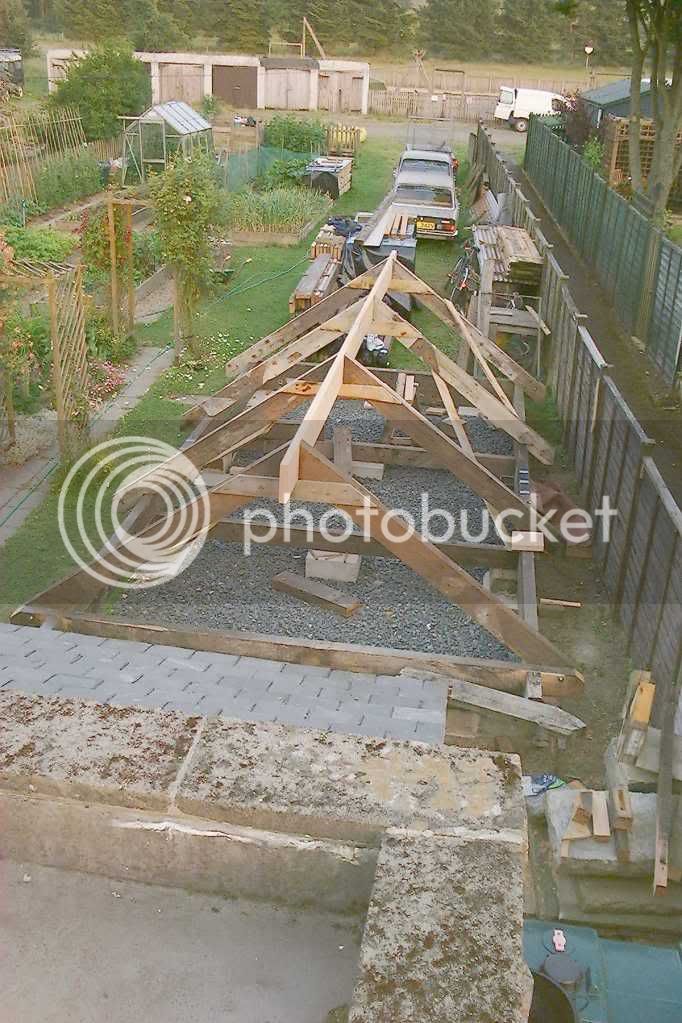
This a different view of the roof structure:
DSCF0059.jpg


I later added 3 sets of purlins. These were "red pine" from old council houses. As I bought more reclaimed timber through the project I found that what you actually got varied hugely. I am sure the main 8x4s consisted of 3 or 4 species and there was some yellow in with the red pine. It all looks grey when you buy it!

The best book I read was Stiles "Sheds". I bought a copy when I visited the Weald and Downland museum. Really good for inspiration. I used his design for my skylights, more of that later.
 
hi pitch pine


Martin it is nice to know others go down the over-engineered route.

to right mate it's the only way , being a carpenter / joiner it's got to be wood, anyway concrete is cold in winter when i work on the bench many years ago along side on the concrete floor we had to have duck-boards to stand on to stop your feet getting cold as we were right next to the slipway in Portland harbour about 1/4 mile from chesil beach not the place to be when we had a south westerly gale force nine blowing rattling the joiners shop to pieces believe me.hc
 
pitch pine":1hpm4r3e said:
Andrew yes it is a Dolomite. Extra points if you can work out which model!

1850 Sprint ?

And yes,also like the over-engineered approach to your construction :D

Andrew
 
HI pitch pine

just looking at your roof construction with braces attached, so I'm assuming it ready to be fix to workshop sides/framing when there constructed and ready, that's going to bloody heavy mate , how do you intend to lift it :?: hc
 
Hmmm.....this gets more curious!!

Why build the roof down there, and have the problem of not only lifting it up, but of it being in the way when you build the walls? Why not just build the walls first, then the roof?

Mike
 
maybe thats it all finished and he's actually only 1' 6" tall. :?:
 
Mike Garnham":1tpr2x8s said:
Hmmm.....this gets more curious!!

Why build the roof down there, and have the problem of not only lifting it up, but of it being in the way when you build the walls? Why not just build the walls first, then the roof?

Mike

I had presumed that that was a dry fit of the roof to check the dimensions and that he is going to disemble it then reasemble on top of the walls - or maybe as lee says he's actually a hobbit :D
 
I was going to post some picks of my shed, but now I feel like ripping it down and starting again :oops: :oops: :lol:

I must learn to think before nailing things together :wink:


Great work so far, watching with interest


Regards

Andy
 
must admit I wondered why the roof is sitting on the floor?
 
Dry fit is right, I am not at all hobbit sized! I did this to make sure it all would fit and getting it right "on the ground" was easier than in the air.

Yes bloody heavy is putting it mildly. When I did put it in situ it was tricky. One of the rafter pairs was really dense and saturated with resin. I put an offcut in water and it only just floated.....hernia time lifting long lengths of that.

Dibs I can't remember how long it took to do the trenches. I set off on the build with an attitude that it will take as long as it takes. Fortunately despite the hard physical work I really enjoyed it. I do remember using my 5 foot crowbar alot....lots of stone embedded in clay subsoil.

Dolomite is a 1500HL. Nice car but they like to rust.

More photos soon.
 
Just to keep you lot happy and to deal with the viscious rumours about my height here are some posts:

DSCF0068.jpg


Another angle showing the tenons:

DSCF0070.jpg


You can see the recesses I cut to take the braces. I didn't have the confidence to do them properly ie fully tennoned into the frame, but what I did gave a really stable frame.

Off to bed now.
 
What solid construction!
Noticed the bird feeder from next door, looks like an observation post. Does it hide cctv? :twisted:
 
so next stage was to fit the wall plates:

DSCF0080.jpg


The braces are in place and made the frame very rigid. The 2 central "tie beams had dovetail joints to lock them into place and were housed 1" into the wall plate....my fanciest joinery yet!

DSCF0086.jpg


Here's some detail showing one of the braces. They were cut from 2" pitch pine.

DSCF0097.jpg


Now the roof attached to the rest of the frame. The boards stacked on the left are the cladding.

More soon.
 
Back
Top