Wadkin PP Rebuild (Picture Heavy)

UKworkshop.co.uk

Help Support UKworkshop.co.uk:

This site may earn a commission from merchant affiliate links, including eBay, Amazon, and others.

GK1

Established Member
Joined
9 Nov 2012
Messages
45
Reaction score
0
Location
Yorkshire
Following the advice given earlier about turning the arbor down to 30mm I'll post some pictures here. It's still a work in progress though substantially complete. The colours are a bit variable due to the mix of natural and fluorescent lighting in my workshop fooling the white balance on my camera.

Here's the machine as received with a temporary power supply:
Wadkin PP
Wadkin%2520PP-101-20121119%2523DSC00406.jpg


Fence arrangement with missing fine adjustment knob:
Wadkin PP
Wadkin%2520PP-102-20121119%2523DSC00418.jpg


Extractor outlet with cast dust deflector removed:
Wadkin PP
Wadkin%2520PP-103-20121119%2523DSC00420.jpg


Interior. The footbrake cable is missing and two of four grease tubes are damaged:
Wadkin PP
Wadkin%2520PP-104-20121119%2523DSC00414.jpg


Sliding table which made a slight scraping noise when traversed:
Wadkin PP
Wadkin%2520PP-105-20121120%2523DSC00433.jpg


Cast table and sliding table removed:
Wadkin PP
Wadkin%2520PP-106-20121120%2523DSC00443.jpg


Basic clean up:
Wadkin PP
Wadkin%2520PP-107-20121122%2523P1030076.jpg


Arbor and blade housing, the front chip cover is missing and a new one will need to be fabricated:
Wadkin PP
Wadkin%2520PP-108-20121122%2523P1030077.jpg


Electrical start and stop buttons removed:
Wadkin PP
Wadkin%2520PP-109-20121122%2523P1030078.jpg


Canting trunnion. I didn't disturb the factory fitted pins:
Wadkin PP
Wadkin%2520PP-110-20121122%2523P1030085.jpg


More to follow.
 
I wasn't sure how much work would be required for this machine. Identifiable problems were:

Slight scraping noise from the sliding table.
Rise and fall mechanism too stiff to work.
Missing footbrake parts.
Damaged grease pipes.
A few missing knobs.
Missing chip/blade cover part (not guarding; within the machine)

The sliding table, I was planning on rebuilding anyway.
The rise and fall mechanism was sorted out with a thorough clean and oil.
The footbrake parts were obtained from my local bike shop.
The grease pipes were repaired with some spare tube I had knocking about the workshop.
Missing knobs and chip cover will have to be sourced or made.

In addition I planned to replace the arbor bearings and, of course, repaint it.

The machine was extremely grubby, but apart from these minor issues seemed complete and working. At an early stage I decided there was no point in lifting out the entire saw assembly - I could clean and repaint it just be moving the assembly up and down and at various angles.

So, that's what I did.

I gave the castings a basic rub with sandpaper and wire wool. No stripping, really, and brush painted it with machine enamel and zinc oxide primer internally.

View with arbor removed:
Wadkin PP
Wadkin%2520PP-111-20121201%2523P1030123.jpg


And again:
Wadkin PP
Wadkin%2520PP-112-20121201%2523P1030124.jpg


Main body painted inside and out:
Wadkin PP
Wadkin%2520PP-113-20121130%2523P1030116.jpg


Start and stop buttons. I decided to leave the existing paintwork on the button housing, as that wear pattern was just so nice (!) and I would probably spoil it by trying to brush around all those details:
Wadkin PP
Wadkin%2520PP-114-20121202%2523P1030130.jpg


Another view of the buttons:
Wadkin PP
Wadkin%2520PP-115-20121202%2523P1030132.jpg


Footbrake arrangement re-assembled, awaiting brake cable:
Wadkin PP
Wadkin%2520PP-116-20121201%2523P1030127.jpg


Footbrake pedal:
Wadkin PP
Wadkin%2520PP-117-20121201%2523P1030129.jpg


Interior showing grease nipples. I replaced two of the corroded metal conduits with modern plastic flexy conduit (not fitted in this picture):
Wadkin PP
Wadkin%2520PP-118-20121201%2523P1030125.jpg


Riving knife in place. I think in addition to the slot it's been drilled to take a smaller blade:
Wadkin PP
Wadkin%2520PP-119-20121202%2523P1030133.jpg


Fully canted and lowered, I could get almost everywhere with a paint brush:
Wadkin PP
Wadkin%2520PP-120-20121202%2523P1030135.jpg


Canting and rise and fall gearboxes are fully enclosed, I didn't disturb them apart from removing the winding handles. They're fully greased up:
Wadkin PP
Wadkin%2520PP-121-20121202%2523P1030136.jpg


Riving knife support:
Wadkin PP
Wadkin%2520PP-122-20121204%2523P1030153.jpg


Cast table top repainted and awaiting some manual labour for re-fitting:
Wadkin PP
Wadkin%2520PP-123-20121203%2523P1030141.jpg


New electrical conduit. I found that modern 20mm plastic fittings could be force-threaded into the old 3/4 inch metal fittings. The brake cable is connected but is awaiting proper routing:
Wadkin PP
Wadkin%2520PP-124-20121204%2523P1030159.jpg


More to follow
 
Looks like you're doing a very good job.
Out of interest what's your time invested in it so far.
Good work
Danny
 
Danny, I'm into week 4 more or less full time. That includes errands to get bits and pieces and it includes 2 days spent trying to get the pulley nut off the shaft. Includes time for machining the arbor. Oh, and I had a couple of false starts with the painting as well. First colour was a sort of turquoise, close to the colour of some apparently untouched parts, but it looked far too bluey to me. So I got some RAL6011 green as mentioned somewhere and this turned out to be a bright modern green, so that sort of offended me as well. So I mixed the two together for take three and got a better match, not too far from the colour of the start buttons.

However - the back of the fence plate casting is definitely blue. I've left it unpainted as reference. My second picture shows it as green, but it's not, it's blue, there's weird lighting things going on. So I have a suspicion that the original colour may have been blue.

Here's the story of the arbor:

If there is a special spanner for the locknut I don't have one, I had to make something out of mild steel bar. But even after a couple of days of applying lots of penetrating oil and more heat than I would like, the nut couldn't be freed. I tried the firm hit with a hammer on my makeshift spanner a few times. The nut is quite deep in the pulley so it's not easy to get purchase on it:
Wadkin PP
Wadkin%2520PP-125-20121124%2523P1030090.jpg


Eventually I decided to take drastic measures and worry about the nut afterwards. I was worried about damaging something or stressing the arbor which was held at the other end. A bit of work with a drill:
Wadkin PP
Wadkin%2520PP-126-20121125%2523P1030092.jpg


The pulley itself slid off the arbor easily:
Wadkin PP
Wadkin%2520PP-127-20121125%2523P1030093.jpg


Revealing the rear ball race, a double row self aligning type:
Wadkin PP:
Wadkin%2520PP-128-20121125%2523P1030094.jpg


More time was taken up puzzling over how to get it out. It's a tight interference fit into the casting. Then there was that steel pin driven into the side - what's it for? I worried that it was some kind of retainer so called AL Dalton who said they couldn't identify it and that the bearing should tap out. The part visible in this picture, the circular spacer, was turned around and this made a perfect block to tap out the bearing. I used a lump hammer over a piece of wood and it took about a dozen taps, each one moving it just a few mm.

Once out, it became clear that the steel pin was a redundant grease nipple, the existing grease nipple has been re-fitted as shown in this picture. But I didn't know that at the time.
Wadkin PP
Wadkin%2520PP-129-20121126%2523P1030104.jpg


Here's the arbor with the new bearings awaiting fitting. Plus I have to sort out a new pulley nut, Dalton's don't have them:
Wadkin PP
Wadkin%2520PP-130-20121126%2523P1030108.jpg


The arbor would only just fit in my lathe for work at both ends:
Wadkin PP
Wadkin%2520PP-131-20121203%2523P1030137.jpg


The saw end was turned down to 30mm. I decided to leave the part that takes the innermost flange at the original 1¼" diameter:
Wadkin PP
Wadkin%2520PP-132-20121203%2523P1030139.jpg


Here's the saw end of the arbor, the innermost flange, the spacer which gets removed for dado sets, and a Whitehill bush, it's a really close fit on the new diameter:
Wadkin PP
Wadkin%2520PP-133-20121204%2523P1030144.jpg


At the pulley end, I turned the 1 1/8" 14 tpi thread off, down to 1", and threaded it 1" UNF. Then I took two standard UNF nuts and narrowed them down a bit:
Wadkin PP
Wadkin%2520PP-134-20121204%2523P1030143.jpg


Here's the pulley back on with two standard nuts:
Wadkin PP
Wadkin%2520PP-135-20121204%2523P1030145.jpg


And the saw end:
Wadkin PP
Wadkin%2520PP-136-20121204%2523P1030147.jpg


With the flange:
Wadkin PP
Wadkin%2520PP-137-20121204%2523P1030148.jpg


And with the dado spacer and bush ready for a 30mm blade:
Wadkin PP
Wadkin%2520PP-138-20121204%2523P1030149.jpg


More to follow
 
Fantastic piece of kit and really interesting to see how you've been refurbishing it, thanks for taking the time to post.

Cheers, Paul
 
Looking very good. Thanks for showing it. Quite a bit of heavy working. Getting it clean to start must have been the worst part. It will now live on long after you.....if you follow the compliment! Best wishes.
 
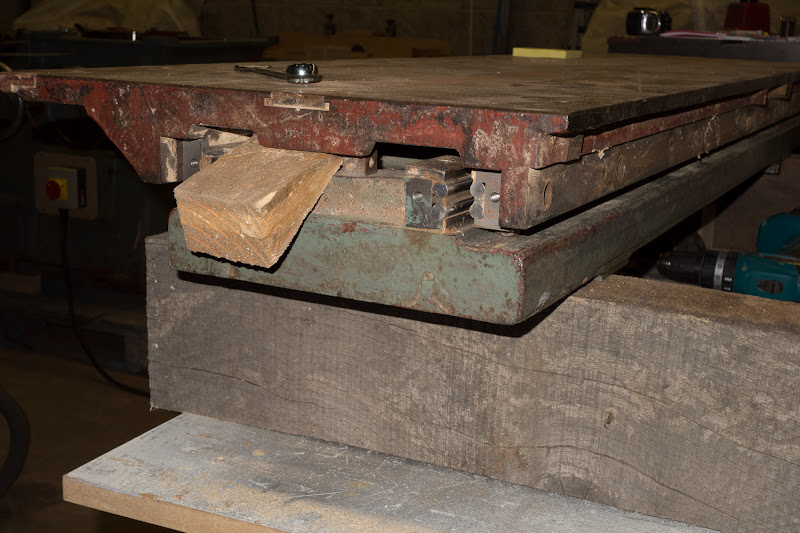
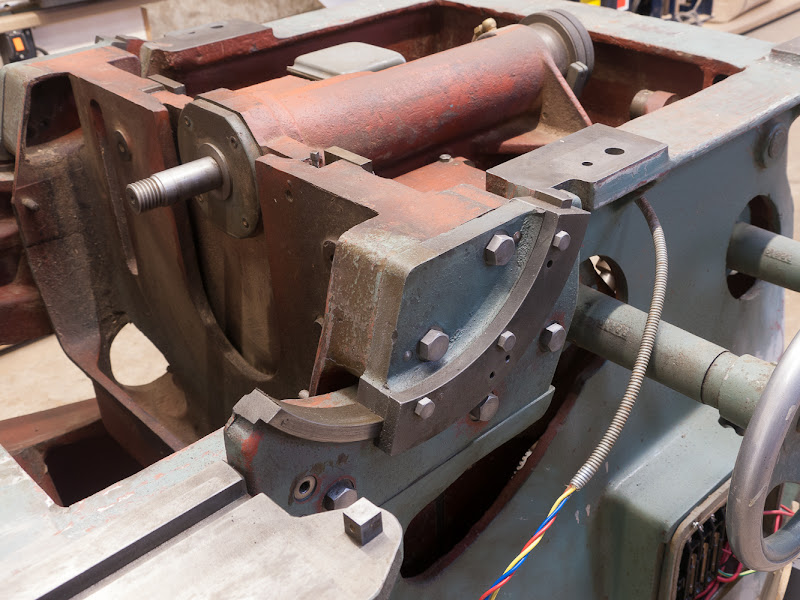
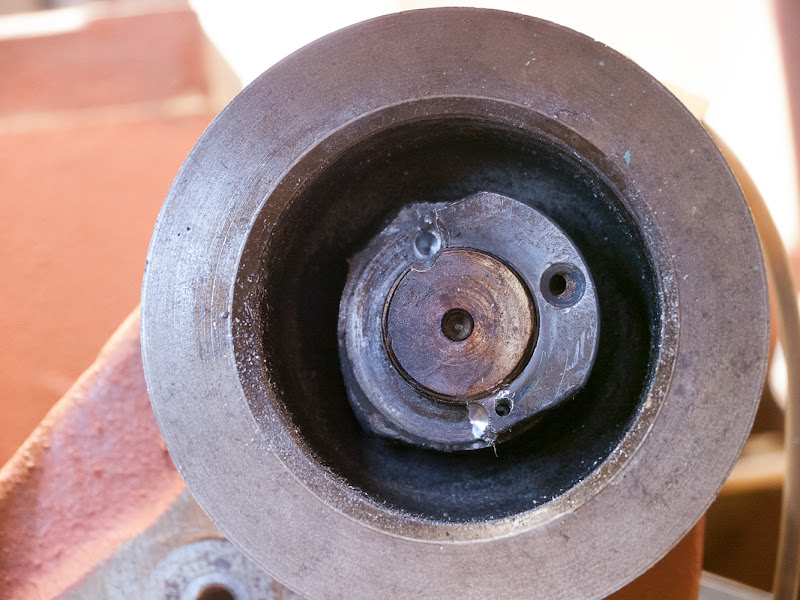
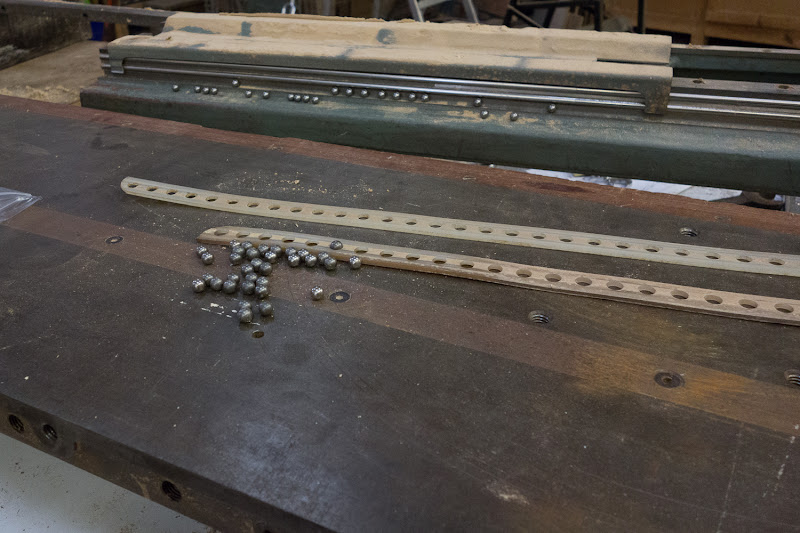
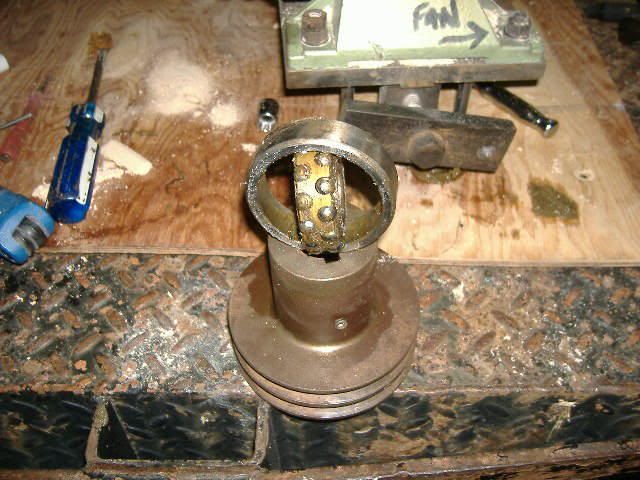
The sliding table was making a slight catching noise. I unbolted the bearing housings on the sliding part so the theory was that the table would lift off and leave the bearings in place on the fixed part. Not quite. After lifting the top table off, two persons required with ball bearings falling everywhere, the cause of the catching sort of became apparent. You can see the two nylon ball bearing retainers and still on the fixed part, the bridge piece which has the shape of the retainers on the side skirts.

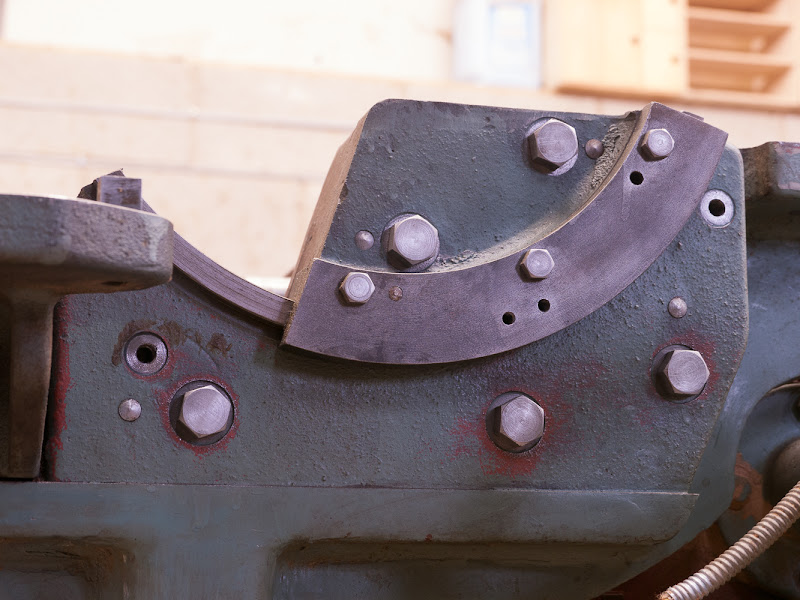
The nylon retainers were actually too long to fit in the space on the bridge piece. Maybe they had stretched a bit with continual use, but one end of each was just tucked behind the metal bridge piece, you can see the left hand end is a bit worn where it's been catching on something.

I cut 4-5mm off the length of each nylon retainer so they each fit snugly in the bridge piece.

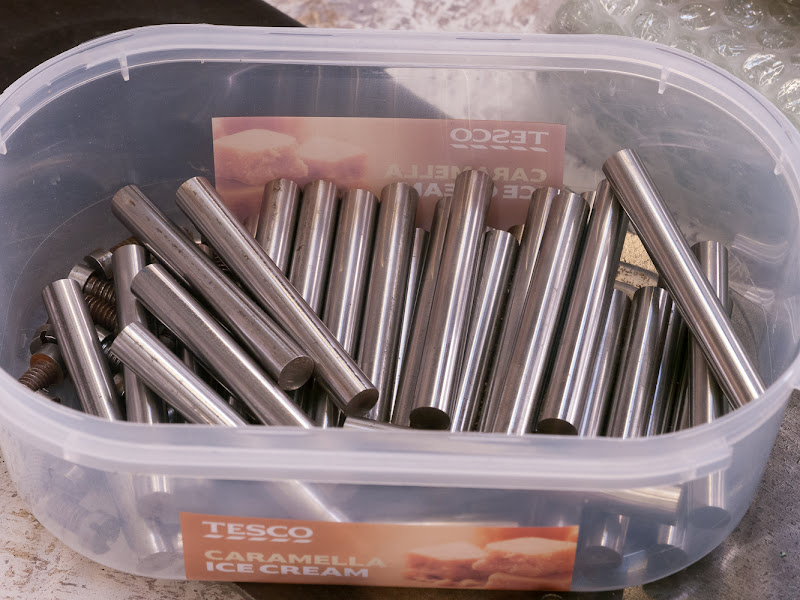
The ball bearings were a bit grey but they were being replaced anyway with high quality stainless steel bearings.
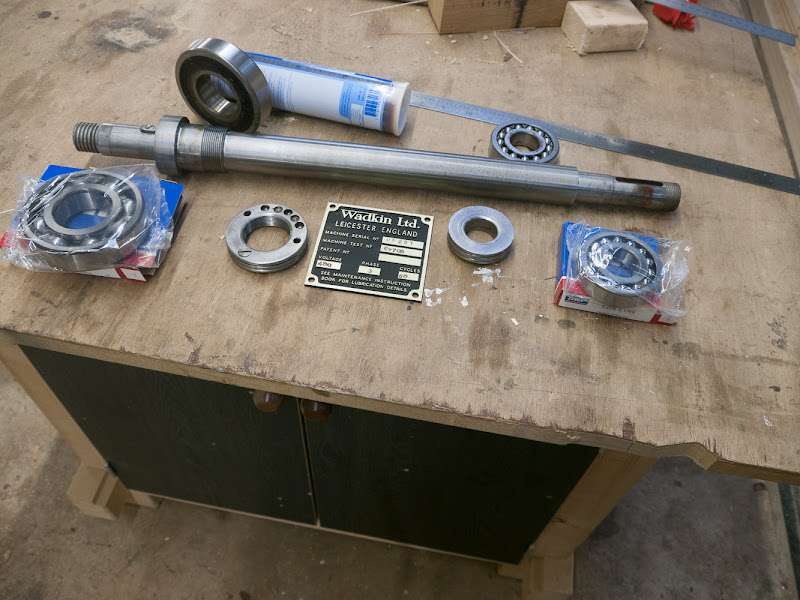
Wadkin PP
Wadkin%2520PP-139-20121120%2523DSC00441.jpg


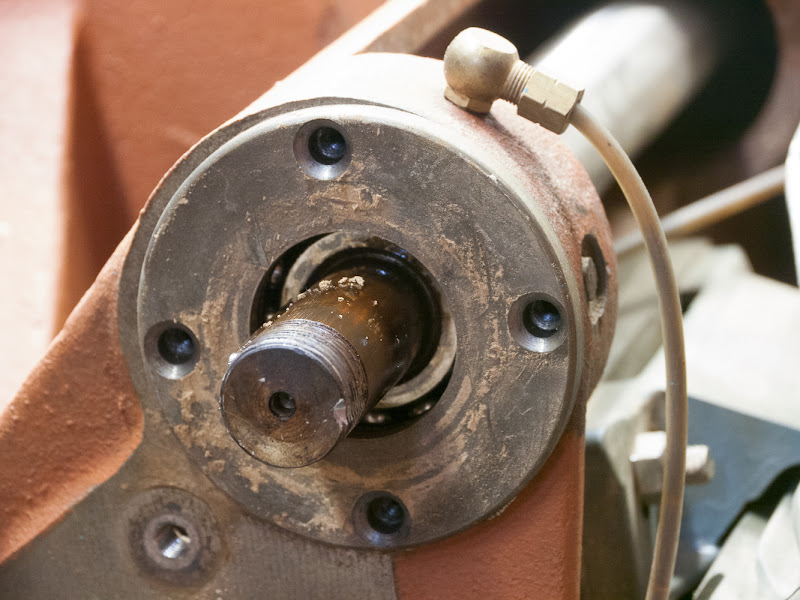
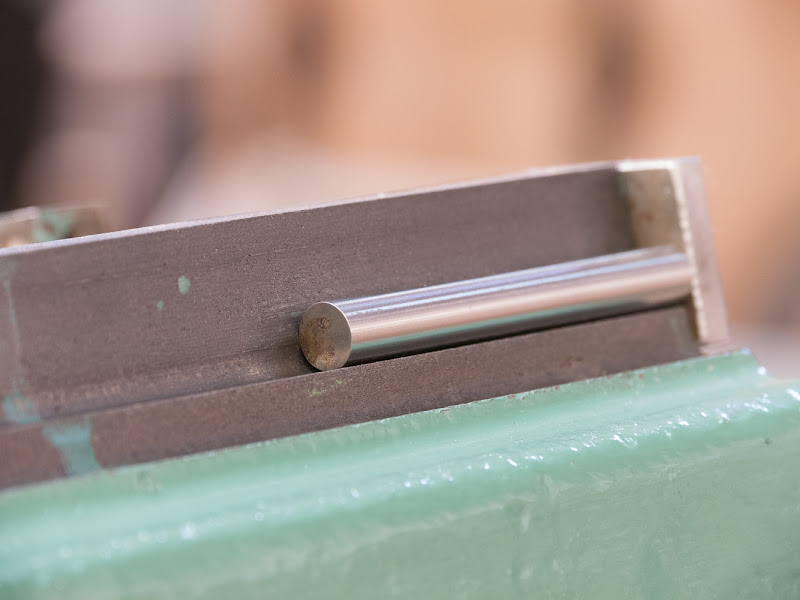
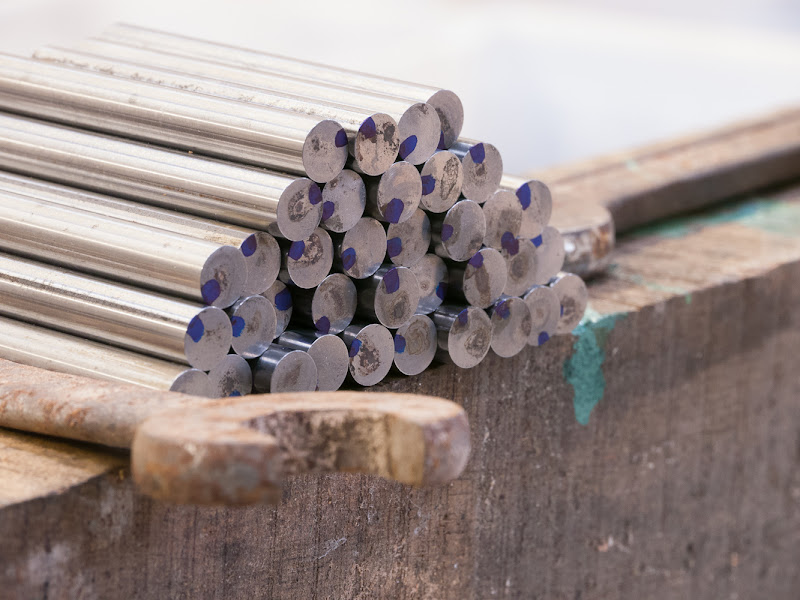
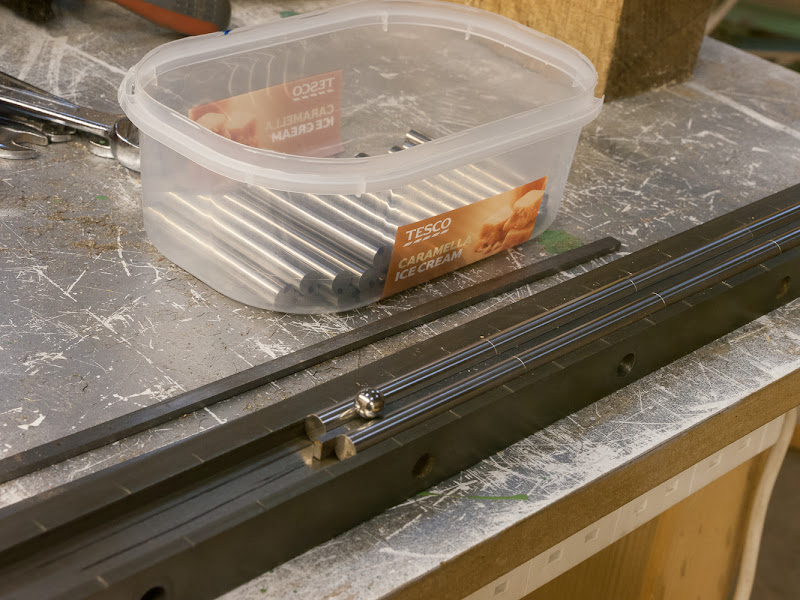
The sliding table travels on 144 steel rods, 3/8" diameter. By running a fingernail round each one, it's just possible to tell that there's a slight flat.
Wadkin PP
Wadkin%2520PP-140-20121205%2523P1030171.jpg


It was straightforward to dismantle the fixed part bearing housing and remove the rods. The casting looked like it had been machined last week. Here's the first steel rod going back, I made sure that the tiny flat was no longer in the line of the ball bearings. Effectively, a brand new section of rod was being presented to the ball bearings.
Wadkin PP
Wadkin%2520PP-141-20121205%2523P1030164.jpg


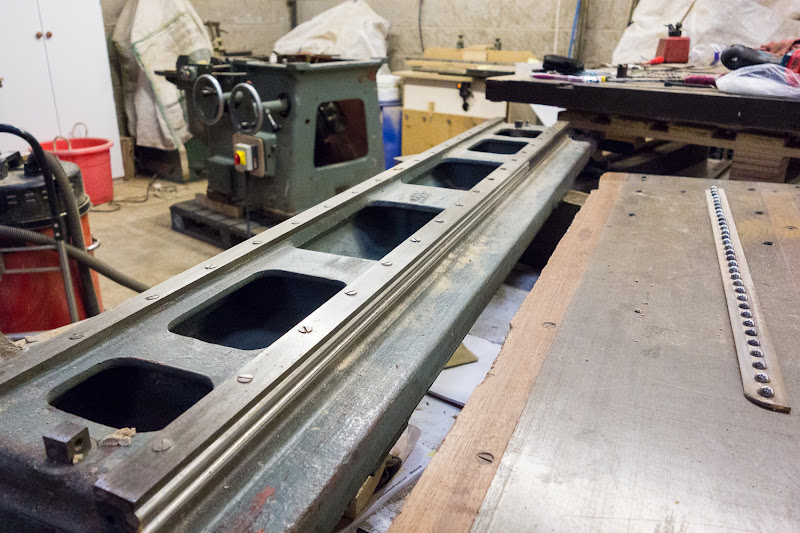
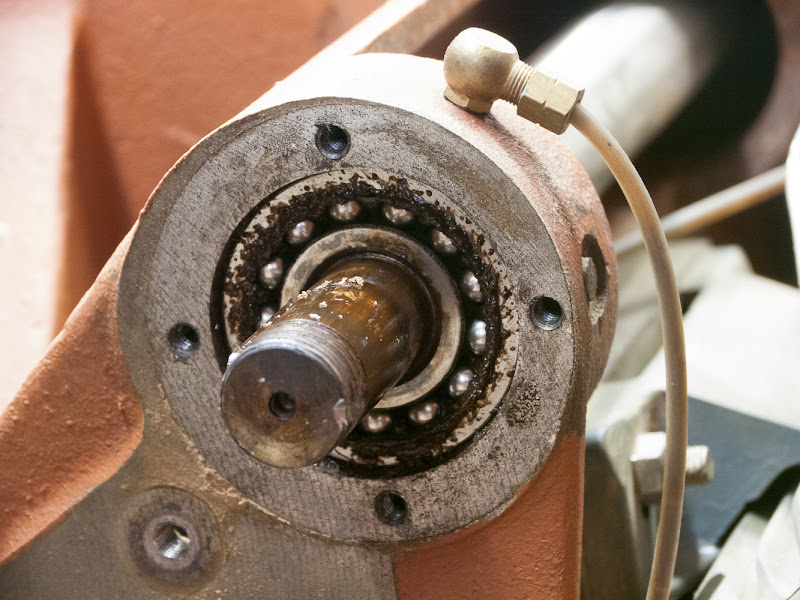
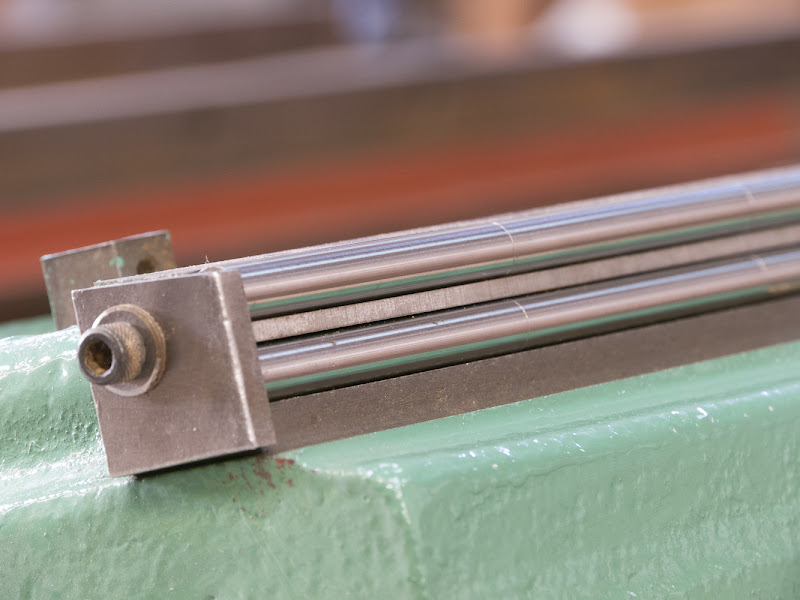
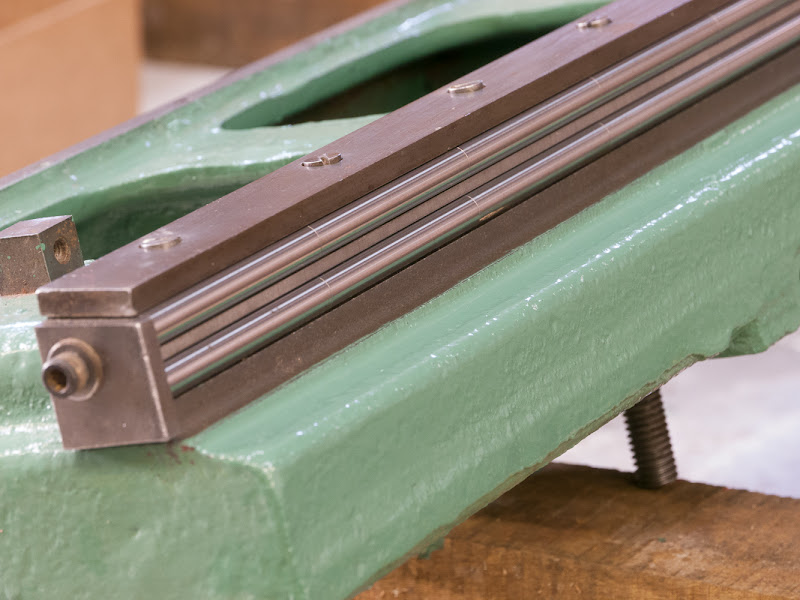
There's a line of steel rods, a steel spacer, and another line of rods, topped off with a steel bar which clamps it all down tight:
Wadkin PP
Wadkin%2520PP-142-20121205%2523P1030169.jpg


There's a cheese head machine screw for every position of steel rod, 18 each side in total, not taking any chances here that something might work loose:
Wadkin PP
Wadkin%2520PP-143-20121205%2523P1030170.jpg


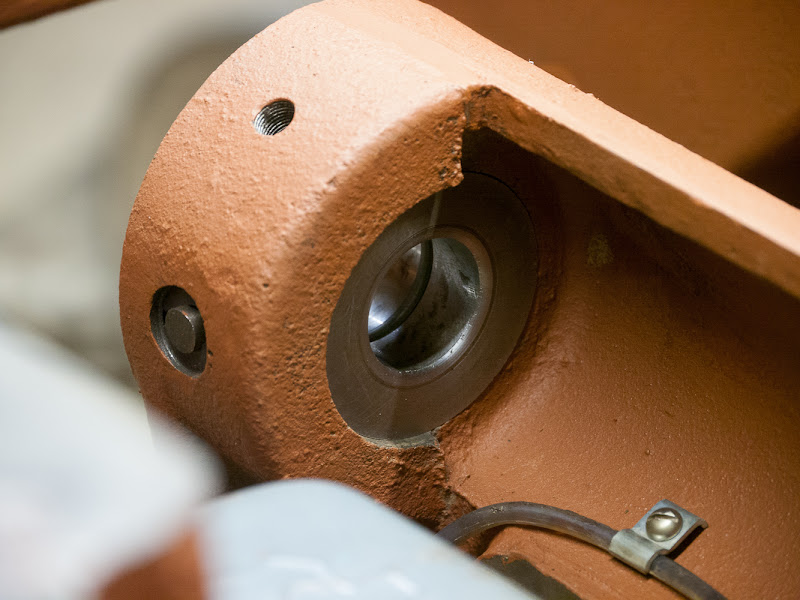
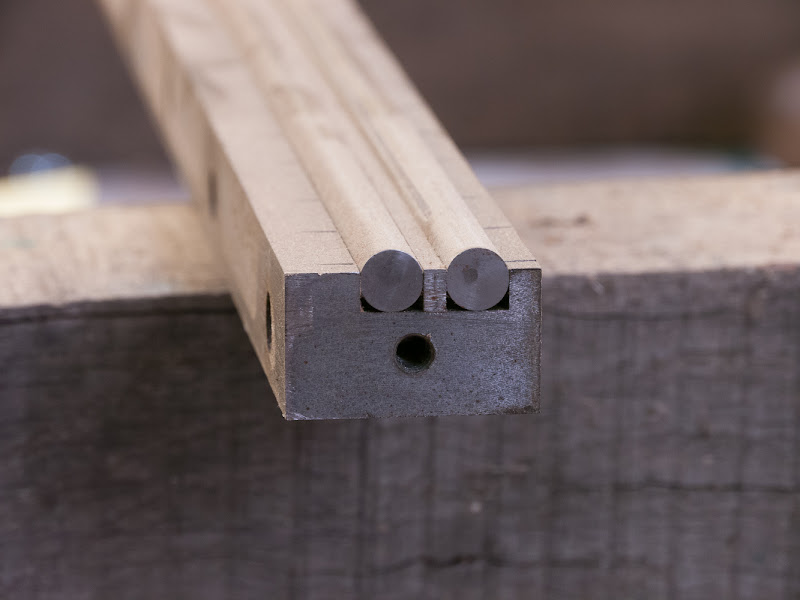
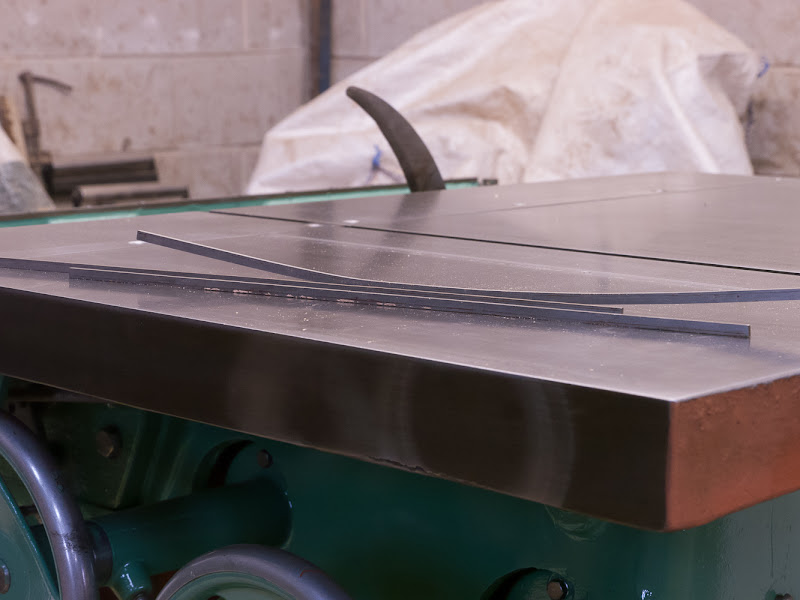
The sliding part of the table was tricky. The rods are press fitted into a channel, the channel is fixed one side of the sliding table and adjustable the other. But I couldn't tell how hard it was going to be to get them out or if they had been pressed in on a machine. You can just see the wear line on the rod here:
Wadkin PP
Wadkin%2520PP-144-20121206%2523P1030172.jpg


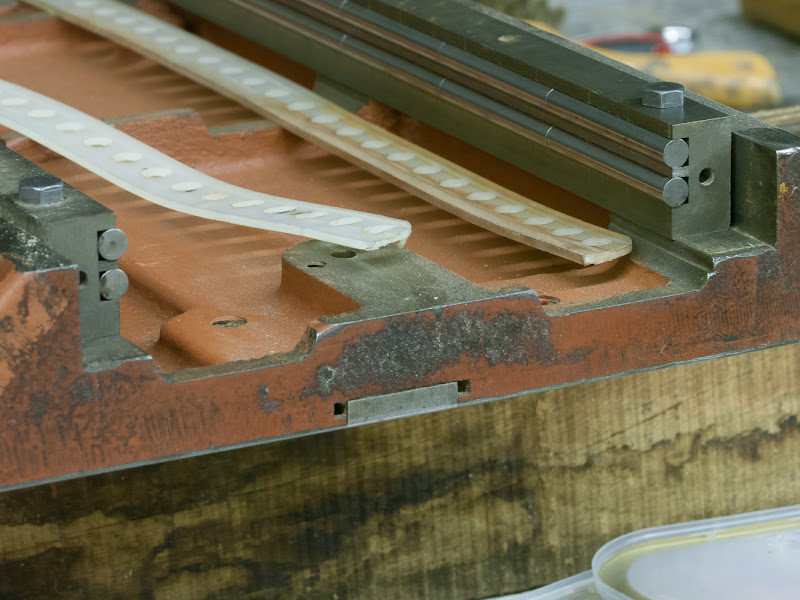
I couldn't prise the rods out for fear of damage. So I had to prise out the centre steel strip. I hoped that after the first lift, the rest of the bar would pop out, but no, it was so securely held that it didn't move at all until the narrow screwdriver was well underneath the bar. Having started the job and being committed, I had to continue and accepted that the separator bars were going to get bent.
Wadkin PP
Wadkin%2520PP-145-20121206%2523P1030174.jpg


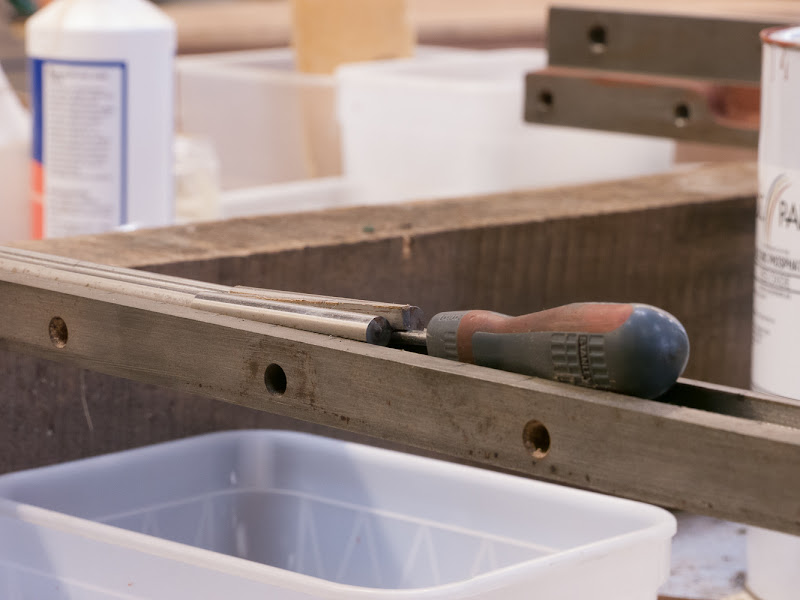
After removing all the rods and cleaning them up, I marked the wear line on each one, for quicker re-assembly:
Wadkin PP
Wadkin%2520PP-146-20121206%2523P1030175.jpg


The steel bars were fairly easy to straighten out and didn't appear to be any worse for the experience:
Wadkin PP
Wadkin%2520PP-147-20121206%2523P1030176.jpg


The bearing housing was easy to re-assemble, a line of 6 steel rods, put the separator bar in, then press the other 6 rods in the gap. Do this three times for each housing. This took a firm press with a piece of wood. Then double check that the bar and rods are fully seated, and make sure there's clearance under the ball bearing:
Wadkin PP
Wadkin%2520PP-148-20121206%2523P1030180.jpg


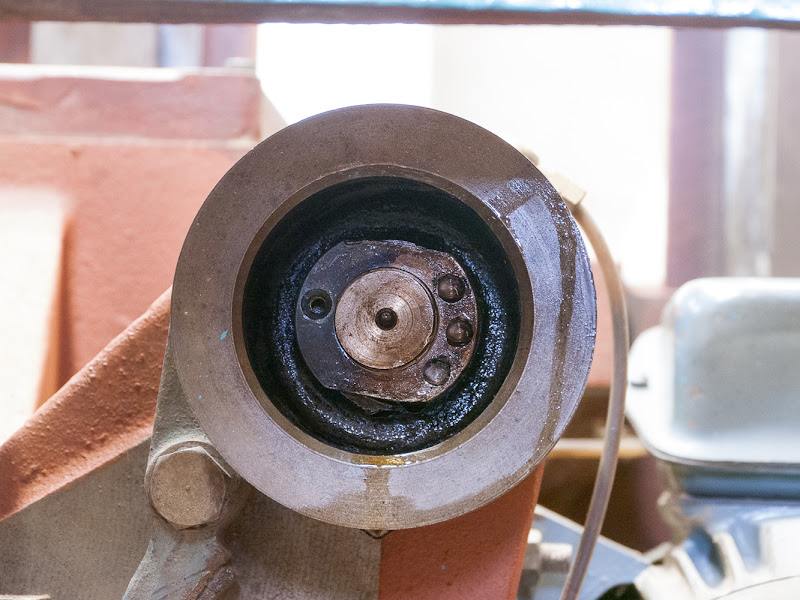
Here the top part of the sliding table is re-assembled and ready for turning over and putting on the fixed part, then insert the ball bearings in the nylon retainer and slide in:
Wadkin PP
Wadkin%2520PP-149-20121206%2523P1030181.jpg


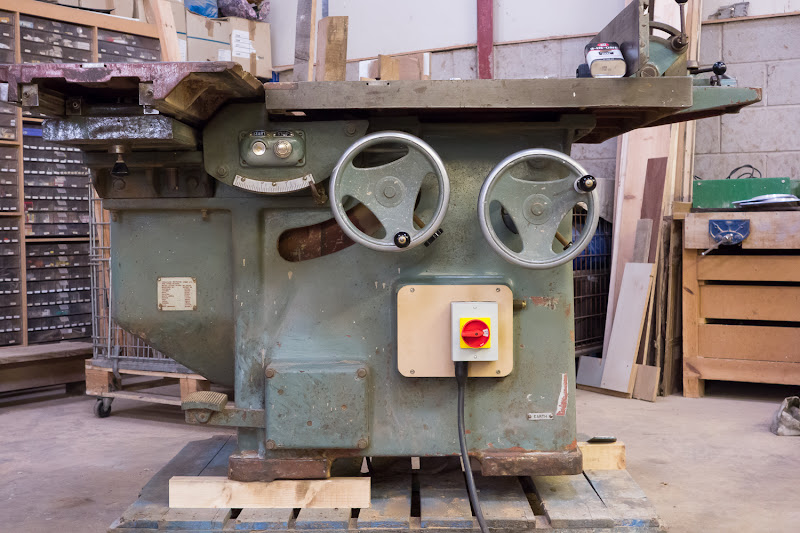
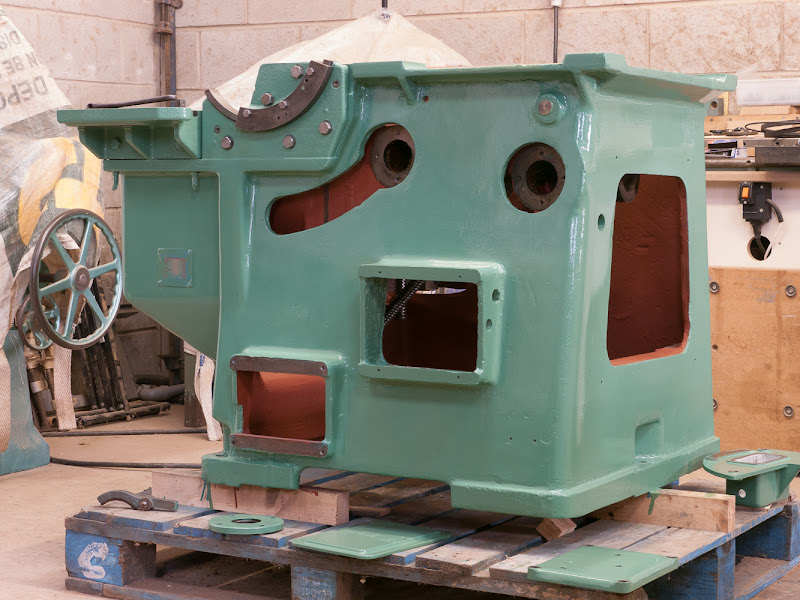
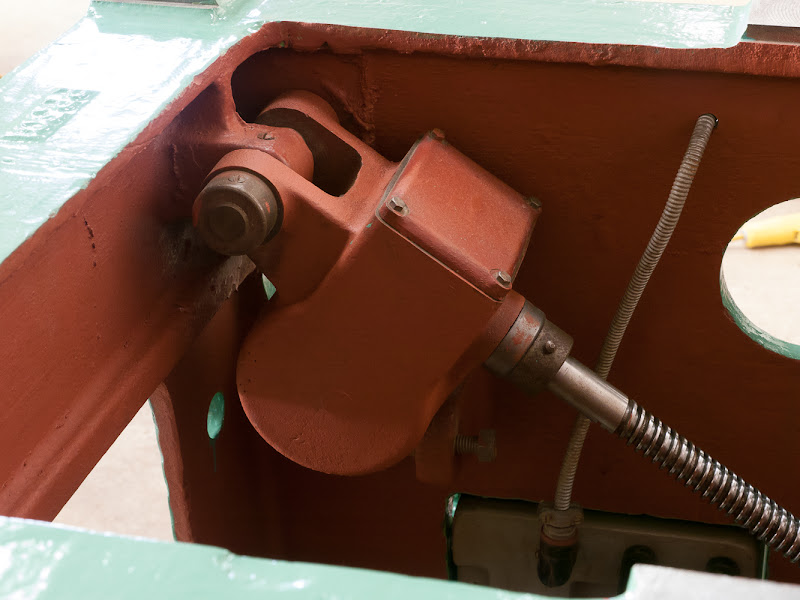
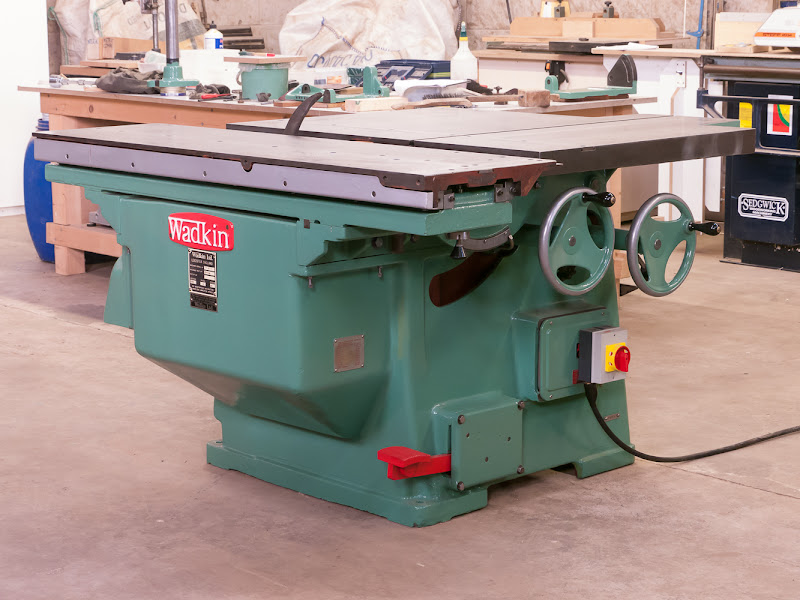
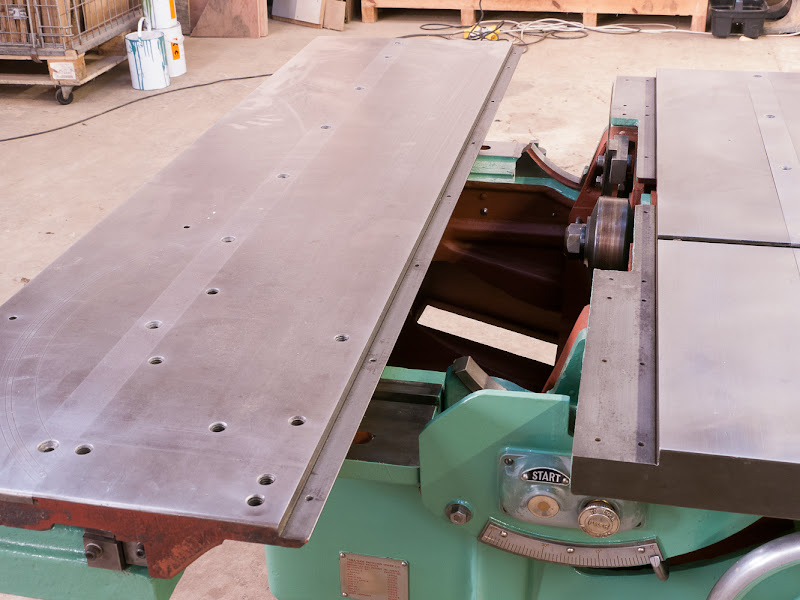
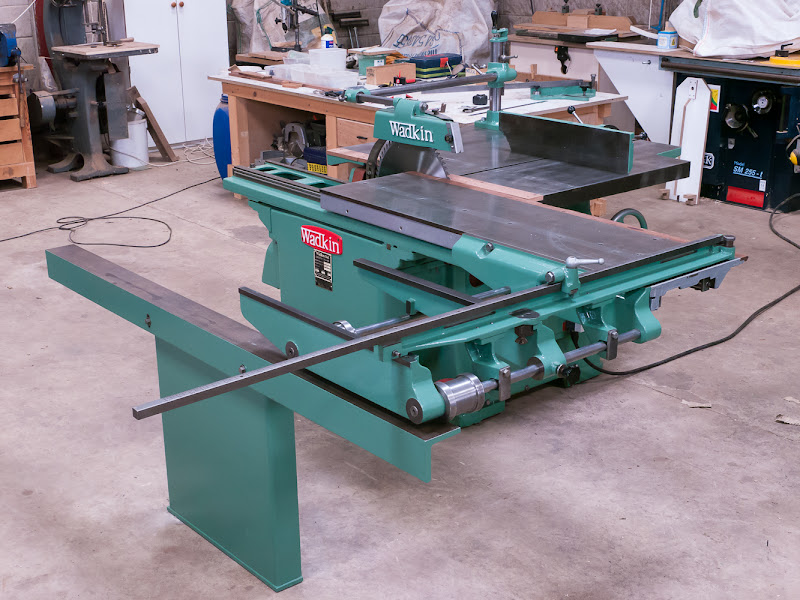
Here's a general view of the machine so far. It came off the pallet to its home position today. The sliding table is the nominal 4' model but it has about 54" of travel. Earlier I said that I didn't disturb the pins that were factory fitted. The sliding table is supported on 4 adjusters, 2 at each end and bolted to the main casting - I was prepared for some adjustment here. Maybe I would have to knock out the pins, slacken off the bolts and realign. A straight edge across the tables showed that they are in perfect alignment. The sliding table should be as good as new, with new ball bearings and and with the rods rotated to an unworn side. It's a heavy table but it rolls beautifully and even freewheels a little.
Wadkin PP
Wadkin%2520PP-151-20121209%2523P1030191.jpg


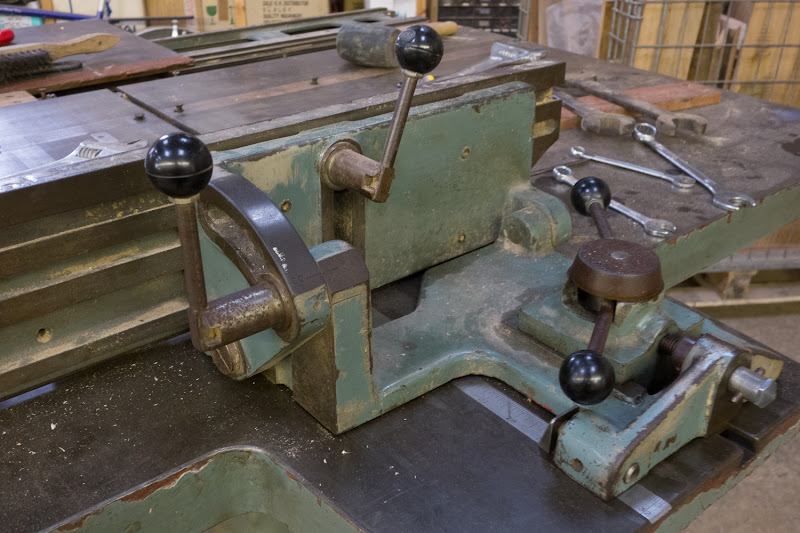
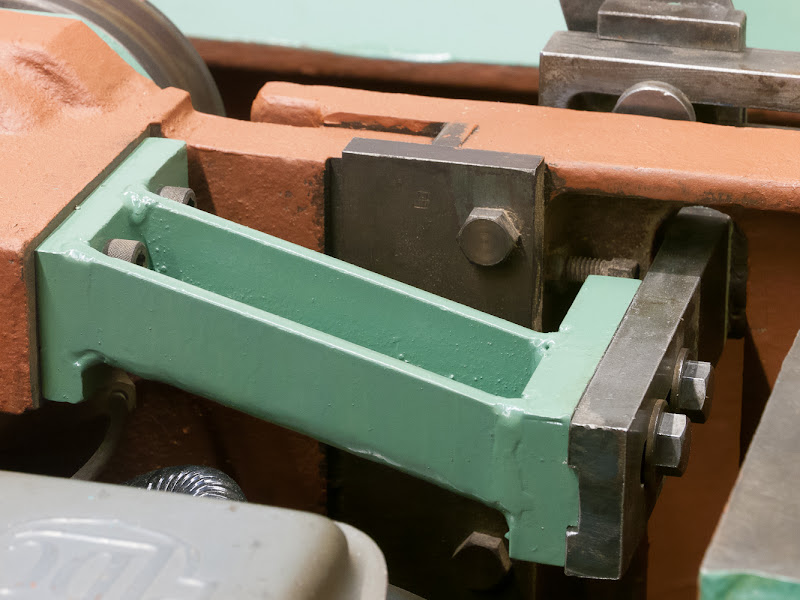
Here's the sliding table moved out for blade access. It's referenced to its home position by adjusters and stops on the main casting, that's something I'll deal with later:
Wadkin PP
Wadkin%2520PP-152-20121209%2523P1030195.jpg


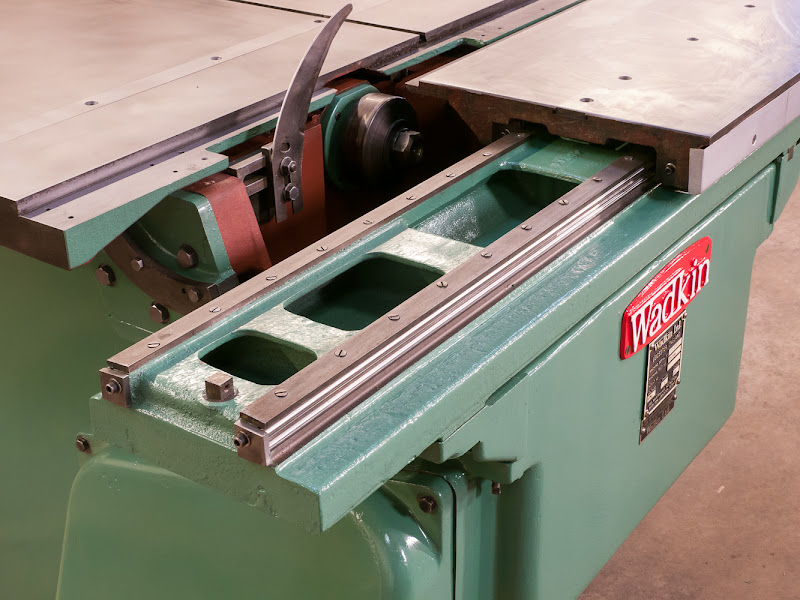
This view shows the table fully extended:
Wadkin PP
Wadkin%2520PP-153-20121209%2523P1030196.jpg


More to follow
 
Nice work, its good fun playing with big old wadkin things. I've got the pp's older and slightly more handsome brother the pk.
Mark
 
Absolutely mind-boggling work!

It is amazing to see what goes into the engineering to ensure that the table of that size and weight moves freely and you get into some serious bottom clenching moments with removing things when all the balls scatter to the four winds in doing so!

You can see why these beauties cost so much to buy even way back then and how they were built so survive until now...and then be refurbished to take on another lifetime!

Superb pieces of restoration with wonderful pictures and description!

Bravo my friend!

=D> =D> =D>

Jimi
 
very nice job on the PP. The Wadkin PP was the last of the timber dimention saws wadkin made and improved on the PK. Though the PP could be had with a direct drive motor (really PK casting parts in place of your belt drive) the belt drive did do more for the saw than anything.

Your bearing seam off to me as I have come across in the sawblade end of the arbor 6309 bearing open and the back is open also. It was original to the saw as the bearing said Hoffman- England and FFY on the outer race. It is hand etched with 1/330 on it. It has 2 rows of balls bronzes cage self inlining. Not cheap.

wadkinppbearings_zps95bca03e.jpg

Also the switch control station is off a much later Wadkin than yours(WW11 ) some one must have changed it at some point. I think thoses are the best looking conrol switches thats wadkin had made by Brooks and I can see why some one would do it.

thanks for sharing and great hand painting work

jack
English machines
 
Thanks for all the comments.

Jack, I've seen some of your stuff and Mark's (wallace) too, very interesting and they both gave me an idea of what's possible although I haven't done a back to metal restoration.

The new bearings in my PP are the SKF 6309 and SKF 1306, per the downloadable manual, both open types, and yes the double row one was expensive. The one in mine had a metal cage and I think the new one has a plastic cage. The previous front bearing was a sealed type and presumably not original, the machine must have had some work including altering the grease inlet.

Jack, if you have a PP picture gallery I haven't seen it, do you have a link for anything?

So far I've been really pleased with mine, I bought it blind apart from a tiny on-line auction image and a 3-word description (I know, I know …) but I've got one that seems to have almost everything that it would have been supplied with. I was so pleased it was the belt drive model, I didn’t know till I went to pick it up.
 
Here's the auction picture of the saw in-situ at its previous home:
Wadkin PP
Wadkin%2520PP-150-2-1-2012102316529_large%2520%2528Wadkin%2520PP%2529.jpg


And the almost completed machine:
Wadkin PP
Wadkin%2520PP-101-20121217%2523P1030218.jpg
 
WOW WOW AND WOW!!!

We certainly have an elite group of people capable of doing wonderful things to the giant beauties here on UKW

And now we have another! These restorations and the detailed WIP information stand as definitive guides for other brave folk to follow.

GK1...that is absolutely marvellous!

=D> =D> =D> =D>

Jim
 
GK1 - I just picked up a Wadkin PP saw and am hoping you might have some insight that could be helpful.

The foot pedal cuts power to the motor just fine, but the mechanical portion of the brake is not working. I checked inside the casting via the side door and there is a cable that runs from the foot pedal up to the casting for the saw arbor. I'm wondering if there is an adjustment or something of that nature to take up some of the slack. I'm not too familiar with working on brake cable lines like this. It appears to be the same sort of deal as you'd find on the hand brakes for a bicycle.

Any thoughts are greatly appreciated.

It won't let me post a link to the other thread, so I can't pass along those pictures...

Thanks!
Matt
 
Back
Top