Toy farm birthday- finally FINISHED !

UKworkshop.co.uk

Help Support UKworkshop.co.uk:

This site may earn a commission from merchant affiliate links, including eBay, Amazon, and others.

ColeyS1

Established Member
Joined
2 Nov 2009
Messages
4,245
Reaction score
35
Hi all,

I agreed to make my work mates son a toy farm for his birthday. I use to have one when i was a nipper so dragged it out from the attic.

691a868d.jpg


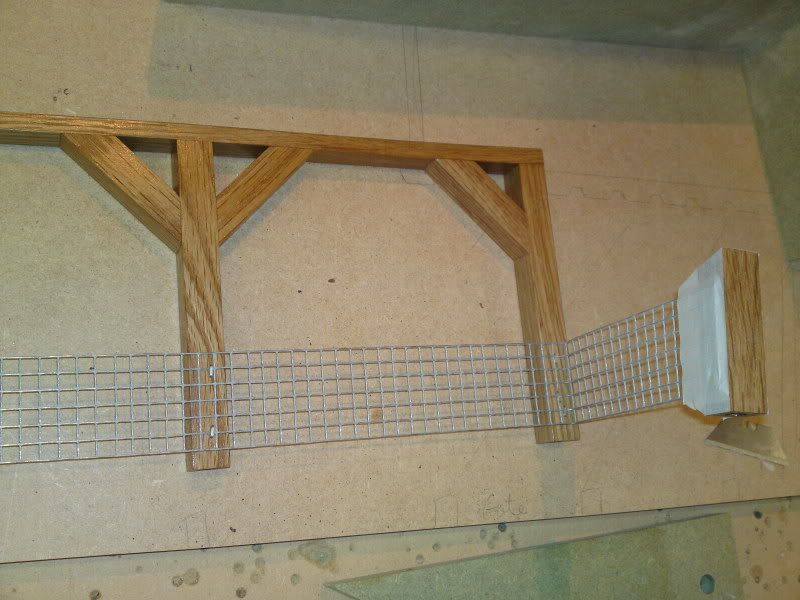
I must have smashed the fence out at some point, so the plan was to make this one a lot more hardwearing- Cue massive over engineering :lol:

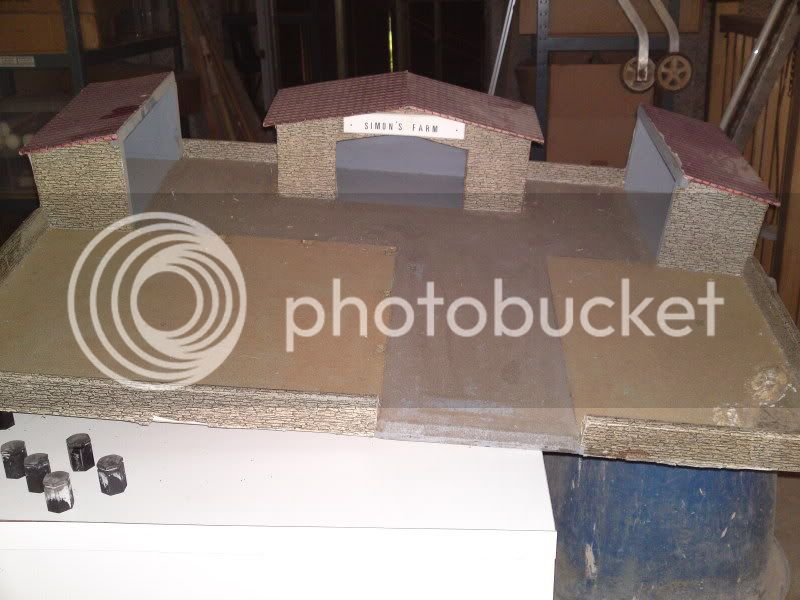
The cupboard its got to fit in is 1200 ish x 600 ish so i'm a little restricted for size. The basic plan is 2 pieces of 18mm mdf for the base and some straw and grass coloured carpets for the sides.

A picture speaks a thousand words so heres some so far of progress.

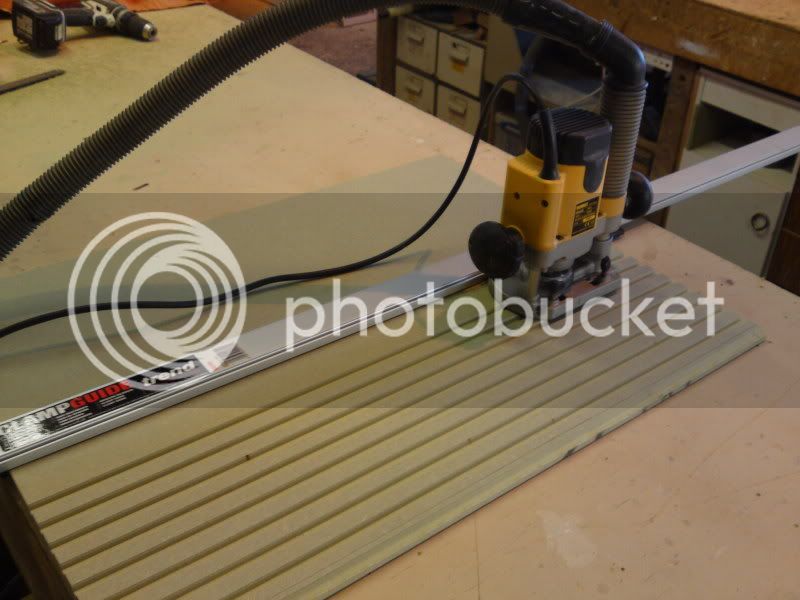
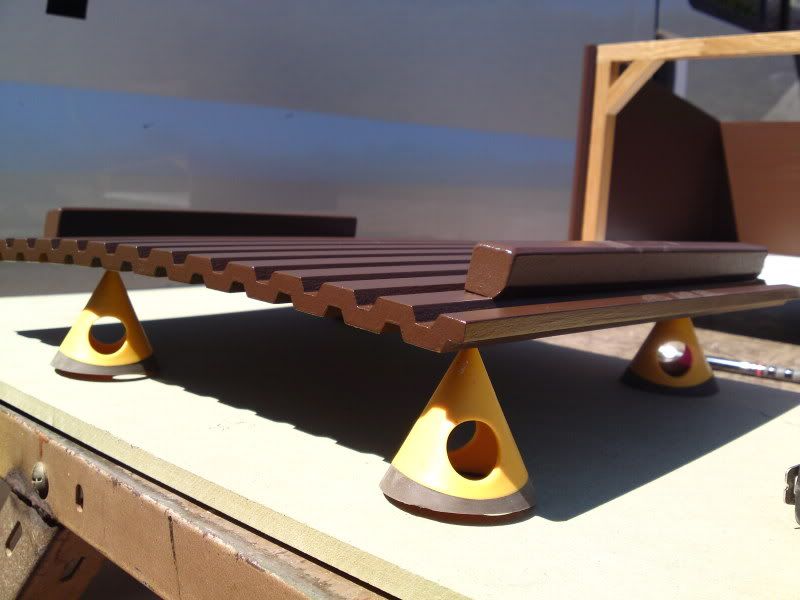
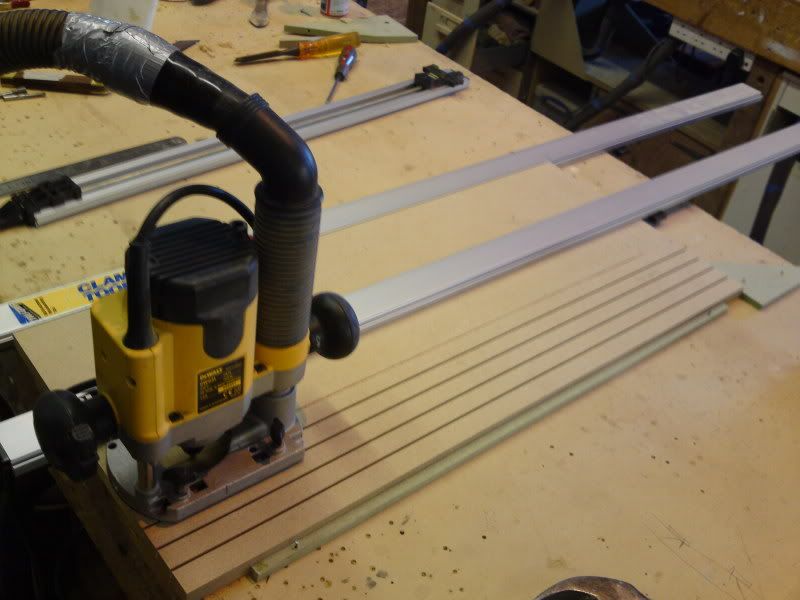
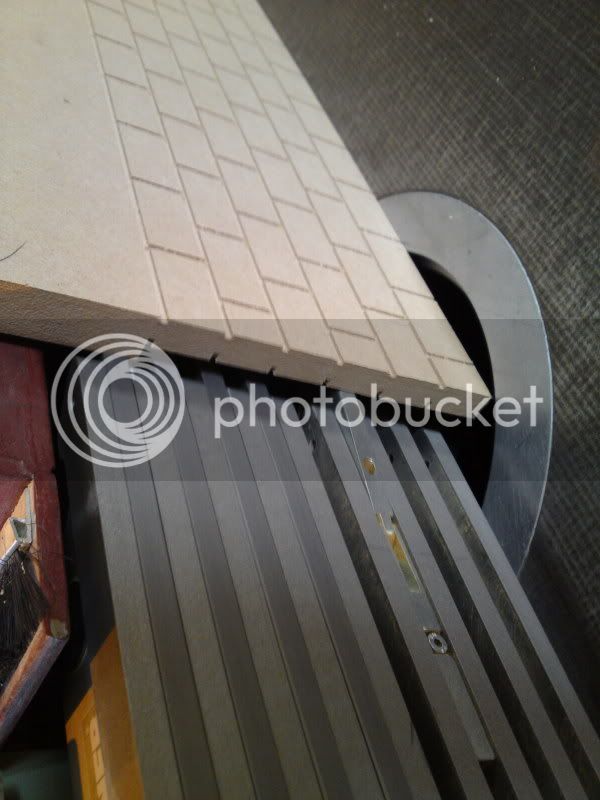
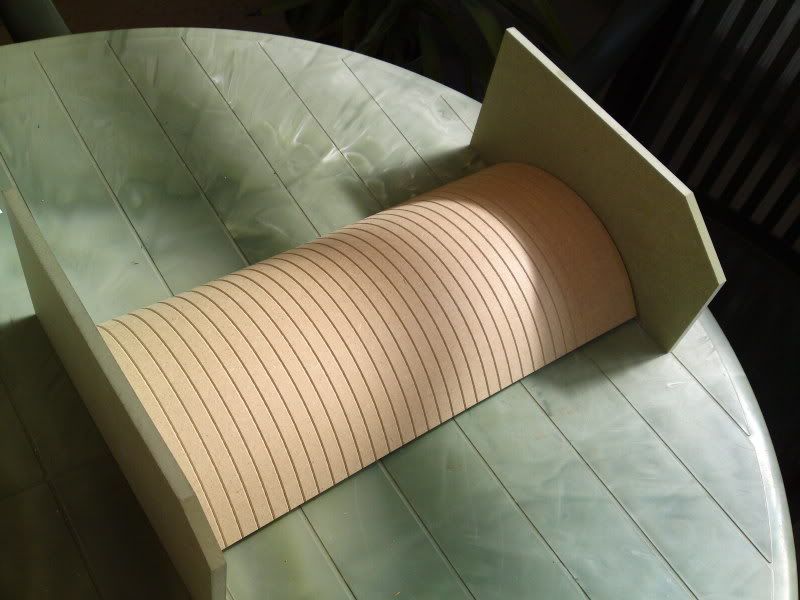
Flexi mdf for the roof
fdfb6d1c.jpg


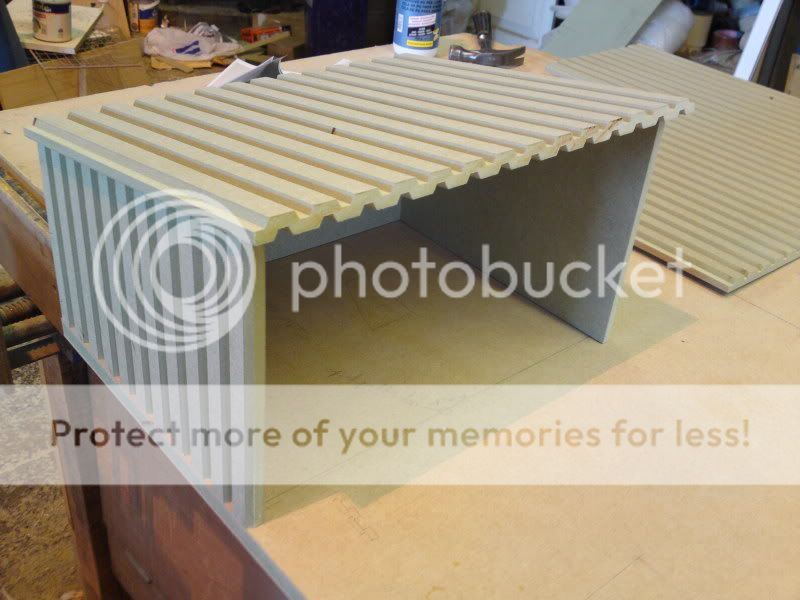
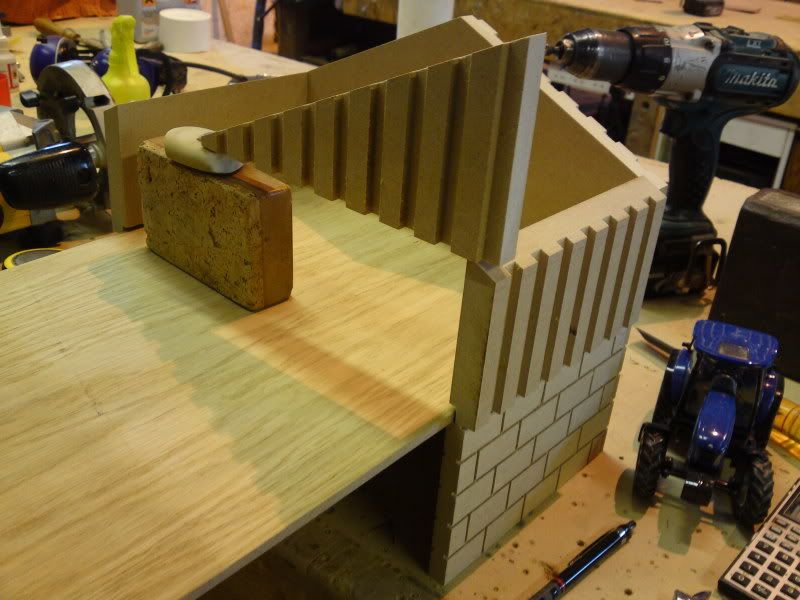
glued on some ends to hide the grooves

6af6a76d.jpg


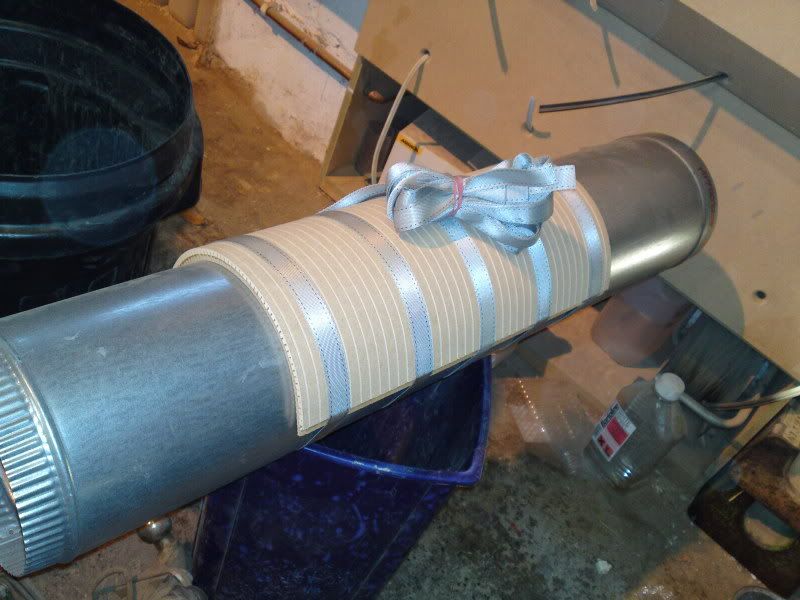
The glue started letting go a bit, so i took it home in the conservatory to cook.

fc1477ec.jpg


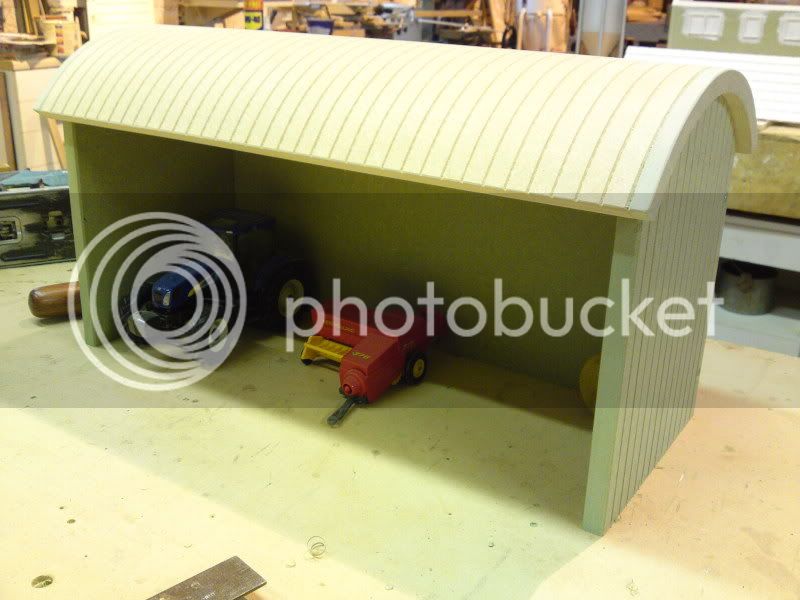
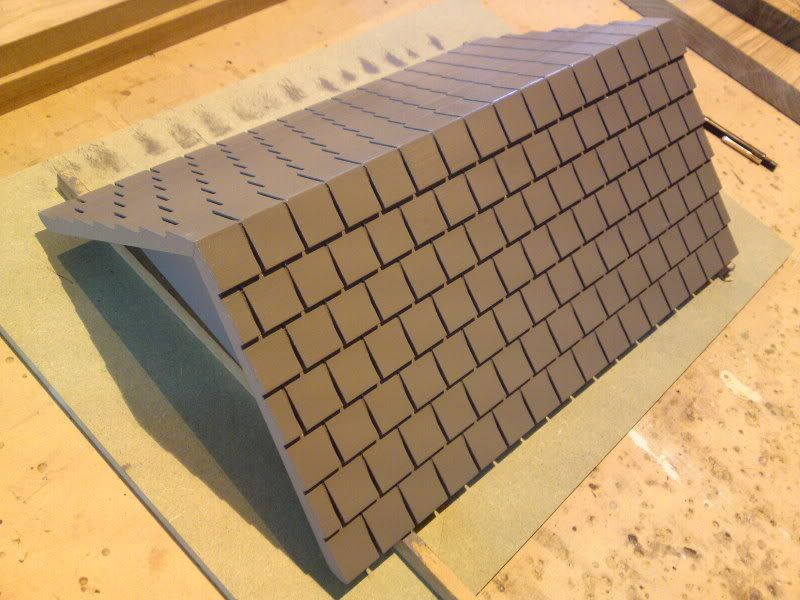
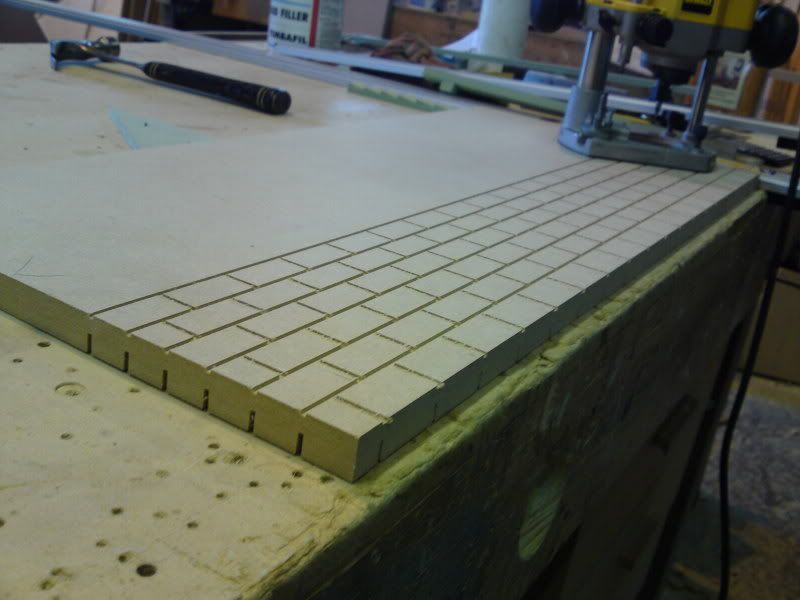
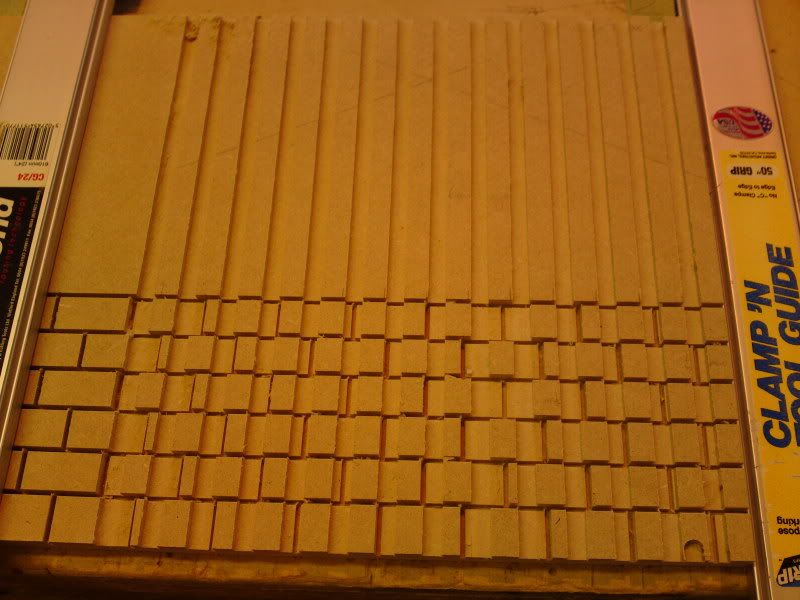
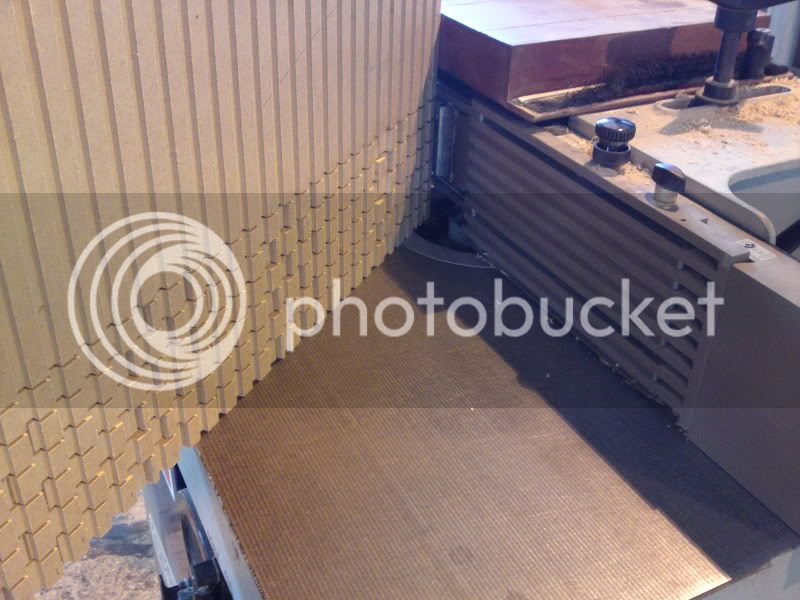
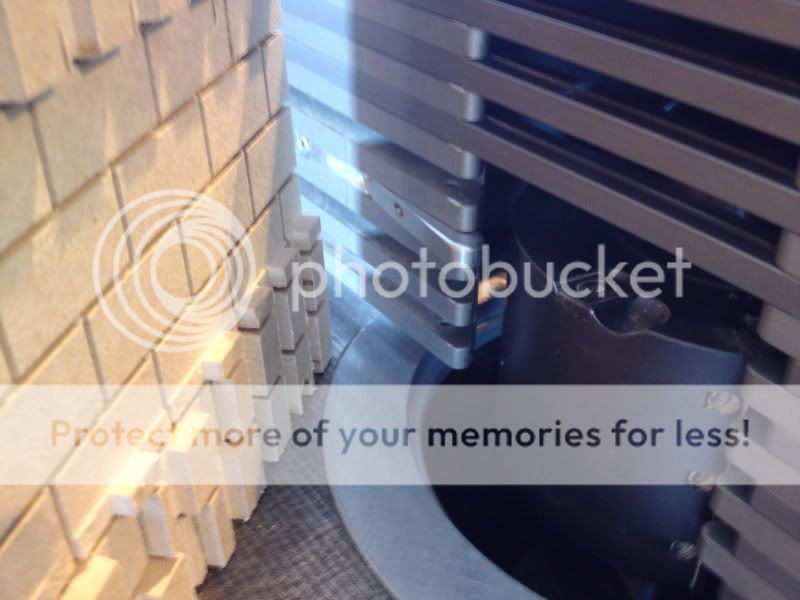
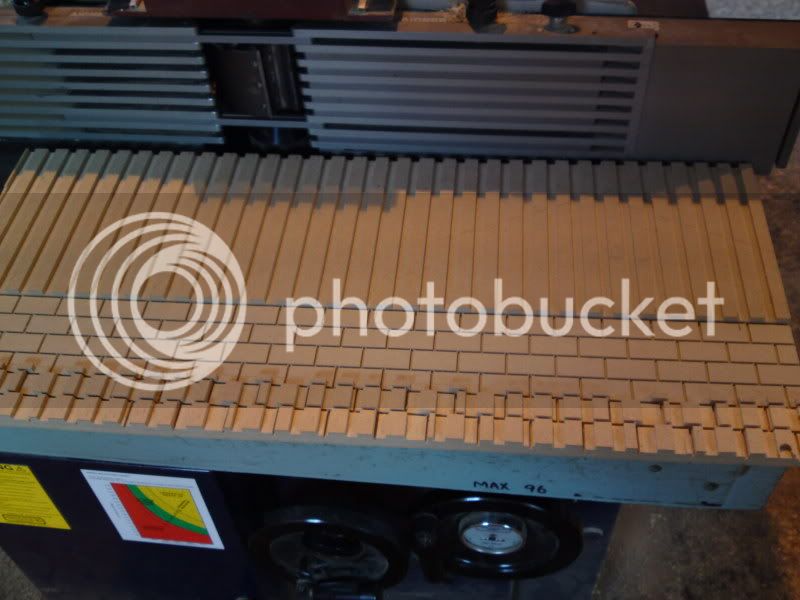
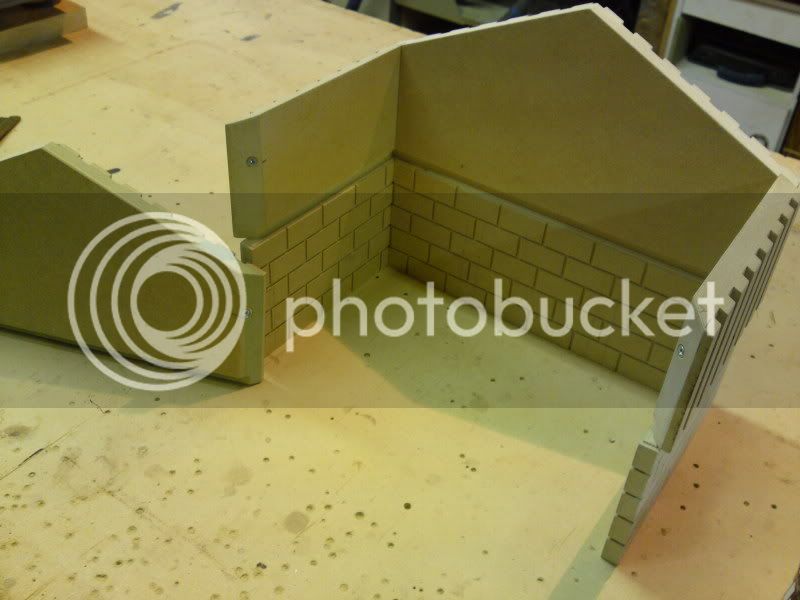
The farm house was next on the list. I wanted to make it a little more realistic then my paper covered one and had the gormless idea of routing a slate roof.
4b279a50.jpg

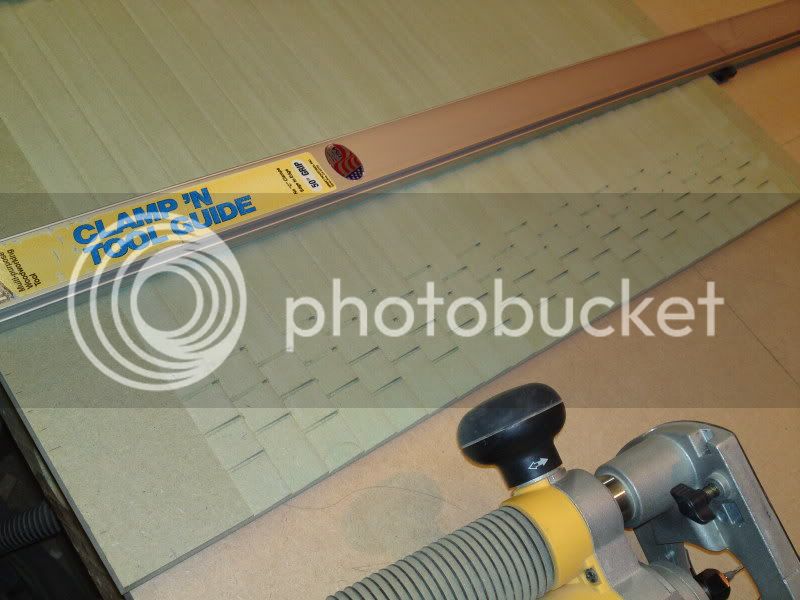
I so wish i had a cnc machine :!: 4 hours later and i had finally finished

ab94683f.jpg


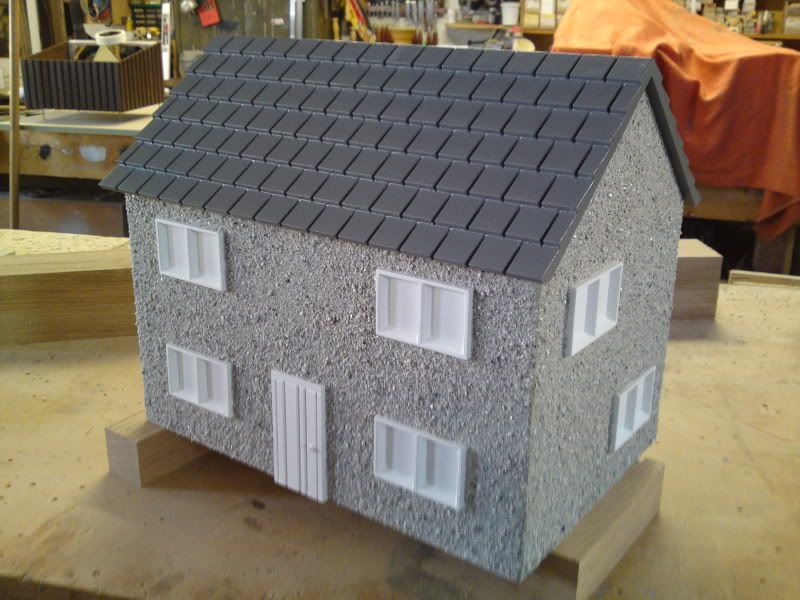
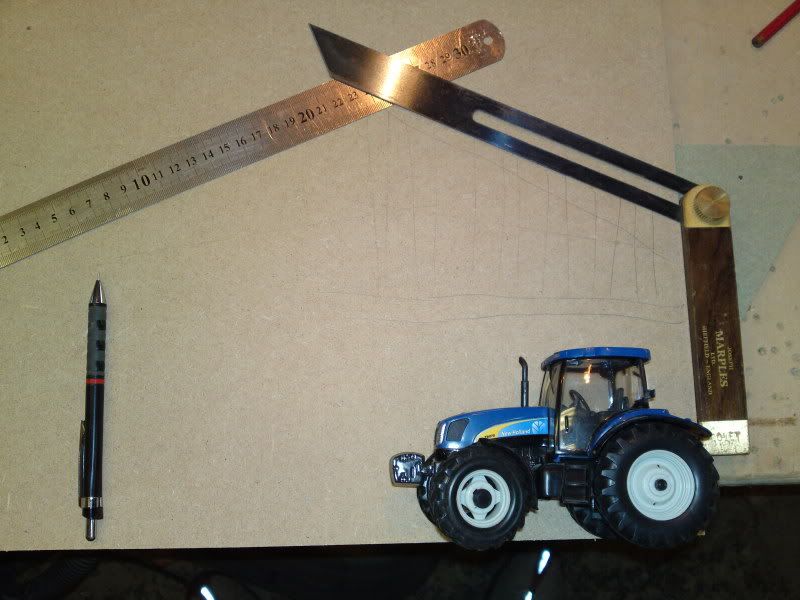
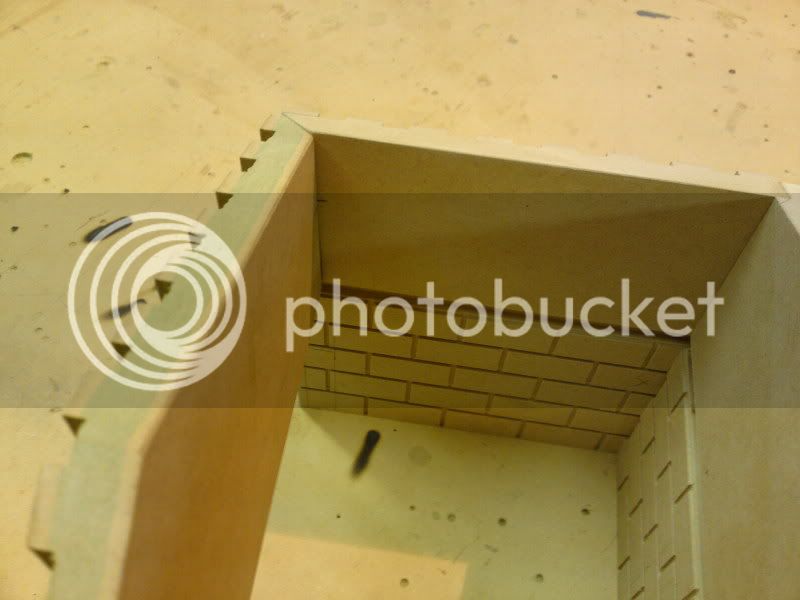
Now i had the roof sorted i could work out what size to make the house. For this i just used 12mm mdf screwed together.

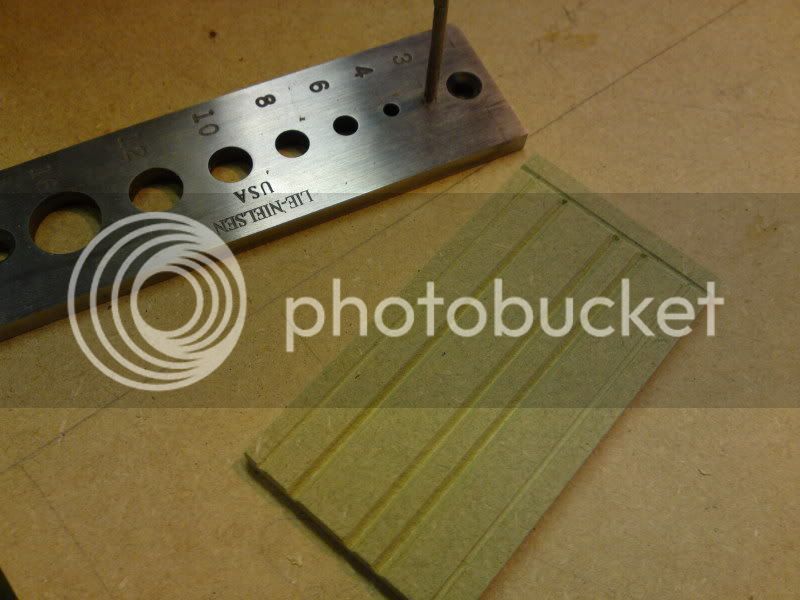
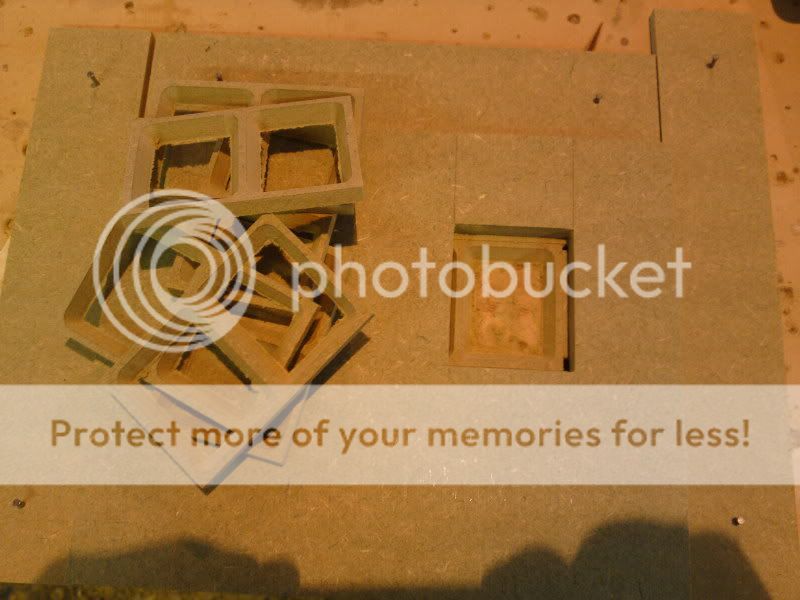
This is the jig i used for making the windows
ae4f8576.jpg


It was using a 60 degree v groove cutter and bush, piercing right through 6mm mdf.
At this point i'm already regretting agreeing to make the thing. Its gonna take ruddy ages

69b10315.jpg


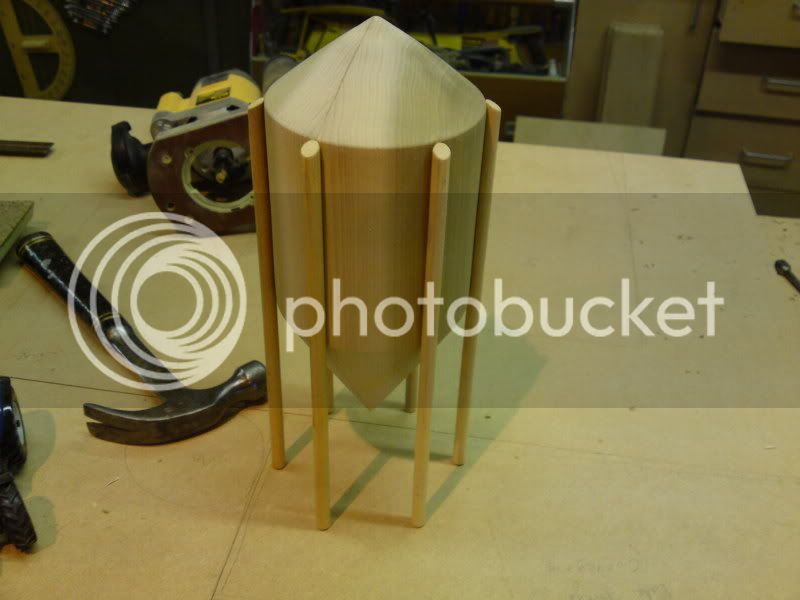
This is meant to be a silo (second attempt) I thought i'd glued up some tulip wood, only to find when i started turning it was ruddy idigbo. I had chunks flying off everywhere ](*,) I so badly dislike that stuff. His boy helped me nail on the dowel legs- Lets just say im glad he's only got a small hammer :lol:

f4fe5f70.jpg


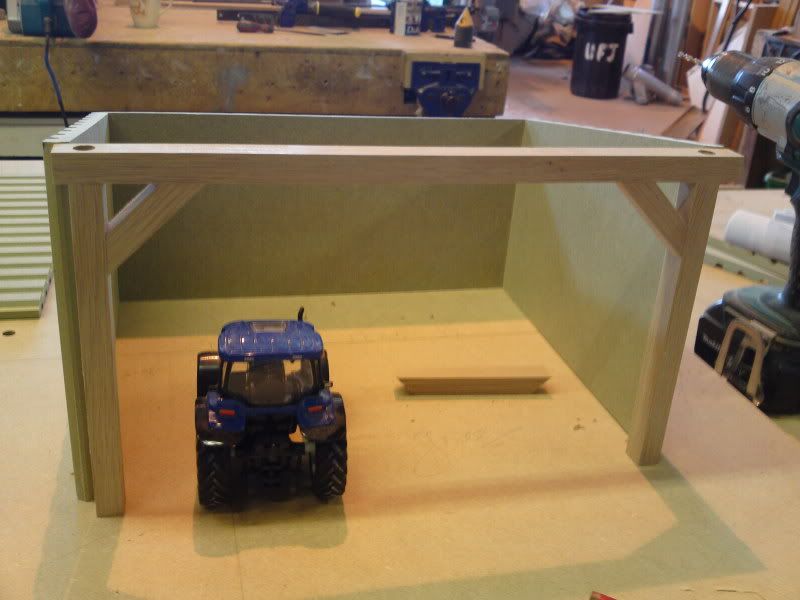
I've got a oak cupboard i'm meant to be making for myself, but doing this is just eating up my hours :roll: His boys been over a few times and twigged onto what i'm doing. 'Simon. why have you got my tractor? That looks like a shed Simon' etc etc Gives me a bit more encouragement to get going.

I tend to start a job, lose interest half way through (usually when it gets to the painting stage :lol: ) so am determined to see this one right through with no big long breaks........

f691197e.jpg

d9b99838.jpg


well maybe :whistle:

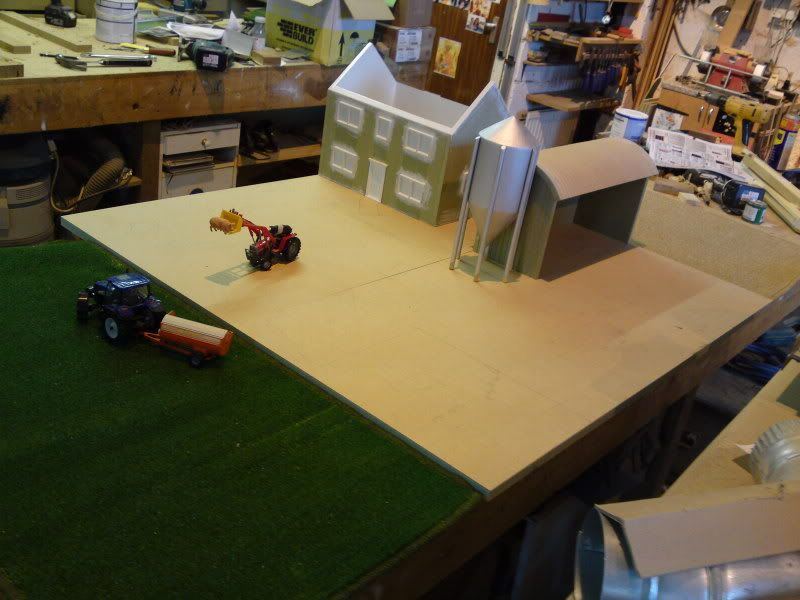
This is where i'm at so far. Done a little more painting than the pictures show, will update when i do a little more.

Cheers

Simon
 
That toy farm will be a million times better than anything you could find on a shelf on the high street. Great detail work. It'll be well worth the effort when it's finished 8) :wink:
 
Looking good. I could have done that (cnc) routing for you #-o :lol:
 
This is looking really good, that routing is a very nice touch, not sure that I would have had the patience for that.
The lad is going to be chuffed with this.
 
Thanks for all your kind words chaps.

Today was quite good on the progress front. Started off with a bit of routing.
1028eec6.jpg


It was no where near as manic as routing the slate roof. I was trying to get the wood to look like the corrugated sheet stuff.

Wizer, hindsight's a wonderful thing-or so my workmates always telling me :roll: :lol: Out of curiosity what cnc machine do you have? I was going to make one. Got as far as getting a 10 x 5 sheet of birch ply, then scared myself at how much the rest of it was going to cost. Aluminium extrusion was the penny buster that time. I was going to make a boundary wall using 50mm rips of 18mm mdf, with stones routed into both sides. I'll see how much i'll need. If its alot, i might use you services :wink: Cheers

After the machining was finished, the sheds came together fairly quickly

c6d0c7b4.jpg

e8c9d26b.jpg


The idea was so that all the buildings could be easily removed. Major overkill but i used m4 threaded sleeves so i could get a good fixing

bf3a7a6b.jpg


I lock nutted the sleeve onto a bolt. This made getting the sleeve in upright a damn sight easier than before. They were going in dreadful beforehand ](*,)

I was having problems getting the paint to dry. I thought putting it out in the sun would be a good idea

eac29ec0.jpg

Nearly had a heart attack when i saw how banana shaped it went :shock: . Luckily it went back to normal after i turned it over. 8-[ I was surprised how bent a flat piece of mdf went, just by routing some grooves in one side. Thought it would have been more stable ......?

Here's a pic of the farmhouse roof finished. Seem to be getting alot of brush marks left in the satin paint for some reason ?

079e57d0.jpg


I bought the Lie nielsen dowel plate a while back. This was my first chance at using it.

4de571f5.jpg


Expensive 3mm door knob so far :lol: Did seem to work well though.

Managed to get some grit on the walls. The boys dad text me a message telling me he'd " just seen a bugler, stealing his siv from the sand pit " :-$
7140fe89.jpg


I stuck the sand on using normal pva. First coat looked a bit naff, but the second covered fairly well. Im still in 2 minds whether to weathershield over it or not? i've got some brown sand in mind for the driveway so dont want too much of it everywhere.

46e76ef9.jpg


Santa's snookered this year. No room for a chimney :lol:

It's nice to see some buildings coming out of the ground now, instead of mdf dust everywhere.

929e7e5c.jpg


Will update more tomorrow, thanks for looking. Off to paint some window glass in now :wink:

Simon
 
Simon it's not a 'proper' CNC. It's called a CarveWright. They are sold in the states as a 'carving' machine. But it is basically a CNC that's been locked down for dummies ;) It's more than capable of doing this stuff. I've well and truly got the bug and can see me eventually building one meself. It's good fun.

You're doing well with this. I really like the corrugated roof. I take my hat off to you patience and accuracy. Well done!
 
Simon,

I am impressed by the amount of midnight oil you must have burned working this one out. The corrugated building for instance. So simple, but so carefully worked out to get the effects you are after. Lots of planning, and visualisation here. I reckon it's going to be a real Rolls-Royce of a toy.

Regards
John :)
 
Great looking toy, I'm sure the recipient will get years of pleasure from it. The attention to detail is excellent. I love the tiled roof, must have been soul destroying work but the end result is brilliant.
 
I'm gobsmacked by the work being put in here, and the proof is in the outcome.

Its amazing, and im sure will be cherished.

Loz
 
The more I look at this post the more I like it. It seems as you progress on you think of another effect.

Have you tried your skills at a dolls house? I bet if you did it would win prizes.
 
Thanks alot for the praise peeps. :wink: :oops:

Im glad some of you are finding it of interest. I was in 2 minds whether to post a WIP. Its mainly only mdf screwed and pinned, maybe the odd housing here and there.

Lots of planning, and visualisation here

John, as sad as this might sound, i found myself looking at alot of sheds and fences whilst driving to and fro. Found myself saying - 'Coooooooooor, what a boodifull owse, i'll av a pic of e' etc etc :lol:

Wobblycogs, last nights write up got lost nearly at the end of writing it. Seem to remember the words soul destroying being in the first edit. There was a point today where i got a bit grouchy. Quick visit to the shop for some sweets and biscuits , stick on the radio ear muffs, and i kind of drifted off into my own strange world.

The colour samples for the drive, house wall etc were dry this morning

57804eec.jpg


The ones with v on were satin varnish. They seemed to look alot wetter than the ones just covered with pva. Still undecided whether to paint the house. Painted the glass in the windows again this morning so there looking a little more realistic.

Finishing off yesterdays job, i fenced up the sheep house.
8dd43370.jpg


Got majorly paranoid about the little ones cutting there fingers. I spent a good 10 minutes filing off any and every possible sharp.

Gave a few other bits and pieces a lick of paint, then it was back to my favorite job- routing :roll:

Just one shed left, and this was the one i was most looking forward to.
43b41022.jpg

Its going to be a cow shed underneath, with a shelf for a hayloft up top. Fingers crossed by tomorrow it should be built for you to see :wink:

It seems as you progress on you think of another effect.

Adzeman, i don't know what you could mean ? :whistle:

After having corrugated sheet and slate, this last shed i wanted to be different

7bf84f58.jpg

d93b218f.jpg


Im using 18mm mdf for this. The bottom part i wanted to look like concrete block.
b83eb13c.jpg


I've done the mortar grooves alot deeper one side as much of it will be removed for boarding. I want the top part to look like wood. I've seen 4inch wide boards with 3 inch gaps with boards nailed on the inside- Looks alright, so guess it'll do for a cow shed :lol:

790ccce6.jpg

This is the grooves for the boarding. Completely balls up the board spacing but hopefully can chop it about a bit to work

30324eb1.jpg


What a mess :!:

To say i was a little concerned about getting the depths right, was a understatement.
Enough with routing now. Off onto the spindle to tidy it up

20010ae9.jpg


Had to take the bottom scriber off, but then just knocked off the bottom.

6916c63c.jpg


I could here the block knocking off some of the little knobbly bits. Was a bit apprehensive at what it was going to look like

88366924.jpg


There was a few slight tears, but it was not bad enough to matter

a885d428.jpg


I'd hate to be without the aigner fence now. It saves so much time setting up the spindle.

Thats the only progress today chaps. Got all the materials ready for tomorrow so should be able to get all the sheds and that in situ for a 'money' shot :lol: . -Then figure out fencing, cattlegrids,gates etc. I can almost see the end in sight. Im so glad that each shed can be painted and put to one side finished.

Thanks

Simon
 
Evening all,

Today i've hit a brick wall :?

I made good progress on the remaining shed, until it came to securing the front. id like to imagine the boys being able to ask there dad/mum what each and every part is called on the farm. With that in mind, i wanted any fixings to be either very well hidden, or scaled down versions of the real things.

1e68b2cc.jpg


The bit of oak mdf is the removable hayloft floor. Getting access to it with the roof on means the front needs to be removable.

5502c461.jpg

45ccfdf3.jpg


I thought some small magnets screwed in the mitre's would be strong enough but there a waste of time :cry: Easy way out is to stick some whopping great normal magnets on, but it'll look out of place ?

I don't know how to get over it, so any idea's would be greatly appreciated :wink: The boy will be 4 on his birthday, and his younger brother's not even 1 yet. I cant expect them to line the mitres up when they want the front back on. :(

I've got the size of the shed, so atleast i can put it to one side and carry on with the rest of it.

My morning started off bad and as the day went on, just got more and more worse. By 3 o clock i was regretting even getting out of bed for the day. Funny how some days can be a nightmare but others happy as a pig in poop

Thanks

Simon
 
coleysbiscuit":20uqgyfd said:
The bit of oak mdf is the removable hayloft floor. Getting access to it with the roof on means the front needs to be removable.
(snip)

I don't know how to get over it, so any idea's would be greatly appreciated :wink: The boy will be 4 on his birthday, and his younger brother's not even 1 yet. I cant expect them to line the mitres up when they want the front back on. :(

Can you attach the wall to the hayloft floor, so that they slide together as one unit? That way your magnets would hold it closed, and it would open like a pencil box. It's not ideal, but they ought to be able to manage it and it would be hard for them to get wrong, even though they're small.

Sorry about the day - I know that feeling, but happily, mine had a really good ending: an old friend called me up from the States, whom I hadn't heard from in over a year and was a bit worried about - everything's fine, apparently, he's just been really busy.
 
Hi Eric The Viking, i was hoping to have the front seperate from the bottom. That way they can stack the hayloft full, without removing the roof. Im probably just being over picky :-k I've got a picture in my head of how i imagine it and it'll bug the life out of me if i think i've bodged it.

Its amazing how when youre rushed off your feet, you tend to loose a sense of everything else going on with the rest of the world :lol:

Simon
 
Hi Simon,

It's coming along well...

I did a doll-house for my daughter long, long ago! It was a tall, Victorian type house. I had a similar problem, but in common with most other D/Hs, I just piano-hinged the front so it opend completely. I used merranti and thin ply in those days, so it was light. A run-of-the-mill magnet catch held the front closed no problem. With the front open, daughter could get to every room in the house.

I also hinged the roof along the ridge, so she could get at the 'loft'. It all worked fine, and the fixings didn't get in the way of daughter's imagination.

The chimney I made from small section timber with a 'V' cut in one end and glued to the ridge. I just don't have any photies I'm afraid, but it did happen!

I can see the chimneys on your farmhouse as having external chimney-breasts all the way up each gable-end, with small dowels for the pots! Easier to fix truly upright too!

Sorry you had a rough day Simon. The worst of my days back then was spent making furniture to fit the doll-house! What a fiddly job that turned out to be!

HTH

John :)
 
Back
Top